6. 3D Scanning and printing
This week we had group assignment to:
- Test the design reules for the 3D printers
- Test the capabilities of the 3D printer
- Document our work to the the group work pageand reflect on your individual page what you learned.
This week we had an individual assignment to:
- Design and 3D print an object (few cm3, limited by printer capabilities/build volume) that could not be easily made with substractive method.
- 3D scan an object; try to prepare it for 3D printing
- 3D print the scanned object
Group assignment
I learnt the basics of 3D printing/additive manufacturing and 3D scanning.
Points to be covered
- Understandting the specifications of 3D printers
- Test printing temperature
- Test optimum initial layer (first layer) printing temperature and speed
- Test overhang angle
Specifications of the 3D printer
Printer we have is Creality Ender 3
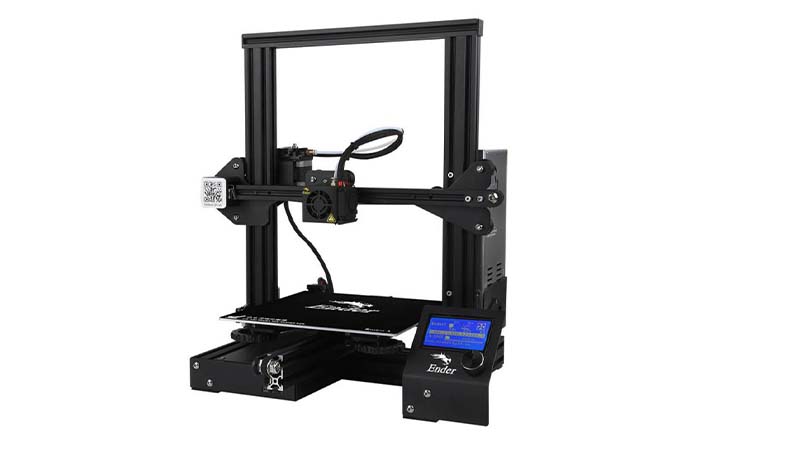
- Technology: FDM (Fused Deposition Molding)
- Print/Buid volume: 220 x 220 x 250mm
- Filament diameter supported: 1.75mm
- nozzle diameter: 0.4mm. However, diffirent nozzle diameter can be used ranging from 0.1 to 1.2 mm.
- Optimum speed: 30-80mm/s
- Maximum nozzle temperature: 235 0C
- Maximum bed temperature: 110 0C
Test printing temperature
Every filament has their recomended range of printing temperature. However, different printers can produce different quality while temperature is the same. This is especially due to nozzle type
Example
- PLA filament: 190-220 0C
- ABS: 210-260 0C
- Nylon: 220-270 0C
Therefore, it is recomended to print temperature tower so that you can determine the Optimum temperature of the filament on the 3D printer you have
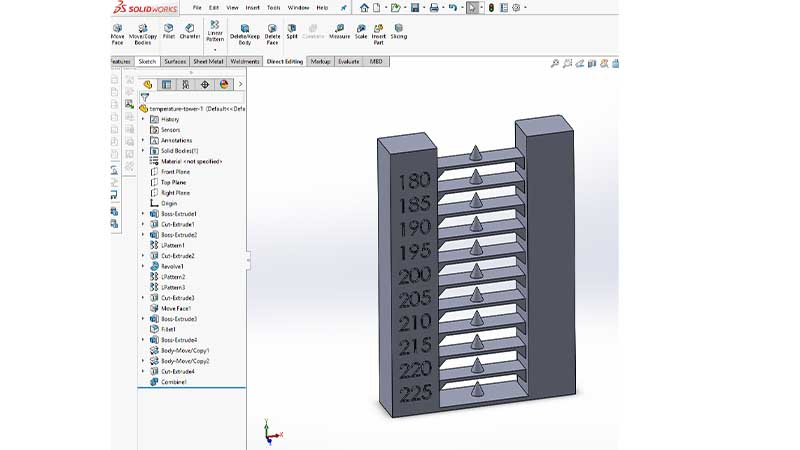
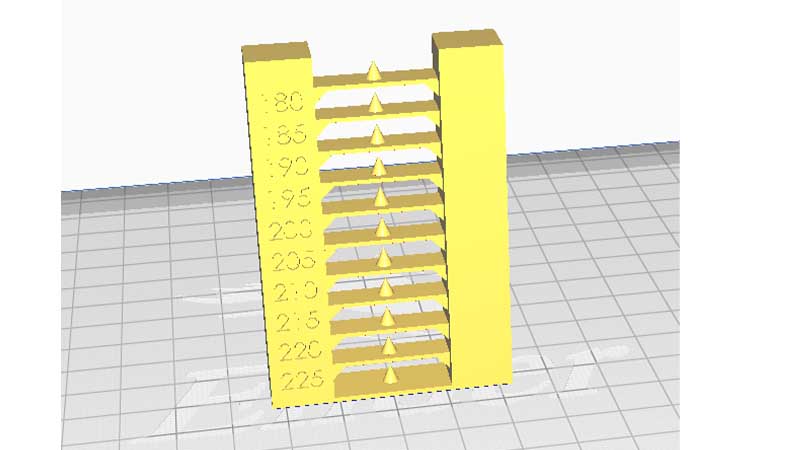
Design and print Temperature Callibration Tower
I designed callibration tower in SolidWorks. Design a simple block and use text tool to write the range of temperature you want to test depending on the filaments. In addition, add the bridge and blob as bonus. Genuine filaments usually have label showing print temperature as well as bed temperature. However, you can find free stl file on Thingverse to test for yourself.
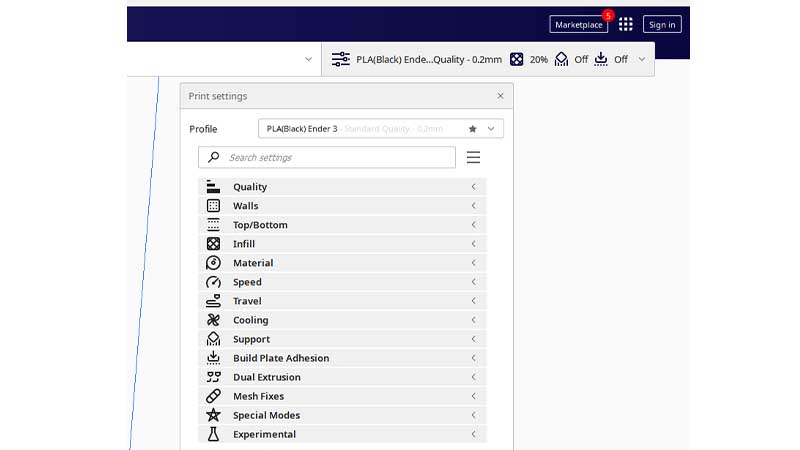
Install Callibration Shapes plugin
Install Callibration Shapes plugin is used used for post processing. This allow to modify g-code. So that you can print at different temperature values.
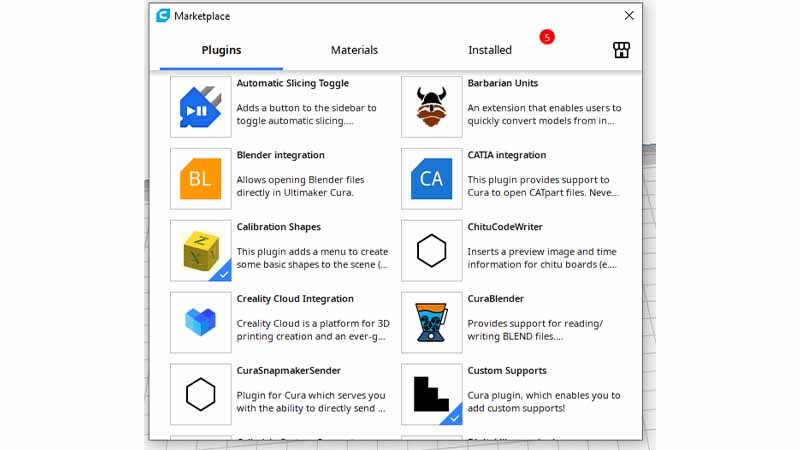
To install Callibration Shapes plugin in cura, open market place and search the the plugin.
After installation of Callibration Shapes plugin, restart Cure Software in oder for the plugin to work. This is tru for all Cura plugin.
Final print
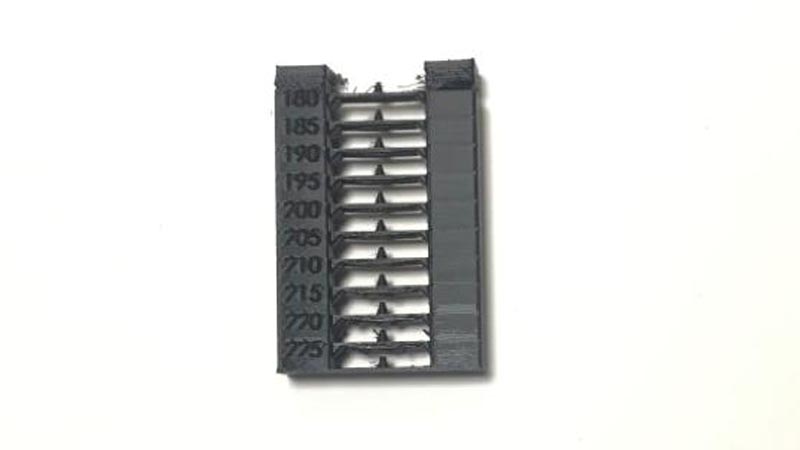
From the result obtained, it is clearly visible that the optimum temperature for our 3D printer as well as the filament range between 200 to 210 0C. 205 0C being the average.
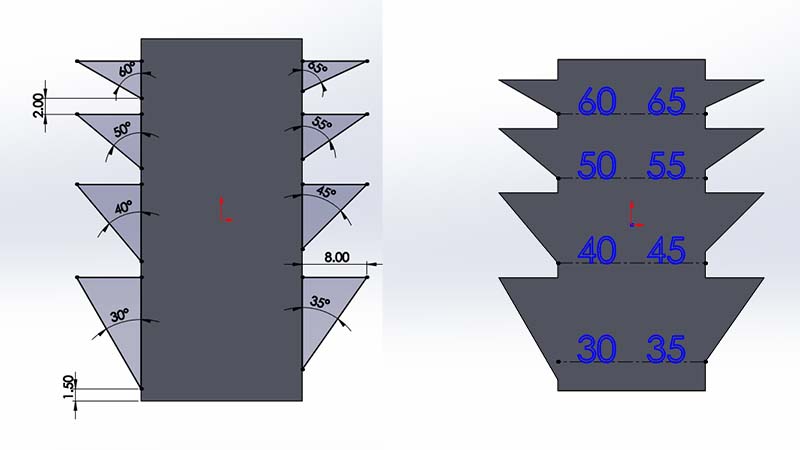
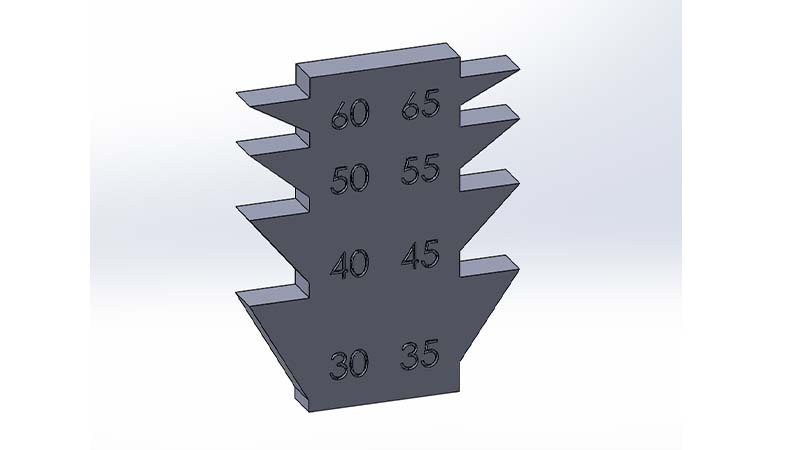
Overhang test
Overhang angle is angle of model surface between build plate/bed and perpendicular plane. As this this angle increase, it becomes more difficult for the printer to print those layers. If this angle is too extreme beyond a certain limit, the print may fail. The average overhang angle for most FDM printers is approximatery 45 degree. However, depending on the cooling, it may be below, or abote that depending on the cooling of the printer. This is that case, you can test model to chech the limit of the 3D printer. This become more accurate if you are using fairly optimun temberature

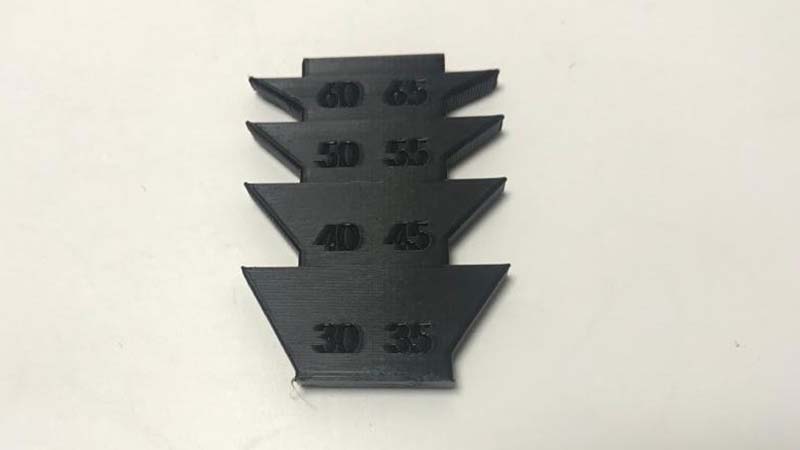
Final print
Individual assignment
3D scanning
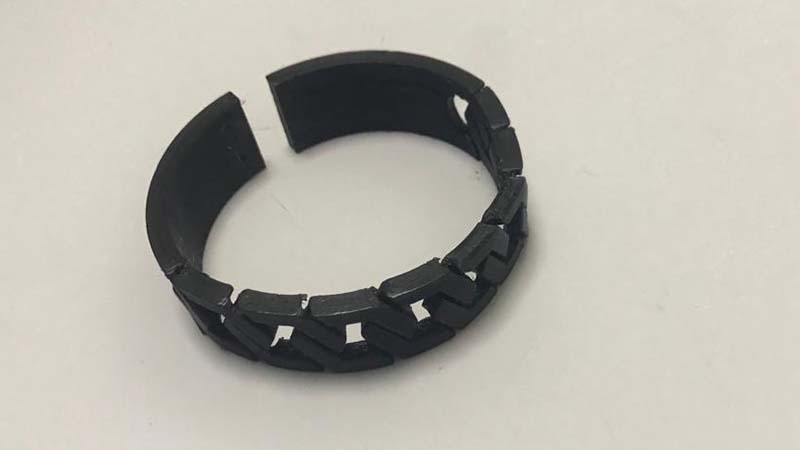
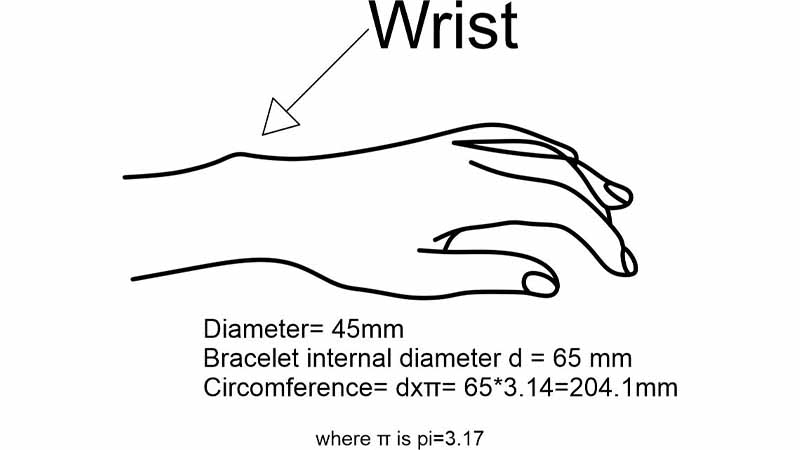
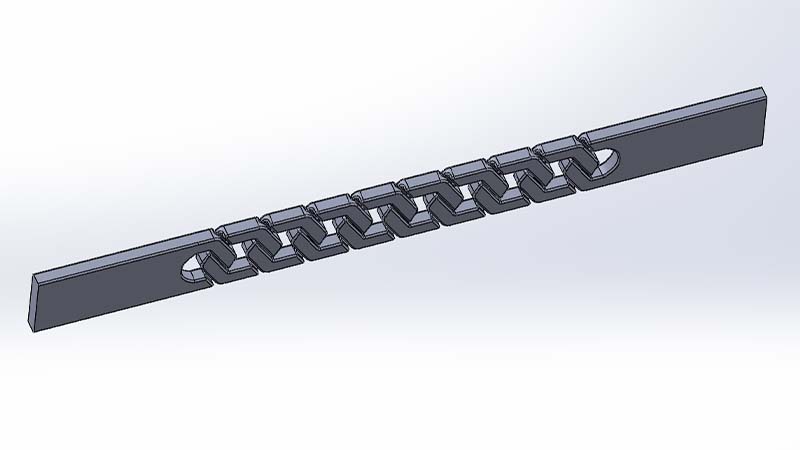
This is the detailed process I followed to design print an object that can't be easily munufactured with substractive method. It is a bracelet with twisted hexagonal chain links.
For staring, the approximate wrist's diameter of a grown person is 45mm. For the sake of the assignment, the bracelet should have internal diameter of approximatery 65 mm
Here it is the brief sketch
Designing of bracelet
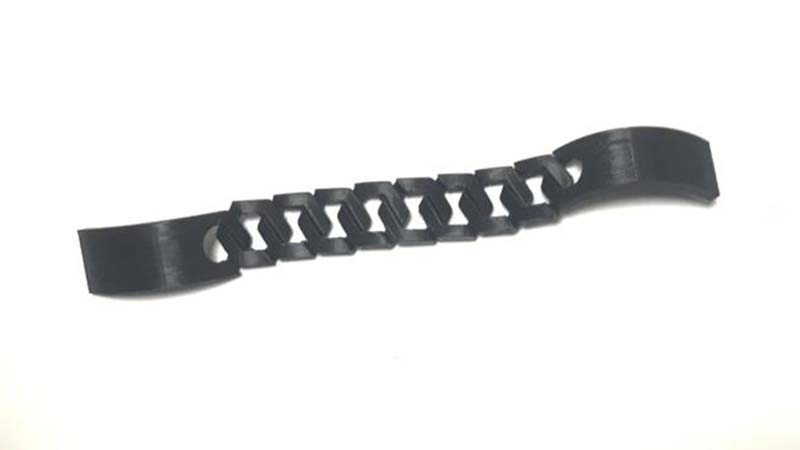
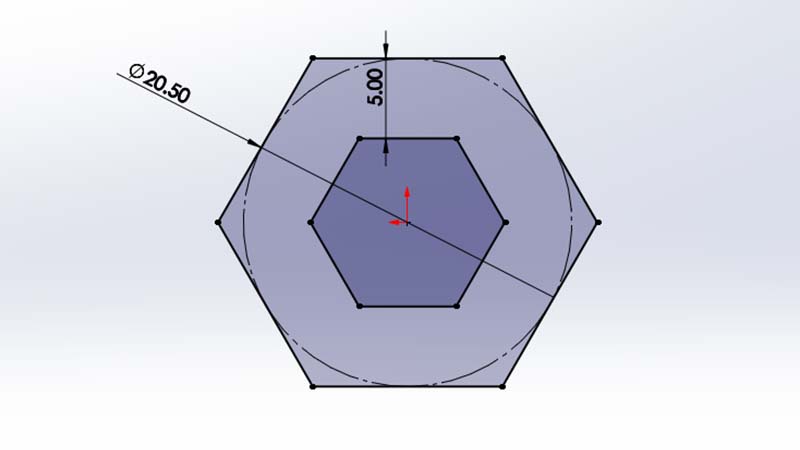
I created hexagonal with 20.5 diamter and 5 mm inside offset. I extrudede 4 mm thickness.
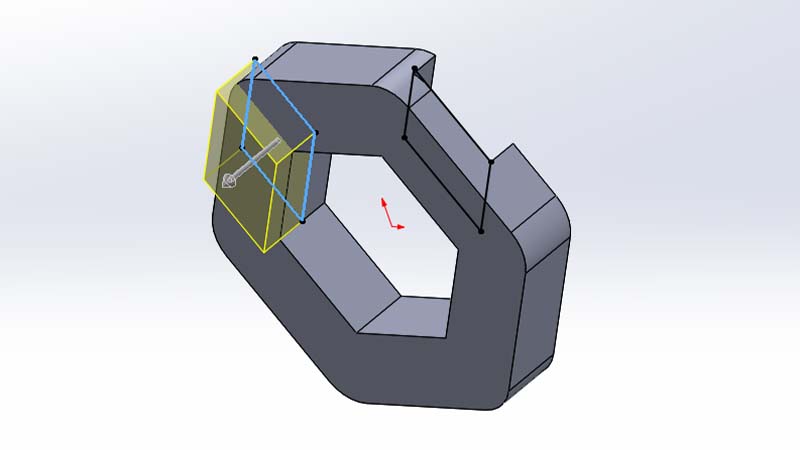
I created extruded cut on opposite side and use circular pattern to cut on all the remaining sides. This is done in order to created twisting effect of the chain elements.
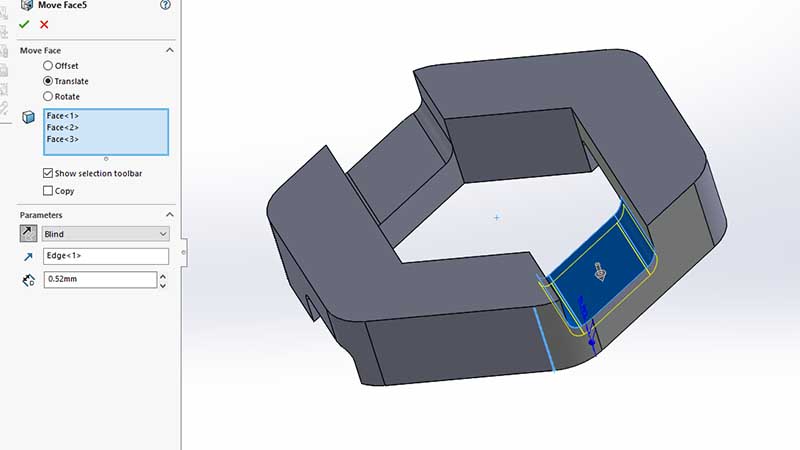
Next, I used move face feature to create crealerence between the elements. As this part will be printed, clearence is neede so that all parts will come out separate. clearence is 0.52 mm
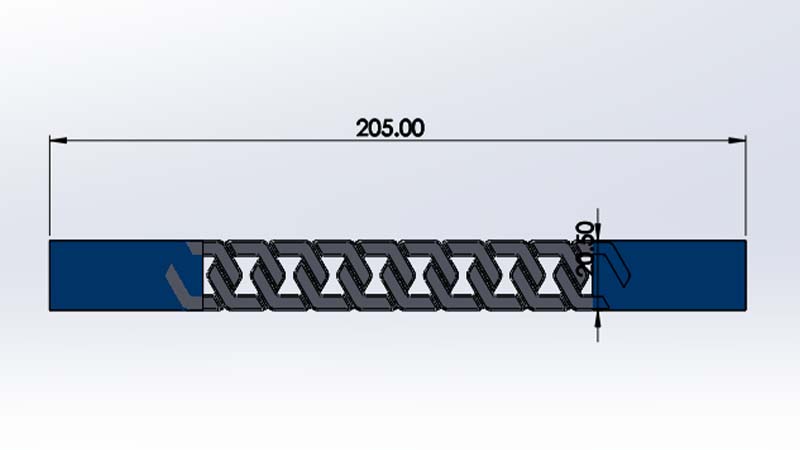
I added the extension element/link and gave it the correct circomference
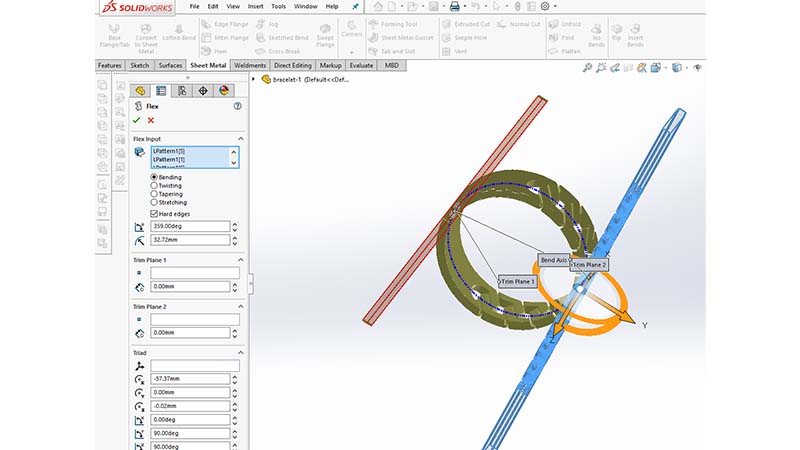
Using flex tool, I was able to bend all bodies in a circular form. Bend angle is 359 degree. This is to make sure there will be a small gap between the connecting side
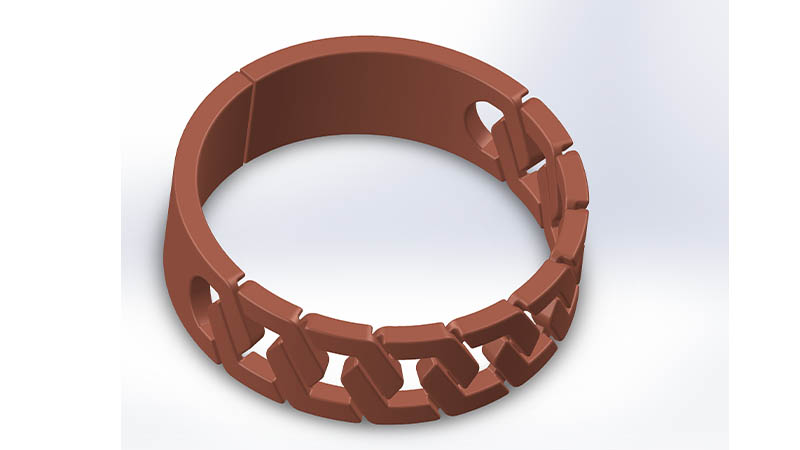
Final rendering
Slicing in Cura
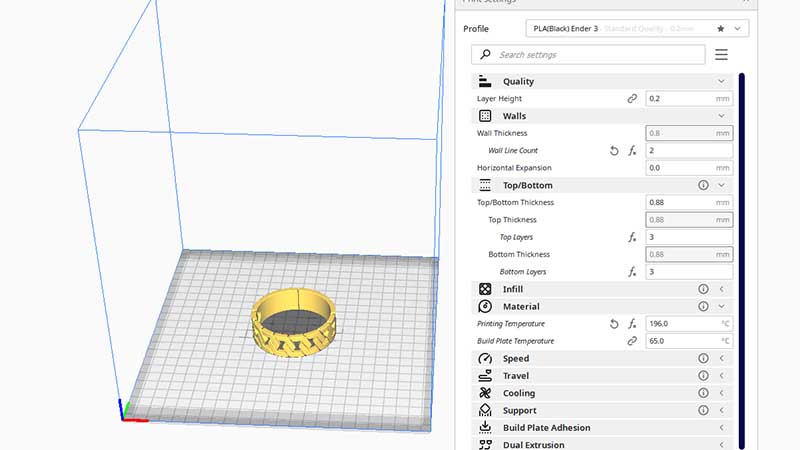
Basic setting I used
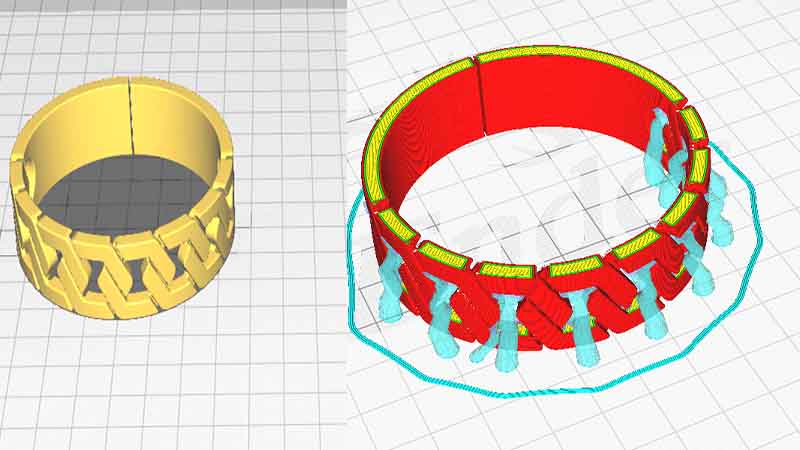
Support, I used tree support
Final print out