3D Printing is a process for making from a three-dimensional digital model (its CAD representation) into its physical form by adding layer by layer of materials. There are several different kinds of printer technologies available, however, the most commonly available and affordable is a technology called fused filament fabrication (FFF), also known as fused deposition modeling (FDM). These printers use a continuous feed of filament made from thermoplastic materials, typically delivered in a spool, to build your model.
The most important thing to remember while designing for 3D printing is the fact that your digital design will become a physical object. In the digital design environment, there are no laws of physics to adhere to, such as gravity. Anything can be "drawn" in 3D on a digital canvas, but not everything can be 3D printed. Each 3D printing process has its own limitations. Here are the most important design considerations that apply to all of them that you should keep in mind:
All 3D printing processes build parts layer-by-layer. Material cannot be deposited onto thin air, so every layer must be printed over some underline material. Overhangs are areas of a model that are either partially supported by the layer below or not supported at all. There is a limit on the angle every printer can produce without the need of support material. For example, for FDM and SLA this angle is approximately 45 degrees. It is a good practice to limit the overhangs of a model, as layers printed over support usually have a rougher surface finish.
The second thing to keep in mind when designing a part to be 3D printed is wall thickness. Every 3D printing process can produce accurately features that are thin up to a certain point. As a good practice, always add thickness to your models. Walls with thickness greater than 0.8 mm can be printed successfully with all processes.
Something that is often easily overlooked while designing a 3D model is the fact that the materials used for 3D printing undertake physical change: they are melted, sintered or scanned with a laser and solidified. The heating and cooling of material can cause the parts to warp while printing. Large, flat surfaces can be especially prone to warping. Warping can typically be avoided by using correct machine calibration and having adequate surface adhesion between your part and the print bed. A good practice is to avoid large flat surfaces and add rounded corners to your 3D models.
When you are creating a 3D model with intricate details, it is important to keep in mind what is the minimum feature size each 3D printing process can produce. The minimum level of detail is connected to the capabilities and mechanics of each 3D printing process and to the selected layer height. The process and materials used will have an impact on the speed and cost of your print, so determining whether smaller details are critical to your model is an important design decision.
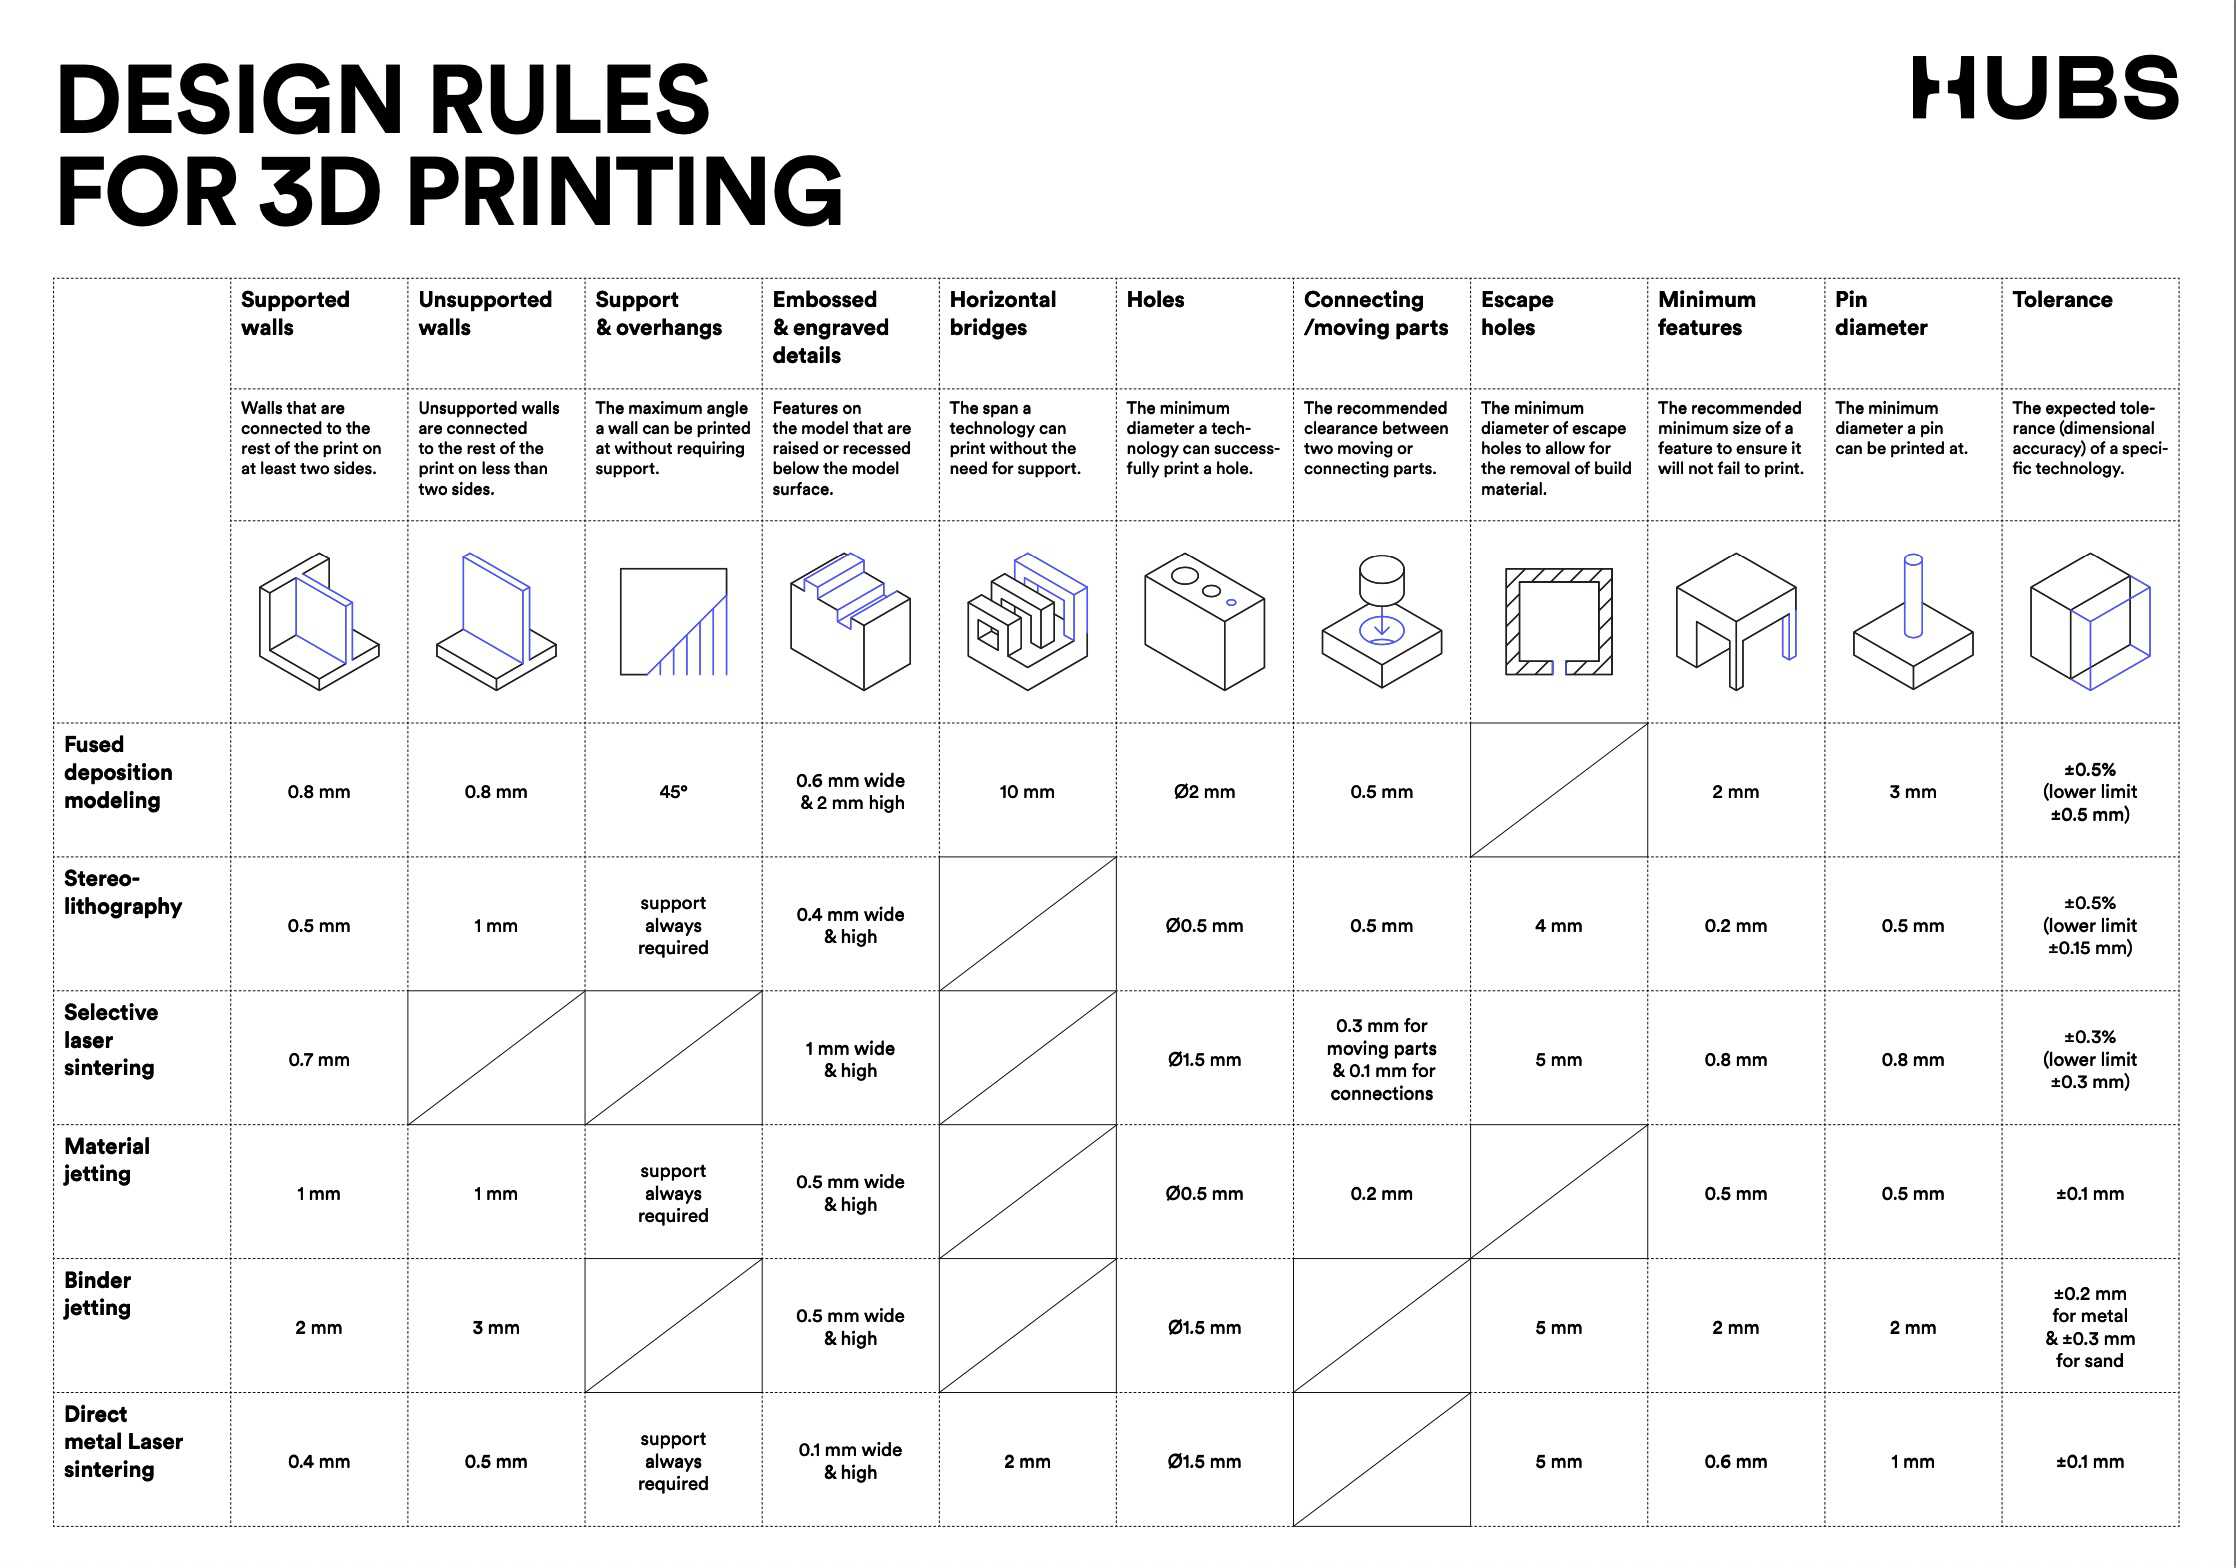
As we can see from the image, there are several “limitations" regarding 3d printing. For example the maximum angle that can be printed, without supports, is 45 °, or the span that can be printed without the need for support is 10 mm, as you can see from the table above.
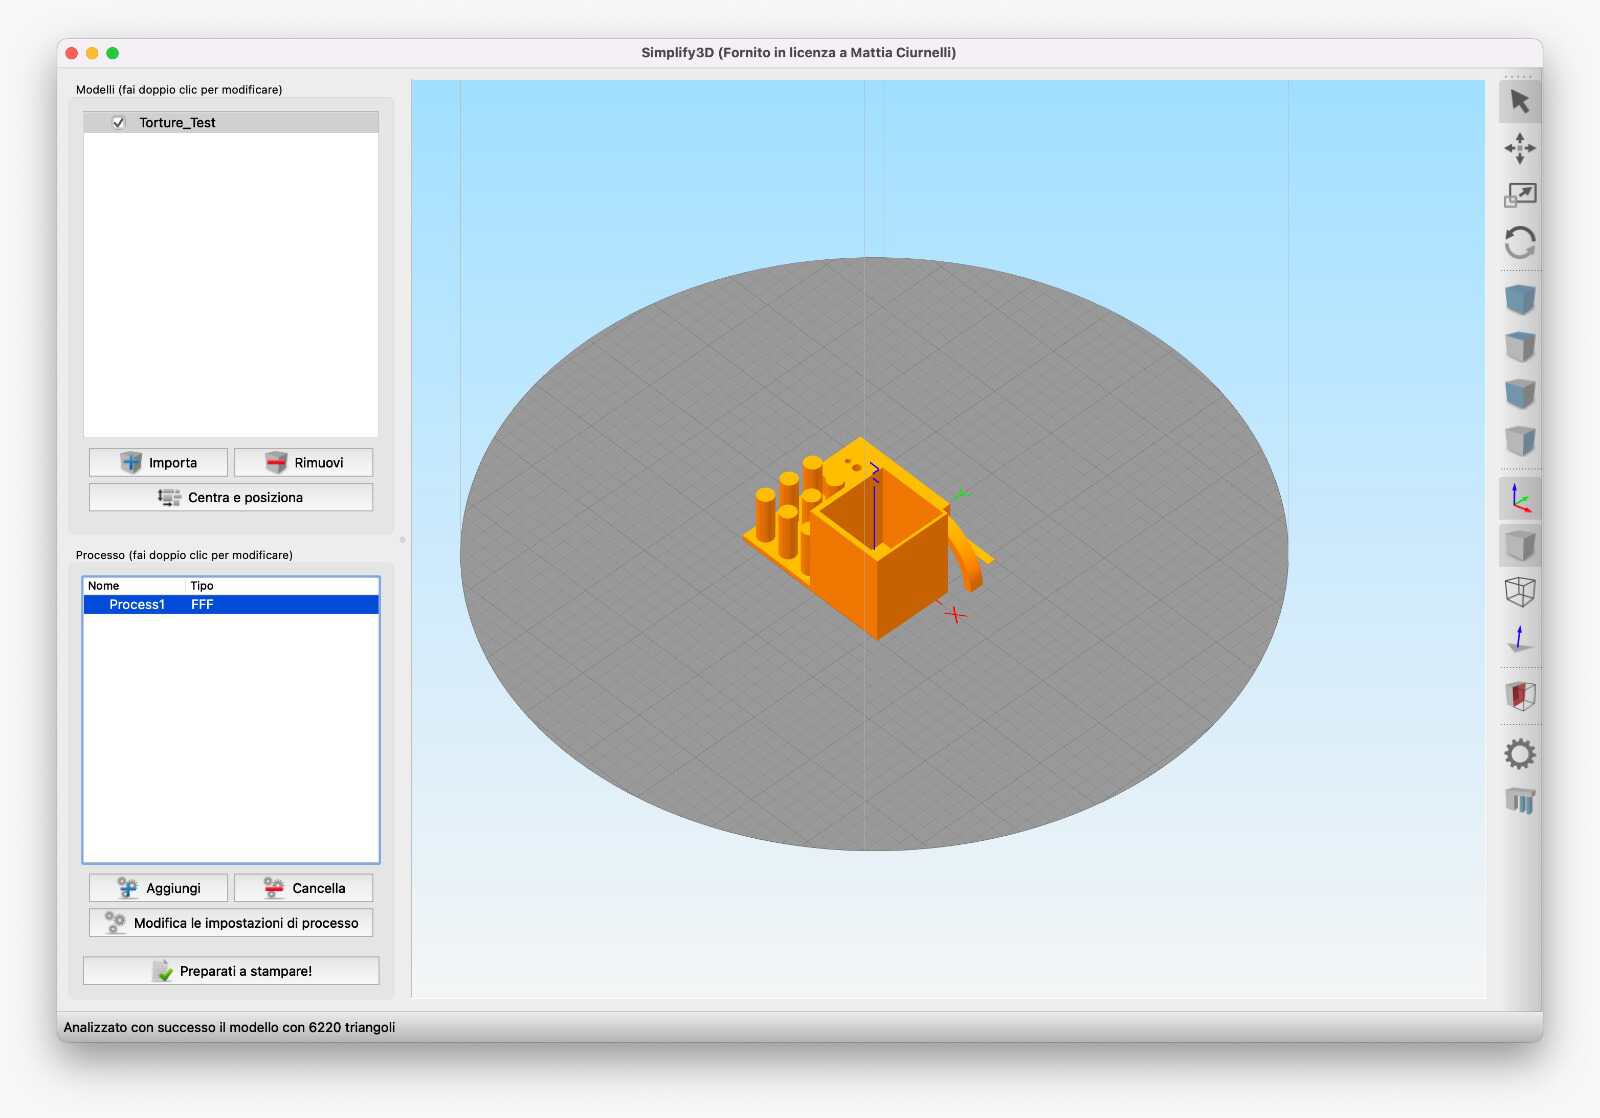
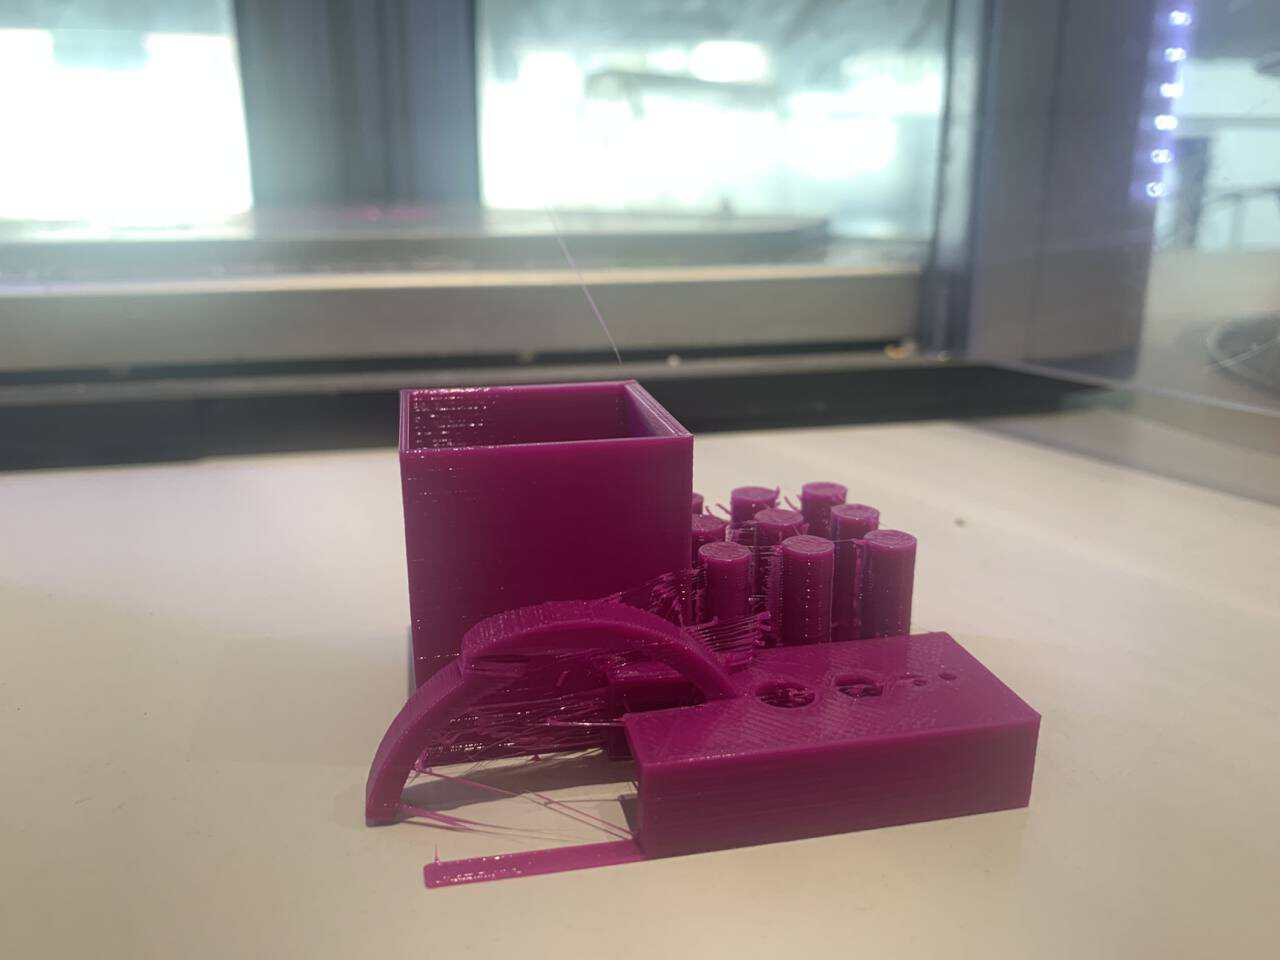
For the group assignment we wanted to test these limitations and we decided to download a All In One 3D Printer test model for the following limitations:
and we downloaded also the Torture test for these limitations:
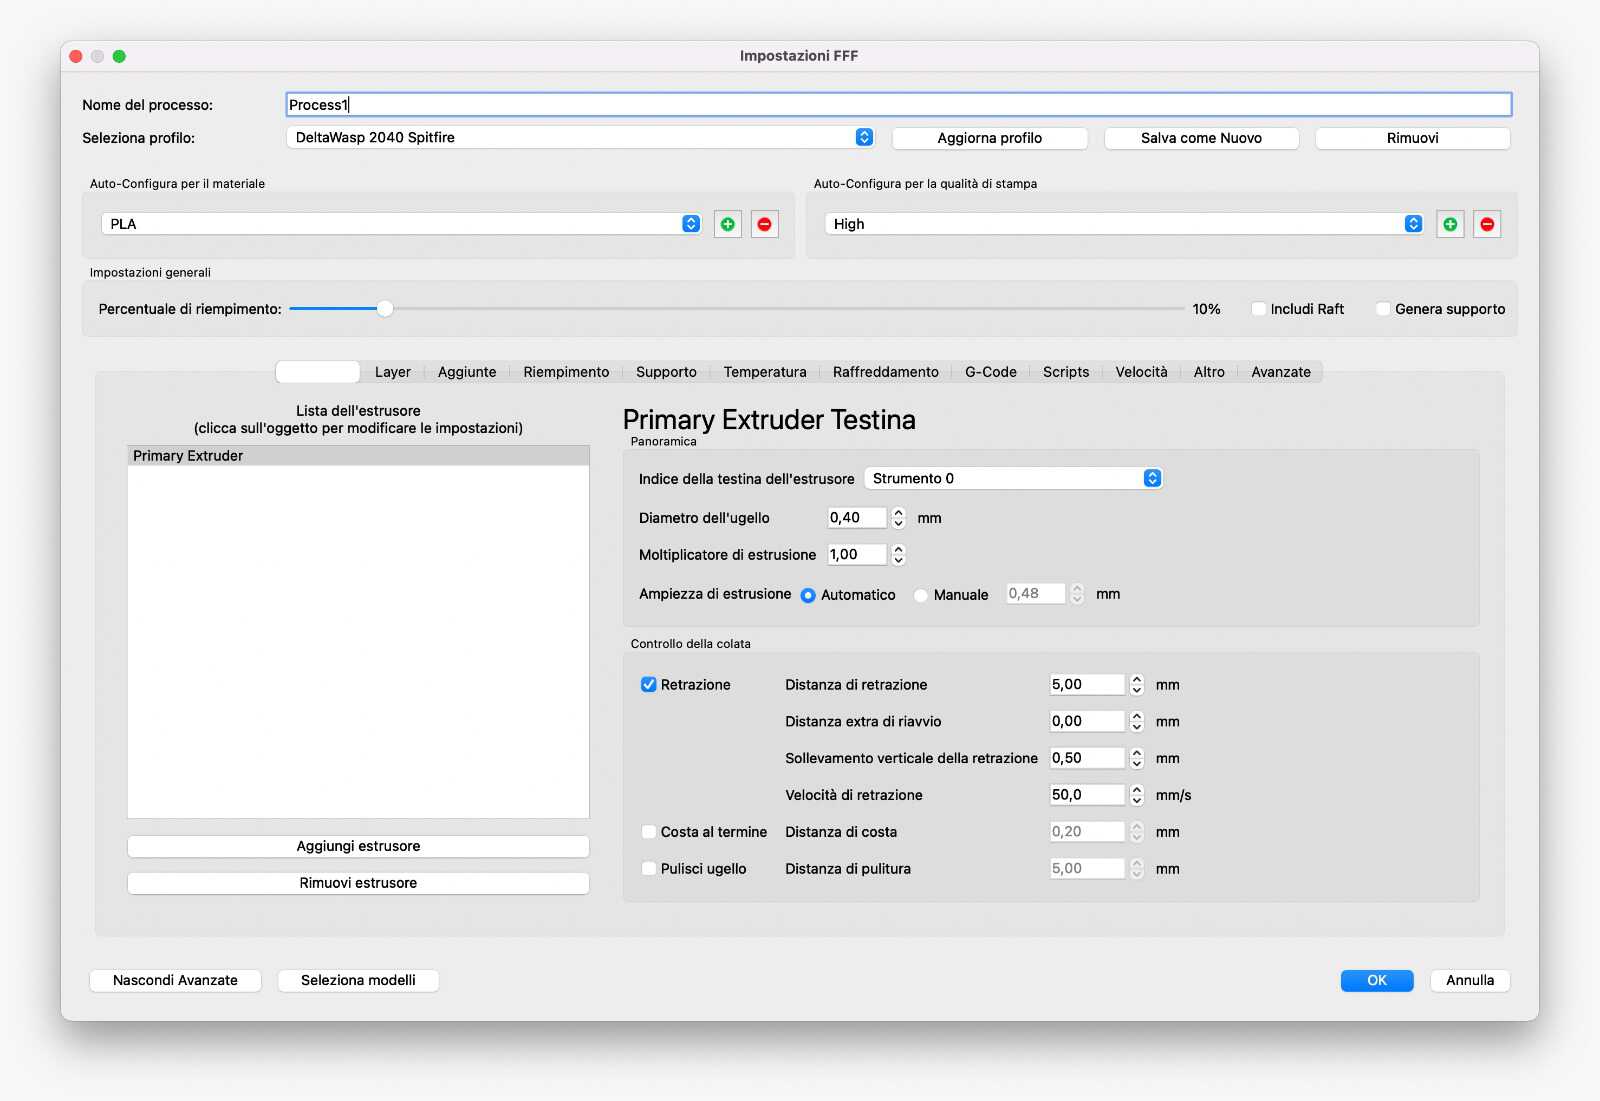
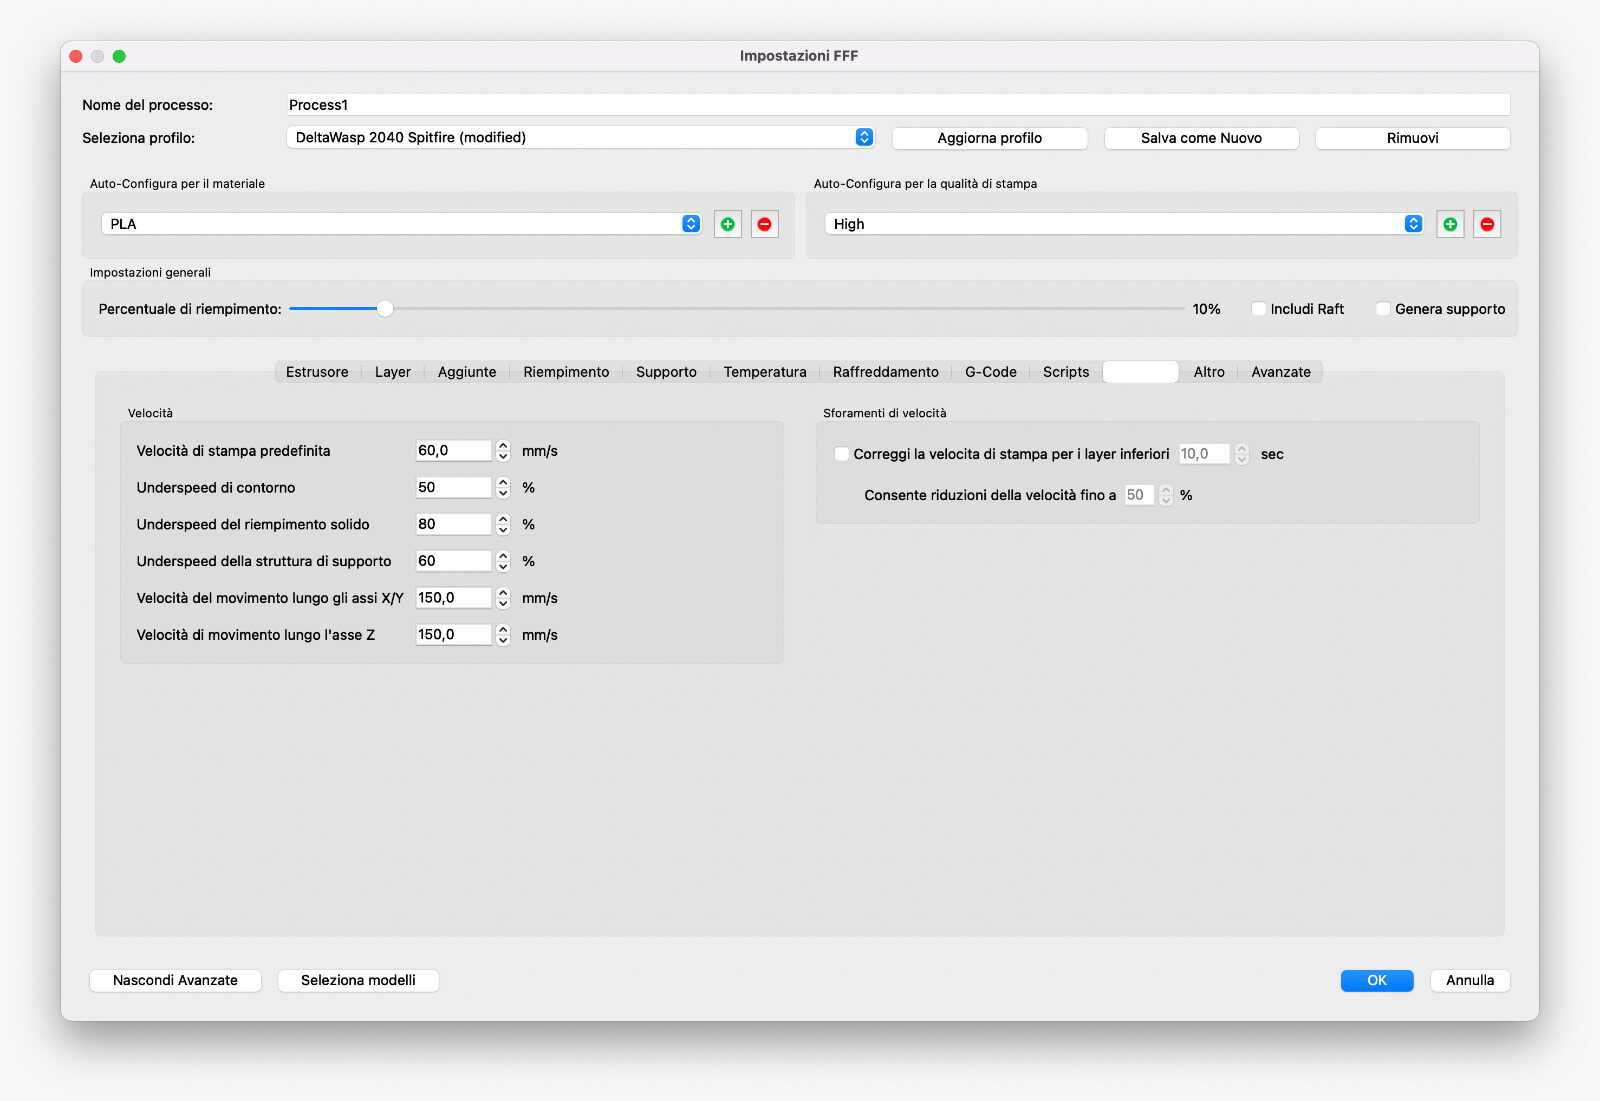
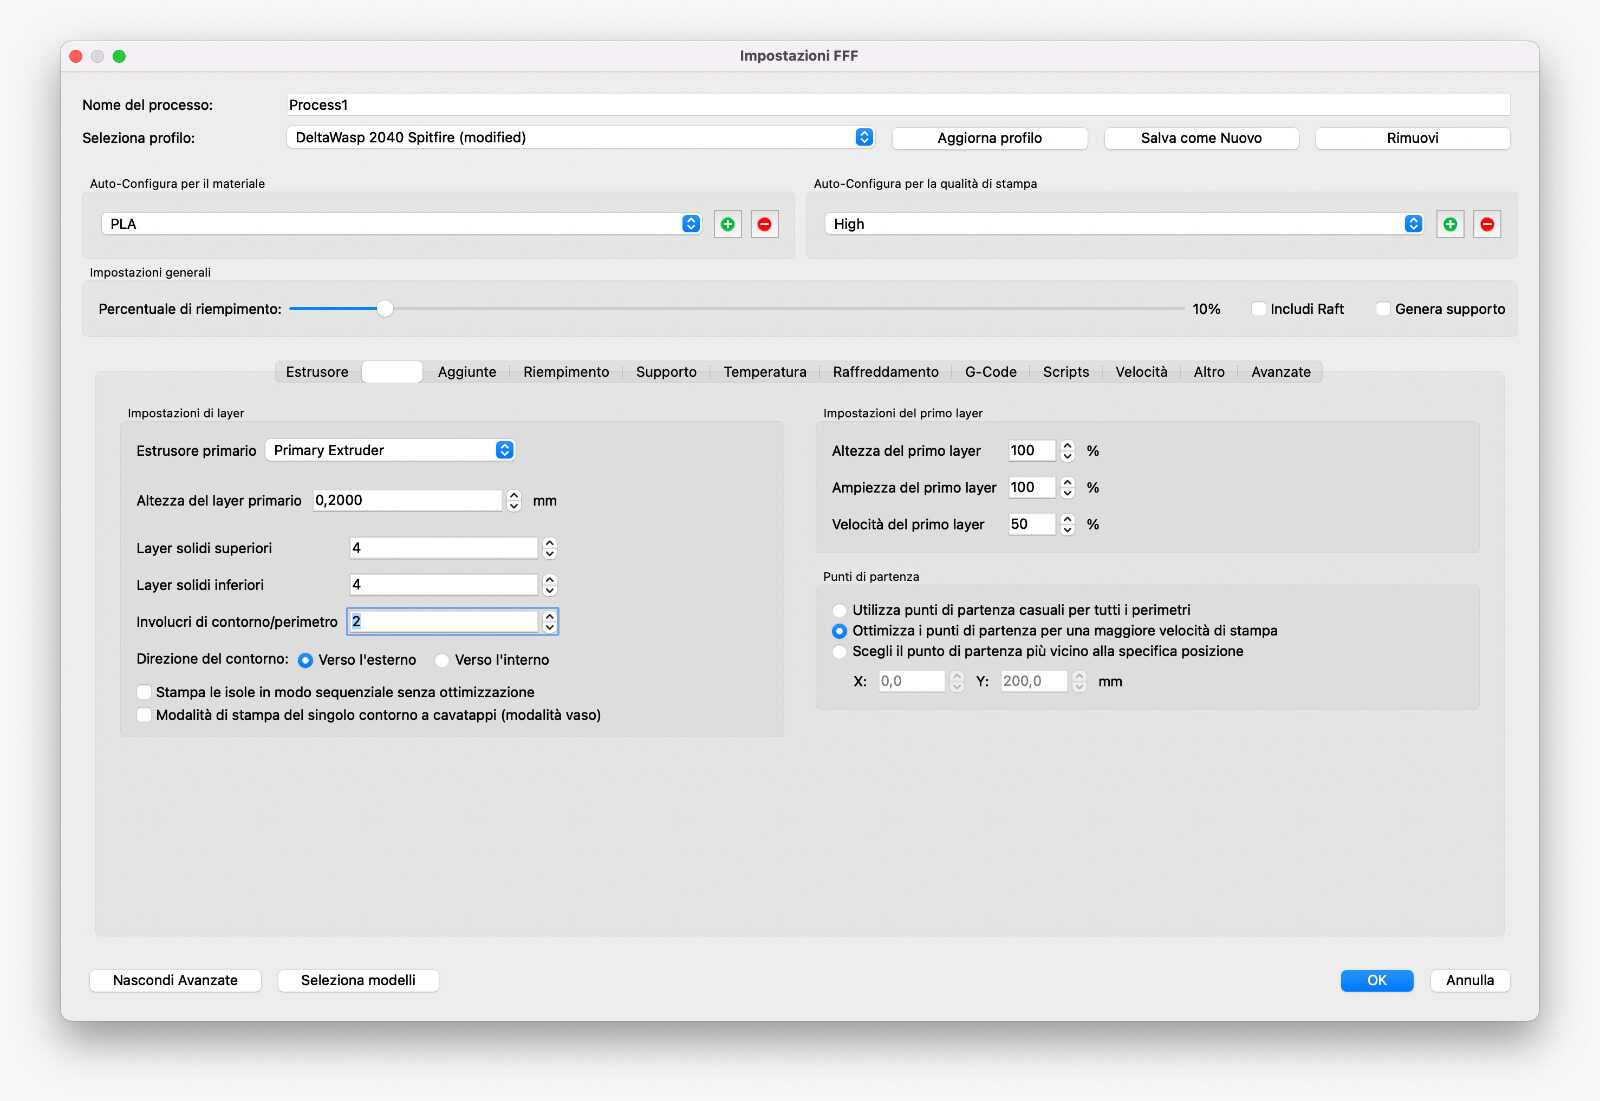
We printed using a Delta Wasp 2040 with a 0.4 nozzle.
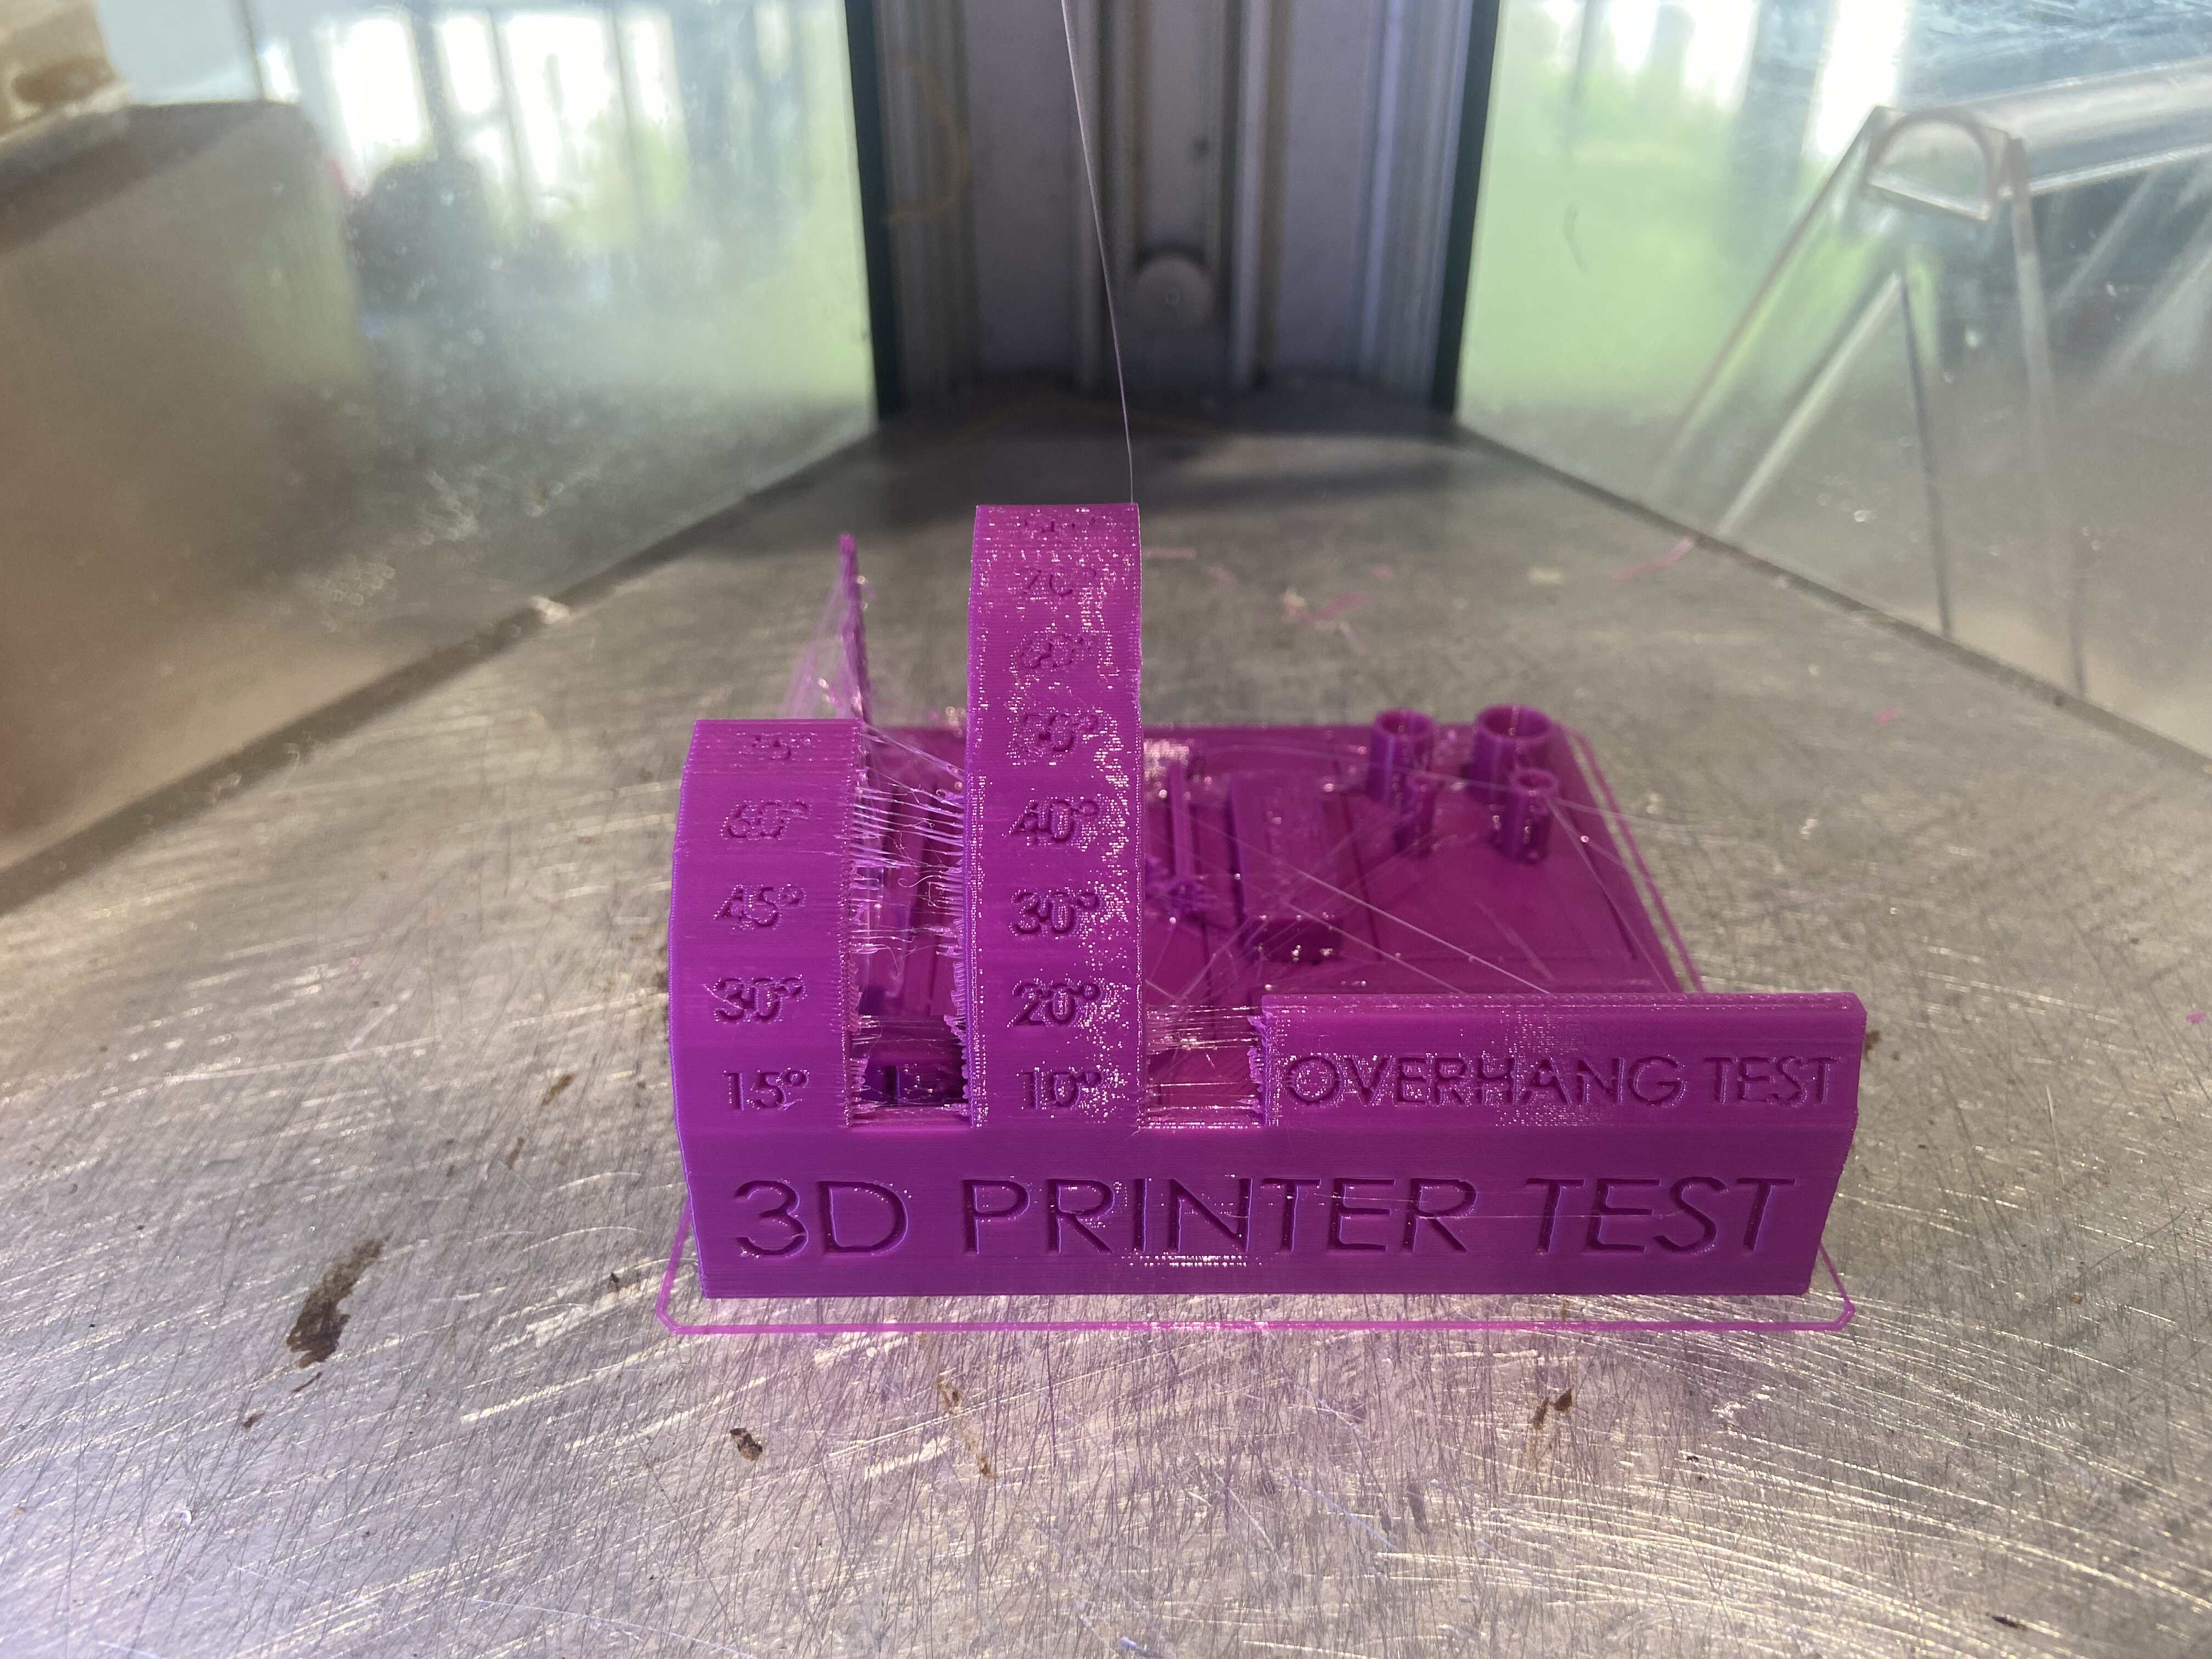
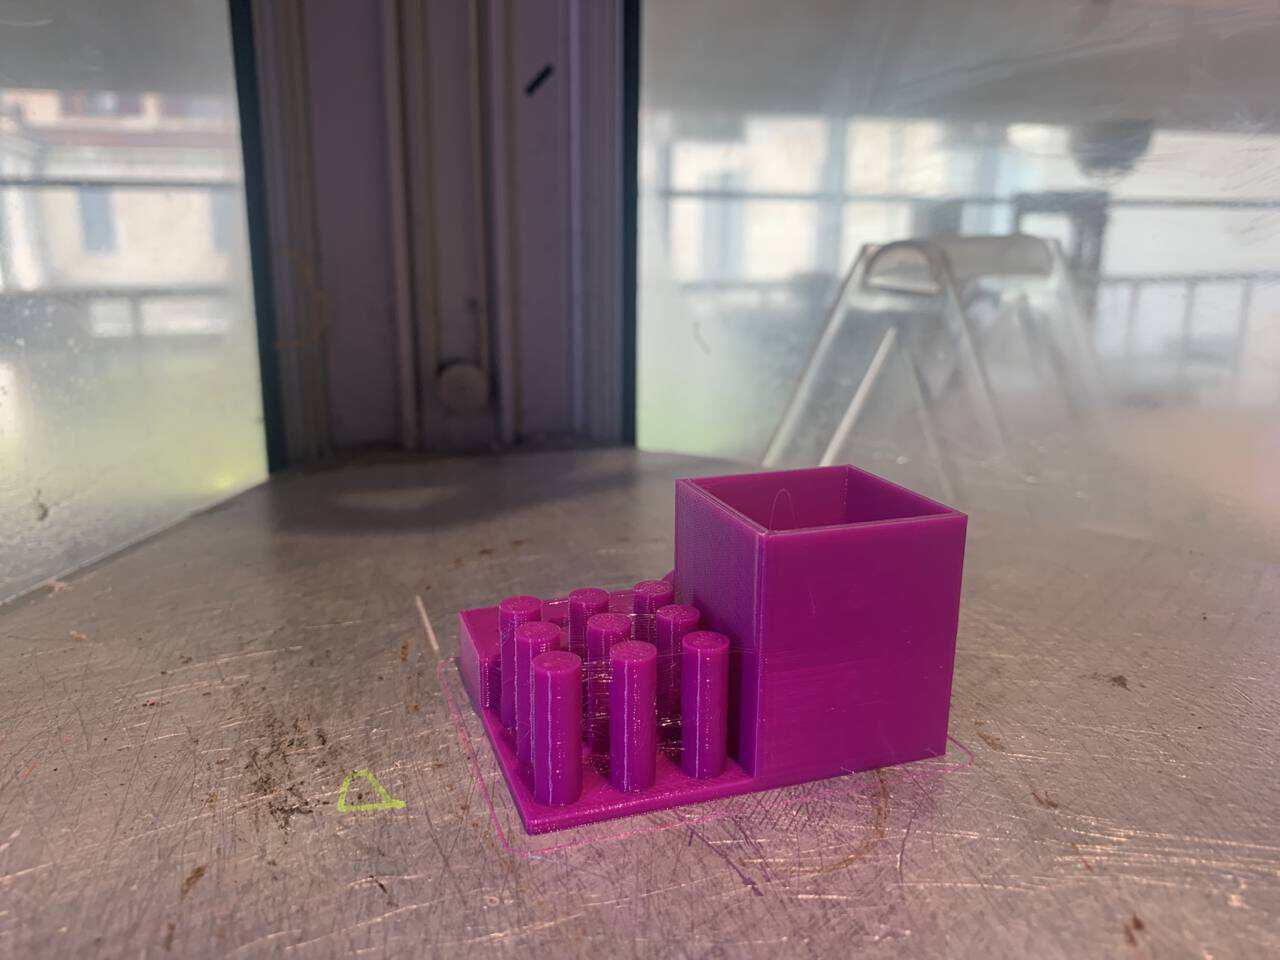
And these are the results of these specifics.
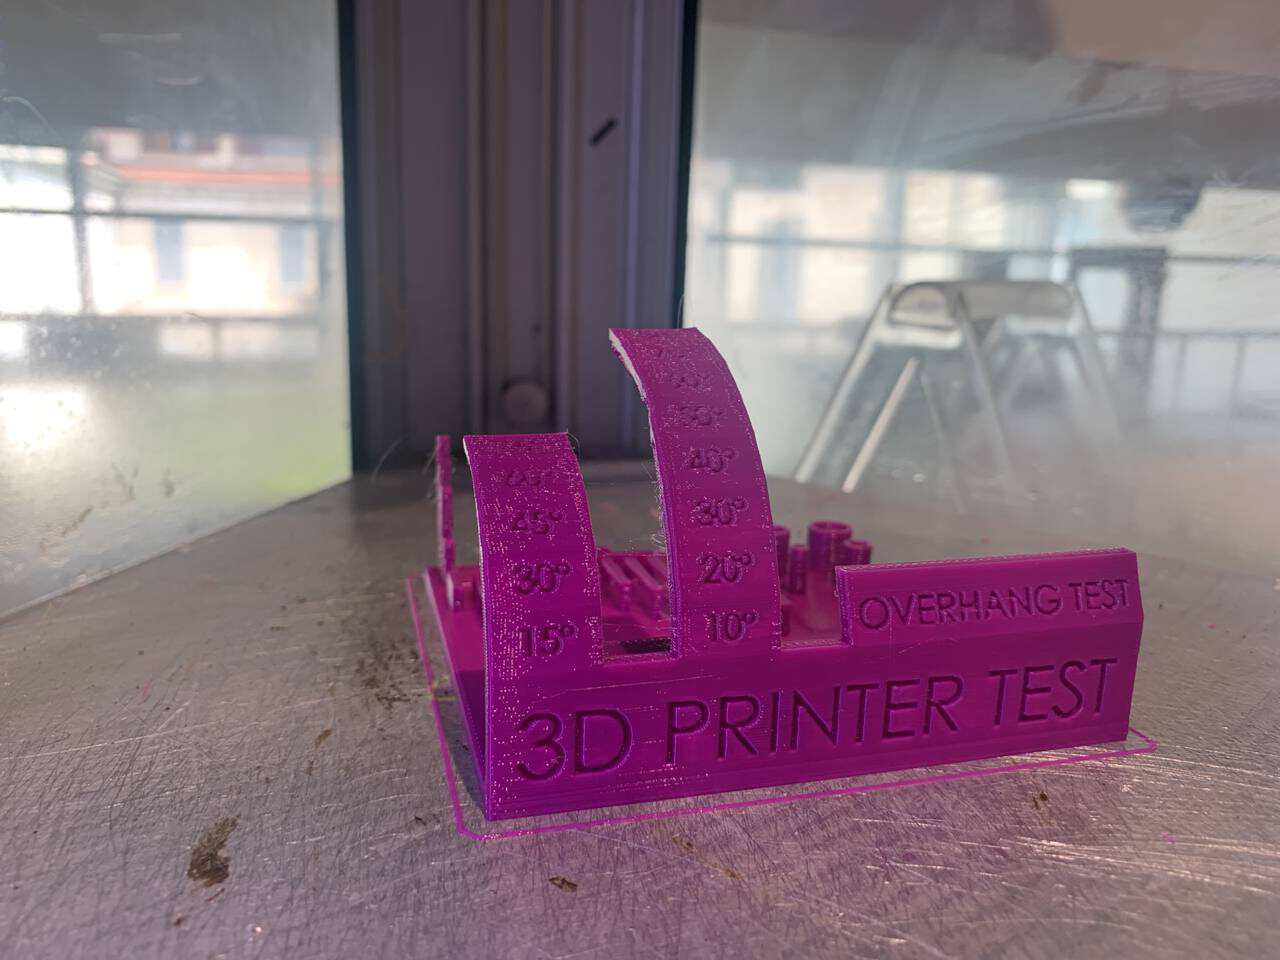
The overhang test tests printer’s ability to compile overhangs at 30, 45, 60, and 70 degrees. The overhang test proved that the 60° angle is the limit to have a mostly perfect print, even if is already not smooth as the 45° and 50°, which are closer to the suggested limit for overhangs.
The bridging test gauges printer’s ability to span unsupported horizontal gaps of different lenghts. As long as the bridge is under 22 mm long, there is no hanging material and the surface is flat. With the two briges that are longer than 22mm, some extrusion is hanging.
The holes were the same dimension as the one for the 3d model and they turned out well.
Exposes mechanical issues in the Z motion system. The z wobble test turned out well when the z was 20mm but not so well with the highest column (30mm).
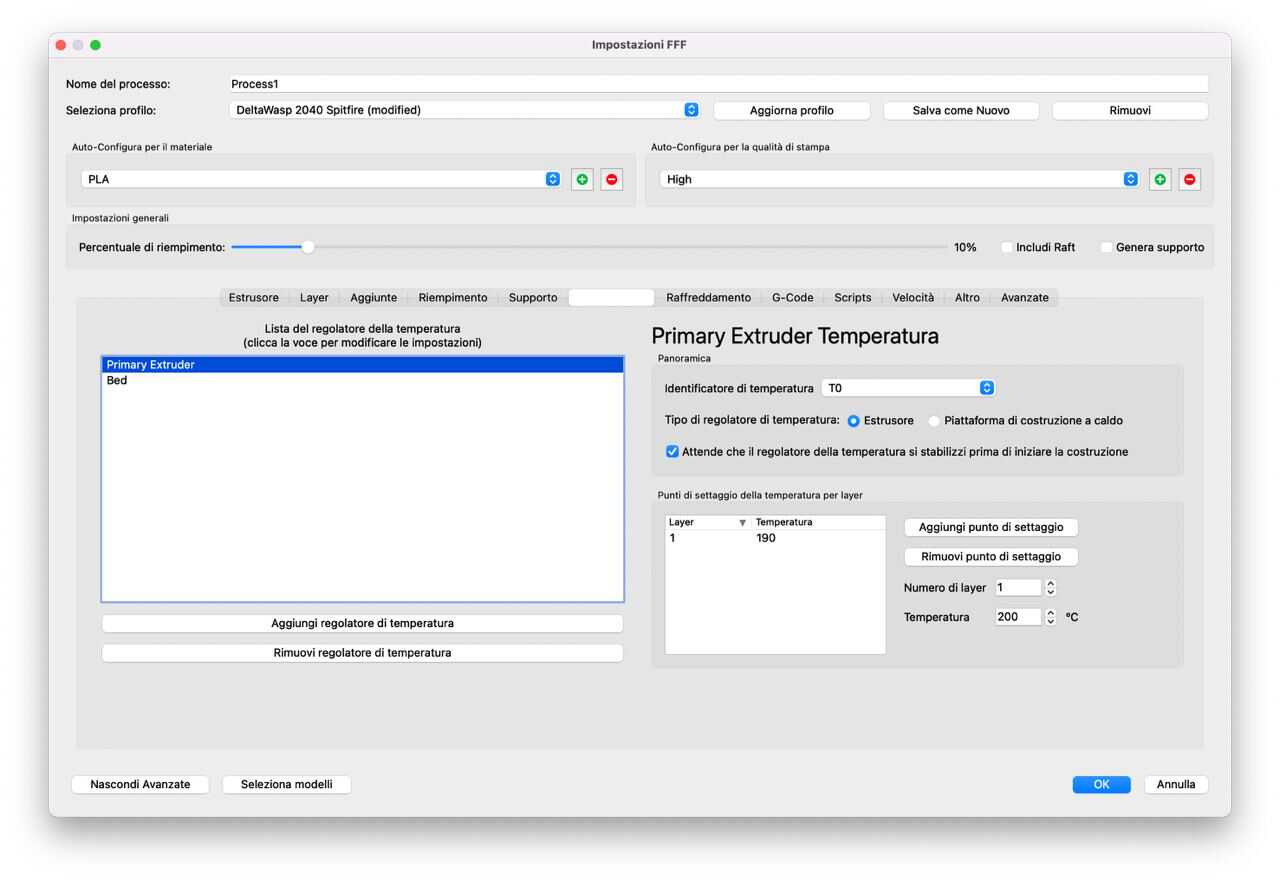
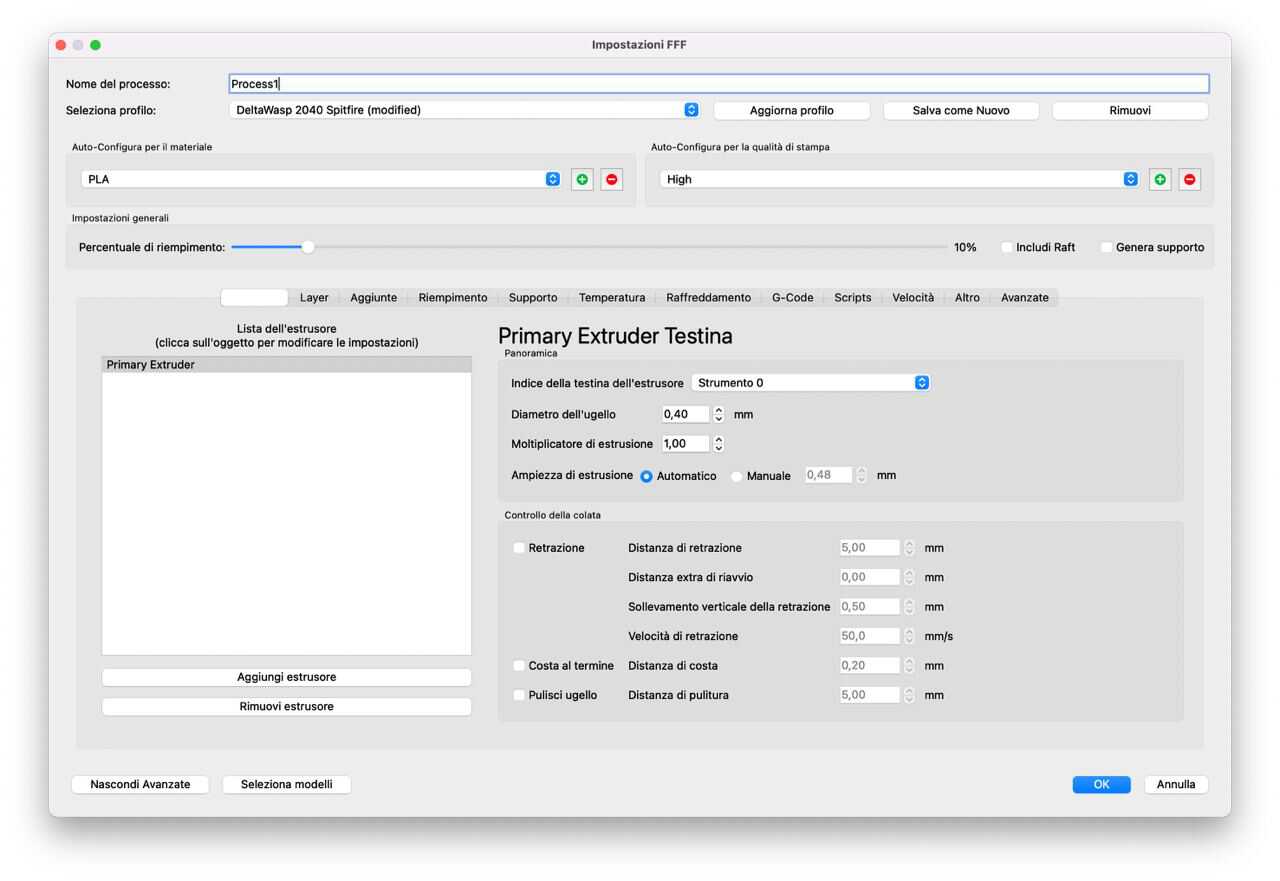
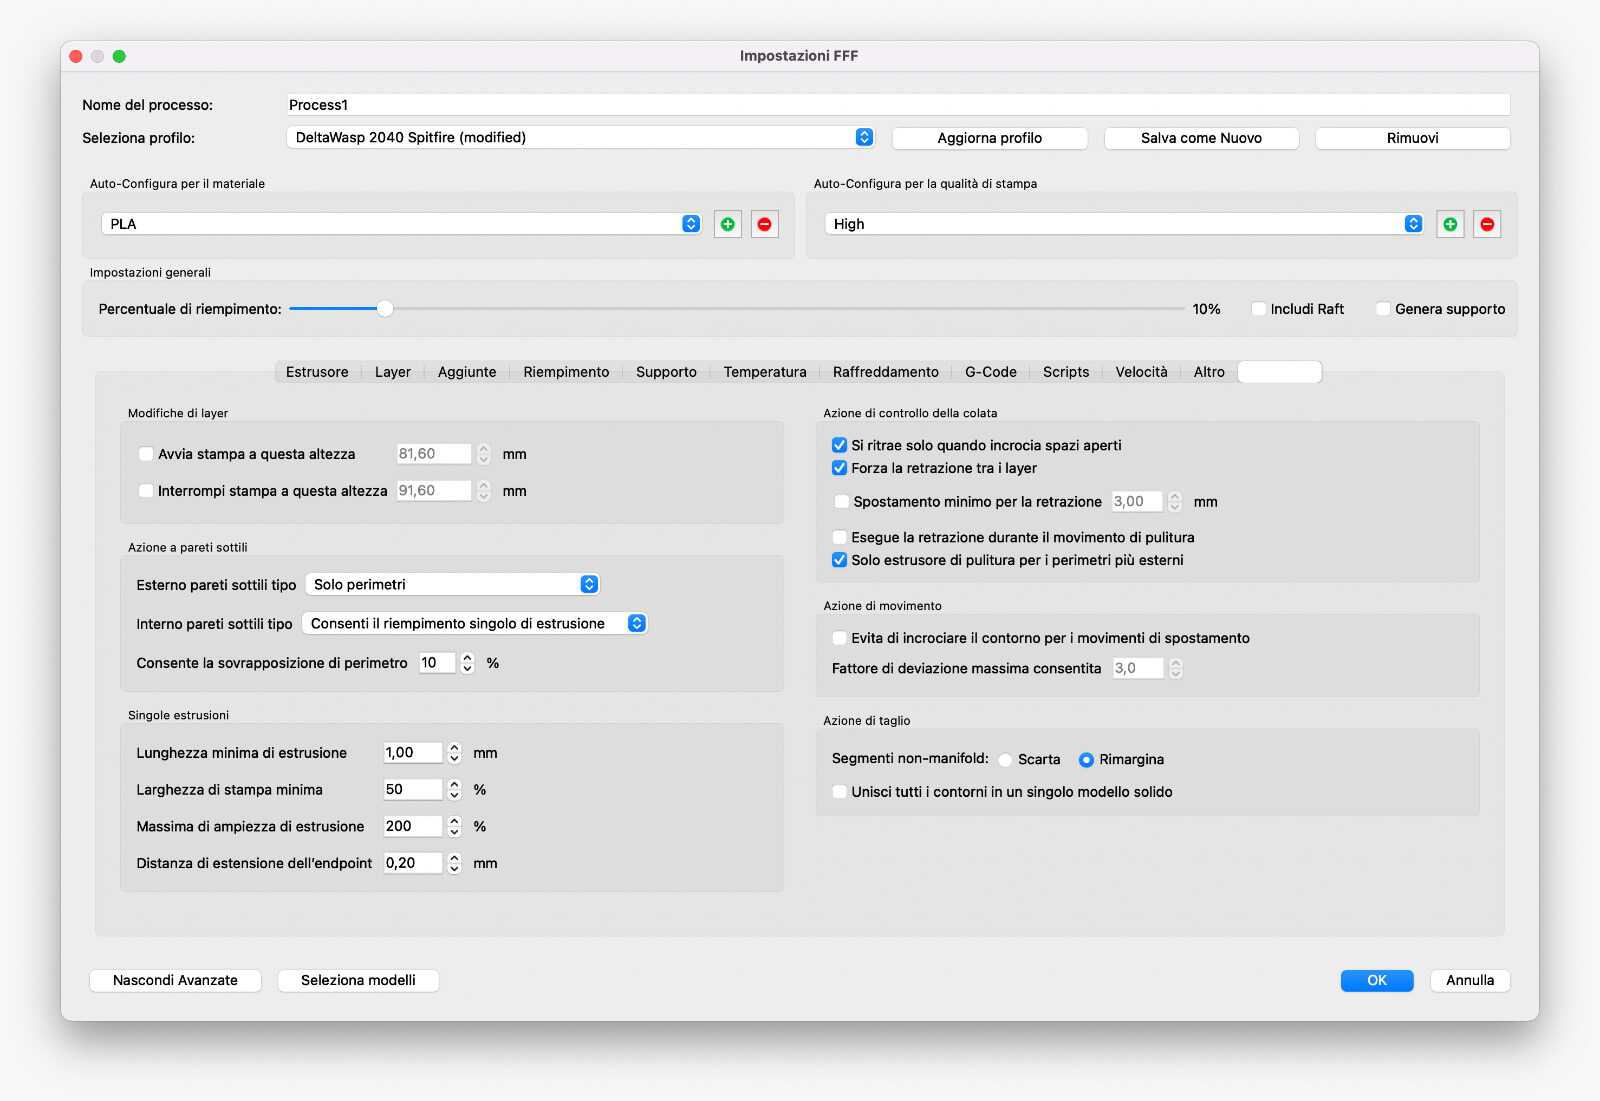
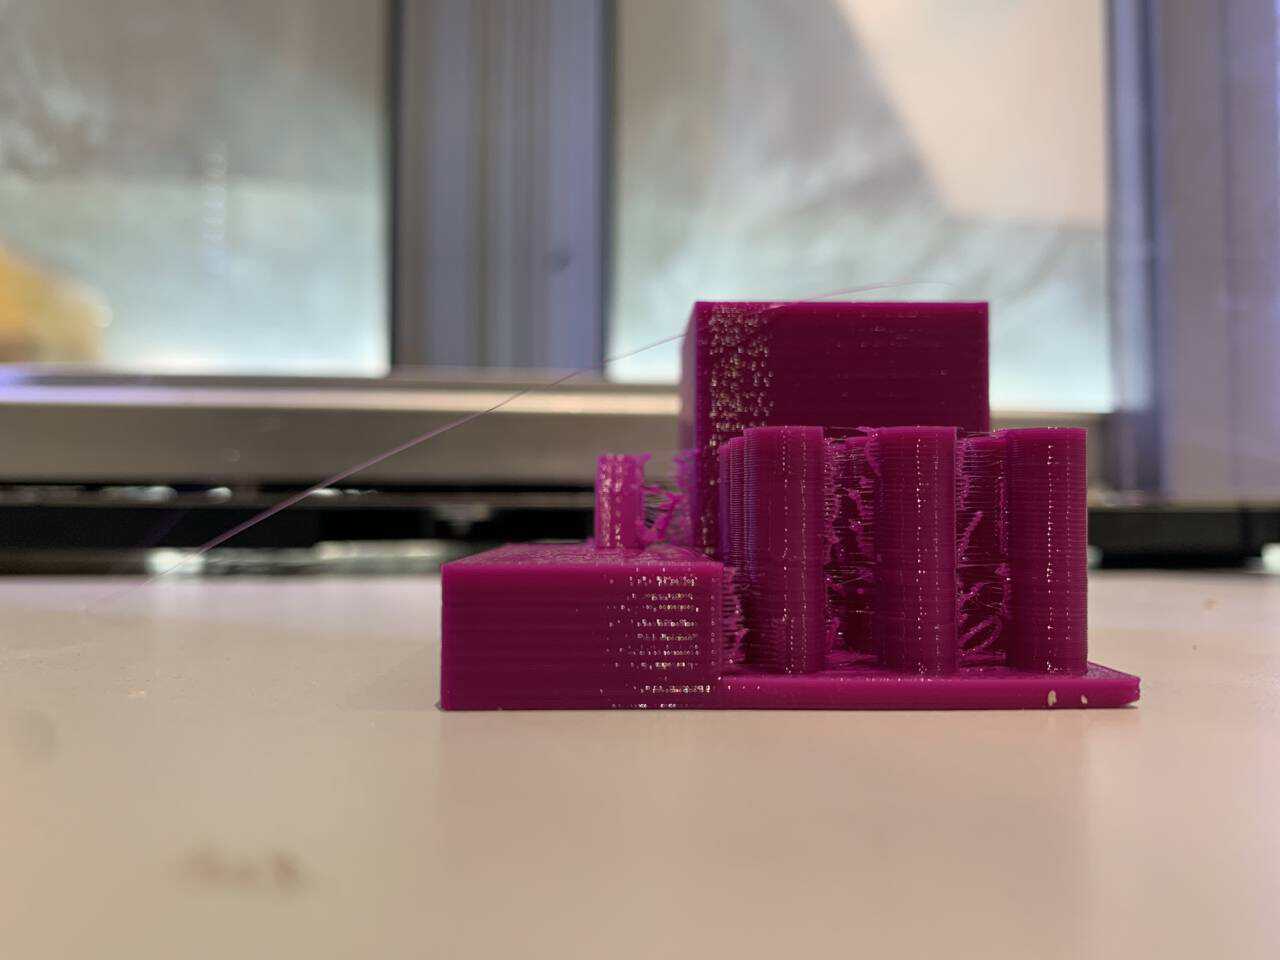
In order to compare the settings, we did another test, in this case with zero retraction and a different temperature (colder).
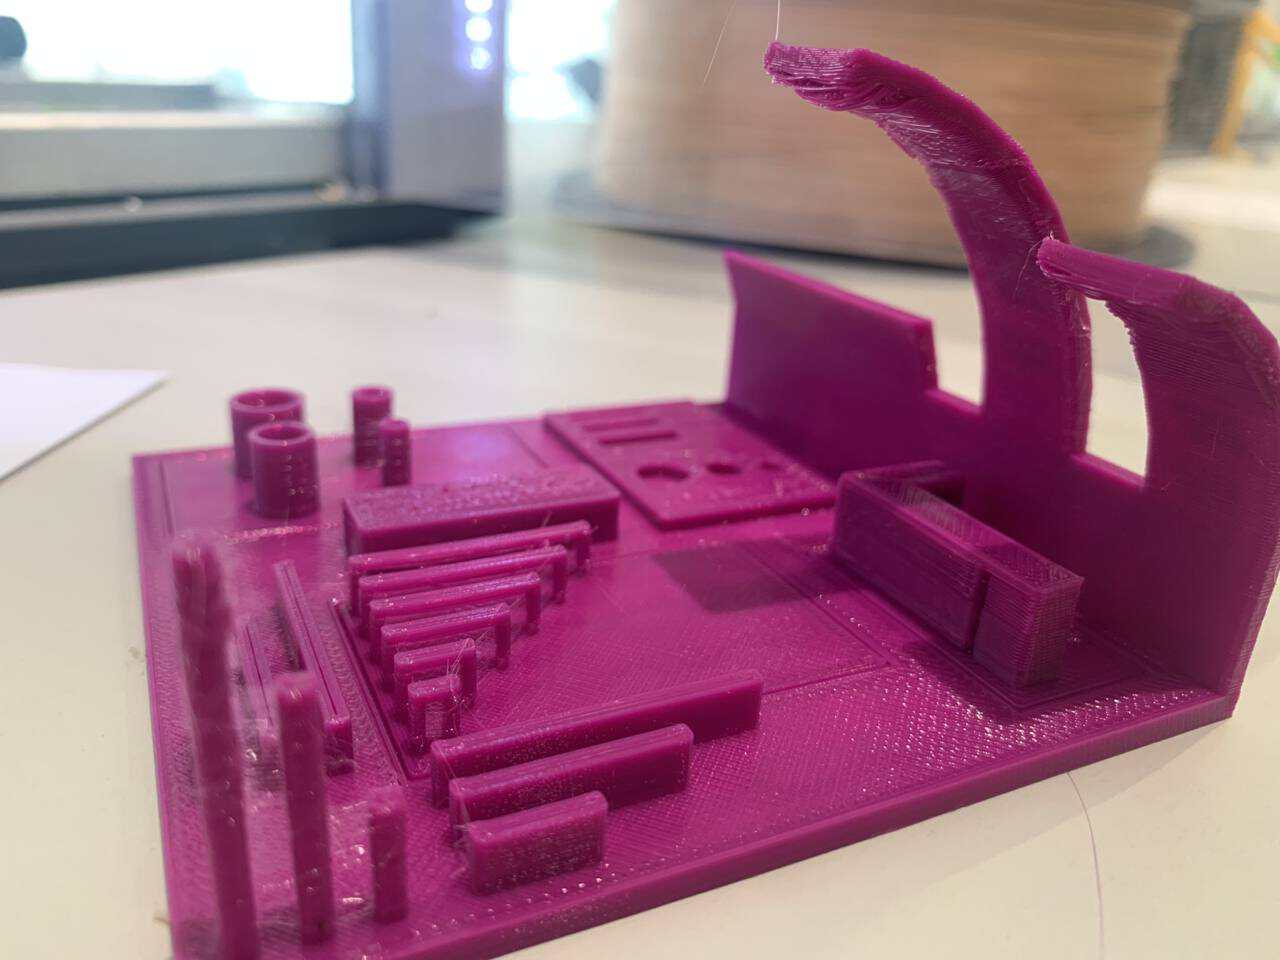
And these are the results of these specifics.

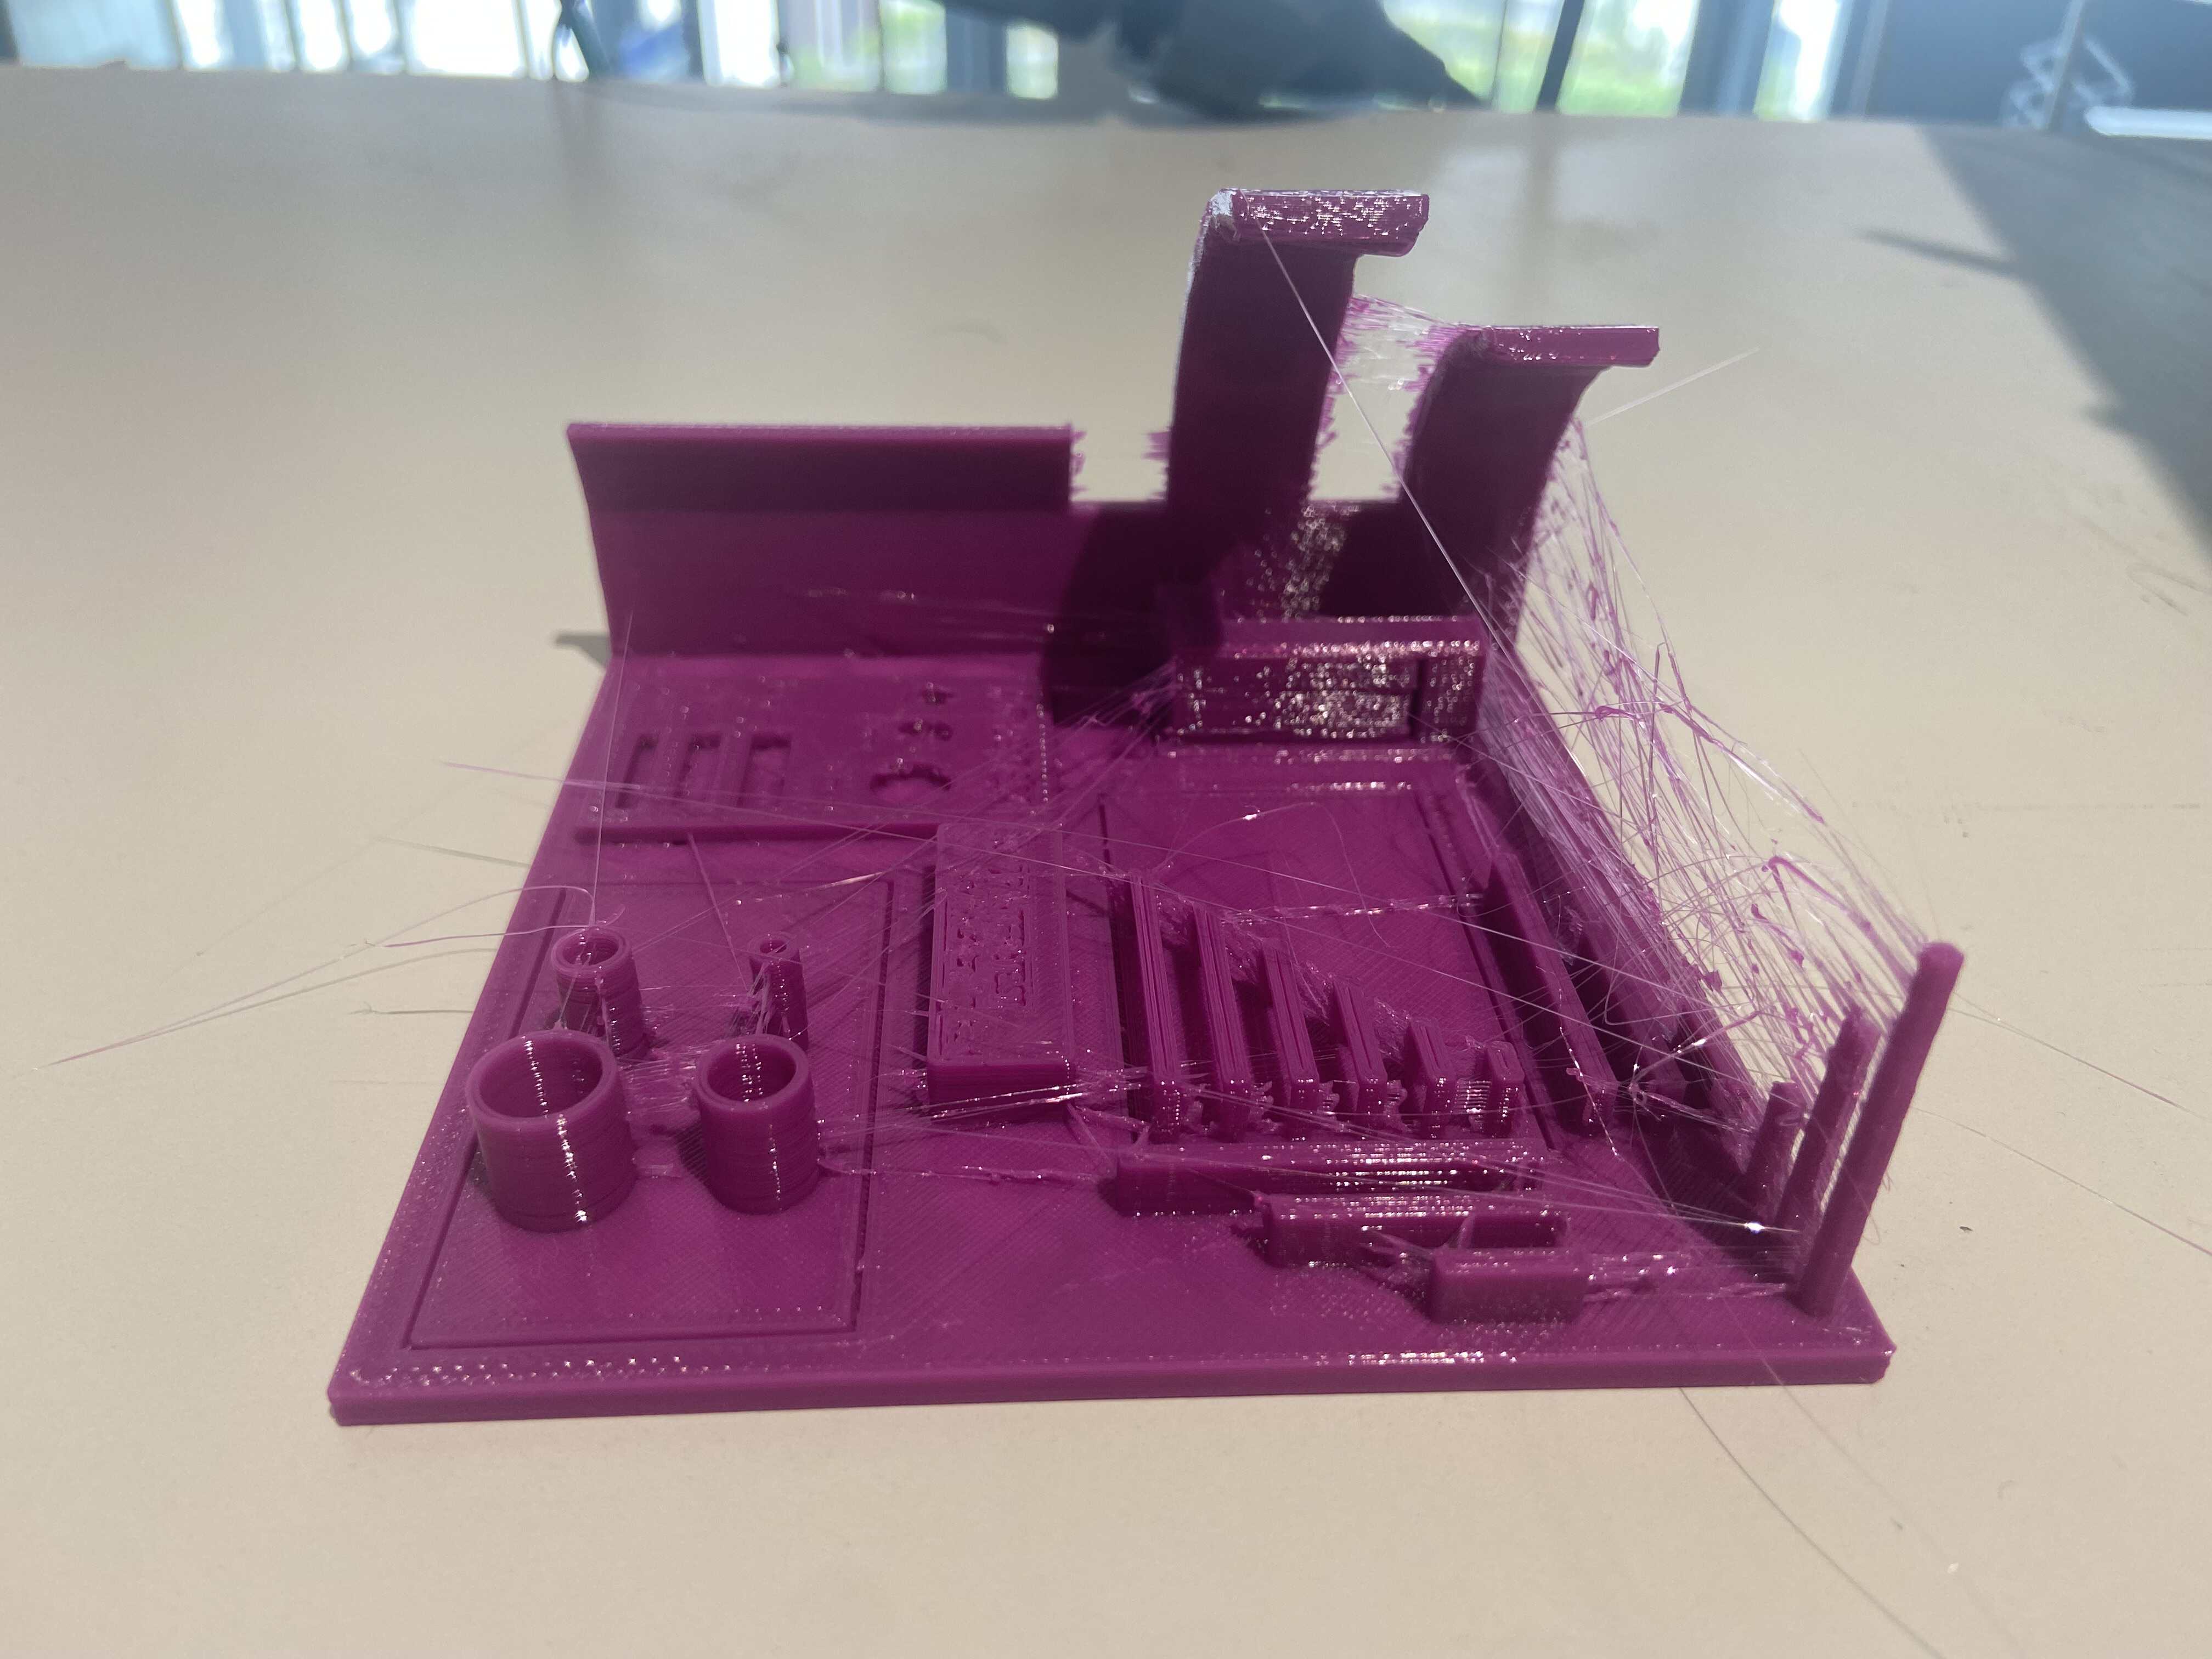
The overhang test proved that the 60° angle is the limit to have a mostly perfect print, even if is already not smooth as the 45° and 50°, which are closer to the suggested limit for overhangs.
As long as the bridge is under 22 mm long, there is no hanging material and the surface is flat. With the two briges that are longer than 22mm, some extrusion is hanging. However the extrusion is not as full as the one with retraction and 220° nozzle: there are also a lot of strings between the bridges.
The holes were the same dimension as the one for the 3d model and they turned out well. However, they are less clean than the previous ones due to the absence of retraction.
The z wobble test turned out full of strings due to the absence of retraction.
Tests the printer’s ability to resolve single-extrusion width features and exposes resonance in the XY gantry.
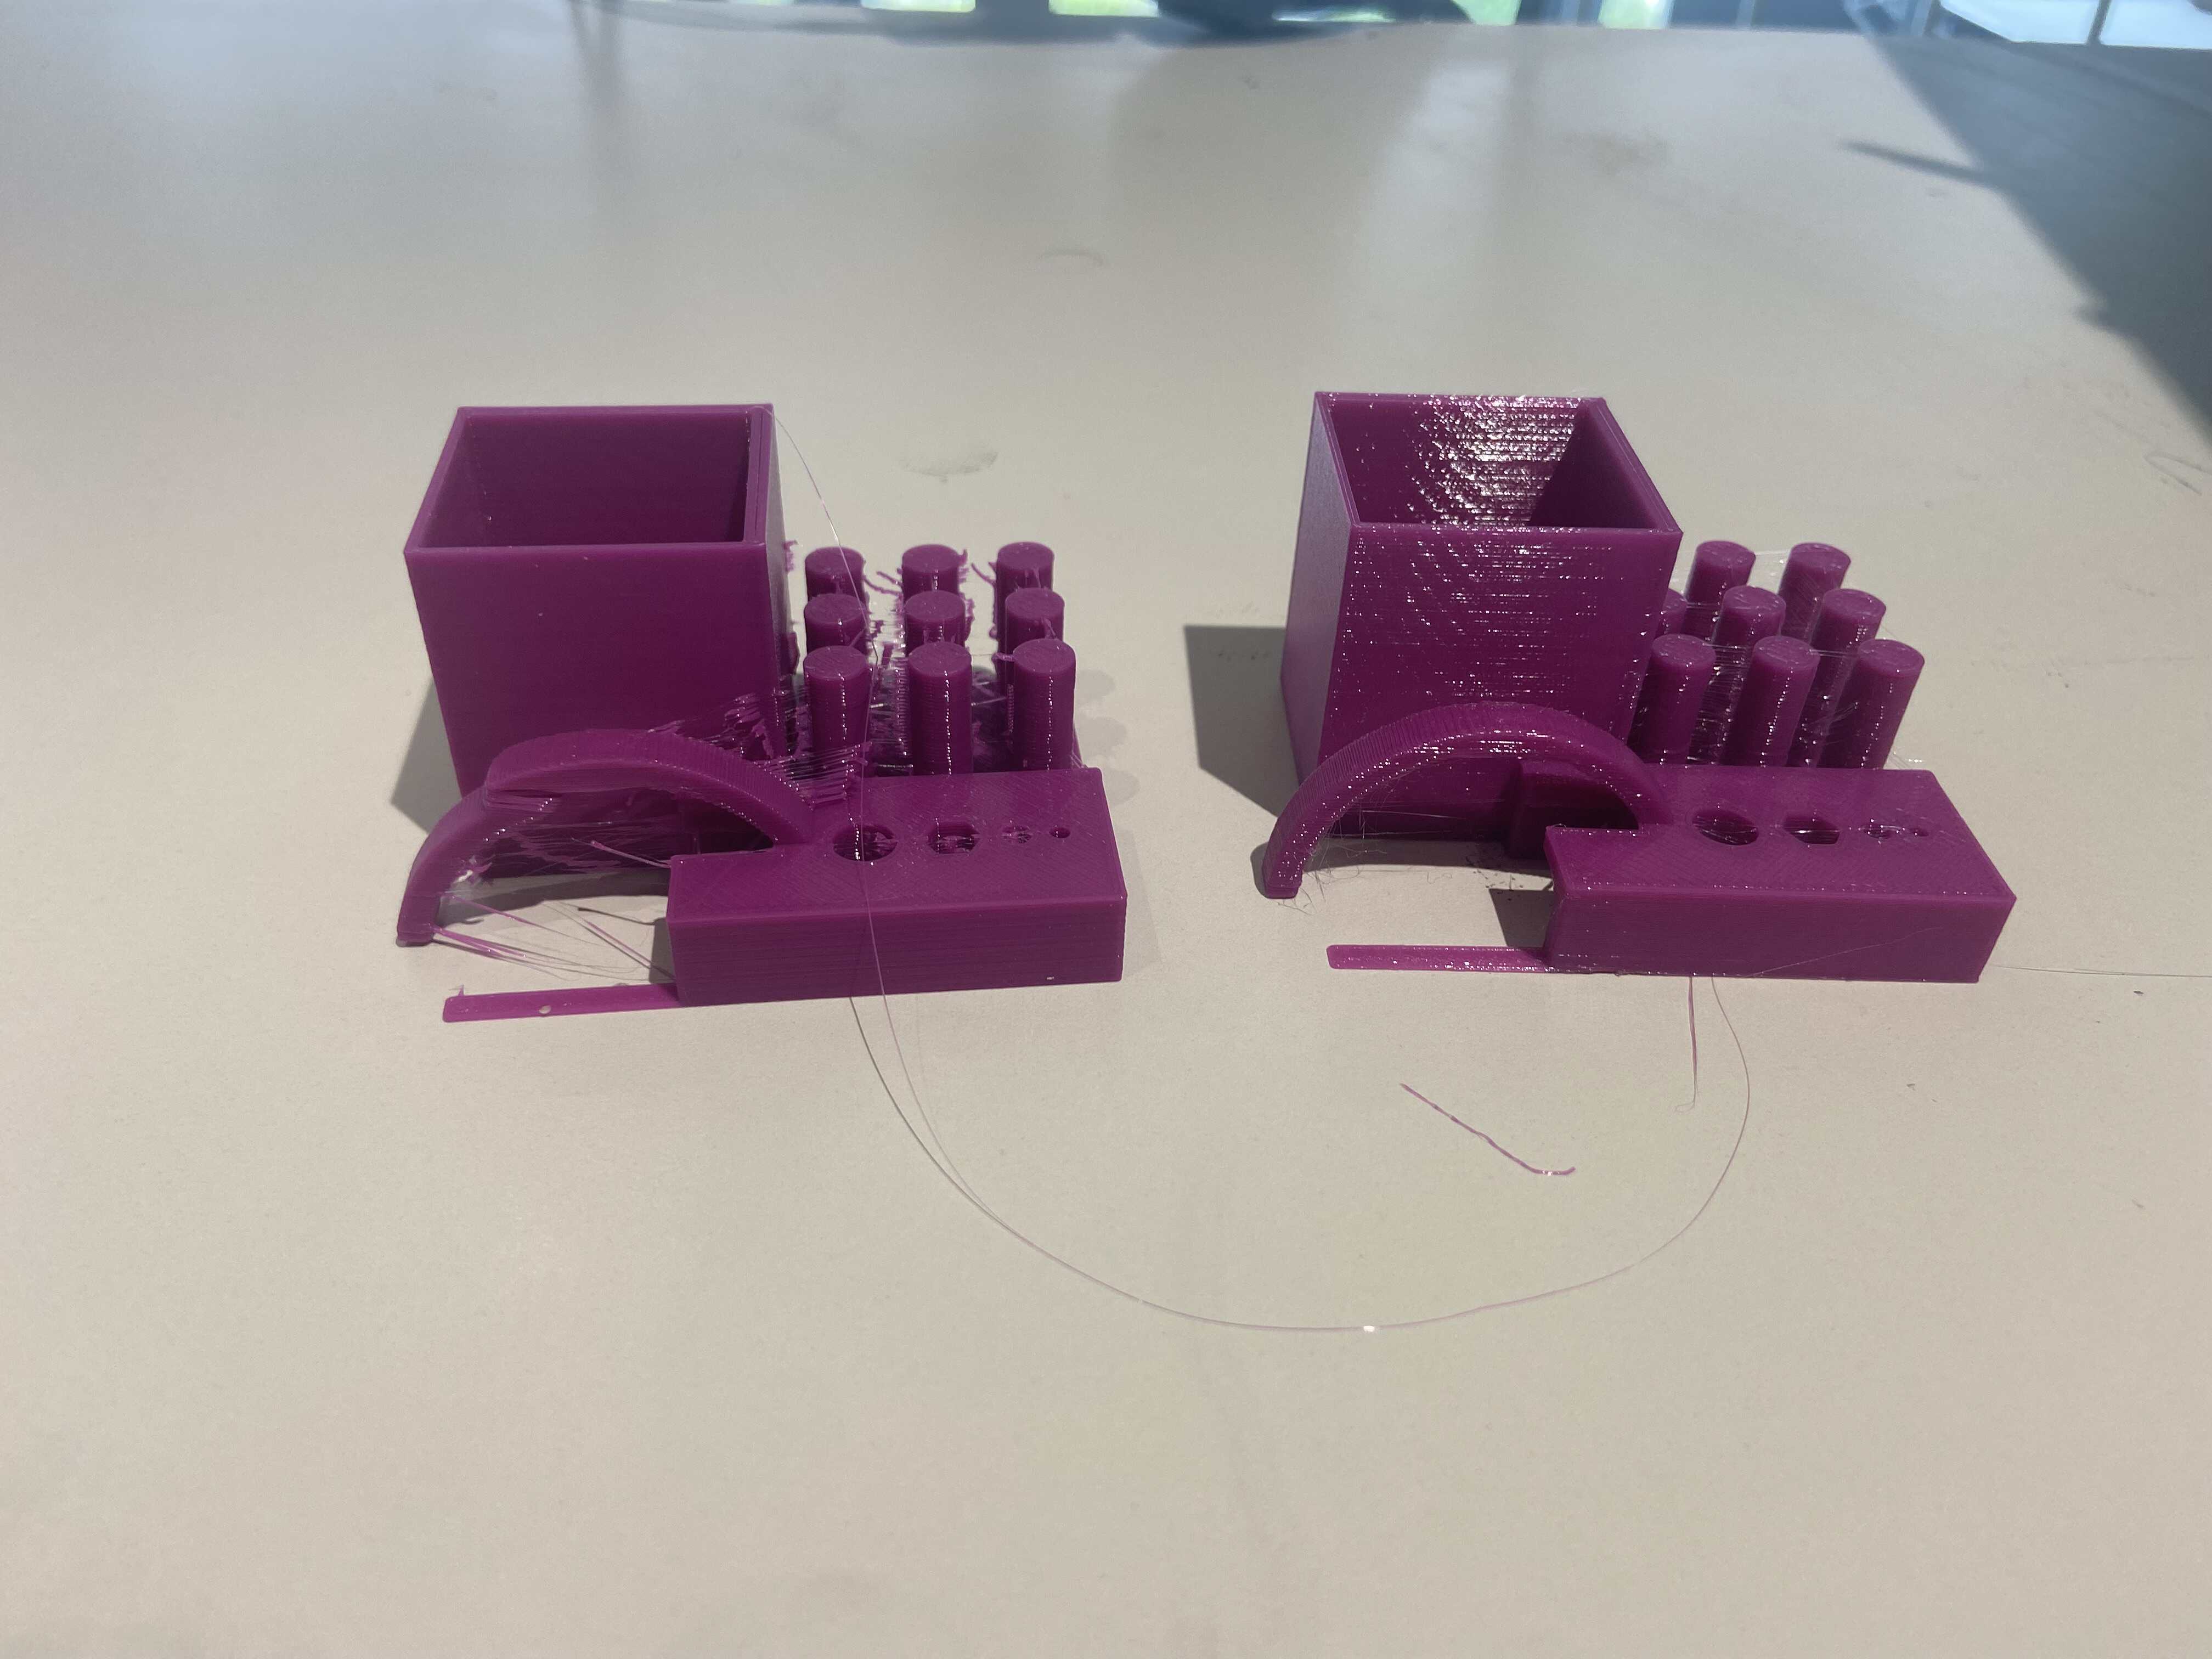
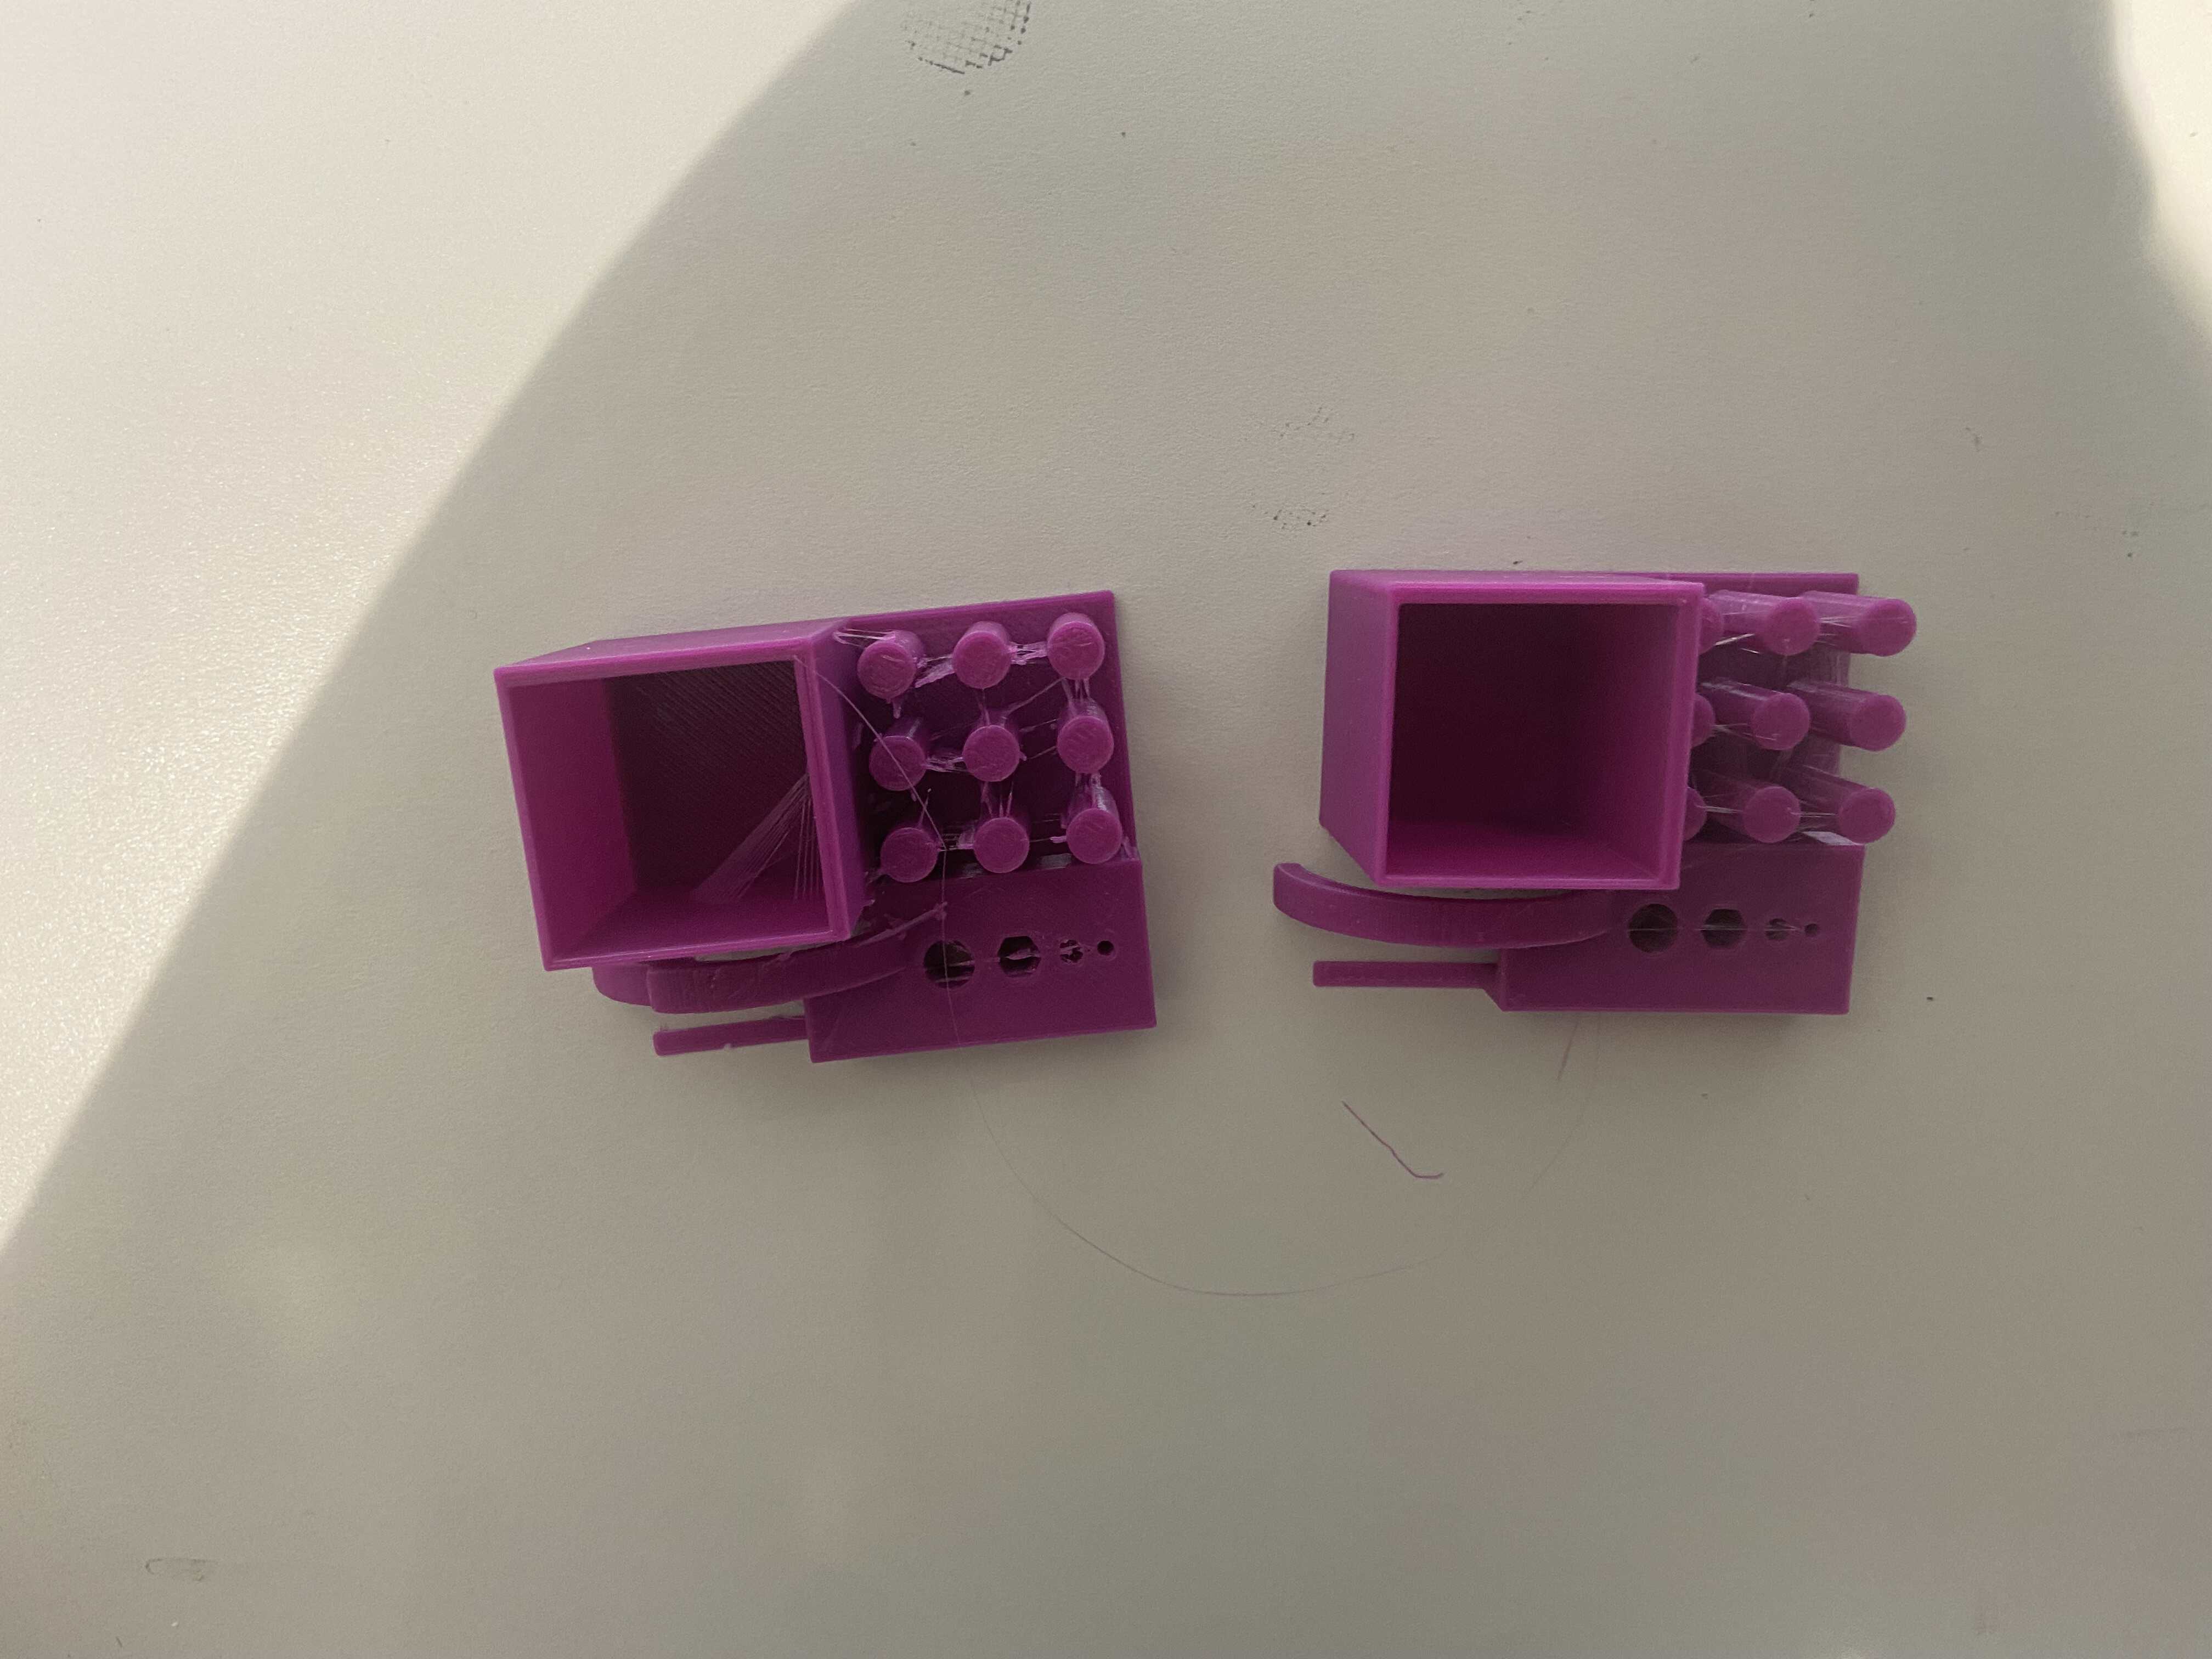
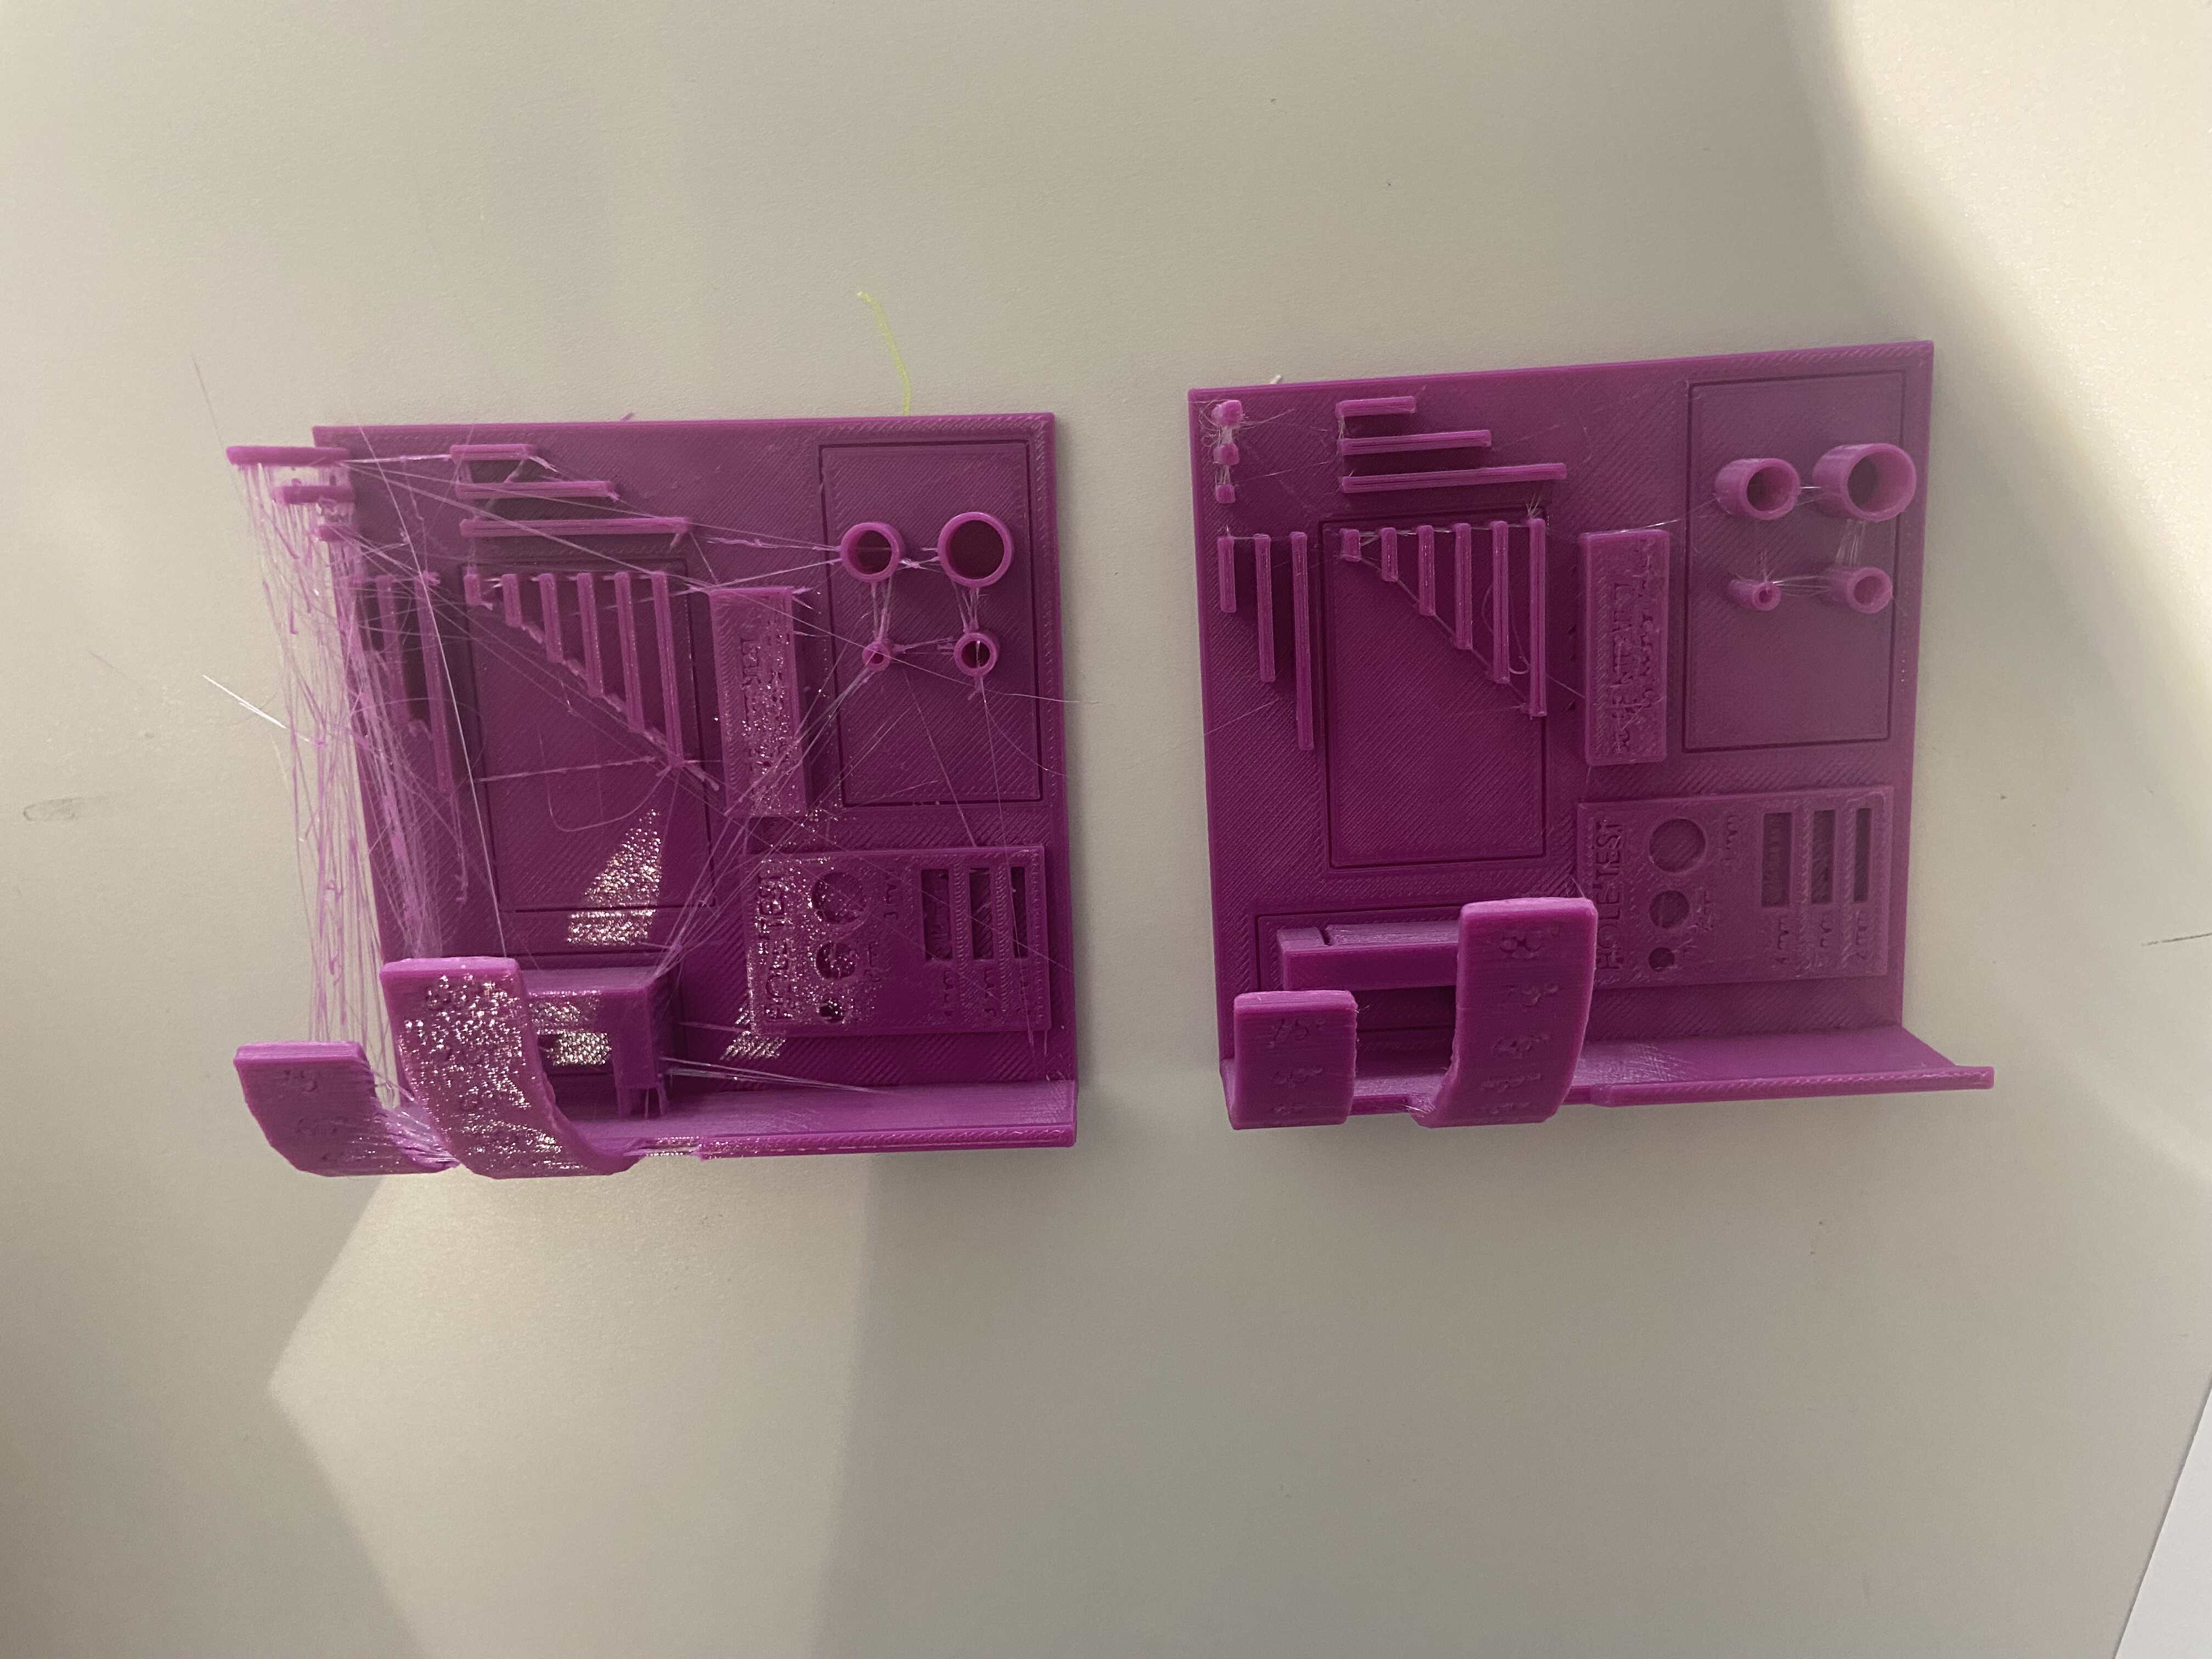
Here a comparison between the two models:

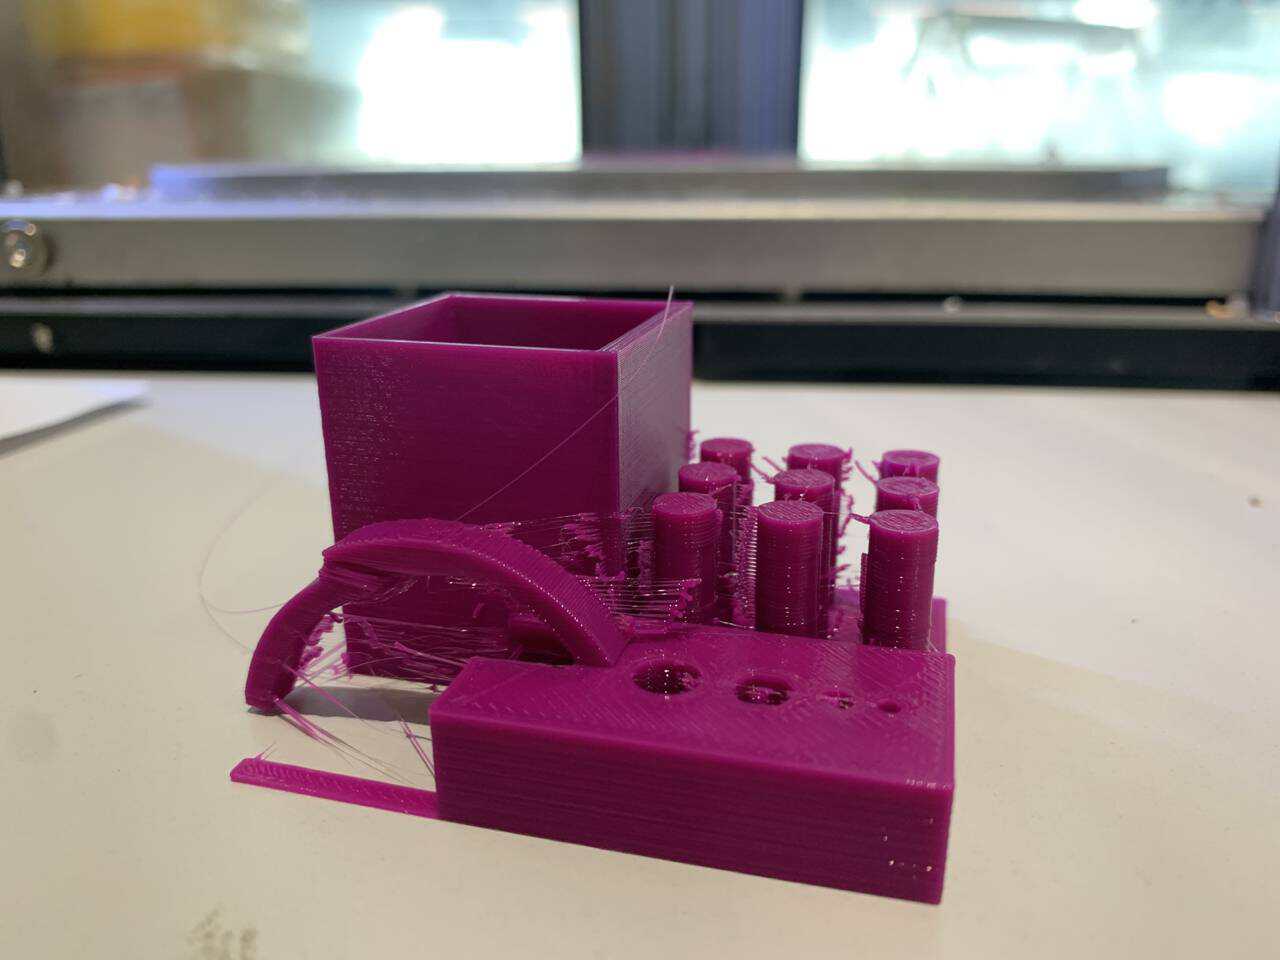
We printed using a Delta Wasp 2040 with a 0.4 nozzle.
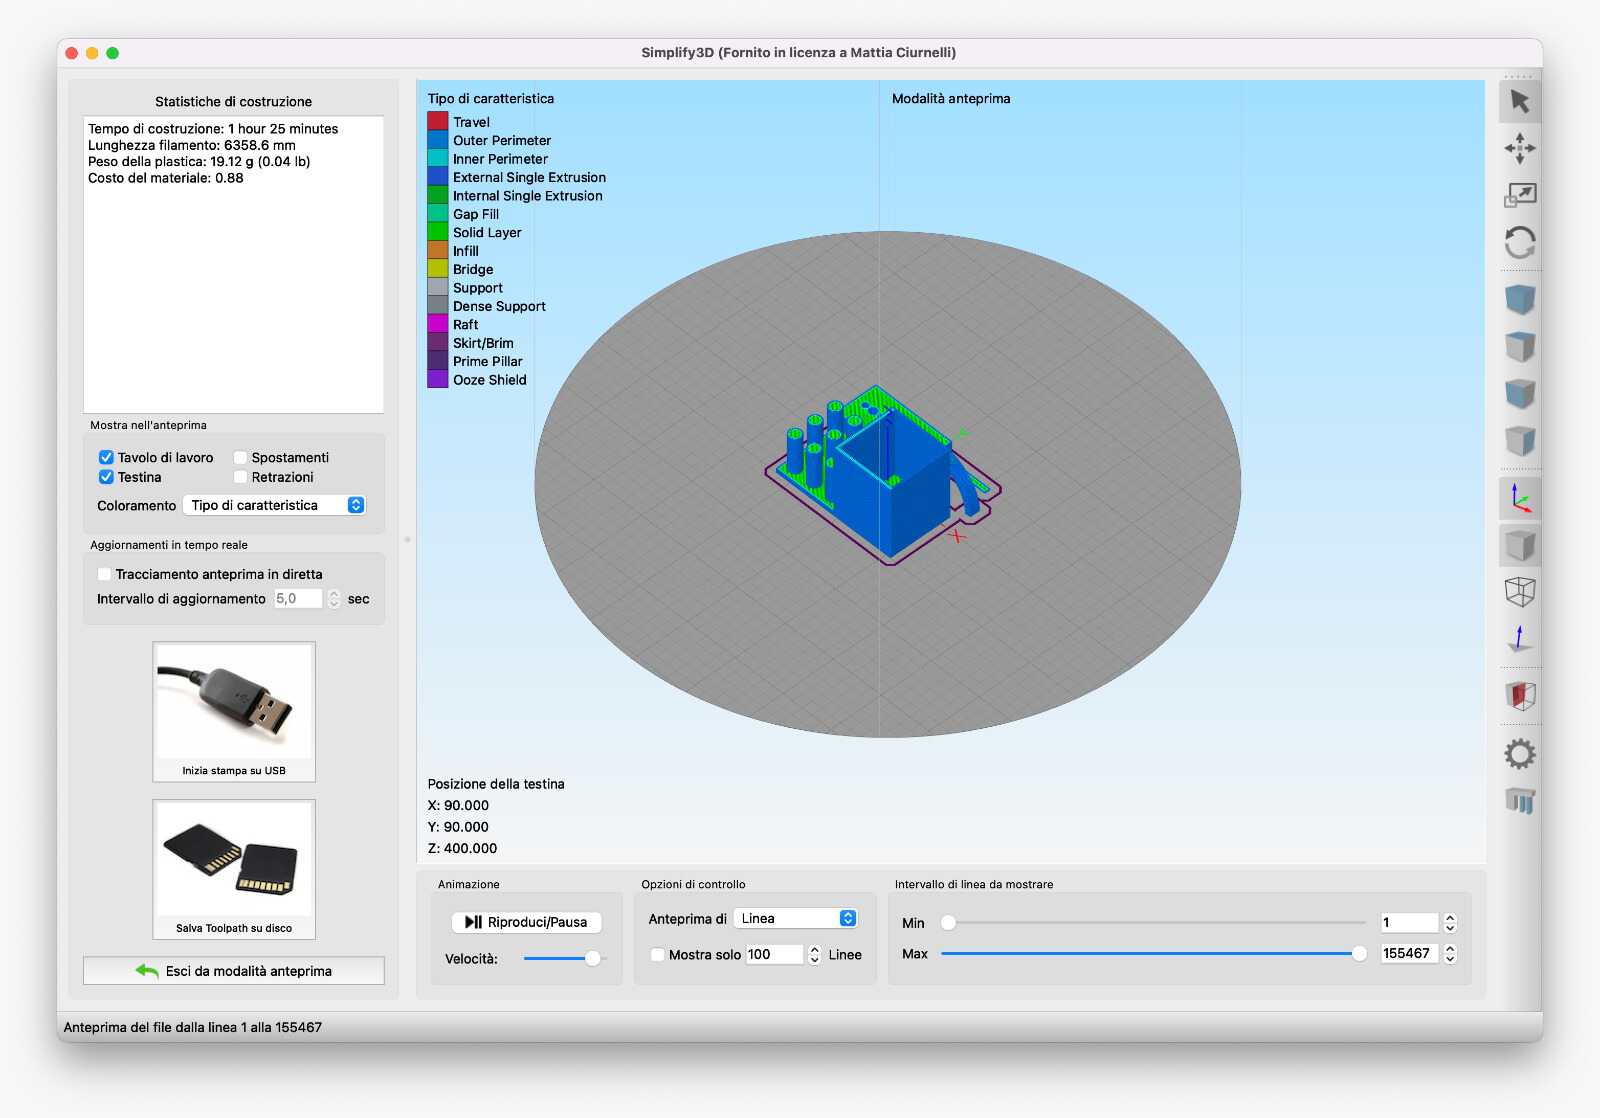
And these are the results of these specifics.
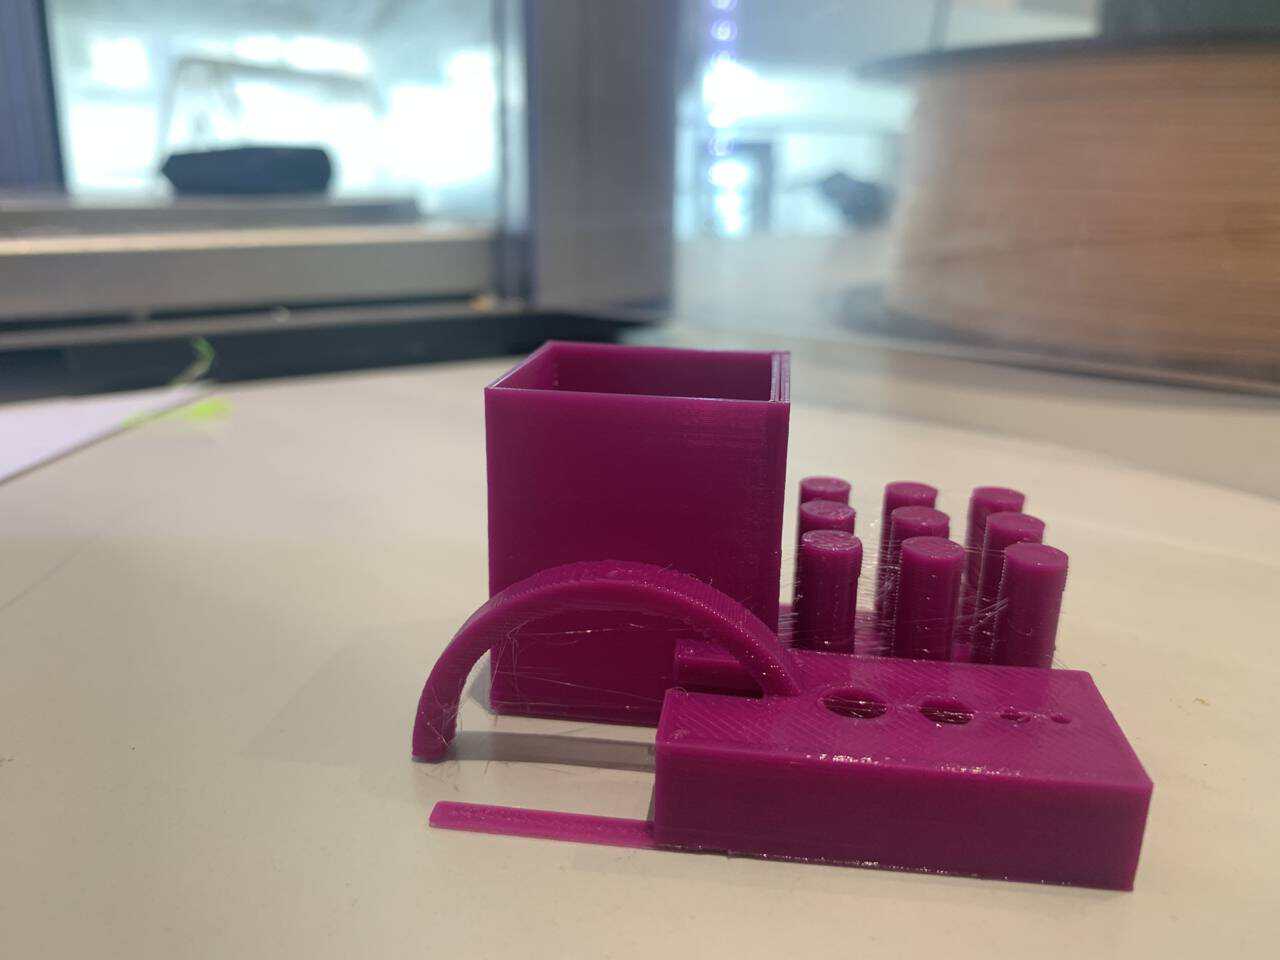
As you can see, the print turned out pretty well: there are few strings and the layers are neat and clean.
The bridging test, in this case an arch, considered also the overhang (because it is an arch). It had only a few layers dripping down at the top of the arch.
The holes turned out well: they are clean and also the smallest hole (1.7mm diameter) was precise.
The retraction set at 5mm allowed to have few strings that could be easily removed by usign a hot fan.
The xy resonance test tests the printer’s ability to resolve single-extrusion width features and exposes resonance in the XY gantry. In this case, we tried to find if there were any ripples on the corners. The corners turned out super good.
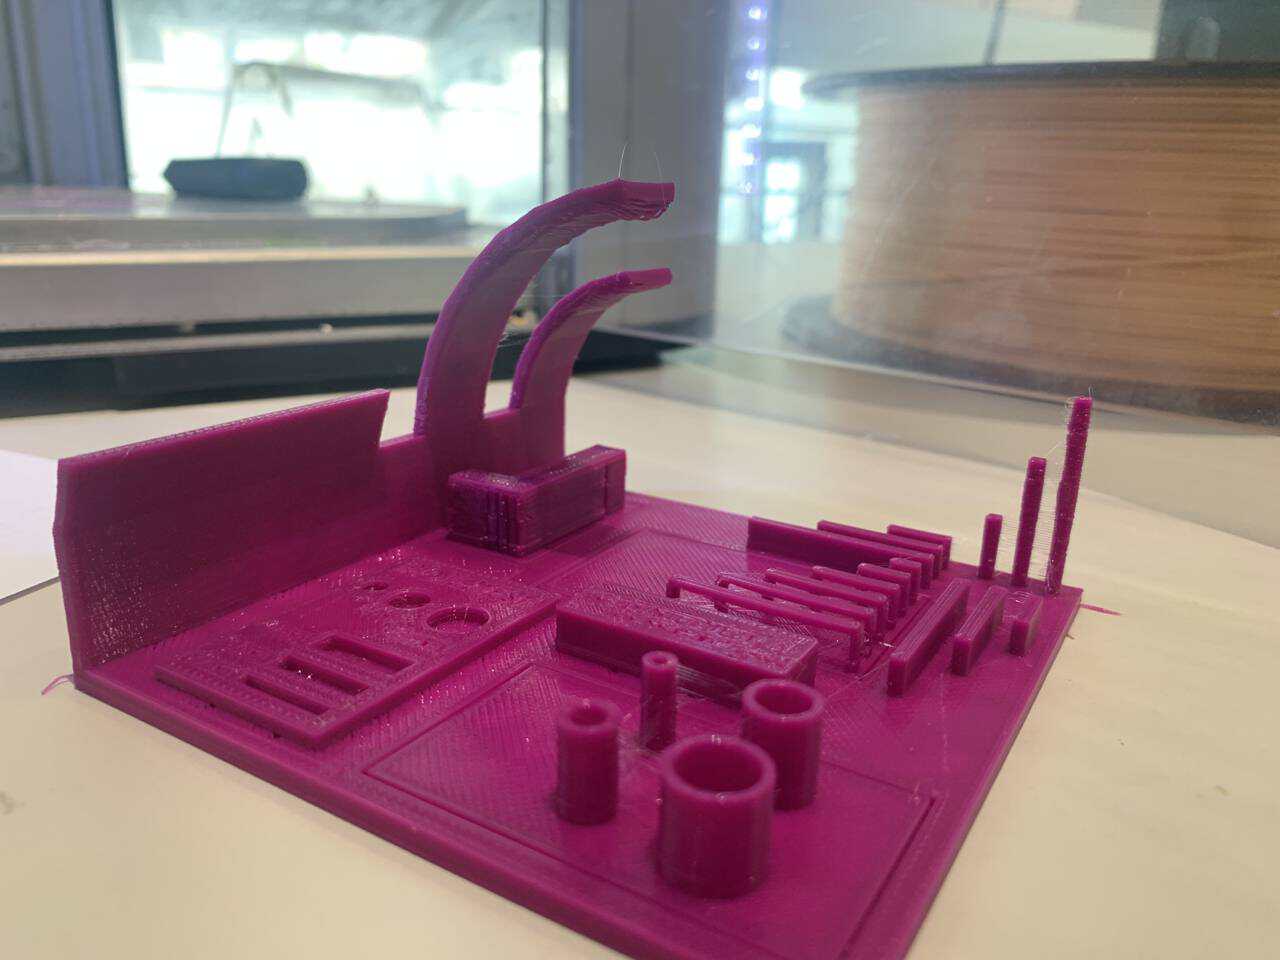
In order to compare the settings, we did another test, in this case with zero retraction and a different temperature, colder that the previous.
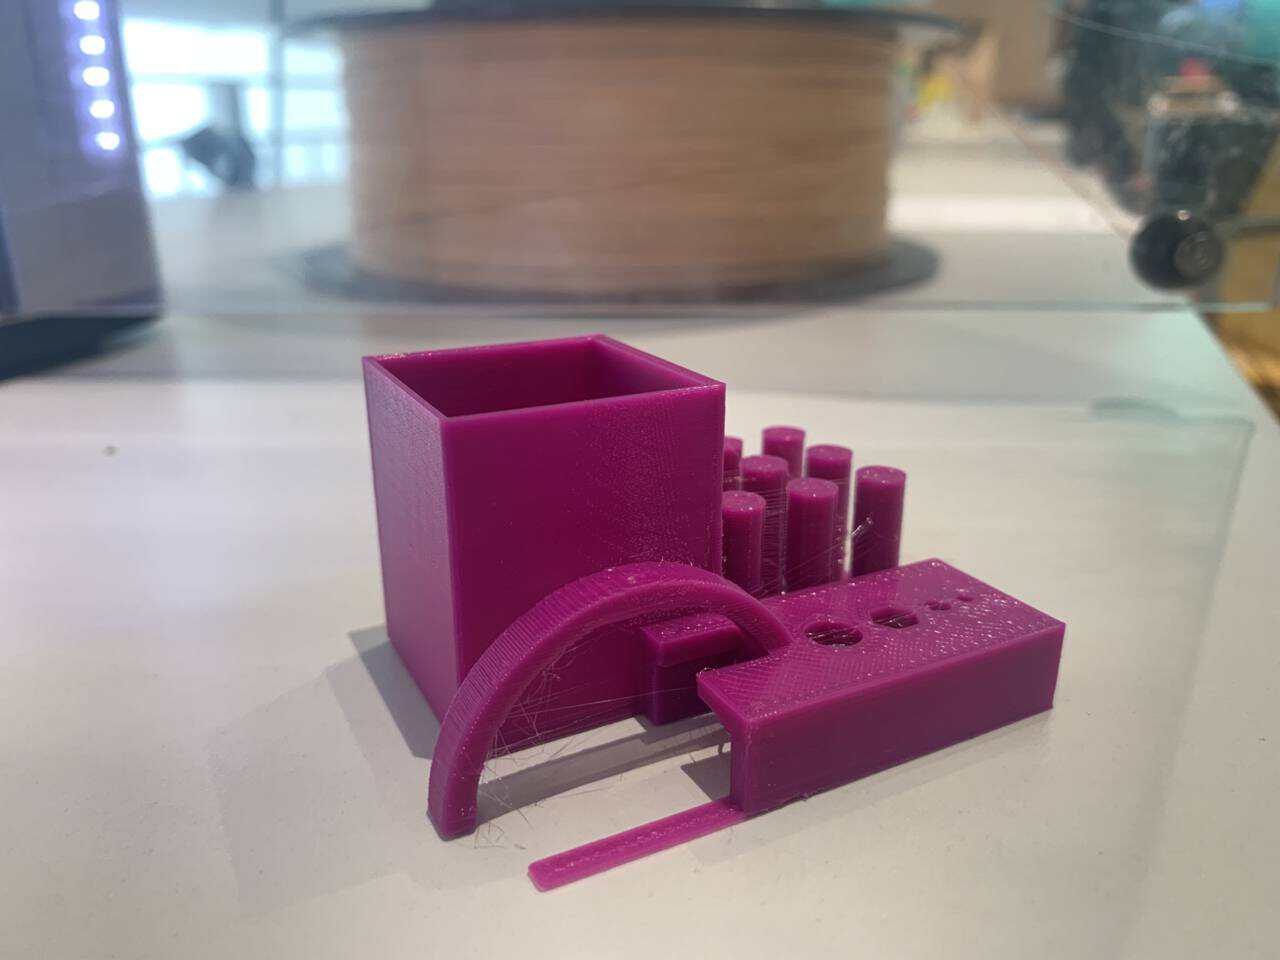
And these are the results of these specifics.
The bridging test, in this case an arch, considered also the overhang (because it is an arch). Without retraction and with a colder temperature the arch turned out super bad: it shifted position and is full of strings.
The holes turned out with strings inside, because of the lack of retraction, above all the larger holes.
The retraction set at 0mm allowed to have a lot of strings and also flaws in the columns.
The xy resonance test tests the printer’s ability to resolve single-extrusion width features and exposes resonance in the XY gantry. In this case, there were only strings due to retraction but the print was super good.
Here a comparison between the two models: