INDIVIDUAL WORK
In this I'm going to use the tajima machine to embroider a logo on a garment.
Actually I didn't know what to do exactly in this week. Thank God my coach helped me by situating me. Thank you Yadu.
To start I looked for how to make a logo. So I went to canva.com and typed in the name of my future business. Often you have to dream. As I love electronics and I hold this position in my Fab Lab., I imagined something. My name associated with technology and what I do. Hence LamTech Design and the layouts of a circuit. I finished making the logo and I had to download, the site told me to pay, something I did not know. So I took a screenshot.
First Logo
I put my logo in a USB key and inserted it into tajima's computer. Then there is its software to install. First I opened CorelDRAW imported my file; then I saved it in windows bitmap format. Then I opened the Tajima software imported my file. Then I converted file to vector. Some part was not very good, see delete. So what makes my design not complete.
Since that didn't work, I created my logo with CorelDRAW, so I wouldn't have any resolution problems. I downloaded another circuit logo from the internet. I open CorelDRAW and then import the logo. I need to convert it to vector.
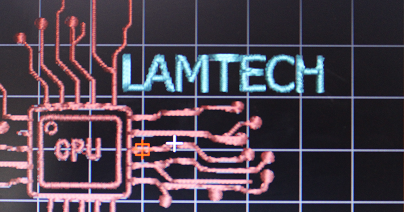
But this logo was not fully visible. I changed my method. As in my logo I want to incorporate an electronic circuit, I will use the Eagle software for that. I drew a circuit and added my words. For the circuit I Just drew a square in another square, infact I Just used the drawing tools of eagle. I did it for my convenience. Here is what it looks like.
To write my name I clicked on T then typed LAMTECH and enter. On the bar I can increase or decrease the size of my writings or change the format. For the format I took proportional, with a size of 6.45 and increased the ratio to 29%. And I place it in the place of my choice.

Here is the new logo

And now I saved the file in windows bitmap format …
Then I went back to the tajima machine, open the tajima software which is "wilcom EmbroInderyStudio". On the toolbar I click on image then import my file. I worked on it. The imported file, let's proceed to processing. There are two ways to do it but I chose to use the Graphics Mode.
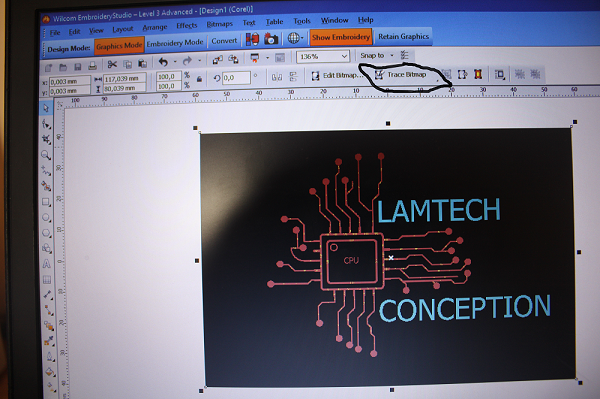
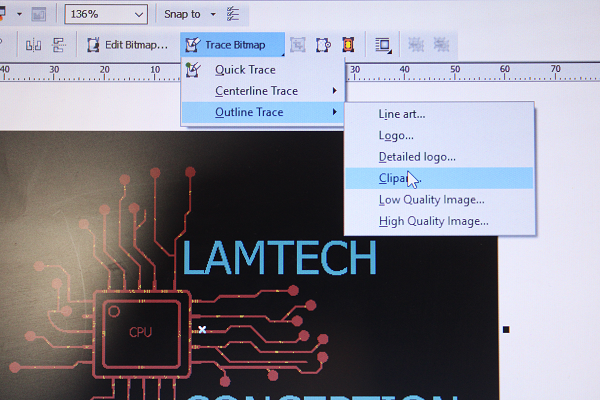
I clicked on that it opens the settings. In bitmap trace I chose clipart; it gives less color than the others.
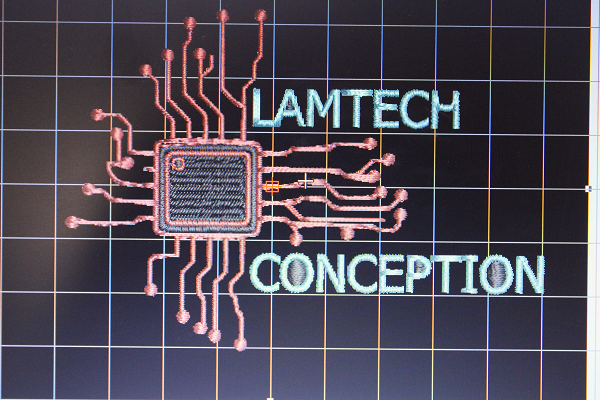
This will transform my image into a vector, with the different parameters that appear I have set my design. There are total 5 colors, I will erase and leave the background red blue and black. At the level of color I reduce the number of colors by three.
This is how the logo looks now; then I click on convert. This will generate the plots of the wires with the different colors. The black parts inside what is square or round I have to delete them.
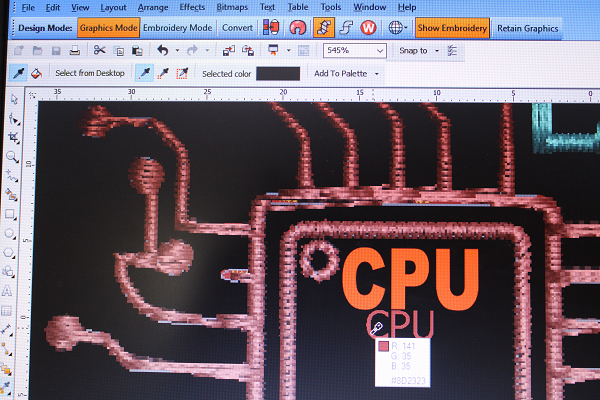
I click on the black part and click delete on my keyboard.

My writing CPU was small so the software couldn't handle it well. I rewrote CPU, the color was different. I took the color from the old CPU writing and pasted on the new one. Then I selected the writing and clicked on convert.
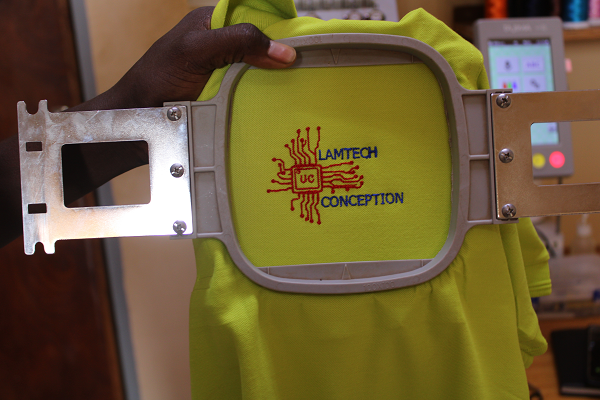
To finalize I click on show embroidery to erase the photo and leave the threads. And here is the final logo. It's really pretty. Now I will save my file in tajima (DST) format. This is the G-code generation of the tajima machine. I saved it as LOGO.DST
The tajima machine, preparation of the material. I will use a dress on which embroidered.

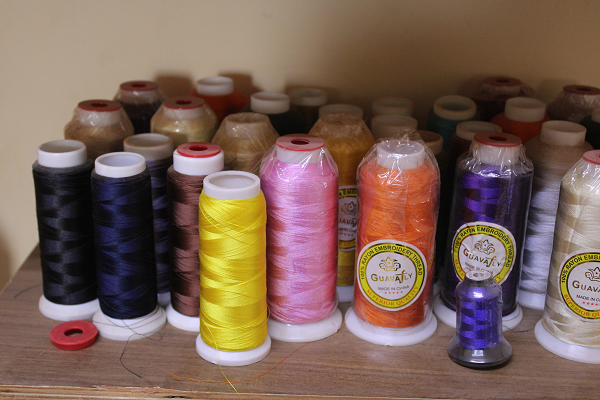
The embroidery threads, but they are already put on the machine. Hat support tools.
les fils
Hat stand

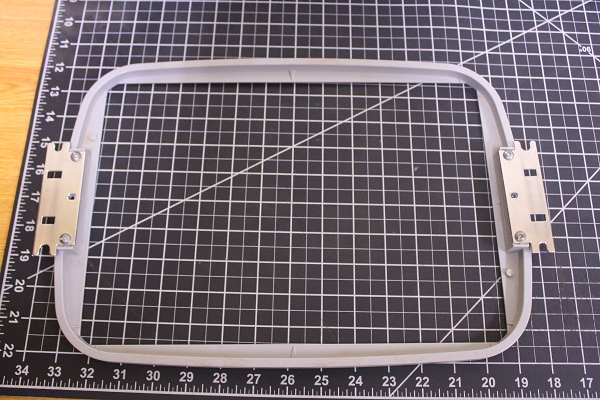
Big frame
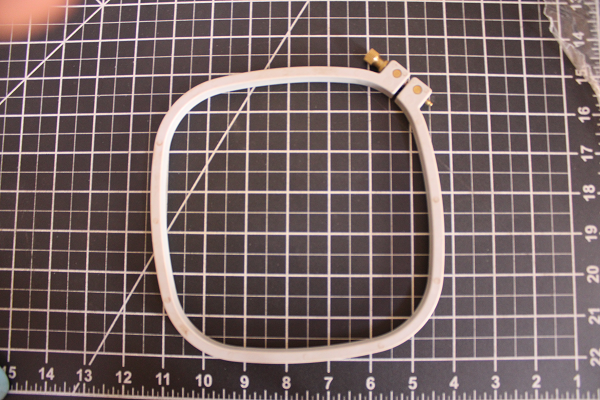
Small frame

In my case I will use the small frame because I have a small logo to embroider. How is the garment placed between the two tools?
Small Frame with Adjustment Screws.
Small Frame with Handle

First I have to place the garment between the two frames. So I put the frame that has the screw at the bottom. It should be noted that the screw makes it possible to adjust the space between the two frames; I place the coat. Then I place the other frame on top by pressing. If the garment is not well stretched it would play on the embroidery, so it must be stretched well by pressing. Stretching the garment away will make the surface of the embroidery flat. This will prevent the wire from breaking all the time .
Video assembly frame clothes
Fixing the assembly on the machine. The arms of the frame will be used as fixing, I have to check that there is not an obstacle at the bottom. I move my head to check if there is not something stuck. All is well.
I start Tajima. I had already saved my embroidery on a USB key. I plug it into the machine. Then I check if the wire at the bottom is not finished or blocked.
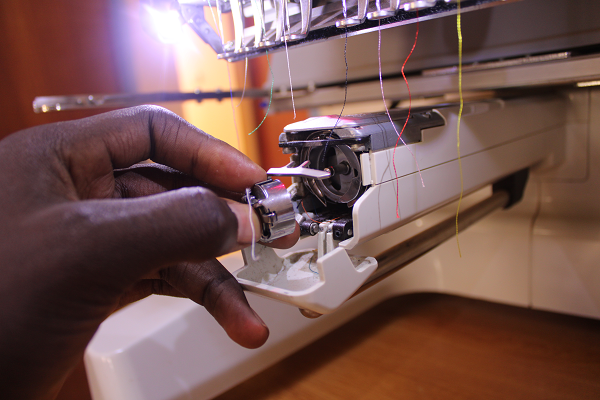
After I select my file, on the screen of the machine you can already see what the logo will look like at the end. I select the colors for my logo by looking at the thread numbers on the screen and on the machine.
Video color selection
Then I position the suit well in the middle thanks to the red light that illuminates. I check the space that the logo will take up on the garment by clicking on the screen. If the size exceeds the frame I have to change another frame.
Mounting and positioning video
Everything is perfect, my logo fits. My college MOHAMED helped me a lot on this part. Thank you MOMO.
This first outfit was for a test, the defects. I hadn't put any glue on the bottom of the suit. The letter H had not come out well. The letter C is stuck to the O and the CPU is not output well. I corrected all my mistakes. In addition, the coat was not very well stretched, so it breaks the thread every time.
Without glue
Logo test
Subsequently, I corrected my errors, and here is the sequence of events. I used the glue ironed on the suit with an iron. It was tense this time.
Embroidery, number of times the thread was cut 1/10 compared to the first test.
Real embroidery video
Final embroidery.
Final Embroidery
ME
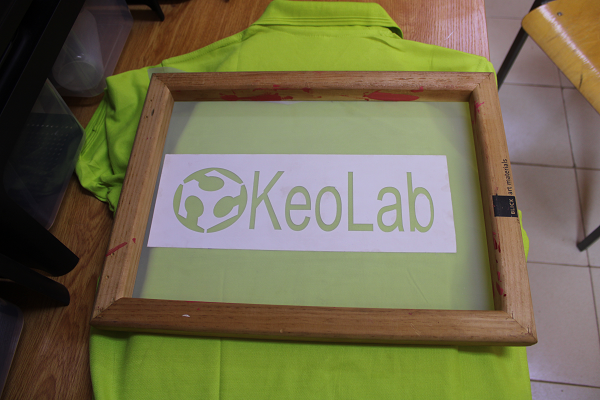
I thought of something why isn't the Fab Academy logo printed on the clothes too, on my back. But yes in addition with the name of my FabLab in front. To do this I will use the Roland Vinyl machine. So I downloaded the Fab Academy logo from the net.
The software I'm going to use is CorelDRAW. I open it I draw a frame with the dimension of the Vinyl surface which is 5000mm 3000mm and I import my logo on it. Then I write the name KeoLab in front of the logo, which gives a better view. I converted the logo to vector; to do this I clicked on the logo then on bitmap clipart and it was generated. So I delete the photo and leave the layout.
For the name KeoLab I took an Ariel font only.
With Vinyl if you want to print and as it is to paint on a garment you have to do a Mirror before cutting. I typed alt+F9 the Mirror function appeared. I made my Mirror to the right. I placed it at coordinate 20; 20.
I had trouble and I spoiled the material a little, in the parameters the cutting speed is 20cm/s and the force is 120gf, this cuts all the paper and blocked the machine. I had to force stop the machine and restart.
Following I lowered the force to 80gf and launched, but was not deep and failed to cut through the first sheet layer.
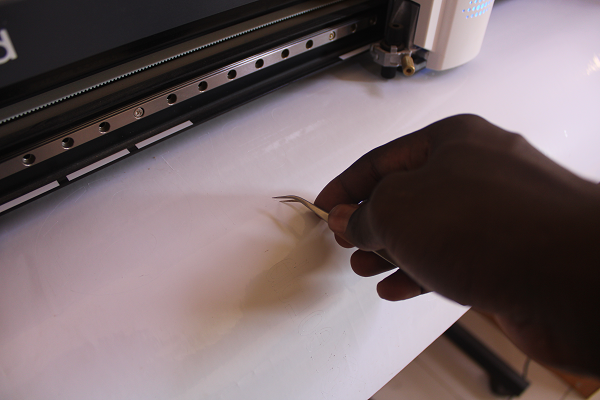
I increased the force to 100gf it cut but other small parts were not there.
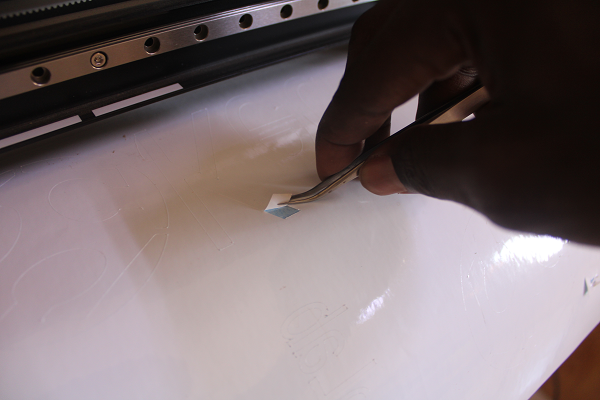
Now Sava. I made the frame and put the force at 250gf. I finished and stuck it on the grid.
Final embroidery.
vinyl print

Printing sticks on the frame
Preparation of the habit, I used the glue with an iron to glue it on the back of my habit. Then I asked for help from Anselme a photographer to help me place the logo in a good position. But he told me that the font I used was not the right one, that I have to use Montserrat(edge) as font for KeoLab. Then he told me that the location is better. In addition, he advised me to use the dimensions of the frame to work especially on the width.
bon police
So I measured the dimensions of the grid and it was 25cm/36cm. So I will reprint with the font he is talking about taking into account the dimension; I used the width dimension. I did.
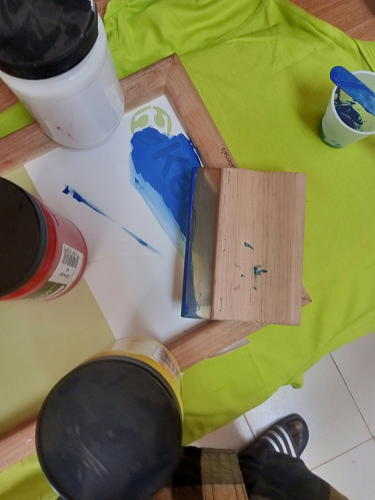
Now the cut. This time I decreased the cutting speed to 10cm/s and the force was 120gf. Anyway, it went well. I drew the frame and also cut at 150gf as a force with the same speed. I glued it to the frame.

I put the frame on my coat and applied the necessary paint. But alas I had not checked that there was no green color. I'm lost because I did a lousy job, without this color my logo means nothing. Oh shit. It's only KeoLab that we're going to see. I finished putting the paint, I detached it turns out that there are a little ugly parts, this is due to the fact that I applied a lot of paint on it. Next time I'll do better than that.
ME
