The week of molding. This week we worked in a group with our coach Abu and then everyone worked individually.
Working Group
When we talk about molding I immediately refer to mold. But how do you design this mold to be important?
It should be noted that there are three steps to mold a piece; but also we can do two steps. Here are the three steps:
- The first is to create the mold on a raw material with the MDX-50 modela machine;
- The second is to use the first to pour gum or rubber material to have a mold permanently;
- The third is to use the second to pour material such as hard rubber or cement or iron to obtain a part.
That of the two stages:
-
First you have to design the piece you want and print it on your object;
-
Second used this mold obtained and pour and you will get your part.
In this mission we will use the three-step method.
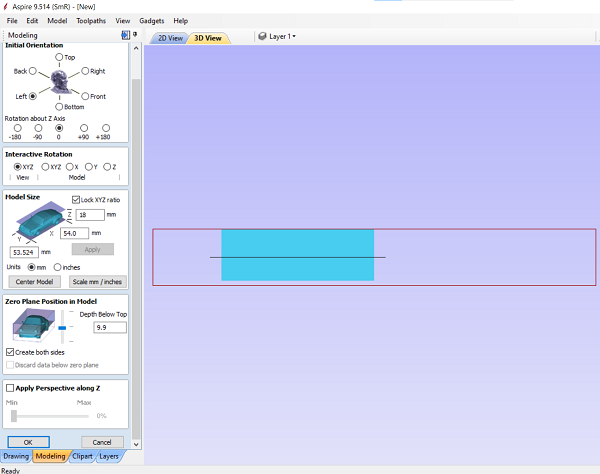
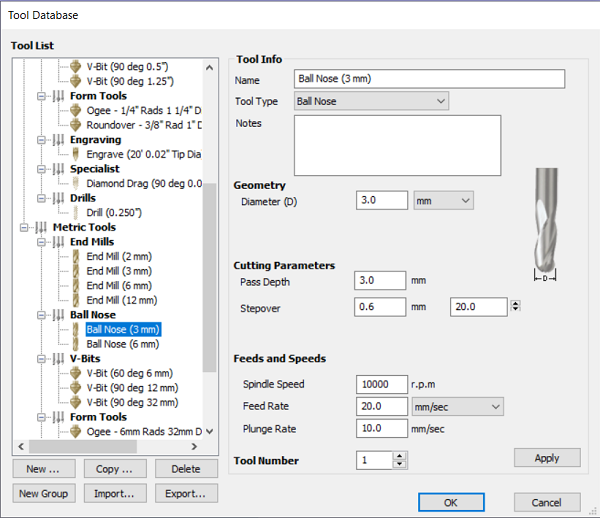
In the group, coach Abu shows us two software to work on our 3D model. These are the aspire software (universal software) and the SRP Player software (software released with the machine). We work on our 3D model on both software to see the different parameters. Both are complex but suction was used for the realization of the mold. We opened our software, in the modeling part we imported our 3D model, then I placed it at my convenience the part I want faces me. Then I define the size of my object. In the zero plane position, we chose to machine our part starting at the surface of the object, I adjust the jogge so that the surface of my part corresponds to the line Zone de Texte: toolpathred; usually it is the thickness of the part that must be mettre.et ok.
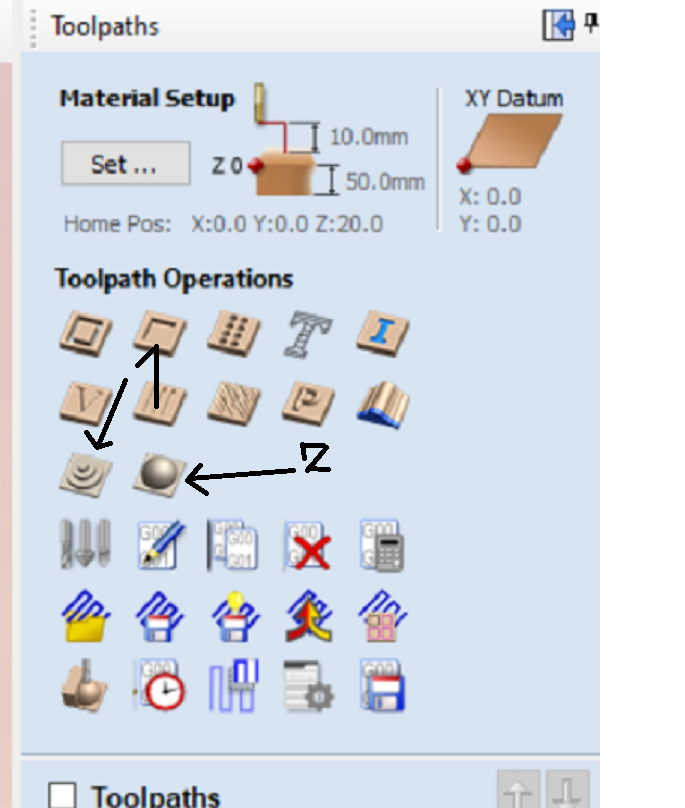
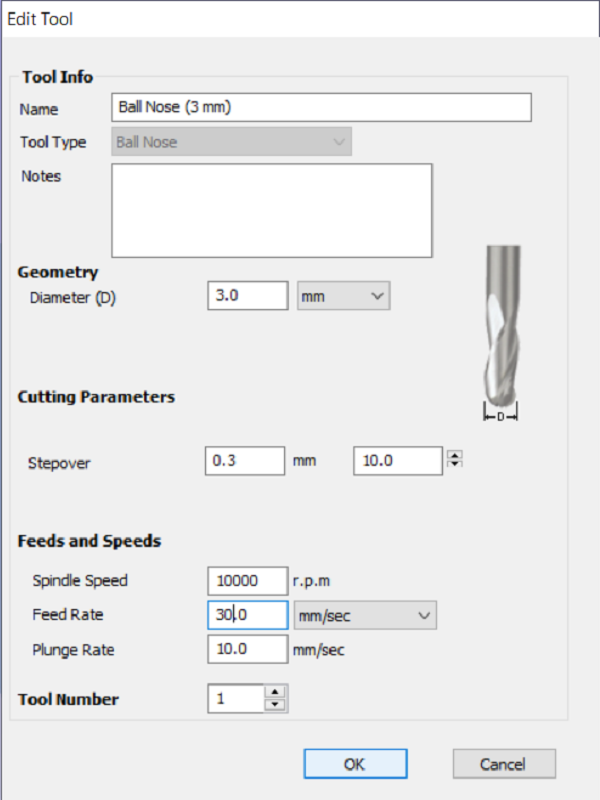
In toolpath, there are two things to consider. The Roughing Toolpath 3D function (it's 1 in the picture) is the roughing and the 3D Finishing Toolpath function (it's 2 in the picture) is to finish the object. So then we clicked on the Roughing function to create the first path that the wick will use to mill our 3D model and finally we click on the Finishing as its name suggests it is to make our 3D model very smooth. And also allows to clean the small errors of the first, so after the finish the piece becomes very smooth and pretty to see. These are the different parameters of the two functions:
And we save the file.
NB: in case you are going to use different wicks for each parameter, you will first save the file for the draft and then another for the finish. The Aspire software does not take into account two different tools in the same file. But the SRP Player software Yes. You could say that this is part of the limits of aspires using the pilot of the MODELA MDX-40 machine.
Setting up the object on the tray and fixing the XY0.
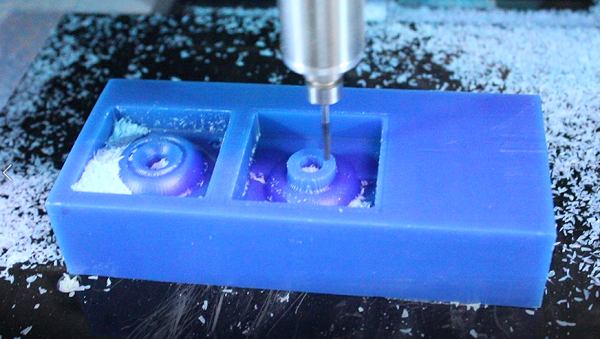
The part on which we are going to mill our mold is modeled wax, we used double-sided transparent glue to fix it against the tray. Then we did our XY0. To do this, we used VPanel the software that controls the movements of the machine. On the Vpanel interface we directed the wick to the top of the Piece. We have positioned our wick perpendicularly with the angle 90 of the piece.et we configure this part as X0Y0. There remains the fixation of the Z0; the modela MDX50 machine has an automatic tool changing system. To take the Z0 I connect the sensor to its port and we put it on the object. We have a tool called a false wick. We took the false wick as a reference and then fixed it in the collect of the machine. Then we control the wick above the sensor, we go down a little close to the sensor and we click on set Z0 by sensor in the Vpanel. And our Z0 is taken. After we classified the tools we want in the wick doors. In the modela screen menu you can choose the tool you want to use automatically. After making the Z0, then the Z0 of the other tools fixed in the wick doors are calculated automatically. We finish positioning X0Y0Z0, now it remains the cut.
Now on the Vpanel interface I click on Cut I choose my file that I saved through aspire and output
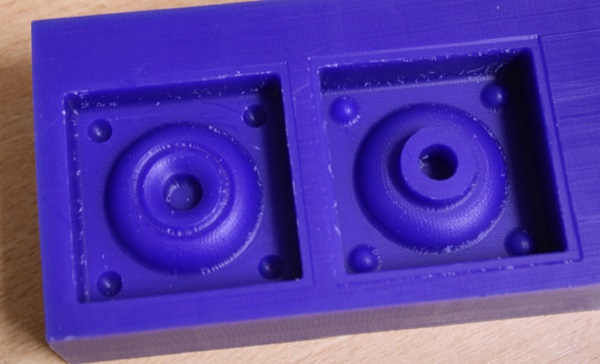
The milling of our mold took 37min;
The Costs
The mussel
The material of the molding. The mixture of the liquid for the mold
Silicon Rubber

Hard Rubber

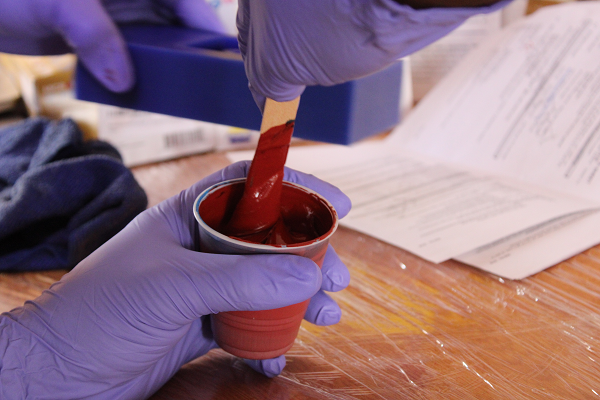
In our lab we have two components, the one we will use to create the mold is made of very malleable material, its material is gum (Silicon rumber high temperature, that is to say that it hardens once exposed to high temperature.) And the other one that will be used to create the part is made of hard material (hard rubber). We have their user manual. A weigher was used to measure the weight of the liquid. To make our container first to take its weight and put the machine at zero weight. To weigh each component we use its ratio. For the first component 100% of A and 10% of B. Then we poured our liquid looking at the weight, we measure the two constituents of the first component in; and we mix it up. Finally we pour into the mold and wait. Some hour later we unmolded our mold. We used pliers to put them together. Holes were made to pass the liquid from component 2.
The Mixture
Casting

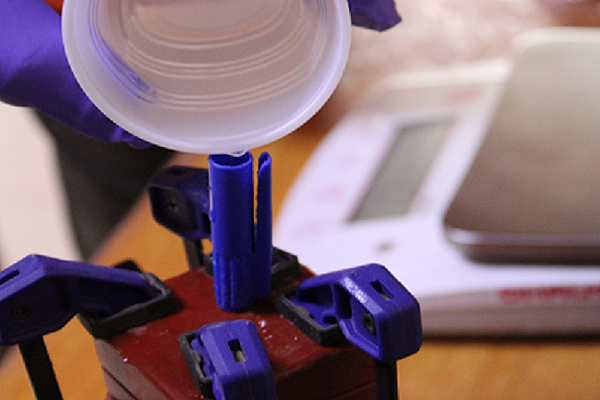
The Assembly
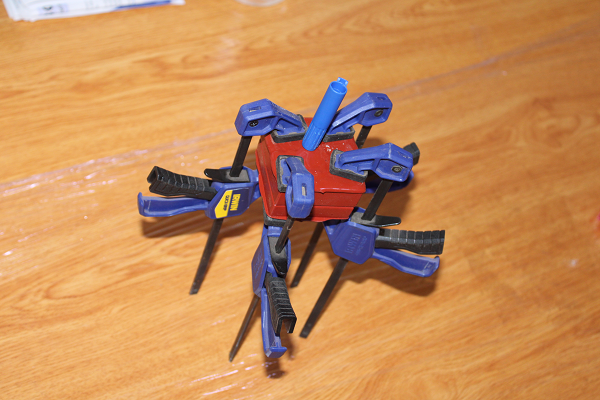
To print our piece we put together the two molds obtained from the milled mold with pliers; then we made little ones through which we will pour our material which is the hard rubber component. Then we weighed the weights of the component. Its ratio is A at 100% and B at 90%. Then we mixed them. we poured the mixture through the cap of the ballpoint pen. A few hours later we unmolded our piece. The piece was a great success. Thank you Coach ABU
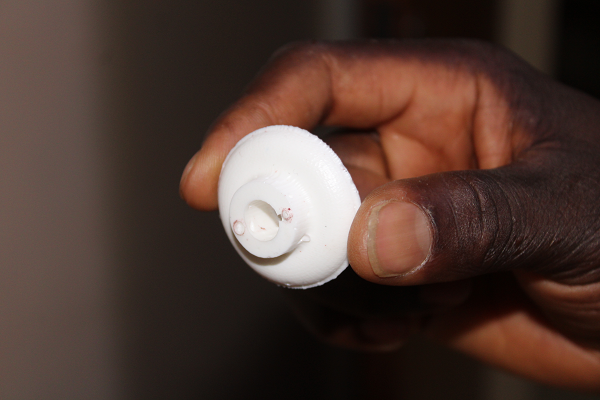
Casting
FINAL OBJET
INDIVIDUAL WORK
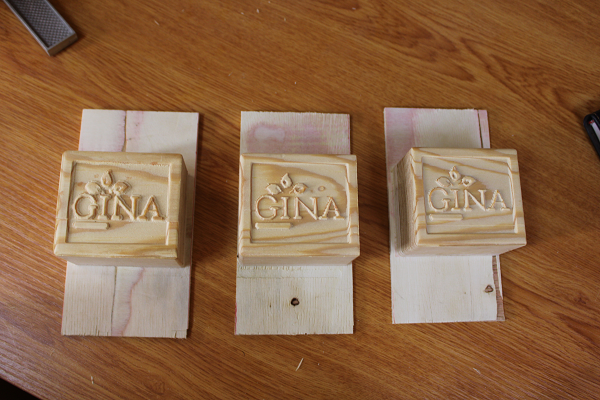
The design of a soap mold.
To design my soap mold I used wood. Firstly the size of the soap (50mm) exceeds that of the wood at my disposal. So I superimposed the wood on 18mm plywood. To do this I first fixed the plywood on the shopbot tray. I calculated the space that my wood will take (410mm long, 80mm wide and 40mm high) and I planed this part of 0.5mm thick with an End Mill wick of 6.3mm. Then I put glue on top and glued the wood; but the glue could not hold. So I measured on the wood and spotted the trajectory of the, then I dismantled all the plywood. On the back of the plywood I screwed 6 screws so that the plywood catches my wood very well. The screws are screwed out of the path of the wick.
After fixing the wood I cut the dimensions of the soap on my wood. To do this I drew the dimensions of the soap on the software aspires. The surface of the wood is 420mmx80mm and for soap is 80mmx70mm. So I created three molds spaced 42.5mm apart. The height of the soap is 50mm, when I superimposed the wood it gave me a thickness of 58mm;
To start I opened shopbot3, the driver software of the shopbot machine, I started the machine via its power button and I pressed the reset button. Then on the software I clicked on XY0 to put the machine in coordinate (X0, Y0). Then I took the Z0 on my wood.
Subsequently on Aspire I selected the dimension of the wood and in toolpath I chose the engrave function; I put the thickness at 0.5mm; I chose the 6.3mm End Mill wick. The deep pass is 4mm, the stepover is 40%, the splindle speed is 12500rpm; the Feed Rate is 100mm/s and the Plunge Rate is 30mm/s. the planing has taken a thickness of 0.5mm defined in the parameters; I planed because the surface of the wood was not flat. In the clear pocket I chose raster and air conditioning to facilitate the work of the machine. Finally I calculated and recorded; with the Shopbot3 I choose my file and click on start, I press the start button to start the rotation of the wick and I click OK to start the planing. It took 7min.
After planing we move on to the creation of molds including cutting wood. Since we have already traced the dimensions of the soap on the wood on suction I according to the three soaps and the frame of the wood then I group. Then in toolpath I chose the engrave function, the thickness has 50mm; I chose the 6.3mm End Mill wick. The deep pass is 4mm, the stepover is 40%, the splindle speed is 12500rpm; the Feed Rate is 100mm/s and the Plunge Rate is 30mm/s. the planing has taken a thickness of 0.5mm defined in the parameters; I planed because the surface of the wood was not flat. In the clear pocket. In fact it is the parameters that planing only the thickness has changed. I choose the object and click calculate to generate the plot. Finally I record. I open the shopbot3 software. I choose my file, open, and then click start. I press the start button to start rotating the wick and clip OK to start planing. A few minutes, about 35min, the machine finished its work. I relaunched another one to make rounding on the molds. The next step is to draw the soap logo on the molds.
-
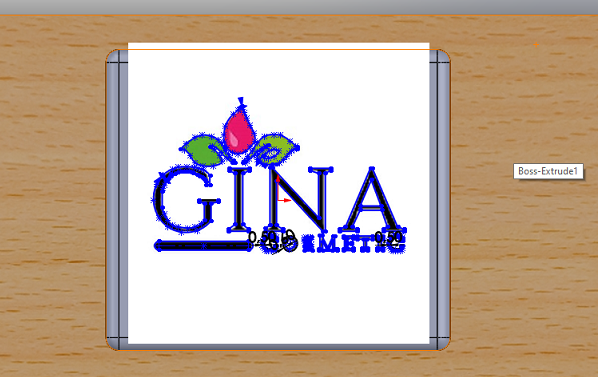
Import-Picture First, modeling the logo on the three molds. How is it done? Zone de Texte: Final modelisationZone de Texte: Calque1I took the dimensions of the soap on Aspire, I opened my SolidWorks software. I drew the molds respecting the dimensions and then I extruded. It remains to draw the logo on the different molds. I didn't know how to do it then the logo is on a photo. I looked on YouTube how to put a logo with SolidWorks, and I got tutorials that I could watch. This gives me even more experience on SolidWorks. To create the logo on my molds, on SolidWorks, I click on parameter then on Add-Ins then I check the two boxes of Autotrace and OK. Now you have to export the photo, to do I click on the surface of my object and sketch, then in tools I click on sketch tools then sketch picture and I choose my logo. In the settings that presents itself, I set the dimensions of the logo to 80mm and I placed it above my room. I click on the arrow next to it, then I use the Bic in red (use to select color) I click on it and I click on cntl of my keyboard and I go to click on each part of the logo, that is to say each letter and other then I click on begin trace. I use all four changes to get a good result. For me ended up when I copied my logo and generated the trace it was not good, so I erased and reimport then when I generated the trace and ok I deleted the trace and then make a layer using the sketching tools of SolidWorks. When I finished I clicked on the sketch part and the photo I deleted it and the lines remained. Here is this link to the YouTube video that allowed me to do this. When I finished the chalk I extruded the logo 2mm thick. Then I did a material removal to keep the surface pretty. The final object was very pretty.
The Layer of Image
The Mussel Wood
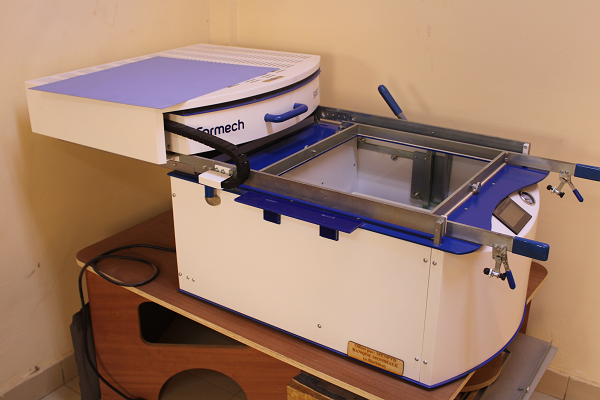
When I finished the soap mockup, I now have to mold it. I will use the Formech machine to do this.
Formech
First I watched tutorials on YouTube on how to use the machine. But I had asked Coach Abu how to use it. When he came we made our first try. The material used is plastic. The plastic heating temperature was exceeded. In addition the shape of the wood that I put, in fact the plywood was not flat, suddenly I fixed the wood behind. But when we did it didn't work.
Tryed One
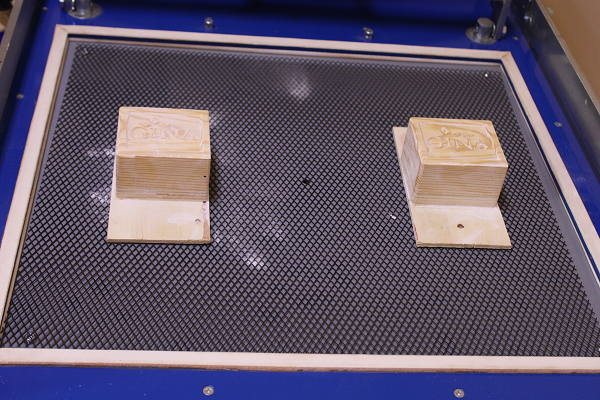
We had to tear it to remove our model, as it was so we changed the method. We therefore divided the models into three. This will facilitate the deposit and allow the machine to vacuum well.
Tryed One
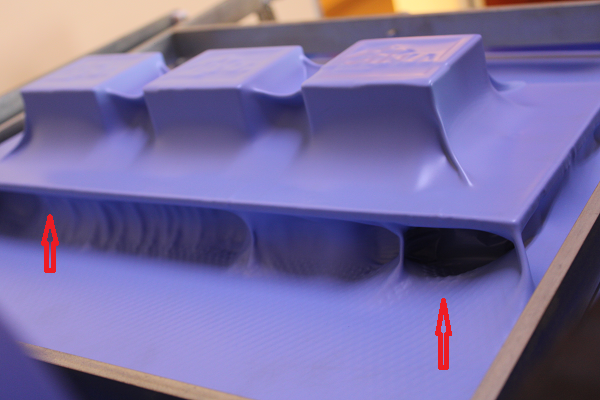
Tryed Two

The parts that I underlined in red there, this is due to the fact that I put the models next to each other. In addition to remove it was the quata, it also did not succeed. We try yet another way. This time I will place only two models. I also thought of something. If it is so difficult to remove the model after molding, then I will put powder on the models. It would at least make the stain less difficult for me so I dusted it as planned.
Tryed Tree
This time with the powder it was not so difficult to remove. The plastic was already hard, so there is a mold that cracked. But the other was good. I have seen that the plywood leaves traces on the mould. So for the rest I cut the models again and left them on a single shape, it looks beautiful anyway. During the pressing I used a cloth to press on the surface of the molds so that the plastic takes the shape of the model.
Tryed Two
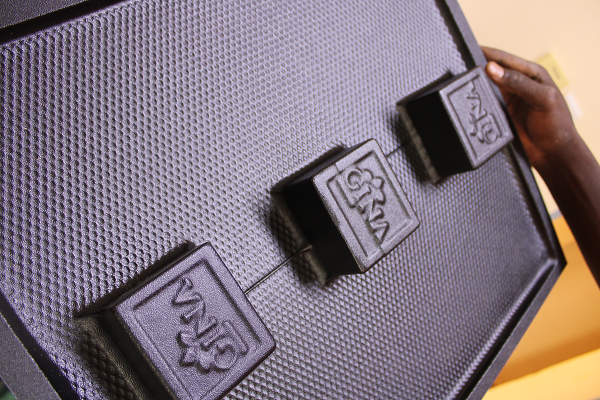
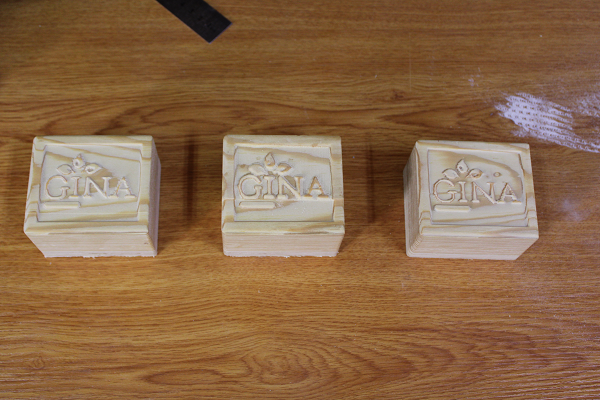
This time I can say it's the right one. What makes the model so difficult to remove is because it was all square. No rounding or anything. To make it more usable I cut out the unnecessary parts of the piece, leaving just the molds.
Mold
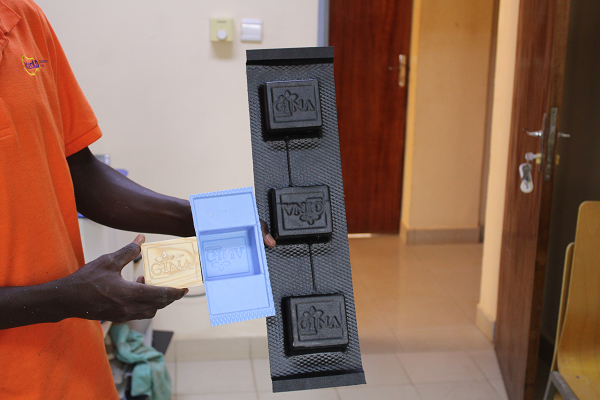
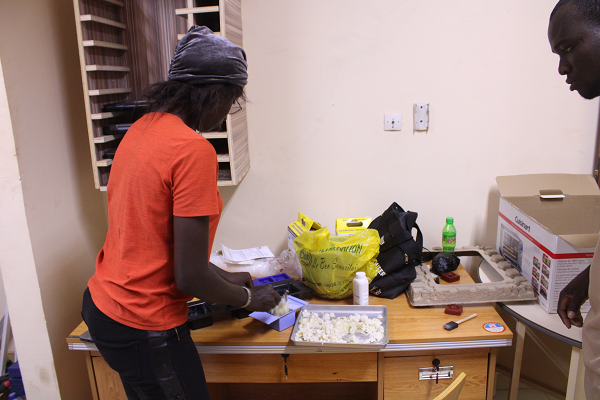
Then I called GINA to come and test my mold that I made for her, her brand. She brought Marseille soap that we had to melt in the microwave. In reality I did not know how this machine works, then I read its technical sheet which gave an idea on the use. We cut the soap.
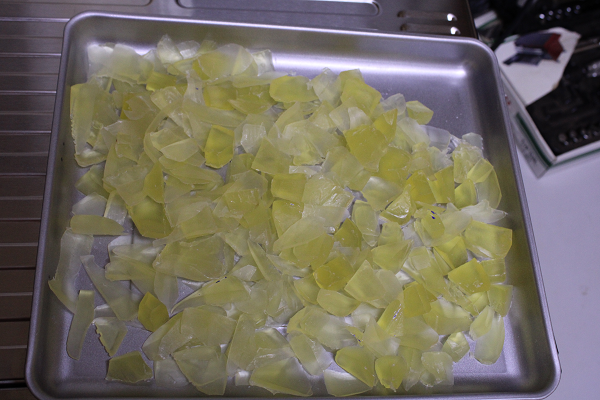
Placed in the microwave left for a few minutes but it did not melt, what I wanted was for it to be liquid so that I could pour it into my mould. But no. She told me that it is because it is at the microphone that the soap has not melted. We squeezed out the soap, then put it in the mould.
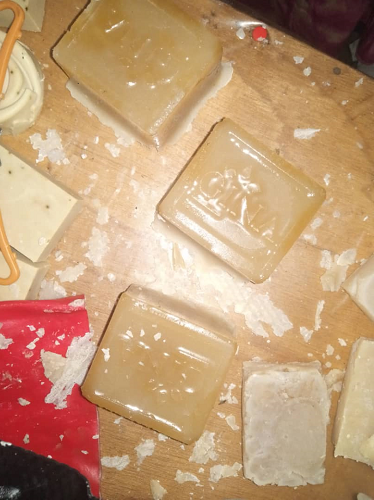
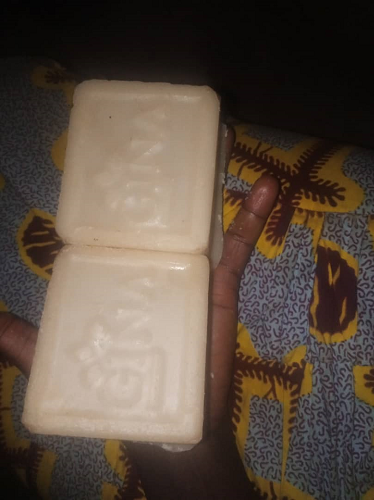
Then it was really hot, so I put it in the fridge, a few minutes later I unmolded the soap. It was really hard to get it off, you have to tap tap to get it off. I drooled over it. The result looks really ugly. But I tell myself that it is because the soap was not liquid. You can hardly see my logo that I suffered to make. But you could feel it from the touch.

To test my mold, GINA promised to do it. She had a training next week, so she will bring the molds, then after the training is to mold the liquid soap. As expected she does. But the difficulties were those I had encountered. Infact as the mold is not malleable, to unmold you have to tap tap so that its fate at the end. Otherwise after unmolding the mark is very pretty. GINA I loved working with your Logo.
Molding soap
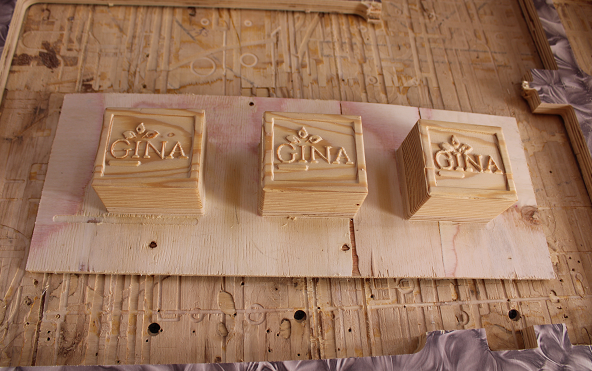
Here is the final result of the soap.