Embedded Programming
***Group assignment***
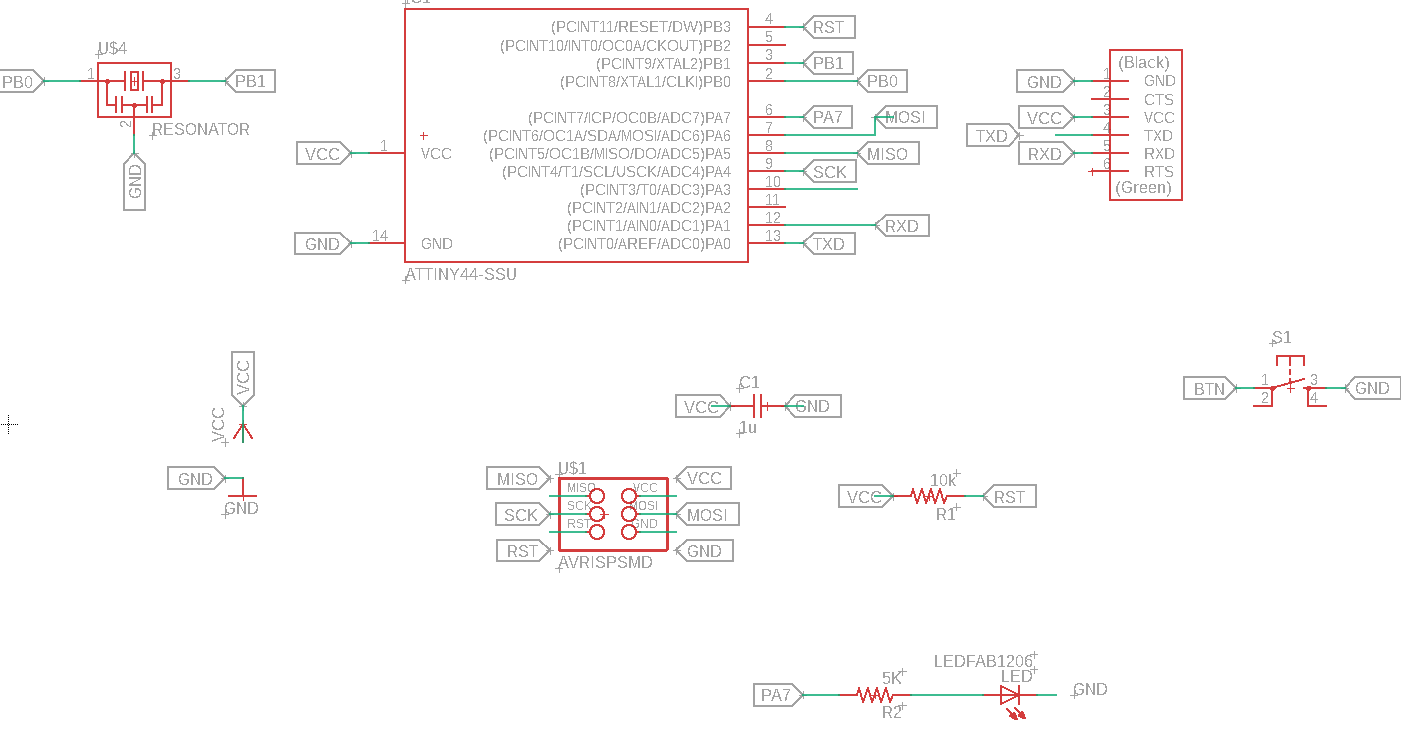
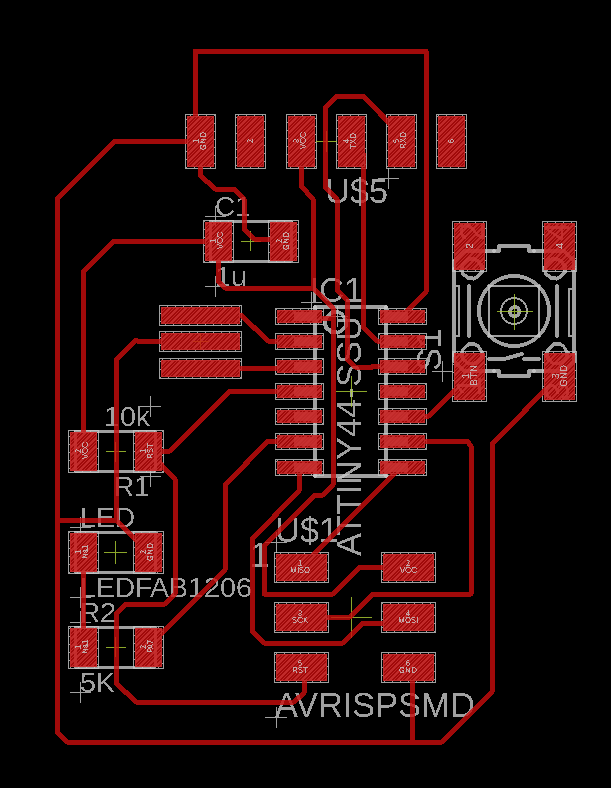
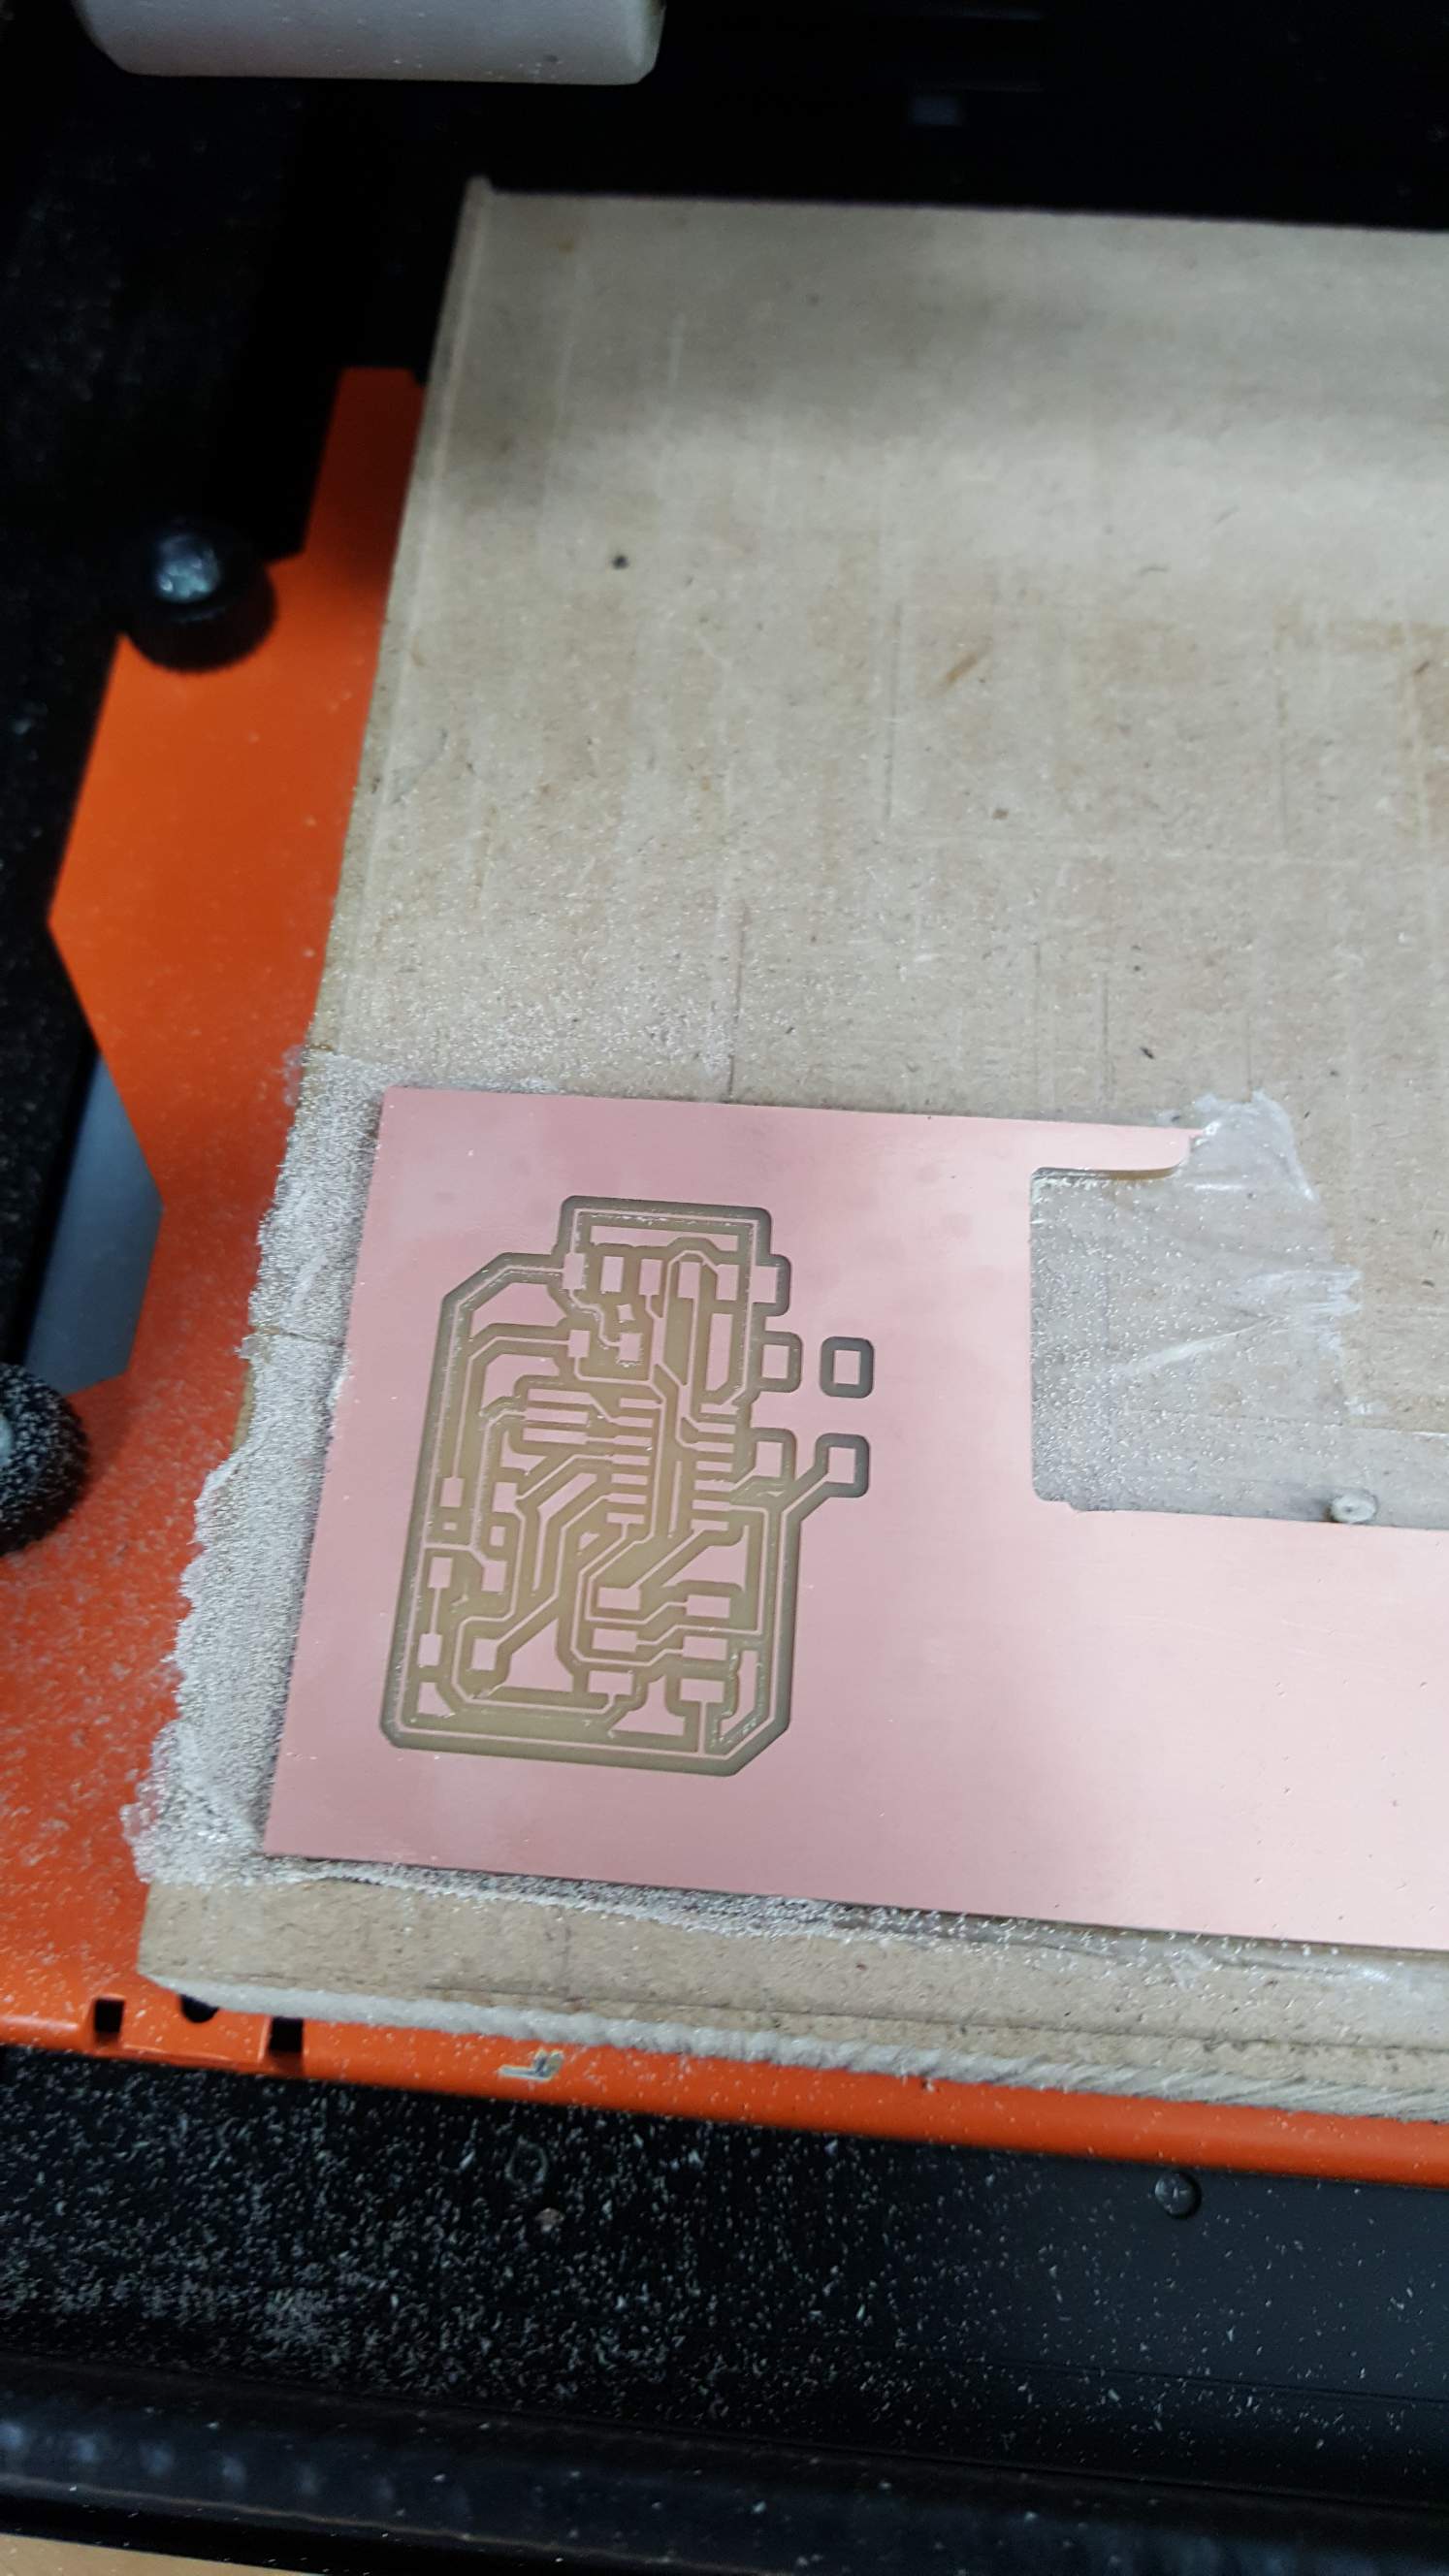
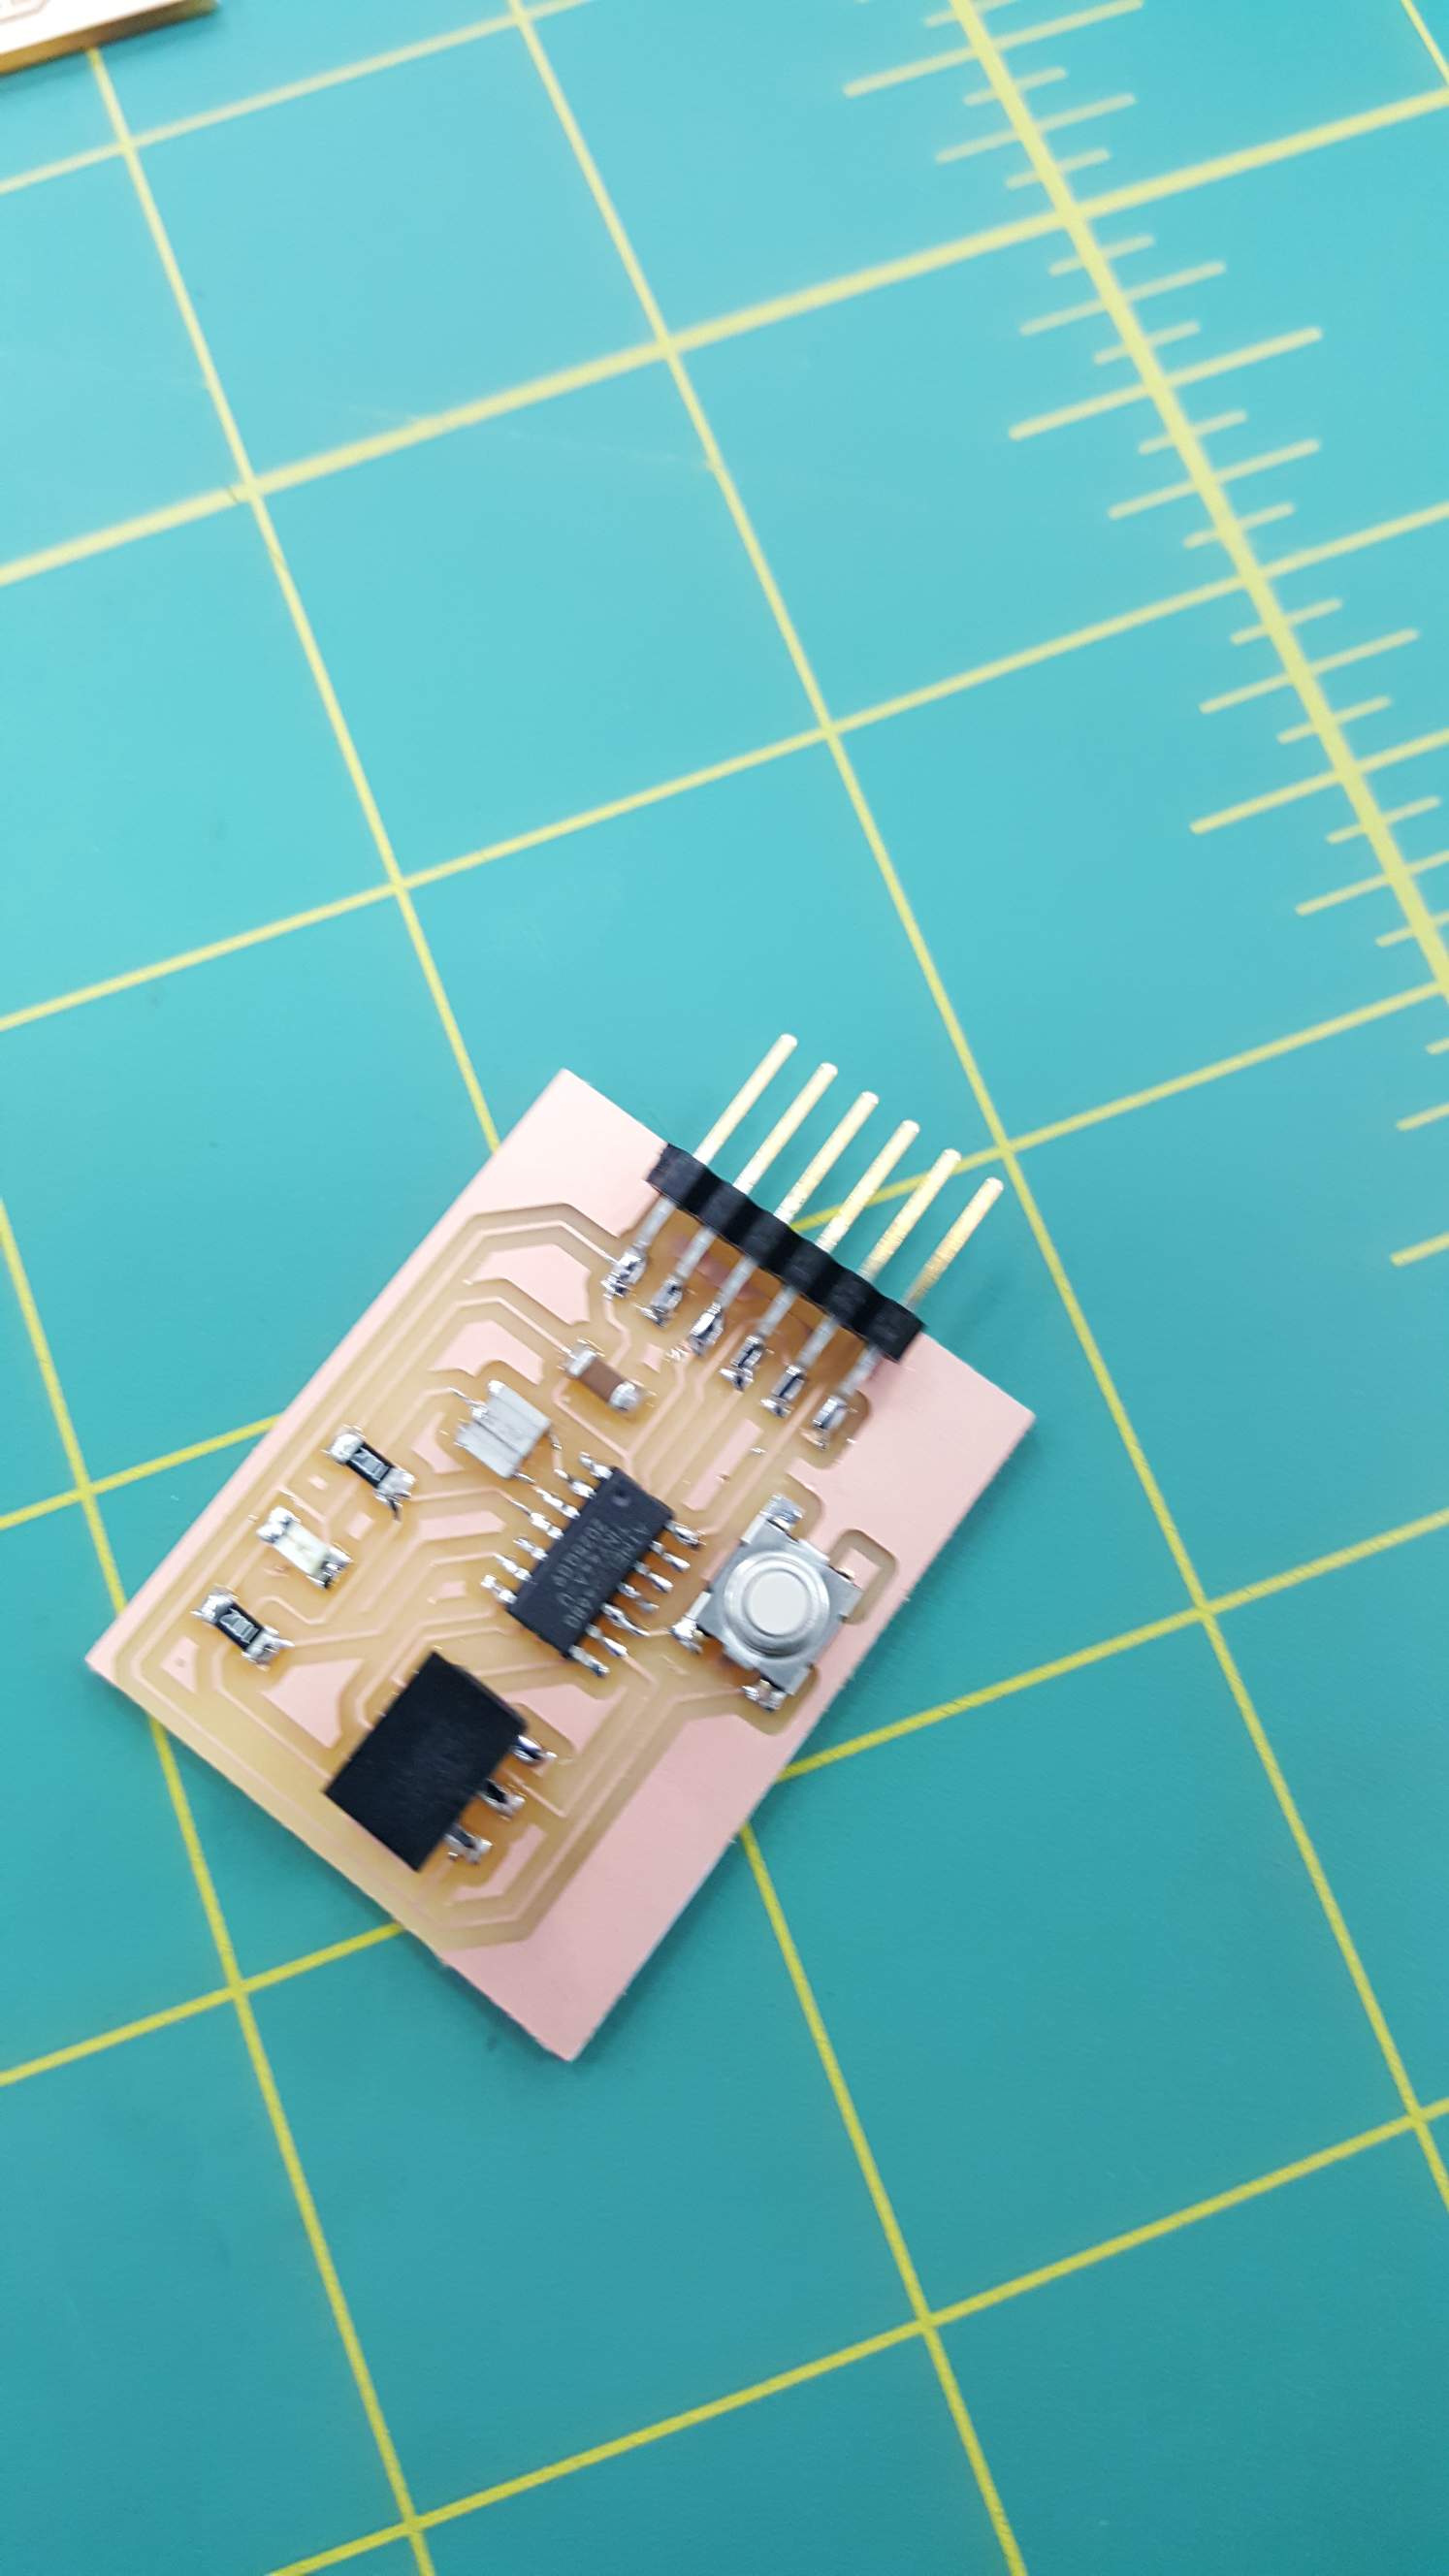
For this week I decided on milling new board using ATTINY44, I made a modified Echo board and added a button and led, I plan to program the button as input to control the light as output to trigger a blinking sequence.
Reading through the datasheet, I highlighted some of the information I thought was significant, we can see the pins order and designations.

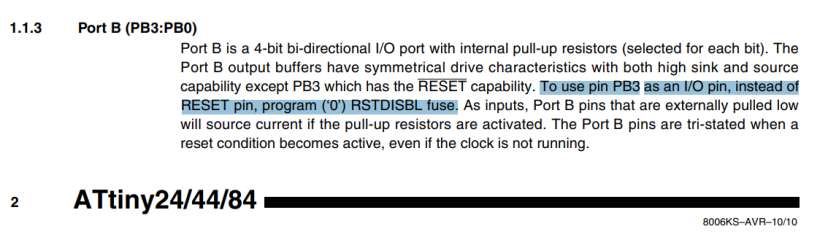
Some info about the reset pin and built in pull-up resistors.
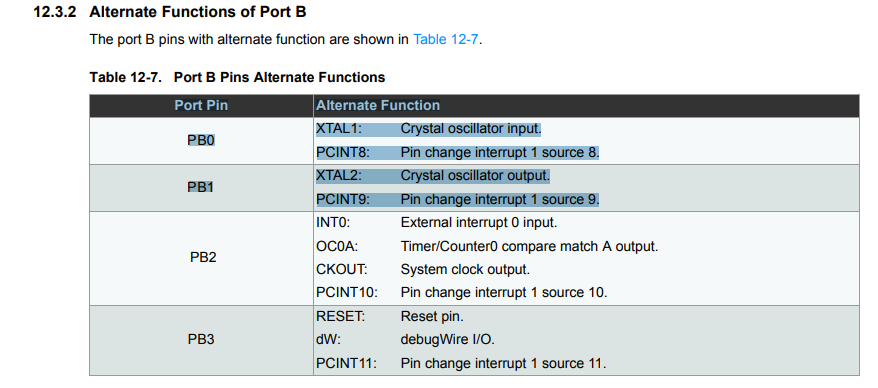
Other pin specific functions.
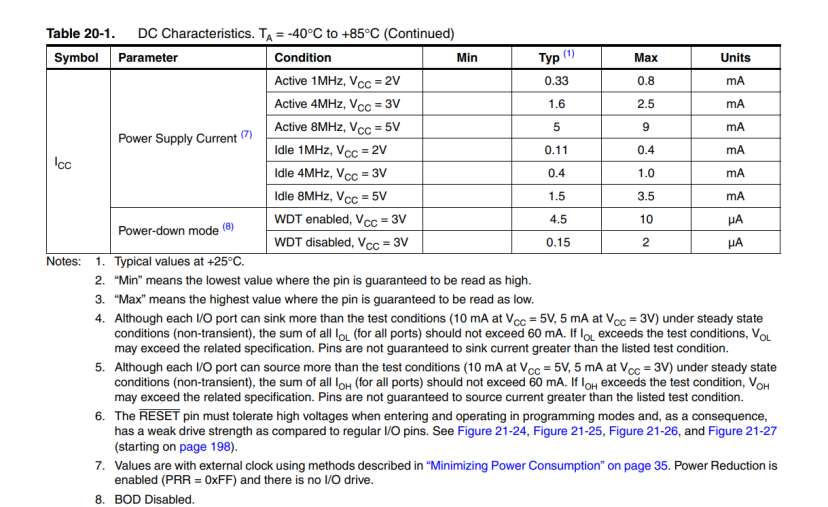
DC electrical characteristics.
To program the board, I used the FabTiny program I made in Electronics Production week, I connected the ISP pins and used Arduino IDE, to be able to use Arduino IDE first add the ATTINY boards to the Board manager by going to File > Preference, and pasting the following link to the ATTINY package: "raw.githubusercontent.com/damellis/attiny/ide-1.6.x-boards-manager/package_damellis_attiny_index.json" in the field for "Additional Board Manager URLs" , Arduino ATTINY boards.
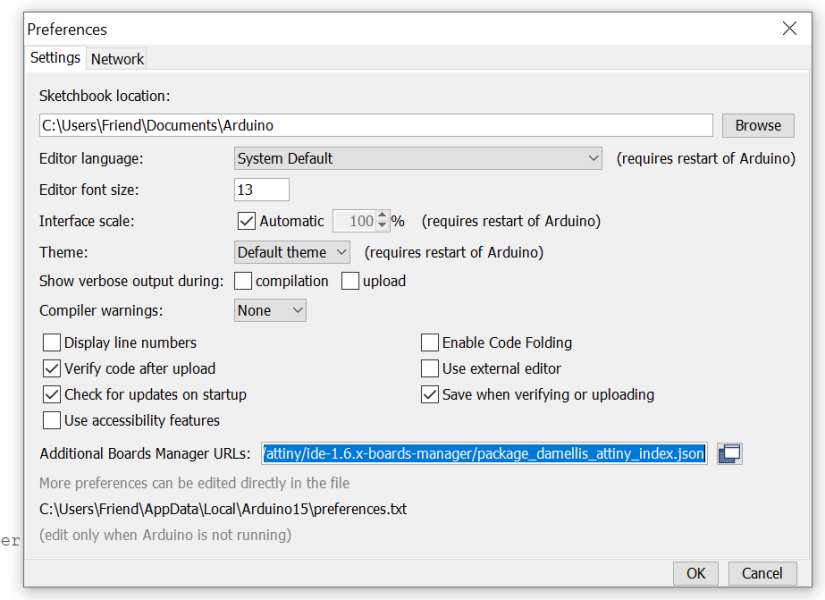
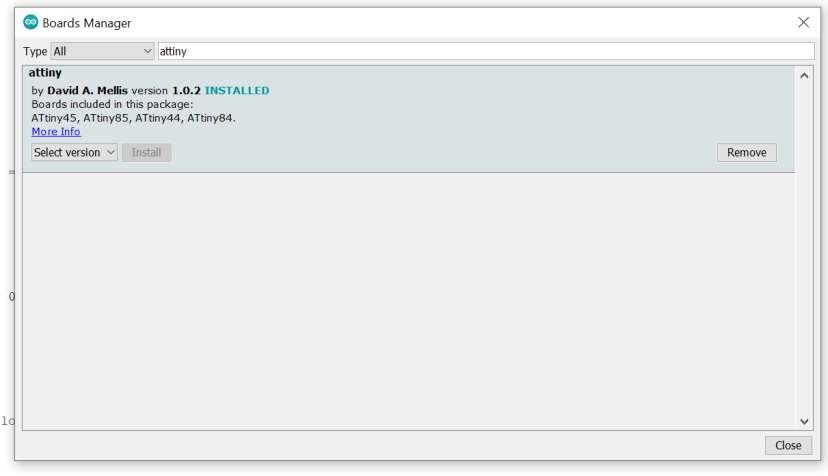
Then go to Tools > Boards > Board Manager, and search for Attiny, it should be visible now in the manager, install it.
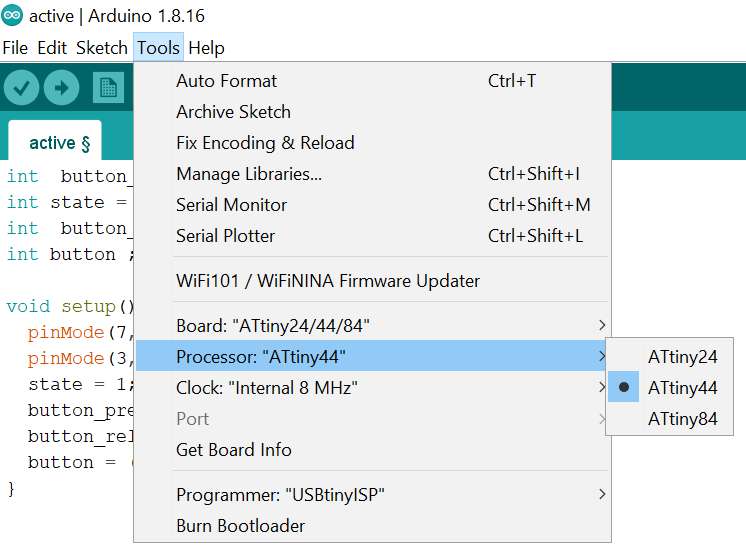
Now set up the Arduino to program the Attiny by doing the following under "Tools" tab:
- Set the Board to Attiny24/44/84
- Set the processor to Attiny 44 or whichever processor you used.
- Set the clock rate to External, 20MHZ, I reverted to using internal 8MHZ because the timing behaved erratically when I used the resonator.
- Programmer "USBTiny" or whichever programmer you're using, the USBTiny usually operate on the Virtual USB Port of COM6.
Now the Arduino IDE software is ready to send code to your board via the programmer board, I wrote the following code to make the light blink a specific number of times when the button is pressed.
int  button_pressed;
int state = 1;
int  button_released;
int button ;

void setup() {
  pinMode(7, OUTPUT);
  pinMode(3, INPUT);
  state = 1;
  button_pressed = LOW;
  button_released = HIGH;
  button = (digitalRead(3));
}


void loop() {
  if ((button == button_pressed) && (state == 1))
  {

    state = 0;
    delay (50);
  }

  if ((digitalRead(3) == LOW) && (state == 0))
  {

    state = 1;
    delay (50);
  }
  if (state == 1) {
    for (int i = 0; i < 10; i++) {      //loop for number of times the light will blink when the button is pressed.


      digitalWrite(7, HIGH);
      delay (100);
      digitalWrite(7, LOW);
      delay(100);

      state = 0;

    }

  }


}
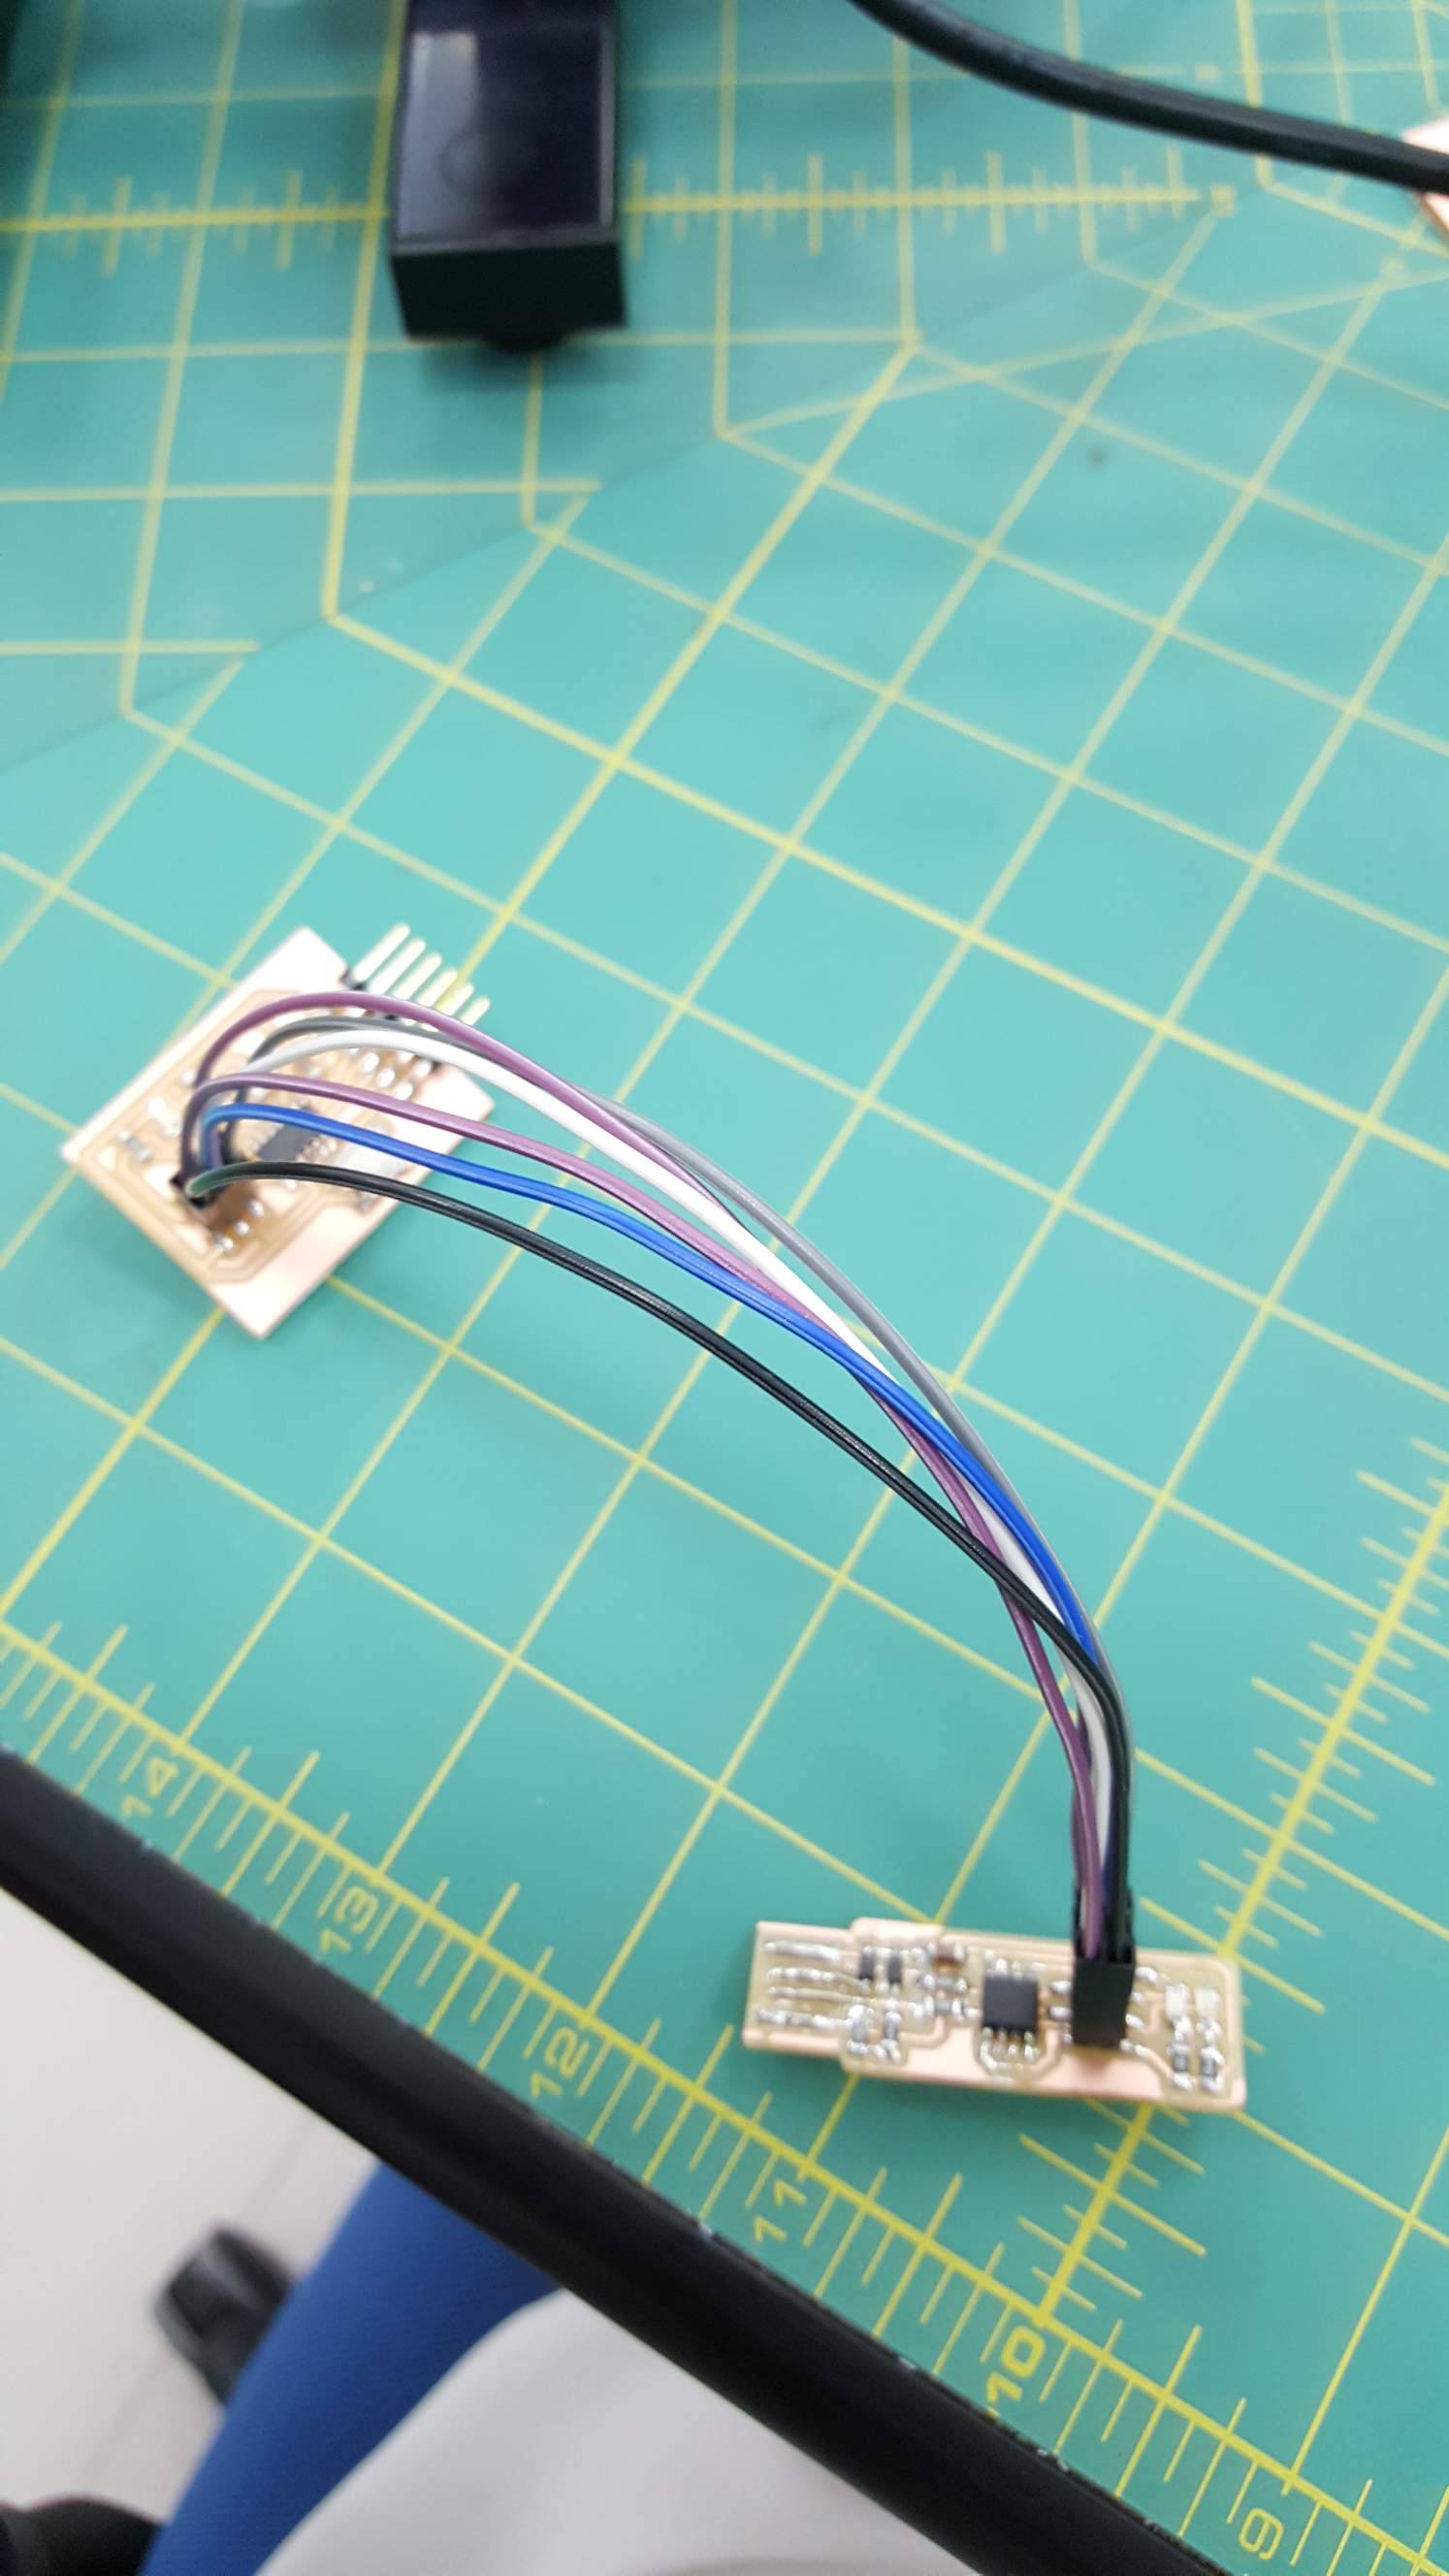
I wired up the light board with the programmer through ISP connection, plugged the programmer through USB and uploaded the code through Arduino IDE.
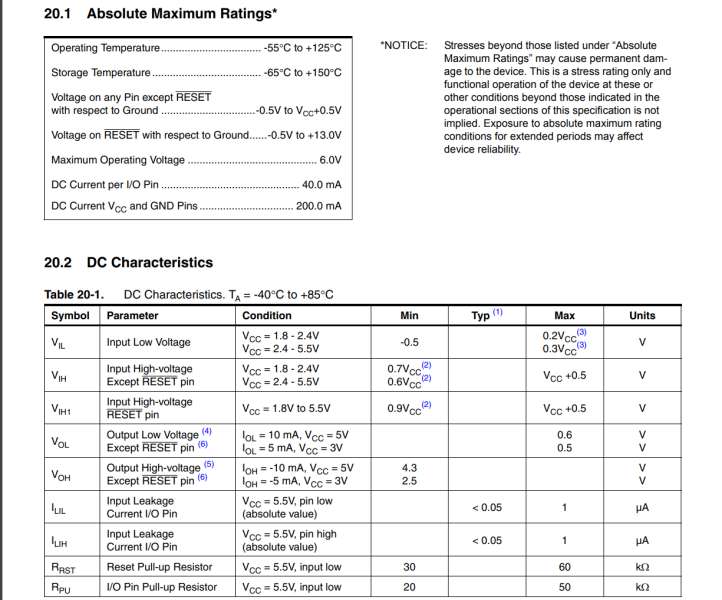
Now when I press the button, the light should start blinking, but the button isn't behaving as expected and the light seems to be at half brightness, only when I hold the button the light increases in brightness, I tested the voltage between the button pin and the ground and it showed a 1.6V, looking back at the documents for the Attiny in the DC Characteristics table,
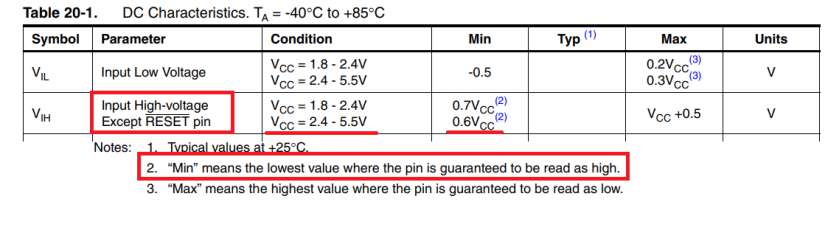
note that it mentions the High voltage for a 5V input should be at least 0.6 * the Input voltage, 0.6*5V = 3V, so 3 Volts is the minimum voltage the button pin should have to guarantee a high state.
Also looking at the Low voltage the highest it can be is 0.3* the input voltage, 0.3*5V = 1.5V, so 1.5V is the highest voltage to guarantee a LOW state for the button pin.
Our button voltage of 1.6V exist in a float state where it changes from LOW to HIGH erratically, to fix this we connect it to a power source to guarantee it stays in the HIGH state, the Attiny allows us to do this through software with its built in pull-up resistors which can be added to our code, so the fix is a simple code change, pinMode for the button pin from INPUT to INPUT_PULLUP, which will connect the pin to VCC via the built in pull-up resistor.
pinMode(3, INPUT_PULLUP);
Program the board again and now it works as intended.