Computer-Controlled Machining
-
*** GROUP ASSIGNMENT***
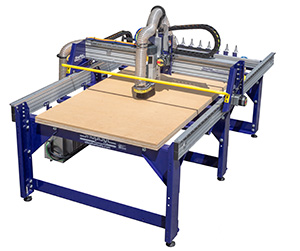
The machine: ShopBot
Shopbot is a large format CNC machine with a work area of 2400mm by 1200mm, the user manual is here, The manufacturer website, the software used for preparing designs is Vcarve while the machine is controlled by the software ShopBotEASY.
Workflow for using the Vcarve software:
- On opening Vcarve, set the dimensions of the work area, units of measurements, material thickness and zero datum of the material.
- Import your designs into Vcarve.
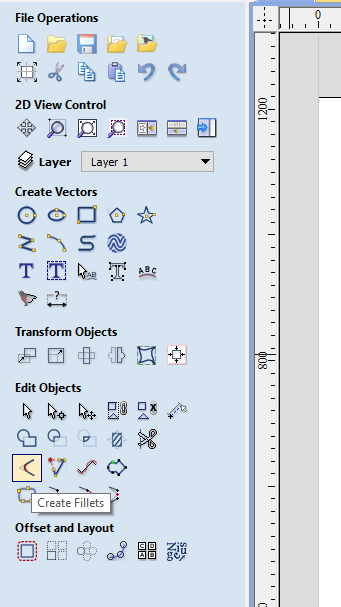
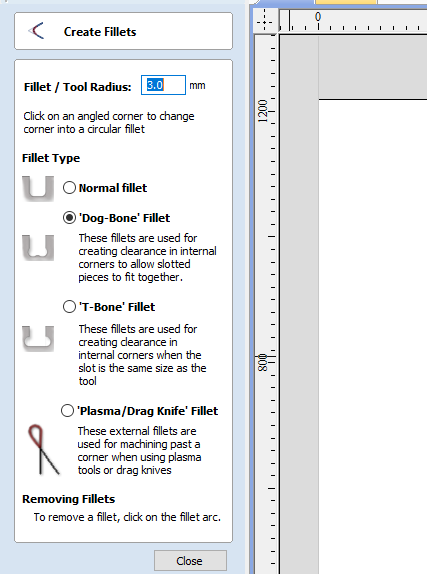
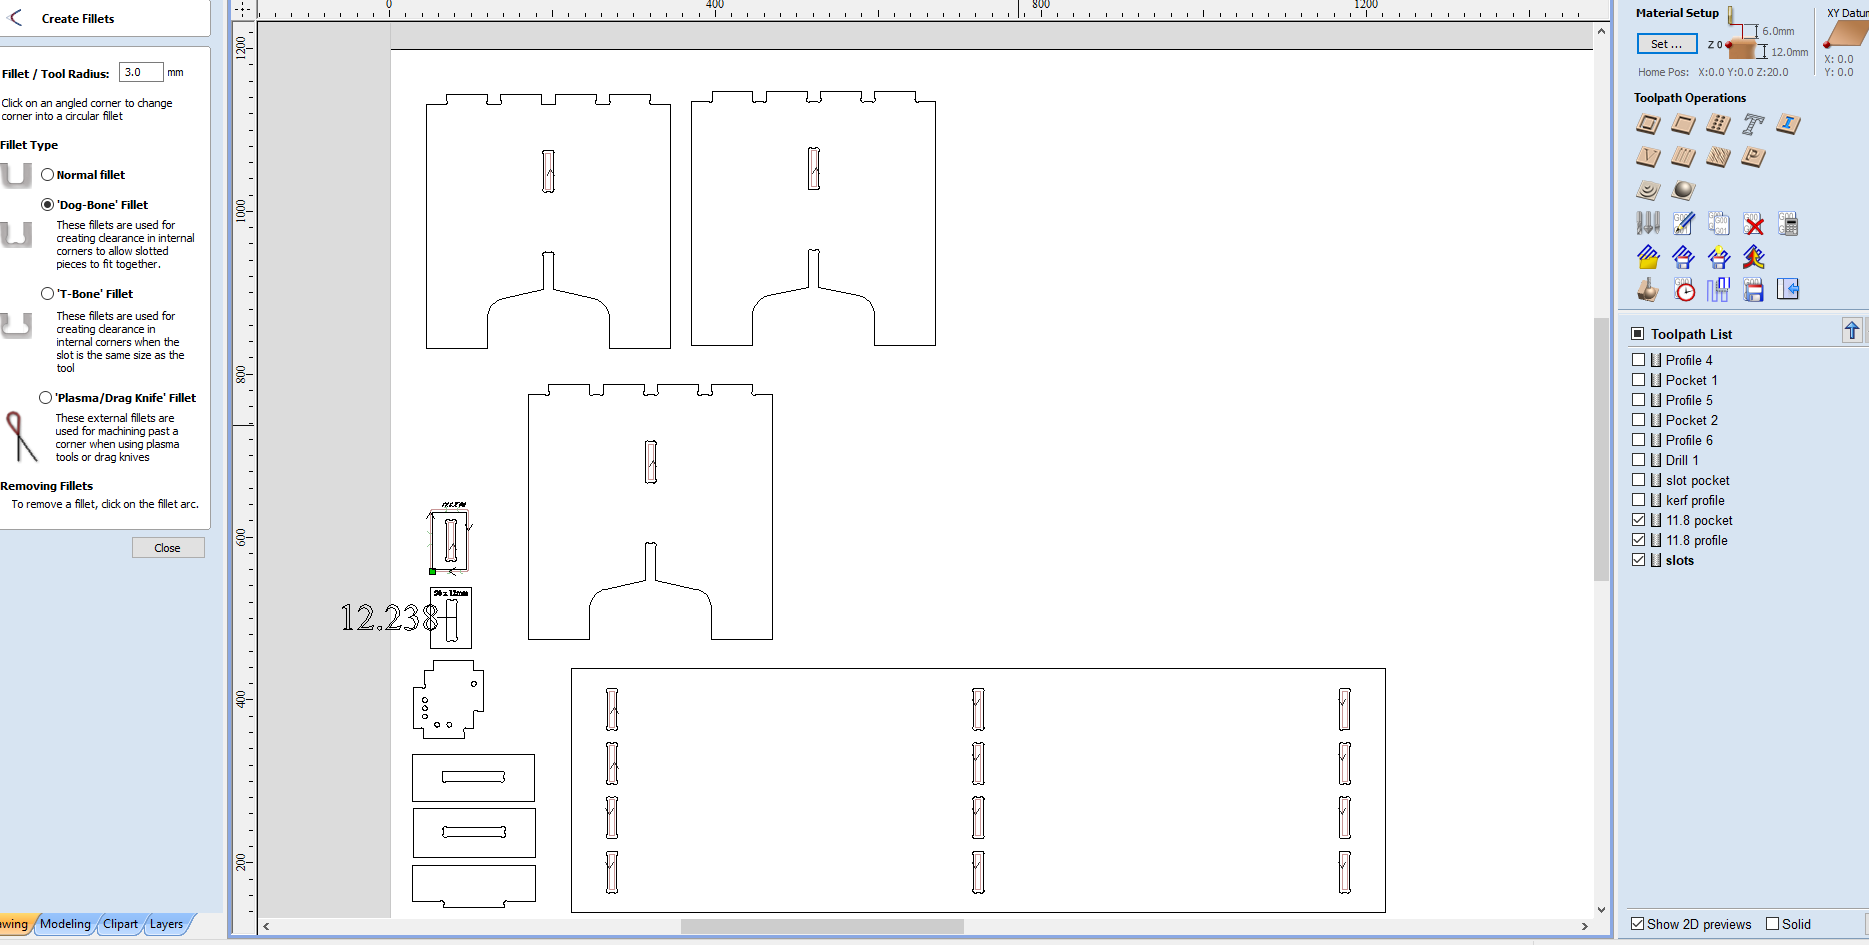
- Edit any inward facing corners by adding a dogbone fillet, for best fit use at least a diameter equal to half the tool diameter.
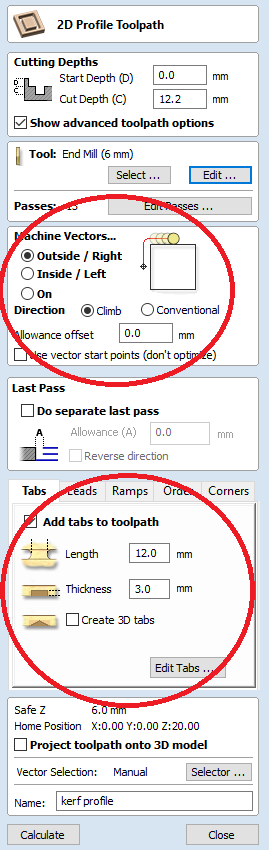
- With a contour selected, use the toolpath options to define the type of operation, ie pocket or profile.
- Increase the cut depth to slightly more than the material thickness, only a couple of millimeters is enough, select the desired tool, set the depth of passes, a depth of the tool diameter is acceptable bu usually go for half the diameter to increase the usable life of the tool, set the desired feedrate and spindle rpm.
- Add other important settings like adding tabs to profile cuts.
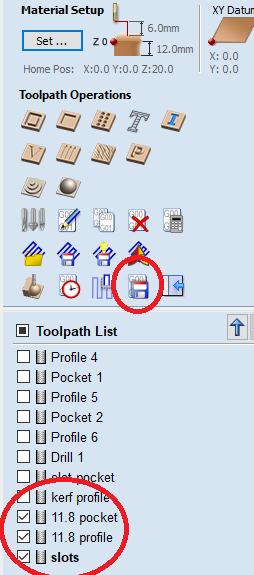
- Preview the machine toolpath, select the toolpaths you're going to use and save them so you can send them to the ShopBot.
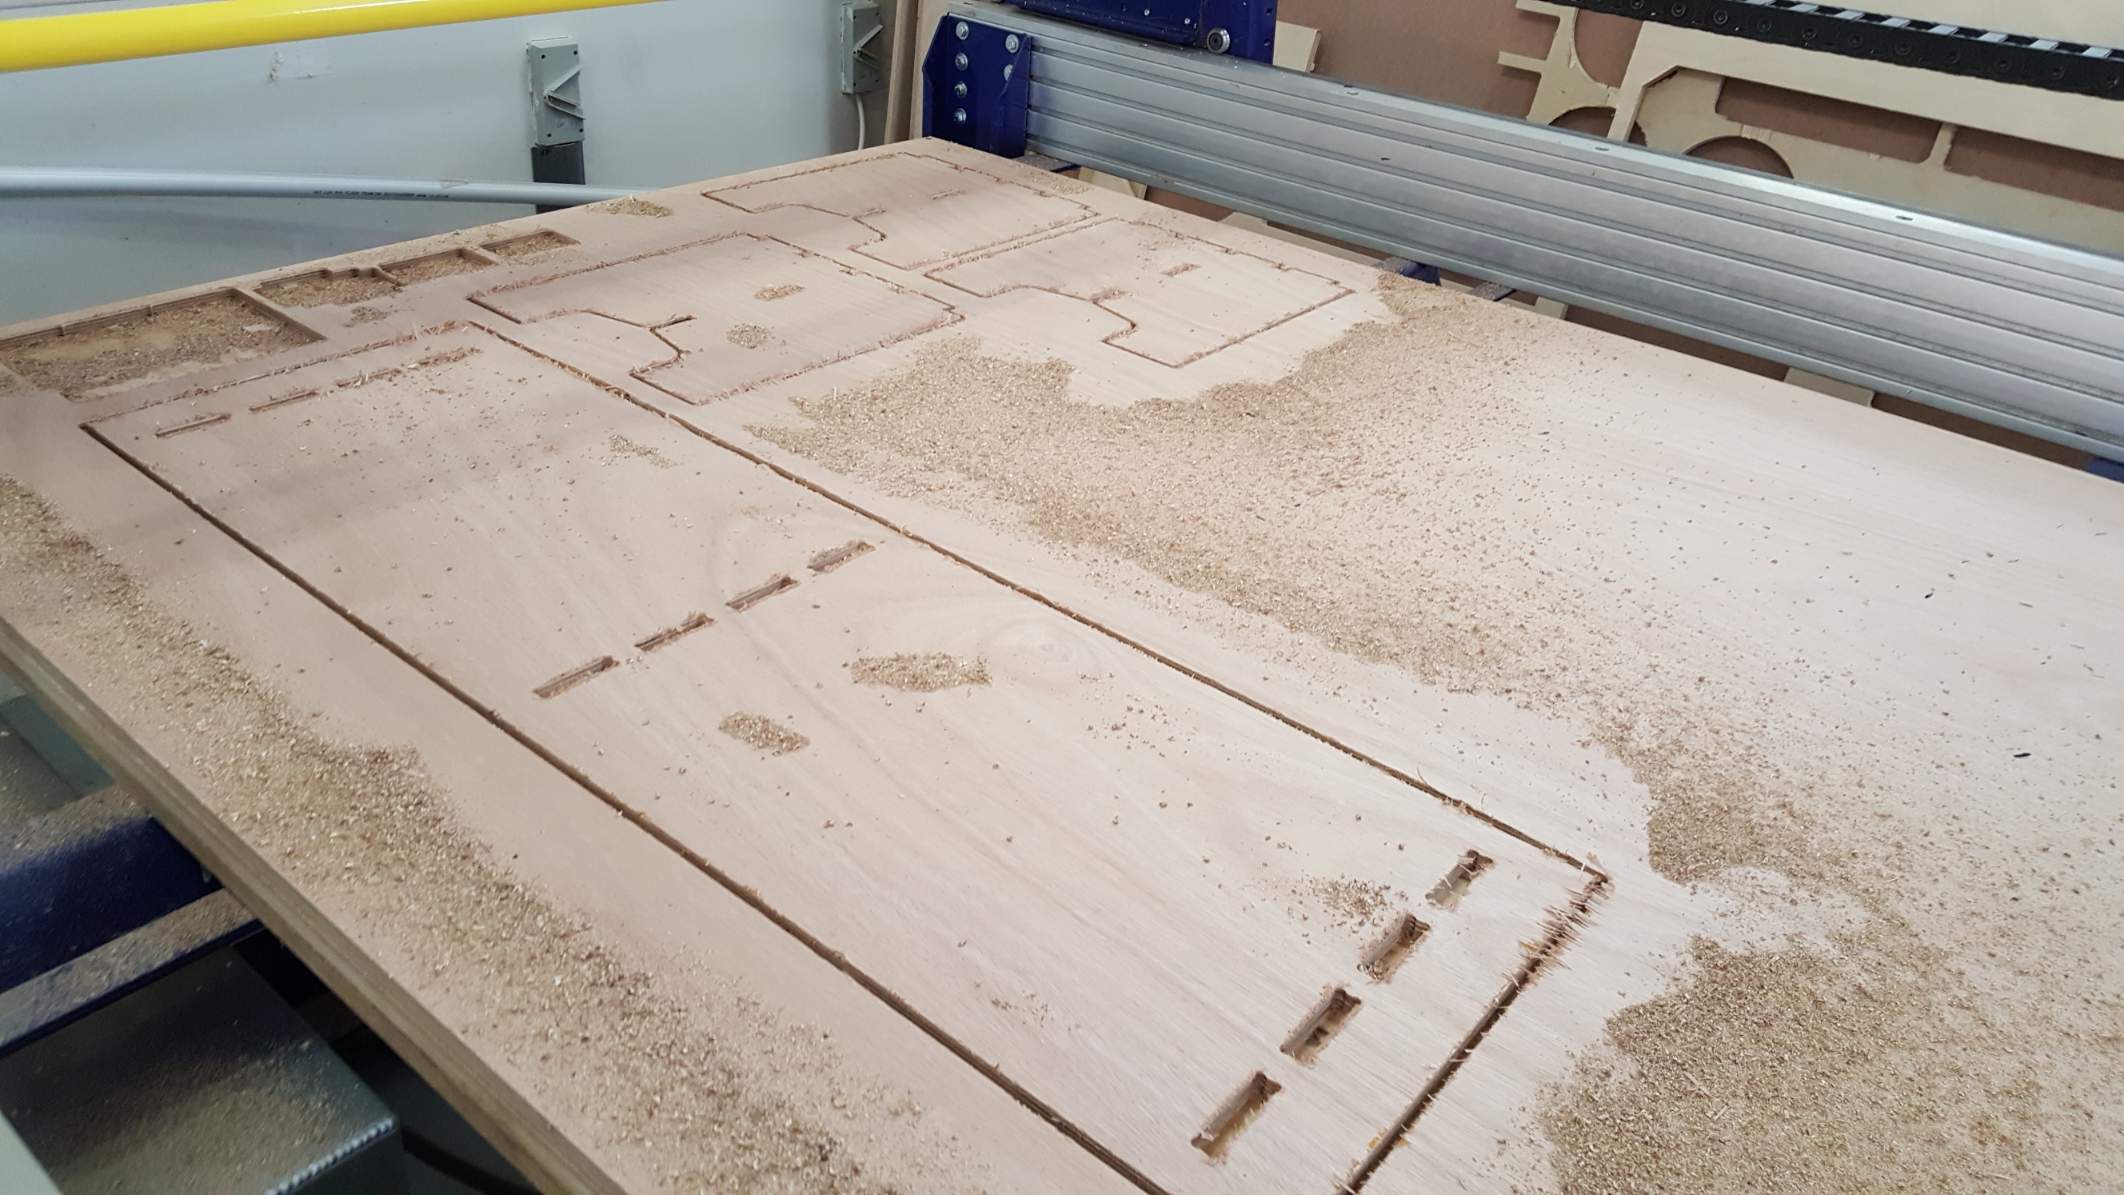
- After the job completes, wait around 5 minutes for the dust to settle, use the vacume leaner to remove the dust of the workpiece to reveal the tabs.
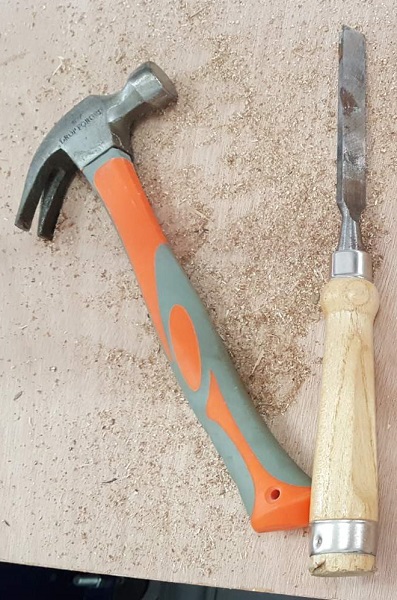
- Use a hammer and chisel to break the tabs, extract the work piece.
Work Flow for operating Shopbot:
- Wear the protective equipments(mask, lab coat, gloves, hearing protection).
- fix the work material to the sacrificial material on the bed.
- Turn on machine.
- Press the restart button on the control board.
- Zero the X and Y axis through the software.
- Make sure the correct millbit is installed properly.
- Use the conductive plate to level the Z axis.
- Engage the spindle, Now the machine is ready to receive work file.
- Once a file is received follow the onscreen instructions.
Group Assignment Portion.
Safety Instructions
The safety gear used is lab coats, gloves, earplugs, eye protection and mask.
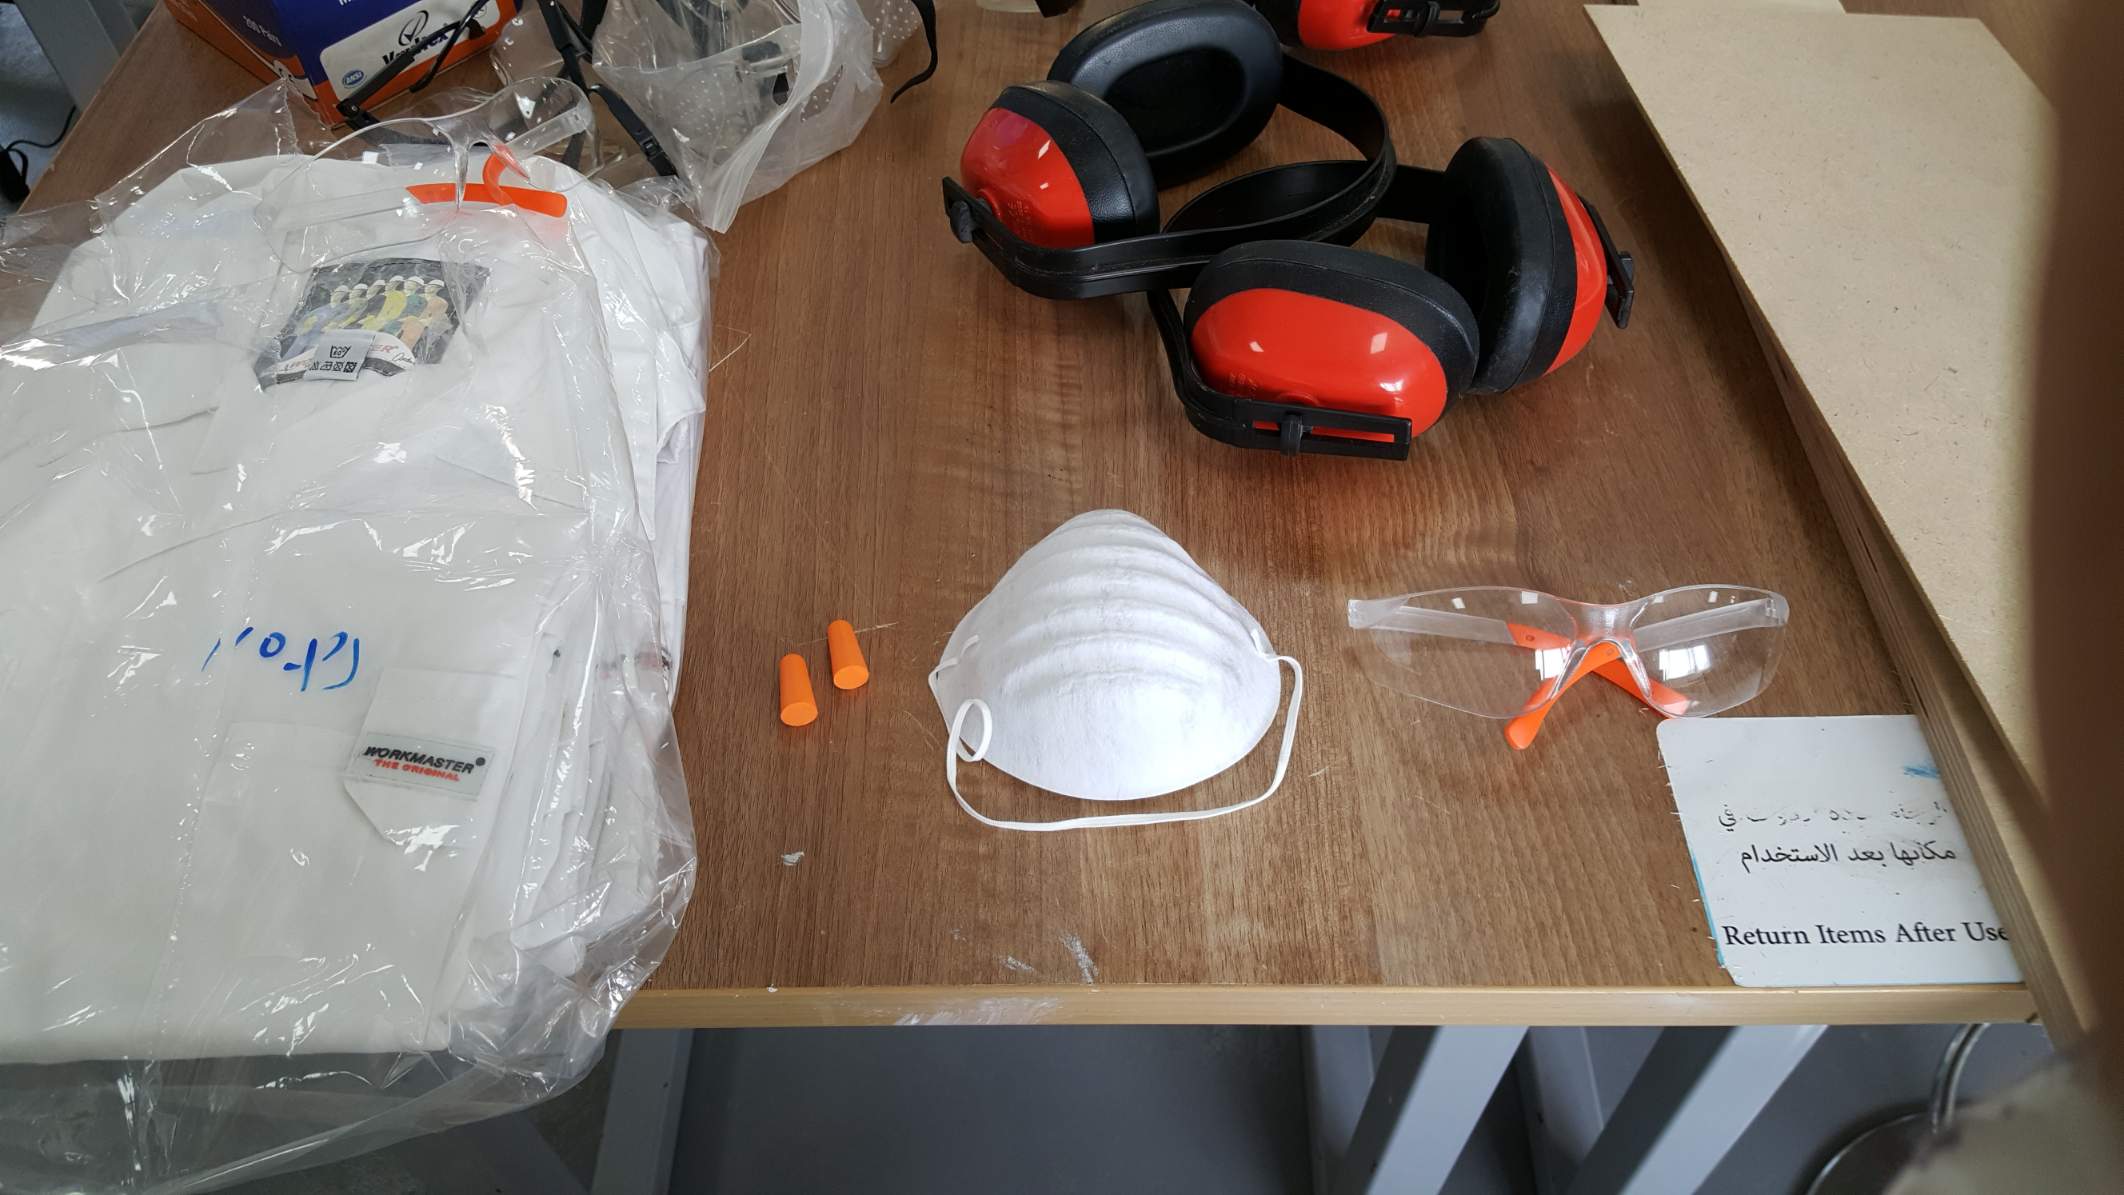 safety Gear
Before starting the machine, open the side door and ventilation window, once the machine start with a job vacate the machine room taking the control panel with us, observe the machine operation through the window until it finish, if something goes wrong hit the emergency stop button on the control panel, when the machine is done, wait 5 minutes for the dust to settle before entering. Never approach the machine while its running and don't leave the machine unattended unless its turned off.
Testing the machine and material
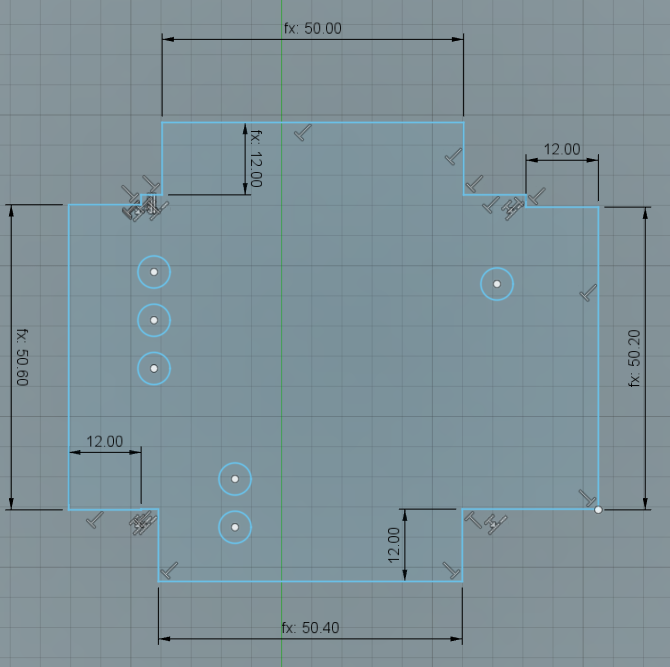
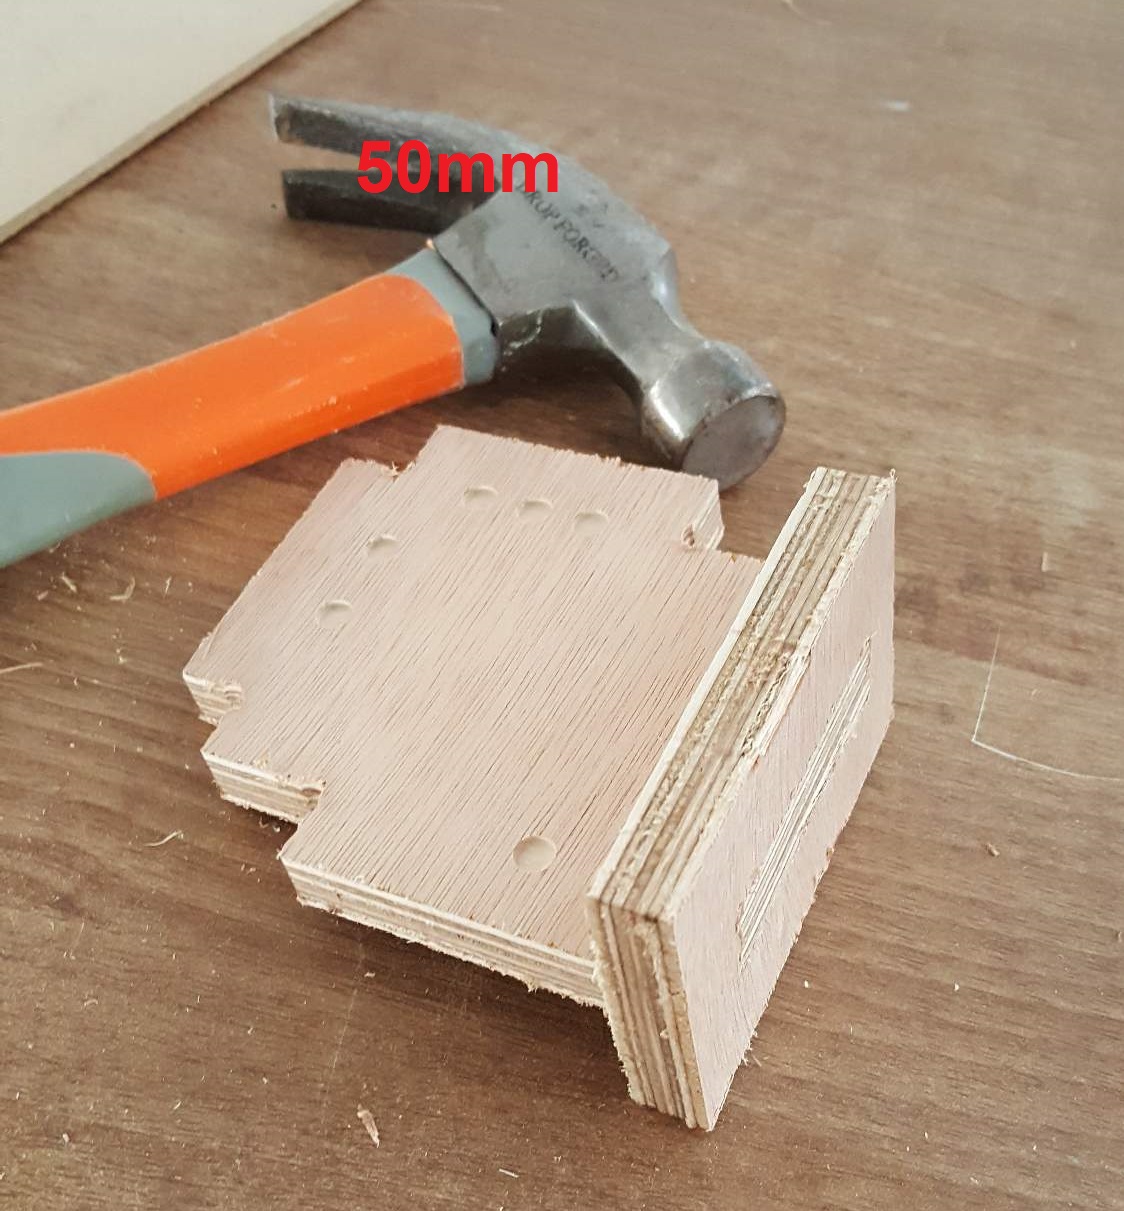
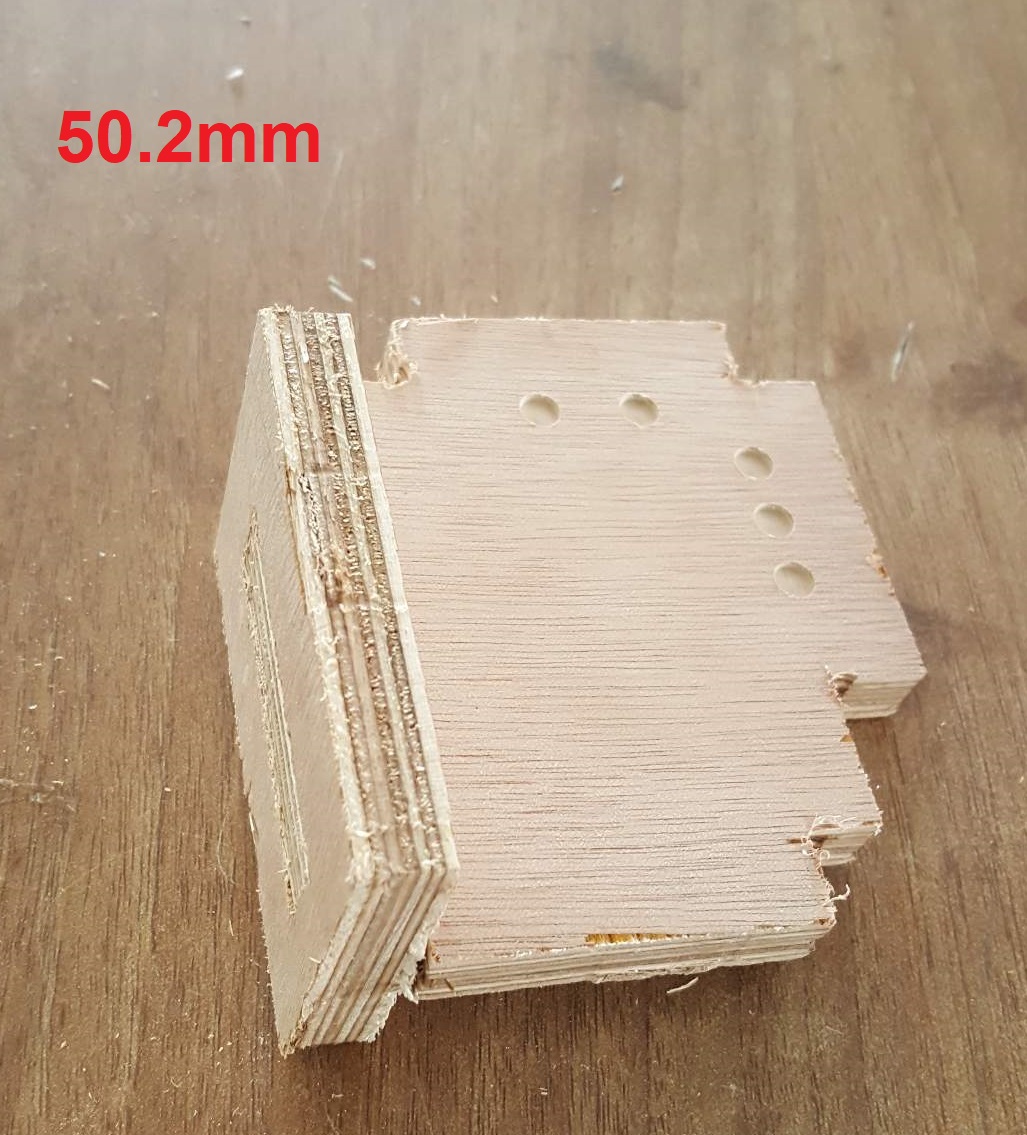
for testing the kerf and fit I designed a slot and four male pegs, the slot width is 50mm and the pegs are 50mm,50.2mm,50.4mm and 50.6mm.
In Vcarve I set the work area to 2400mm X 1200mm, zero at the top, Thickness 12mm.

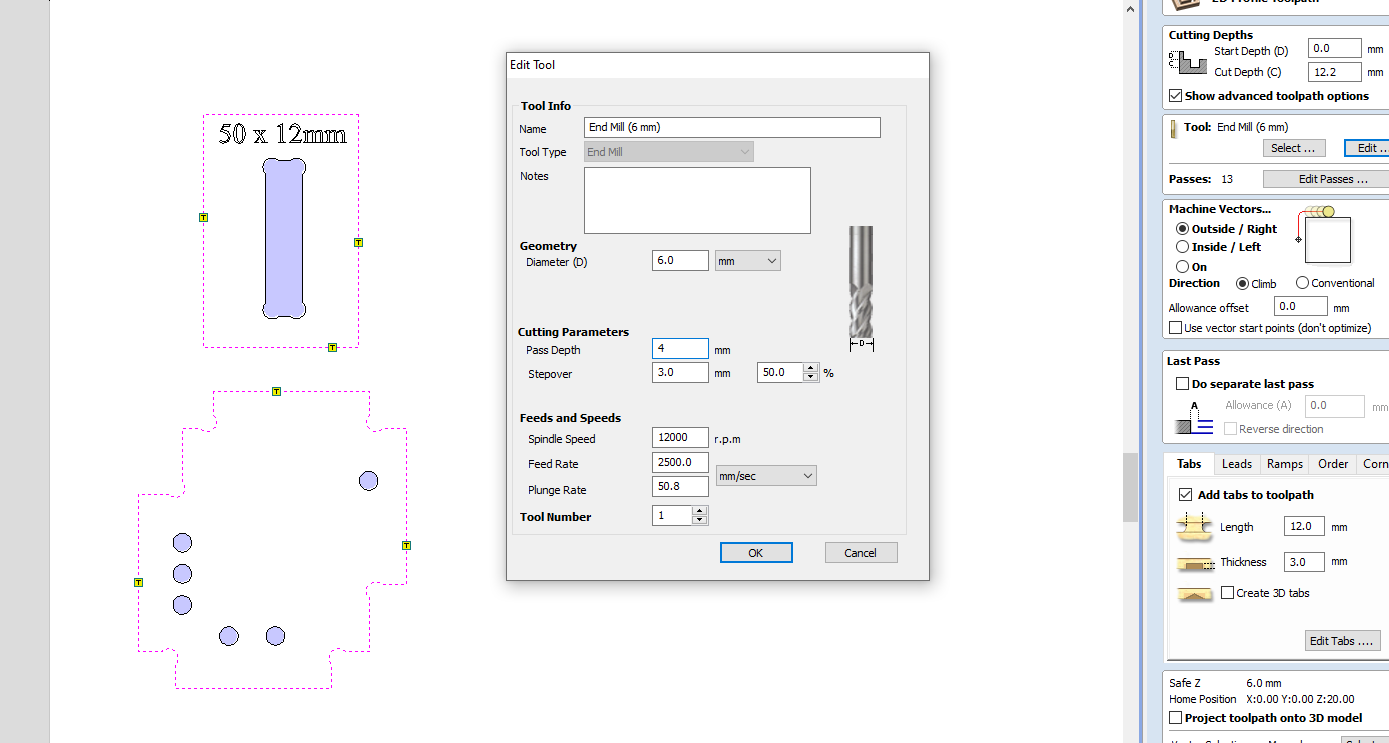
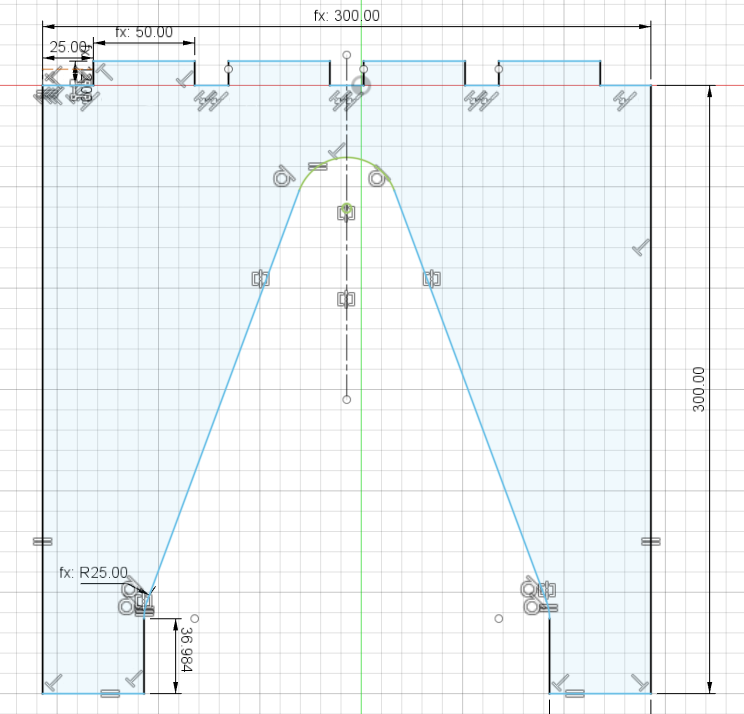
Choose the fillet, doogbone and set the diameter to half of the tool diameter, the tool is 6mm so I type in 3mm.

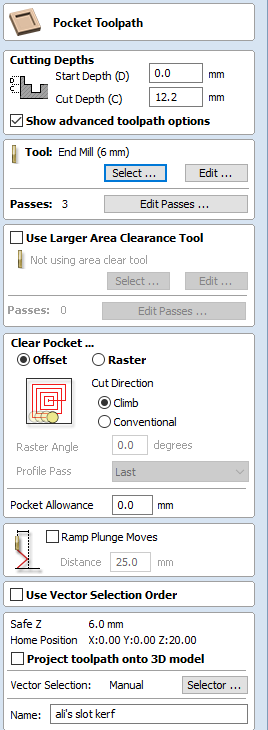
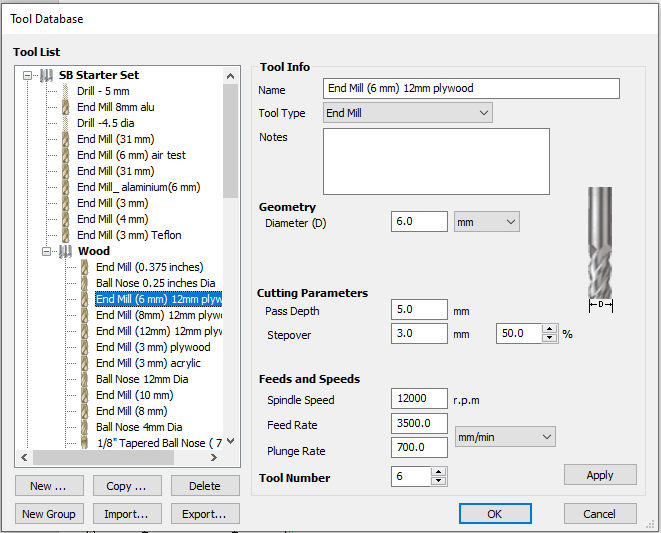
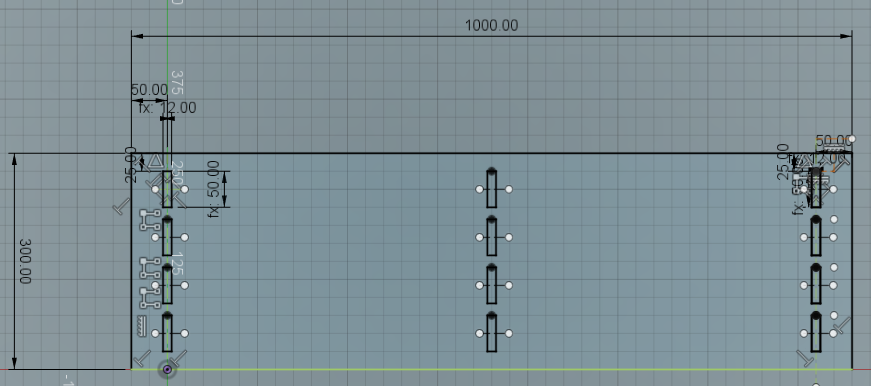
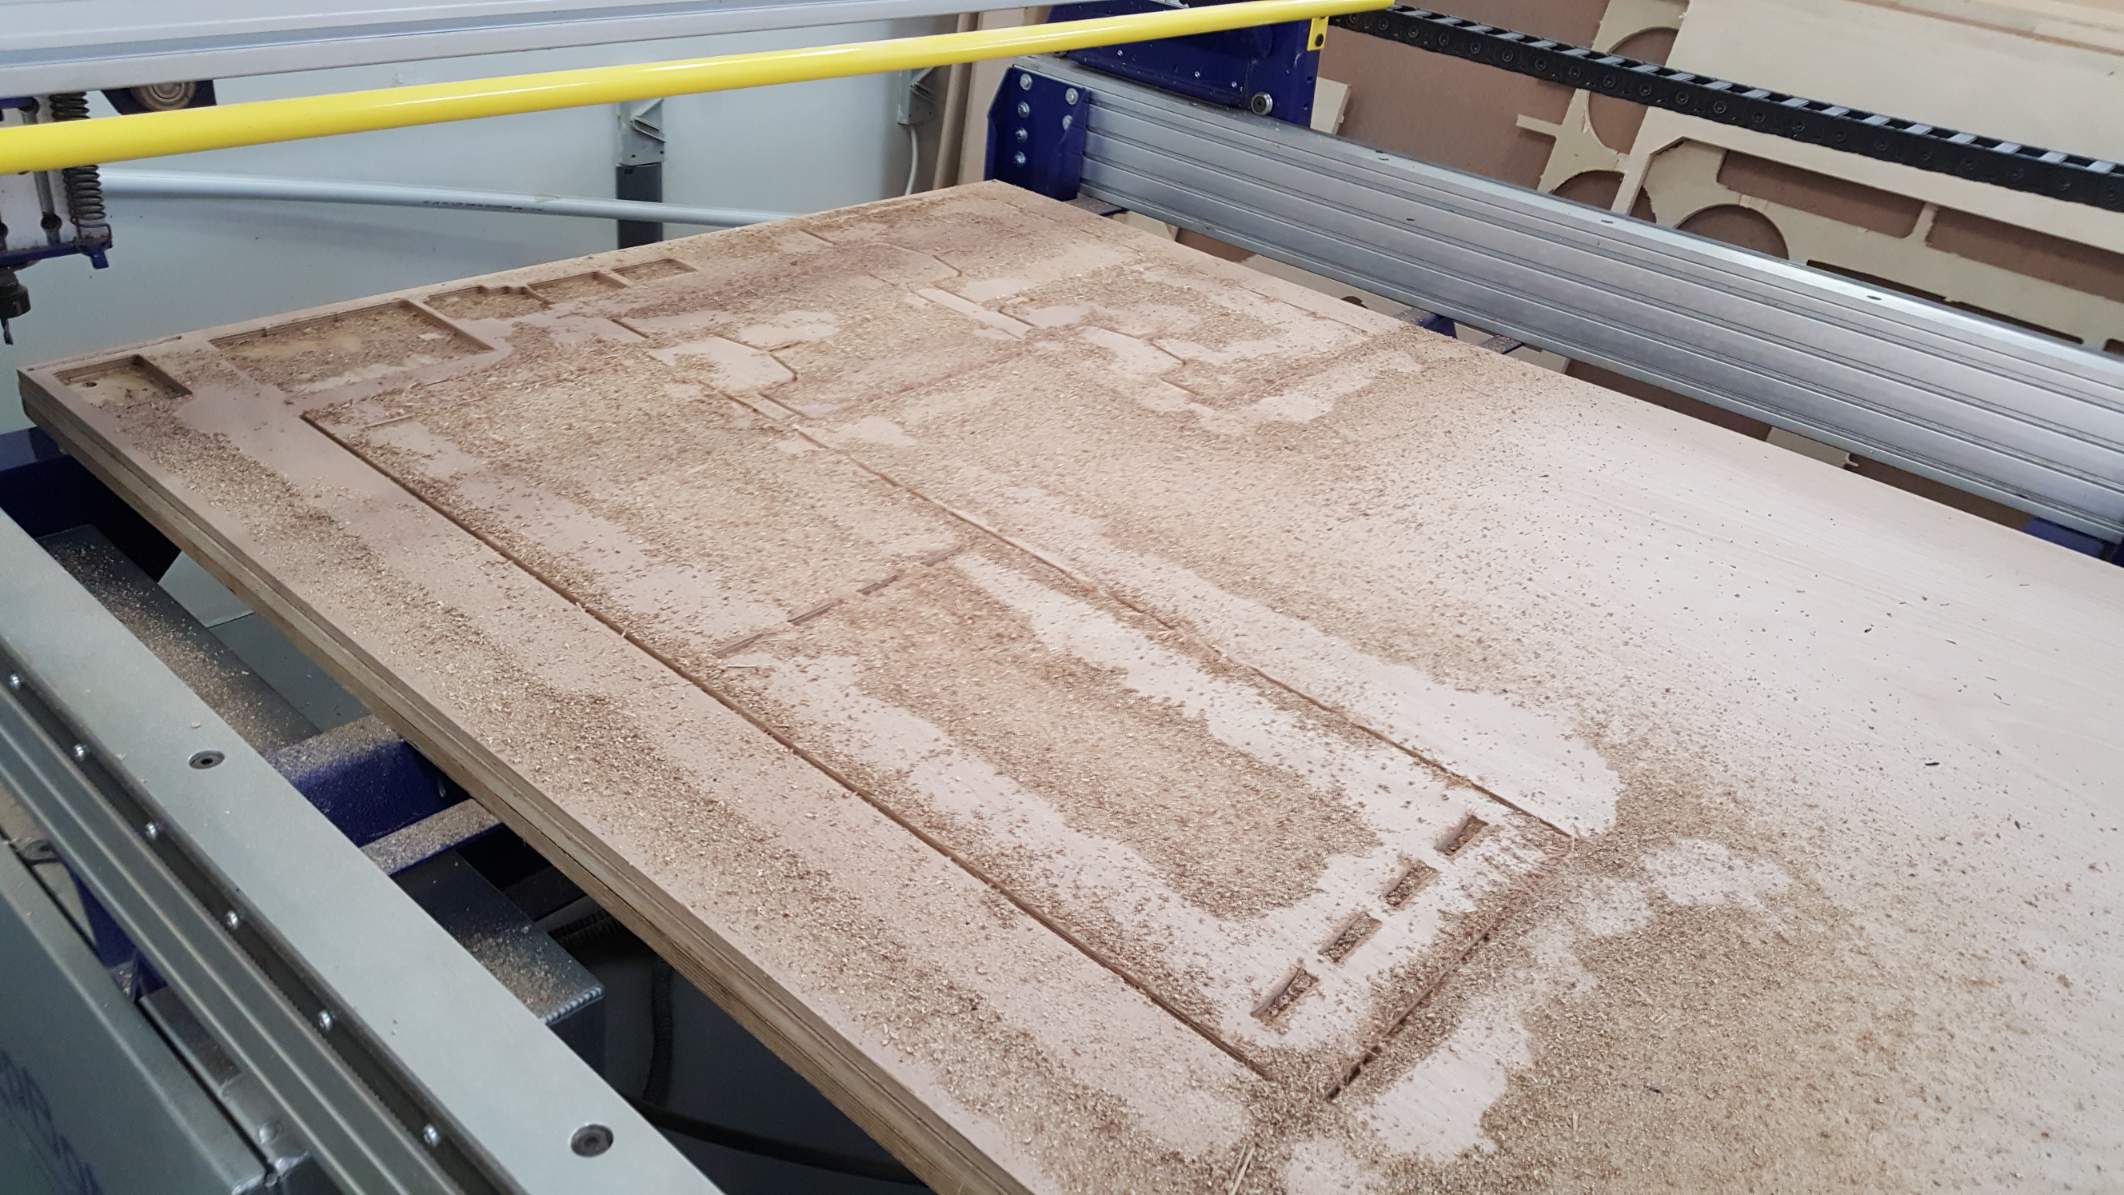
Import the file in and set the toolpaths, Pocket for the inside of the slot and profile for the outside contours. cut depth set to 12.2 to make sure the tool clears the material. select the correct tool, set the stepover to half of the tool diameter so 3mm again, I used a spindle speed of 12000 rpm, feedrate of 3500 mm/min and plunge rate of 700 mm/min, check how many passes the tool will take, hit calculate when finished with choosing the settings, the picture below shows the settings used for the pocket toolpath along with mill bit used, the RPM is 12000, feed rate 3500mm/min, plunge rate 700 mm/min
For the profile toolpath make sure to choose the machine vector most suitable for your contour and add tabs to hold the work piece during milling.
Select all your toolpaths, hit save toolpath and now the file is ready to be sent to the machine.
The end result post milling was that the 50mm slot fit snuggly in the slot with the help of a hammer, 50.2mm also fit well while the 50.4mm and 50.6mm don't fit well. I decided on using 50mm male pegs for my final design and edited the parameters of slot size to match my findings.
Individual assignment portion
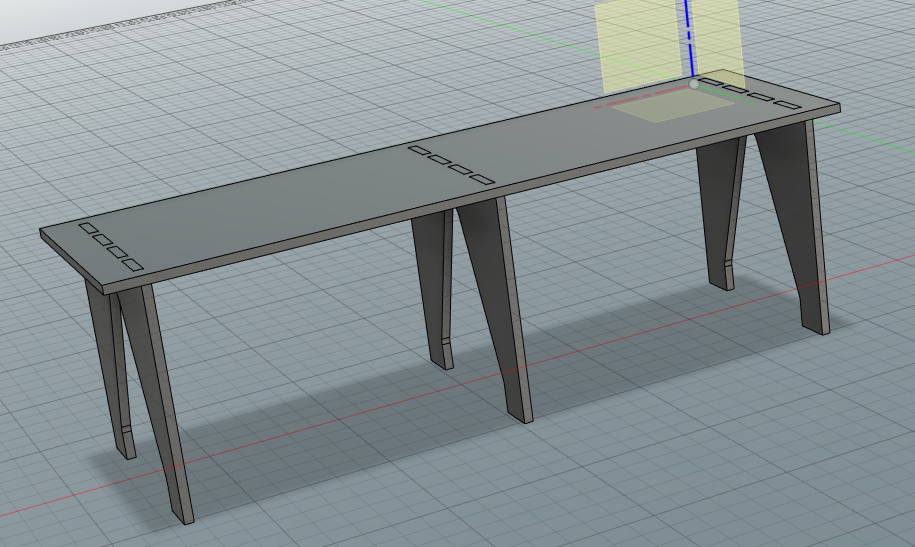
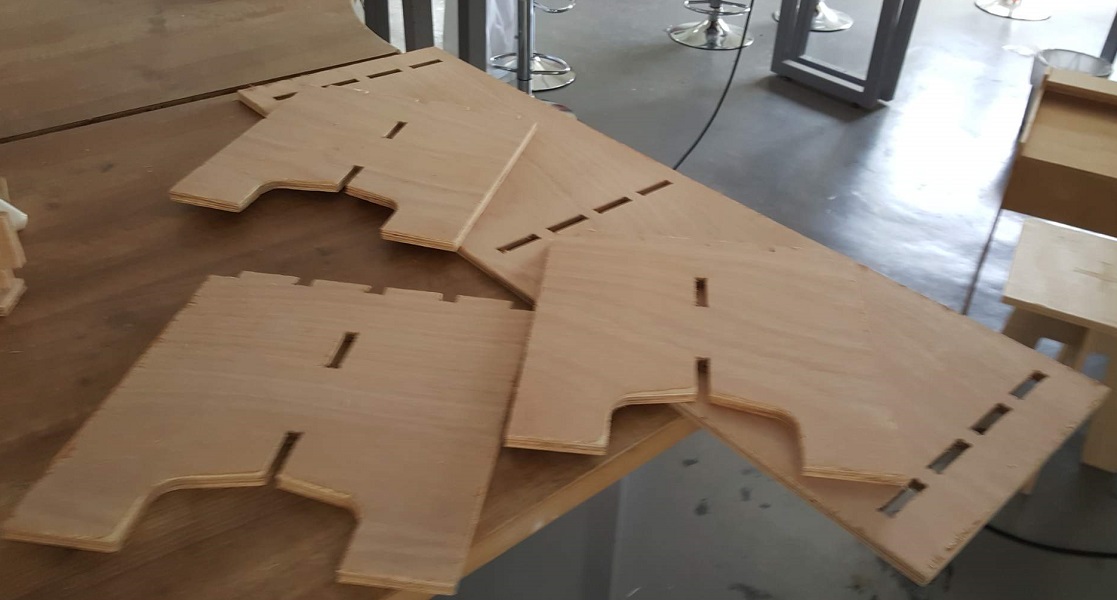
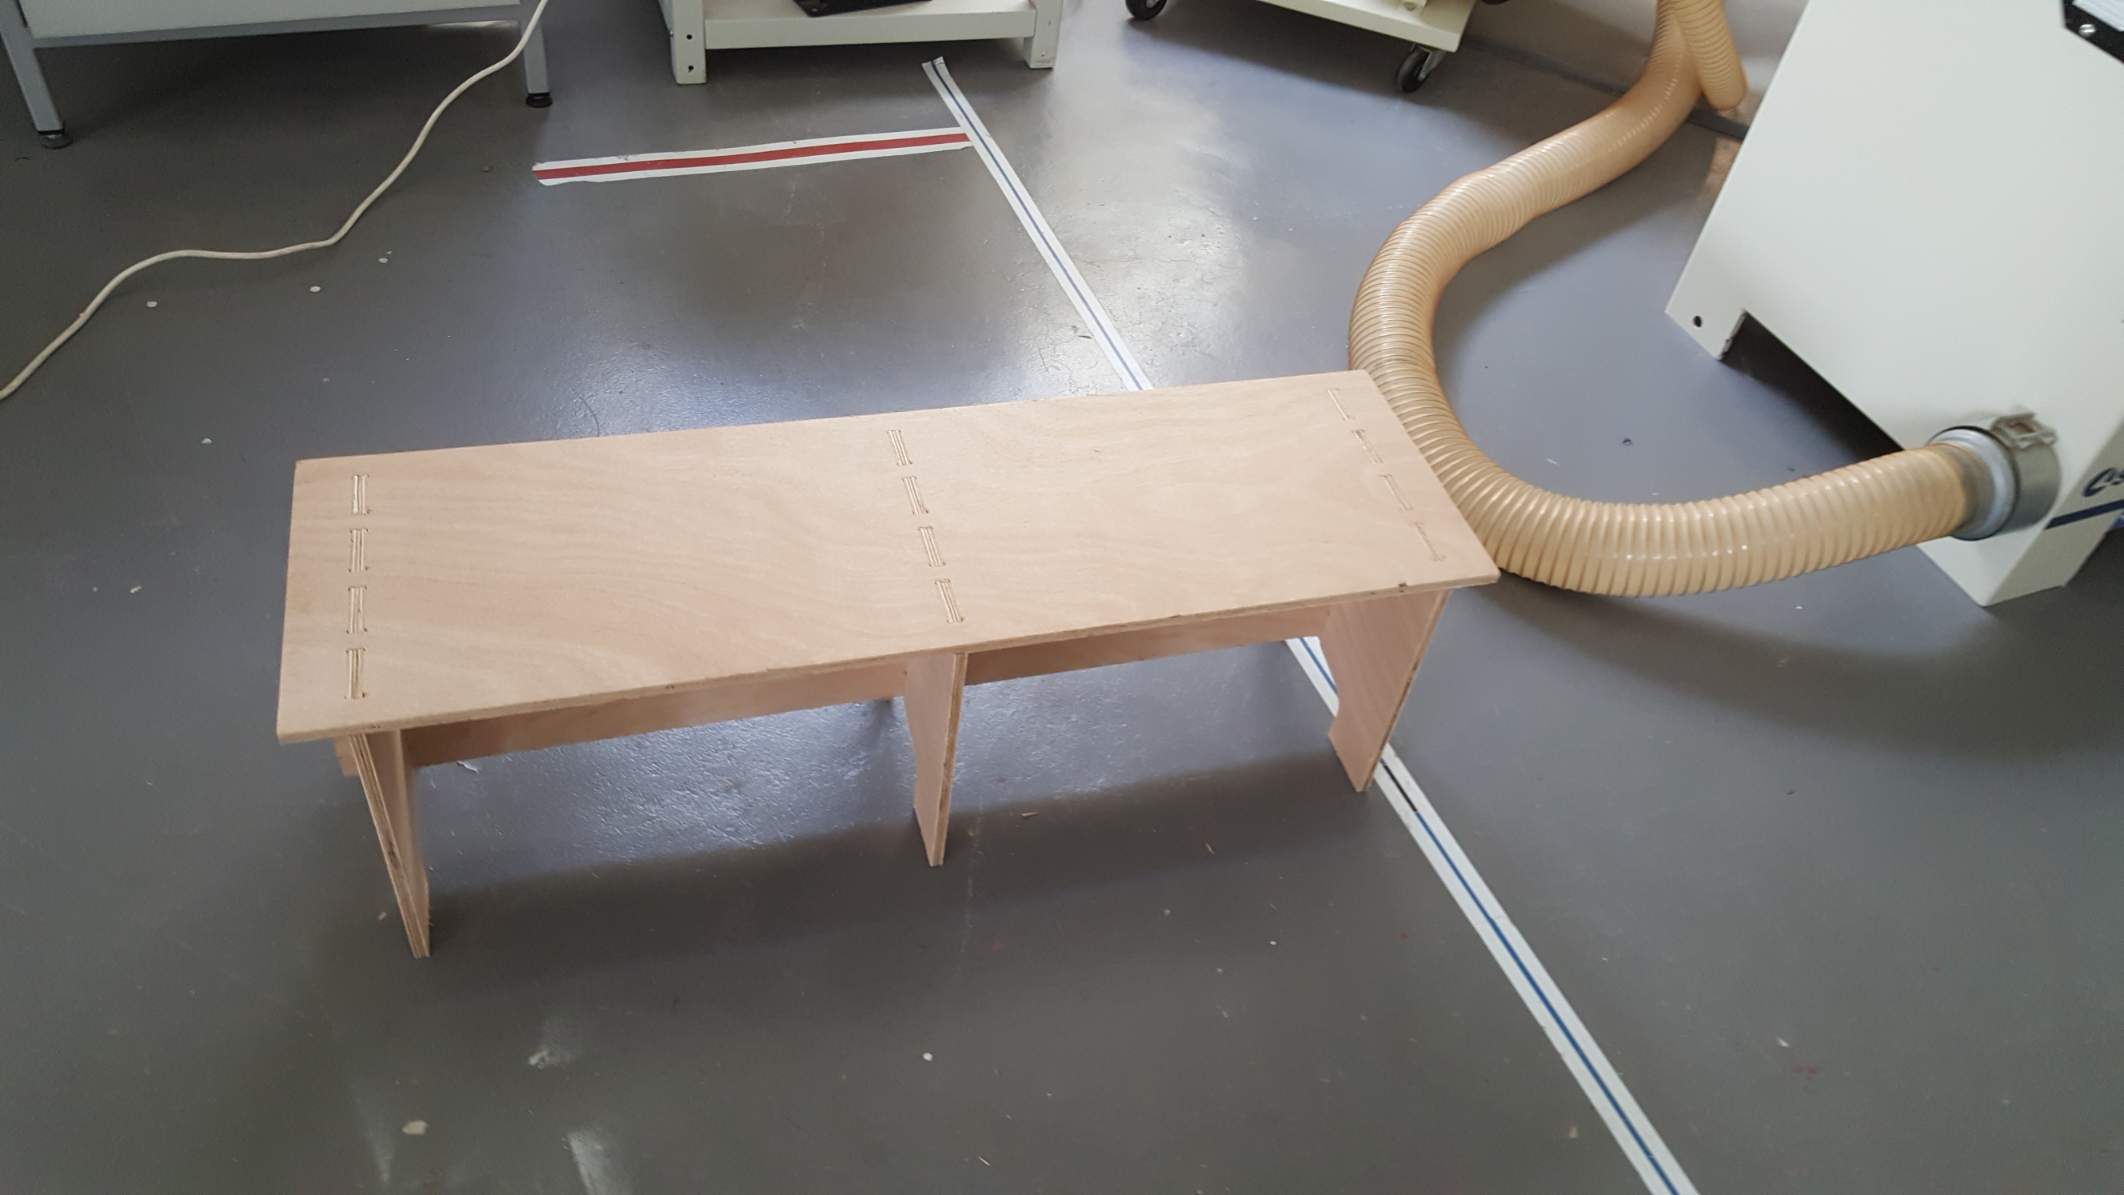
Our lab isn't equipped with a large format CNC machine so I had to use the ShopBot machine in Emirates Fablab in Dubai, this means a 4 hours round trip from where I live so I had to limit my design to something simple and can be made and assembled quickly, I settled on designing a short bench that is one meter in width made few parts, The design will link a slotted bench top with three leg segments that have pegs to fit into the slots.
I exported the sketches into dxf format and opened them in Vcarve following the same editing steps outlined in the workflow and in the group assignment portion of this week's work.
Before approaching the machine I put on the protective equipment, put the material on the work bed over the sacrificial material and fix it by screwing the edges to the sacrificial material using a drill.

Now on the side panel, switch on the machine by turning the red switch.
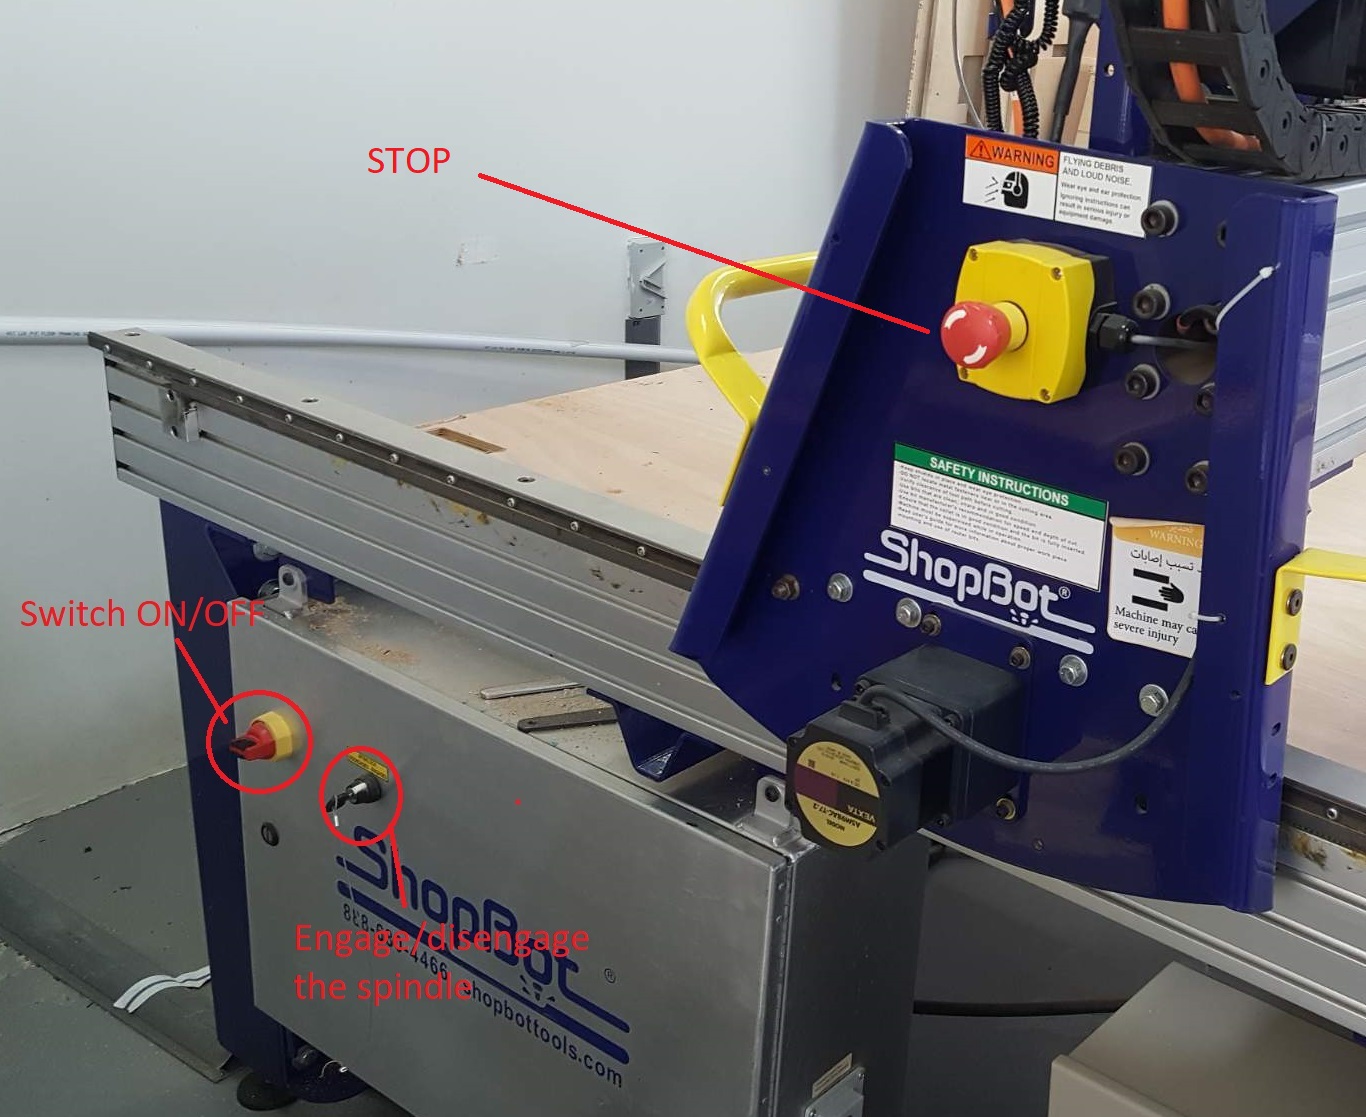
Every time we start the machine, we have to hit the Reset button on the wired control panel.
To home the X and Y axis, use the ShopBot Easy software, open the keypad tool, select Zero Axes, tick the X and Y axes and click Zero, the X and Y axes will be homed and zeroed to the corner automaticly.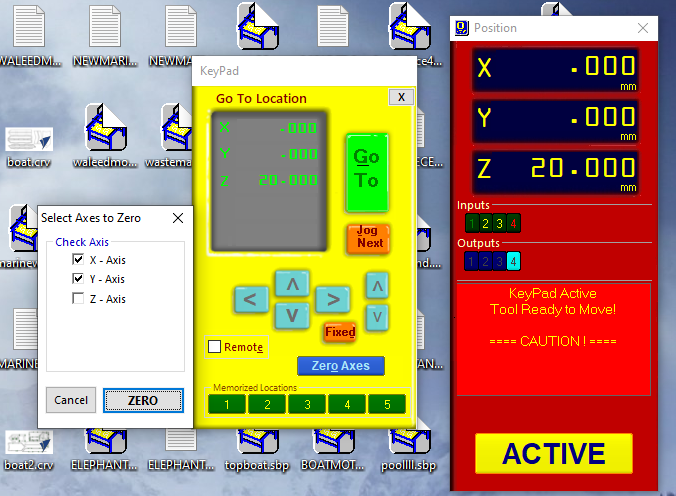
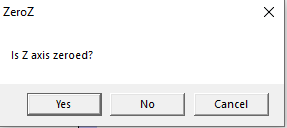
To home the Z axis, first use the software keypad to move the tool head to an accessible position, take the conductive plate out of its stowage area and place it on the bed, Z homing will pass a small current through the tool head to the leveling plate, once the tool head touches the level plate the electric circuit will be closed and the machine will record the Z position plus the level plate thickness to determine the Z axes zero point. it's important here to use the correct millbit to get an accurate zero level.
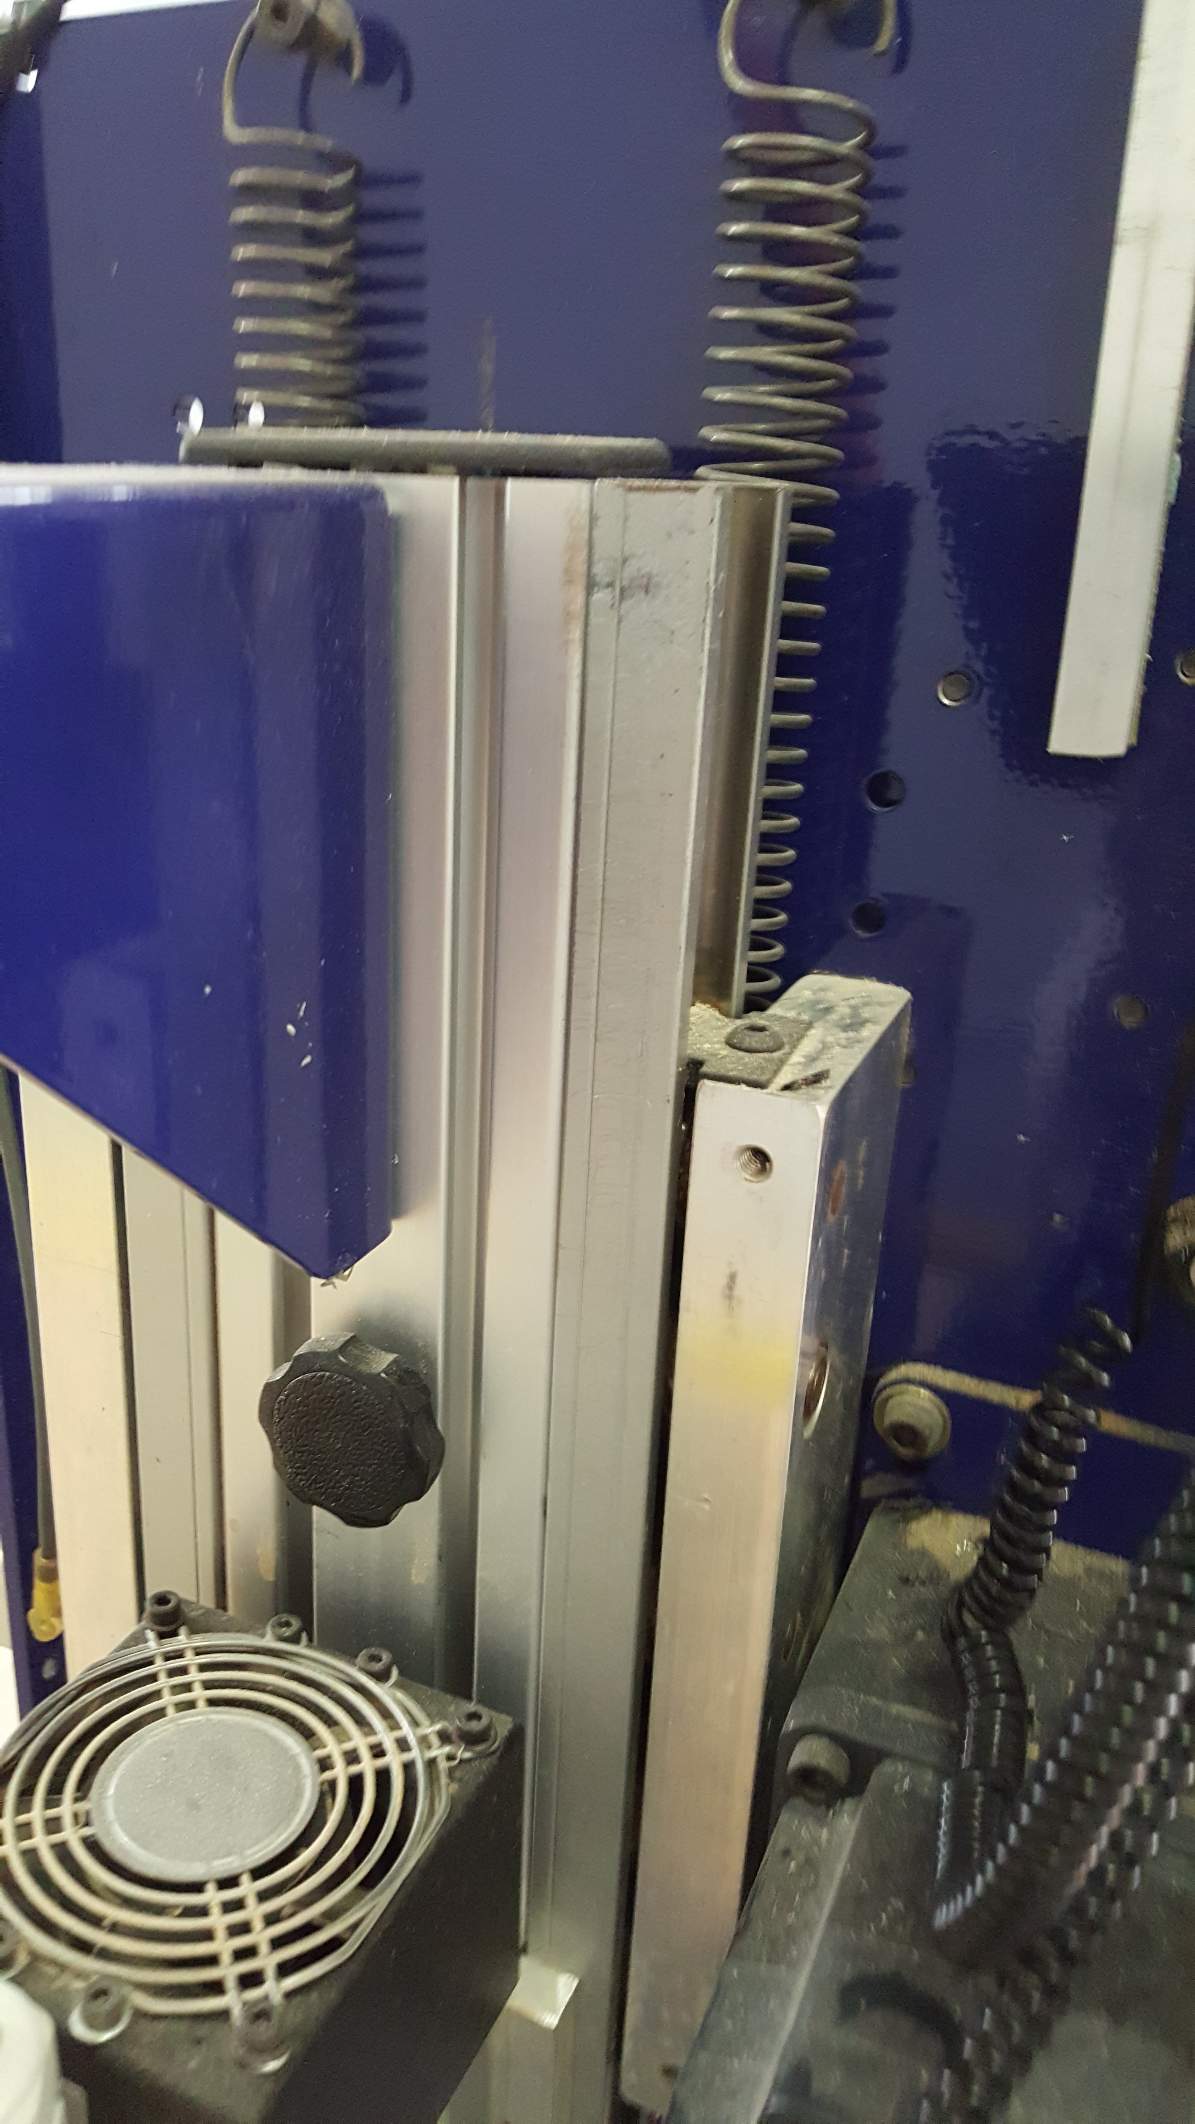
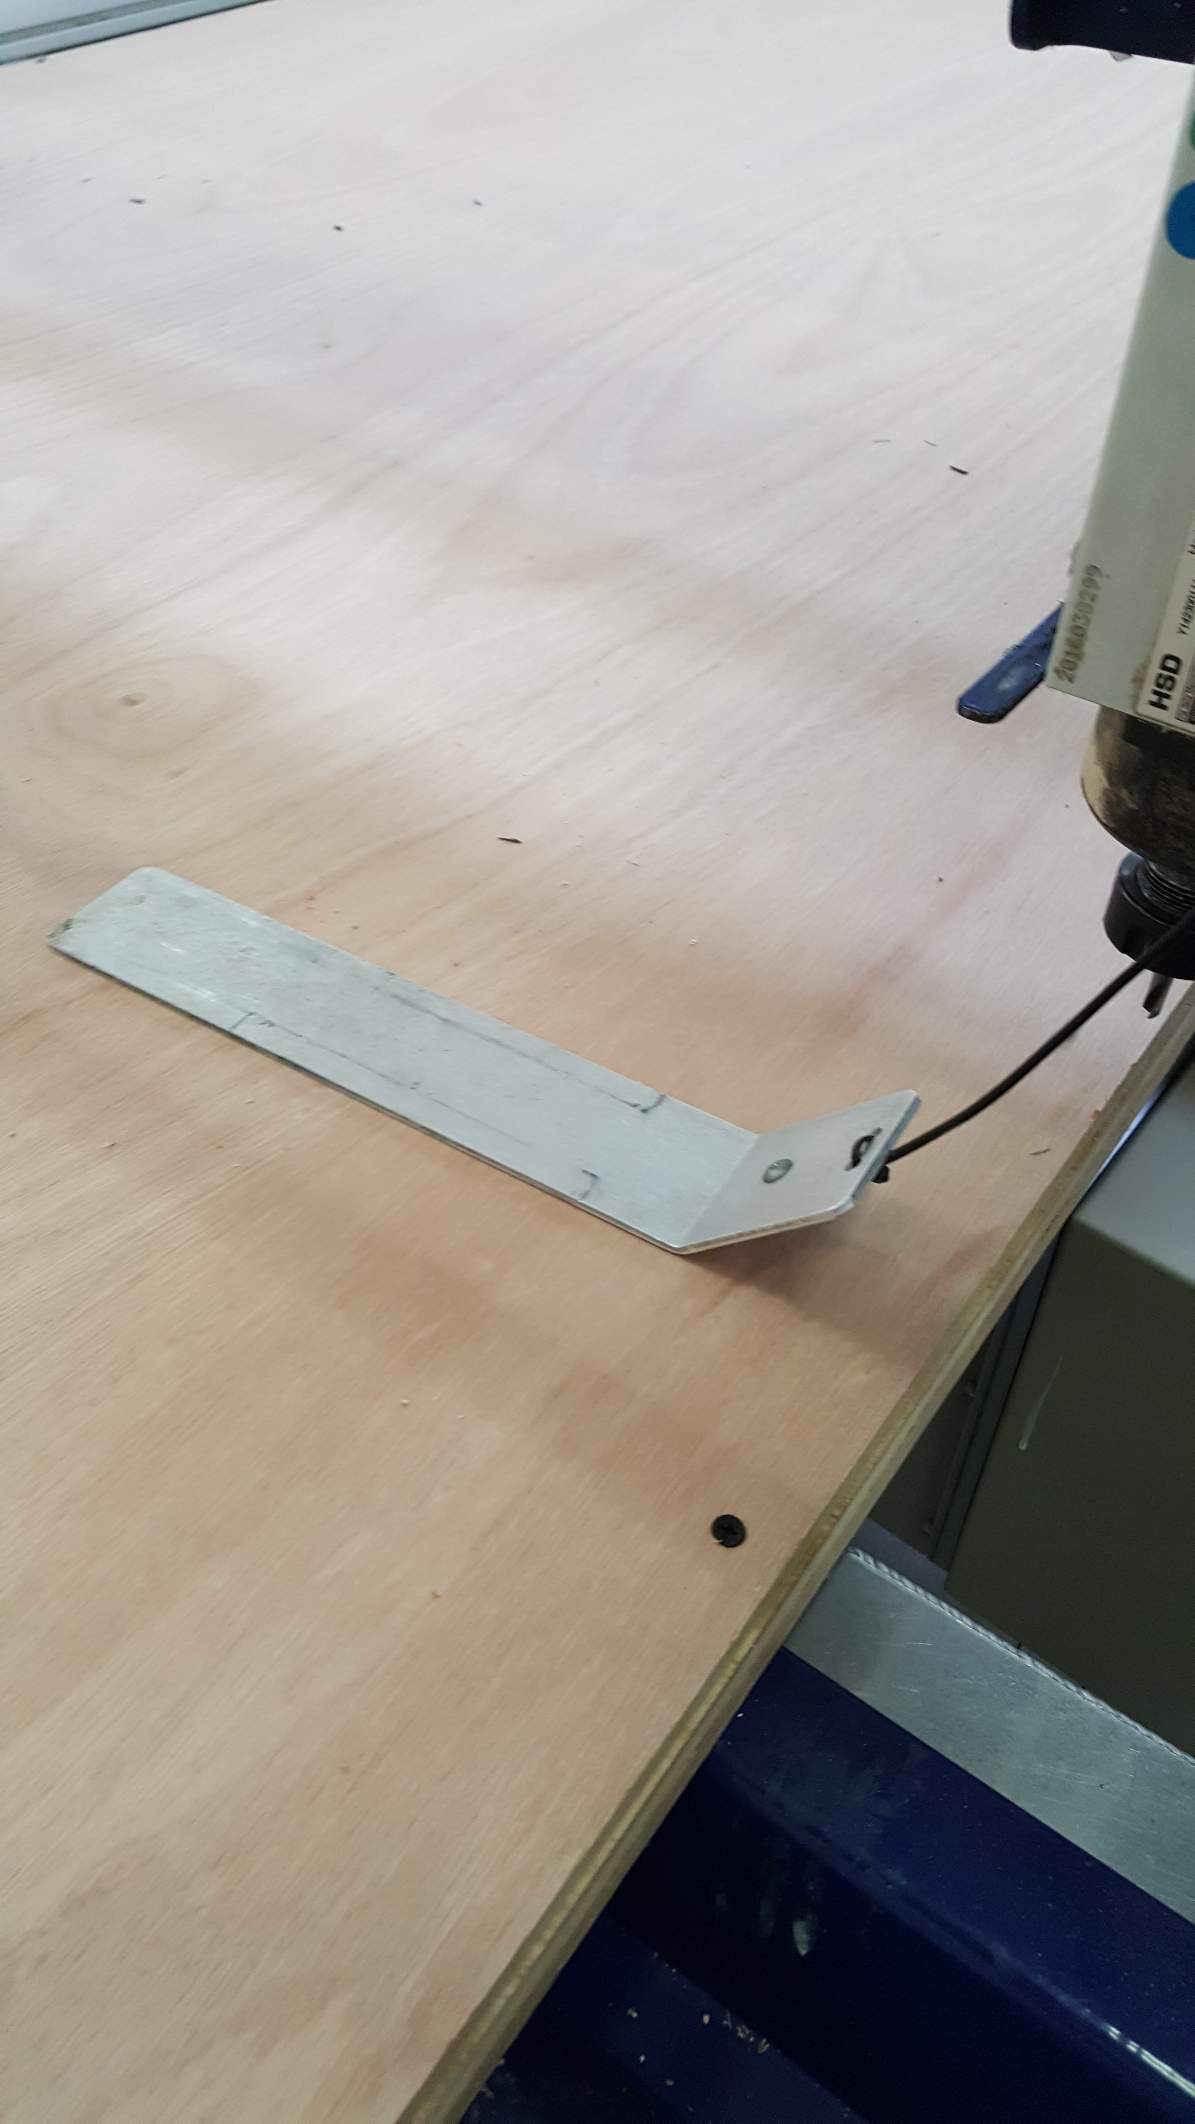
Take the alligator clip and hook it to a metal part in the machine to ground the electric connection.

Now on the ShopBot software zero the Z axis and the machine will lower until the tool head touches the plate, then it will do it a second time but more slowly, if the machine behave unexpectedly hit the red Stop button.
Now that all axes are leveled, stow the leveling plate, remove the alligator clip and connect it to a non conductive part of the machine and engage the spindle switch on the side panel.

Now the machine is ready to receive a job file from the connected PC, load up Vcarve and import your design, set the dogbone fillets and add the profile and pocket toolpaths. make sure to use tabs with the profile toolpath.
Make sure the tool paths are selected in the right order, pockets should be higher than profile so the machine starts with them first, save the file and Shopbot easy should detect it automatically.
To start the file, on shopBot Easy click cut part and select the work file generated by Vcarve.
The software will prompt you to make sure the correct tool is installed and Z axes is leveled.
Then it will ask you to start the spindle with the wired control panel.
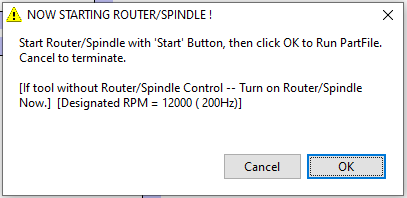
Once started and you hit ok in the software the machine swill begin to work on the design.
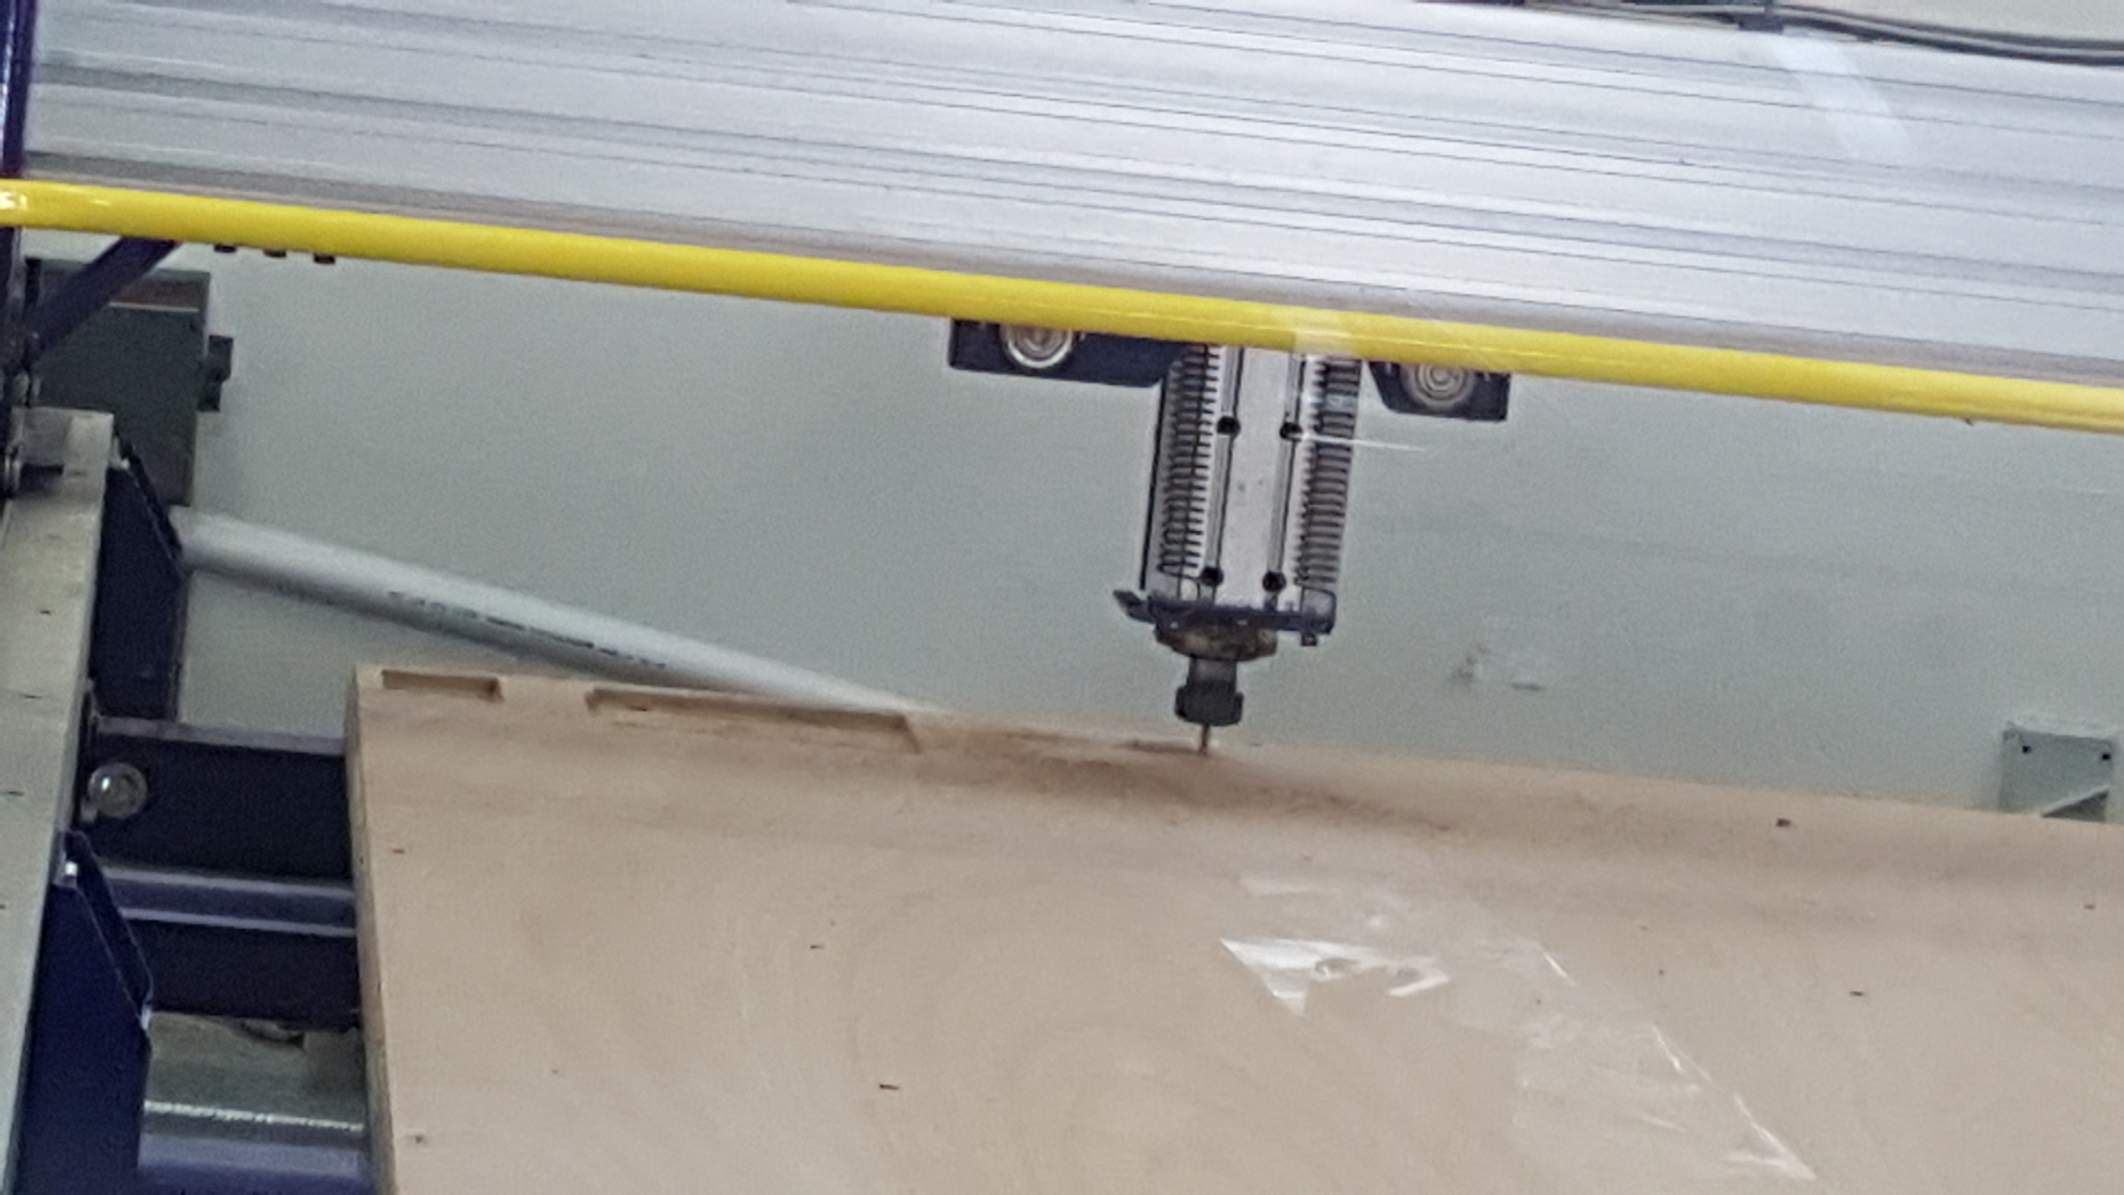
Use a vacuum cleaner to remove the saw dust and reveal the tabs so we can cut them.
Use a hammer and chisel to break the tabs.
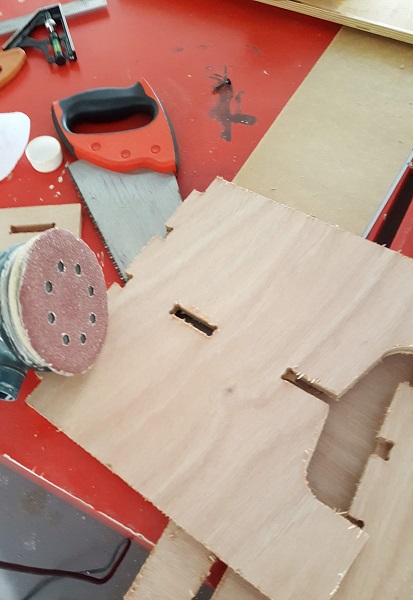
Extract the pieces and sand the edges.
Now assemble the bench.
Download