

The information contained in the safety data sheets is of the utmost importance since they will give us a guide on the use of each material, in addition to knowing about the risks we run by omitting these recommendations. The proportions of preparation of each material are the most important to have optimal results according to the manufacturer's instructions.
It is convenient to have a sampler with these material tests so that in future practices the other users of the laboratory have a visual example of how their project could look.
![]()
1. For my individual assignment this week I decided to make some pieces inspired by this Montessori model skill game. I'm thinking of including some similar elements in my final project, so this exercise was very helpful.

2. The first step was to model the pieces of the game, taking as reference the measurement of my modeling wax (2”x3”) and the diameter of my tool (0.0393701")
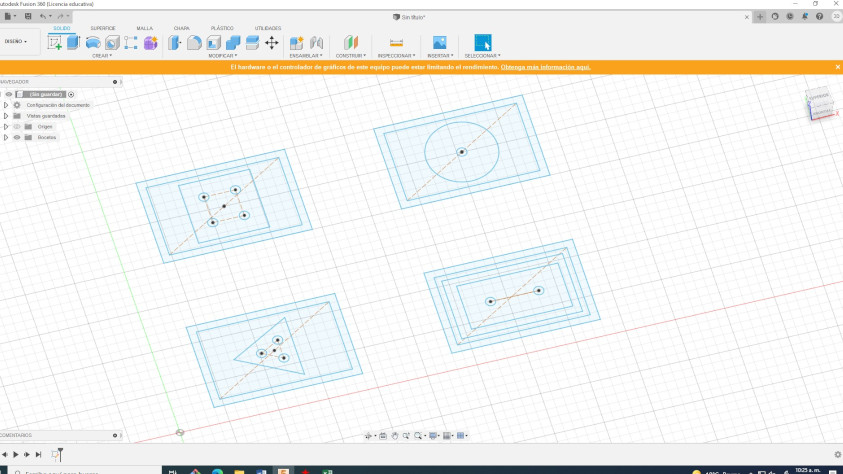
3. I decided to make some variations to the original design.
This is the material I decided to use as it's cheap and you can reuse the leftover material to cast a new block, that's awesome!
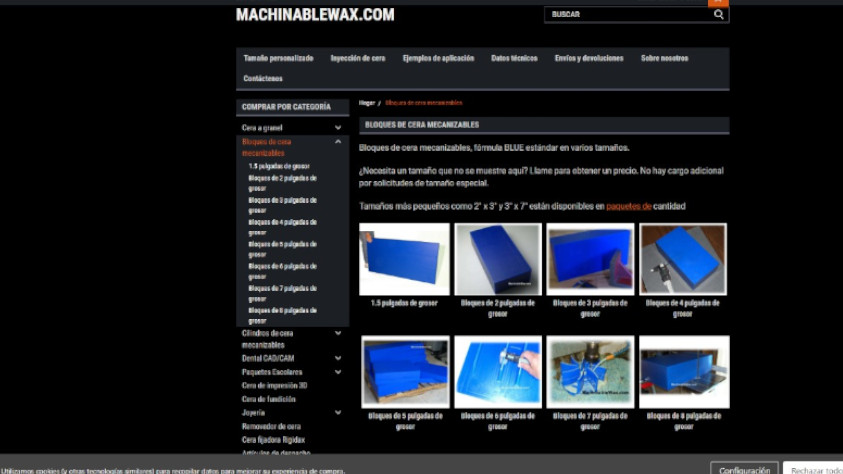
4.Machinable Wax Blocks
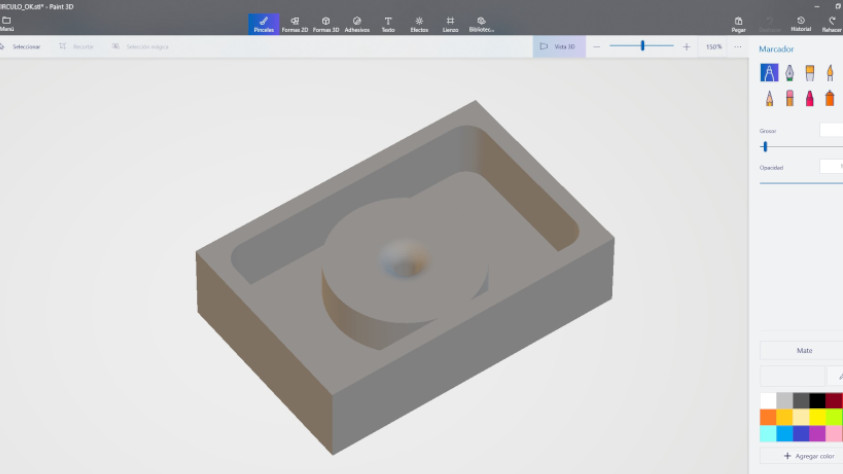
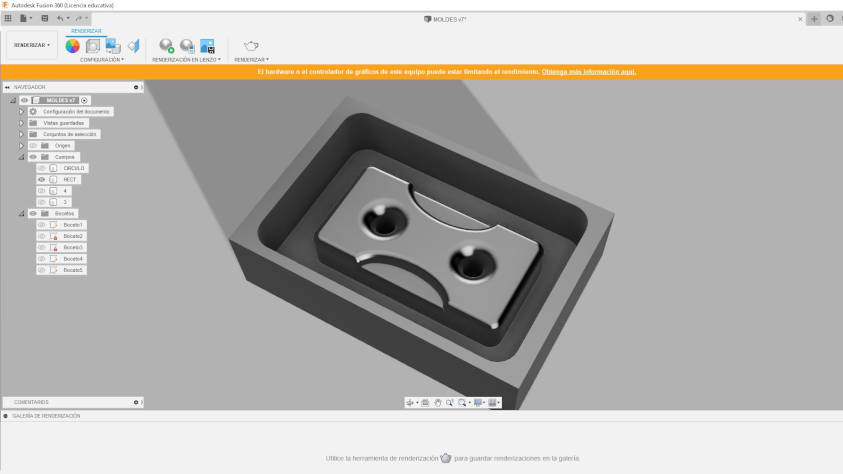
5. Once I finished designing the model, export it in STL format and preview it with Paint 3D
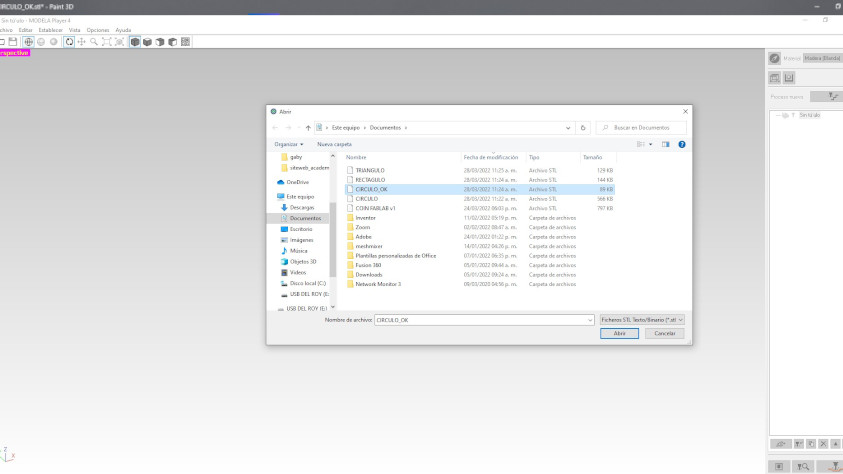
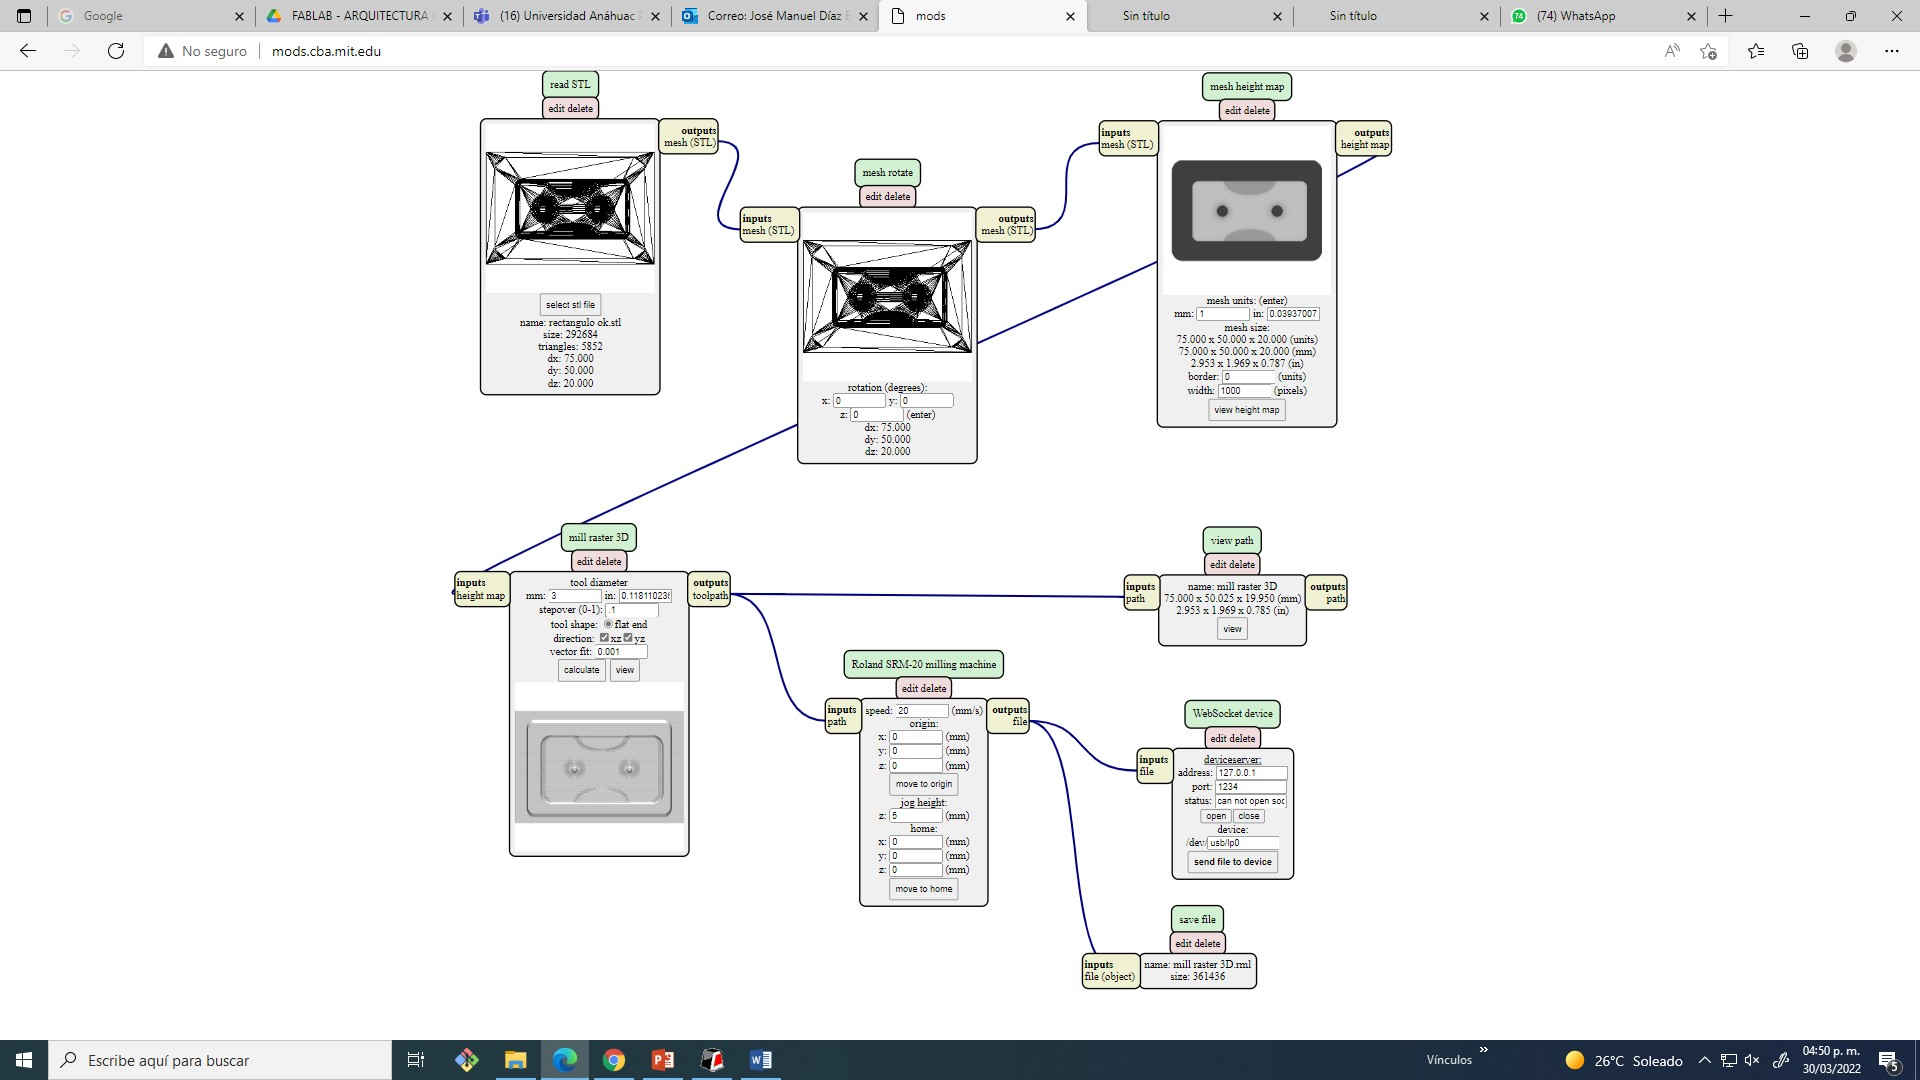
6. To generate the G code I decided to experiment with two softwares, first with Modela Player 4, the software from the manufacturer of the Roland Monofab SRM 20, and then with MODS since it seems to me to be a very useful tool for this process, in addition to the one that is can run from the internet browser is a nice plus.
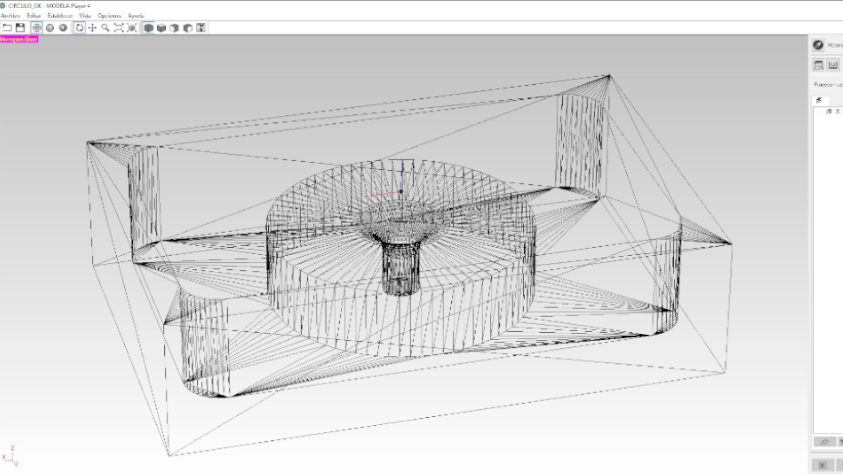
7. In modela, the first step is to open our STL file, first it will show it in a kind of mesh that delimits the geometry of the piece, if you want to change the view you can use the icons found under the menu bar. (spheres)
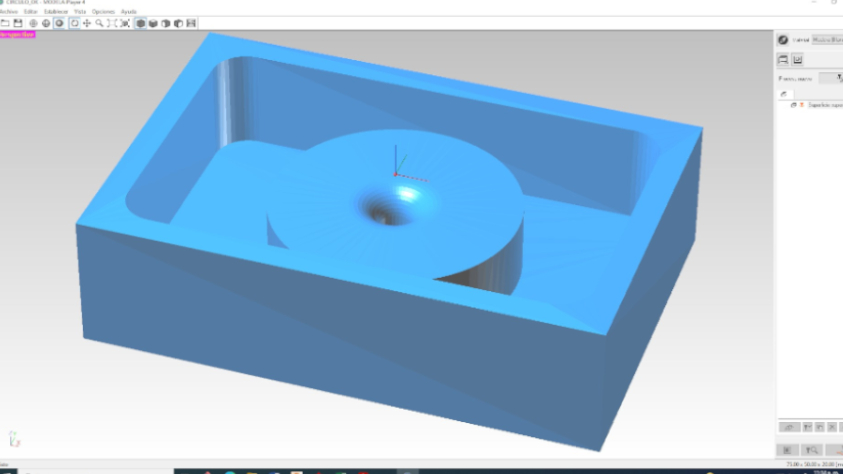
8. This render view is a bit more user friendly and helps us verify if our model was exported and imported correctly.

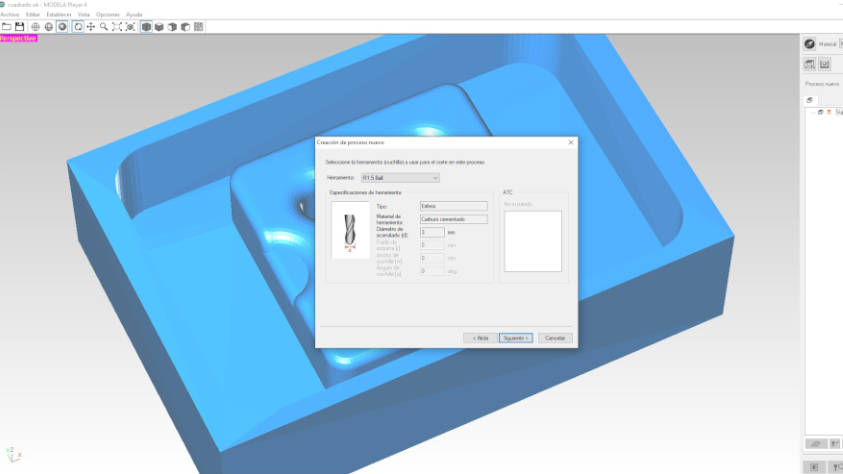
9. Then in the upper left part we have the configuration panel here we can select the material that we are going to process, create new cutting processes and manage the configurations.
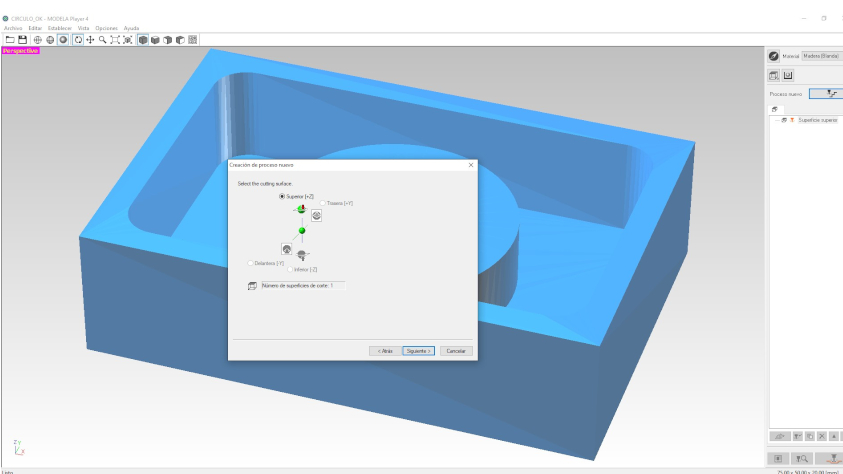
10. Once we click on the new process button we must choose the cutting surface, the user manual recommends always using the upper face (Z)
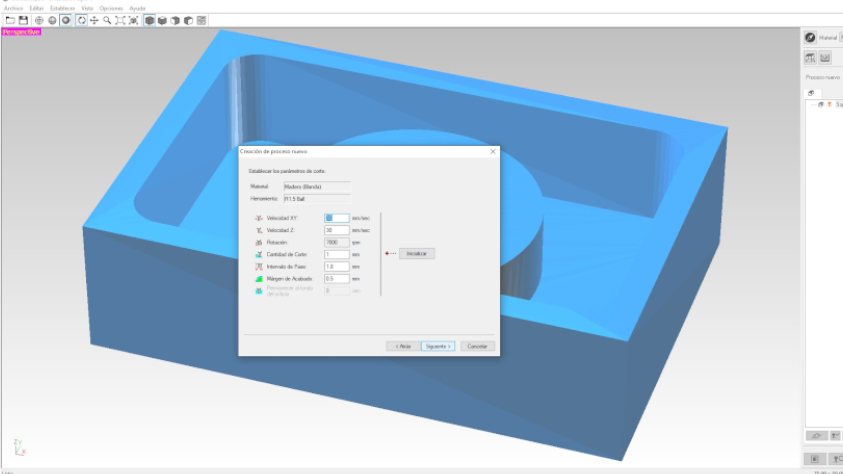
11. I selected the tool to use, this together with the chosen material generated the ideal cutting parameters for this process.
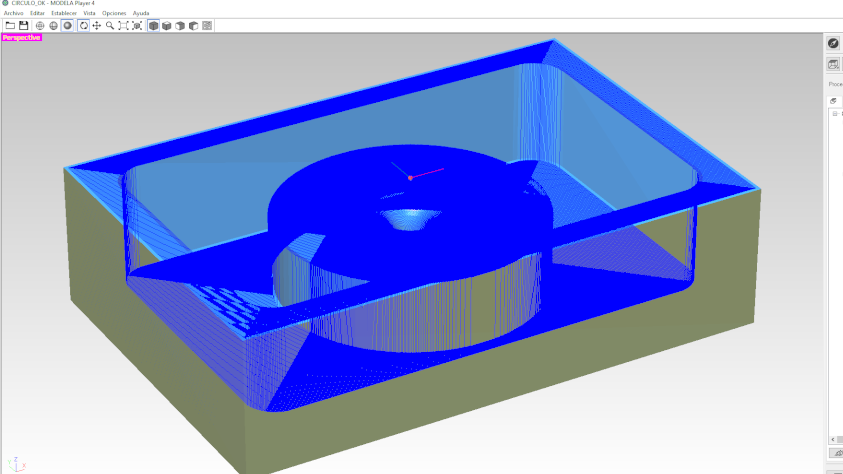
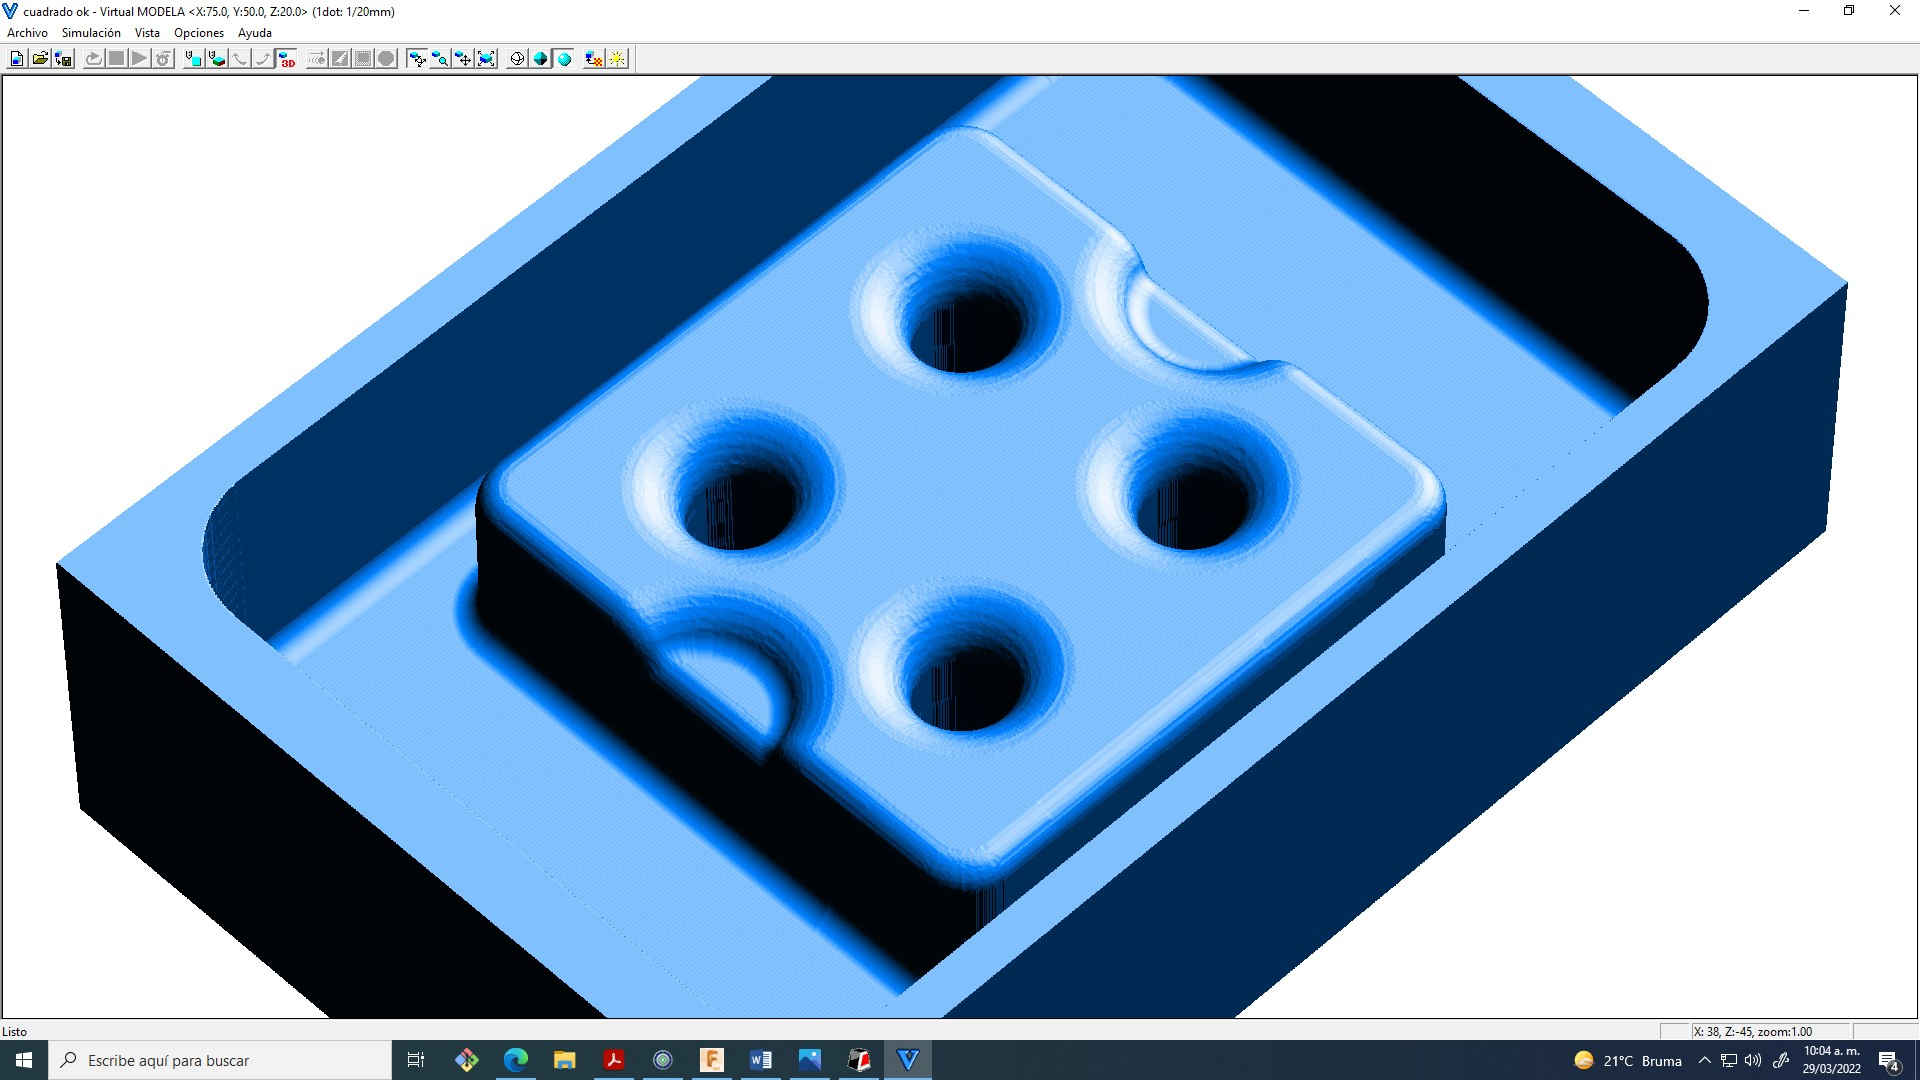
12. This software works together with Virtual Modela, where we can preview our project once we have configured each process. To access this view you must click on the Process Preview button.
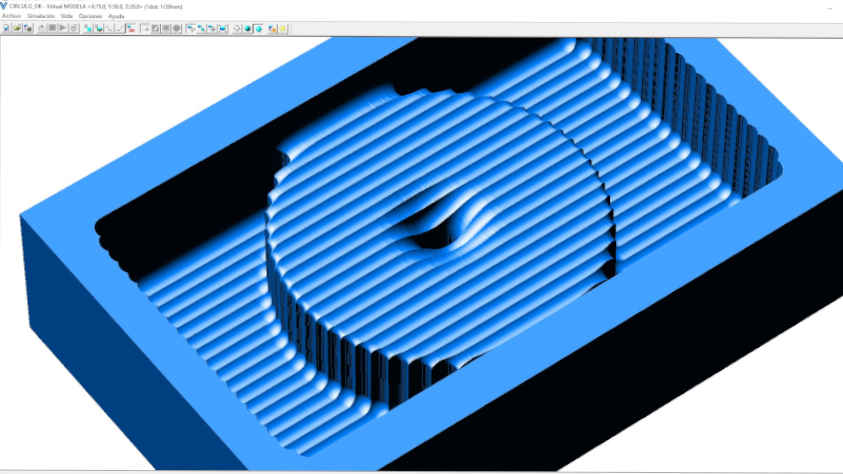
13. The first process should be roughing, here a large amount of low quality material is removed, the result was as follows:
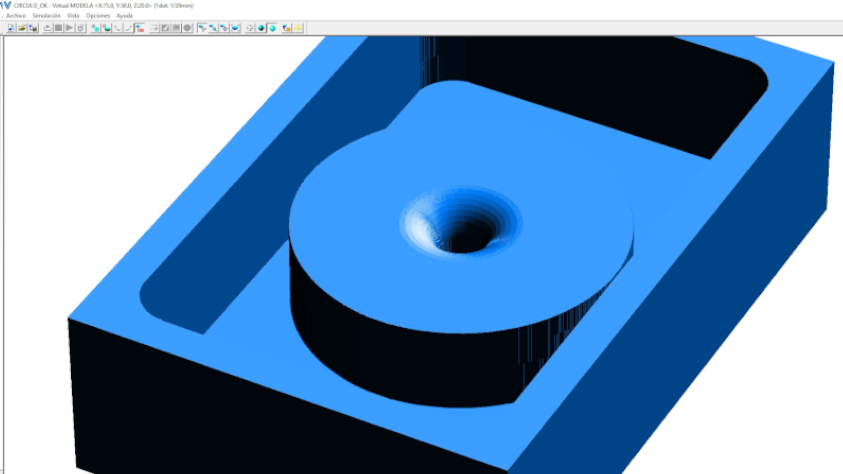
14. Later I generated a new process, this time a finishing process to give the last details to the piece, the result of the simulation was the following:
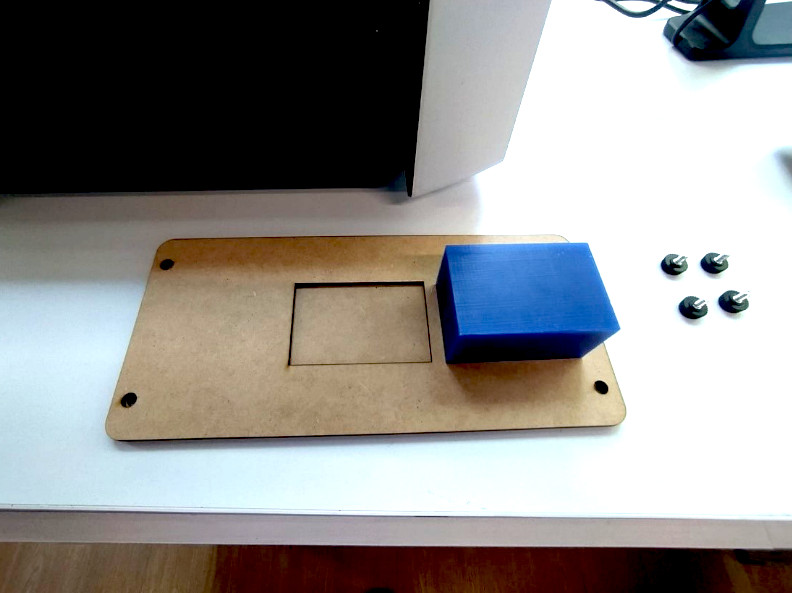
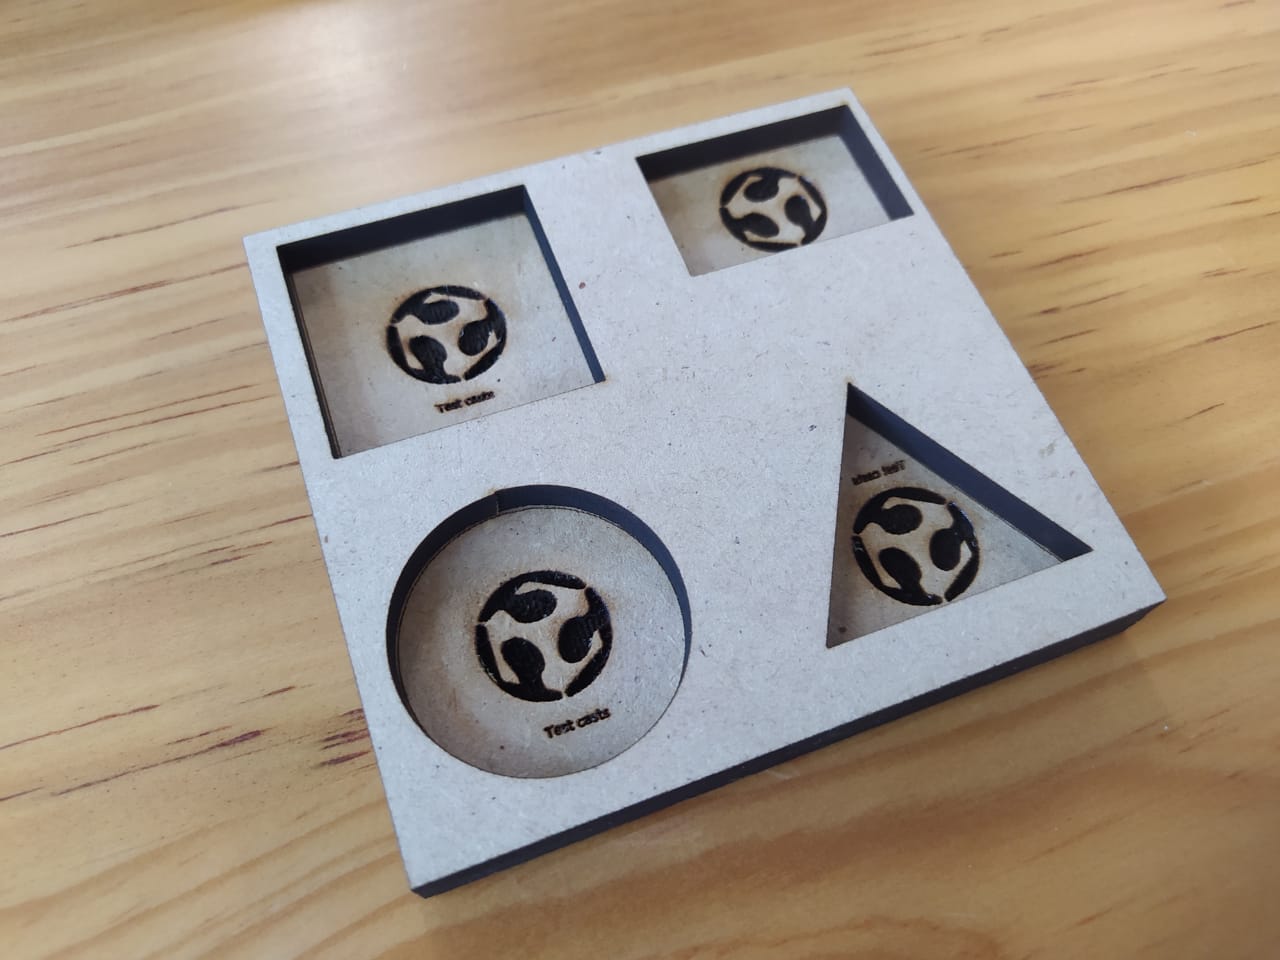
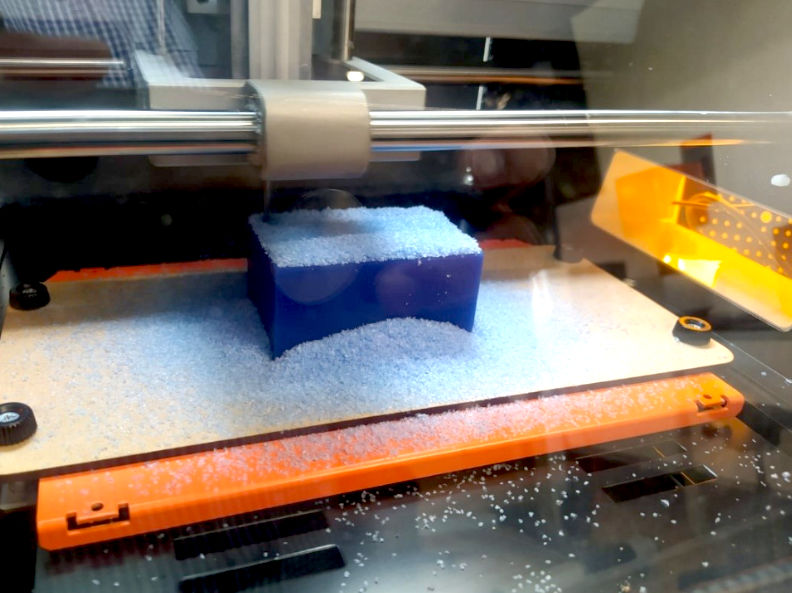
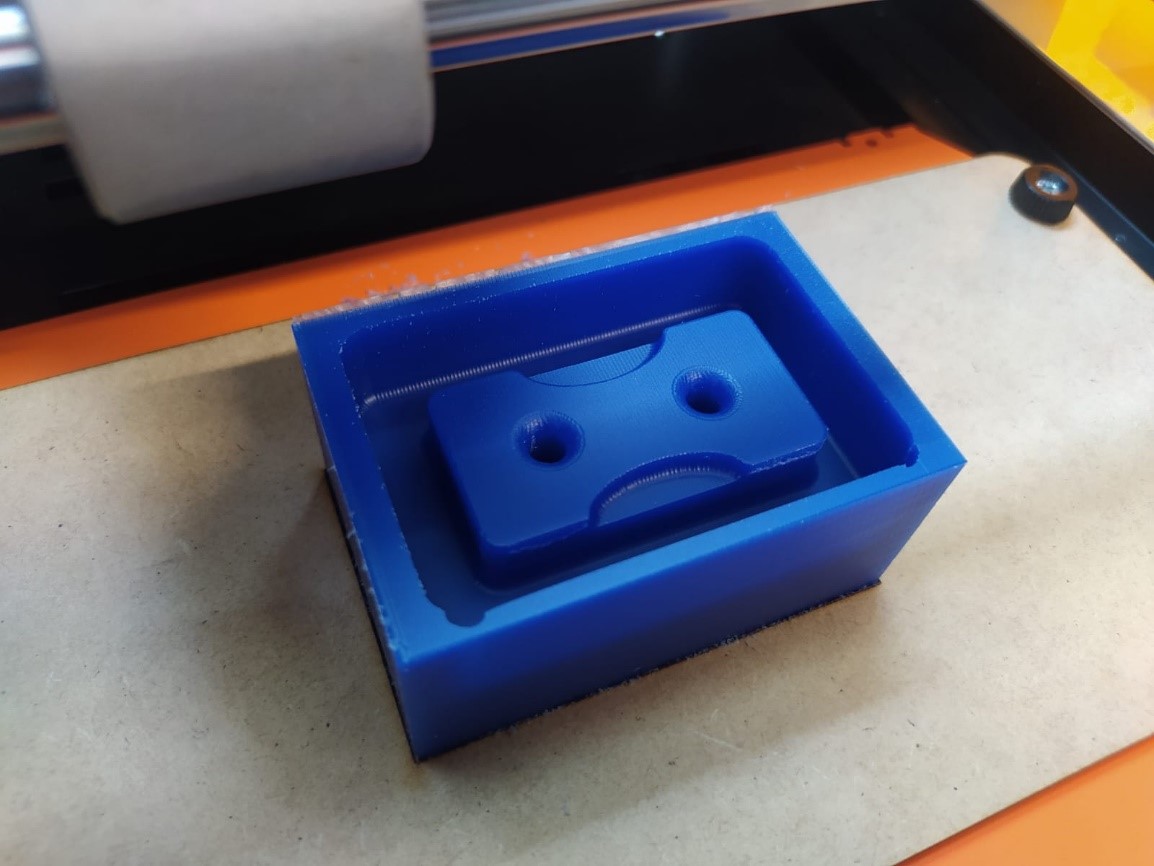
15. To fix my wax block I decided to create a template in MDF, which I made with laser cutting, since one of my greatest fears is that the piece will lift due to the force of the tool, I think that the adhesive tape may not be enough. This is how the part was mounted on the machine

16. Now if the action started, from “Modela” I sent the court order and supervised hoping that everything would turn out well, but….
17. A catastrophe happened, once the roughing process was finished, the tool wanted to go through the entire joint between the circle and the wall and evidently collapsed. Which leaves me with a great lesson, to avoid this type of joint from the roughing process, so I went back to Fusion and modified the distance between elements.
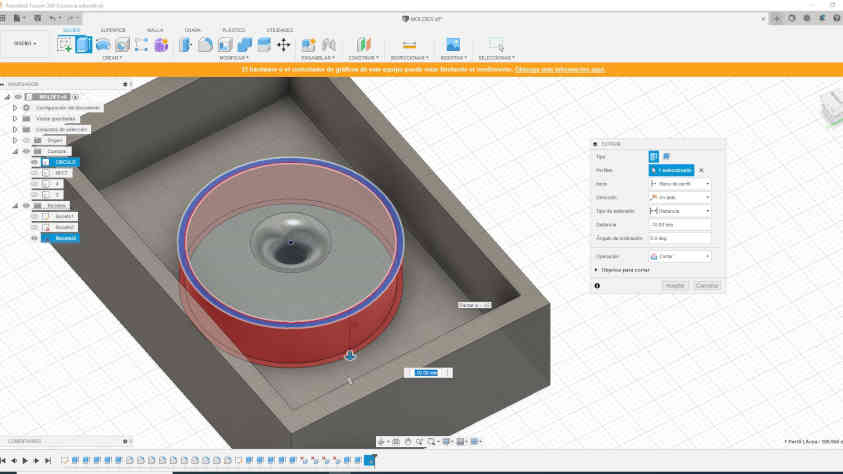
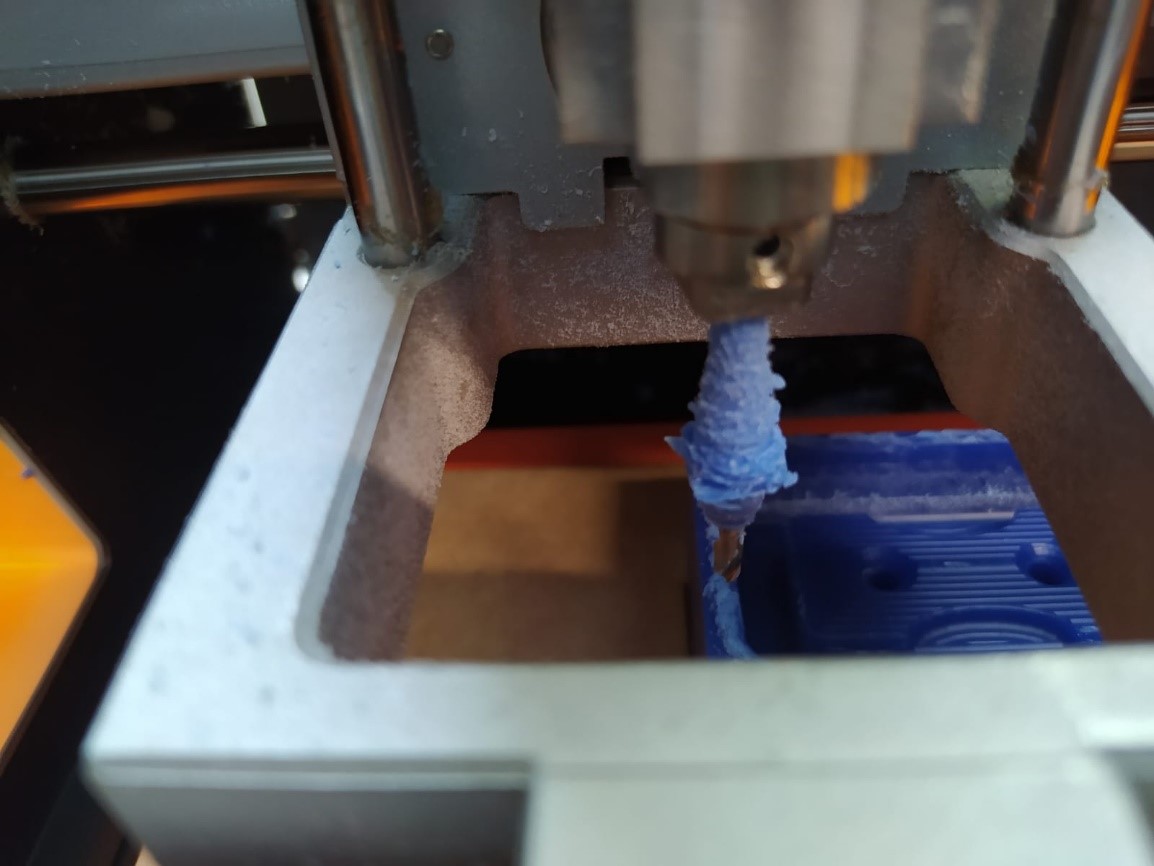
18. By the way, make some additional variants to the original design, the result was the following.
![]()
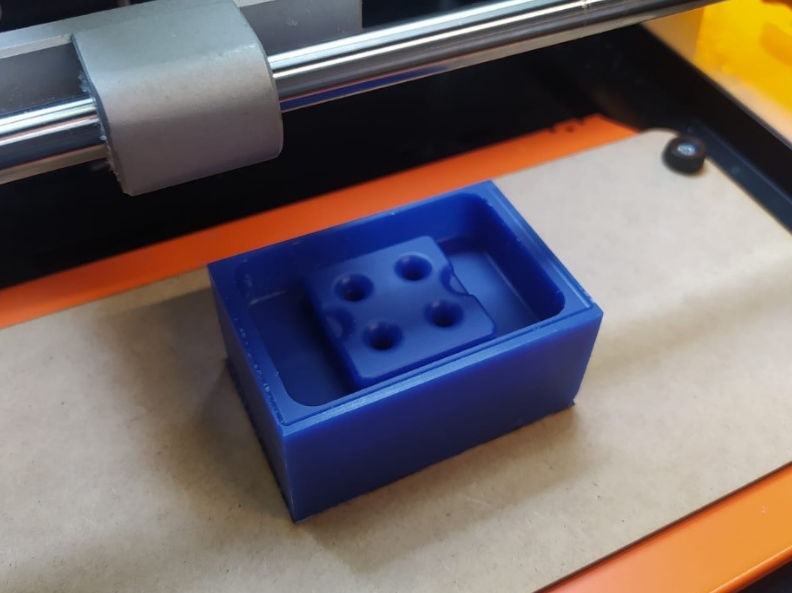
19. I repeated the machining of the parts hoping that the results would be better than the first attempt and… The second manufacturing attempt was successful!

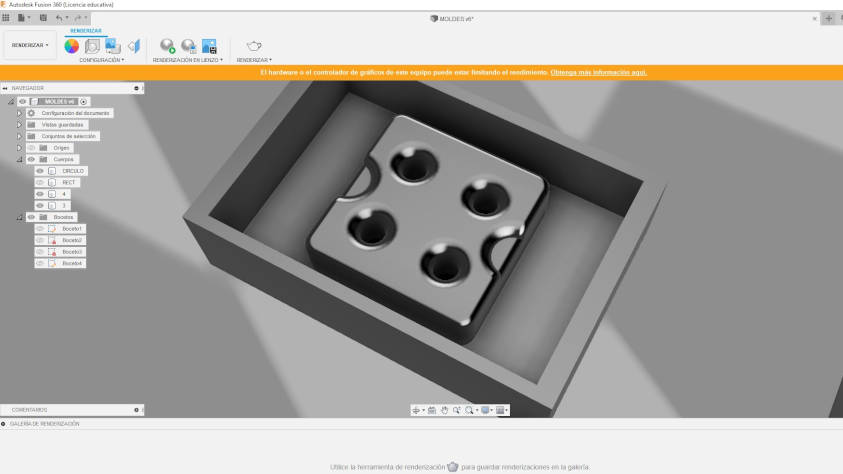
20. Once I was on the run, I continued with the second piece to see if I had already 100% characterized the process from Modela, the results were very satisfactory.

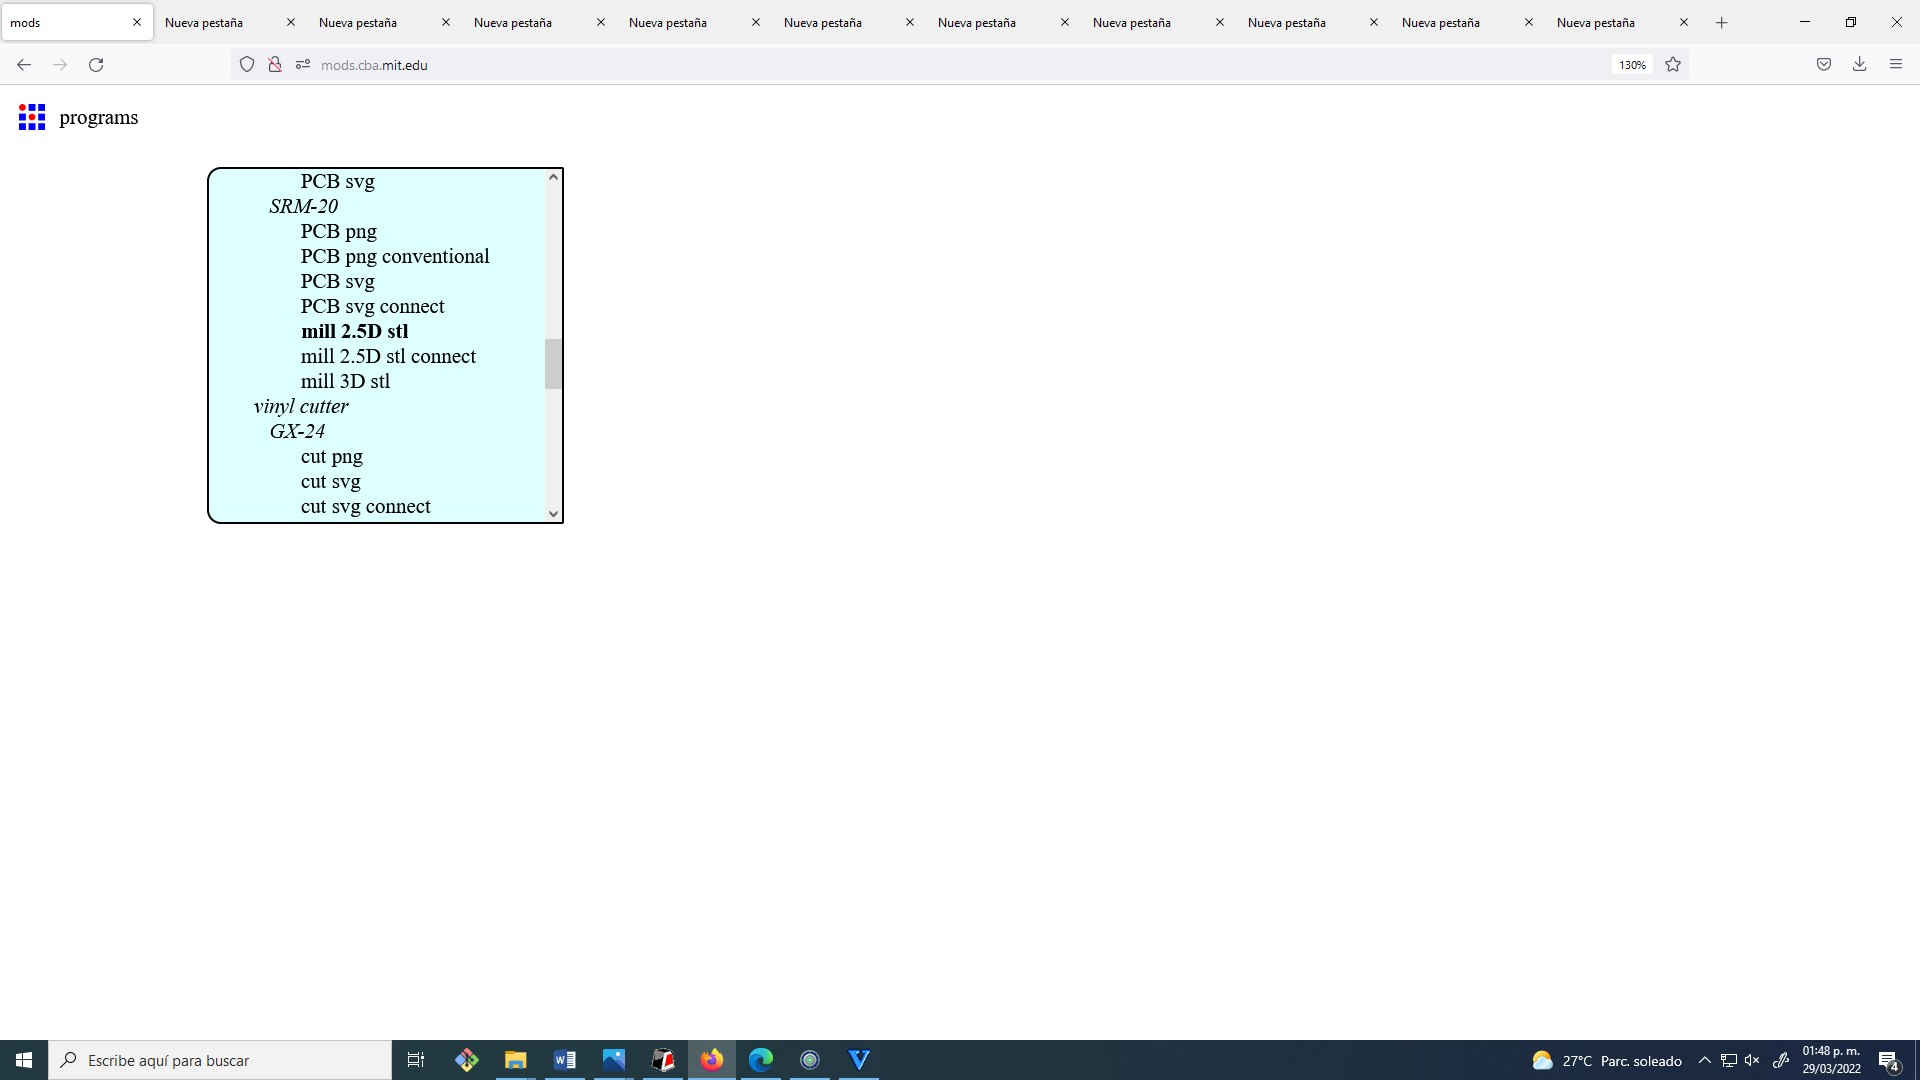
21. I finally experimented with the last piece, now in MODS.
This was the configuration I used.
http://mods.cba.mit.edu/
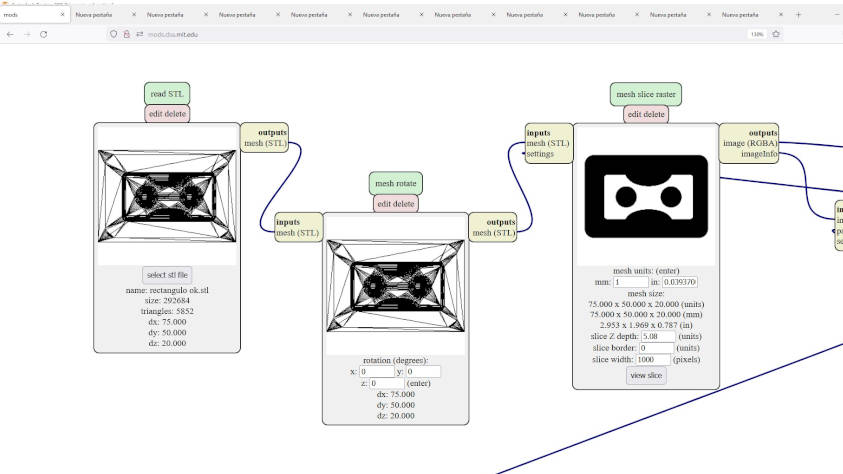
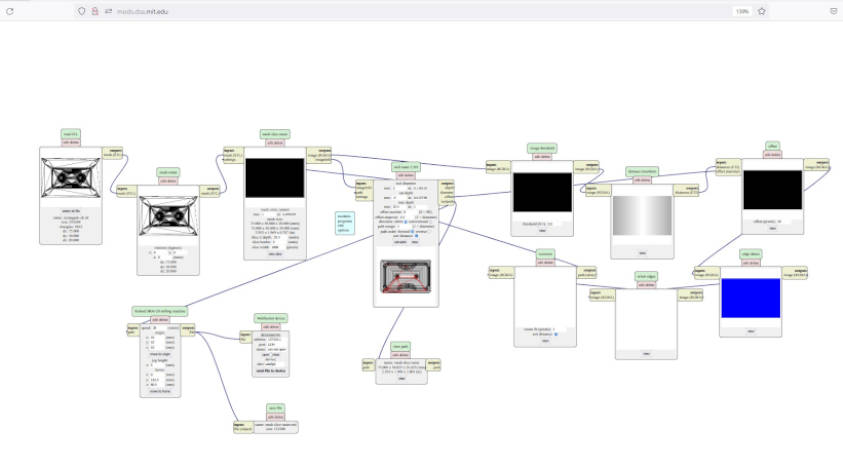
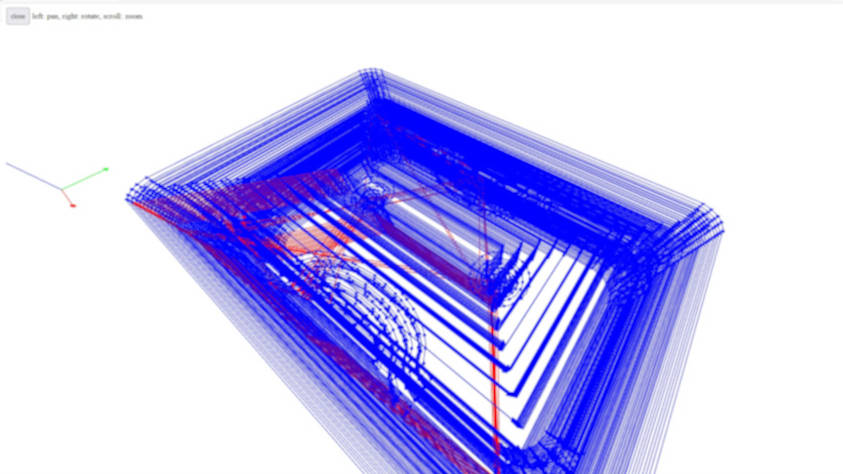
21.1 The roughing looks pretty good, the only thing that worried me a little was the wax buildup on the tool, but I took it apart and removed the excess with tweezers, then calibrated again and ran the finishing process.
This is the settings I used in MODS for the 3D cut
The end result was the following:
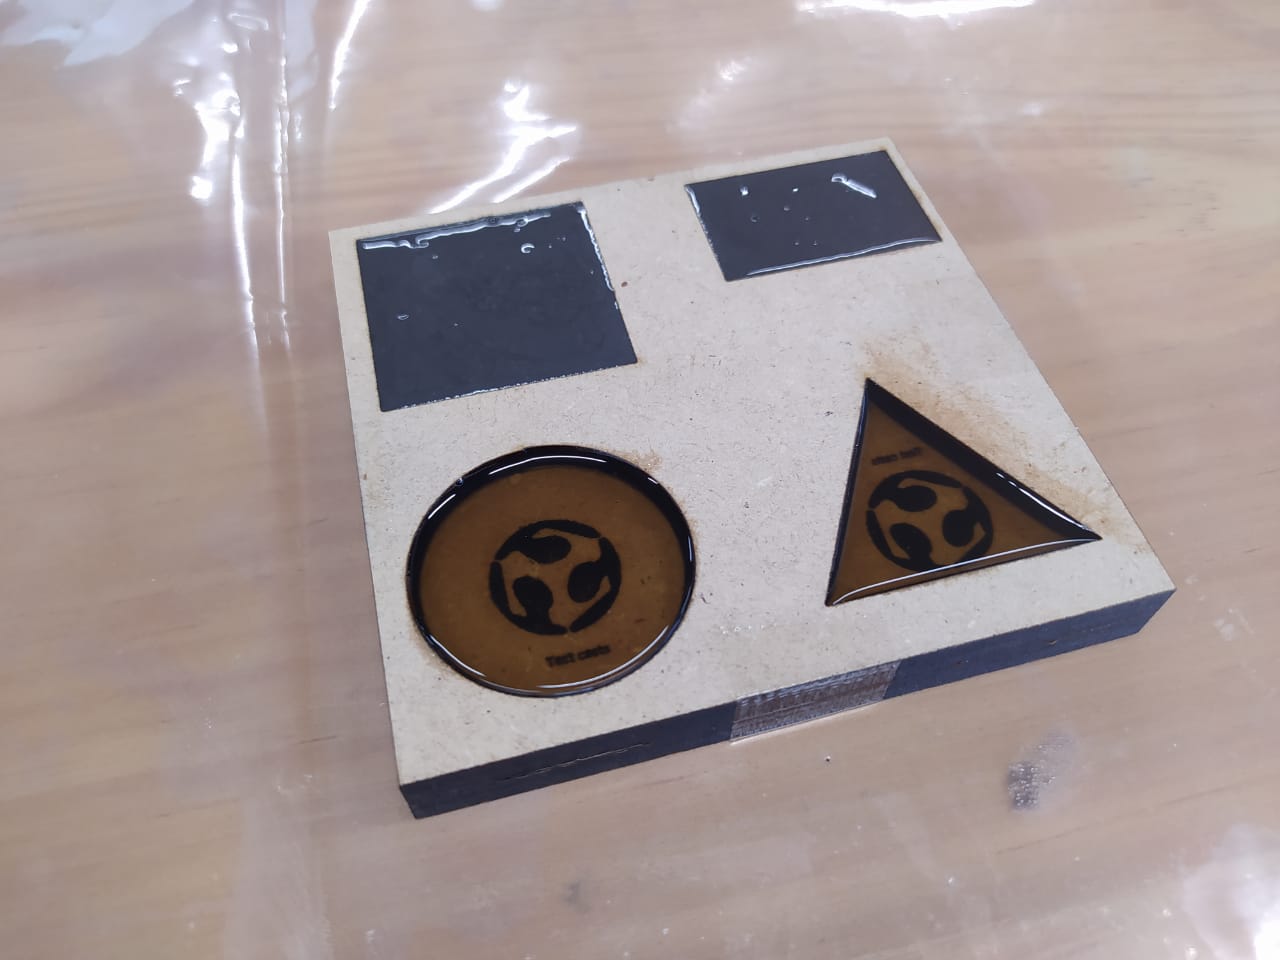
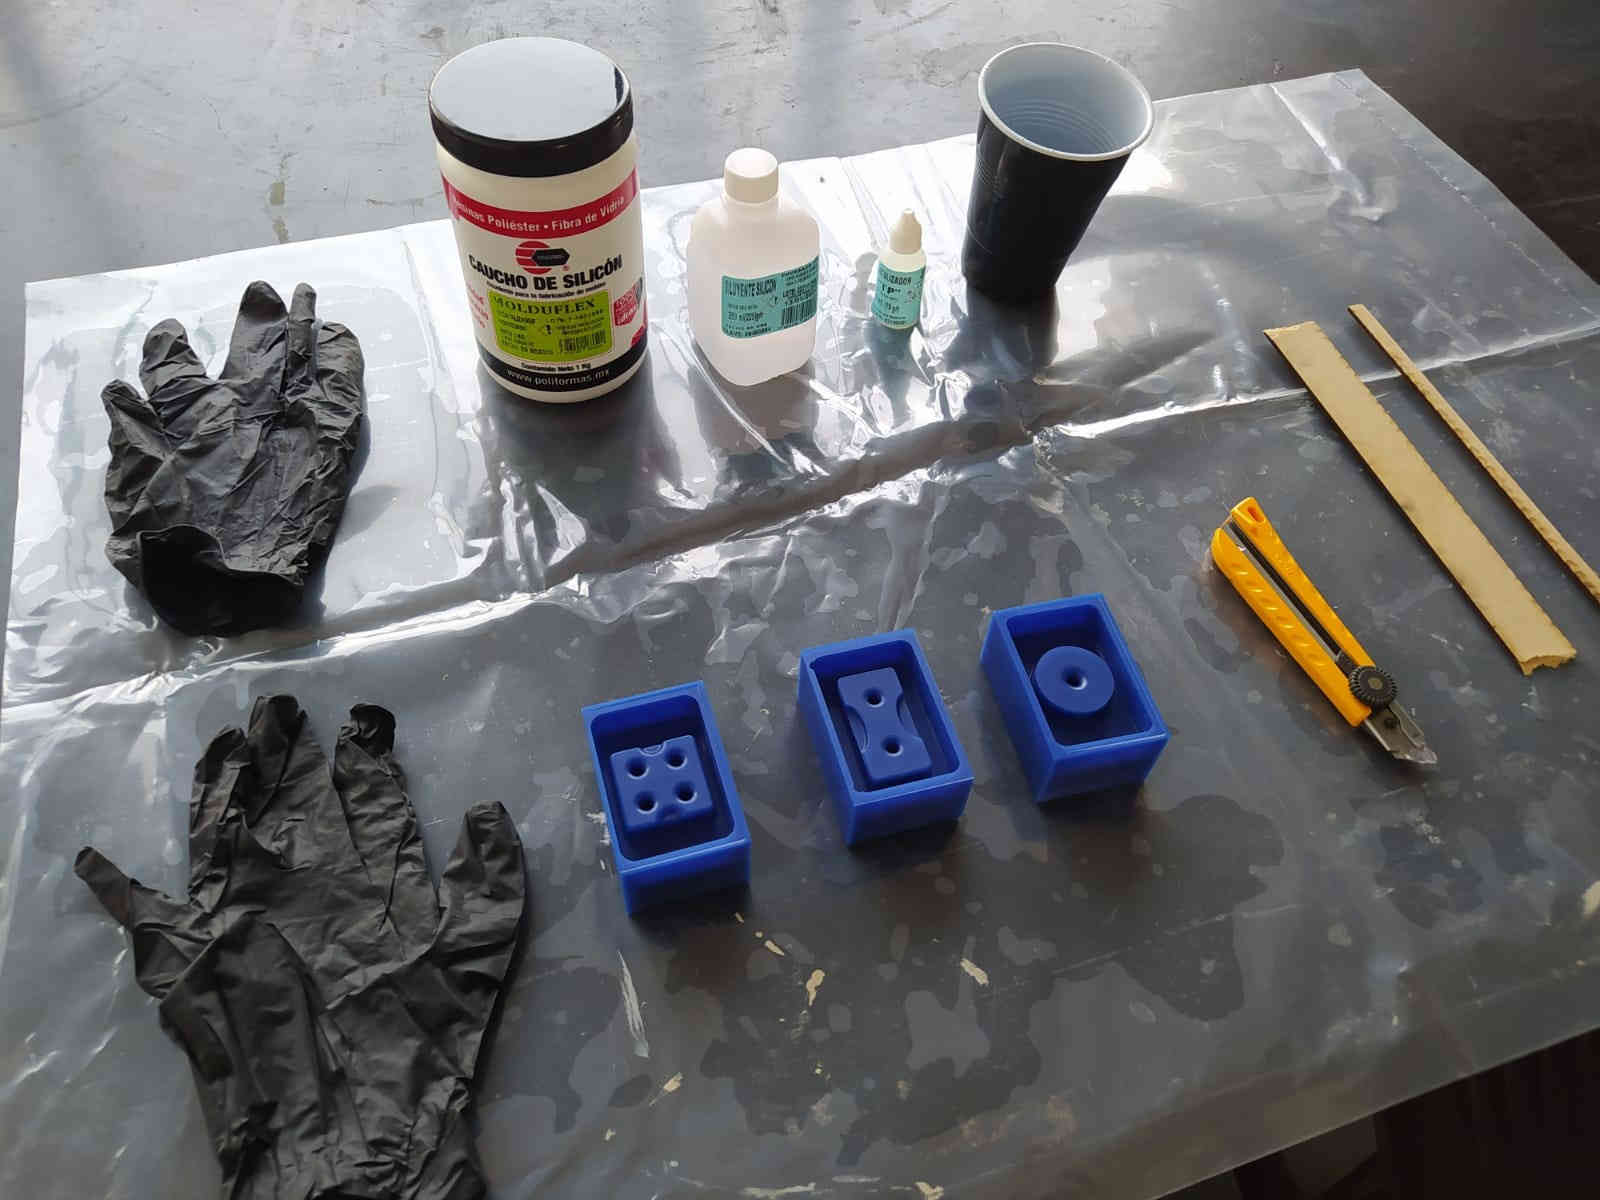
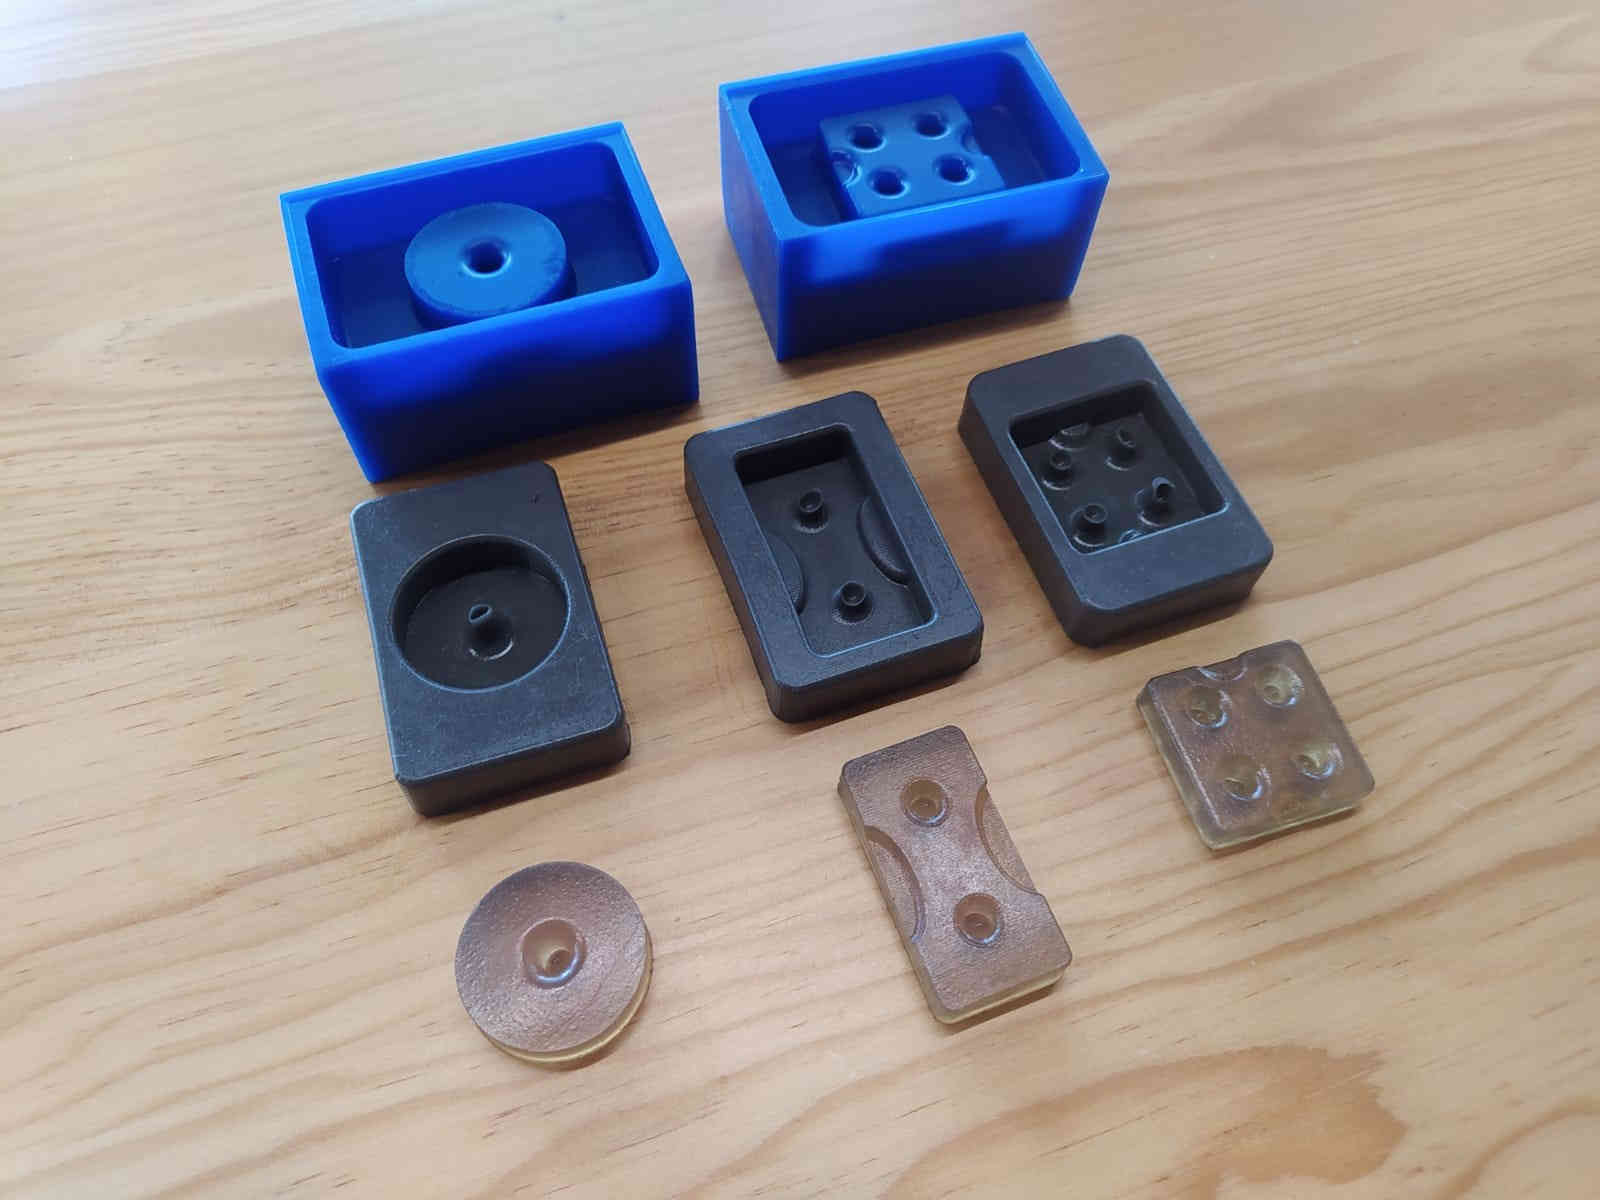
22. Now it is time to make the Silicon mold with Molduflex, for this step I used the recommendations of the safety data sheets that I analyzed in the group assignment.
These are the materials I use for this process.

23. After I prepared my work space, I put a protective plastic to avoid accidents with the materials.
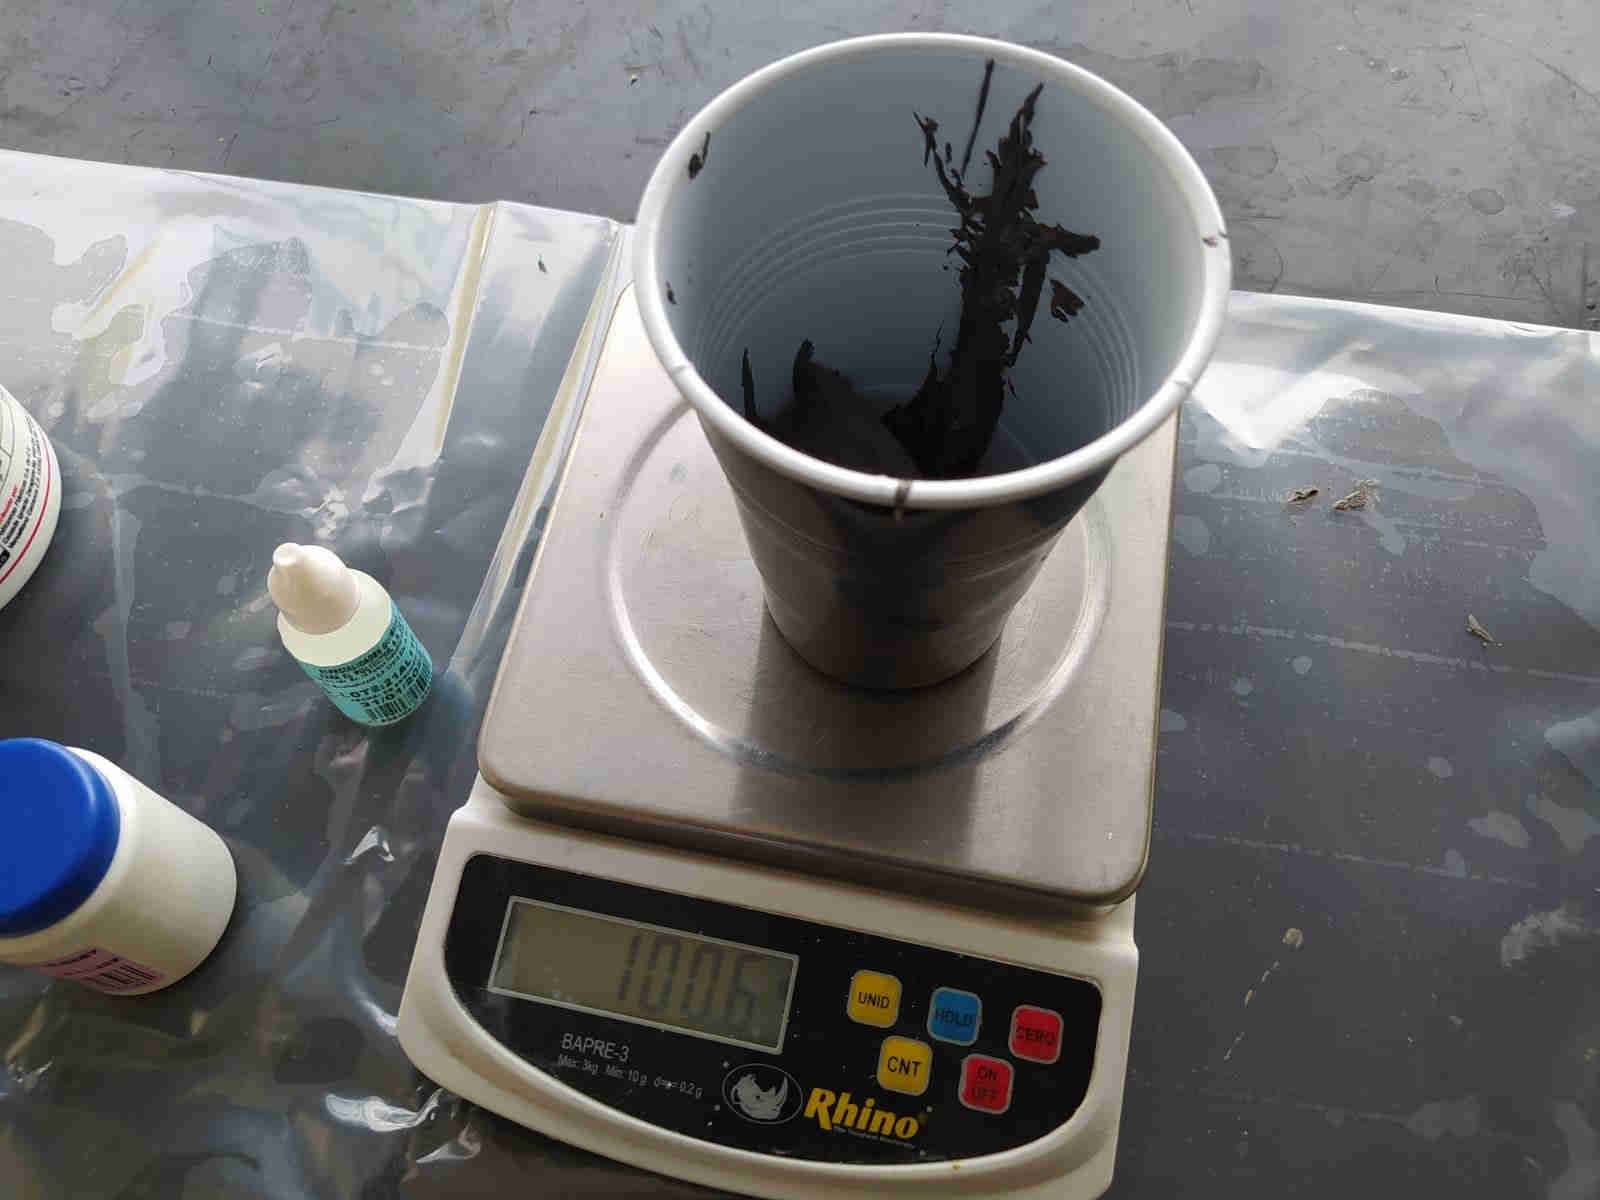
24. Once the workspace was ready, the first step was to make an approximation of the material to be used, for this use some of the techniques most used by Academy students, fill it with water and increase it by 15% due to the waste that is wasted at the time of pouring.
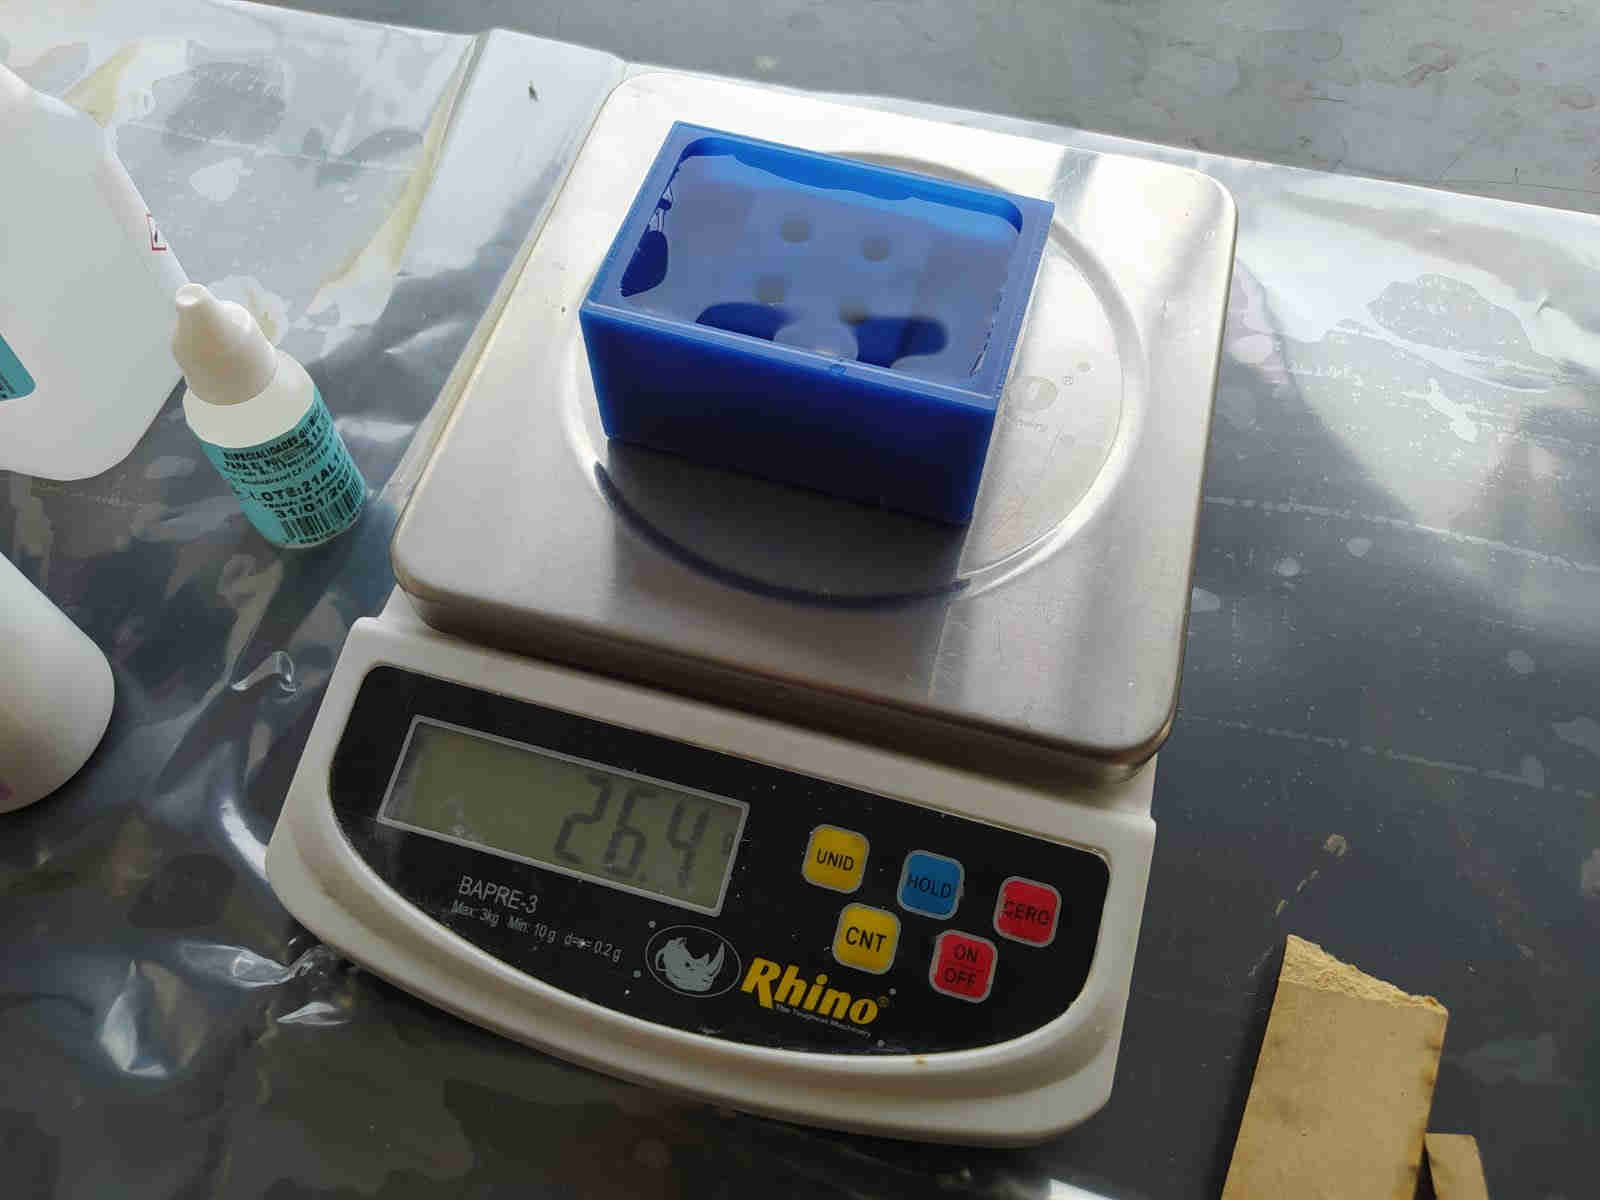
25. One recommendation that I can give you is that, if it is your first time using these materials, prepare individual proportions for each mold since if you prepare for all 3 (in my case) possibly when you empty the last mold the silicone has already started its solidification process and the result is not optimal.
Proportions:
• 100gr of Molduflex.
• 50% silicone thinner
• 80 drops of TP catalyst
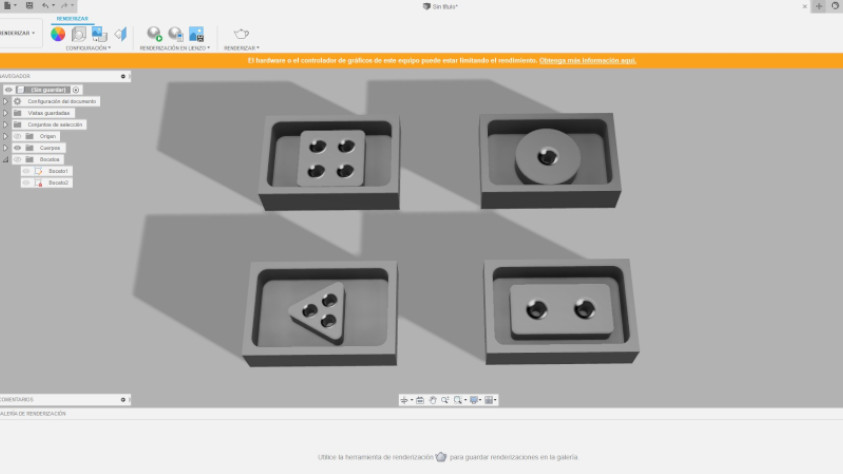
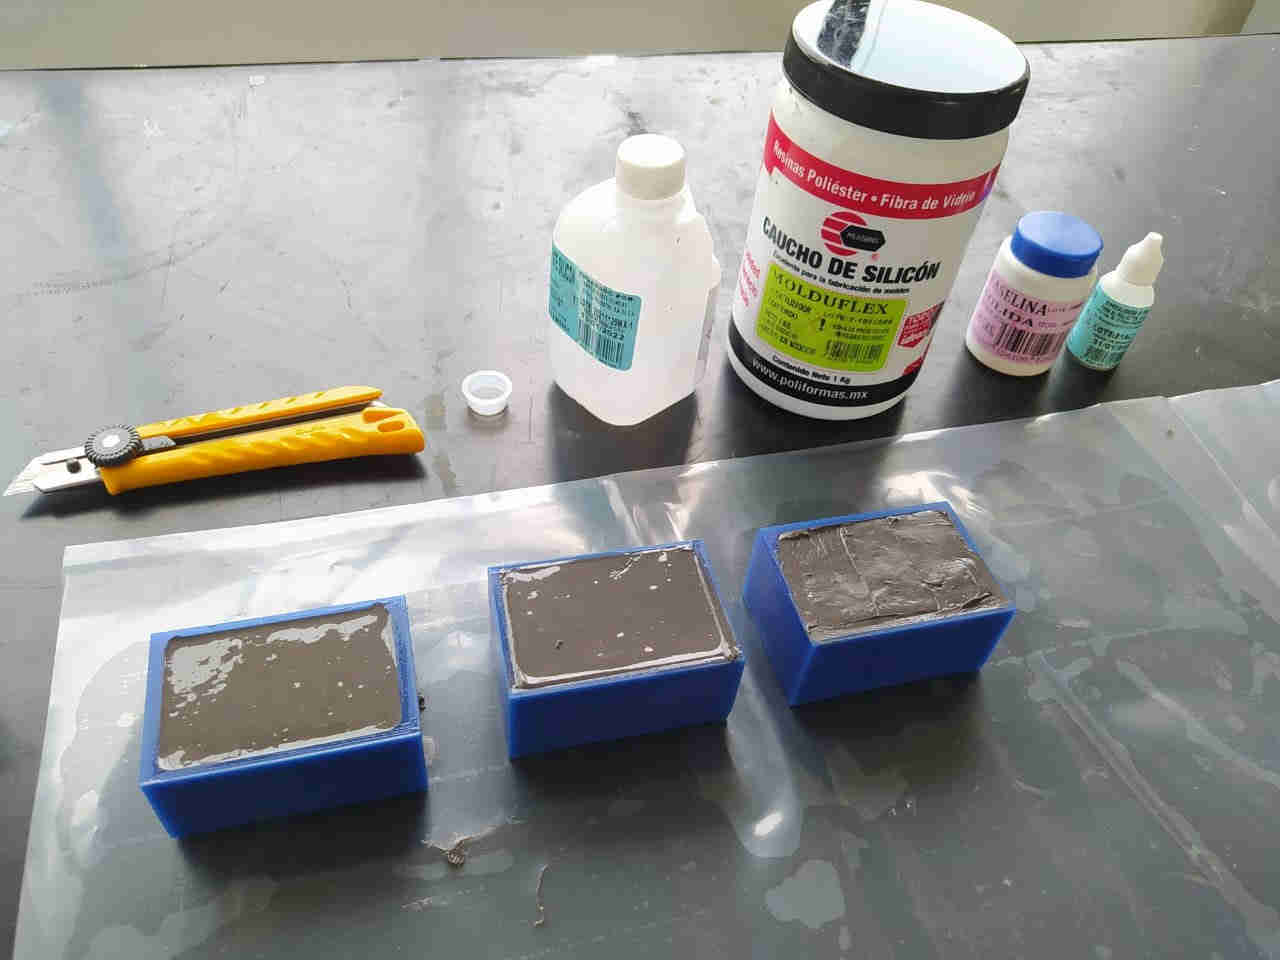
26. Here the comparison between models.
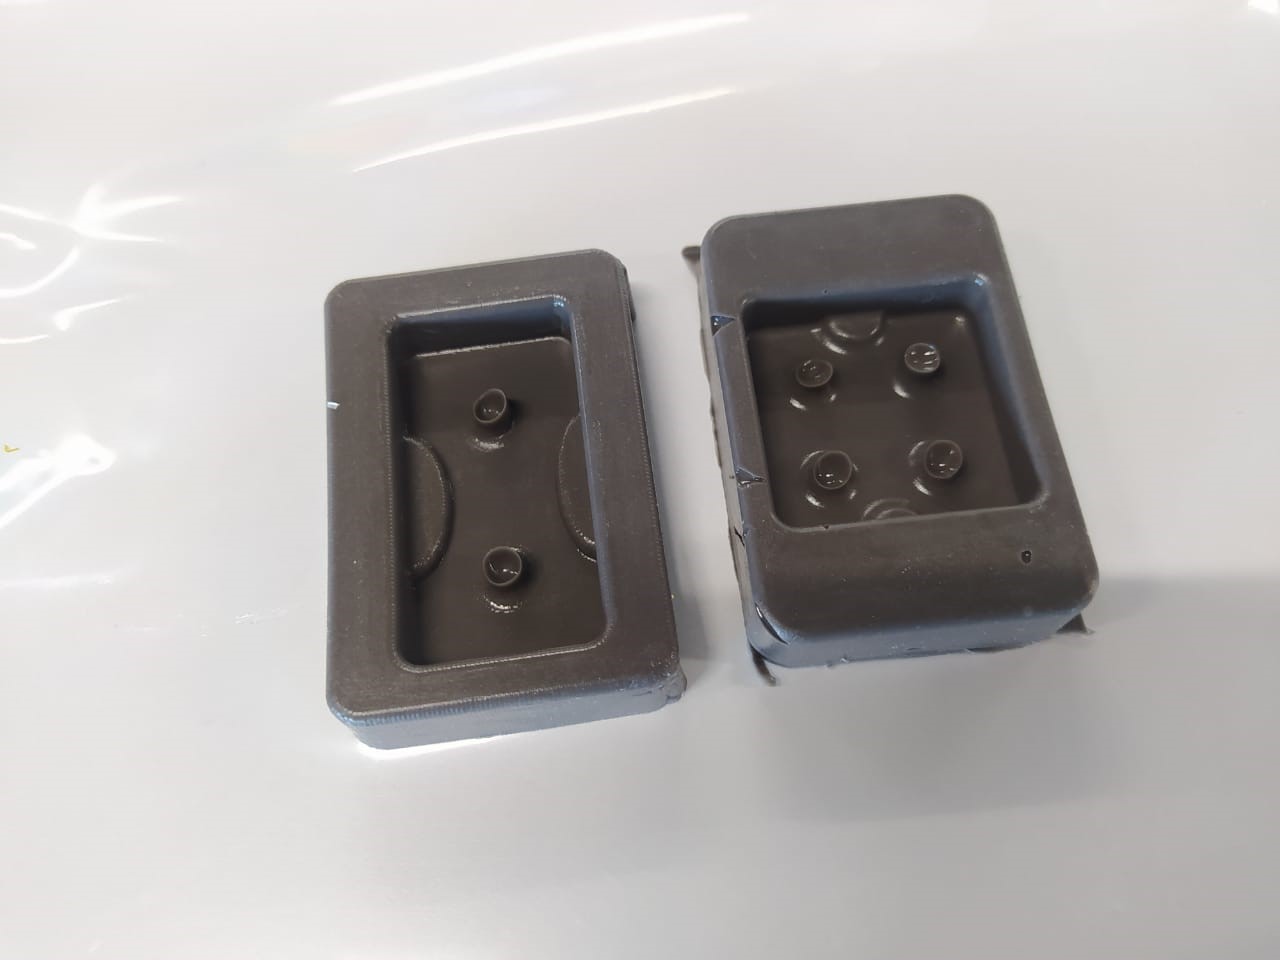
27. After this little mistake, I repeated the process preparing individual servings for each model.
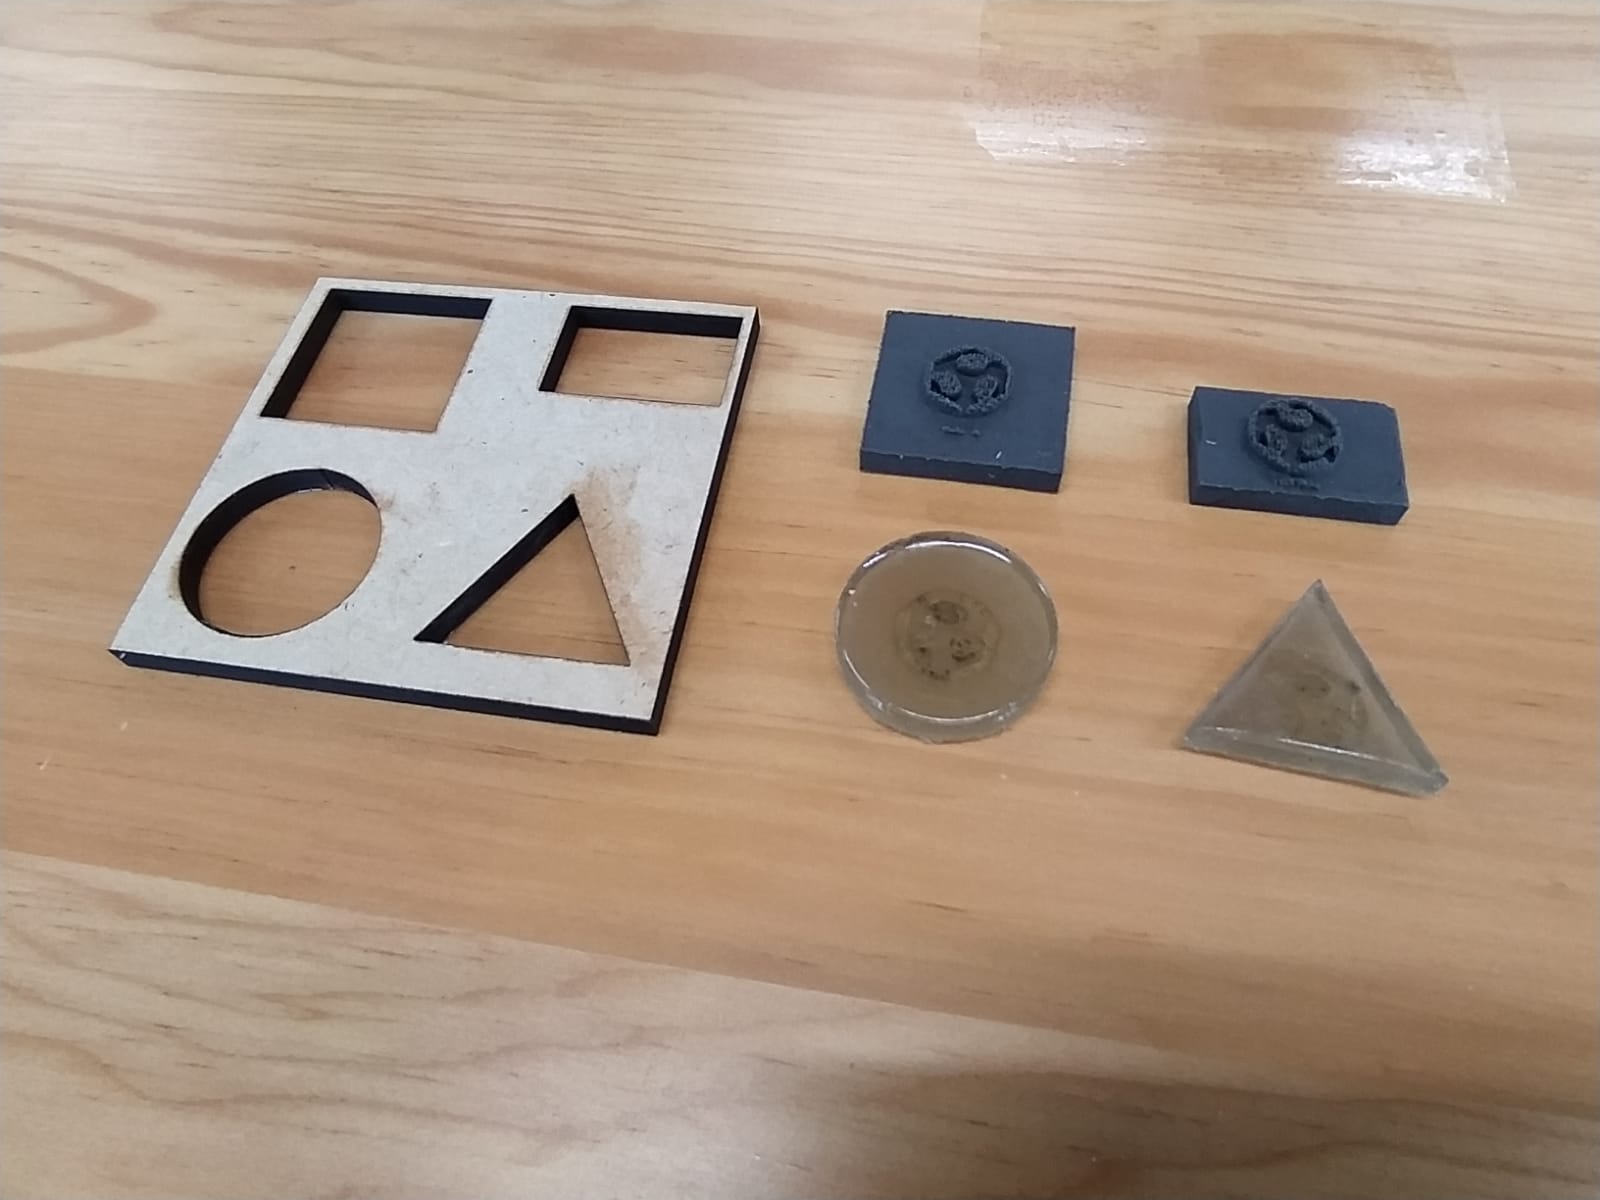
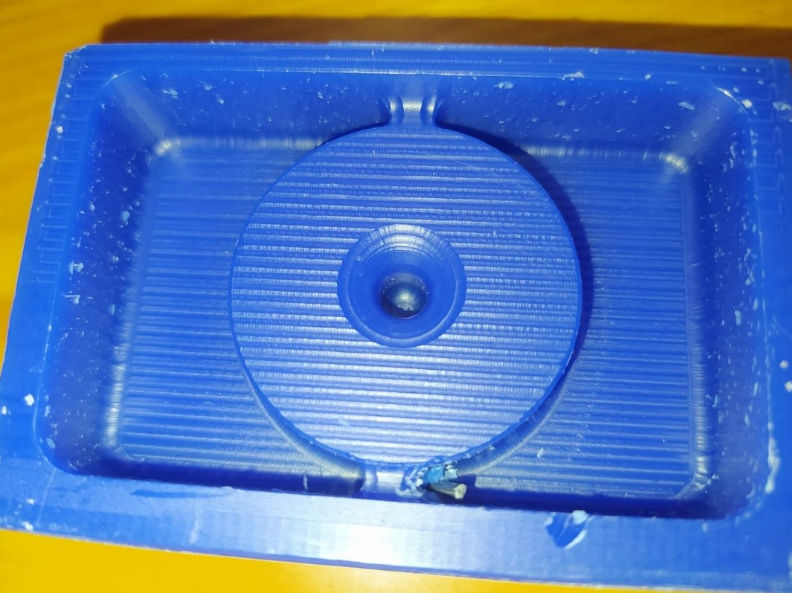
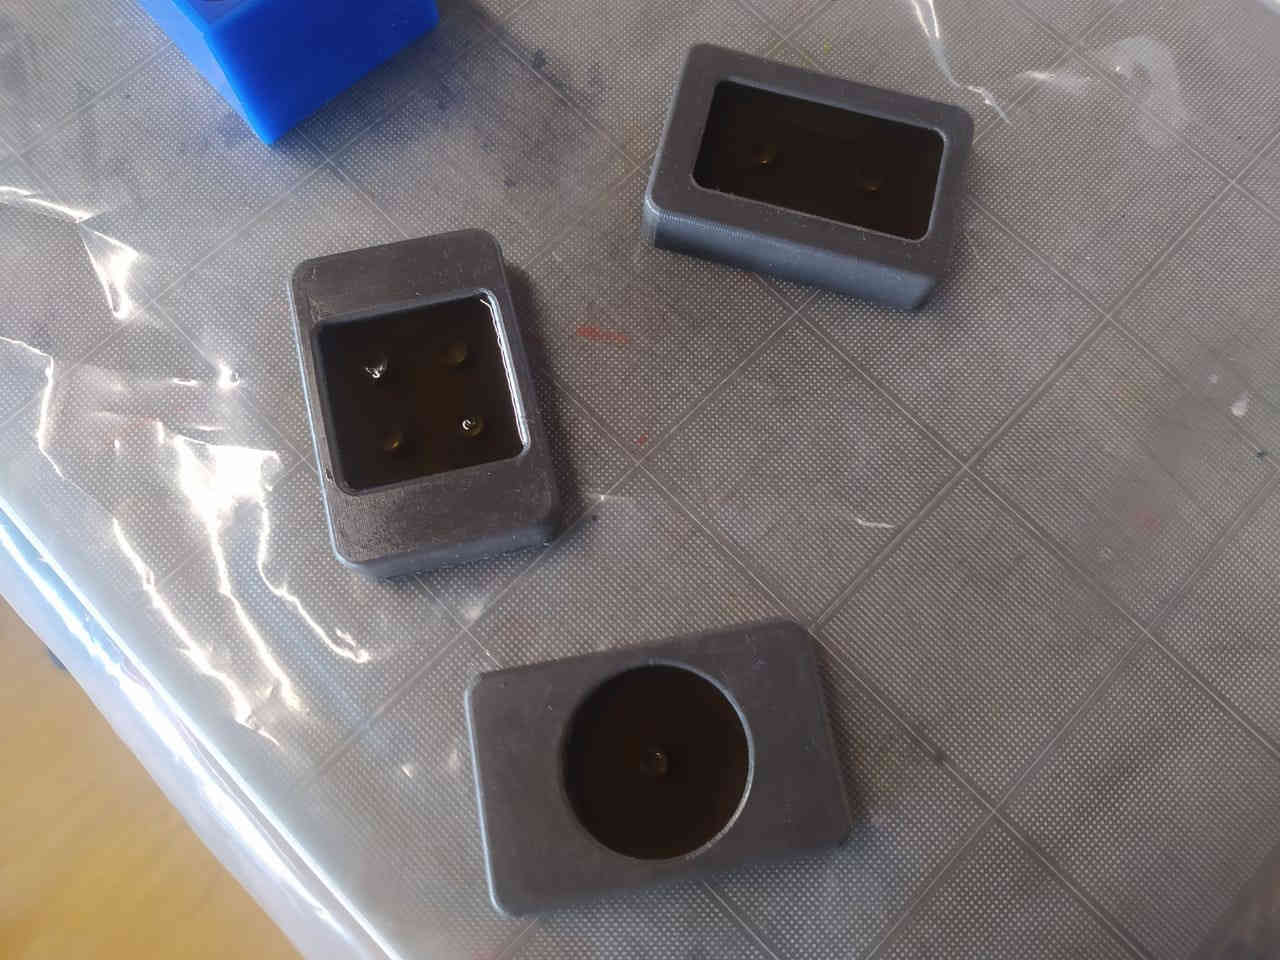
28. Unmolding the parts was relatively easy, but for future projects, it will be worth considering specific geometries to make the process even easier.
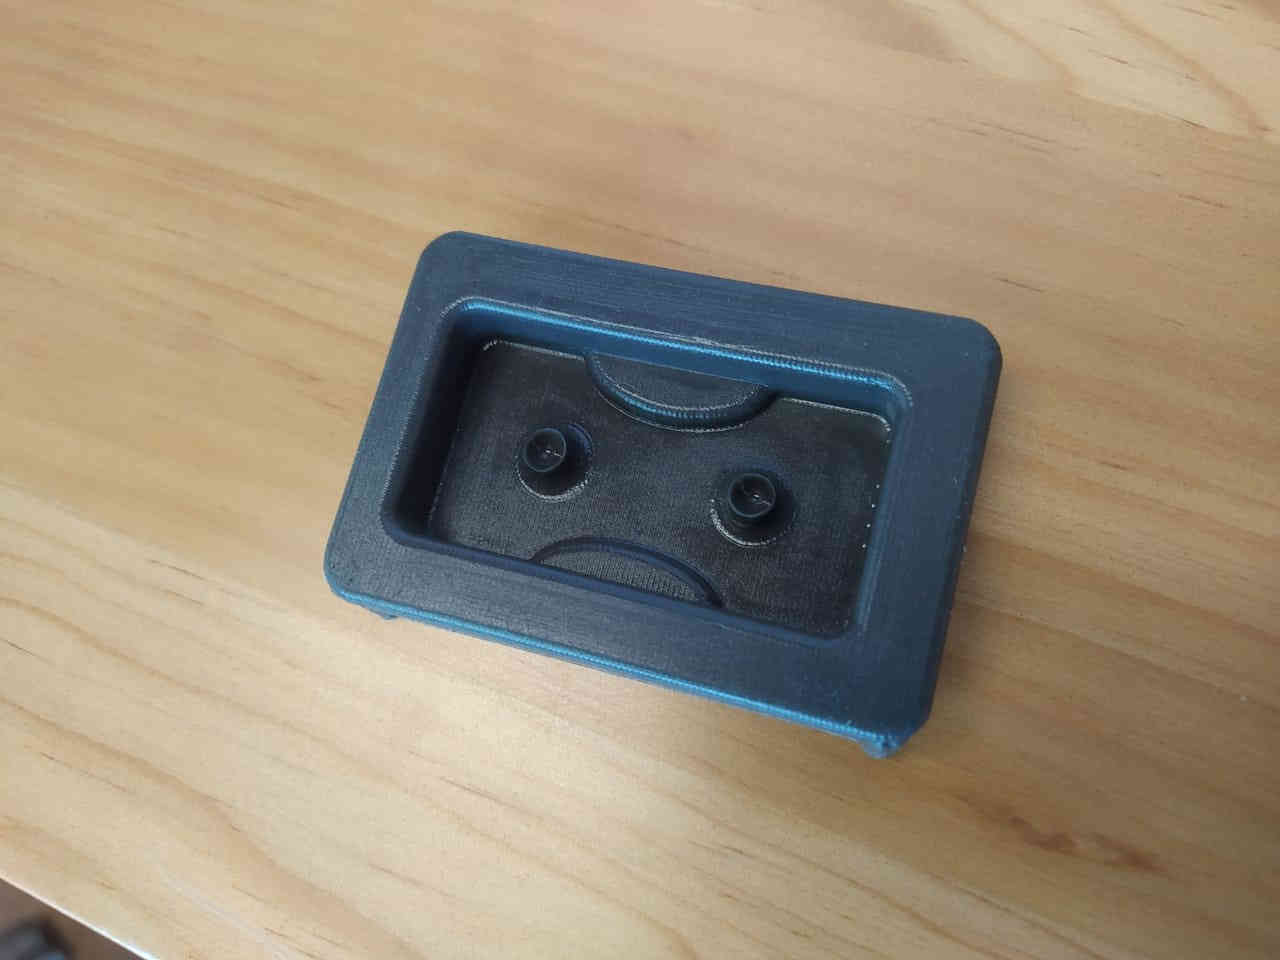
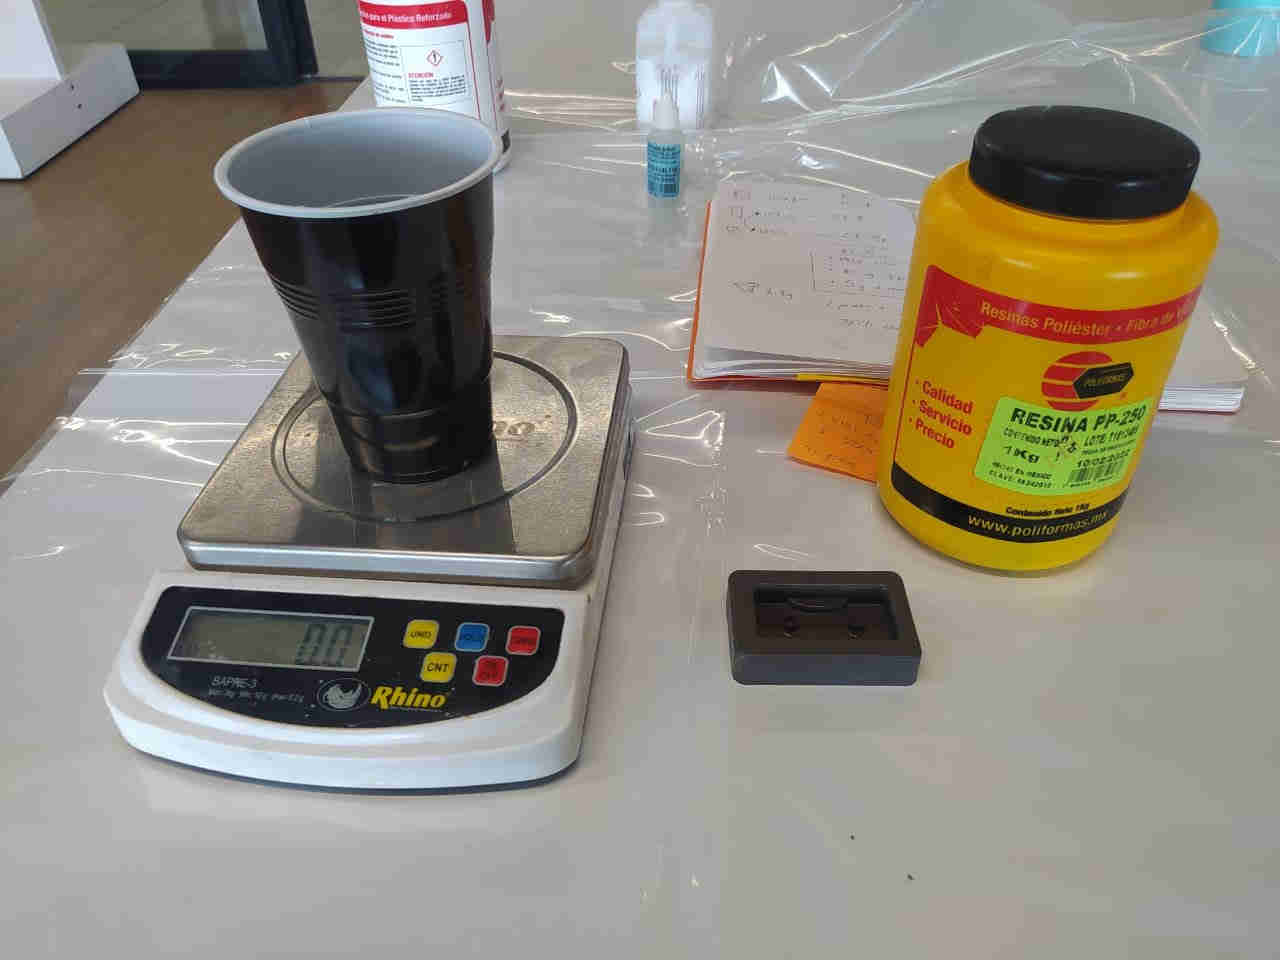
29. Once the silicone molds were ready, with the expected results, I started the casting process, for this I prepared the resin according to the manufacturer's proportions.
Preparation:
• 100 gr of resin
• 40 drops of catalyst K-2000
30. The waiting time for the resin to be demoulded is approximately 3 hours. The final results were the following:
31. Final recommendations: when pouring the resin it is advisable to clean the molds very well since any dust or lint particle will be copied by the resin which can cause slight imperfections, even the smallest scratches can cause these "problems"
![]()
![]()
You can find all the files used in this assignment here
![]()
Copyright 2022 Jose Manuel Diaz Bello