Group Assignment
Link for group assignment
Individual Assignment
Embedded Programming
this week assignment is to use fabISP to program the echo hello board to do something. I learn the basic workflow on how the coding works with the controller.
to undeerstand this its important to know the datasheet of the the controller that we are going to program. With the help of datasheet we can choose the right IC for our project.
Microcontrtoller
A microcontroller is a VLSI(Very Large Scale Integration) Integrated Circuit(IC) that contains electronic CPU(computing unit and logic unit0, memory, Input/output port and few other components integrated on a single chip
I haave linked to understand better on microcontroller
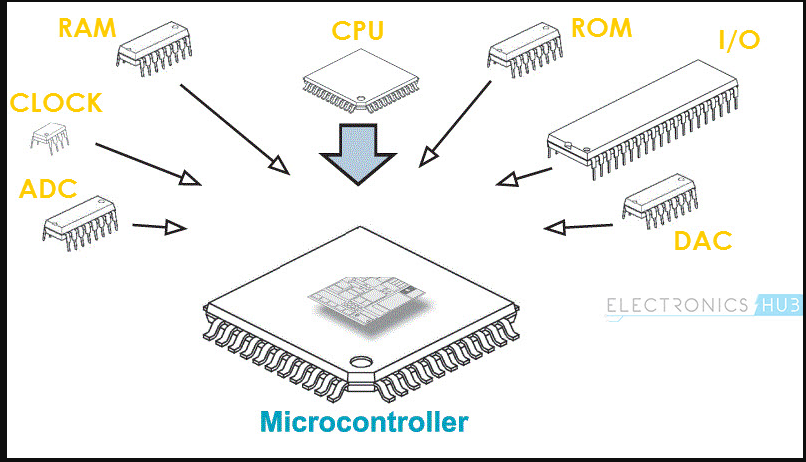
Image source google
Diffeerence between microcontroller and microprocessor
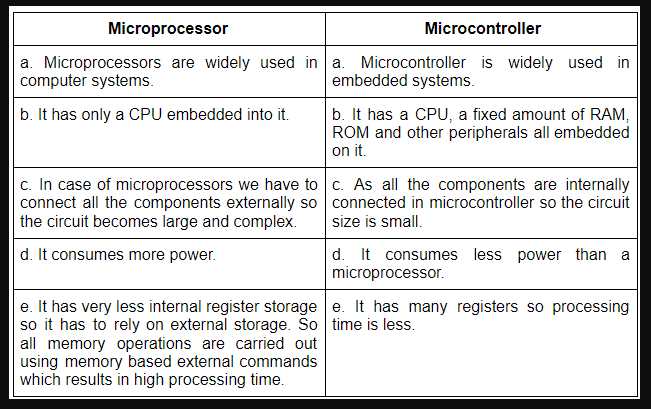
Image source google
Architecture of microcontroller
Microcontroller is built with 40pins DIP(Dual LINE Package), 4kb of ROM(read only memory) storage and 128 bytes of RAM(Random Acess Memory) storage. It consists of 4 parallel 8-bit ports which are programmable as well as addressable as per the reqirement.
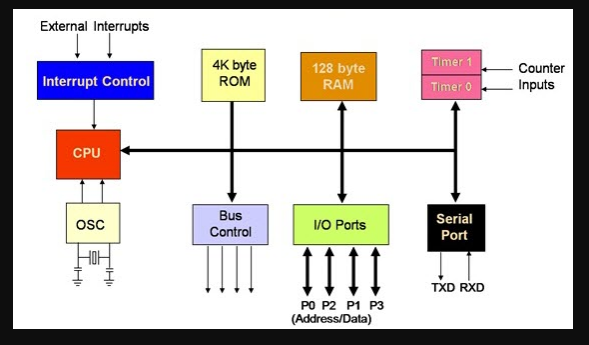
Image source google
Reading datatsheet
A link for attiny44 datasheet click me
Its very important to understand the datasheet of microcontroller. With the help of datasheet we can choose the right microcontroller for any project. Datasheet gives us all information on microcontroller's fuction and structure.
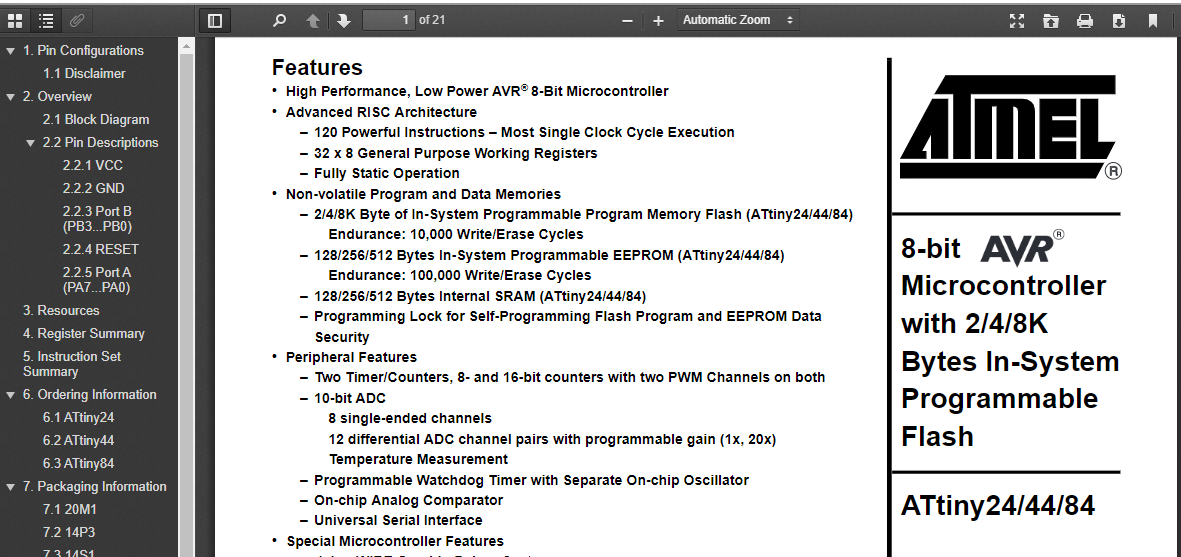
The datasheet for Attiny24/44/84 are same because most of the featurs are same.
Features of Attiny44
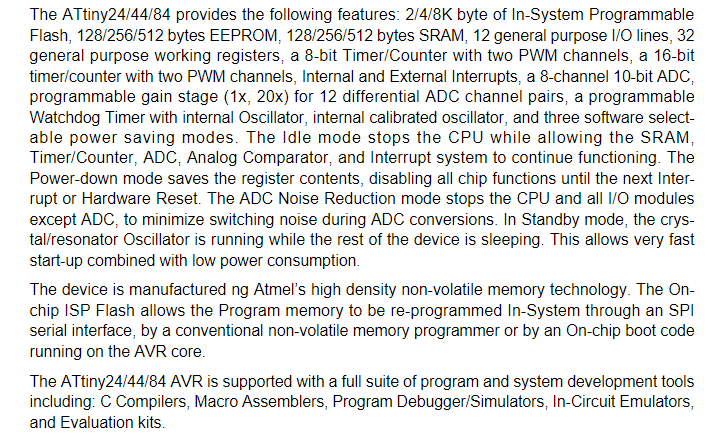
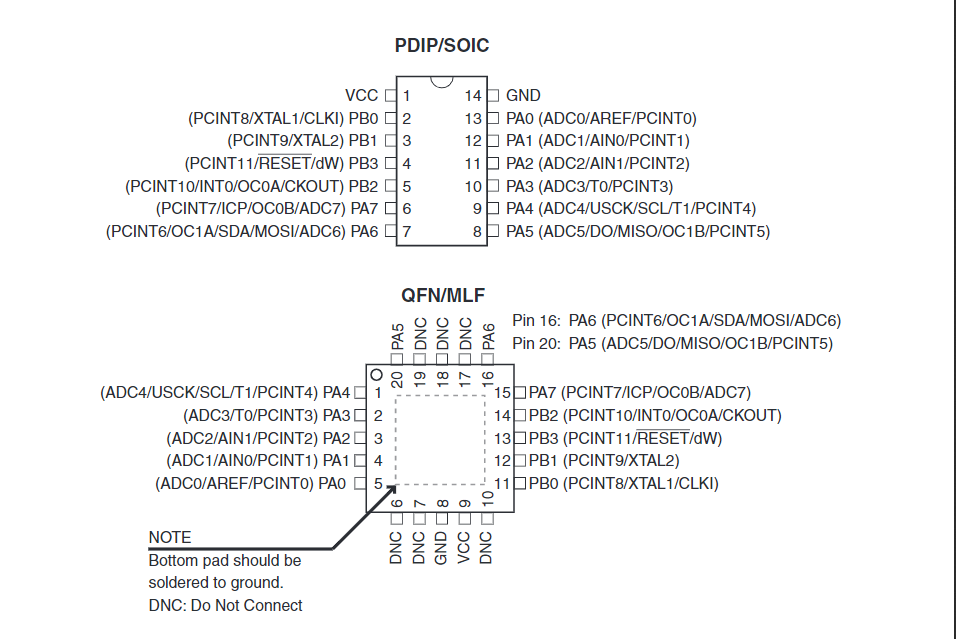
Pin configuration
Pin coniguration will let us know pin resonsibilities and IC connection. But we cannot use this pin adress to program using arduino IDE. Different IDE have different pin adress for programming.
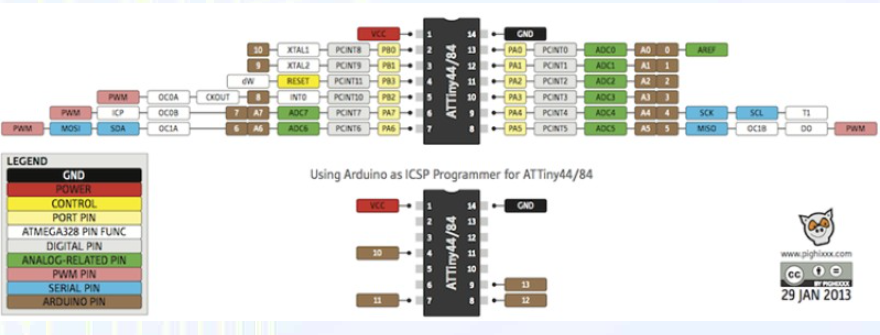
Pin connection for aurdino IDE with attiny44
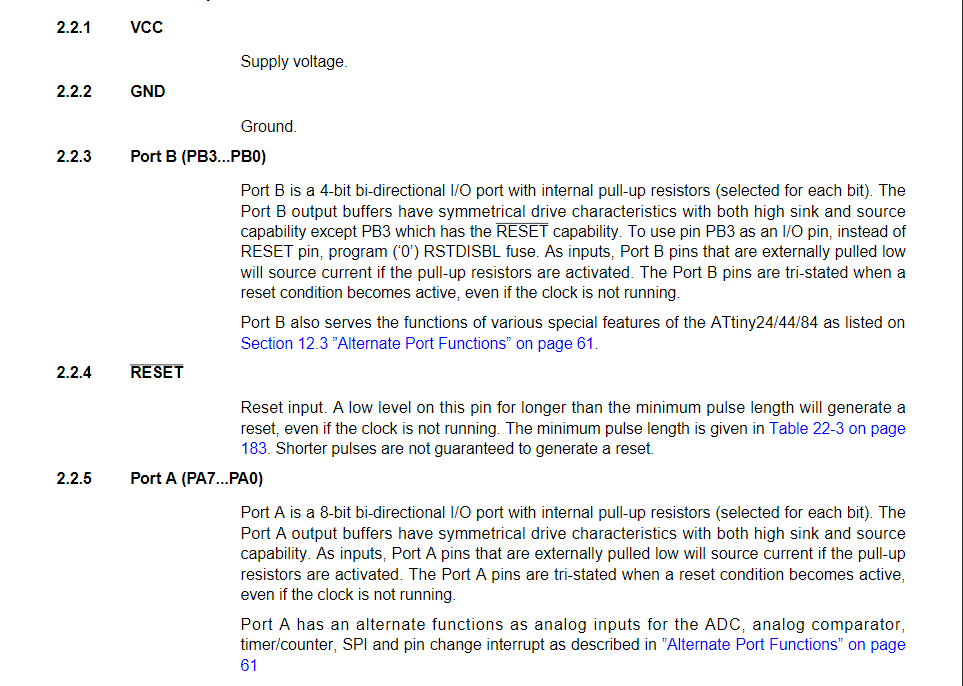
Pin Description
Programming Echo hello board with aurdino_IDE
To program usbtiny i need to download adafruit drivers and install it
Here is a link to download the drivers
after downloading the drivers i set up board and port for programming
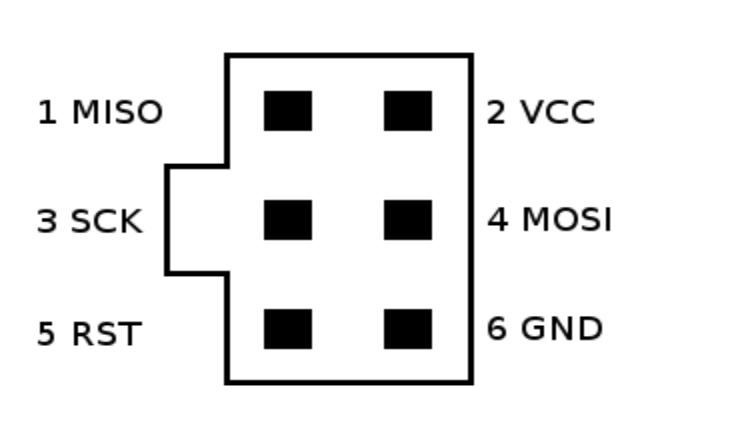
Than i connect FabISP to echo hello board using Jumper wire. I followed pinout diagram of ATtiny44(Hello board) and ATtiny45(ISP) to make the connection for programming.
We can even make the connection using SPI cable. The pinout diagram is shown below for SPI.
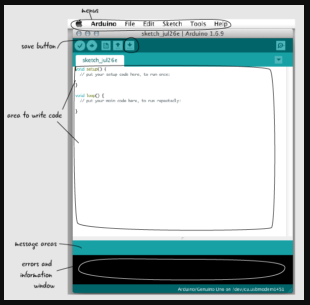
Here is a layout of arduino_IDE and its funchtion
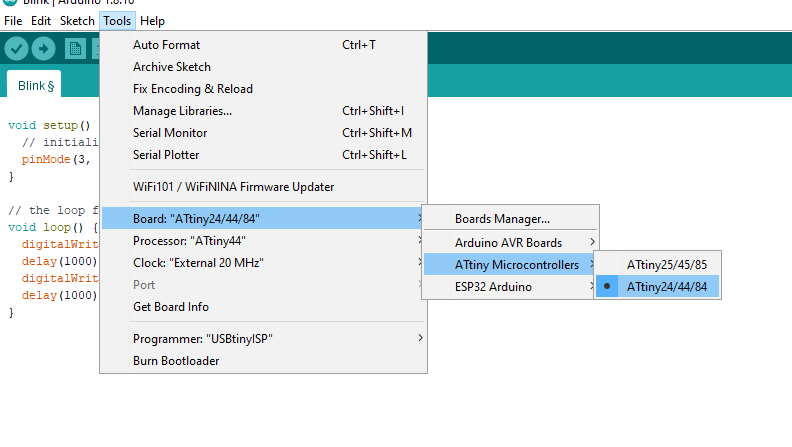
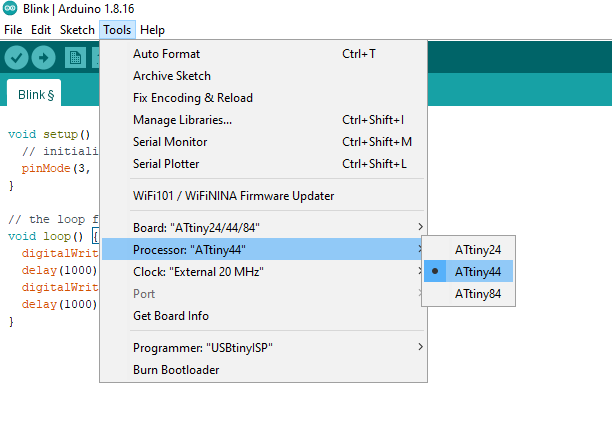
First i set my board to attiny24/44/84, than set proccessor as ATtiny44 and than programmer as USBtinyISP.
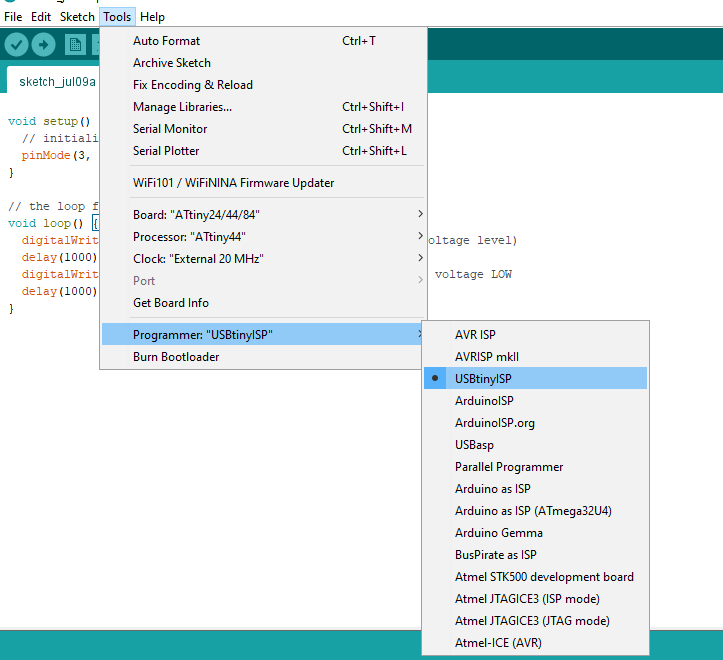
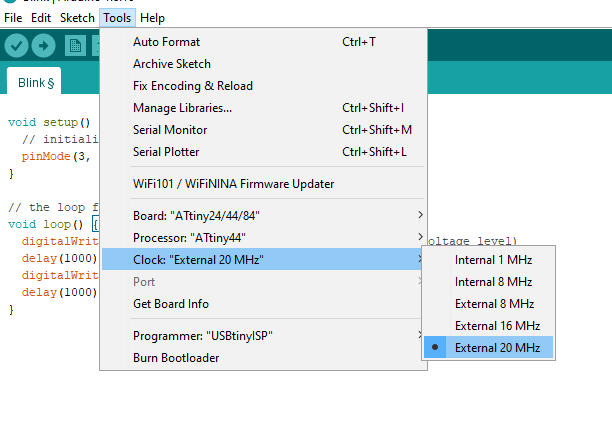
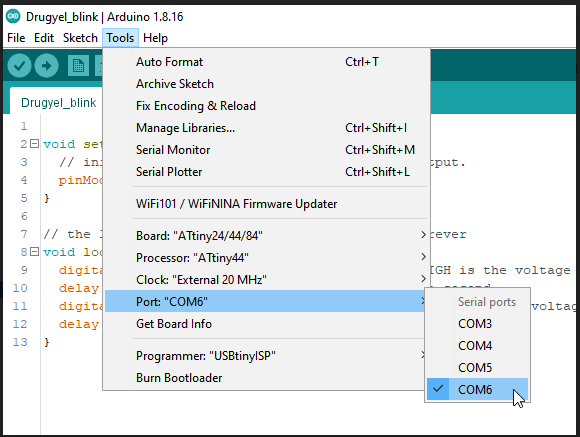
Than I click on tools, port and select COM6 and again on tools, clock and external 20MHz.
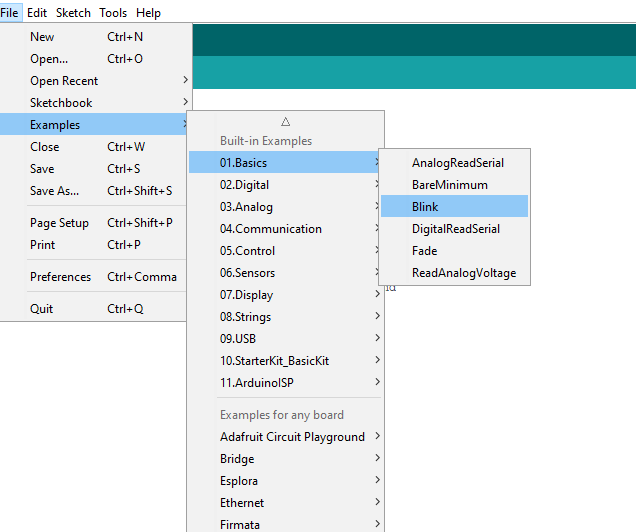
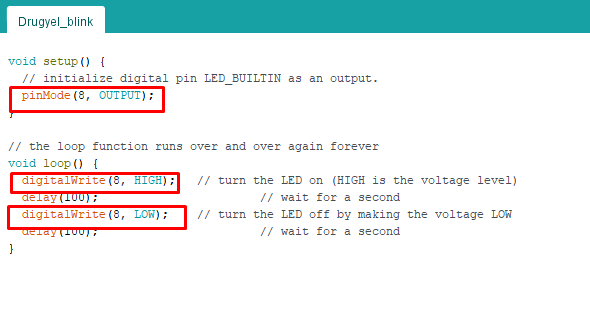
After that I open examples and used blink code. I changed my output to pin 3 and upload. It was successfully uploaded.
Board design file and schematic file
Board file
PCB Board fileSchematic file
PCB schematic file