Project Management
Setting up Git
The first step was to install Git Bash a windows application that emulates a bash shell with UNIX commands simmilar to those on OSX used in terminal which makes it much easier to use in comparison to CMD which is instead based on DOS and largely no longer used and replaced by a powershell a complex but powerful shell tool.
Part of the installation for Git Bash involves selecting the default text editor to be used with the application. By default Vim is selected, and though Vim is universal and found pre installed on nearly all OSs it is far form convenient requiring its own specific commands to work. For this reason Notepad++ was installed and set as the deafault as an alternative, a now a days more commonly used simple text editor that is both intutive enough for the new user, but powerful and effecient for the verteran programmer.
Following installing Git Bash and Notepad++ a Github account was made a repository was created with the name username.github.io which will activate Github pages allowing the URL to be reached like a regular website would be. Very briefly on how github works, github is a cloud hosting service which allows for the storing of data in different sections called repositories. Each account can create different repositories with different names and treat them as a file system would with everything stored under username/"repository name". Users may then pull repositories to their local machines allowing them to work on the files on the repository offline from their personal pc as well as see all the changes in the repository through its different versions. When a user is done with working on the repository offline they may then use git to add the files they wish to upload, commit them, and finally push them to the cloud allowing for future users to pull their work, see their changes and continue off it if they choose to.
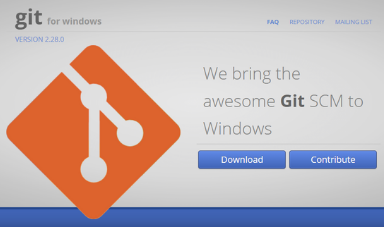 Downloading Git Bash from git for Windows Website
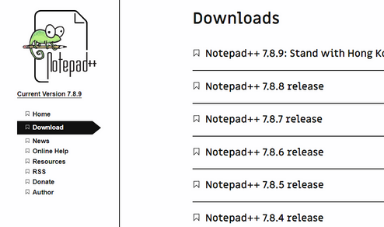 Downloading Notepad++ to use as text editor
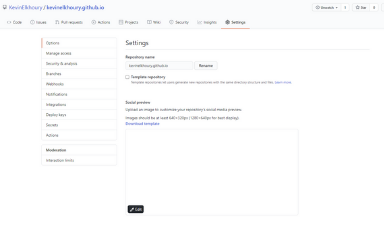 Making Github repository to access GitPages and host site
GitLab
In order to host this website we are using GitLab. This is working via a pipeline, which is copying over all the site information, and running other needed commands in order to host the site. The first thing I did was cahnge the given yml file which was intended for markdown, and instead went through and deleted any reference to markdown, and simply copied over my folder over to the intended folder for hosting "public". This script called .gitlab-ci.yml is responsible for configuring and running gitlabs CI/CD interface. CI/CD standing for continuous integration and continuous delivery allows you to send code over in small bunches and run scripts in between the pushes.
In order to connect to the git repository it is done via ssh, secure shell. Ssh allows us to connect to a server over a secure channel over an unsecure network. This is done typically using asymmetric cryptography. In assymetric cryptography a private and public key pair are generated. These keys work with the public key encrypting information in such a way that only the private key can decrypt. (A lot of math that I am not going to go through here). This means that the encrypted information if intercepted by anyone is useless without the private key to decrypt the information. Here I generated myself a new public provate key pair, and gave gitlab my public key allowing me to securely provide it information and connect to my repository.
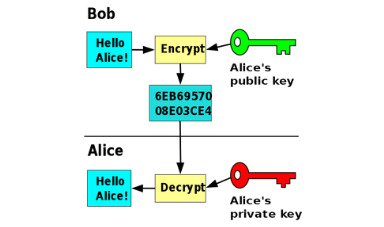 How Public and Private Keys work
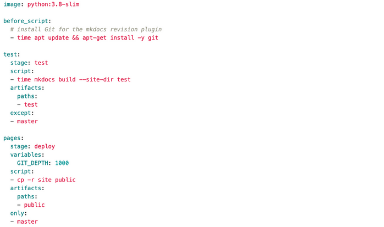 Updated yml file
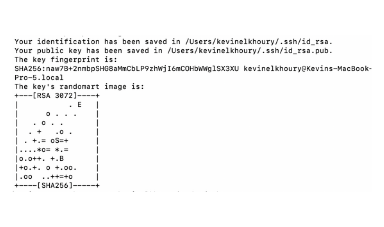 Generating Private and Public Key
Setting up Coding Enviroment
The following step is to choose and set up an IDE, which stands for Integrated Development Enviroment. An IDE is composed to three primary tools, source code editor, a debugger, and tools to build your code. The reccomended IDE for this class was Brackets which is an IDE with built in GitHub support allowing users to view a live build of their file, but also push their work to their GitHub repository with a push of a button. For most users this is ideas especially for those not familliar with how to use naviagate using a shell and how to push files using a shell. However I have had plenty of experience in navigating using a shell in the past, and have been coding in multiple languages, and am honestly sick and tired of downloading a new IDE for every single language that I decide to learn, so instead I have started using VSCode which by itself is nothing more than a text editor, but supports a vast array of add ons to turn it into a proper IDE for any lanaguage allowing me to use VS Code for everything from HTML to C++.
Now that I have my IDE set up for HTML I need to clone my repository from github in order to start making my website. Once I cloned my repository I need to get a template for my HTML website. Here for the class we were reccomended to use some linked to us, however the problem I had with these templates it that we did not actually get access to the CSS, and were expected to just fill in the HTML with the CSS being simply being stored online and accessed. I instead chose to get my own HTML/CSS template with the CSS available to me, so that I could edit and alter the site as I pleased, and not just change the text. This lead me to choosing two templates that I would be using one for my home page called ZeroFour and the other to organize all my projects called Phantom.
 Using VS Code as my choice of IDE
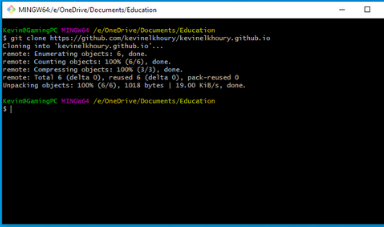 Cloning Repository from GitHub
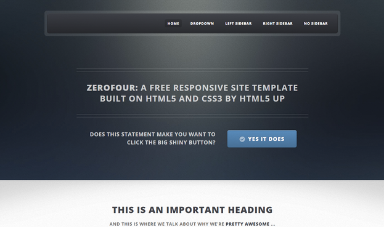 Inital Template Zero Four
Creating the Home Page
Once I loaded in the IDE into VS Code I was given 2 folders containing all the assets and images used as well as an index file and a CSS file to edit freely. the first think I then decided to do was go into the CSS file and reposition the navigation bar. I set a negative top padding on it to move it to the top of the screen and set its position to be relative. I then removed a shadow that appeared around it and its rounded edges, and changed its size a bit to look better in the CSS. Then I filled out the HTML page adding the proper navigation addresses to the nav bar. I then cleaned up the header right under it, changed the font size and location in CSS, removed some extra lines I disliked around it and wrote Digital Fabrigation in the middle of the header in HTML. I left the header as a plain back background for now with plans to return to it later.
I then moved on to cutting uneeded parts of the section in the HTML code, then filled out text to fill up the home page, added some images, and linked the images to their appropriate page. However I ran into an issue here with a grainy background overlaping my images causing them to look pixelated, so I found the image in my files, searched for it then in the CSS, and removed its overlap section, so the images I placed were in front. Then I wrapped up the home page with filling out the footer, and finalizing small text and CSS details to clean up the page and make slight size and color adjustments.
Finally I returned to the header and found some lines of CSS that would reference some Java Script to make the automatic slideshow for my header. I imported in the code, and spent a lot of time toying around with the CSS to change the padding and alignment to make it fit into the header properly. Once it fit in I adjusted some settings with the automatic slide show in the CSS, and then simply added my images in the HTML file.
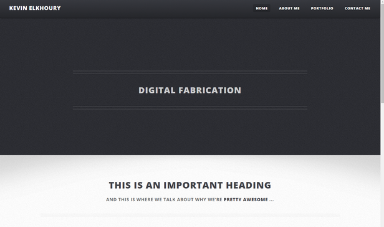 Moved and filled in Nav Bar and Cleaned up Header
 Cleaned the Template and Changed Background, Then Filled in Remaining Sections
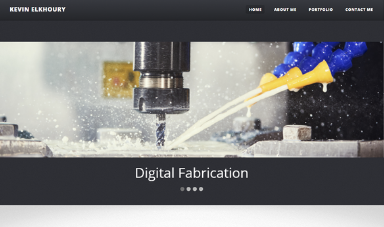 Set the Header as a SlideShow
Creating Additional Pages
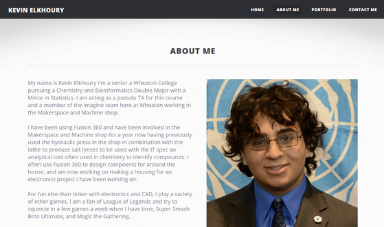
Finally now that the home and navigation bar are finalized all that is left to do is make the additional pages. The first page I made is the About Me page where I simply made an html and css file, linked the about me css file and the main css file to the aboutme html file, and copied in my nav bar and footer. The nav bar did not copy in as nicely as I hoped since it was taking part of the header, so to not mess up my main page I created a new class to put in the nav bar division that I then defined and adjusted in the about css for the nav bar to be aligned properly. I then made two classes one for text, and the other for image and definined them both in the CSS file setting the image aligned right and text aligned left and setting them both to be inline allowing them to be side by side as seen in the image below. I then wrote in the About Me text and finalized my CSS adjustments with size and location then moved on to the next page.
Next I made a contact me page, which in essense was inherently simple. I simply found a template for it online and imported in its appropriate CSS, HTML and Java Script. I then made my own division with its own class to properly align the contact me section to be in the center of the page and not overlap with the nav bar or footer that I imported from the About Me page when I first made this page. All that was then left was to make a second page which the user would be brought to saying "Thank You" in the middle of the page, which I did by making a CSS class, with access to a nav bar to return to the main page or any page the user wants to visit next.
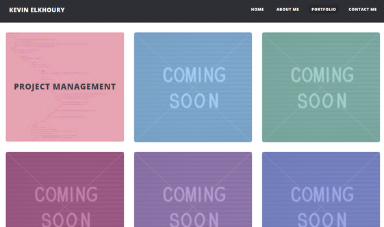
Finally I made my portfolio page for an easy way to access each weeks project. For this I found a template called Phantom with its own CSS, HTML, and Java Script Files. I simply then imported them in, and started remving all the sections except for the boxes that I was using. I then implemented my own nav bar which took a lot of adjusting in the CSS needing to change its padding a lot, then simple placed the footer at the end of the HTML file. I then filled it with an image of this project and set the rest to coming soon.
Then once this was all done I simply used GitBash to navigate to this folder add it, commit it, and push it to my repository.
Finally now that the home and navigation bar are finalized all that is left to do is make the additional pages. The first page I made is the About Me page where I simply made an html and css file, linked the about me css file and the main css file to the aboutme html file, and copied in my nav bar and footer. The nav bar did not copy in as nicely as I hoped since it was taking part of the header, so to not mess up my main page I created a new class to put in the nav bar division that I then defined and adjusted in the about css for the nav bar to be aligned properly. I then made two classes one for text, and the other for image and definined them both in the CSS file setting the image aligned right and text aligned left and setting them both to be inline allowing them to be side by side as seen in the image below. I then wrote in the About Me text and finalized my CSS adjustments with size and location then moved on to the next page.
Next I made a contact me page, which in essense was inherently simple. I simply found a template for it online and imported in its appropriate CSS, HTML and Java Script. I then made my own division with its own class to properly align the contact me section to be in the center of the page and not overlap with the nav bar or footer that I imported from the About Me page when I first made this page. All that was then left was to make a second page which the user would be brought to saying "Thank You" in the middle of the page, which I did by making a CSS class, with access to a nav bar to return to the main page or any page the user wants to visit next.
Finally I made my portfolio page for an easy way to access each weeks project. For this I found a template called Phantom with its own CSS, HTML, and Java Script Files. I simply then imported them in, and started remving all the sections except for the boxes that I was using. I then implemented my own nav bar which took a lot of adjusting in the CSS needing to change its padding a lot, then simple placed the footer at the end of the HTML file. I then filled it with an image of this project and set the rest to coming soon.
Then once this was all done I simply used GitBash to navigate to this folder add it, commit it, and push it to my repository.
 Created About Me Page
 Created Contact Me Page
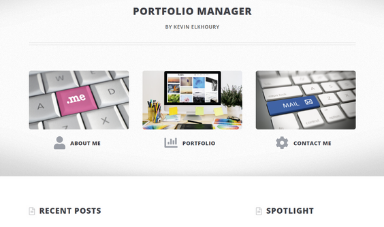
 Used Template for Portfolio Page