Mould Making and Casting
Idea behing process
The process of mould making and casting is simple the idea is to make a negative version of the item you want to create. The benefit of creating a negative instead of directly creating the item you intend is due to alot of materials being far easier to cast then to mill such as aluminuim, bronze, gold, chocolate, ice, and so forth. These materials are significantly more difficult to directly mill, and are hard to make precise milling operations on, however they can all be melted easily. Casting these items insteald of milling them will allow us to make them get create designs of higher degrees of precesion. In addition the process of casting a material is far simpler and less labor intensive than milling it, and can be easily repeated over and over with no added difficulties.
The process of mould making and casting is simple the idea is to make a negative version of the item you want to create. The benefit of creating a negative instead of directly creating the item you intend is due to alot of materials being far easier to cast then to mill such as aluminuim, bronze, gold, chocolate, ice, and so forth. These materials are significantly more difficult to directly mill, and are hard to make precise milling operations on, however they can all be melted easily. Casting these items insteald of milling them will allow us to make them get create designs of higher degrees of precesion. In addition the process of casting a material is far simpler and less labor intensive than milling it, and can be easily repeated over and over with no added difficulties.
 Metal Casting
 Cupcake Mould
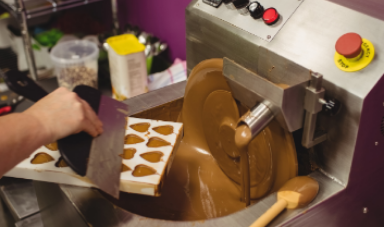 Chcolate Casting
Group Portion
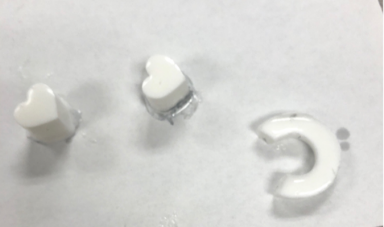
For this weeks group project we first as a group tested out two materials we could use to cast flex foam and a fast casting resin. We detemrined the ratios by using the provided data sheet and most definitely properly and thouroughly read the SDS sheet for both of them. To prepare both the casts we had to simply mix the appropriate amount of mixture A and B, where A typically contains the resin/foam and B contains a catalyst which allows it to harden rapidly. When pouring in the resins especially for the foam we quickly noticed the importance of considering that it will expand aggressively. For the second part of the project we then had to do research on various resins and casting material we could use linked here.
For this weeks group project we first as a group tested out two materials we could use to cast flex foam and a fast casting resin. We detemrined the ratios by using the provided data sheet and most definitely properly and thouroughly read the SDS sheet for both of them. To prepare both the casts we had to simply mix the appropriate amount of mixture A and B, where A typically contains the resin/foam and B contains a catalyst which allows it to harden rapidly. When pouring in the resins especially for the foam we quickly noticed the importance of considering that it will expand aggressively. For the second part of the project we then had to do research on various resins and casting material we could use linked here.
 Fast Casting Resin
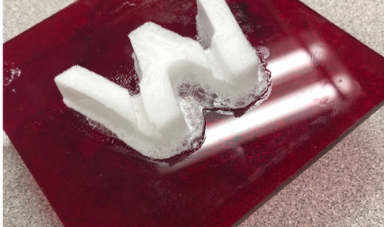 Wheaton Logo in Foam Cast
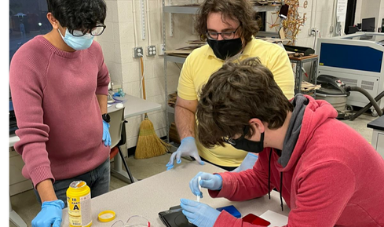 Group
Group
Designing the Mould
The first step is to design the mould. The mould itself is the negative, so if I am casting the mould out of silicone I need to first design the positive to the cast the negative of the mould which can then cast positives. For this week I decided to do something simple and just make a bunch of half speheres to have fun little chocolates half spheres I can eat.
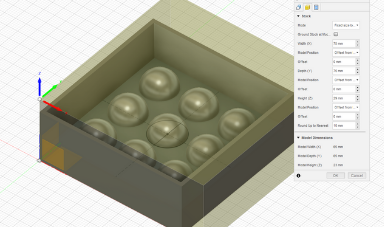
To do this I simply started by making a box then putting a circle in the middle. I then used the revolve tool on the circle to turn it into a halfsphere. Then using the rectangular repeat tool twice I was capable of making a 3 by 3 grid of half spheres. I then used the draft tool on the edge of the box so that it would be easier to remove the silicone from the mould.
The first step is to design the mould. The mould itself is the negative, so if I am casting the mould out of silicone I need to first design the positive to the cast the negative of the mould which can then cast positives. For this week I decided to do something simple and just make a bunch of half speheres to have fun little chocolates half spheres I can eat.
To do this I simply started by making a box then putting a circle in the middle. I then used the revolve tool on the circle to turn it into a halfsphere. Then using the rectangular repeat tool twice I was capable of making a 3 by 3 grid of half spheres. I then used the draft tool on the edge of the box so that it would be easier to remove the silicone from the mould.
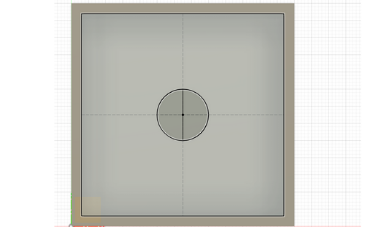 Starting Box and Circle
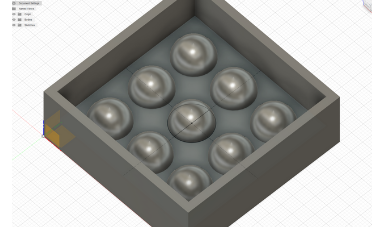 Revolve Tool and Rectangular Pattern
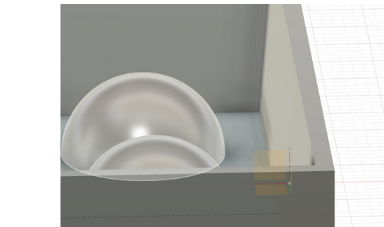 Draft Tool
Milling
The milling process took me a couple of tries due to sizing problems. My initial design I found out was to big for the mill I own, so I had to make it smaller, and cut the wax given to me in half so that it would fit in. The second issue I ran into was on start up the mill would execute the G53 command which causes a z limit error, so to fix this I had to tell fusion to instead lift the mill to clearence height I set. Past that the rest of the process worked like a charm.
The first thing I did was go to the manufacture tab in Fusion 360 and go to the set up. There I set the size of my stock and placed the model to be on the bottom of the stock so the top part would be milled out and surfaced since I had to cut it by hand with a saw. Following that I selected the 3d pocket tool for a roughing operation making sure to use the tool to exclude milling out the sides of the box and only mill inside of my selected area. Then for my finishing run I ran a 3d contour operation which I noticed was making a cool spiral going down, I figured out different ways of removing this by changing the step down distance or changing the operation, but I chose that I liked it and stuck to it. For both the operations I had to change the clearence height to fit my mill, and then when I exported made sure to set the safe height to the clearence height and not G53 as it was set.
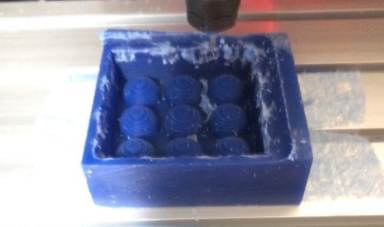
All that was left was to export the nc code generated and open it in Candle my control software for my mill. Candle then gave a nice display of the toolpath when opened. I then used candle the home the mill, then I put my cut piece of wax block in the work area and held it down using carpet tape. I then moved the mill to the X and Y zero points, and I used the Z probe to set the Z zero. All that was left to do was run the mill and wait two hours.
The milling process took me a couple of tries due to sizing problems. My initial design I found out was to big for the mill I own, so I had to make it smaller, and cut the wax given to me in half so that it would fit in. The second issue I ran into was on start up the mill would execute the G53 command which causes a z limit error, so to fix this I had to tell fusion to instead lift the mill to clearence height I set. Past that the rest of the process worked like a charm.
The first thing I did was go to the manufacture tab in Fusion 360 and go to the set up. There I set the size of my stock and placed the model to be on the bottom of the stock so the top part would be milled out and surfaced since I had to cut it by hand with a saw. Following that I selected the 3d pocket tool for a roughing operation making sure to use the tool to exclude milling out the sides of the box and only mill inside of my selected area. Then for my finishing run I ran a 3d contour operation which I noticed was making a cool spiral going down, I figured out different ways of removing this by changing the step down distance or changing the operation, but I chose that I liked it and stuck to it. For both the operations I had to change the clearence height to fit my mill, and then when I exported made sure to set the safe height to the clearence height and not G53 as it was set.
All that was left was to export the nc code generated and open it in Candle my control software for my mill. Candle then gave a nice display of the toolpath when opened. I then used candle the home the mill, then I put my cut piece of wax block in the work area and held it down using carpet tape. I then moved the mill to the X and Y zero points, and I used the Z probe to set the Z zero. All that was left to do was run the mill and wait two hours.
 Set Up
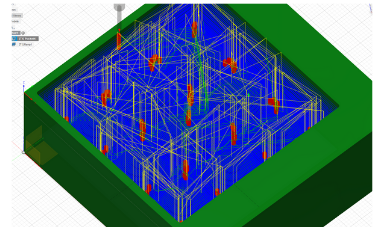 3d Pocket Cut
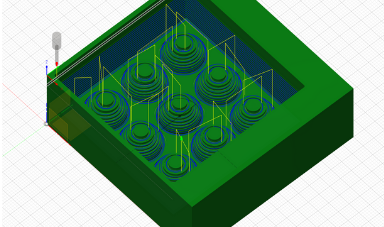 Contour Cut
 Loading File into Candle
 Milling the Wax
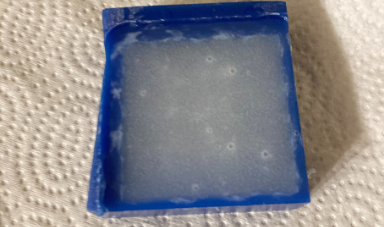
 Final Cut
Mould Making and Casting
The actual mould making and casting portion of this project is by far the easiest and fastest part in terms of labor. Now that the wax mould is done I case a food grade silicone that I purchased from Amazon a few years ago (glad it did not expire). It's a pretty standard silicone that needs a 1 to 1 ration of the material and platinum catalyst. To get the 1 to 1 ration by weight I used a scale went up to 70g, then tared it, then added 70g of the catalyst. I then mixed the cup using a knife, and poured the silicone into the mould. I tapped out the sides to tryh to get rid of the airbubbles since I do not have a gas chamber avialble at my house, and left the silicone to dry for 8 hours.
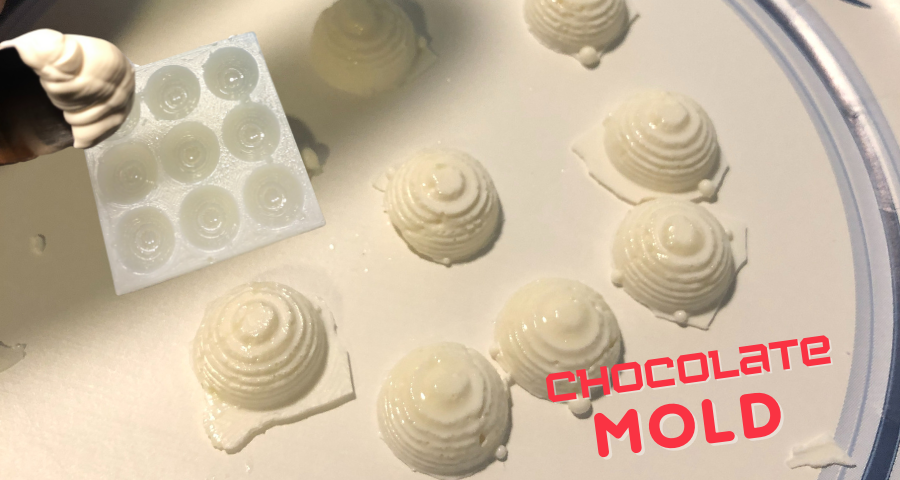
After 8 hours I removed the silicone mould from the wax mold which is the negative of my halfspheres. I started by washign the mould and coating it with cooking oil. All that was left for me to do was melt some choclate in the microwave, and then pour the chocolate into the moulds. I put the chocolate and mould into the freezer and waited a couple of hours. Once the time elapsed I took the silicone mould out of the freezer and then removed the choclates. All that was left to do then was enjoy my half sphered chocolates!
The actual mould making and casting portion of this project is by far the easiest and fastest part in terms of labor. Now that the wax mould is done I case a food grade silicone that I purchased from Amazon a few years ago (glad it did not expire). It's a pretty standard silicone that needs a 1 to 1 ration of the material and platinum catalyst. To get the 1 to 1 ration by weight I used a scale went up to 70g, then tared it, then added 70g of the catalyst. I then mixed the cup using a knife, and poured the silicone into the mould. I tapped out the sides to tryh to get rid of the airbubbles since I do not have a gas chamber avialble at my house, and left the silicone to dry for 8 hours.
After 8 hours I removed the silicone mould from the wax mold which is the negative of my halfspheres. I started by washign the mould and coating it with cooking oil. All that was left for me to do was melt some choclate in the microwave, and then pour the chocolate into the moulds. I put the chocolate and mould into the freezer and waited a couple of hours. Once the time elapsed I took the silicone mould out of the freezer and then removed the choclates. All that was left to do then was enjoy my half sphered chocolates!
 Adding Silicone to Mould to make Silicone Mould
3d Pocket Cut
Contour Cut
Loading File into Candle
Milling the Wax
Final Cut
Adding Silicone to Mould to make Silicone Mould
3d Pocket Cut
Contour Cut
Loading File into Candle
Milling the Wax
Final Cut
Click Here to Download all the files from these projects!