Week
Seven
Make something big!
Group Project
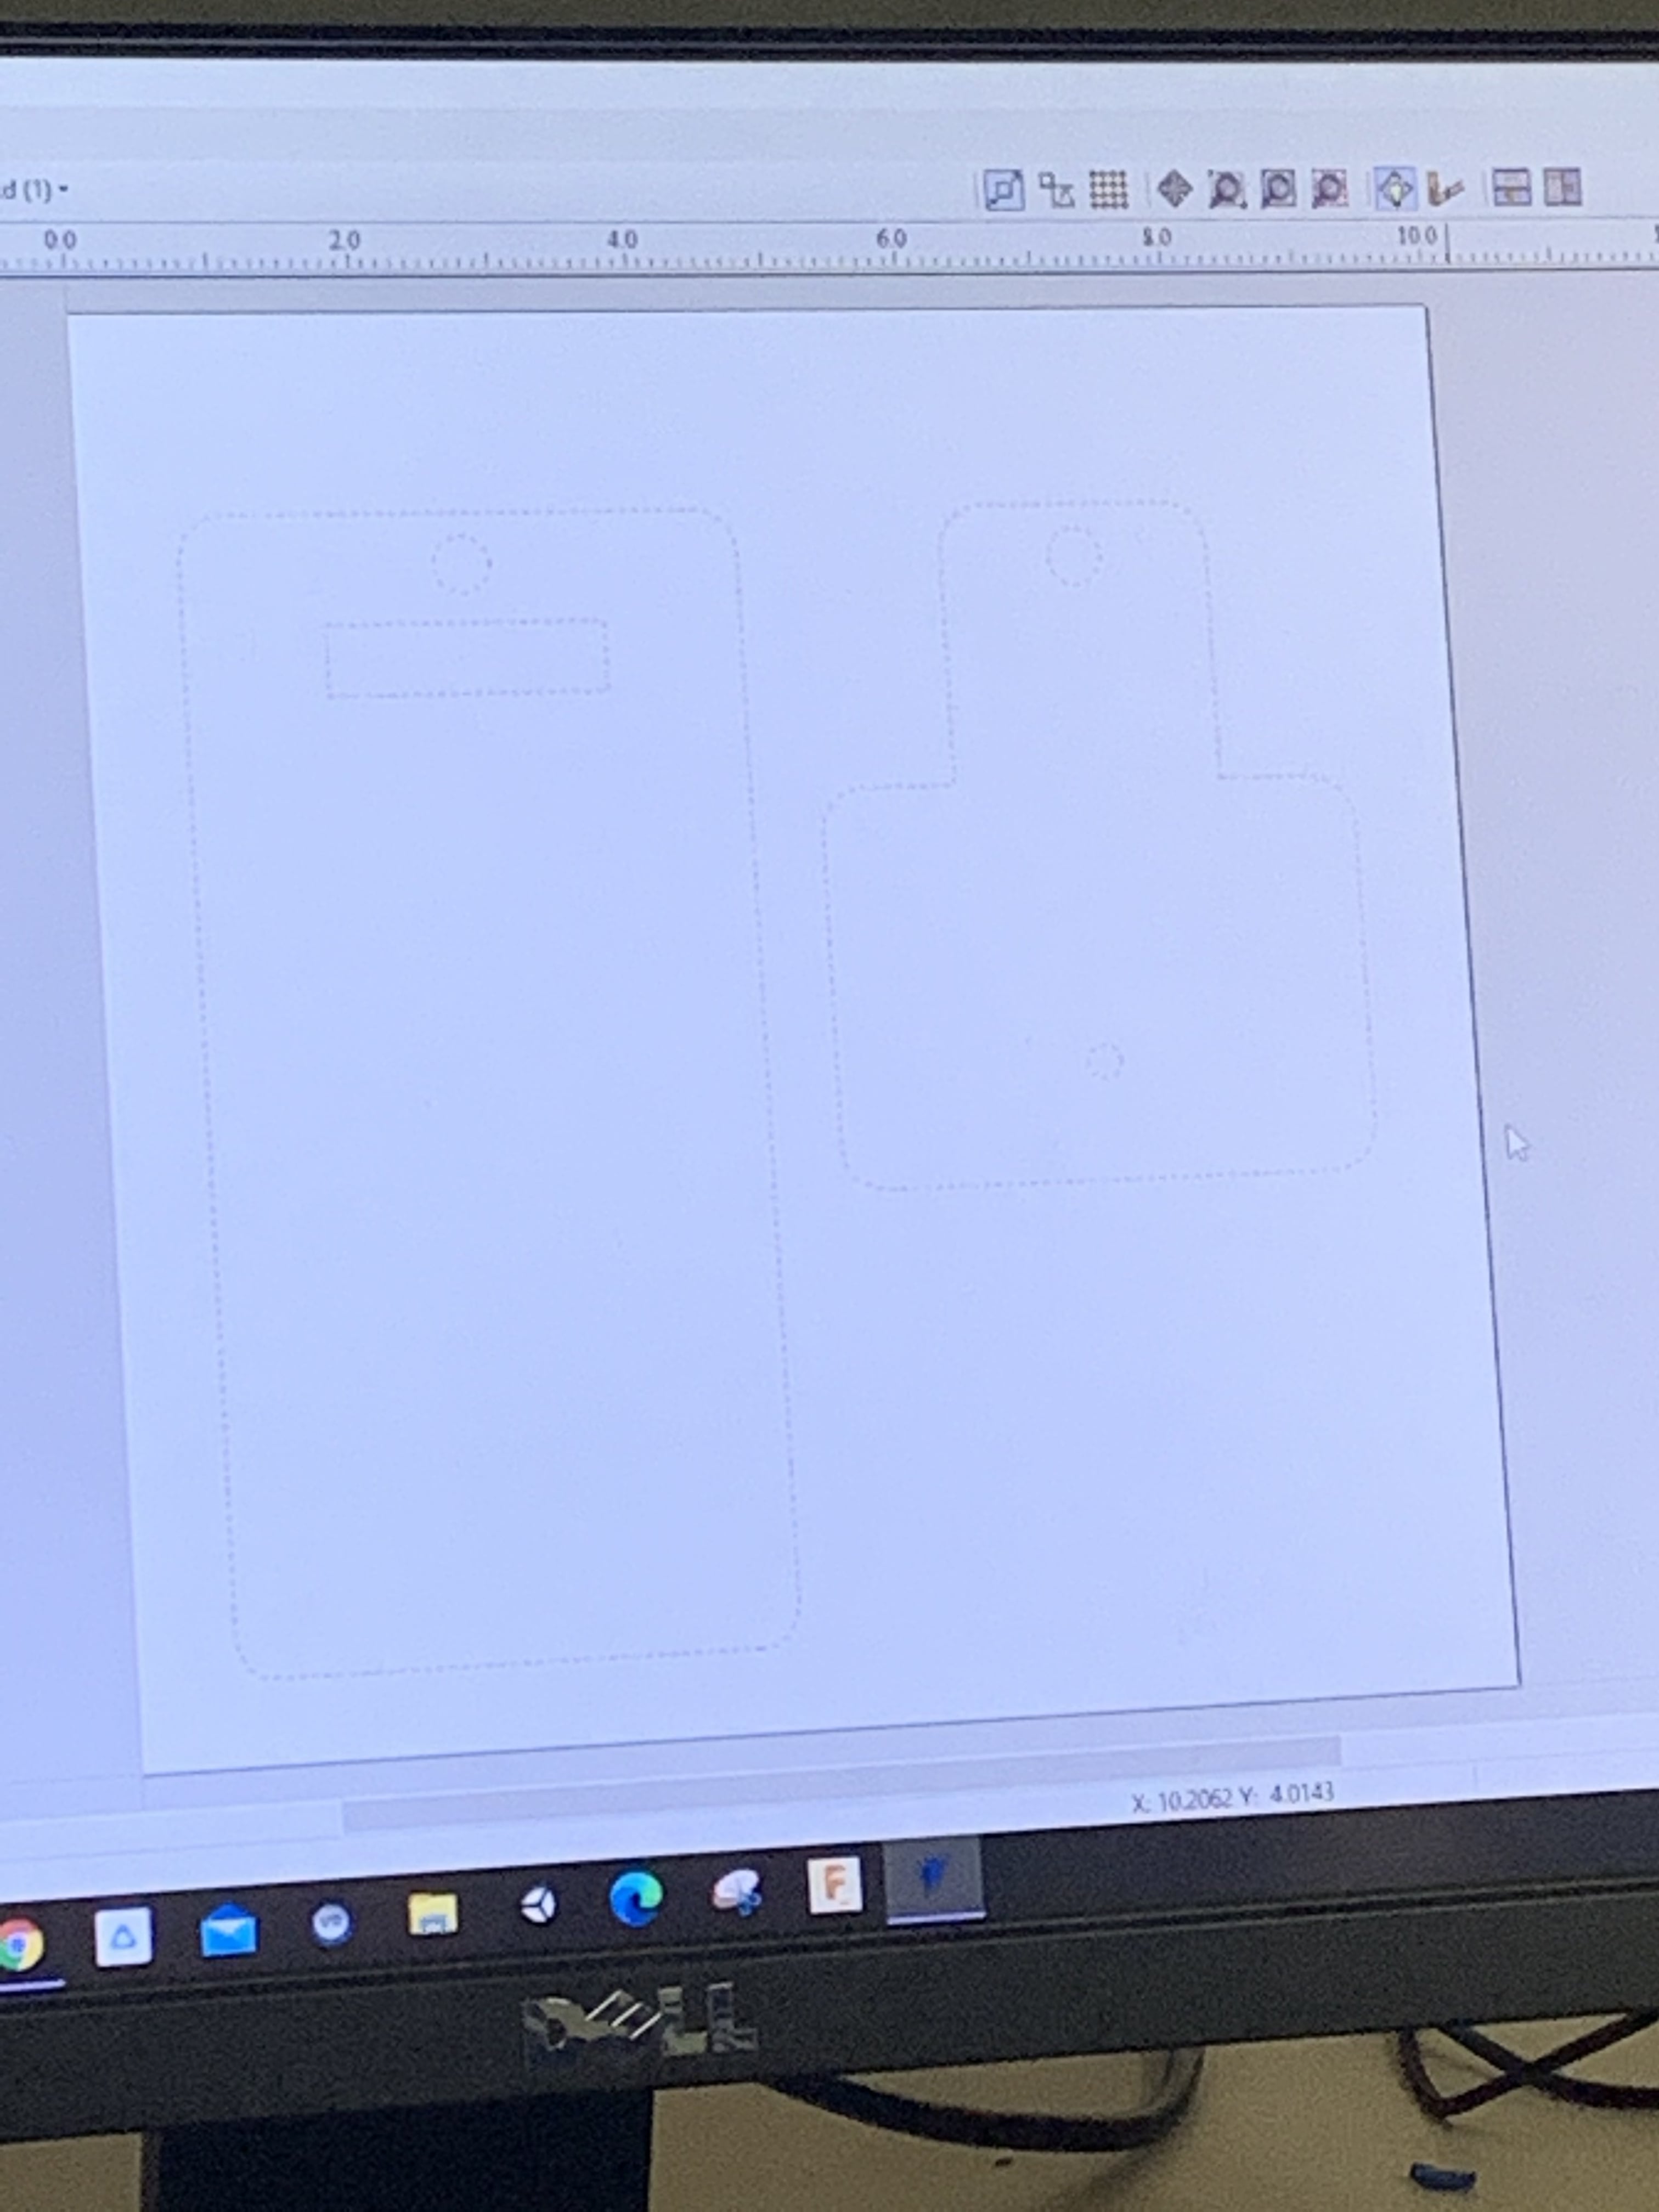
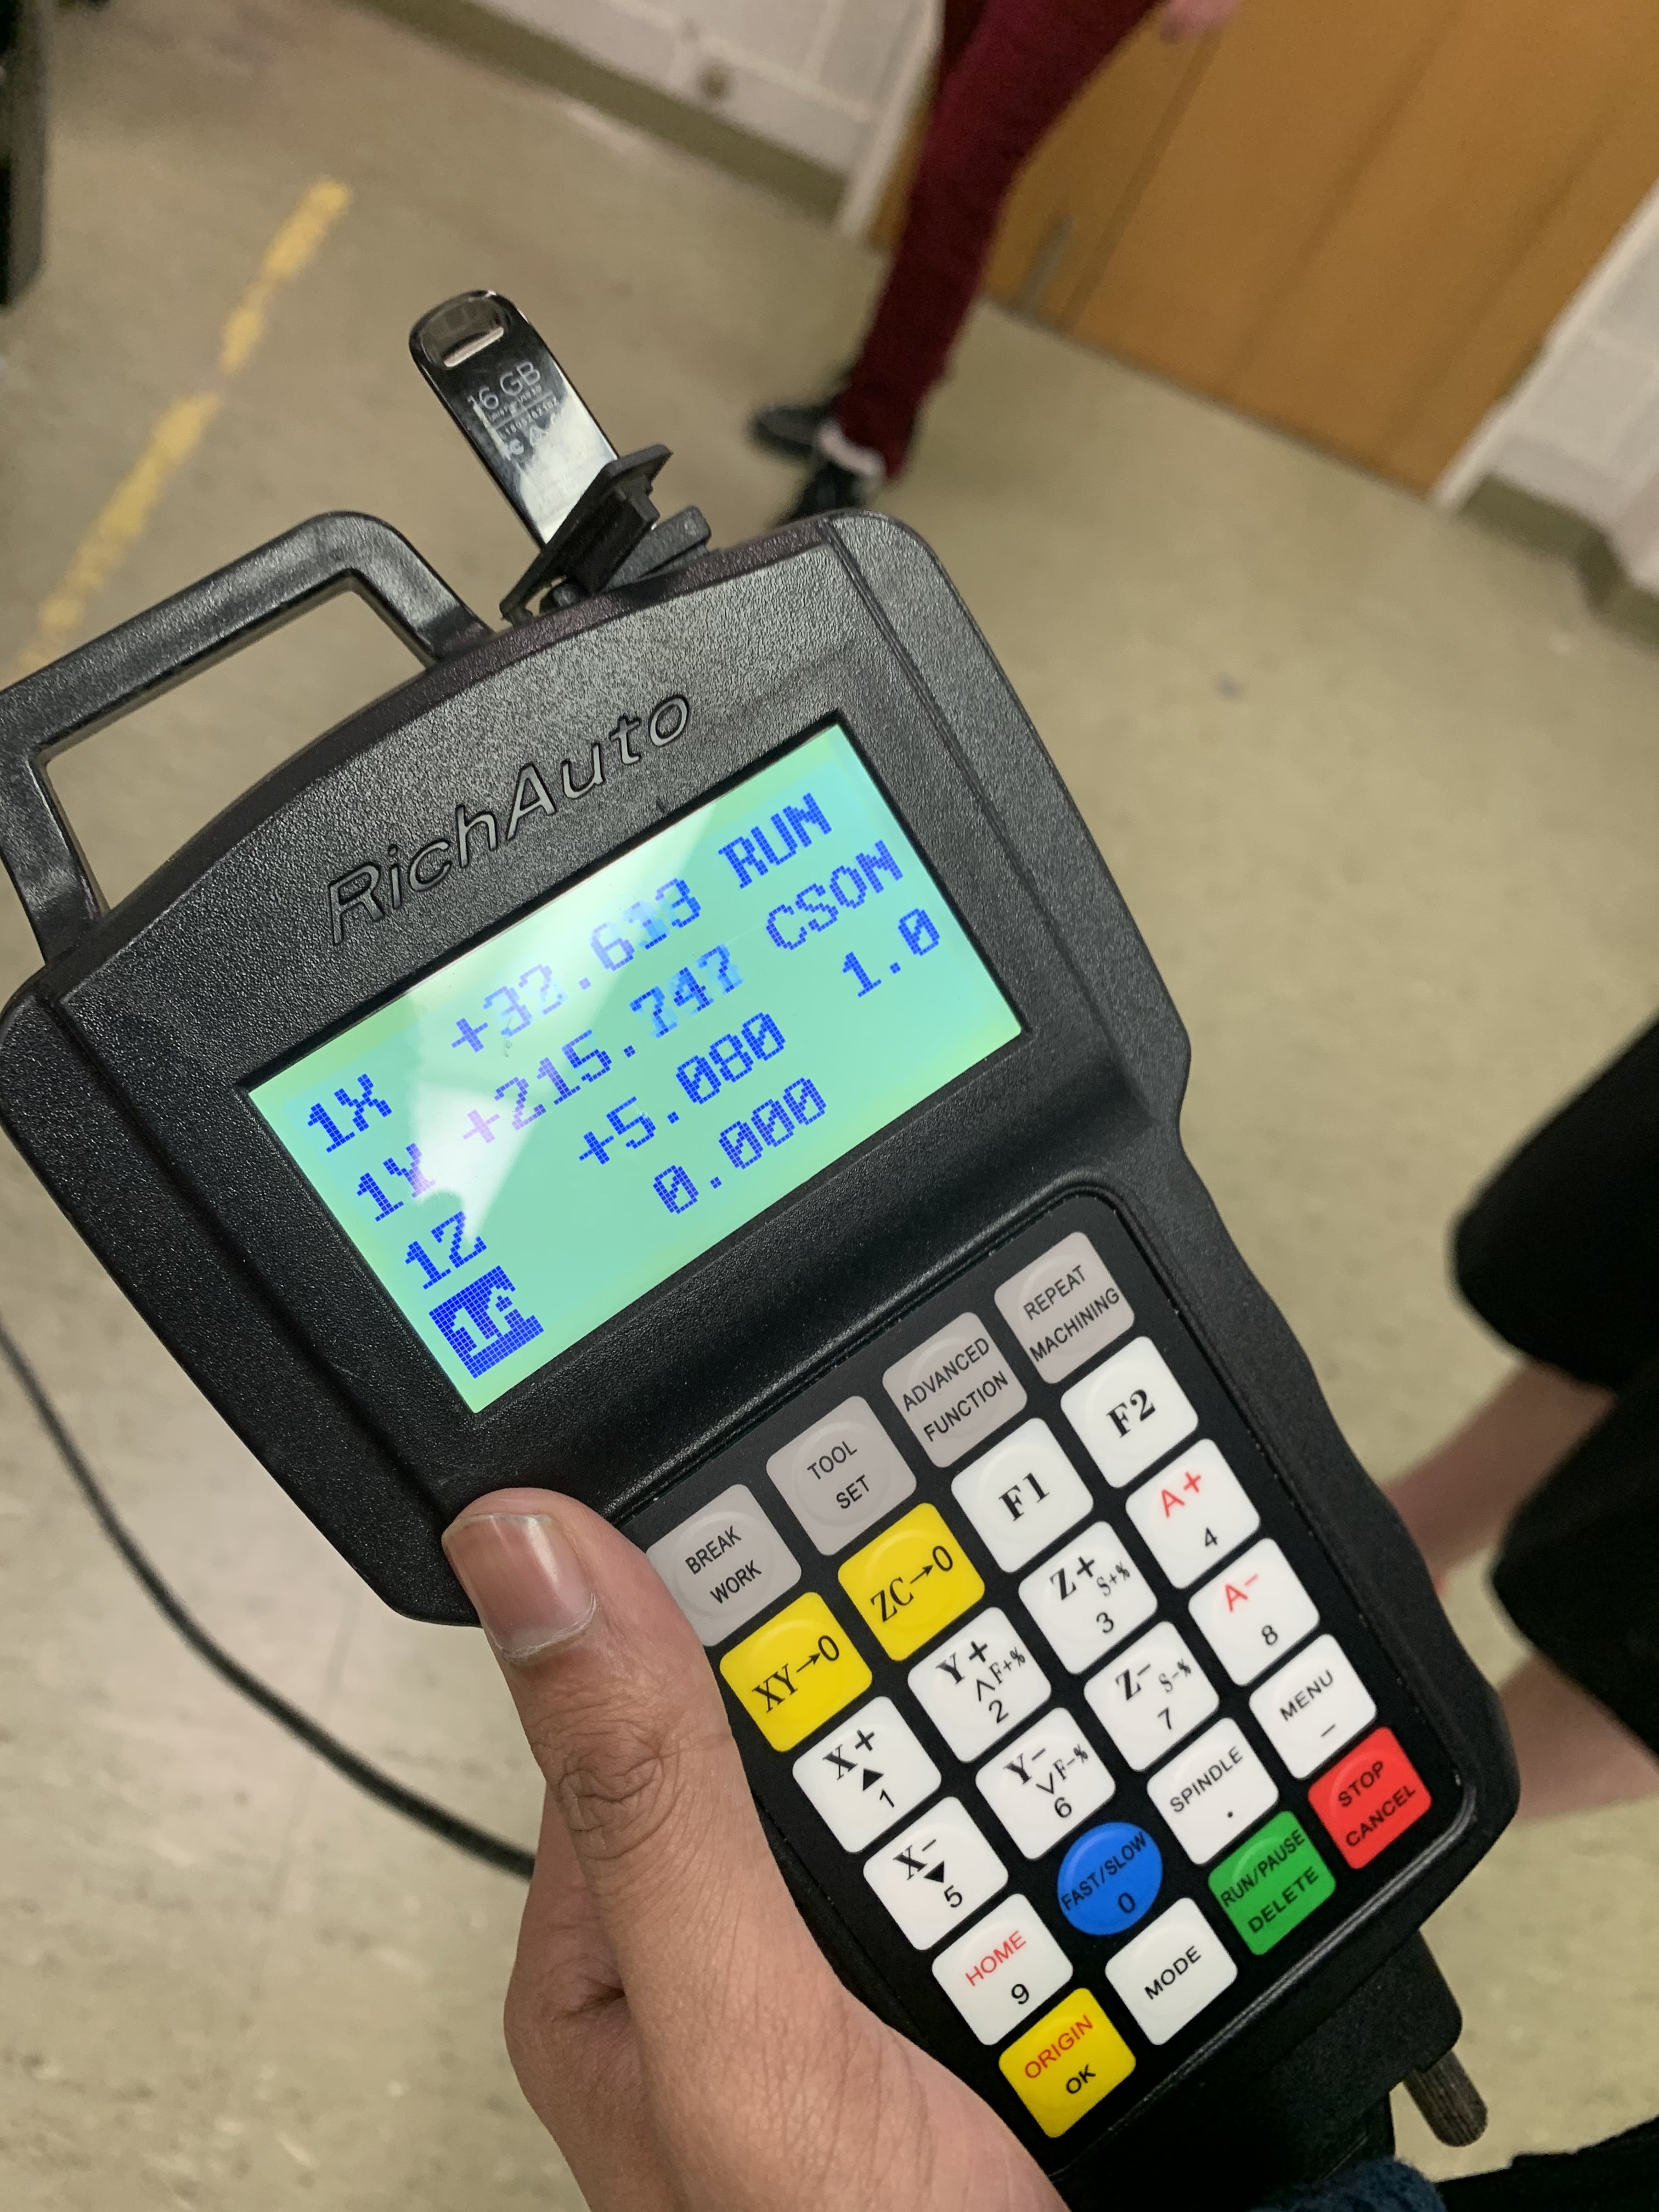
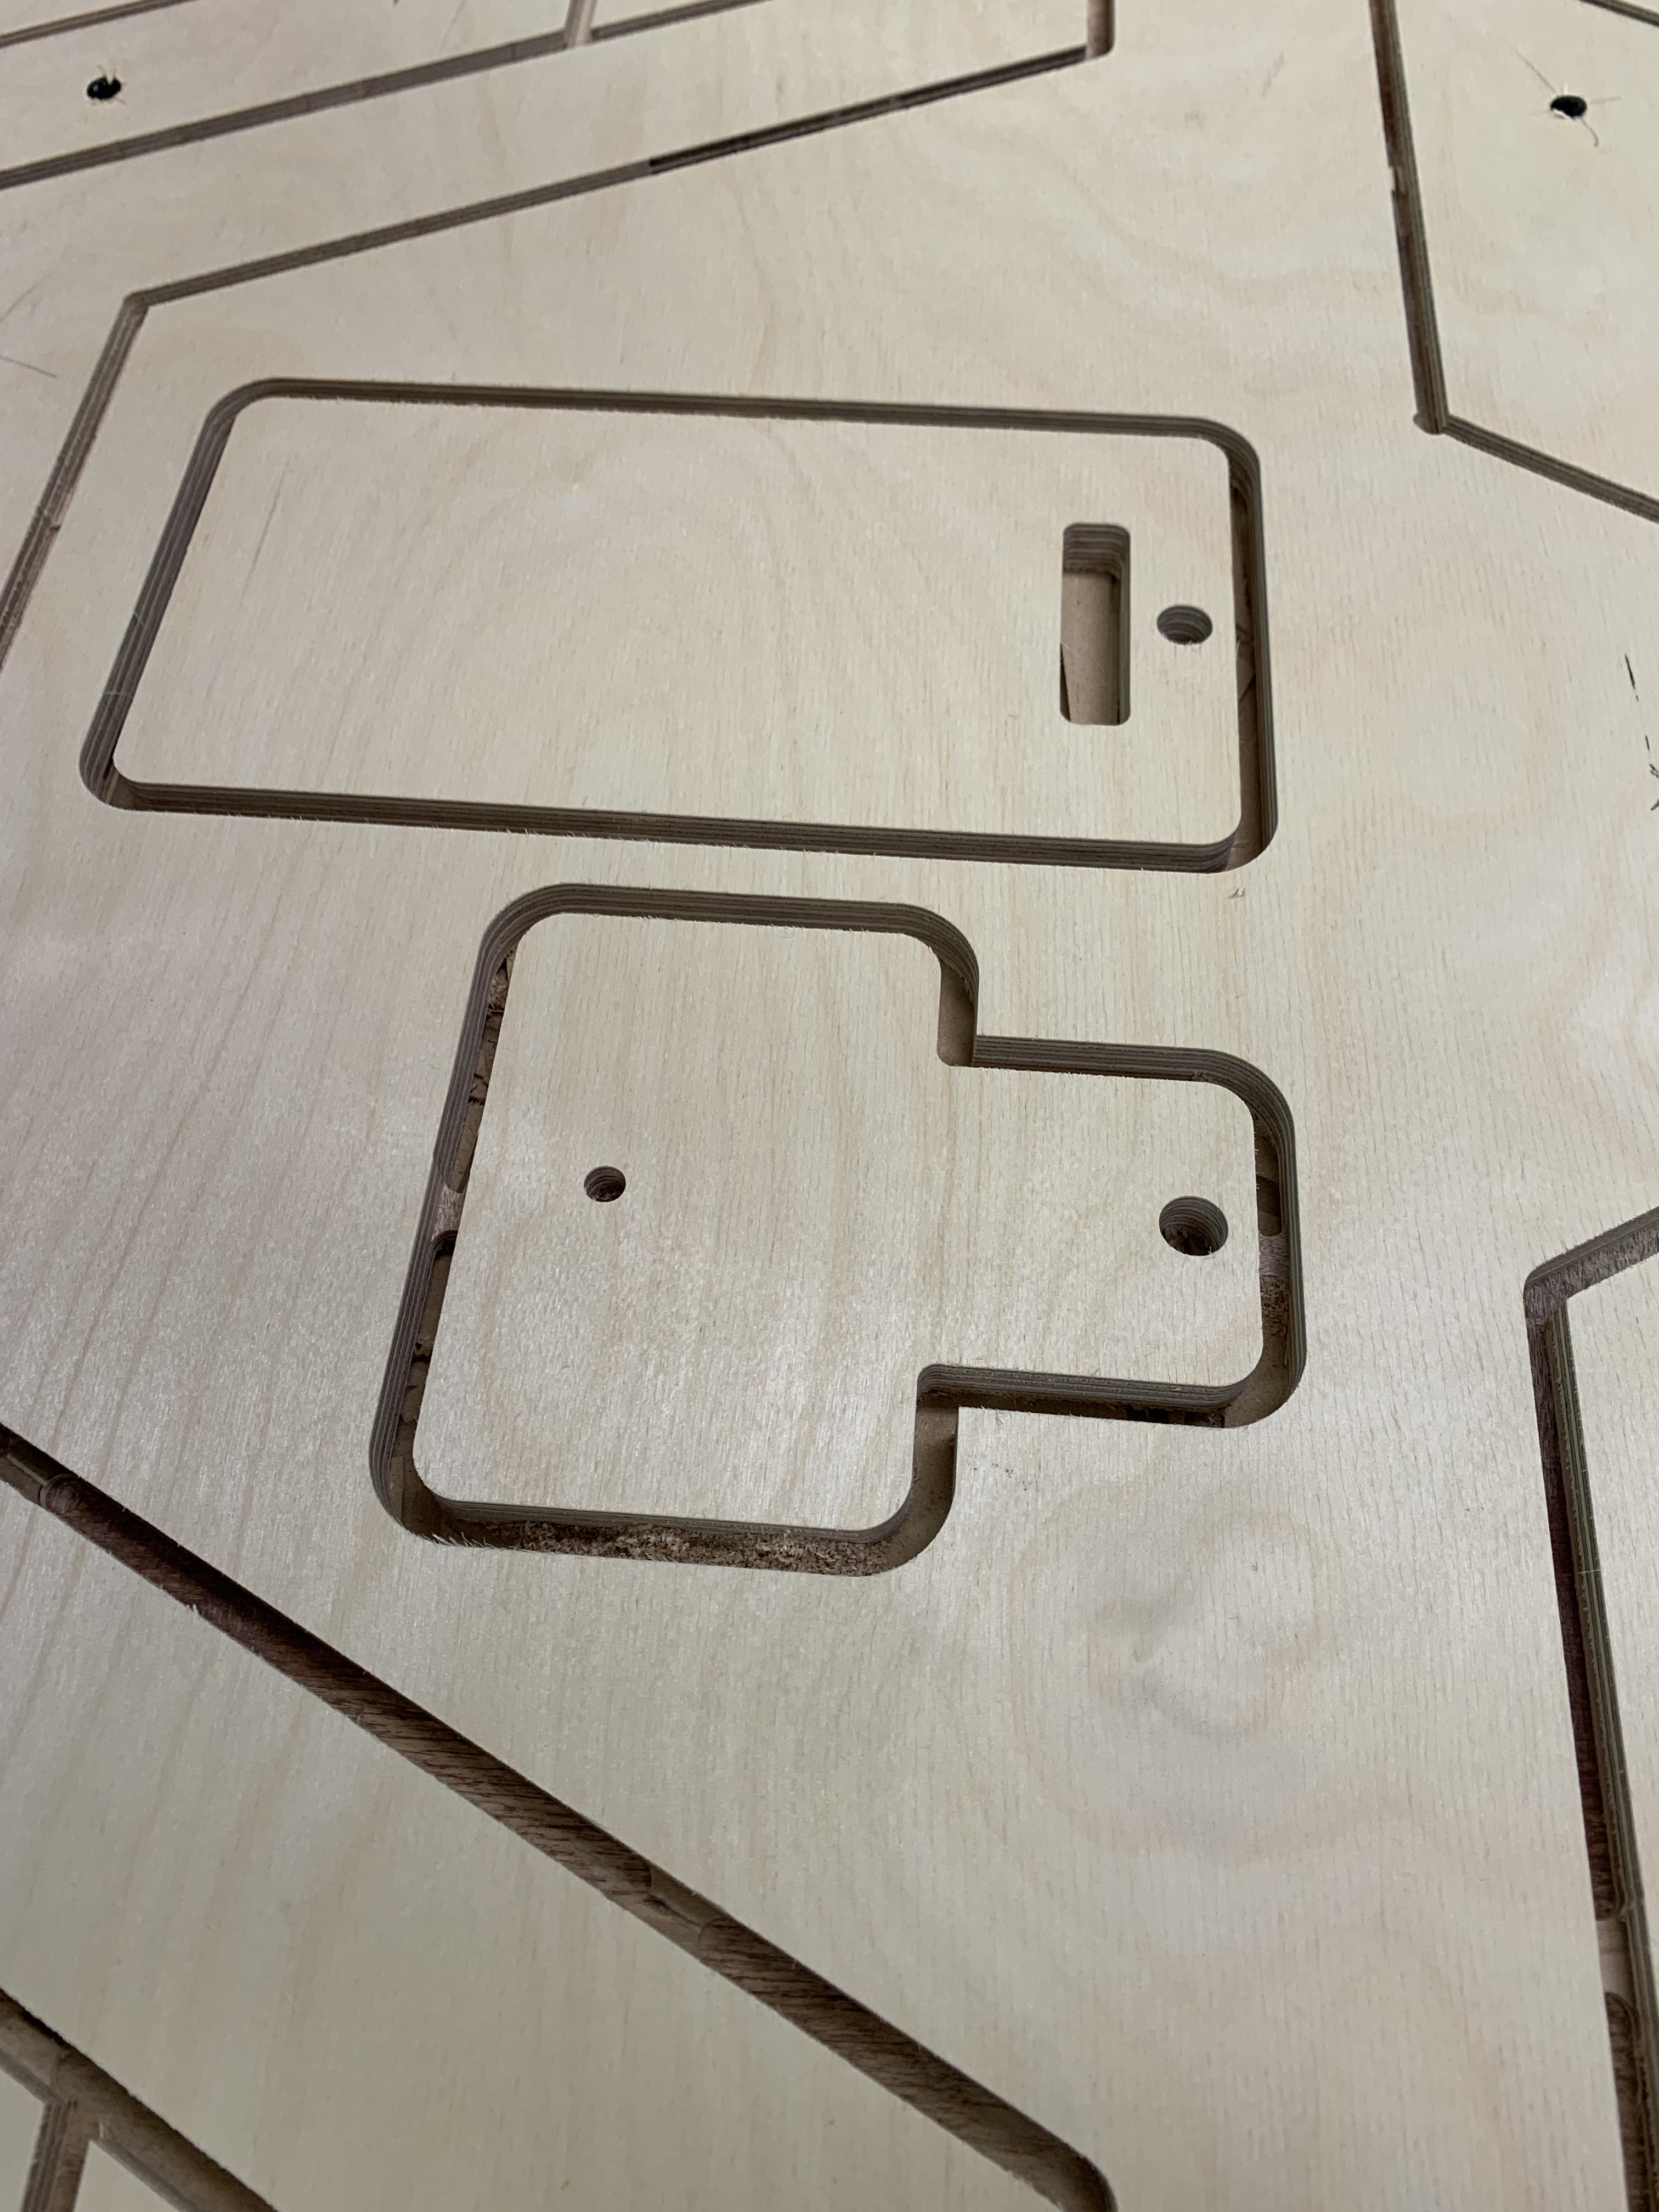
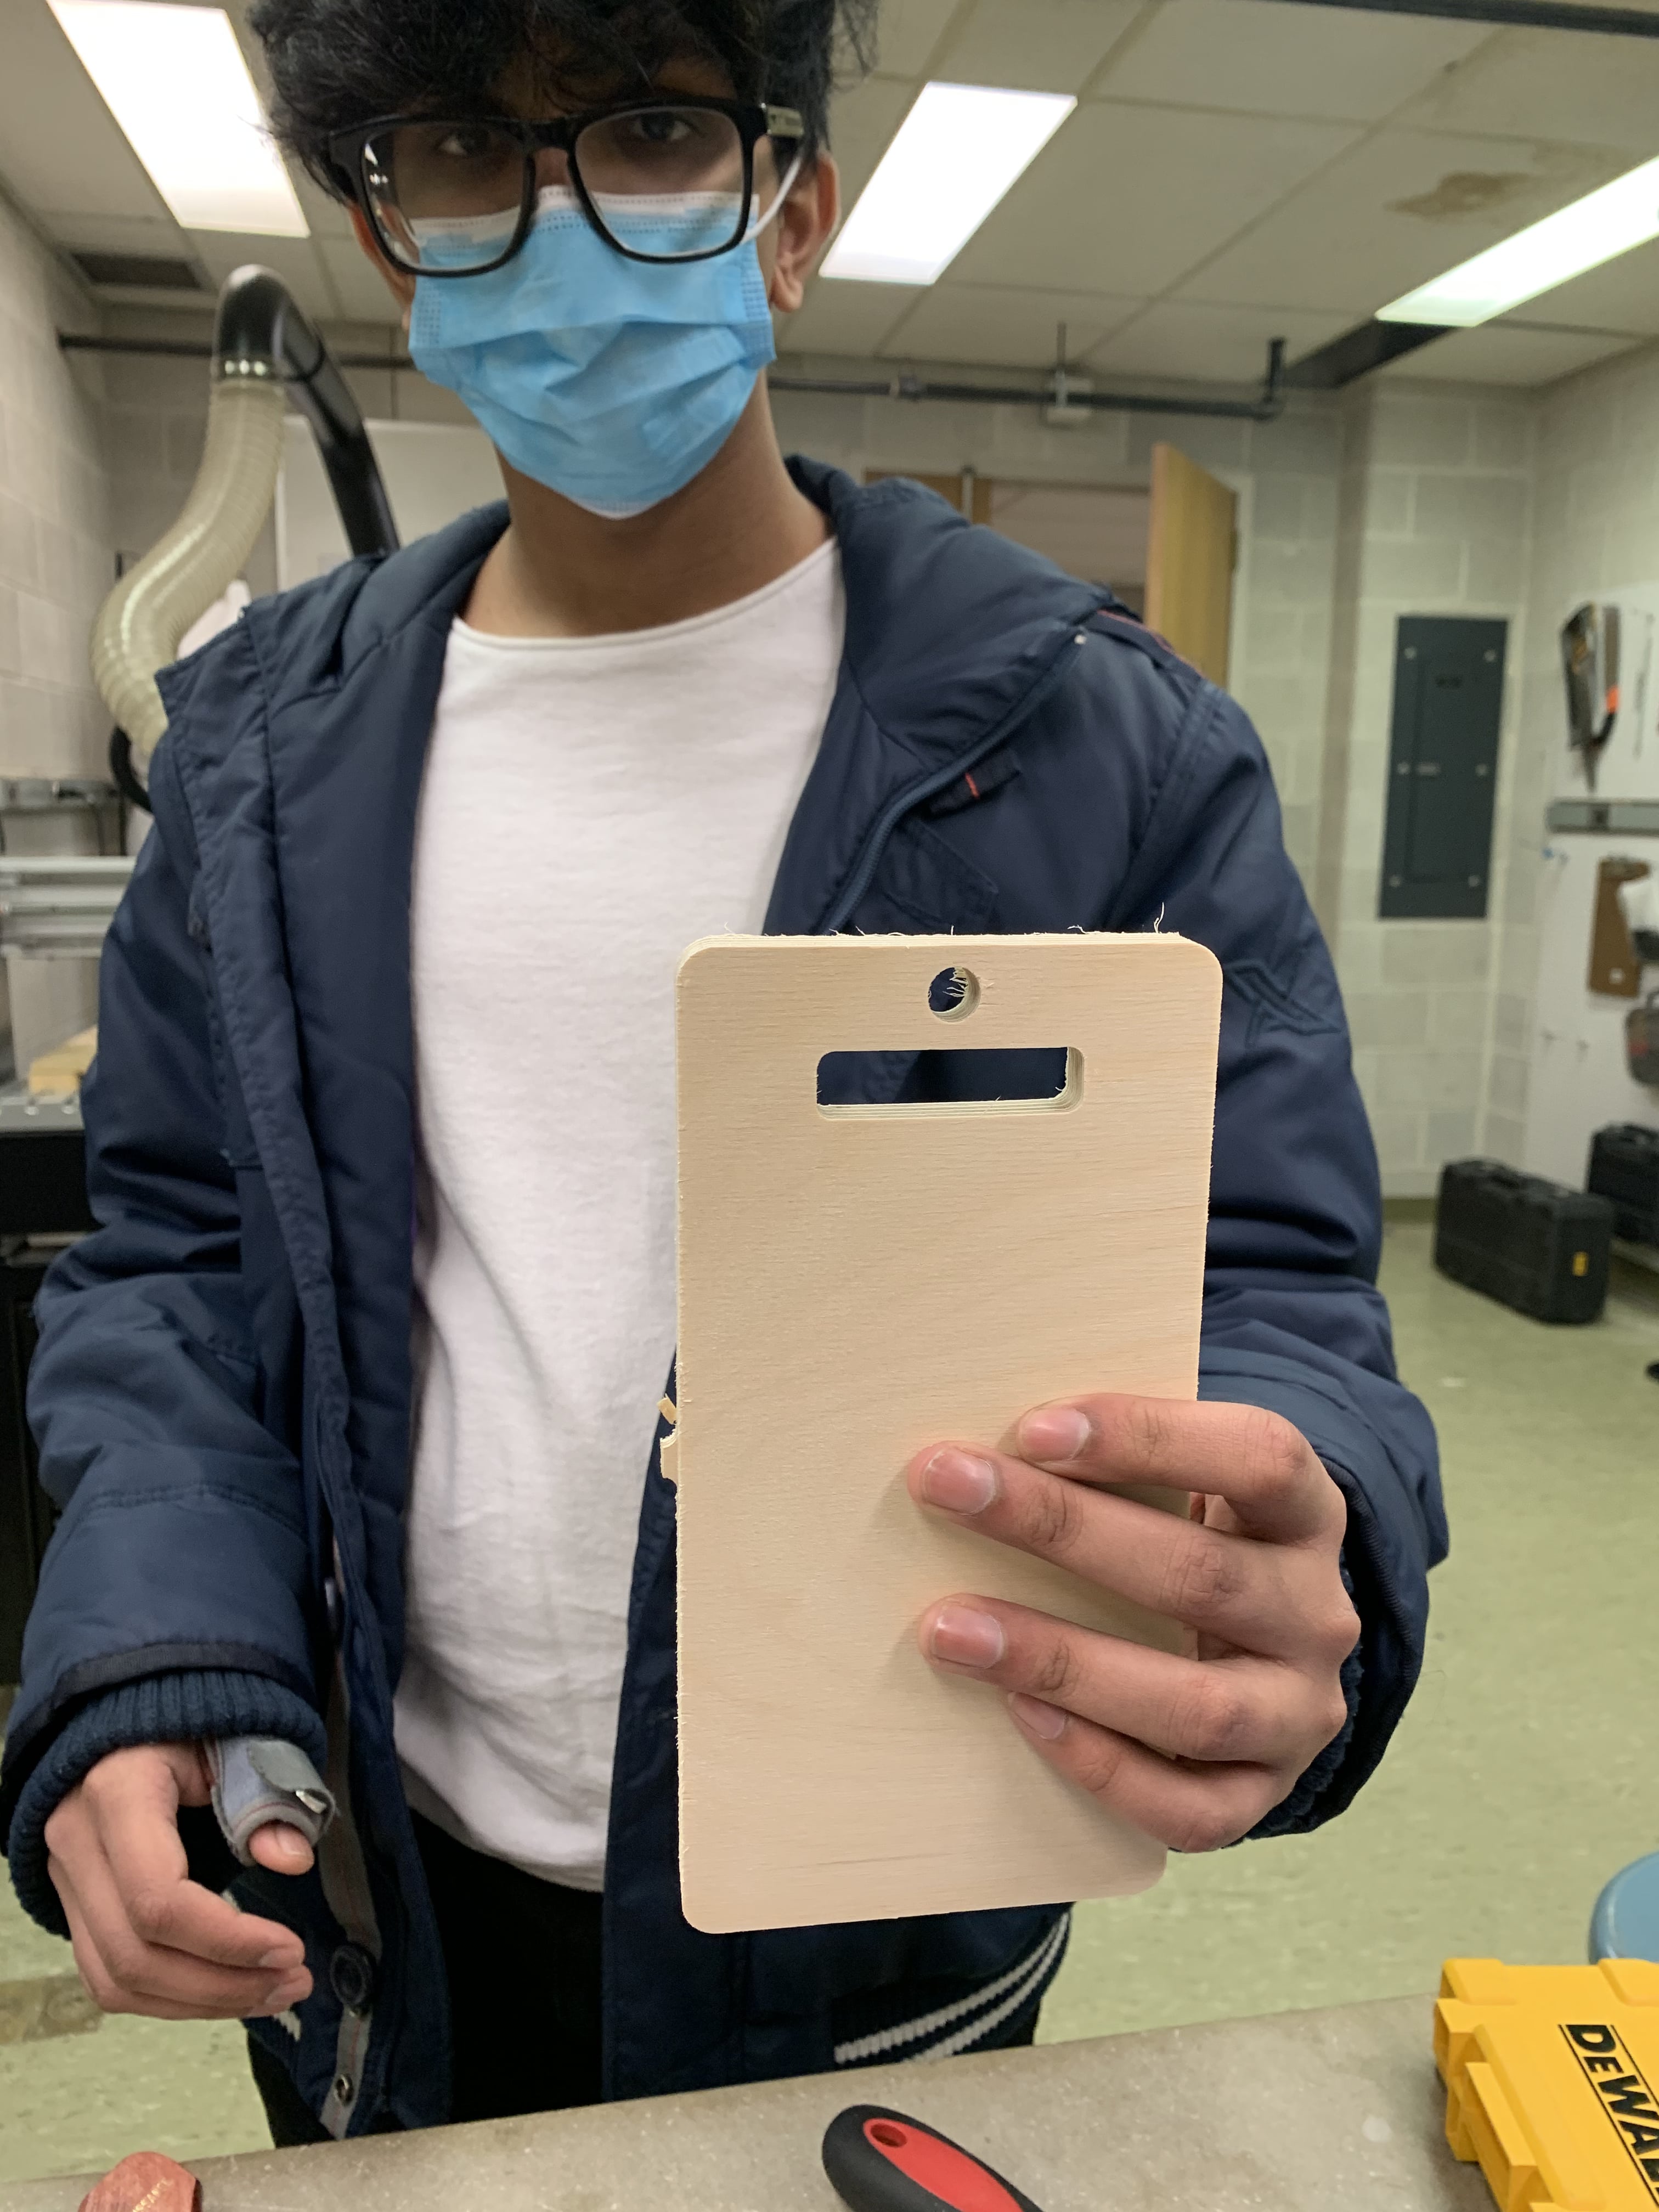
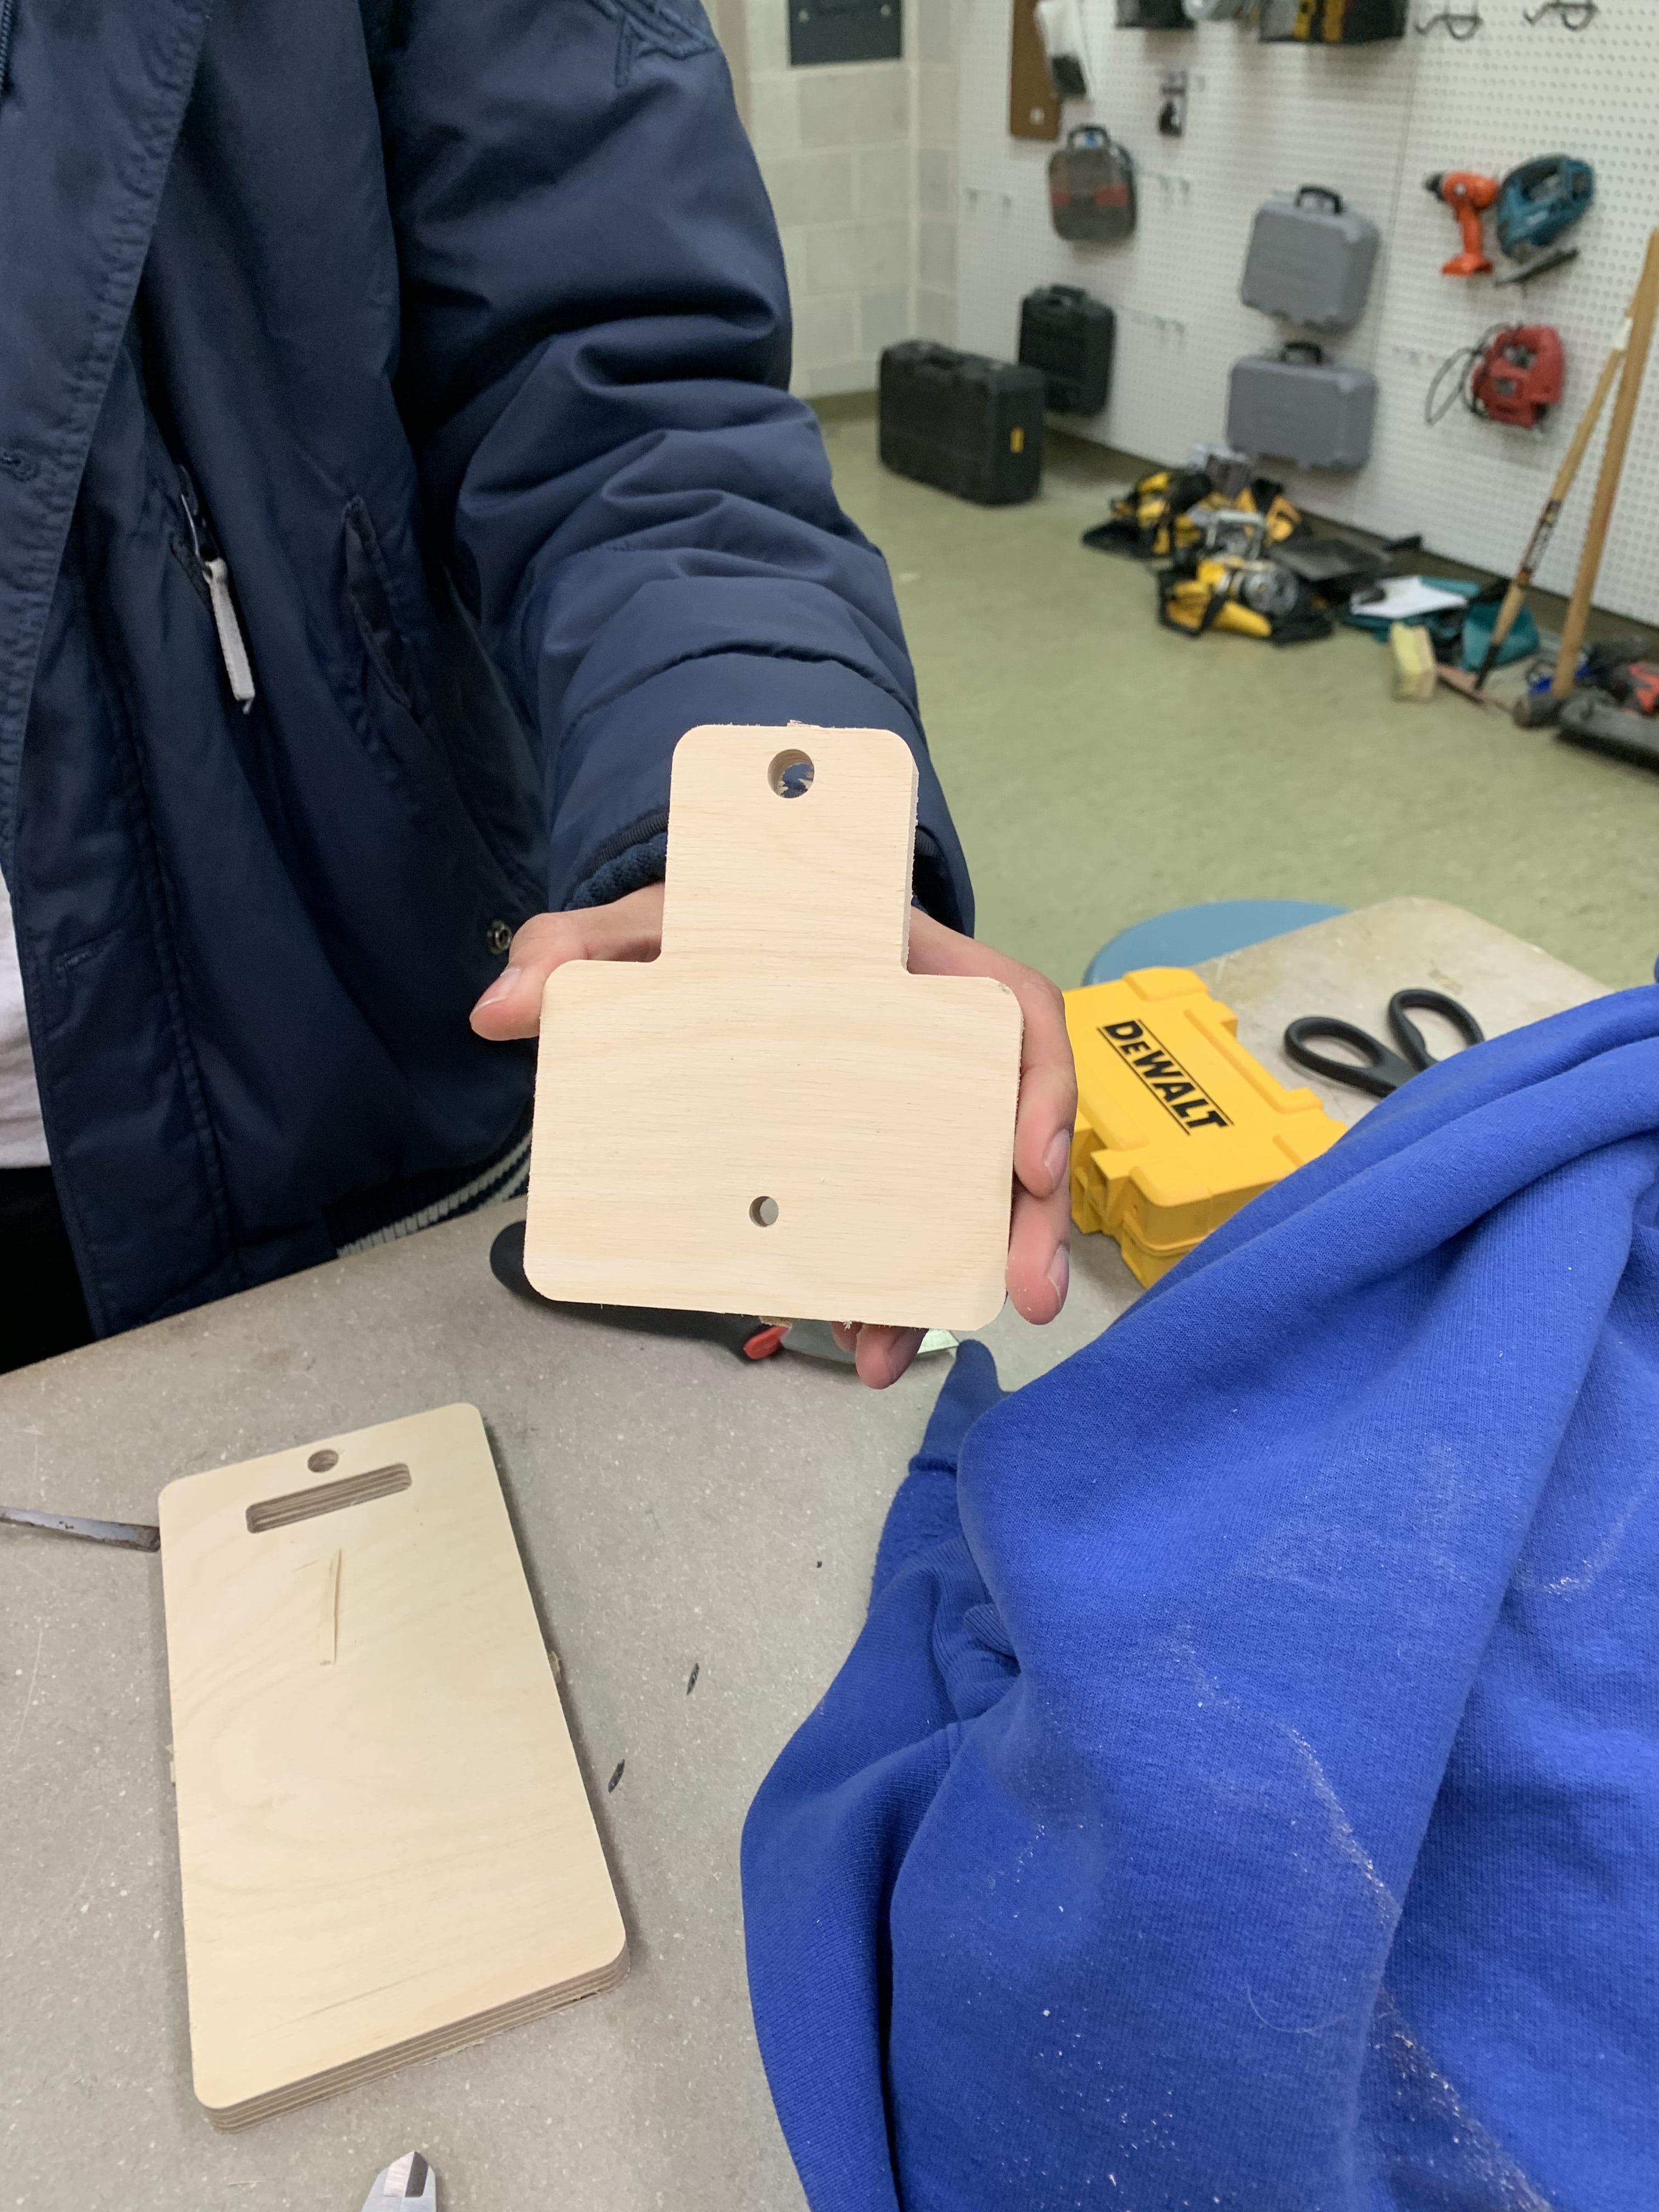
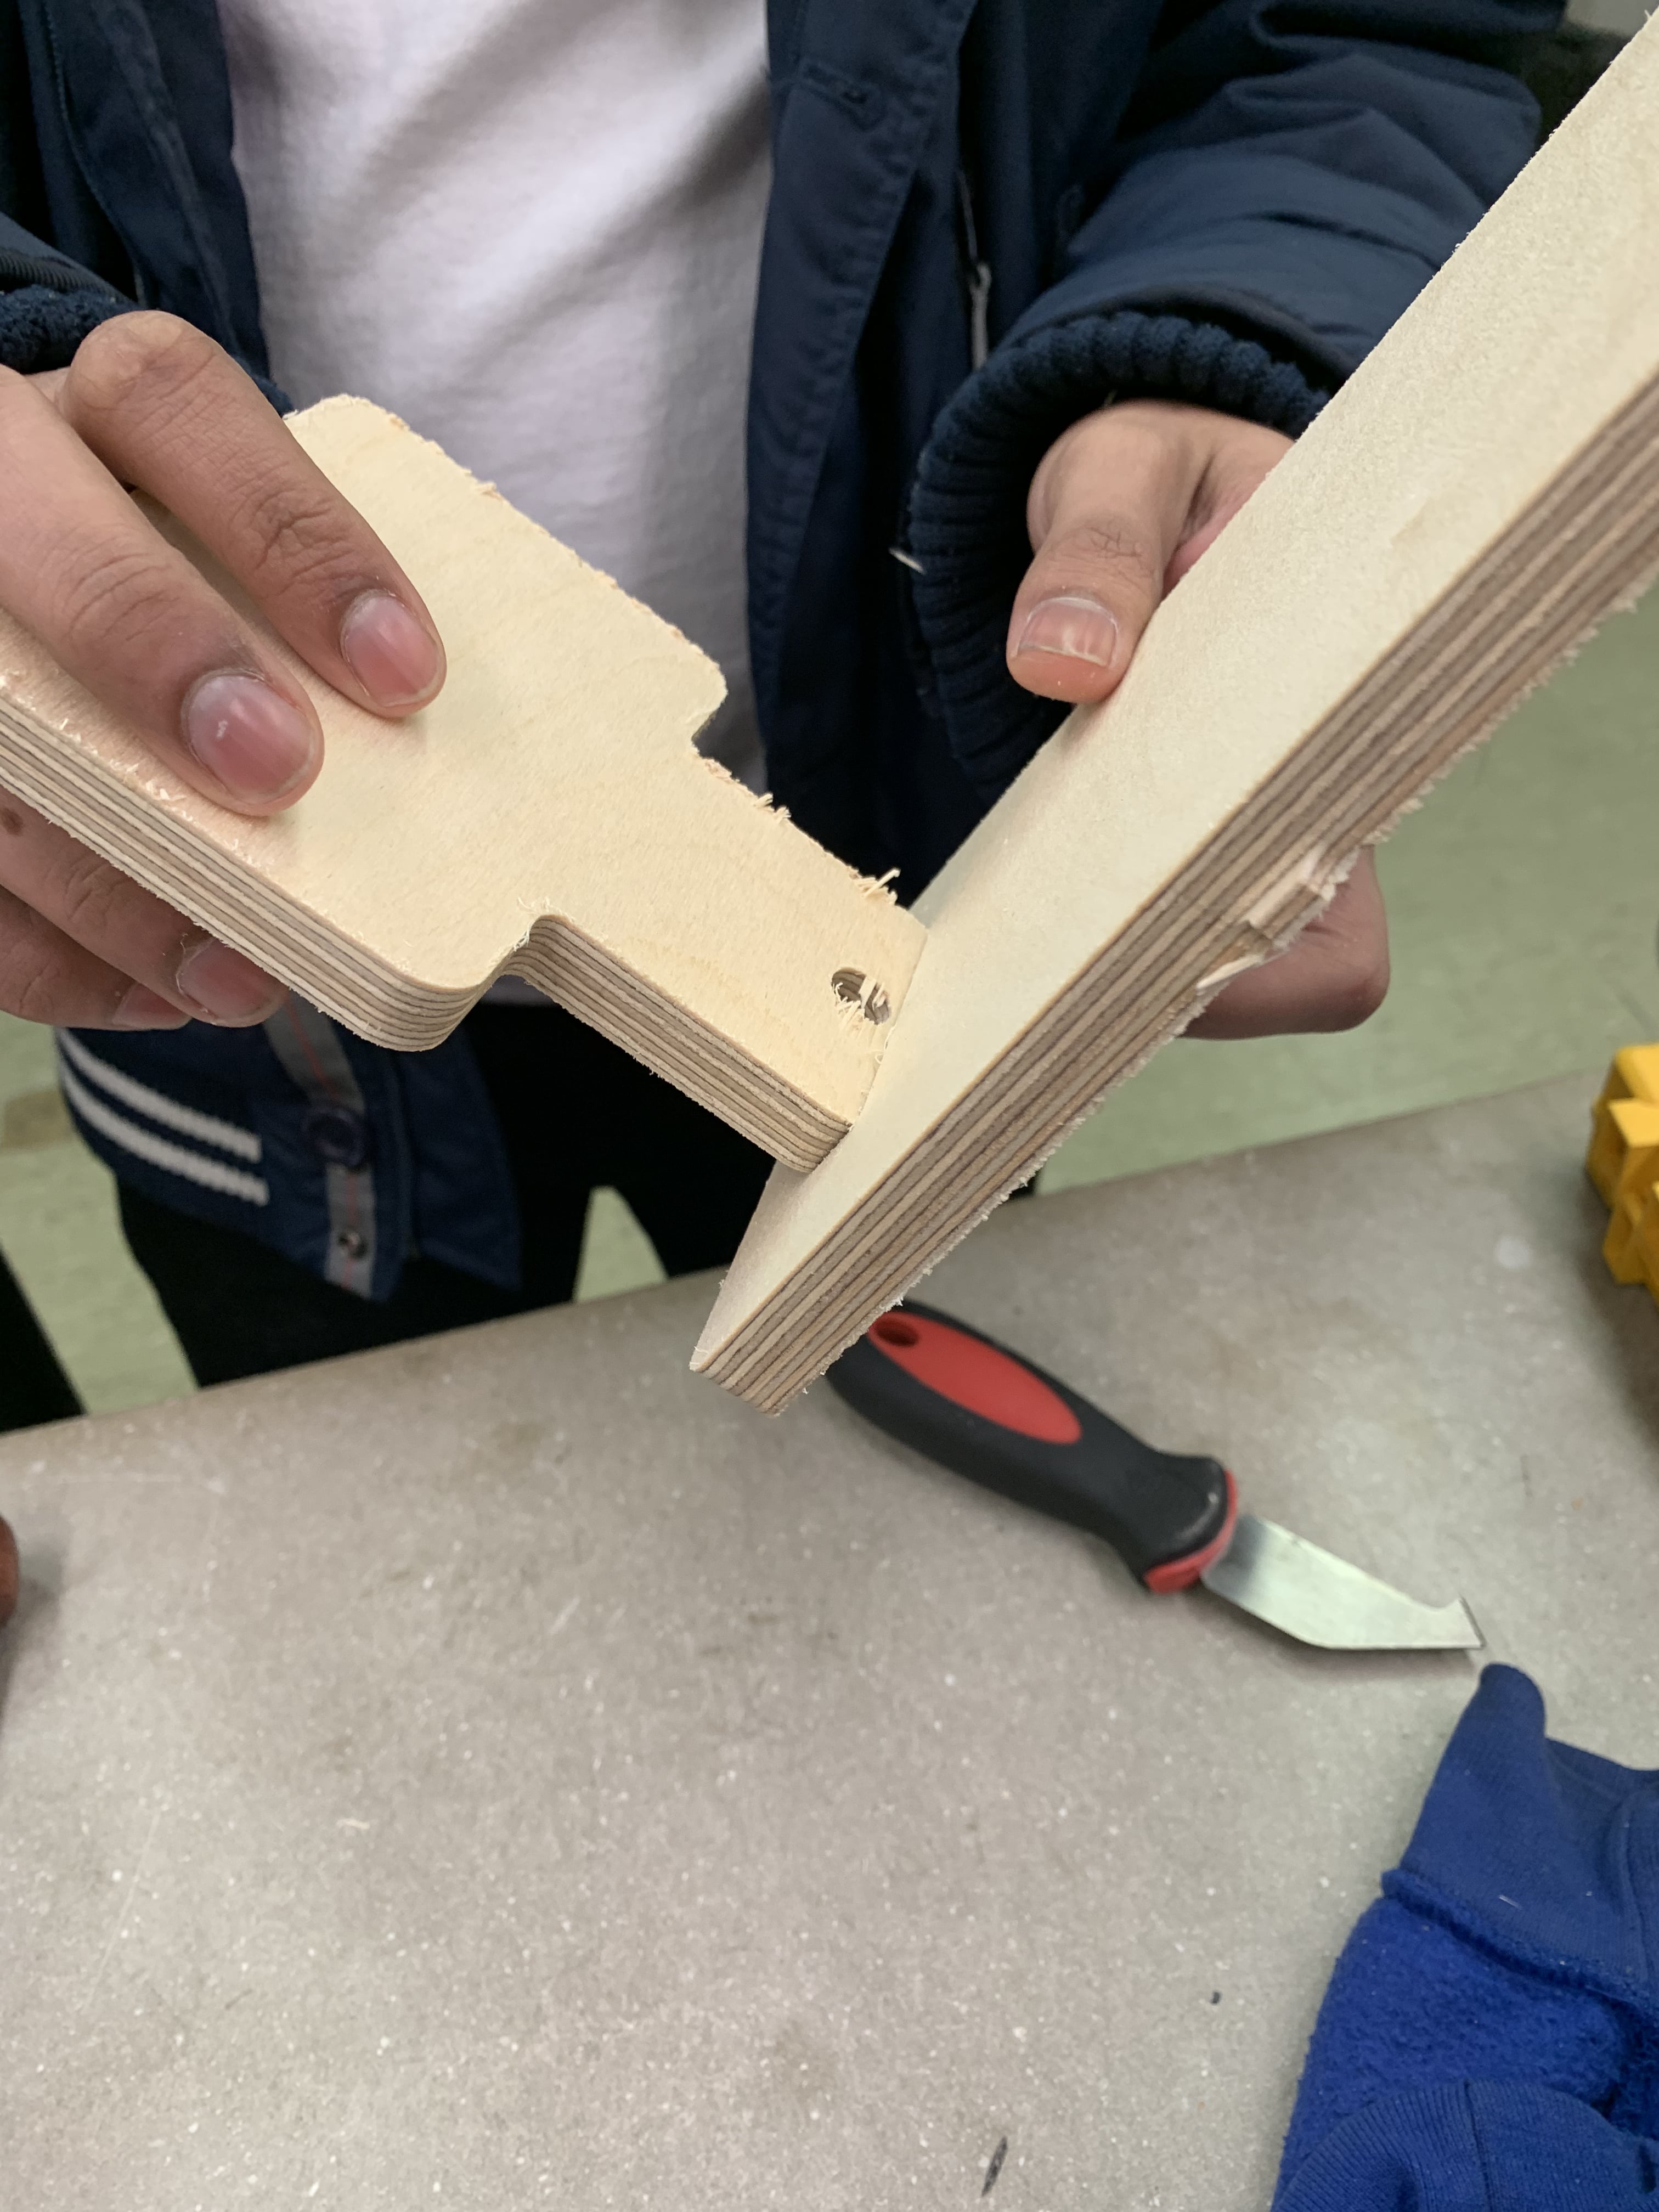
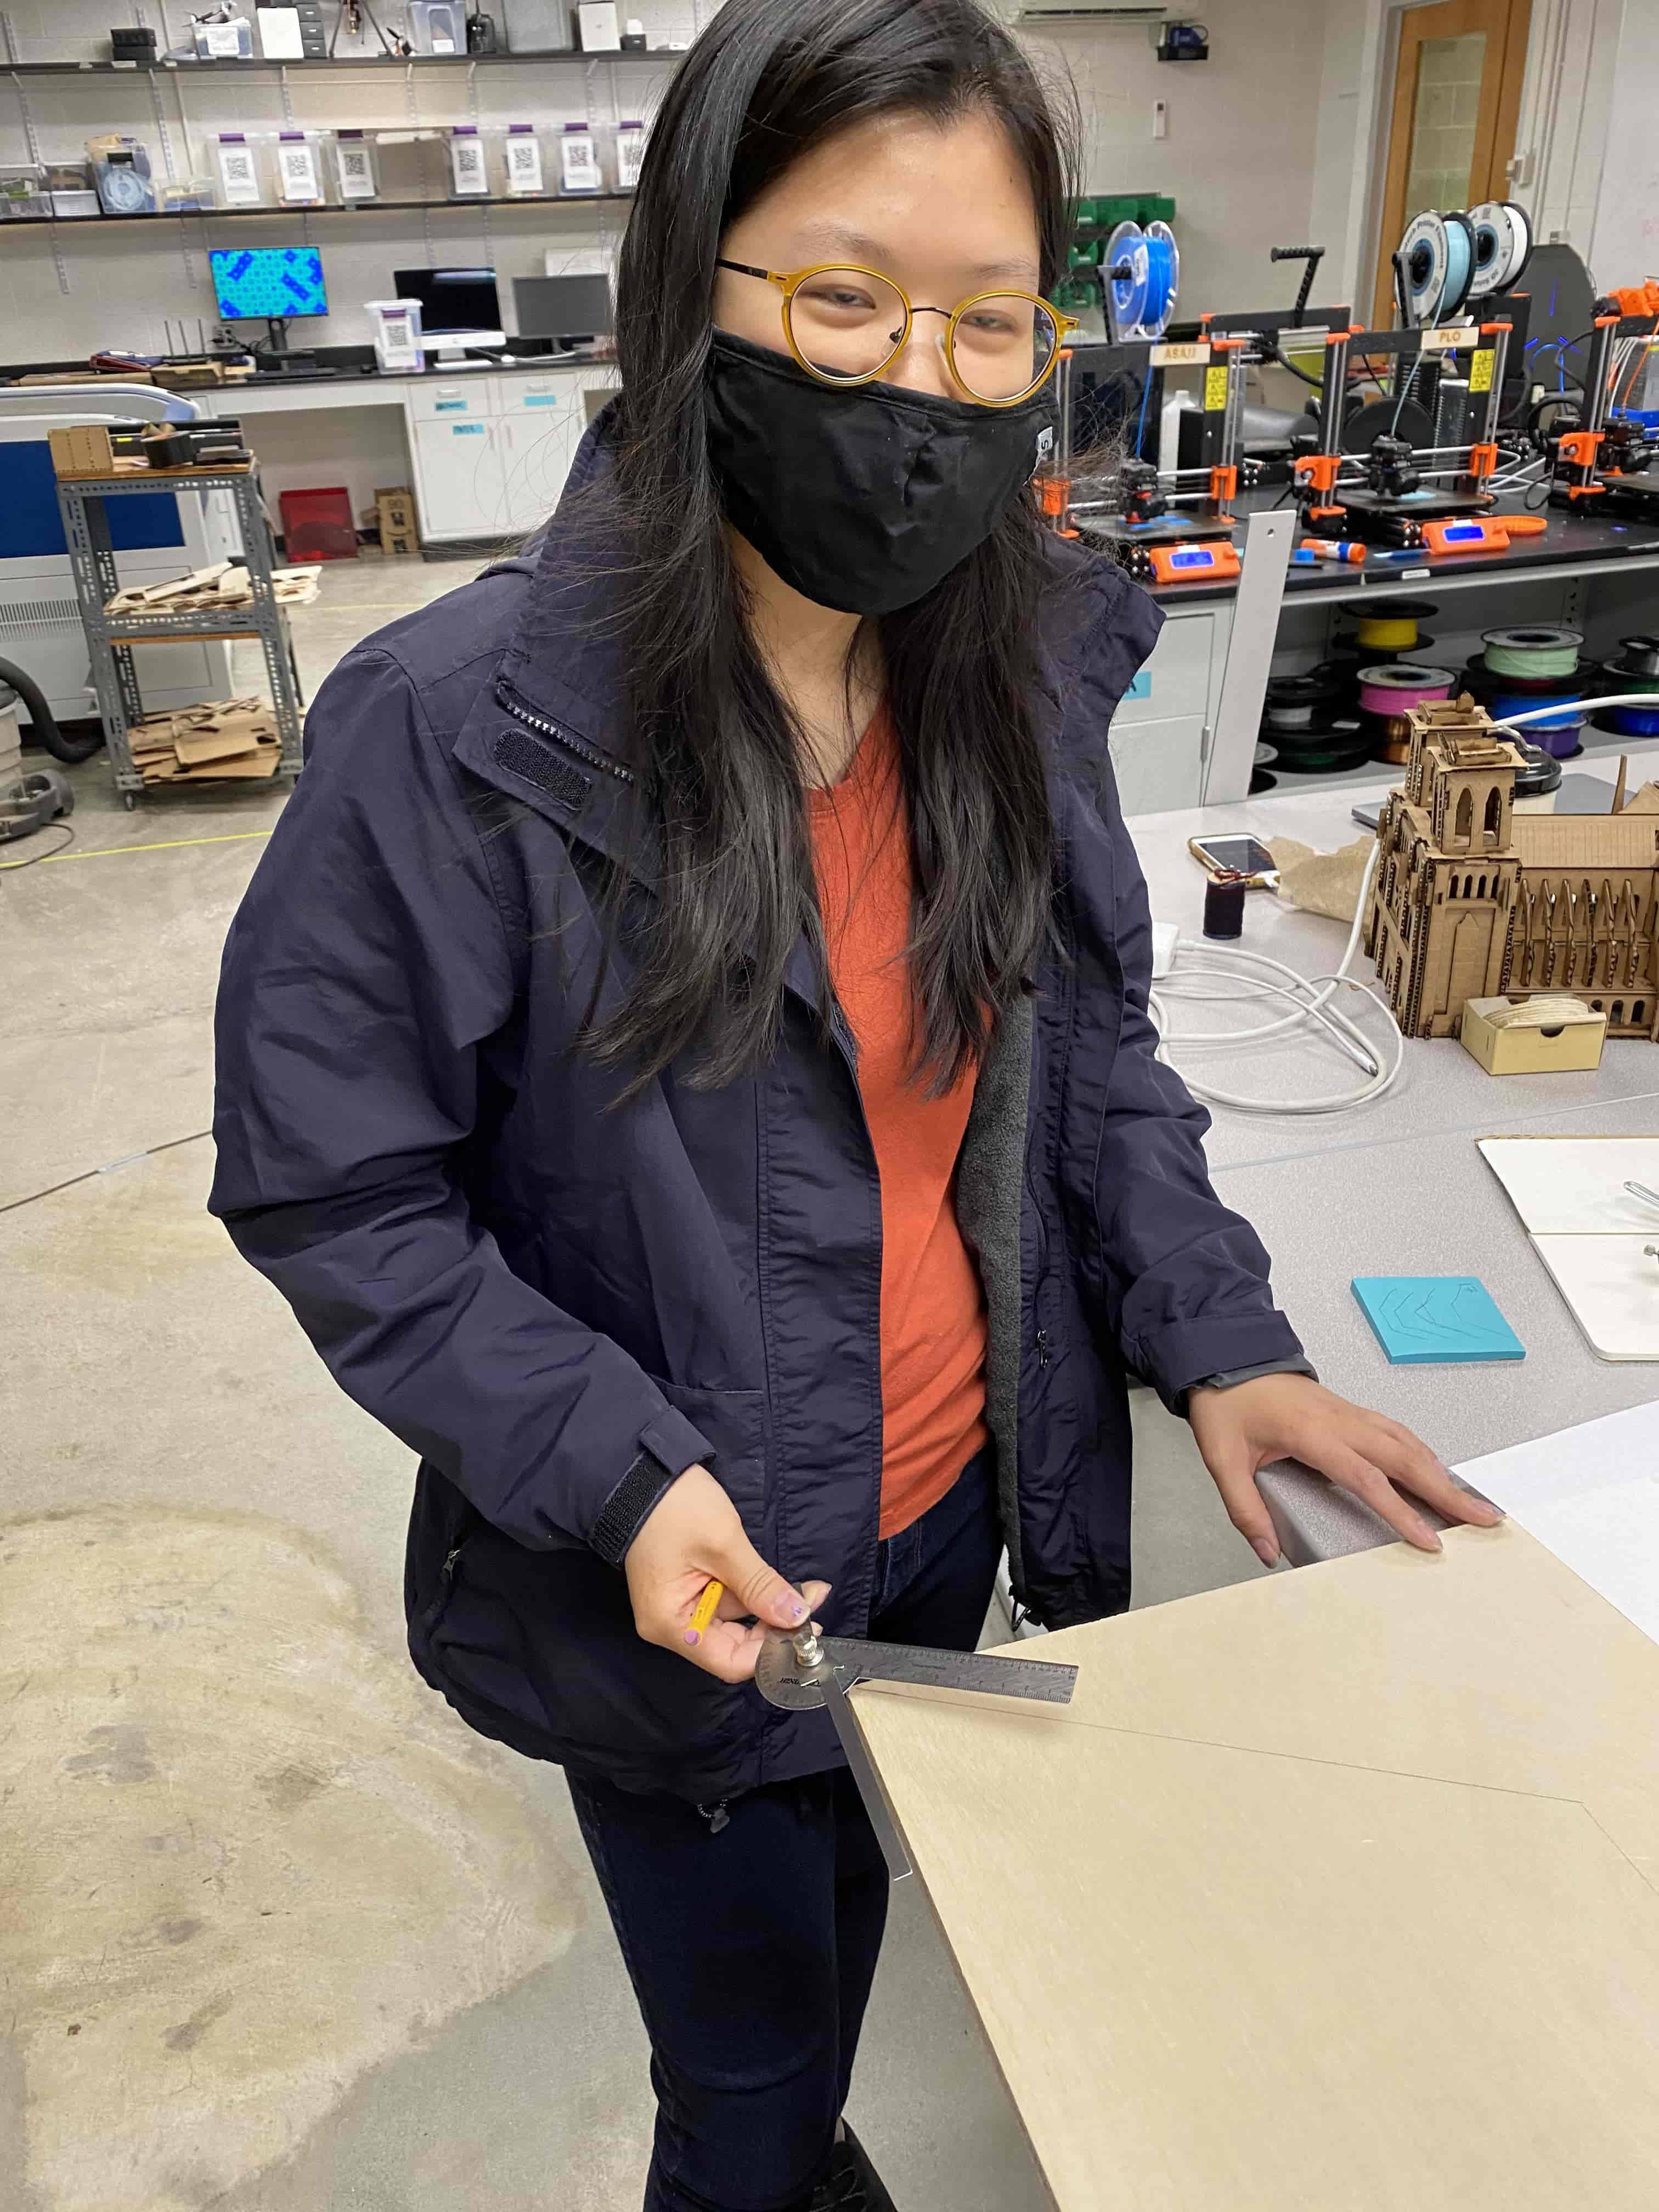
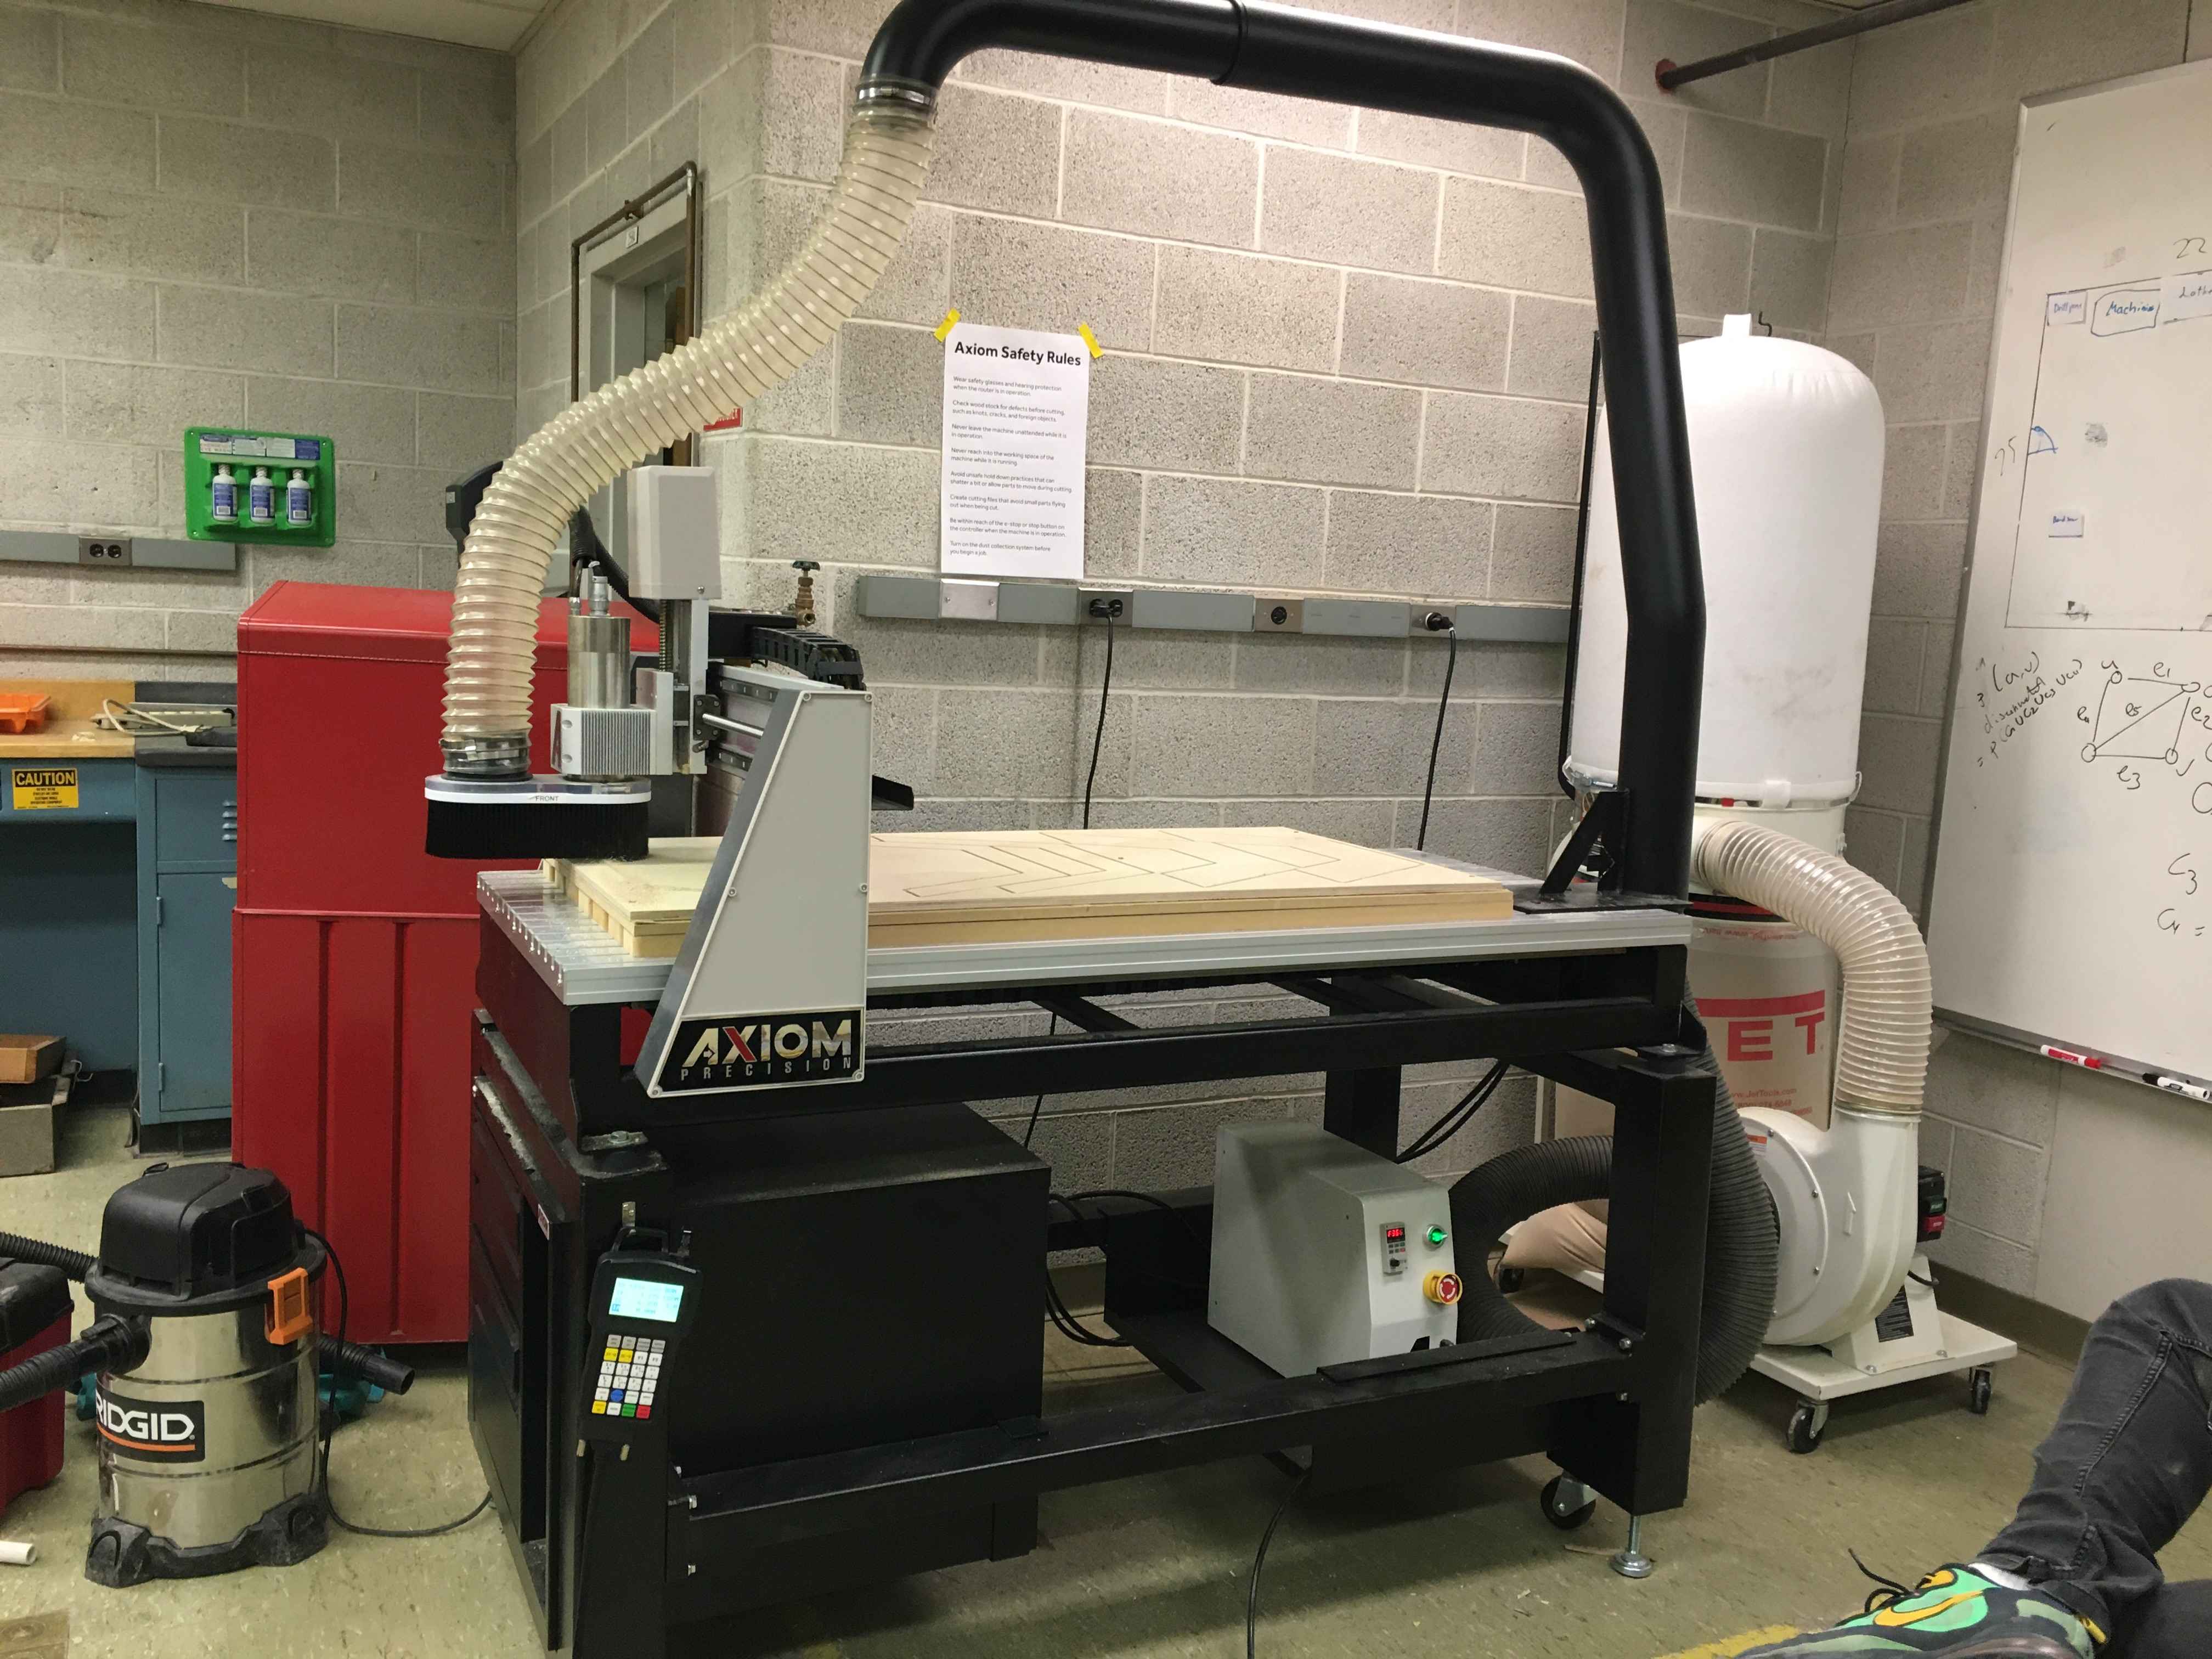
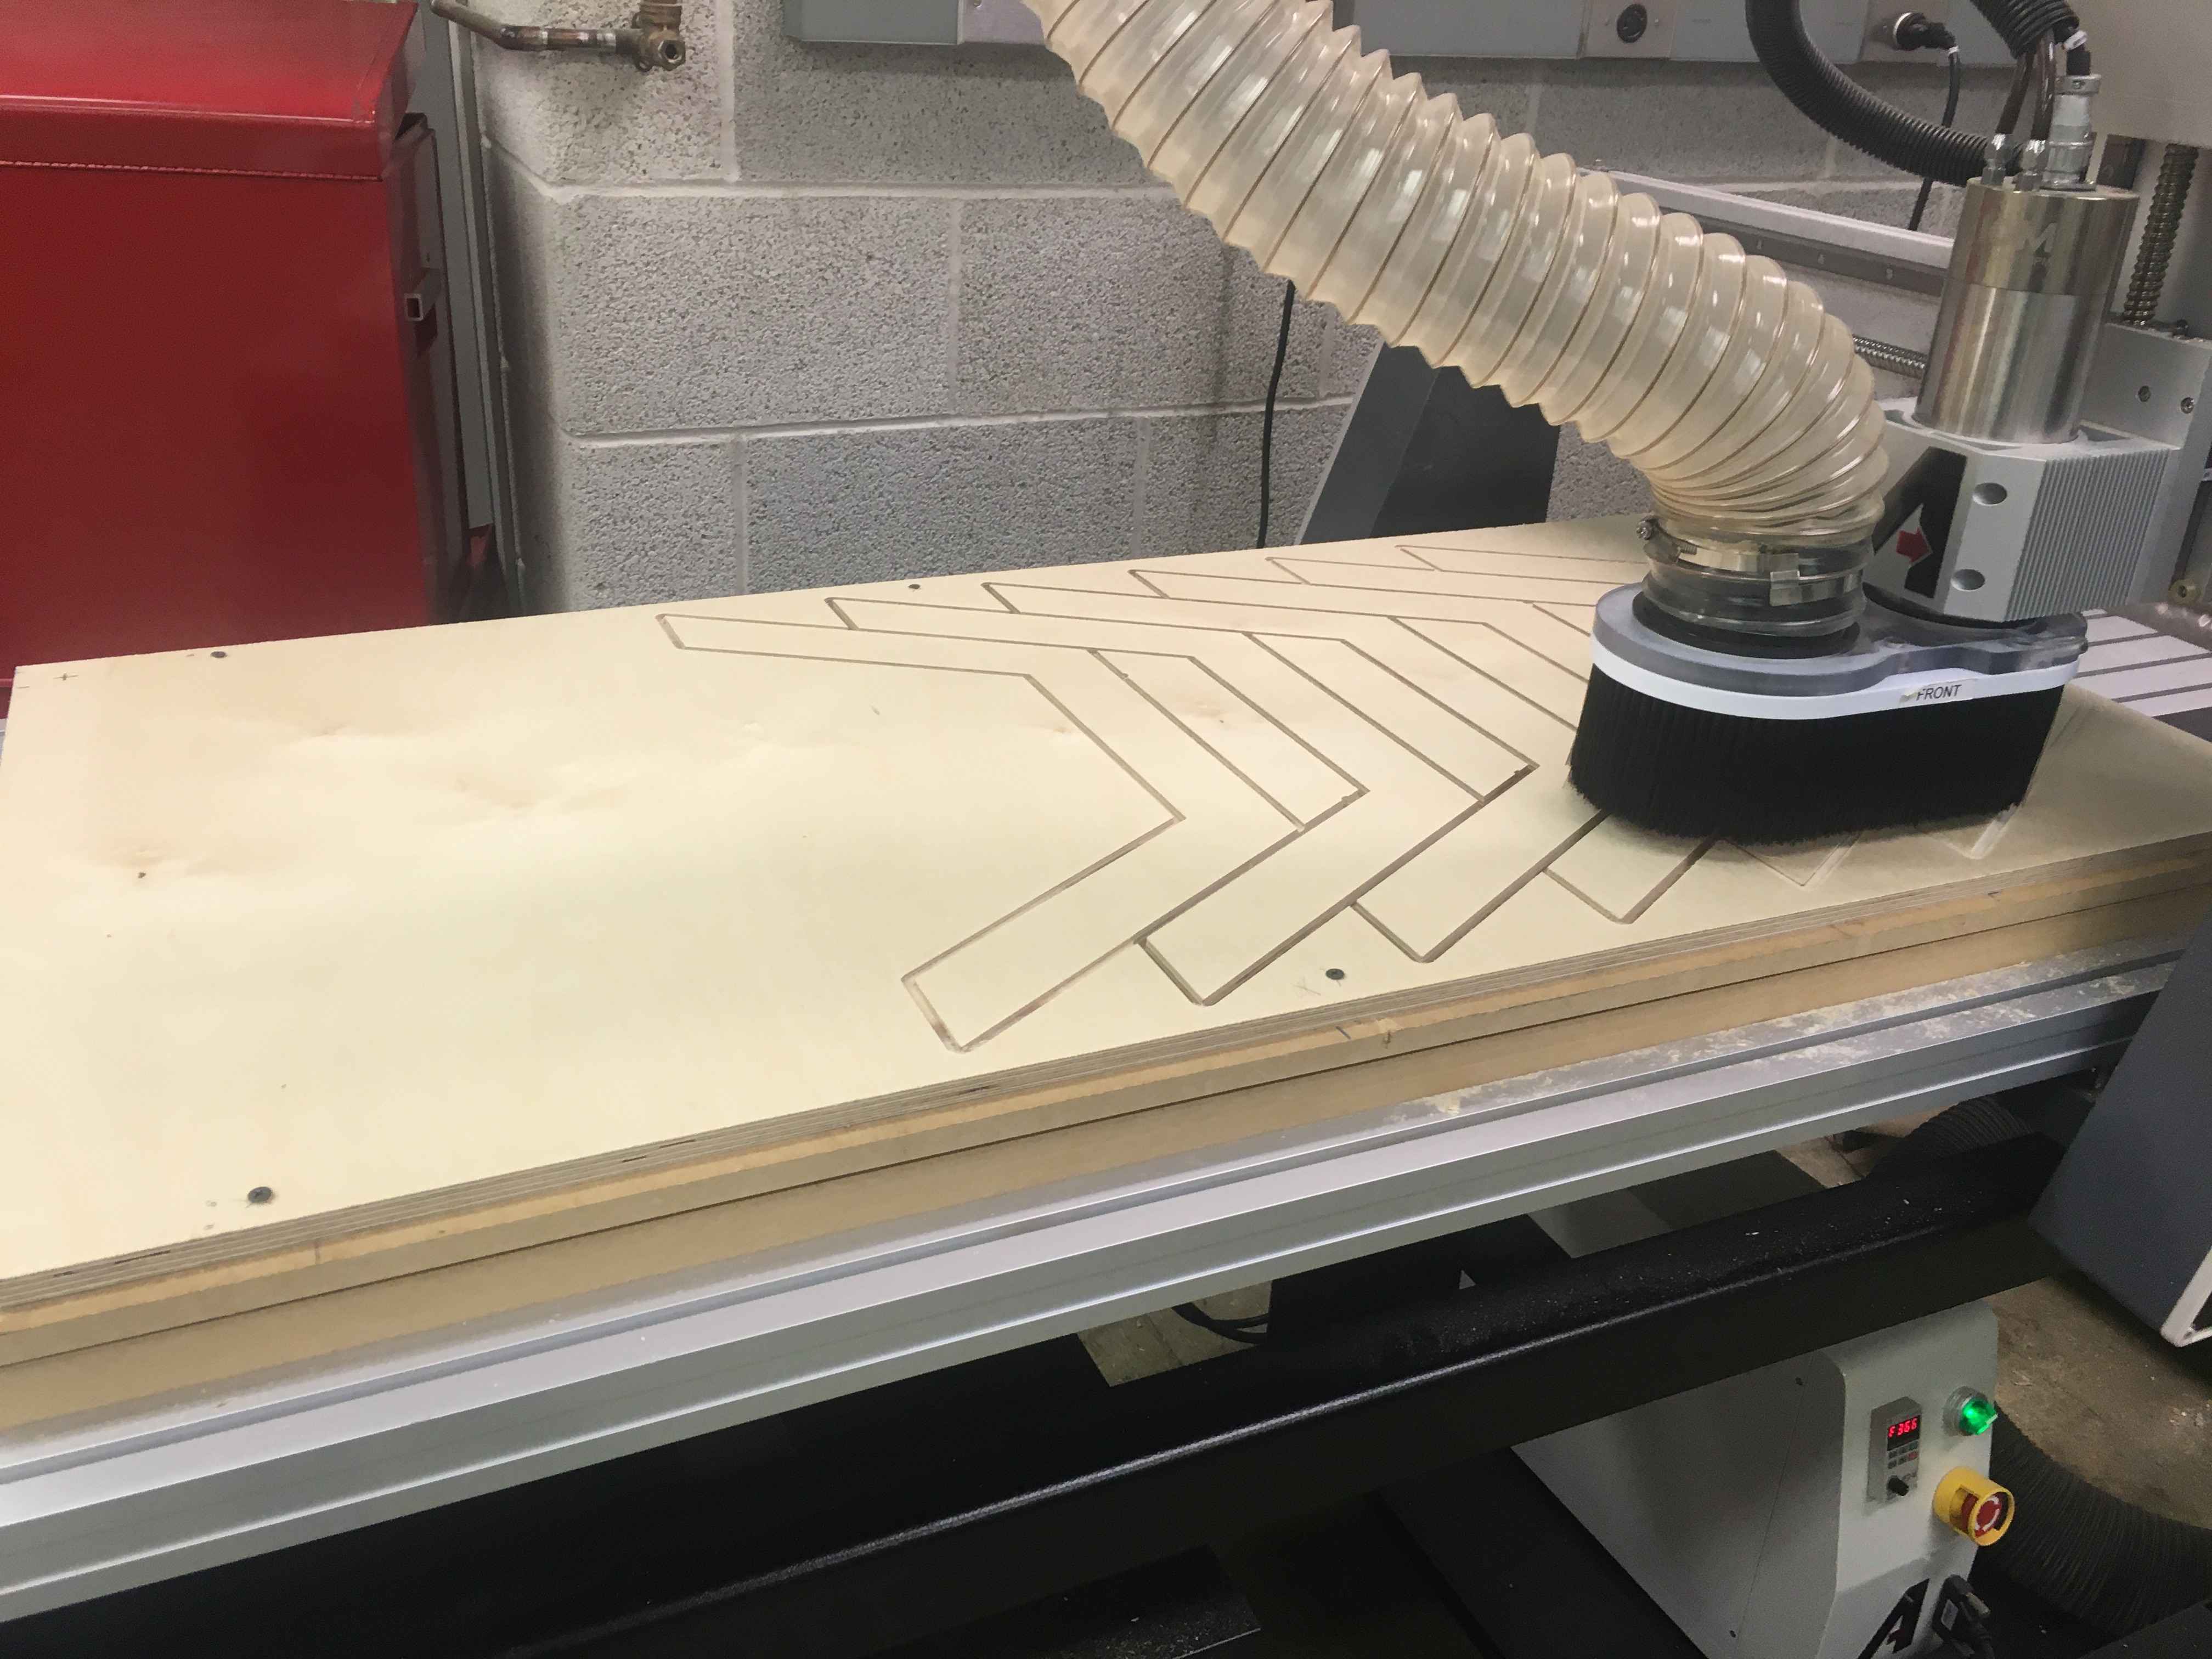
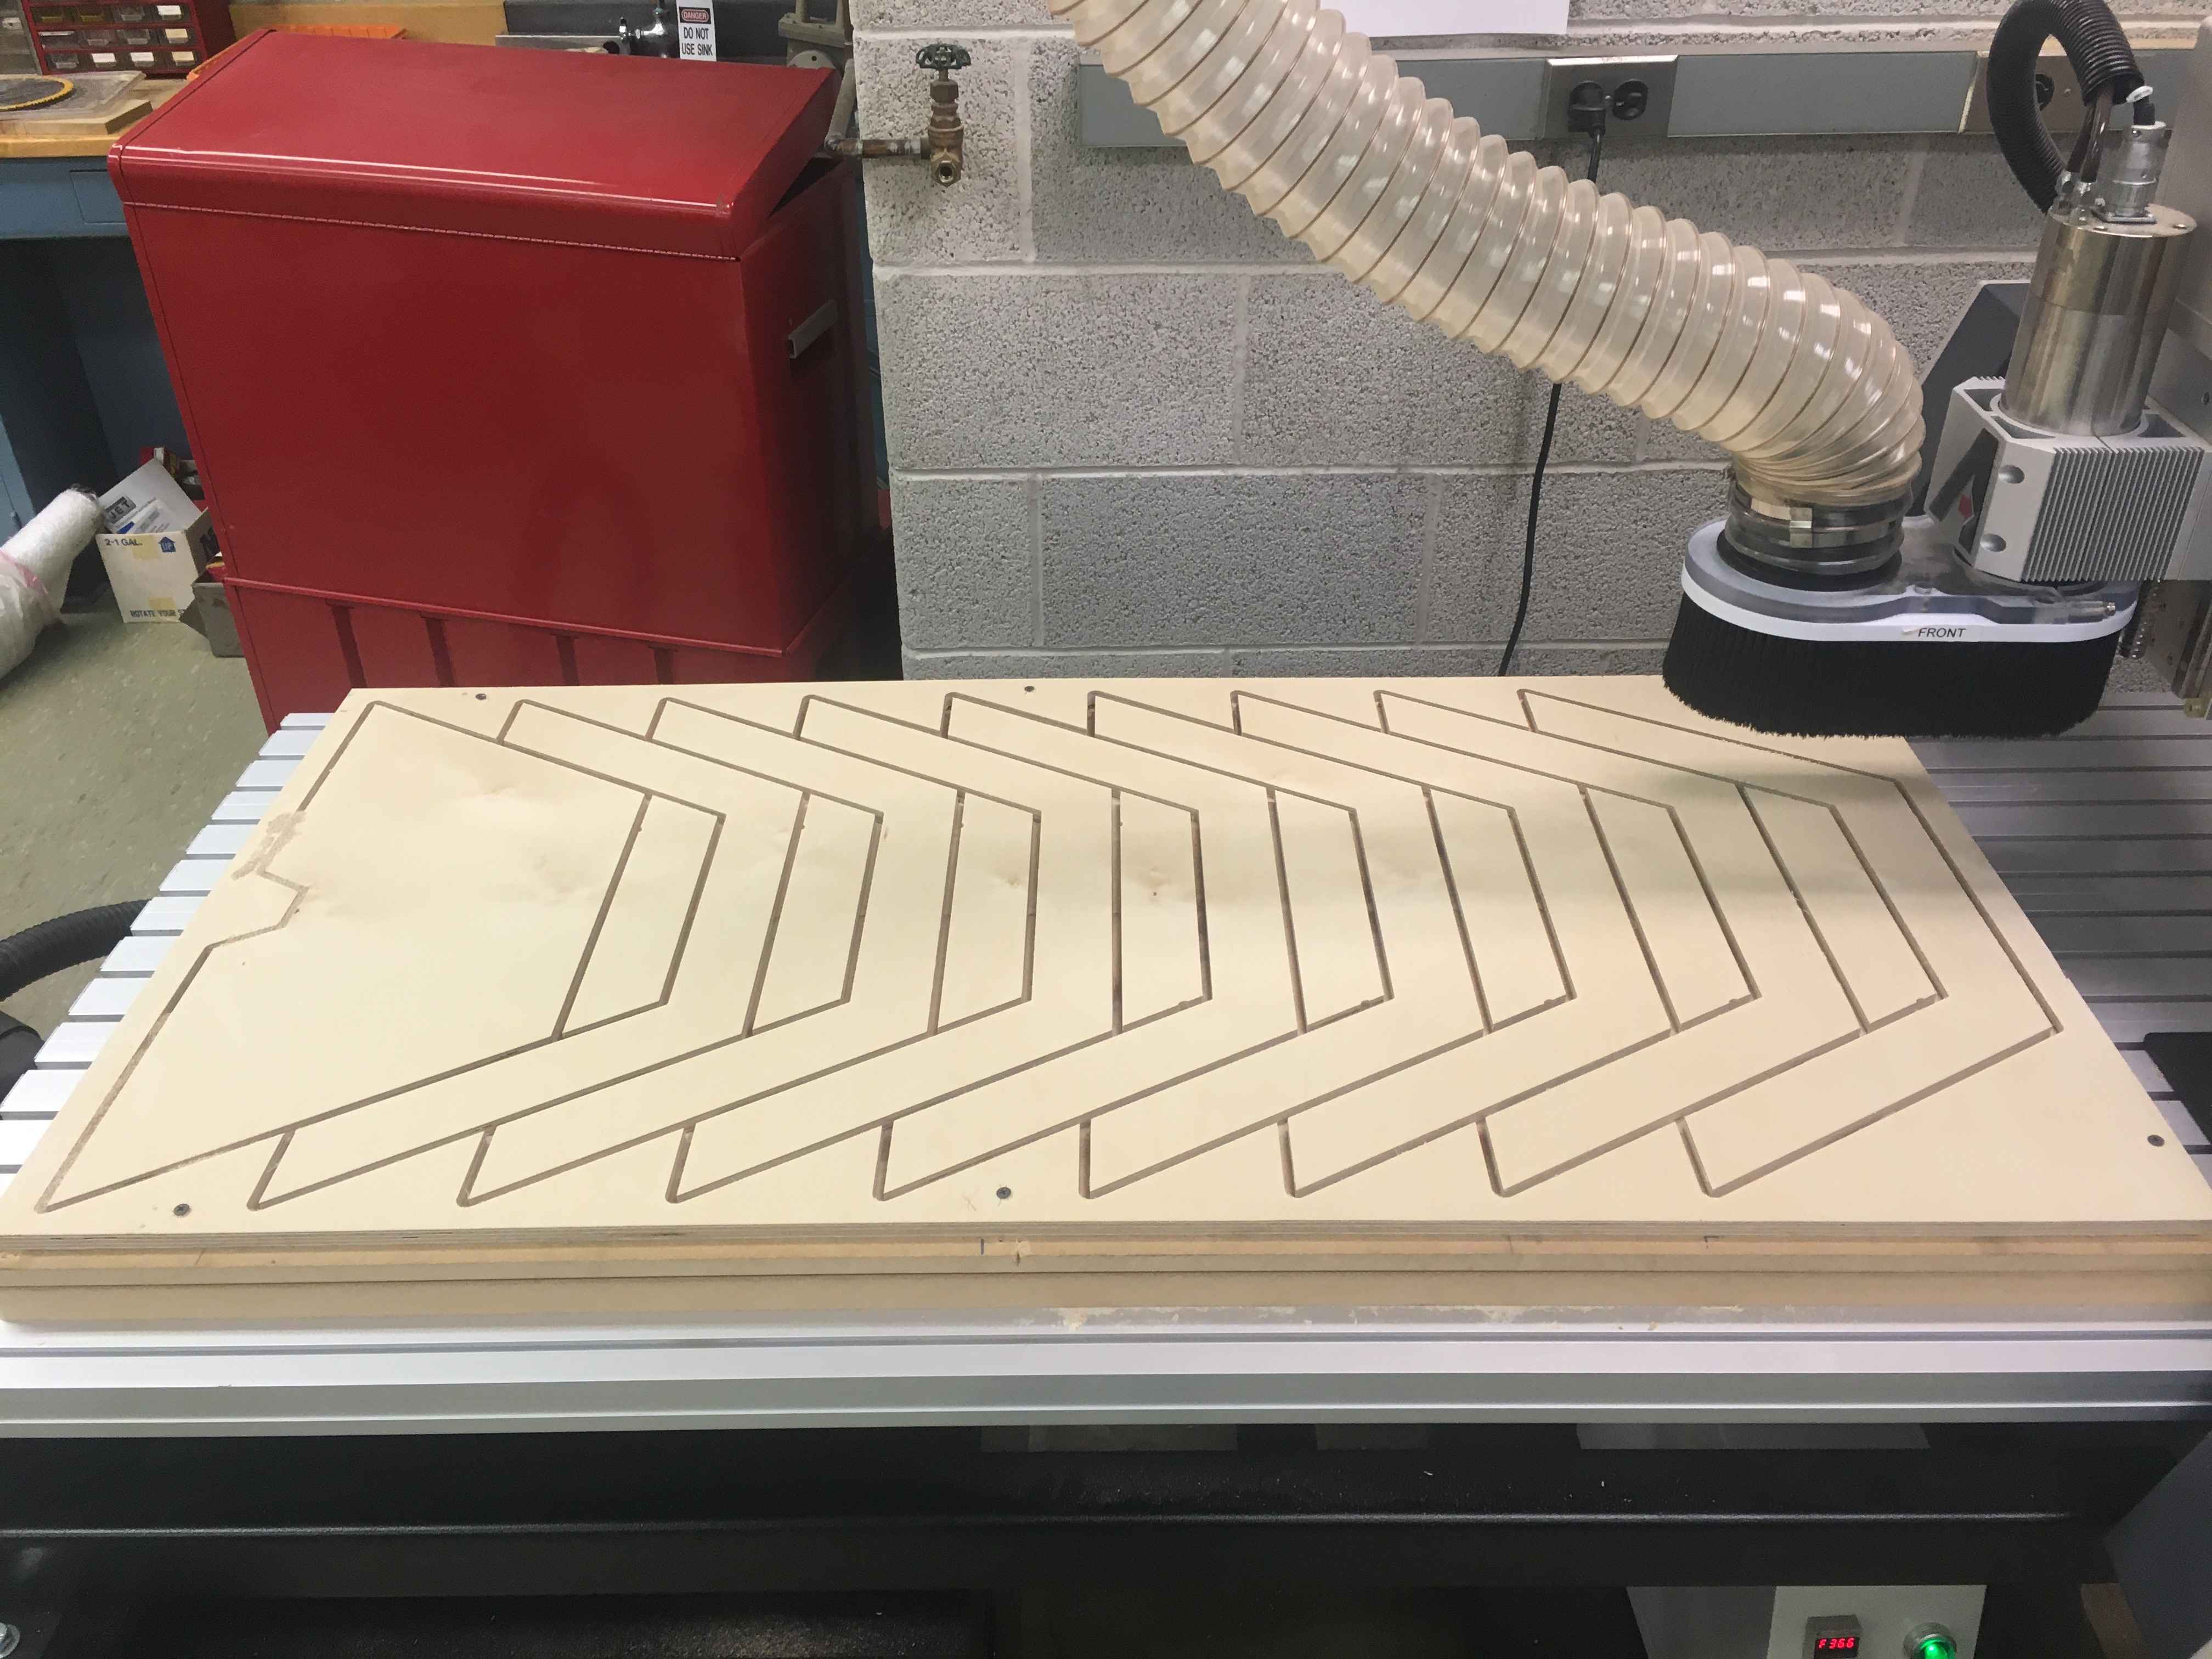
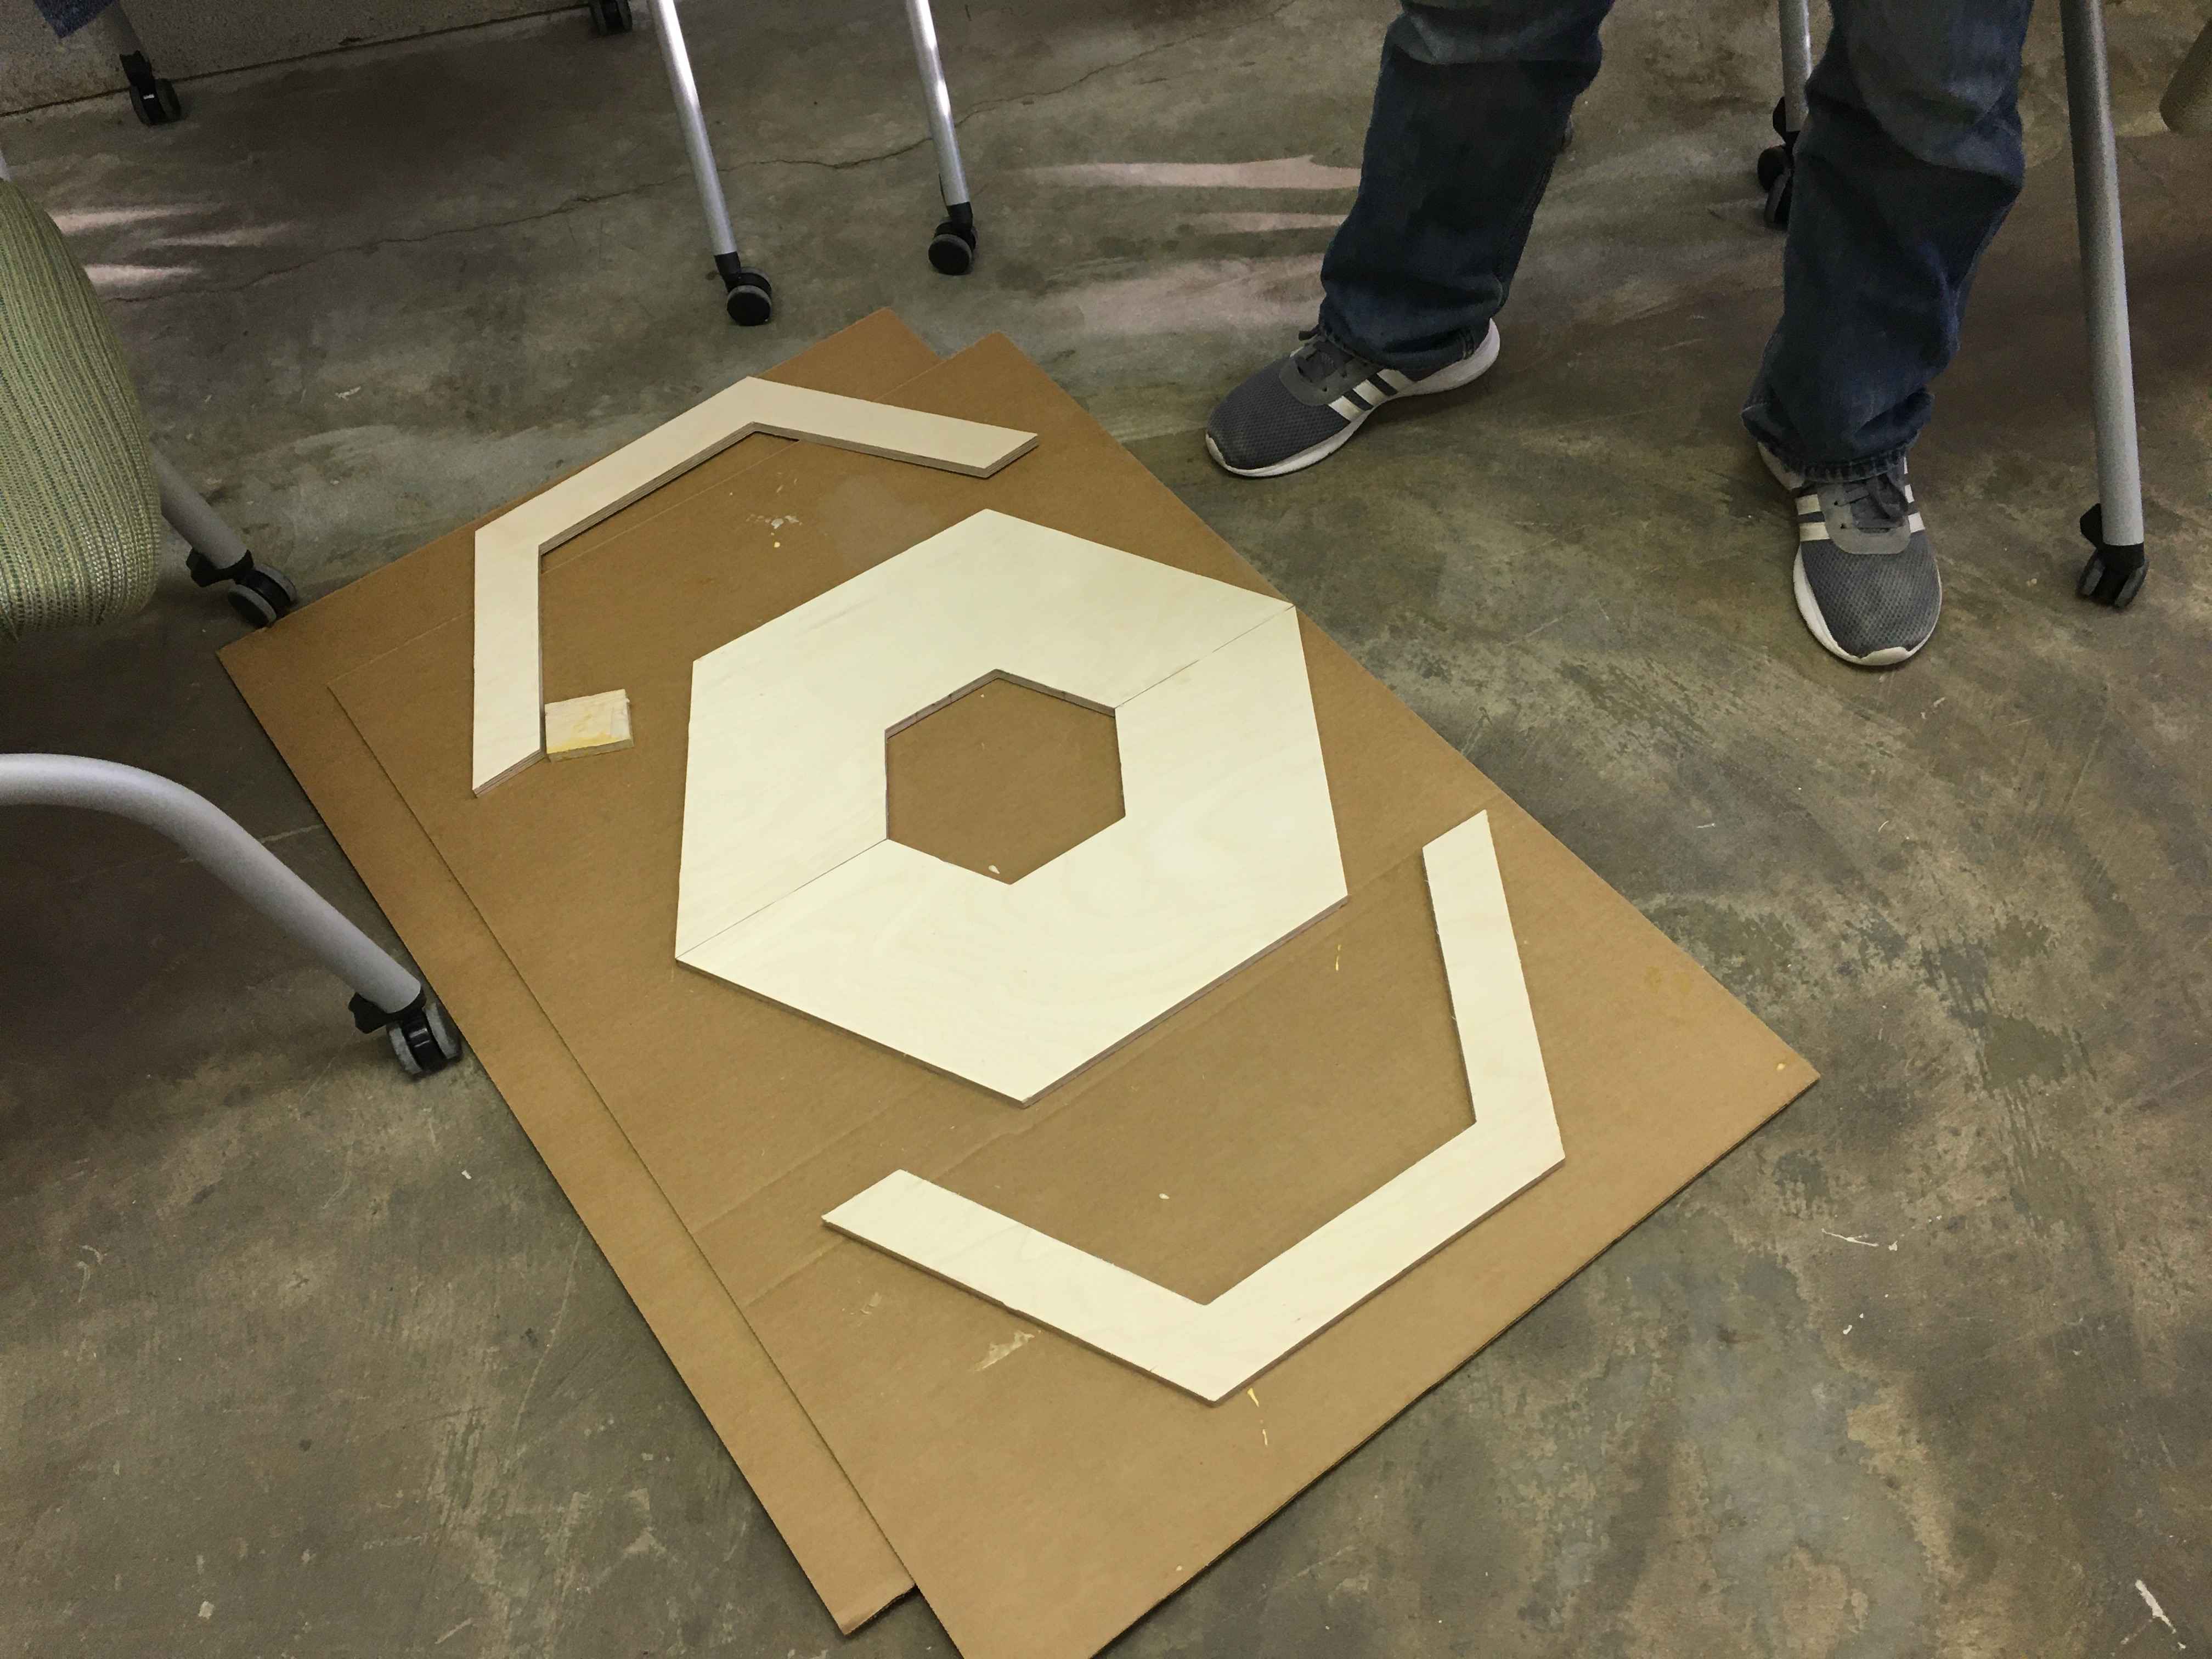
This week my group needed to work to determine the capabilities of our mill. We did this by designing and milling out two pieces that used three different tool paths and fit together using dogbones.
Run-out
Run out is a term describing the inaccuracy in the end mill as it rotates. It means that as it rotates it doesn't rotate completely in line witht the proper axis of the mill. We tested this by drilling a hole in our designs and measuring it to see if it lines up with the width of our mill. We found that for our machine it did line up well. If this didn't work then we were in a situation where we couldn't assume that the mill is actually doing what we want.
Allignment
Allignment in regards to our mill can mean alot of different things. It can mean that the moving arms are properly alligned with the bed. It can also mean if the board you are cutting is properly alligned with the bed. In both of these instances if you have a problem you can end up in a situation when you drill down it doesn't actually drill anywhere near where you expected.
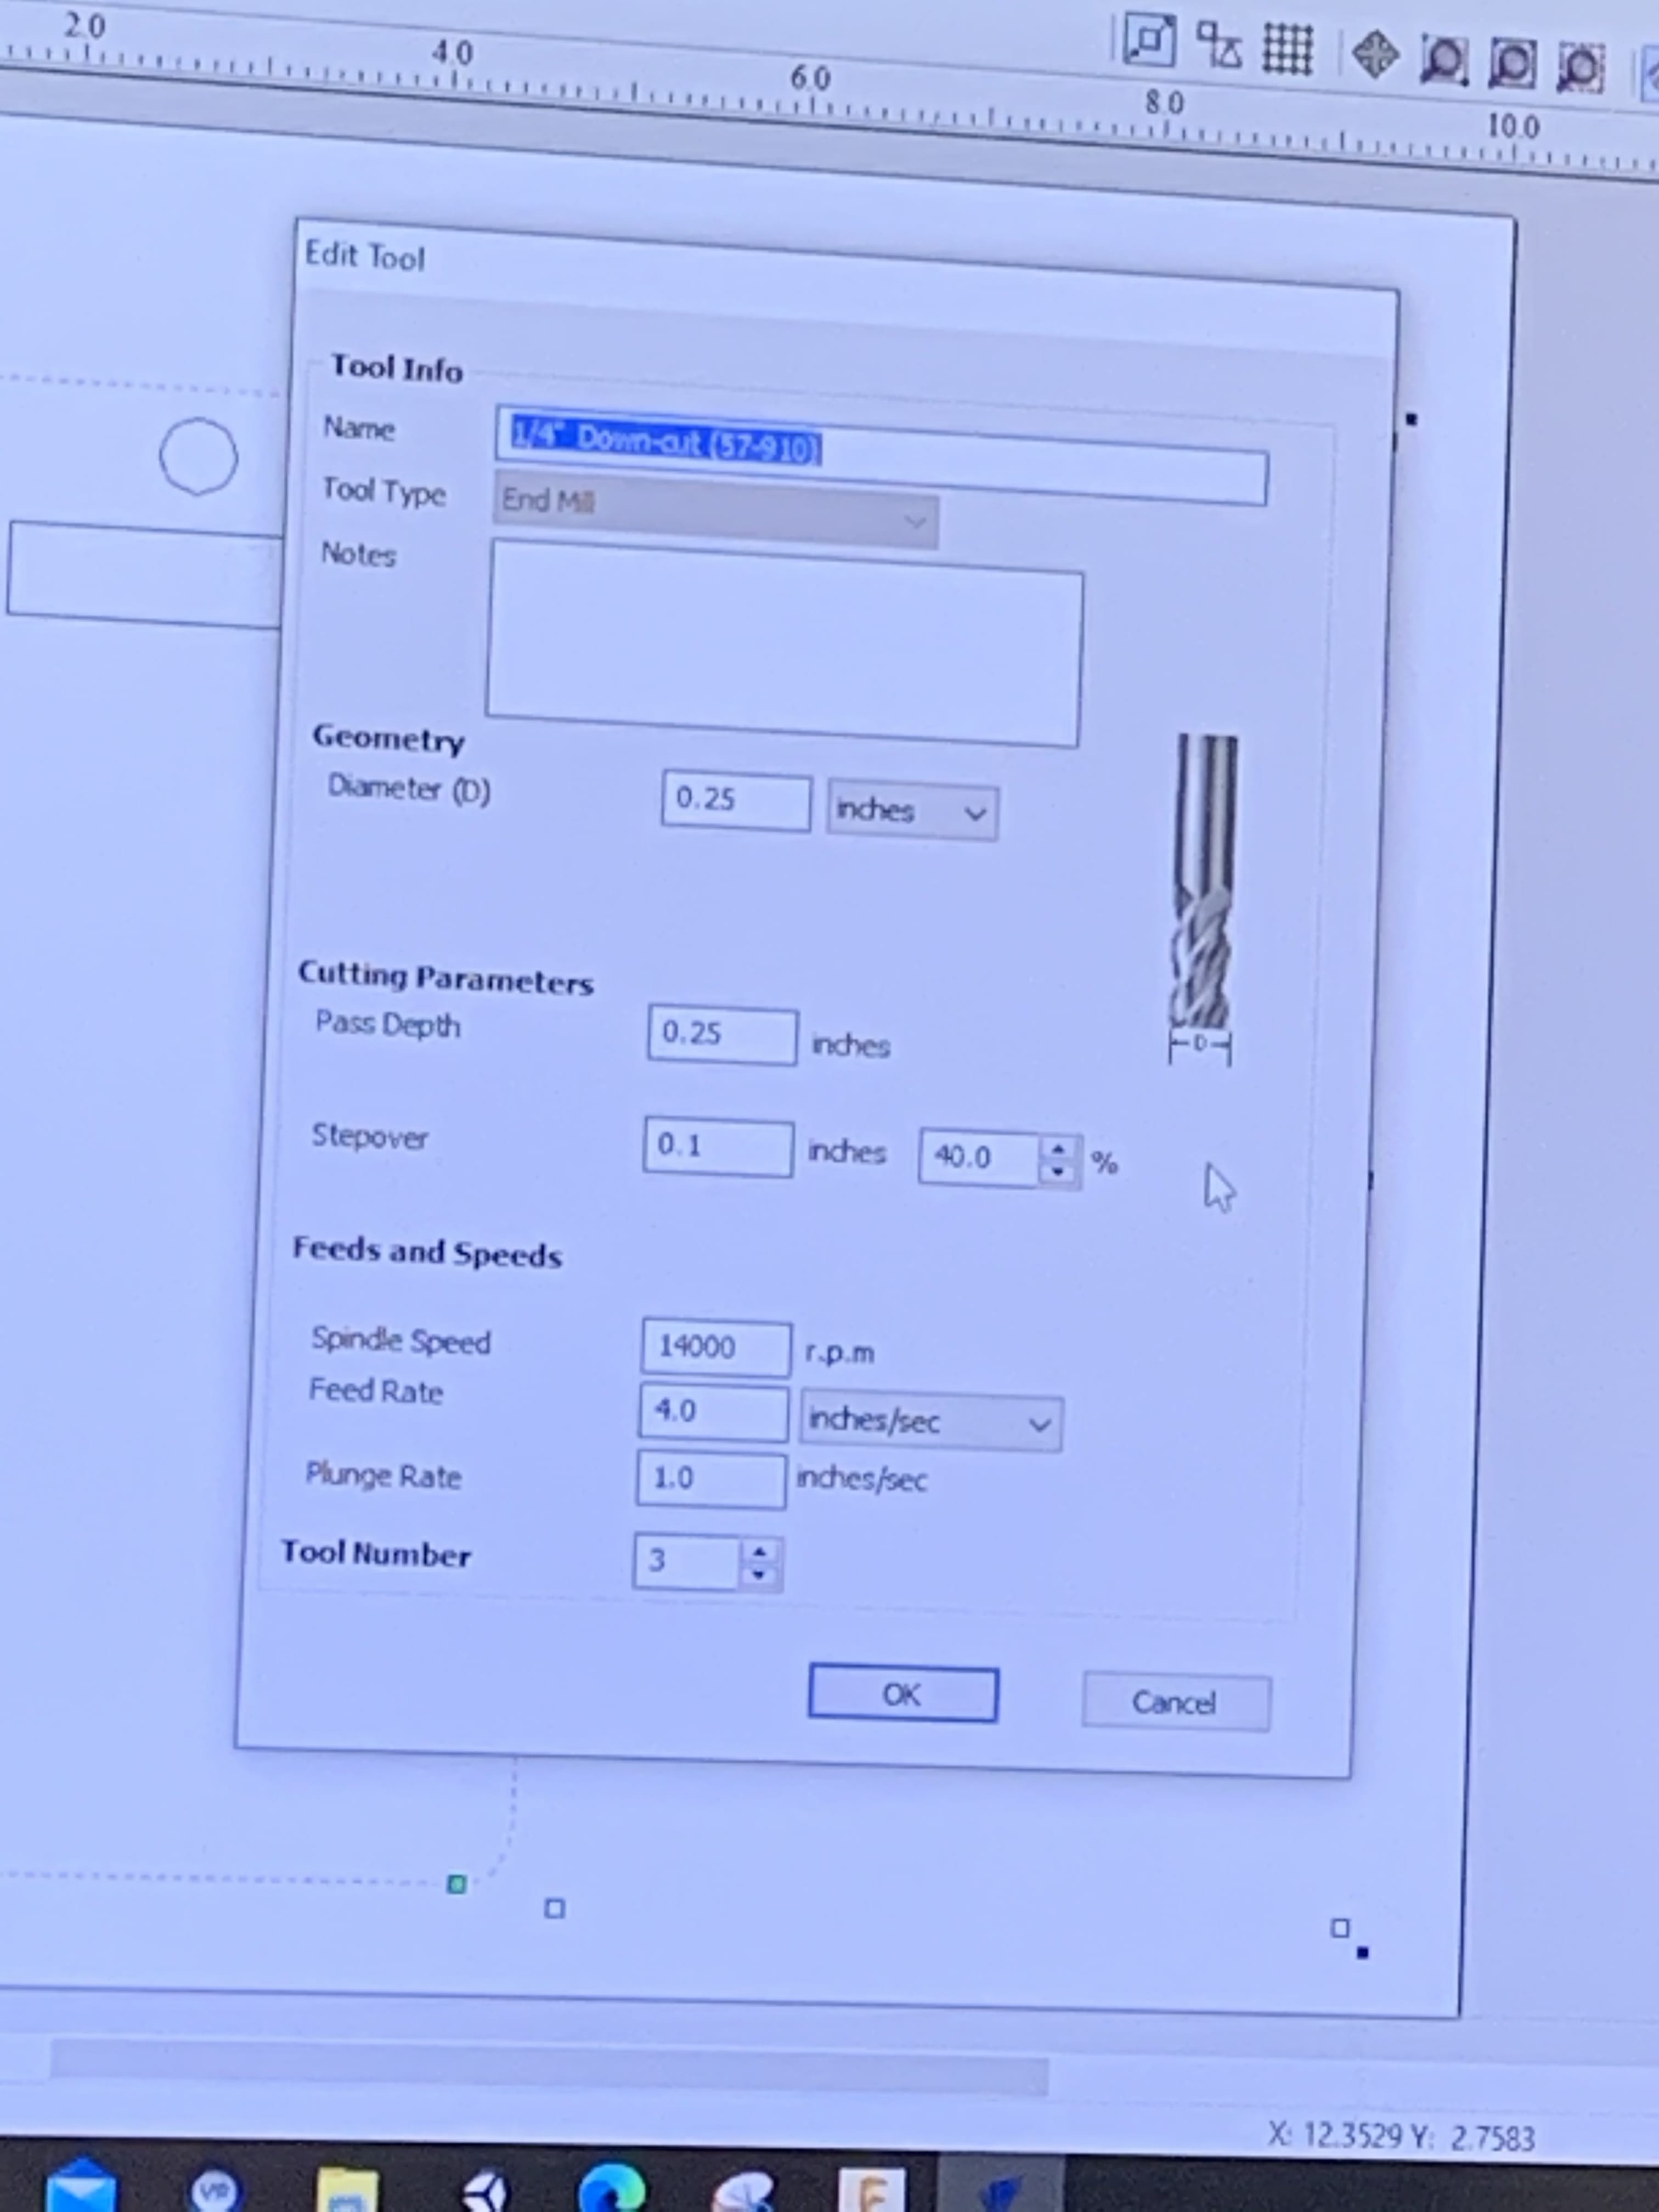
Speed
This is talking about two things. One is the speed of the bit as it traverses over the board. The other thing it is talking about is the rotation speed of the bit. The taverse speed isn't too important so long as it isn't going to fast that your machine can't do it, and that your bit is traversing at a high enough hight that it doesn't break anything. The roational speed of the bit is much more important. This is dependent on the bit that you are using to cut, and should be determined using the product number on the bit. If you don't have the proper speed then you can end up with a situation where the bit either doesn't cut or it goes far too fast and breaks the bit.
Feeds
This is talking about the speed of the bit as it cuts through the wood. This is dependant on two things one being the bit that you are using. Dependent on the bit you have to make sure your speed is matched properly. Even more so then the bit it also matter on the toolpath that you are using. If your feed rate is too slow, then you can cause a fire, and if it is two fast then you can snap a bit.
Tool Paths
Tool paths work to tell your machine what sort of operation to do. There are tool paths for cutting something out of your board. There is another one that cuts a pocket our of your board, and yet another that drills a hole in your board. These are the three tool paths that our group tested but there are several more. Tool paths are important because they determine what sort of speeds and feeds, and bits even that you want to use.

Other Group Project
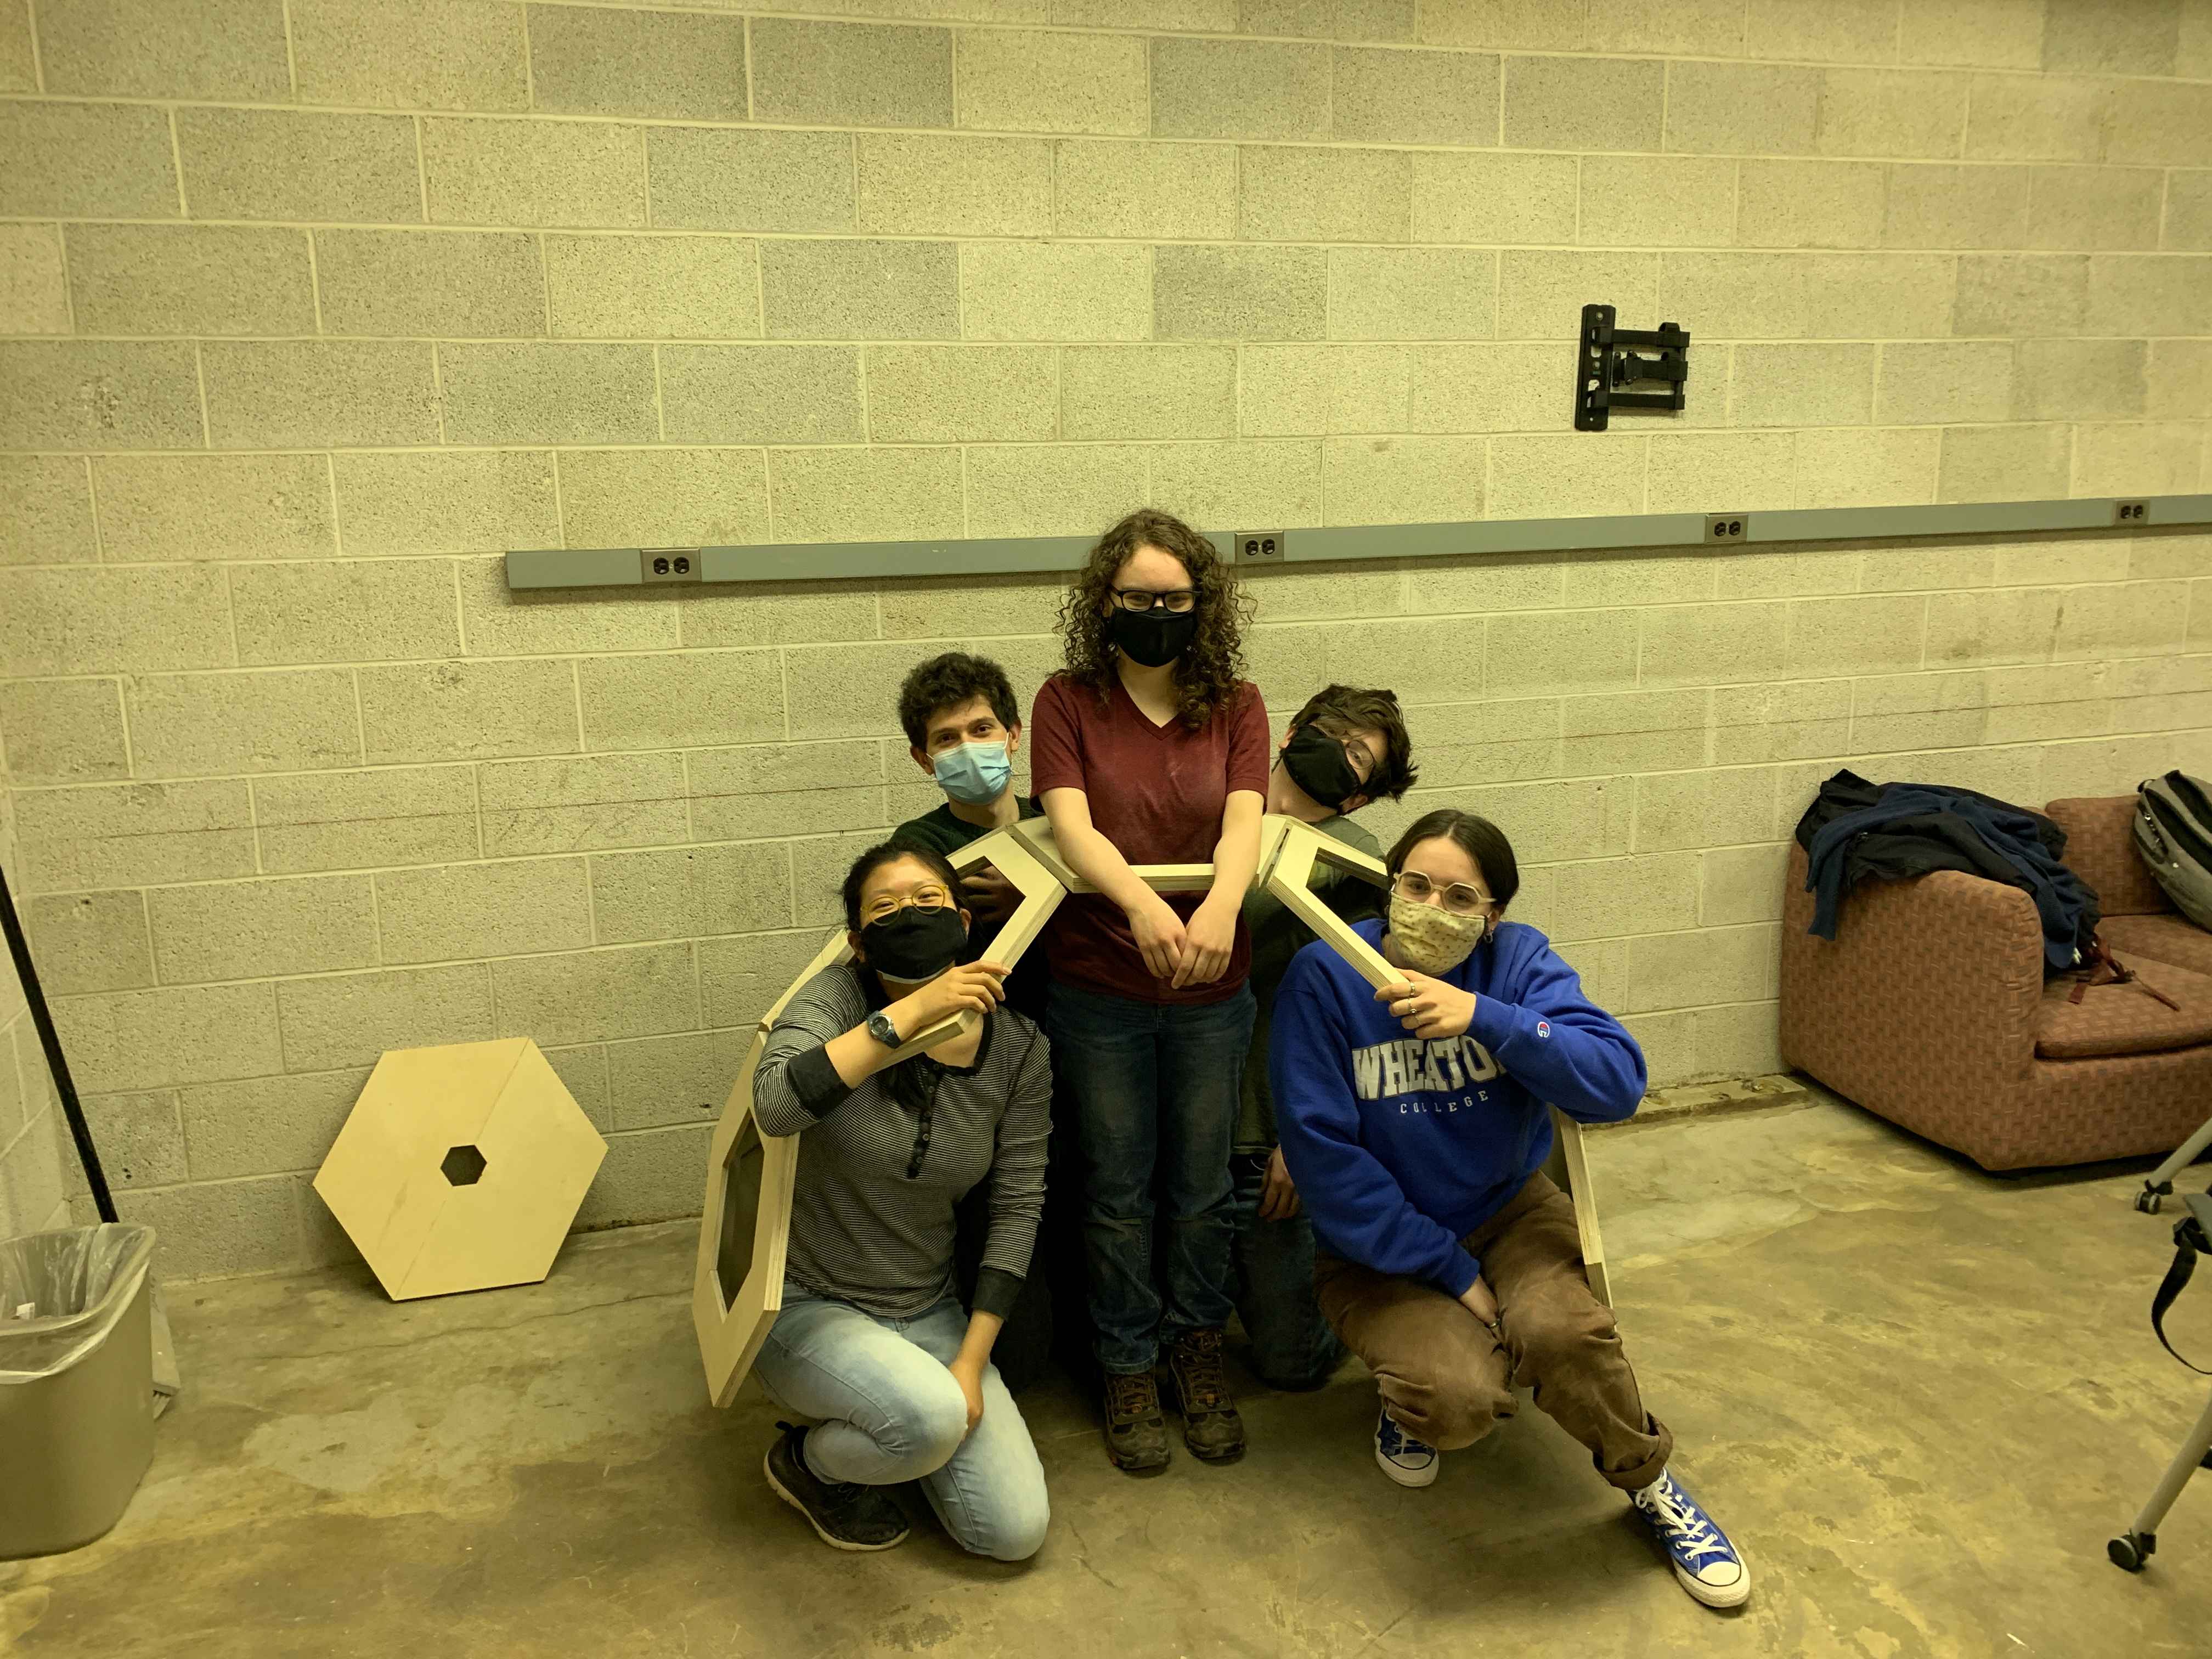
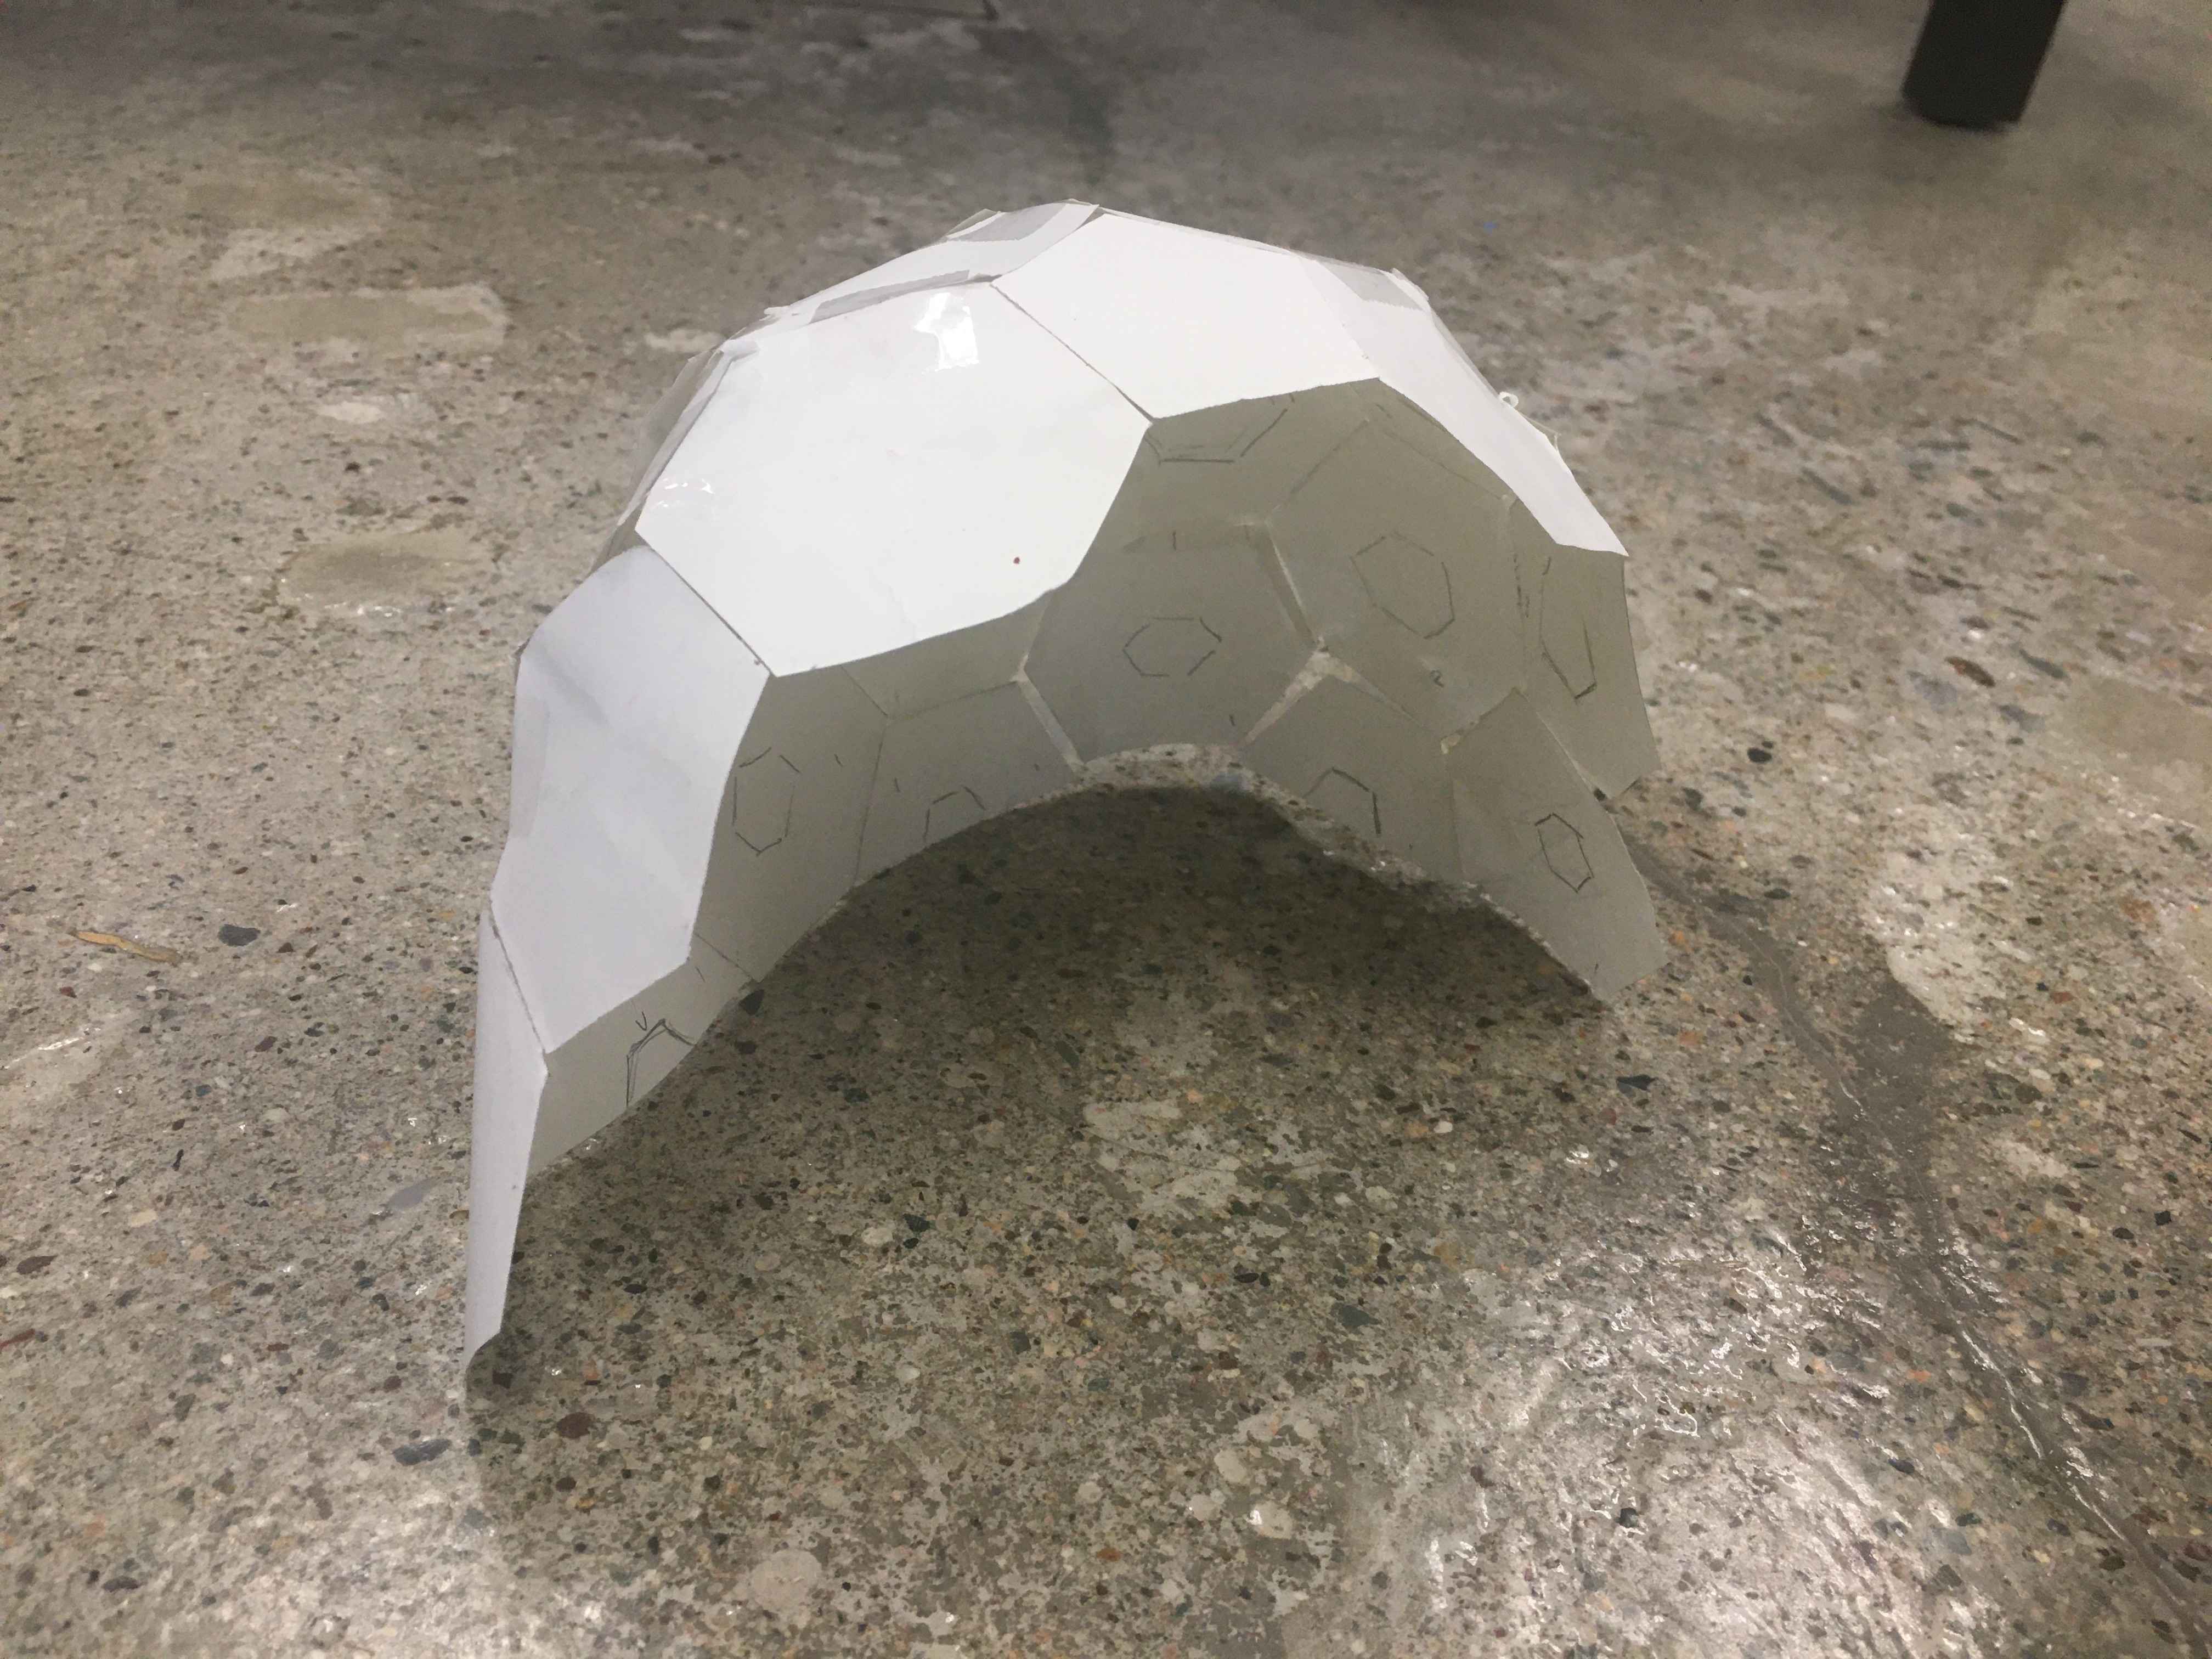
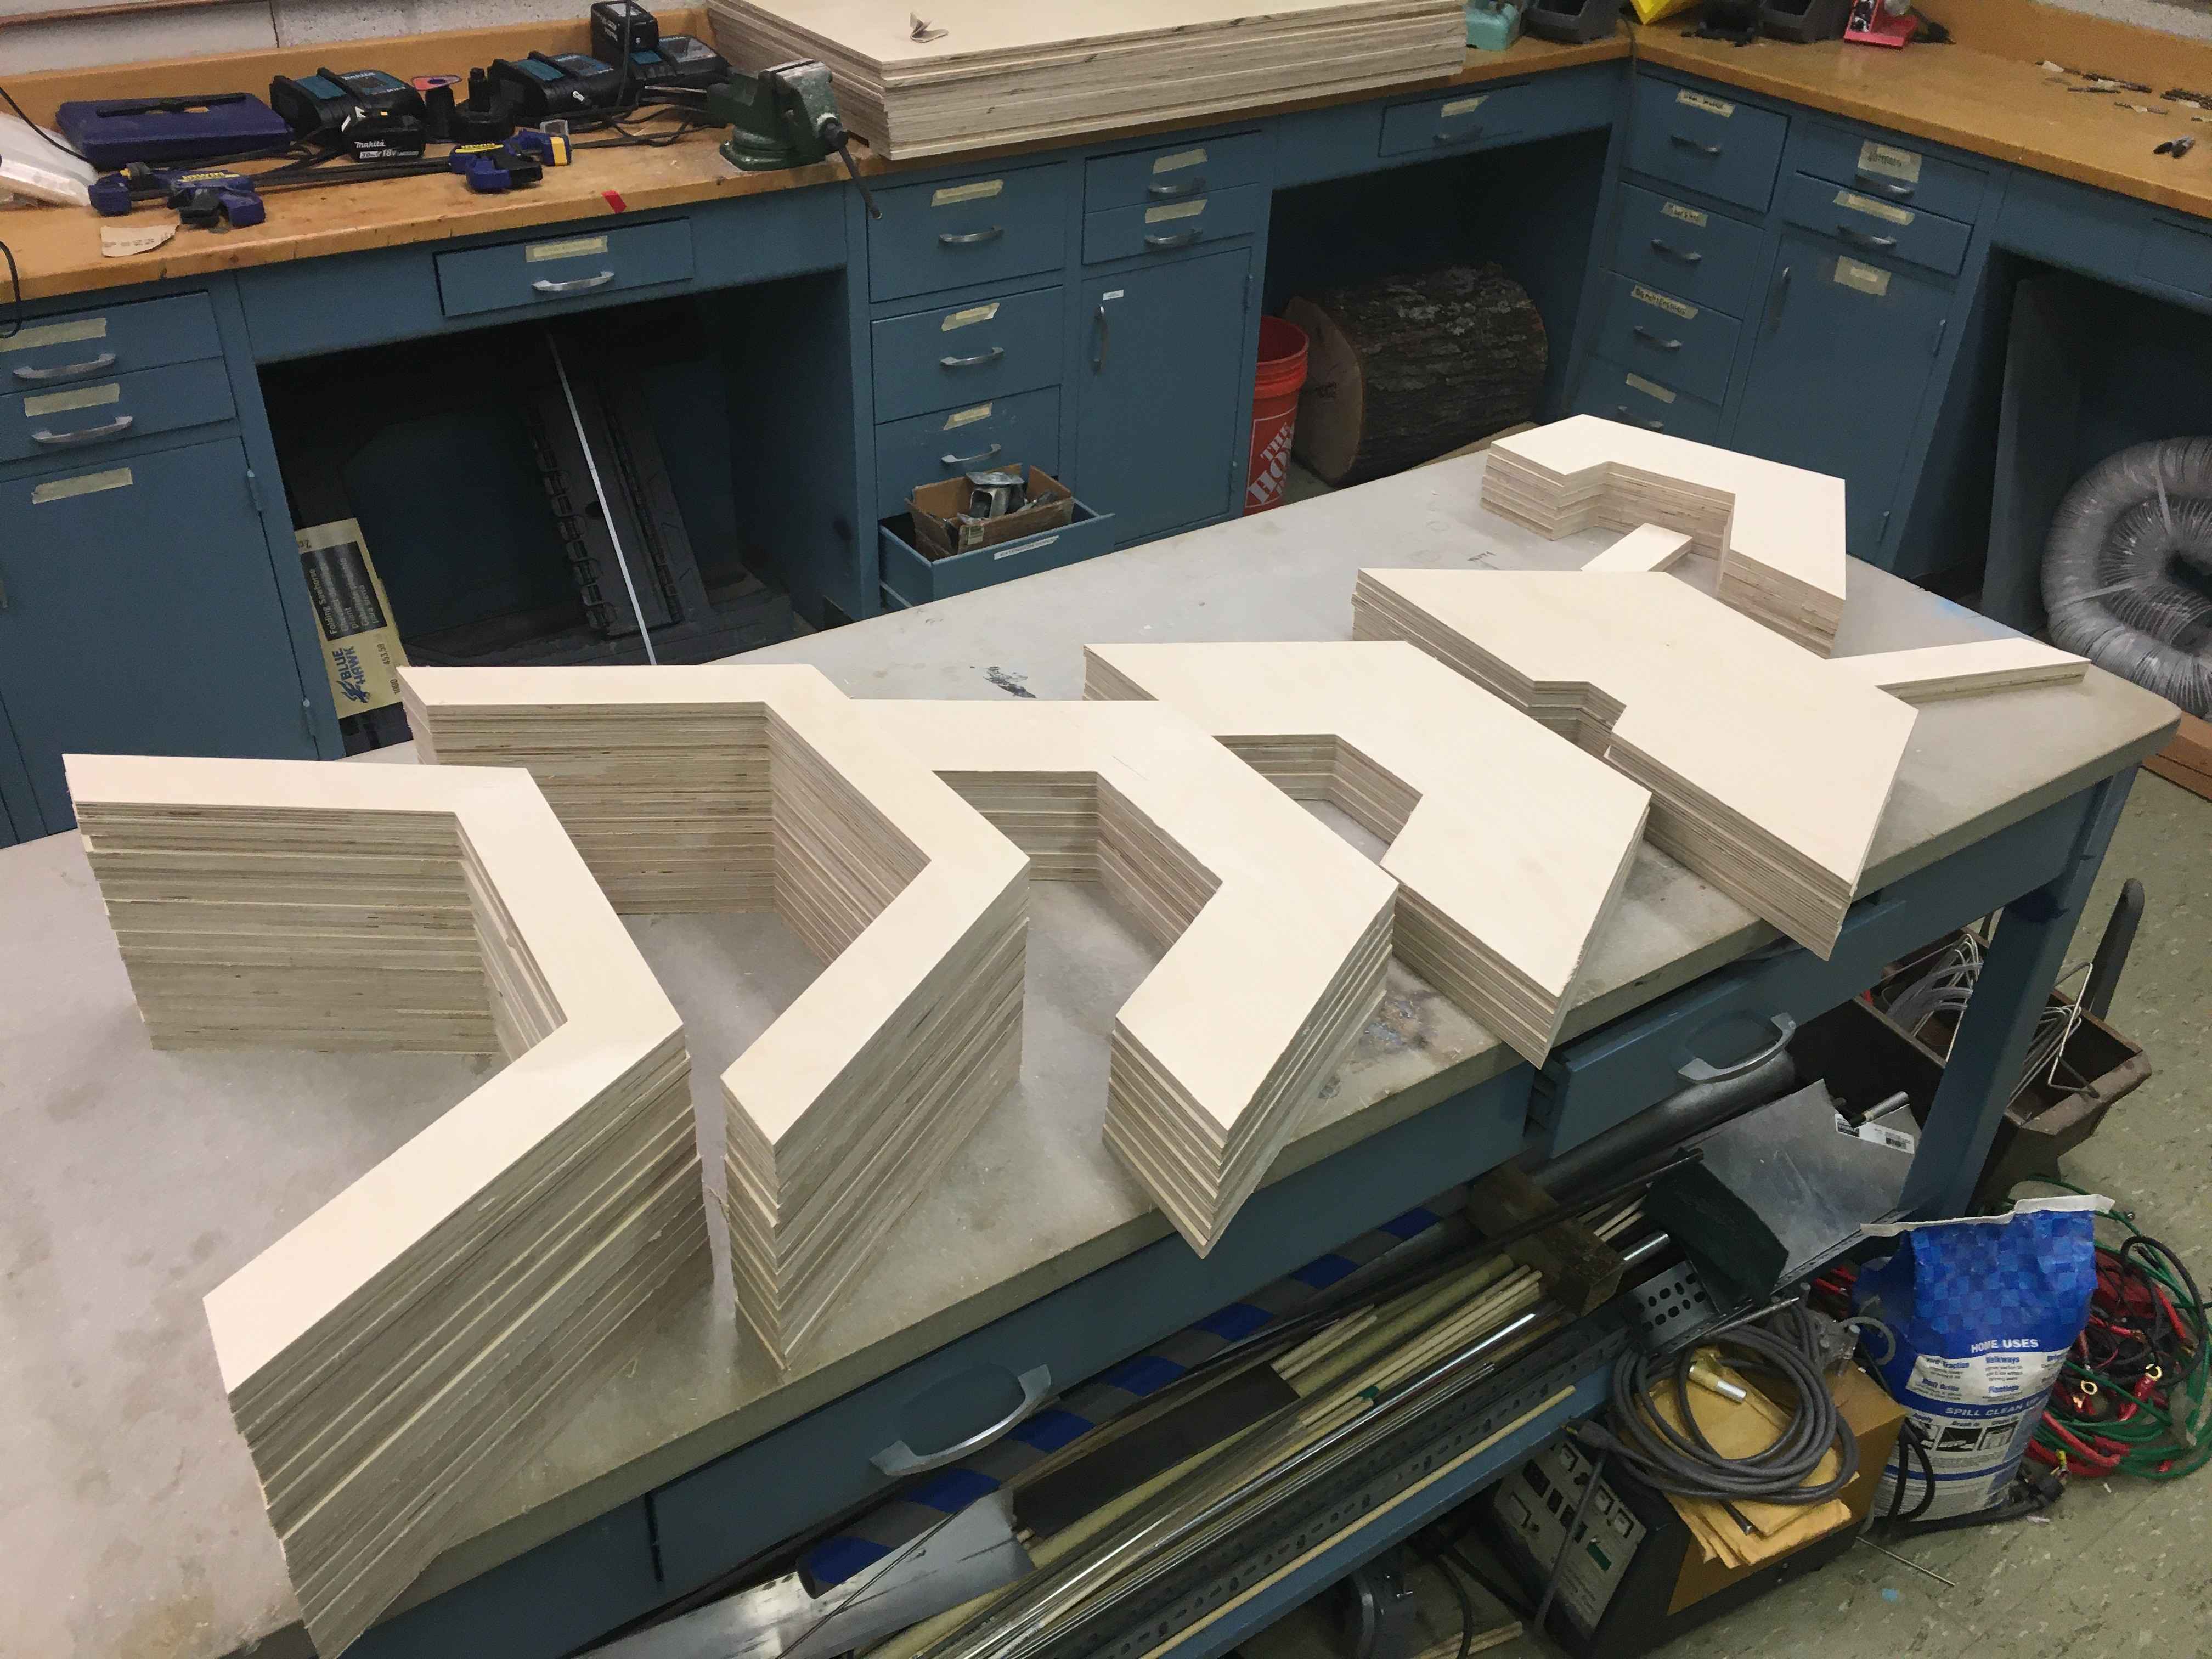
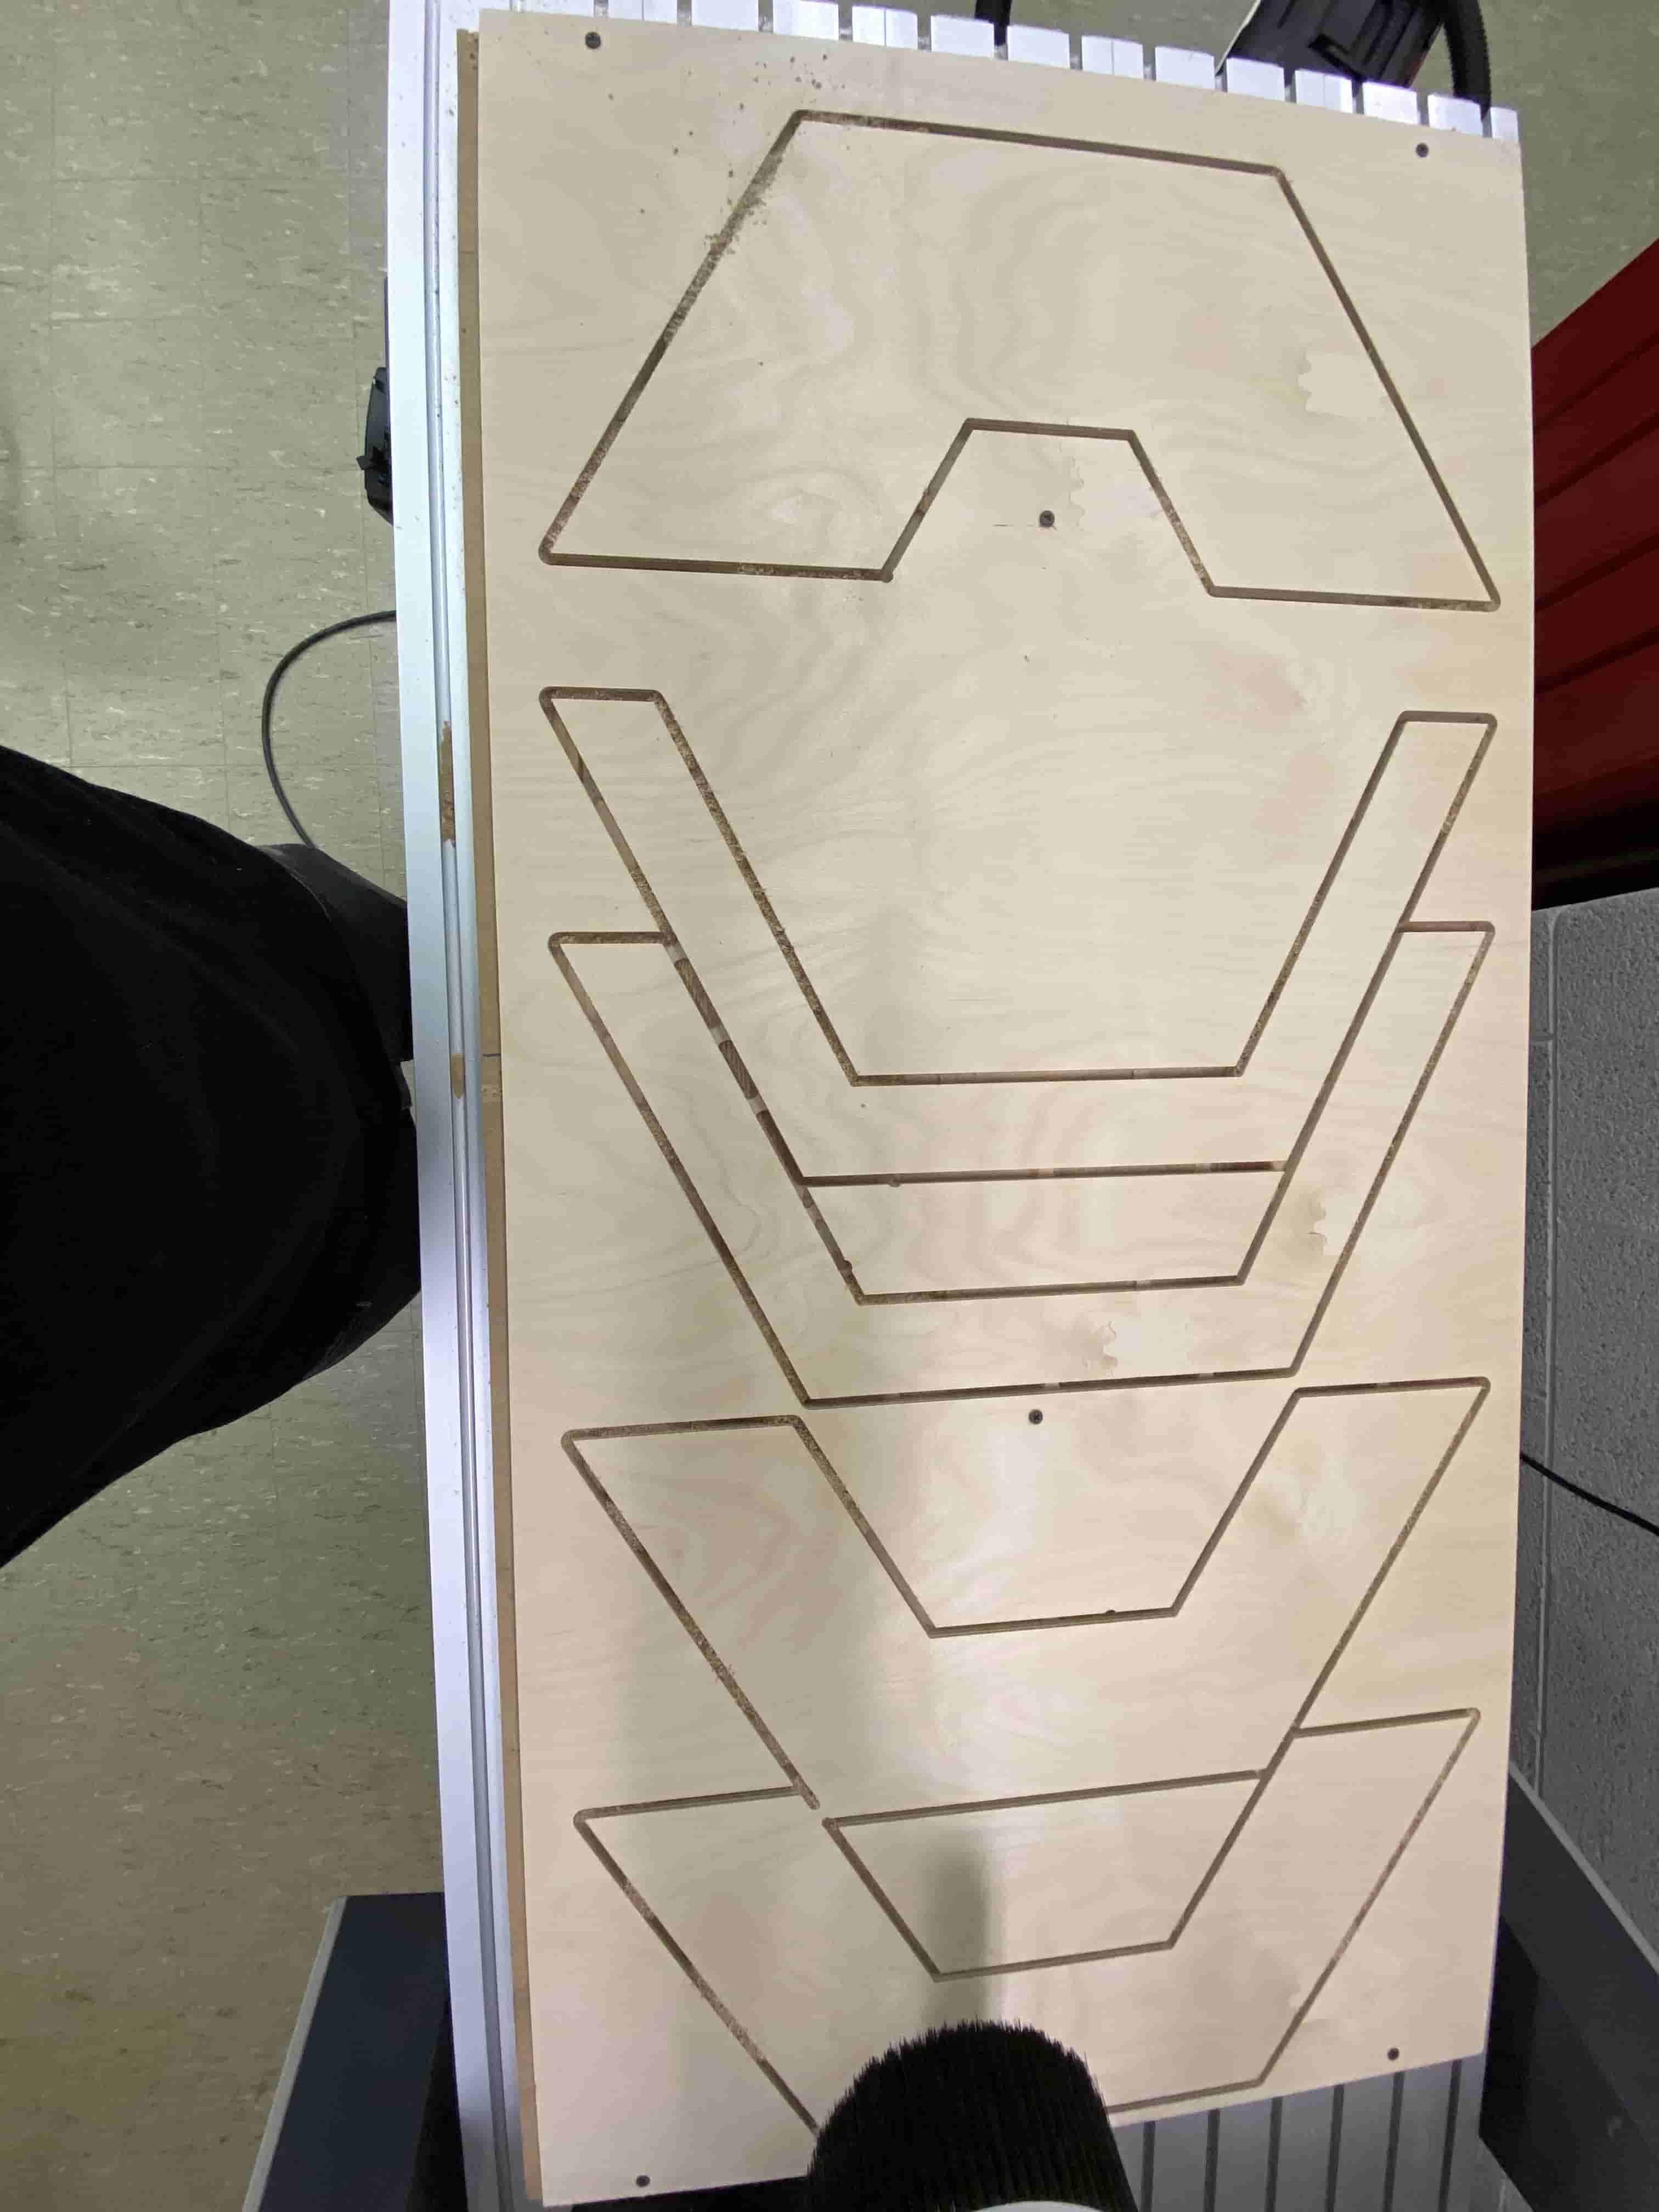
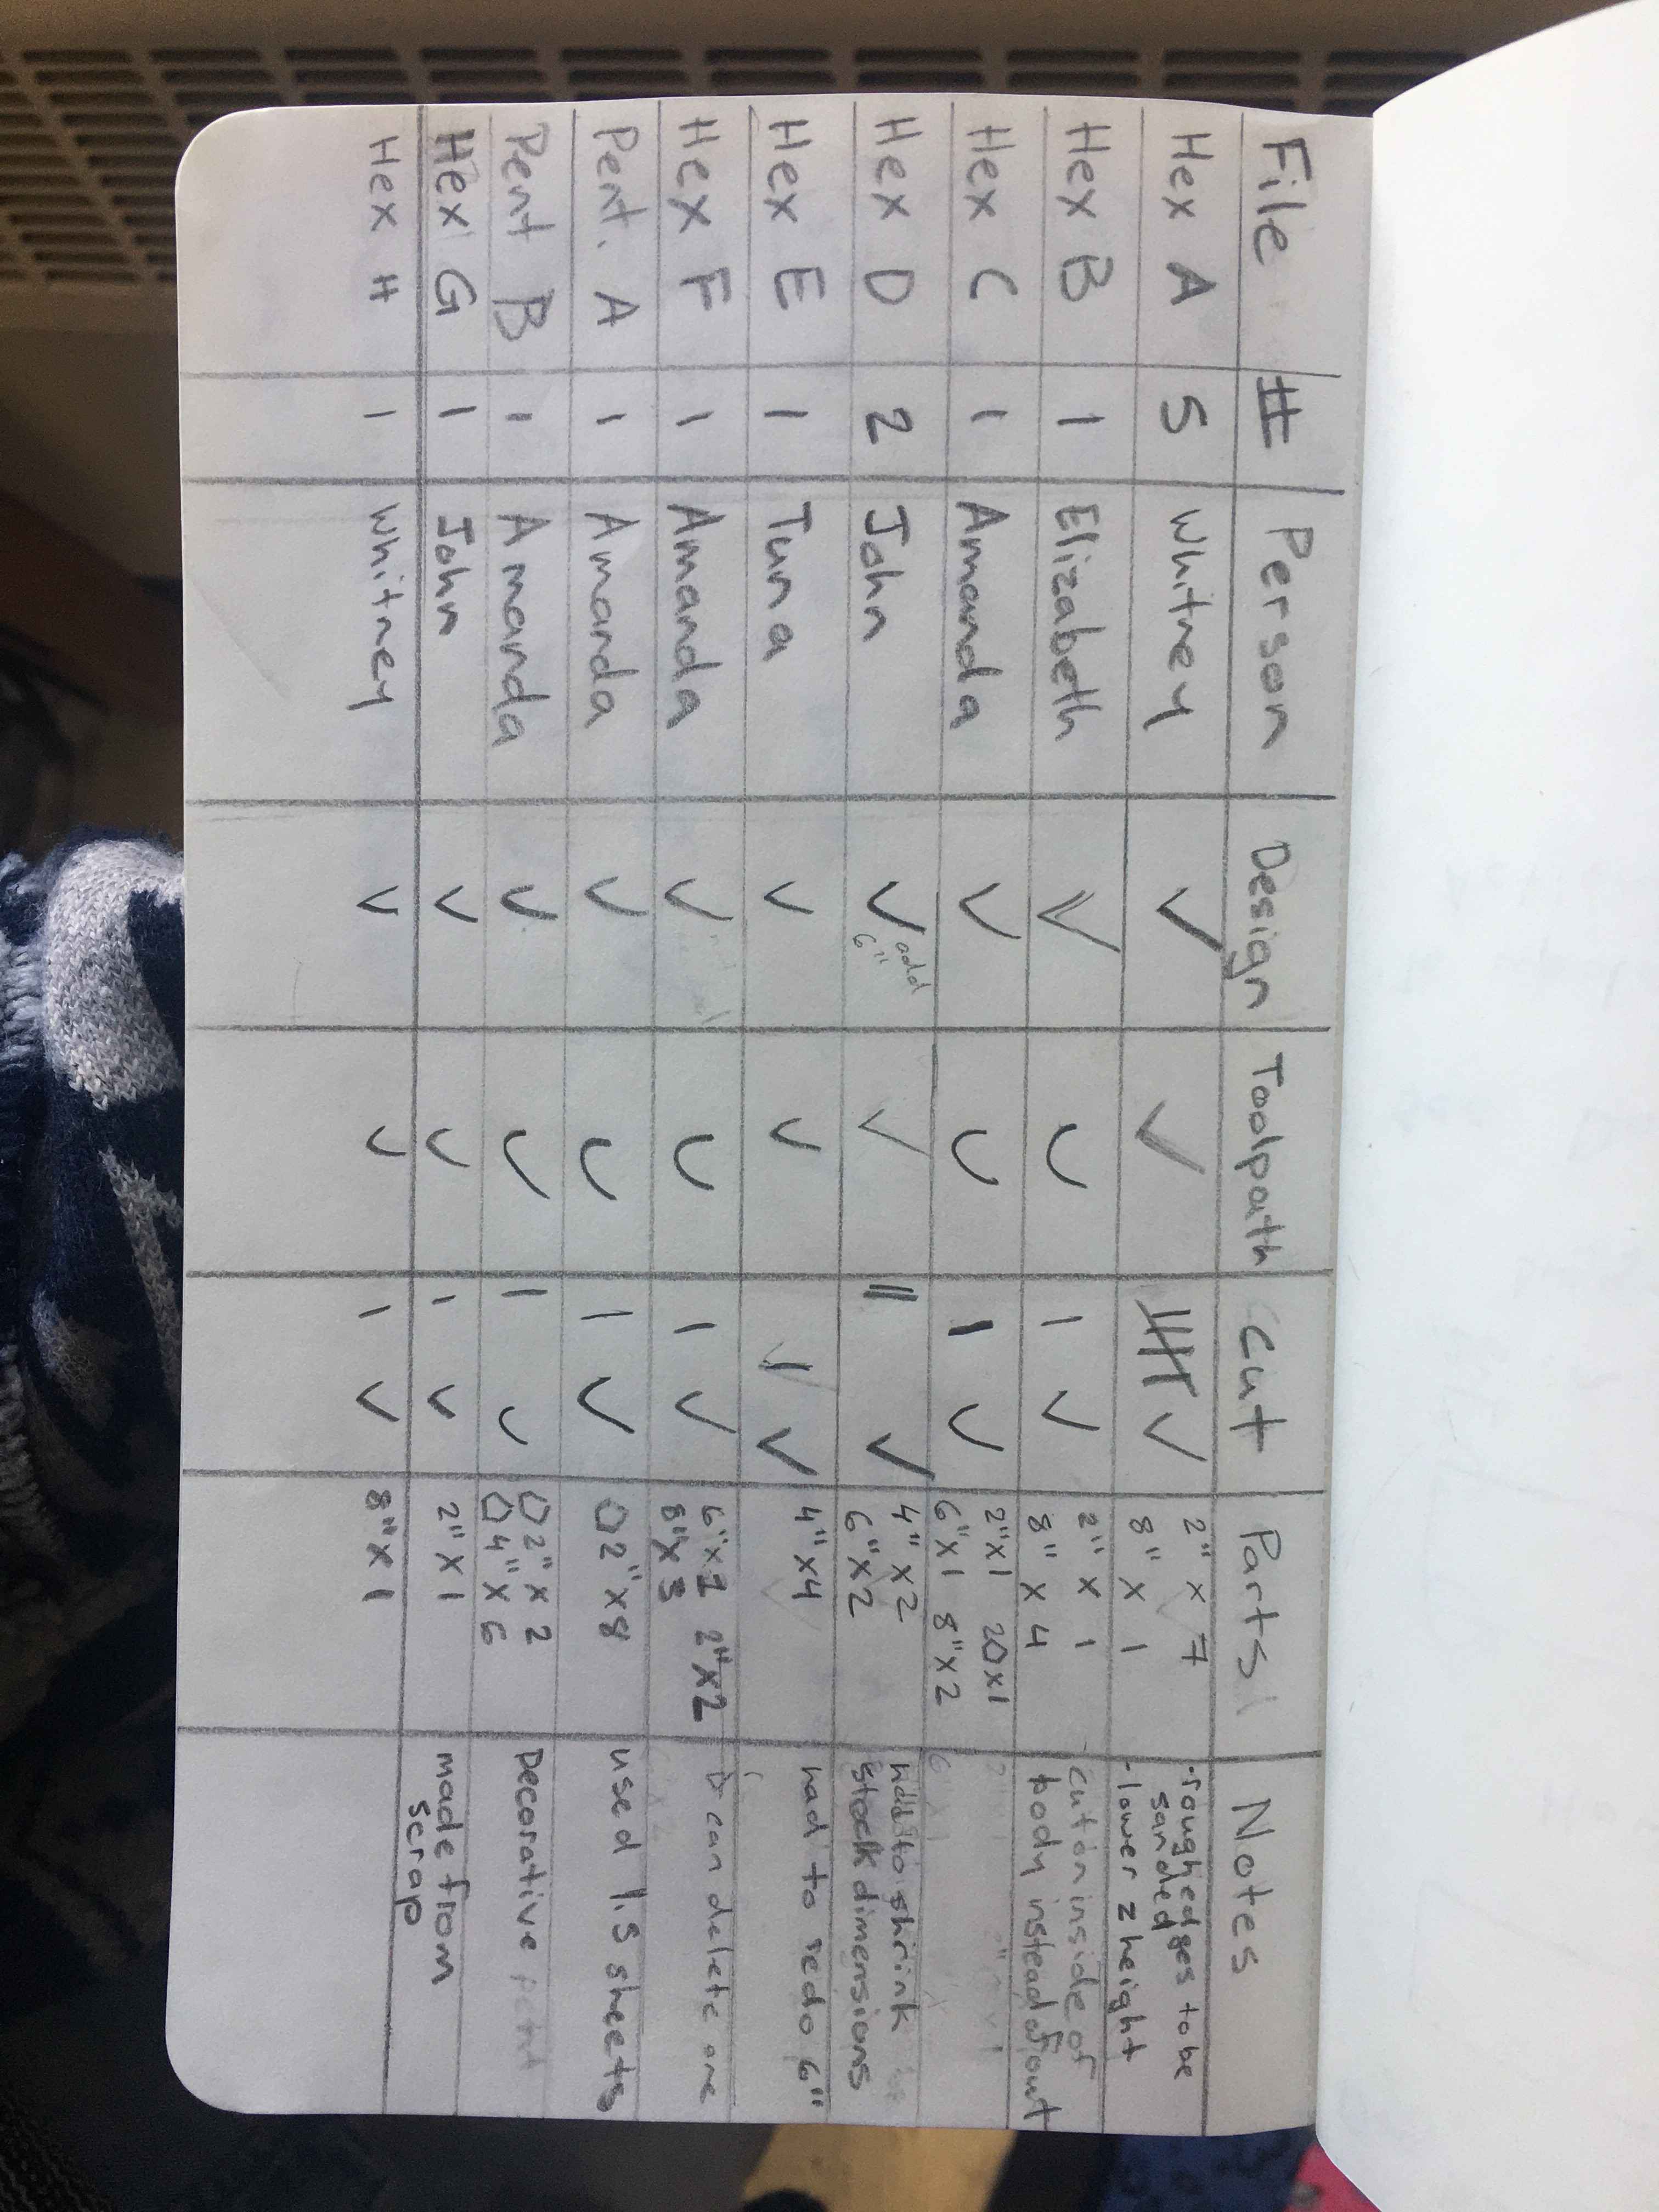
When working on the something big project, me and several students actually decided to work to make a gazeebo together. We wanted to do it together because that way we had access to more lumber and we also would just have more hands which we felt would be useful for actually making something impressive. During our initial meeting we talked about the logistics of making sure that we actually had something to show at the end of the week. In the end we found inspiration in a couple different types of geometric gazeebos and decided to make one out of a series of hexagons and pentagons.
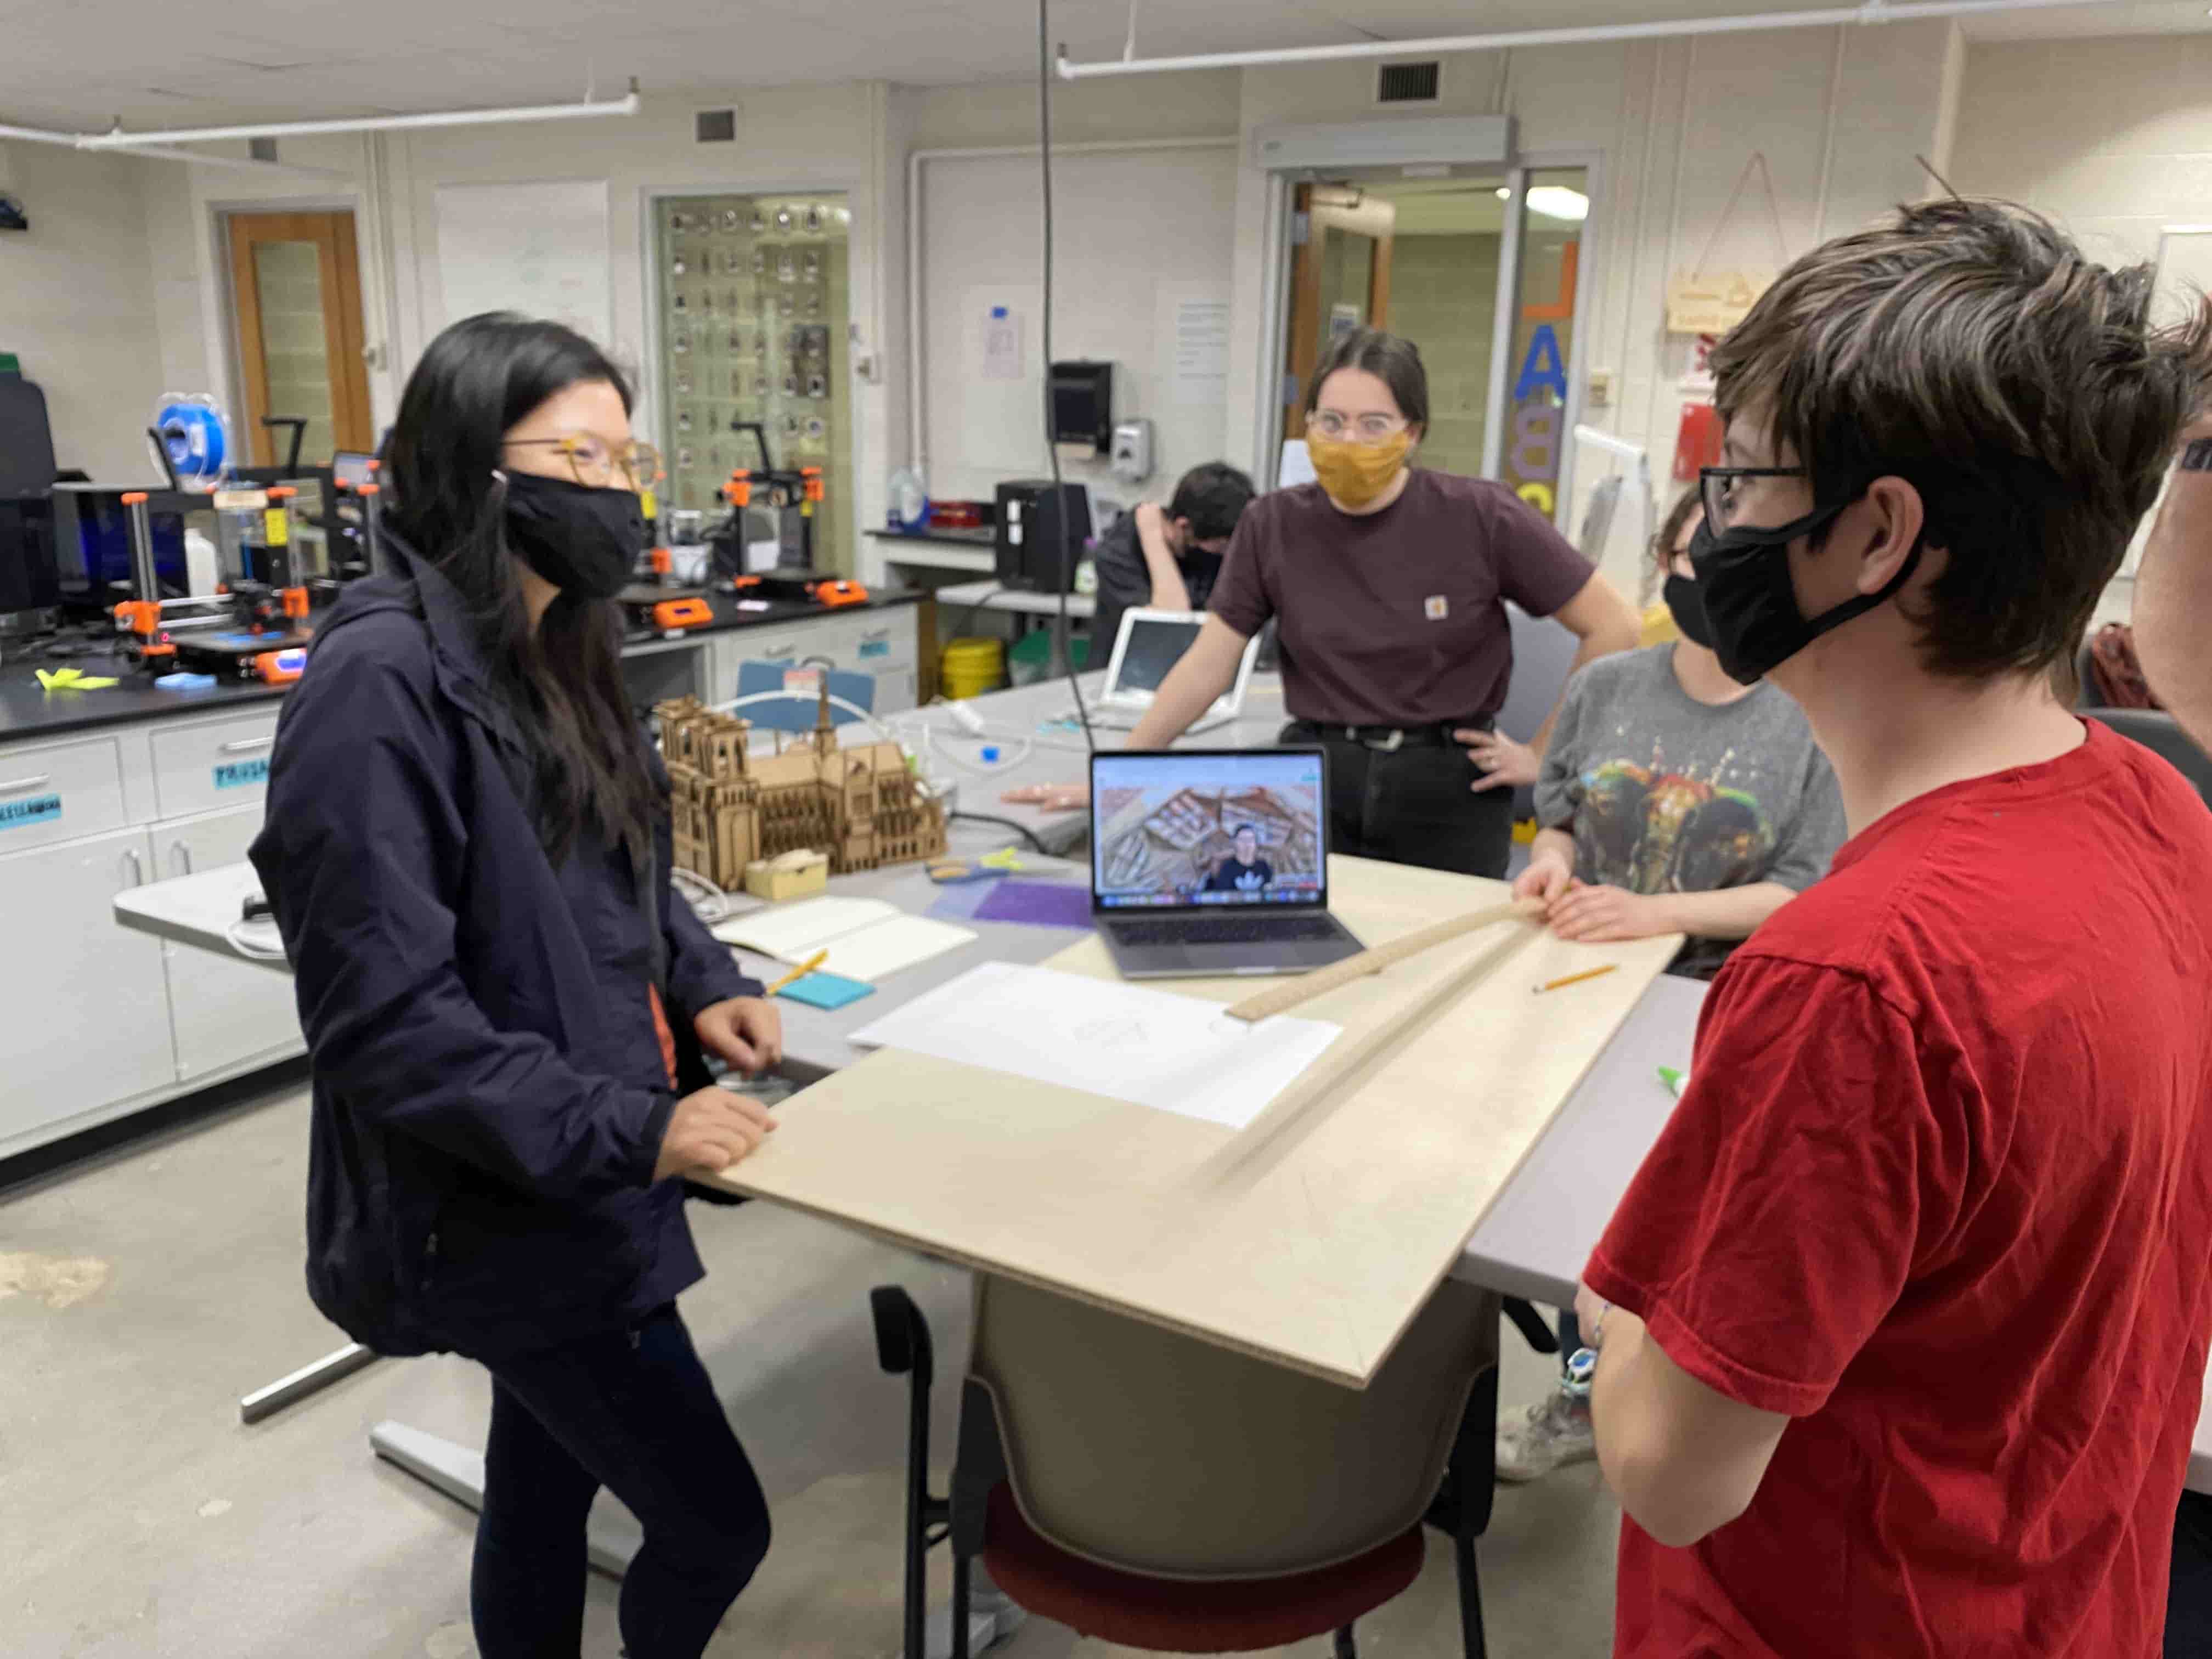
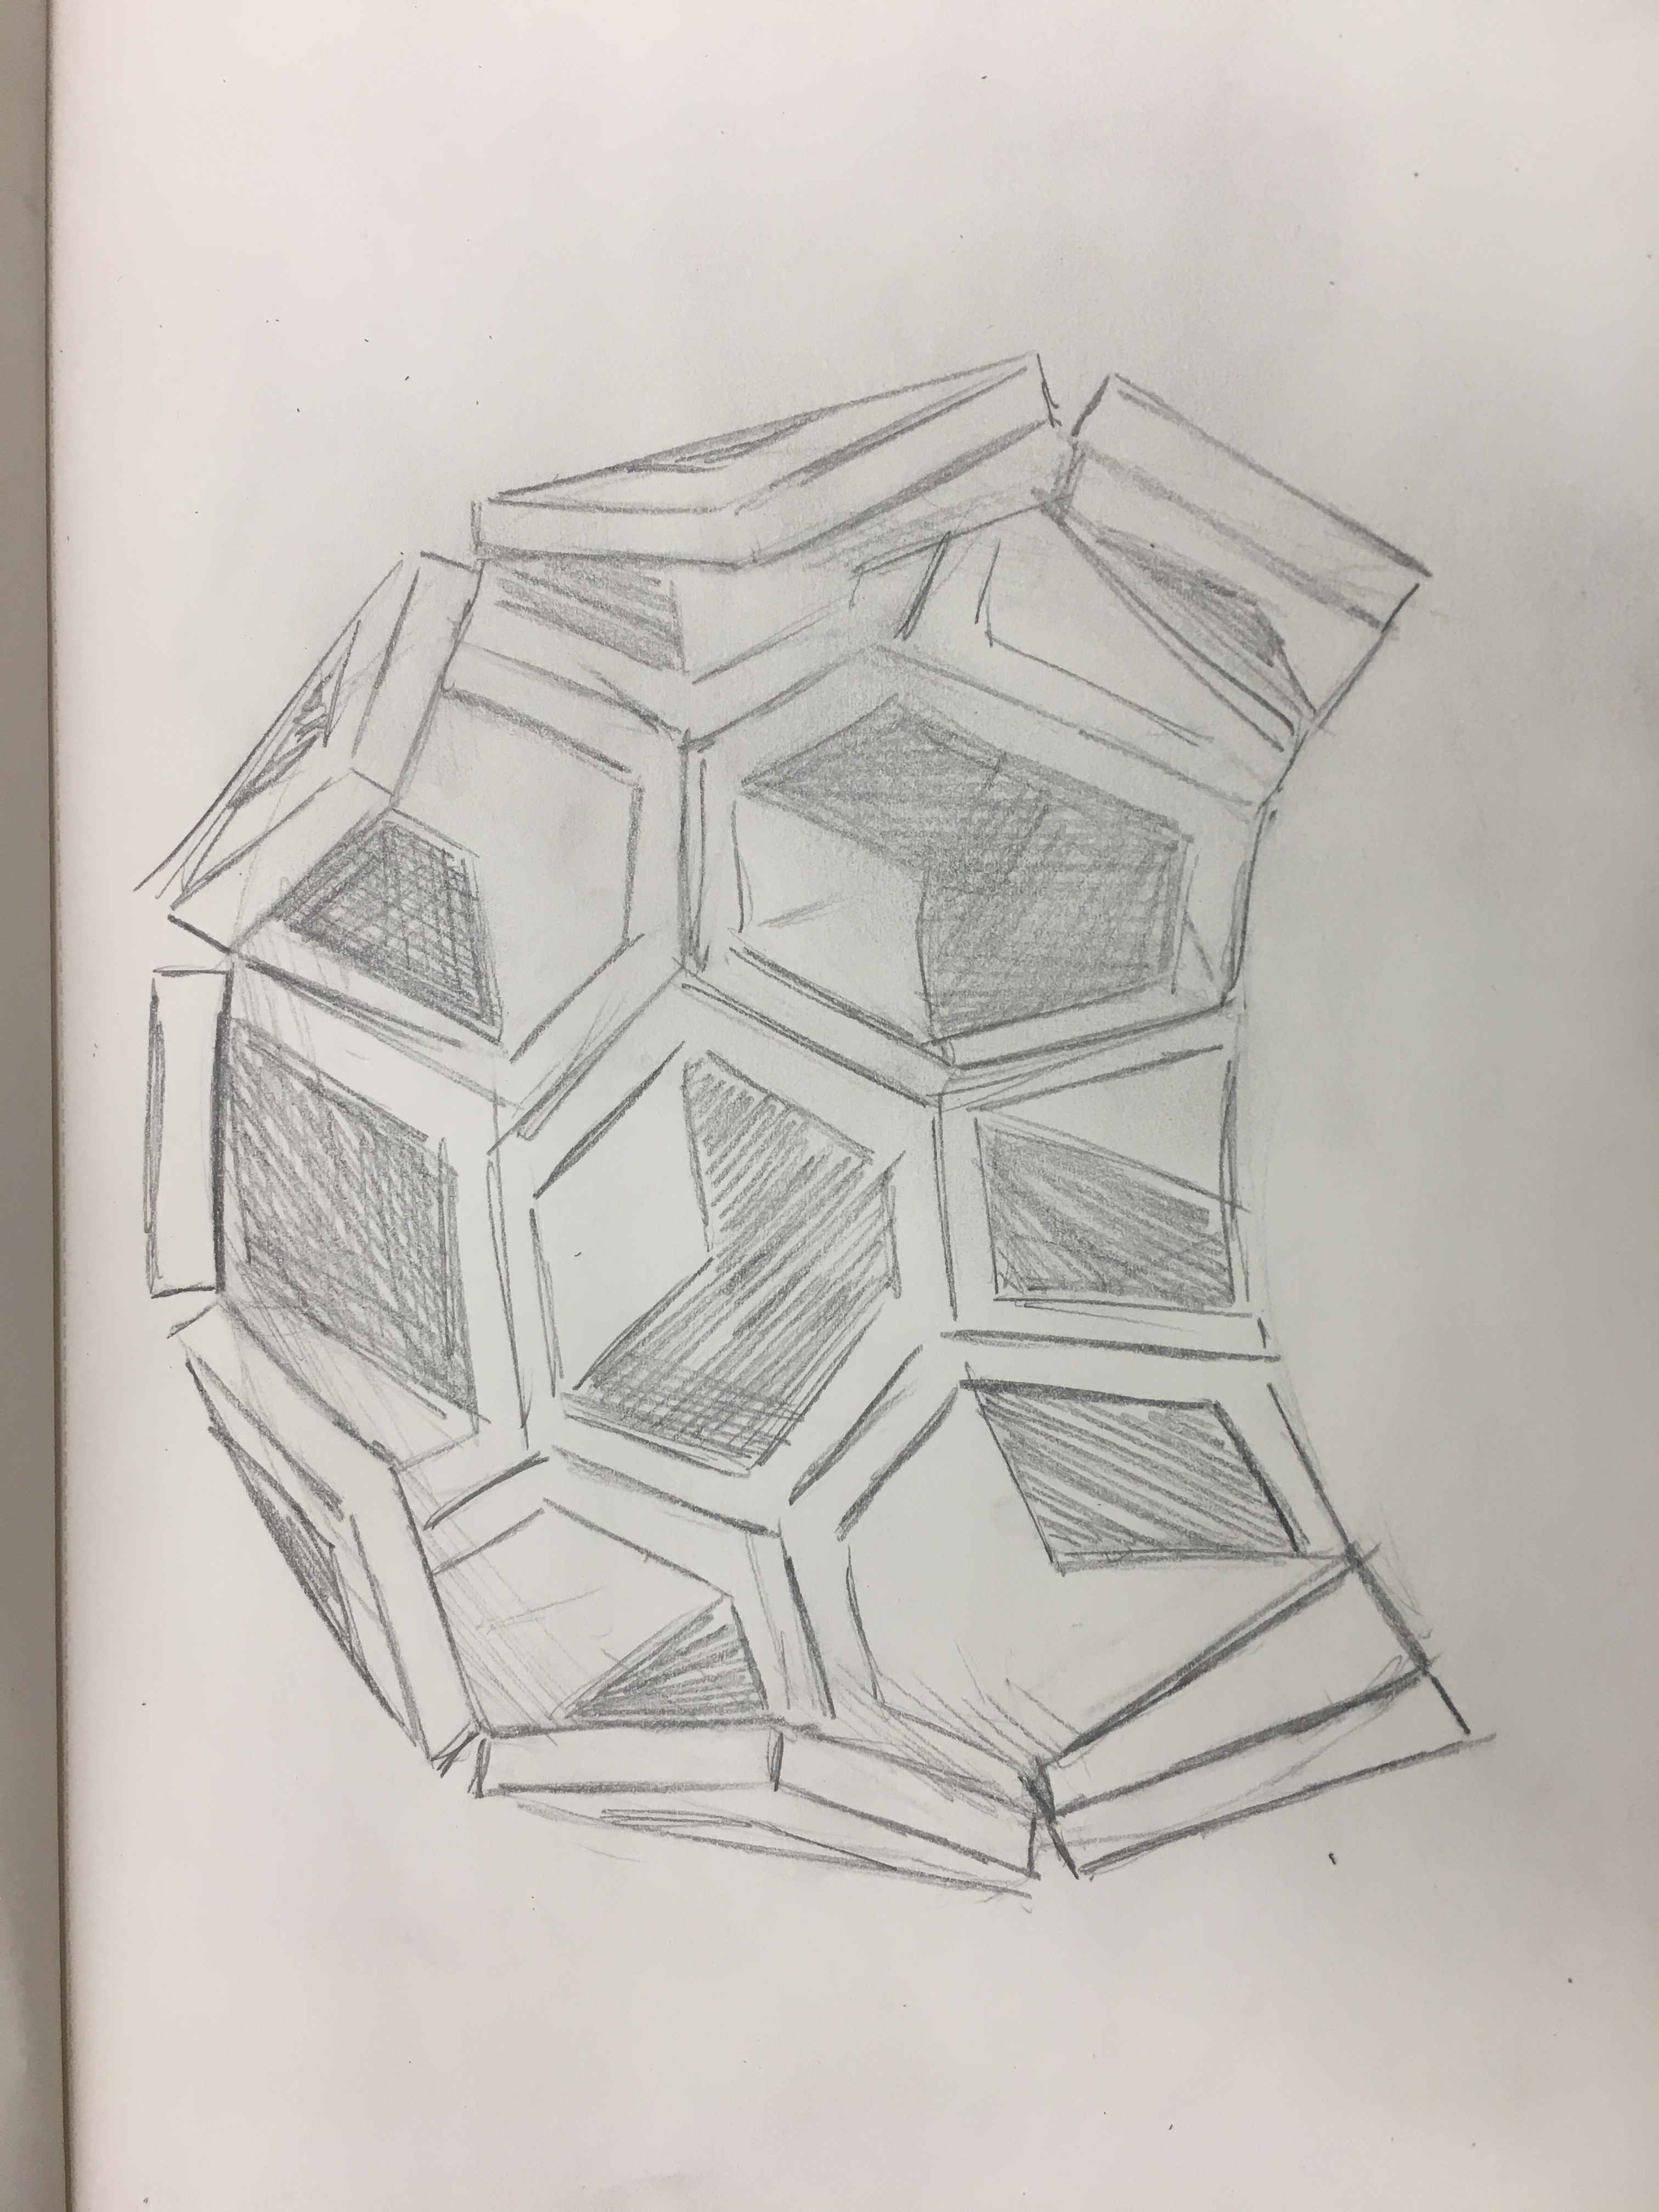
Design
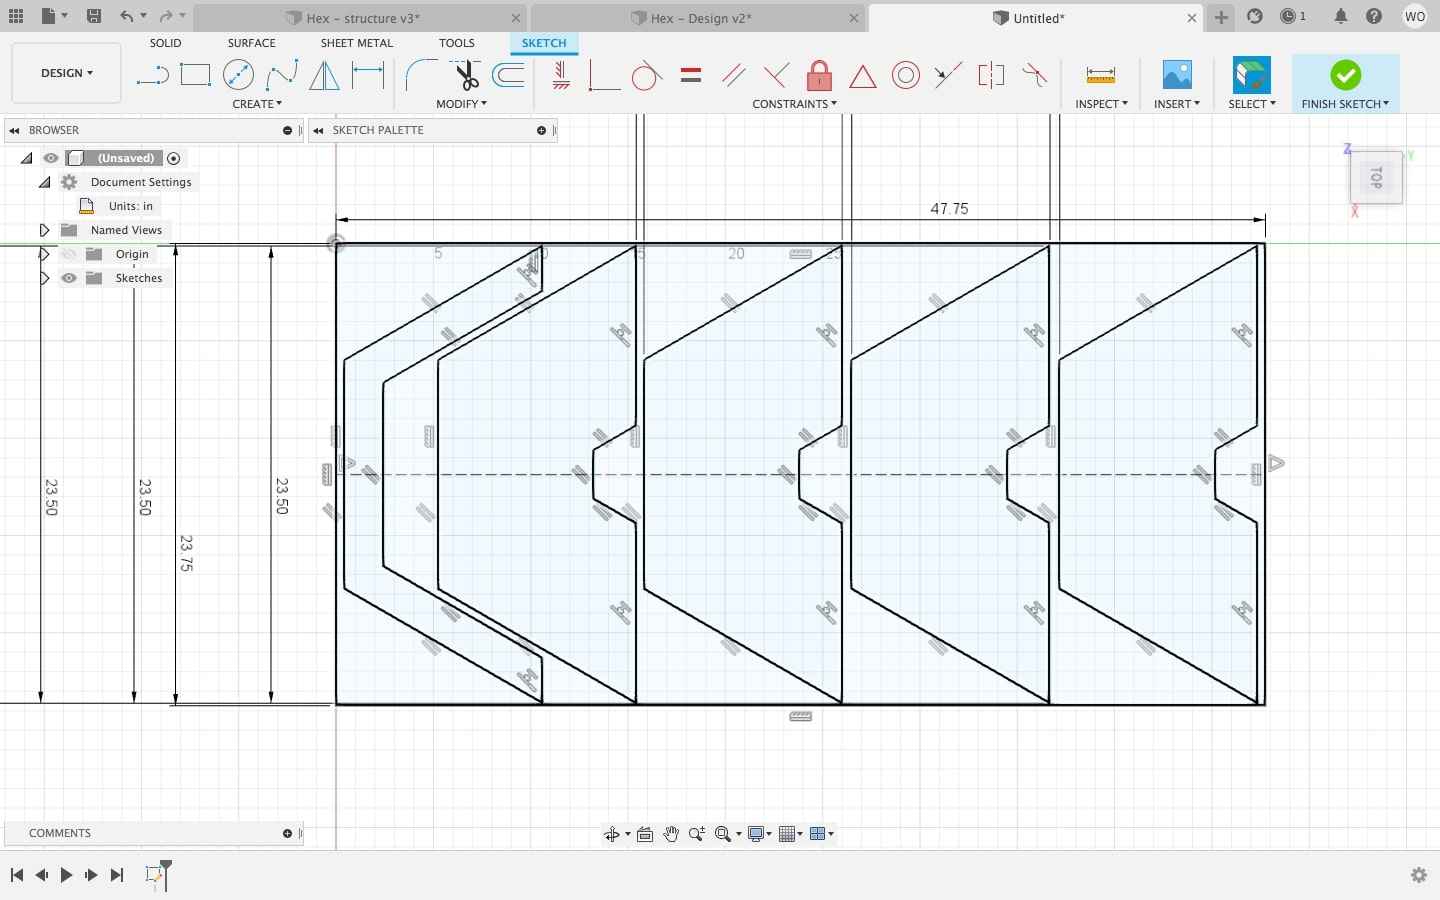
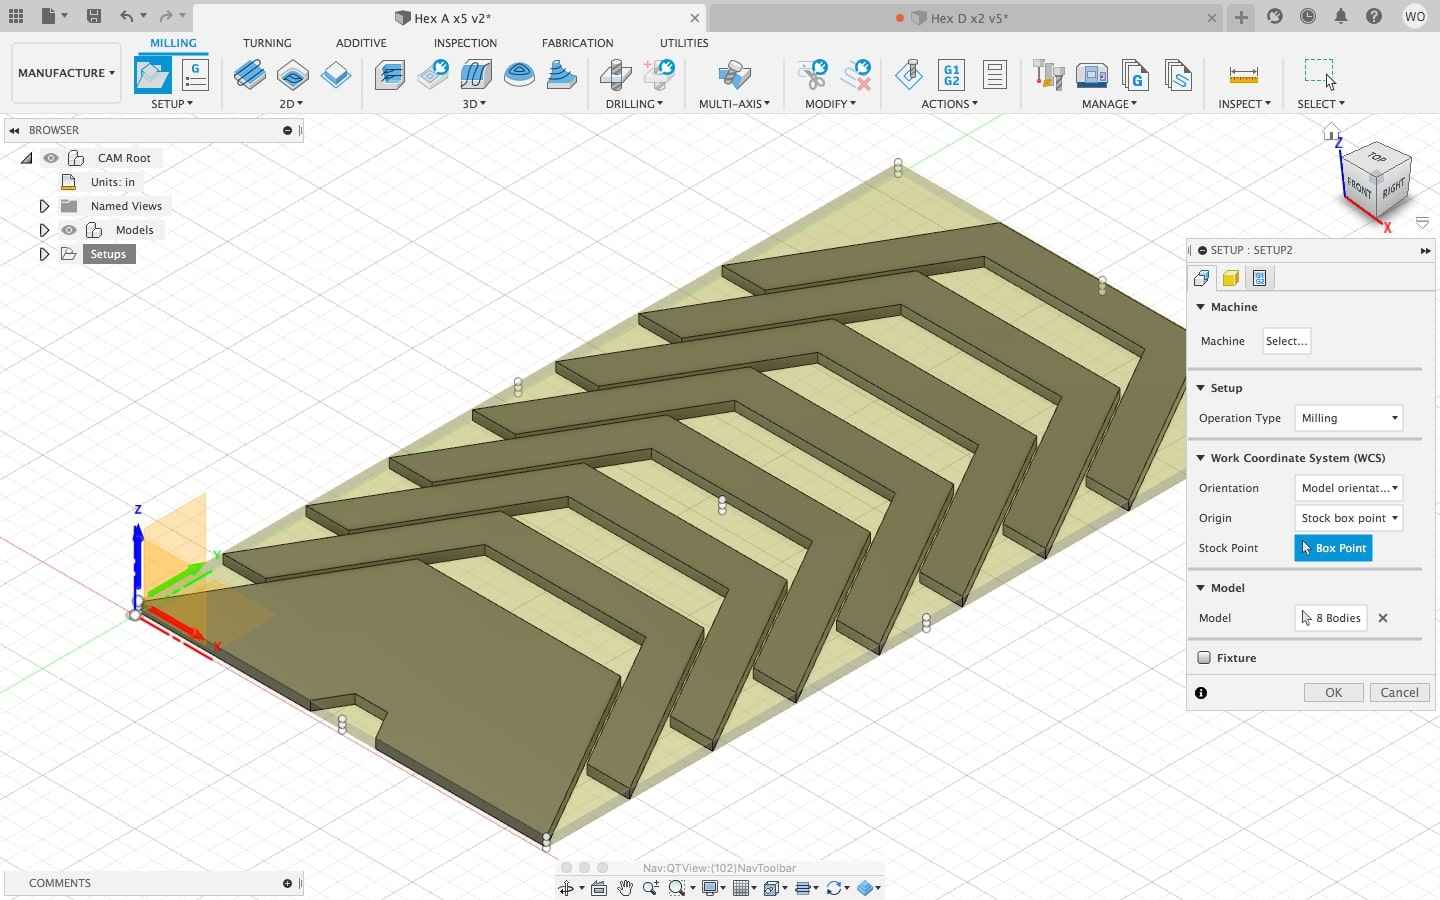
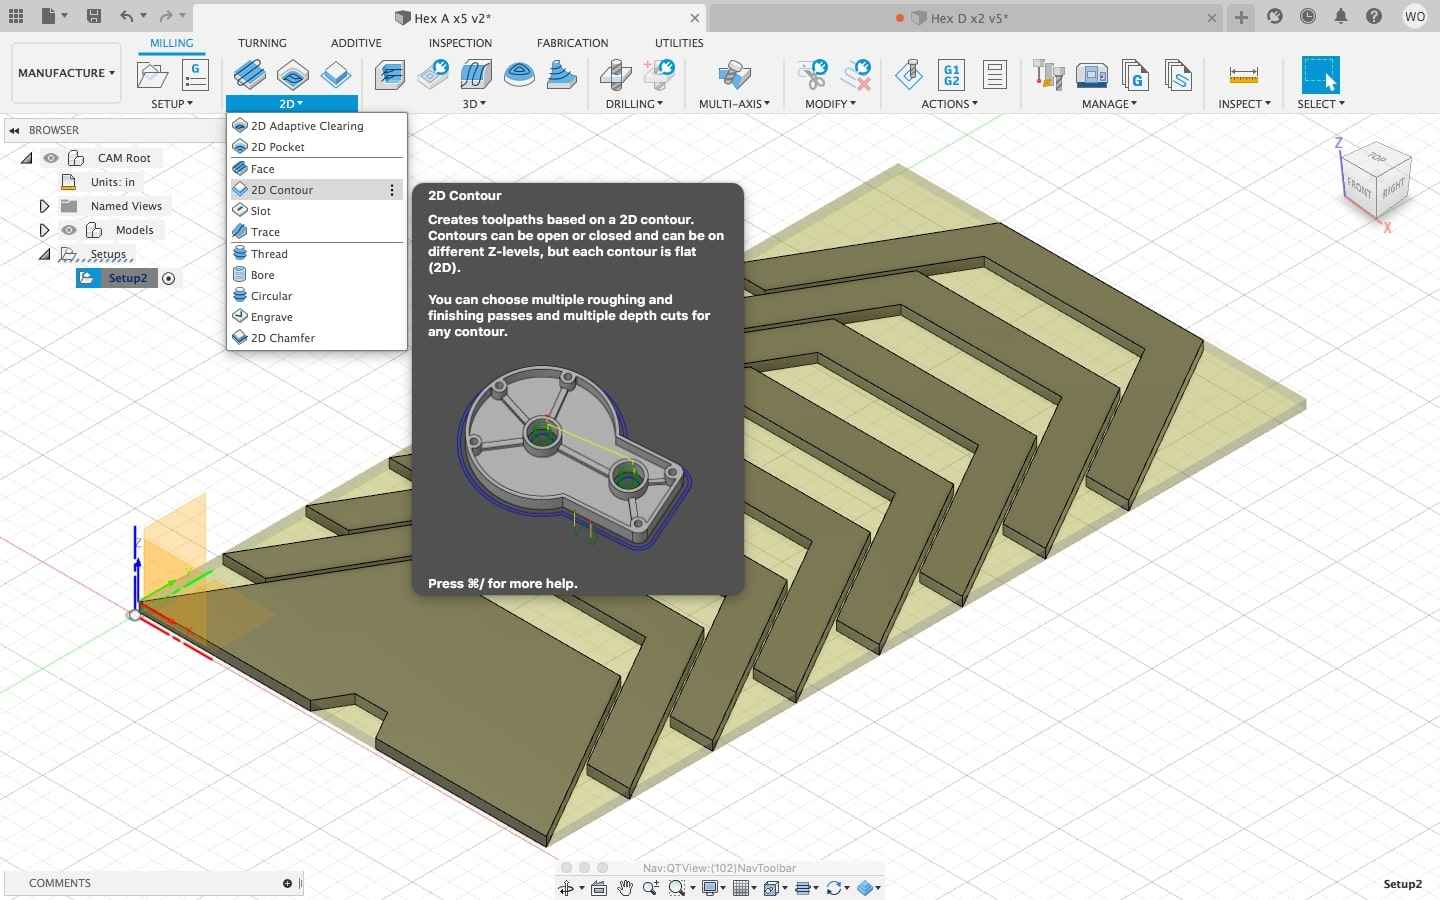
The design step for us was interesting since the general shape we designed as a little physical model, so we could think about how many of each shape we'd need to finish the structure. We also recognized that because of the size of our boards it was much more space efficent for us to use half hexagons, and pentagons with mostly hollow interiors so we can nest our shapes. So once we had that figured out we needed to design files in fusion 360 so that we could see how to fit the most hexagons and pentagons on any given board. With fusion designs done we needed to run through manufacturing steps so that we can actually cut everything out. Then all we needed to do was post process the code, and move it too our mill.


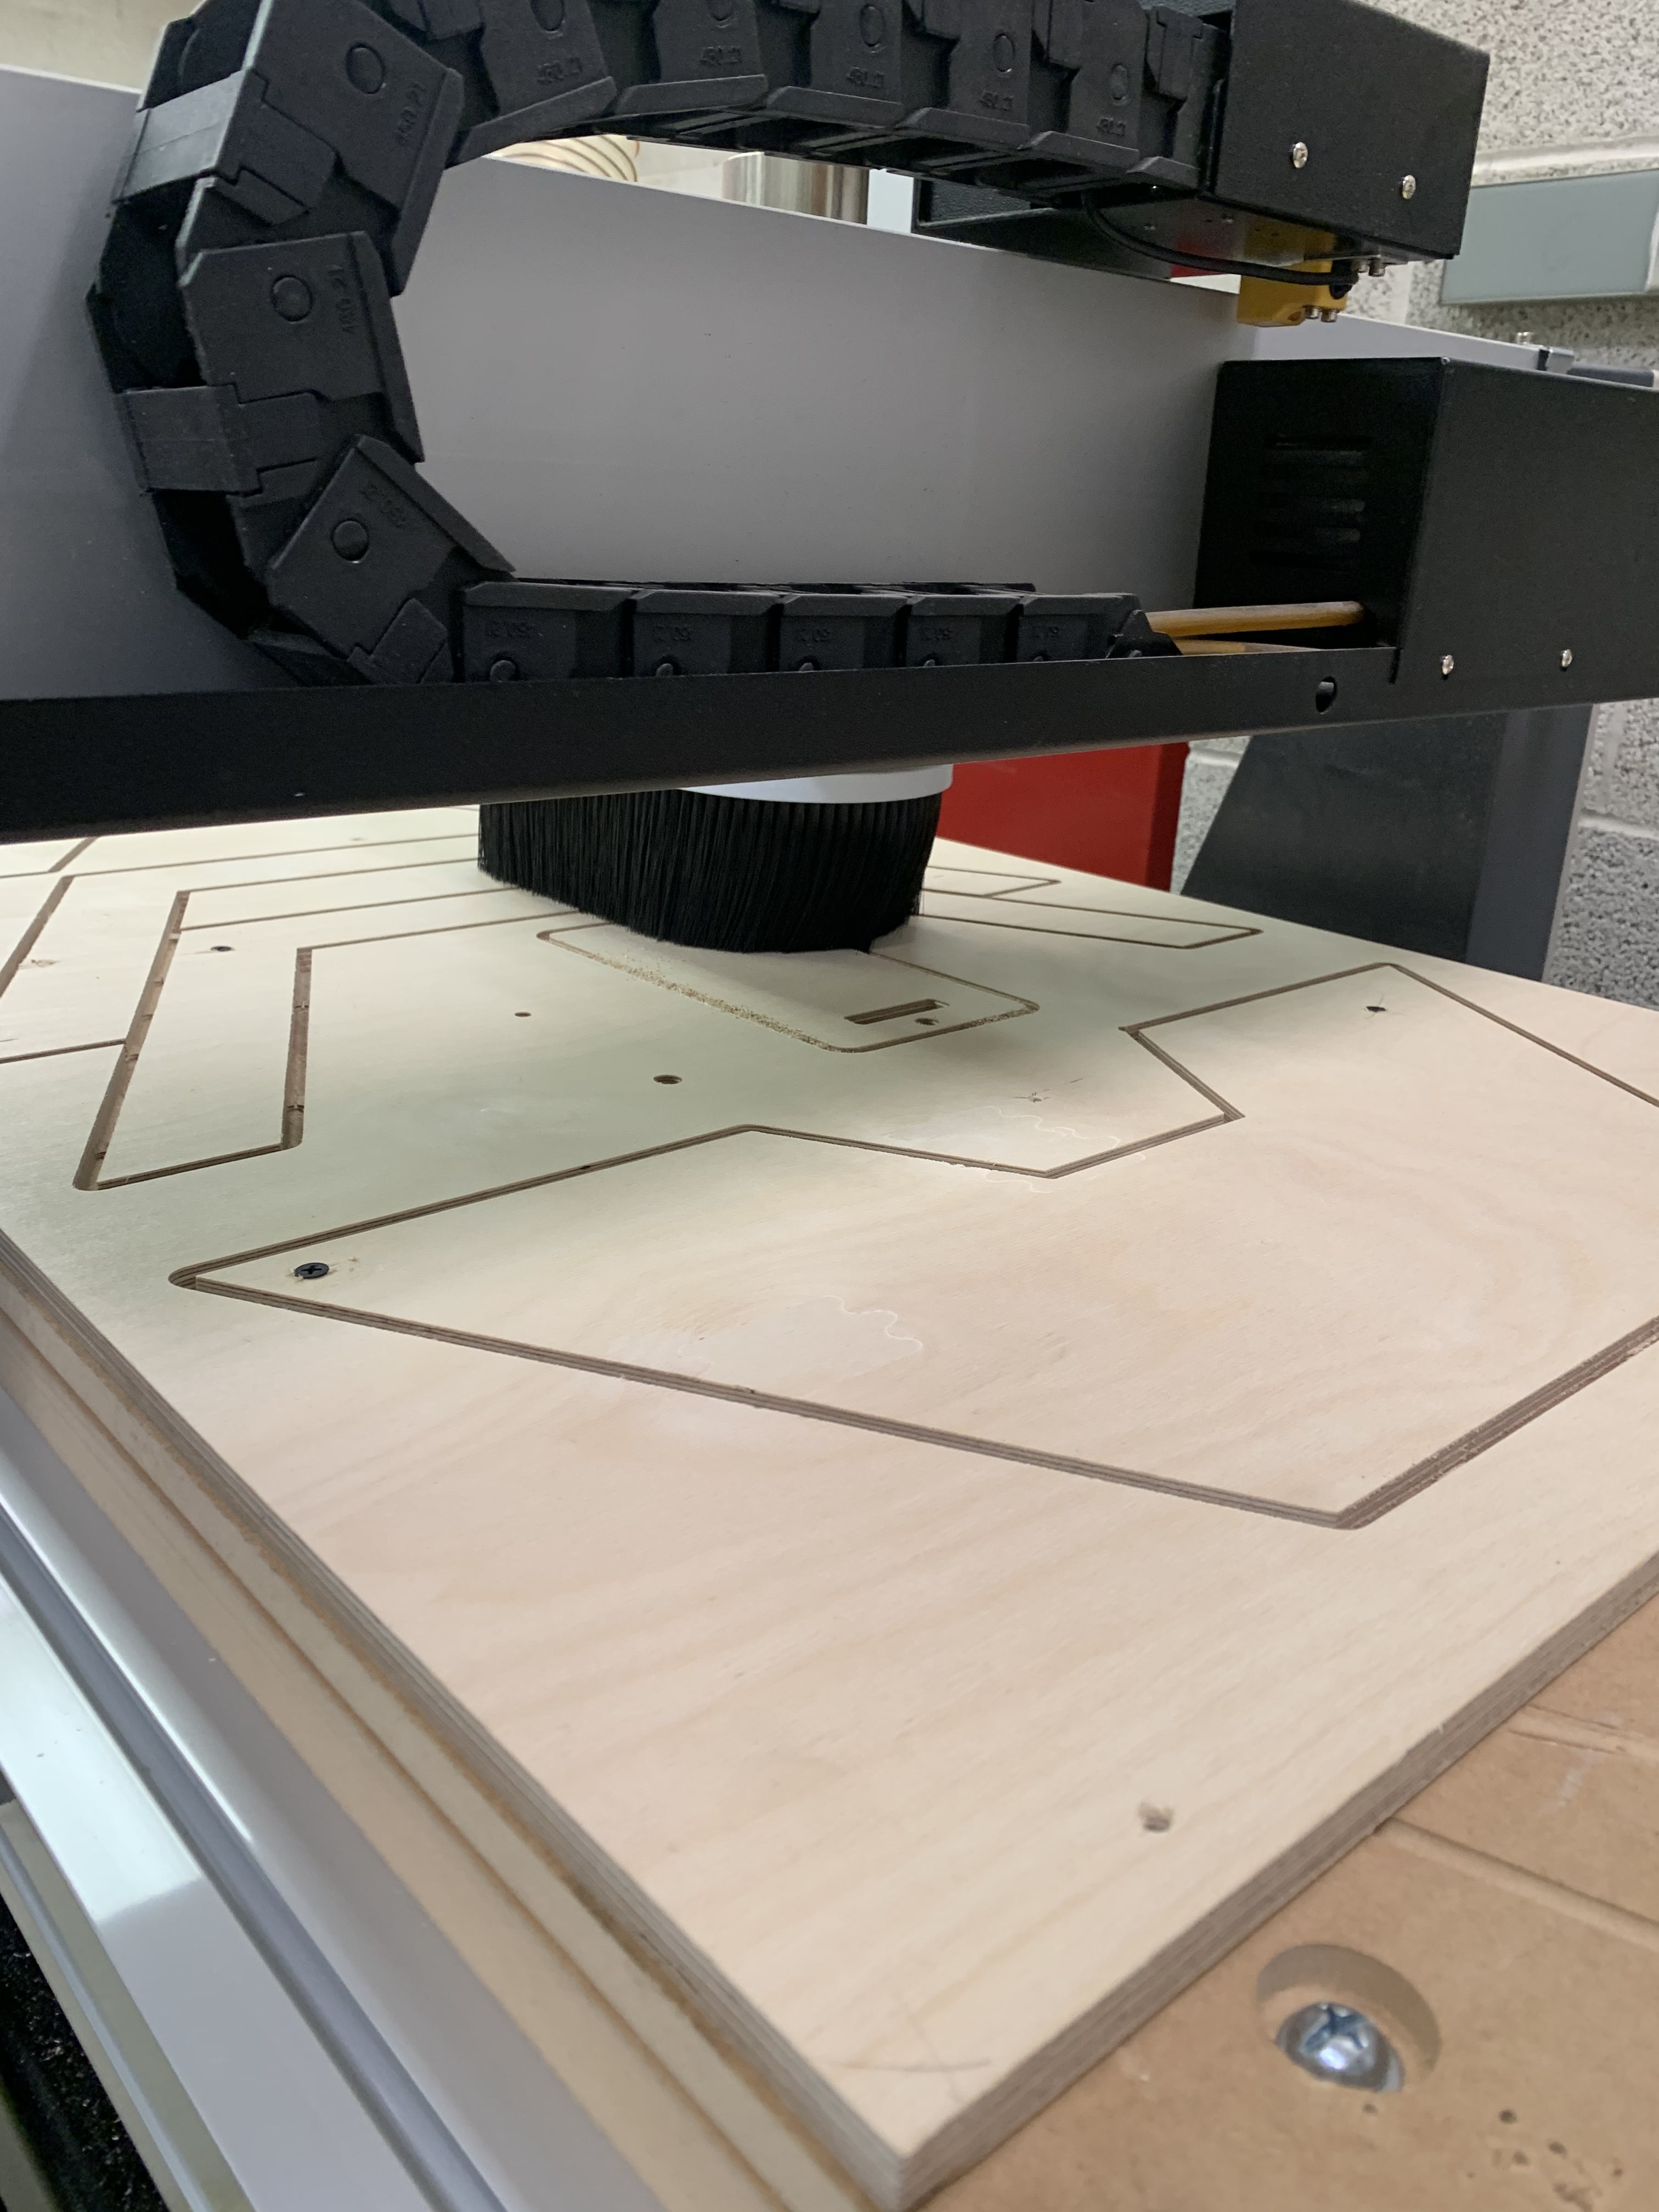
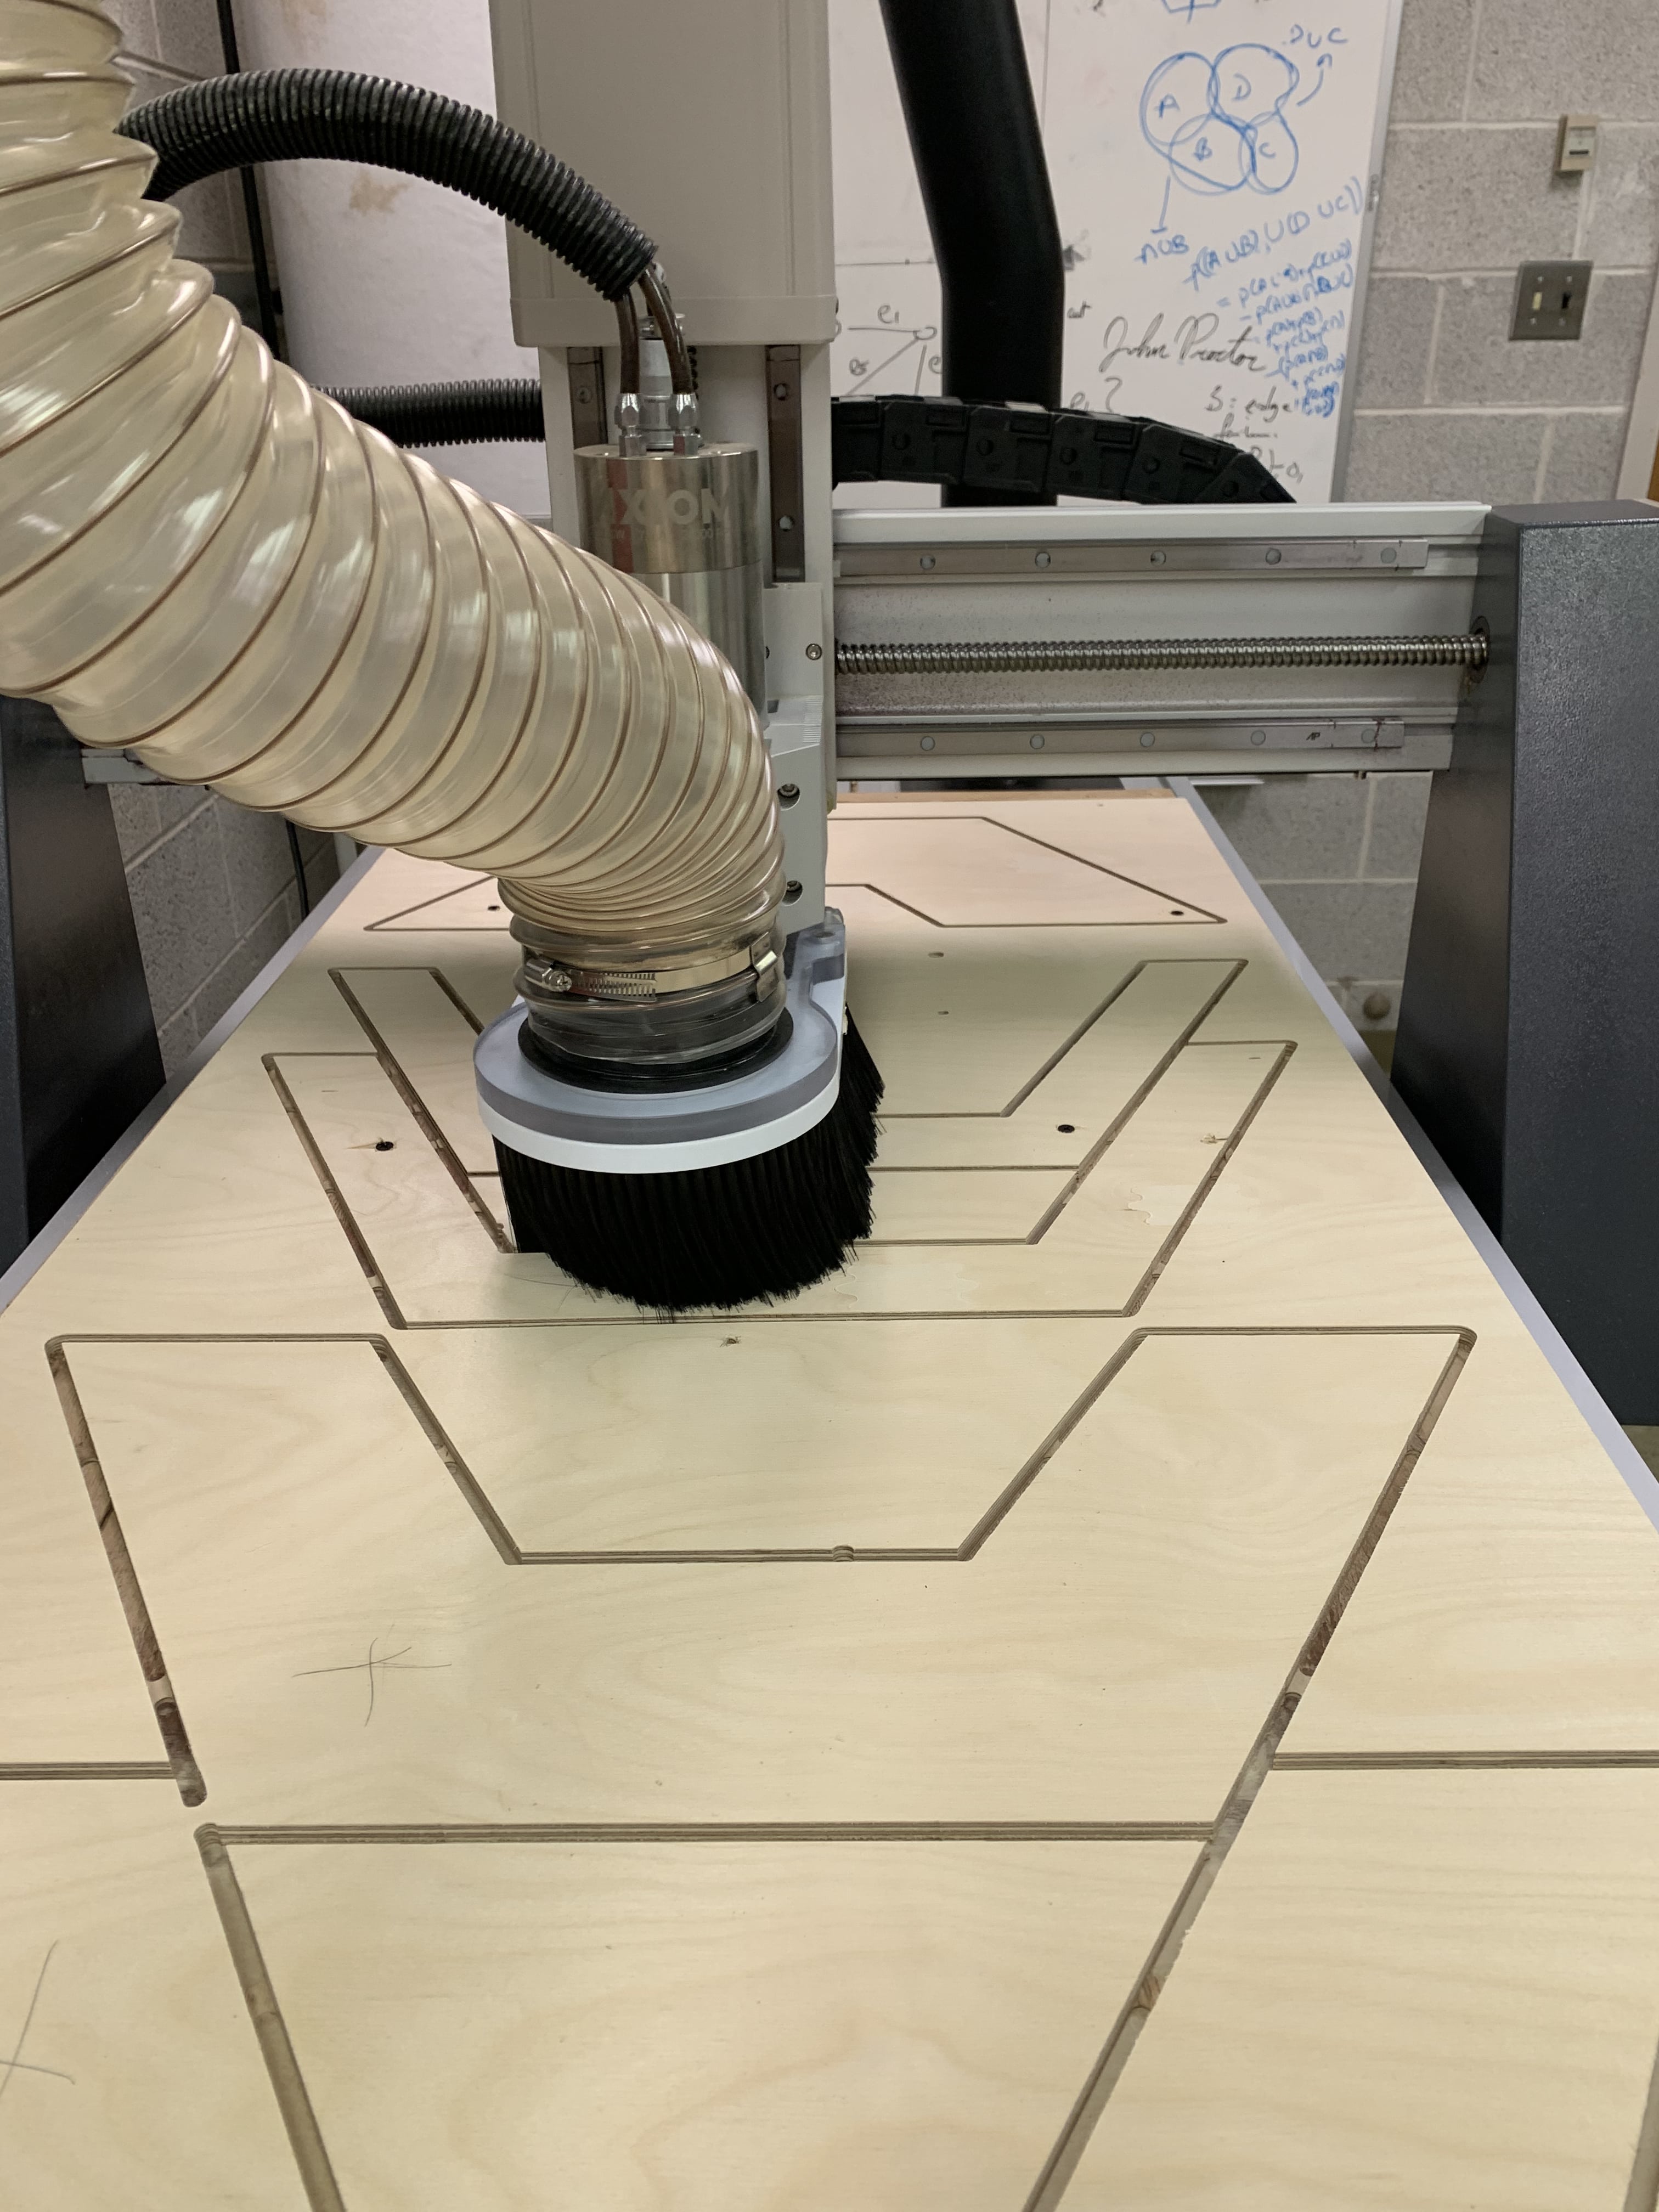
Cutting
I was going to describe this process as the most difficult. I suppose that is true in a way, not in the since that there was a lot of work but we did run into several problems. One thing that we found to be an issue is that our mill would run incredibly slow. Like so slow that we were concerned that it could start a fire. Now throughout our time cutting our boards we discovered two solutions. One was that if we use the exact right bit settings that a student figured out last year then the mill doesn't run super slow, just slow. The other solution we found was to go into the v code and change the speed settings there to a more managable speed. We also accidentally hit a screw with the bit on our mill, and the bit broke. This was really unfortunate, but we were ultimately able to get a new bit and contineu our cuts. We also had a small issue when I left one night where a group member accidentally zero'd the mill to the scrap board, so the mill cut through not only our material, but also through the scrab board. Nonetheless when all was said and done we ended up with plenty of pentagon and hexagon halfs that we needed to sand down.
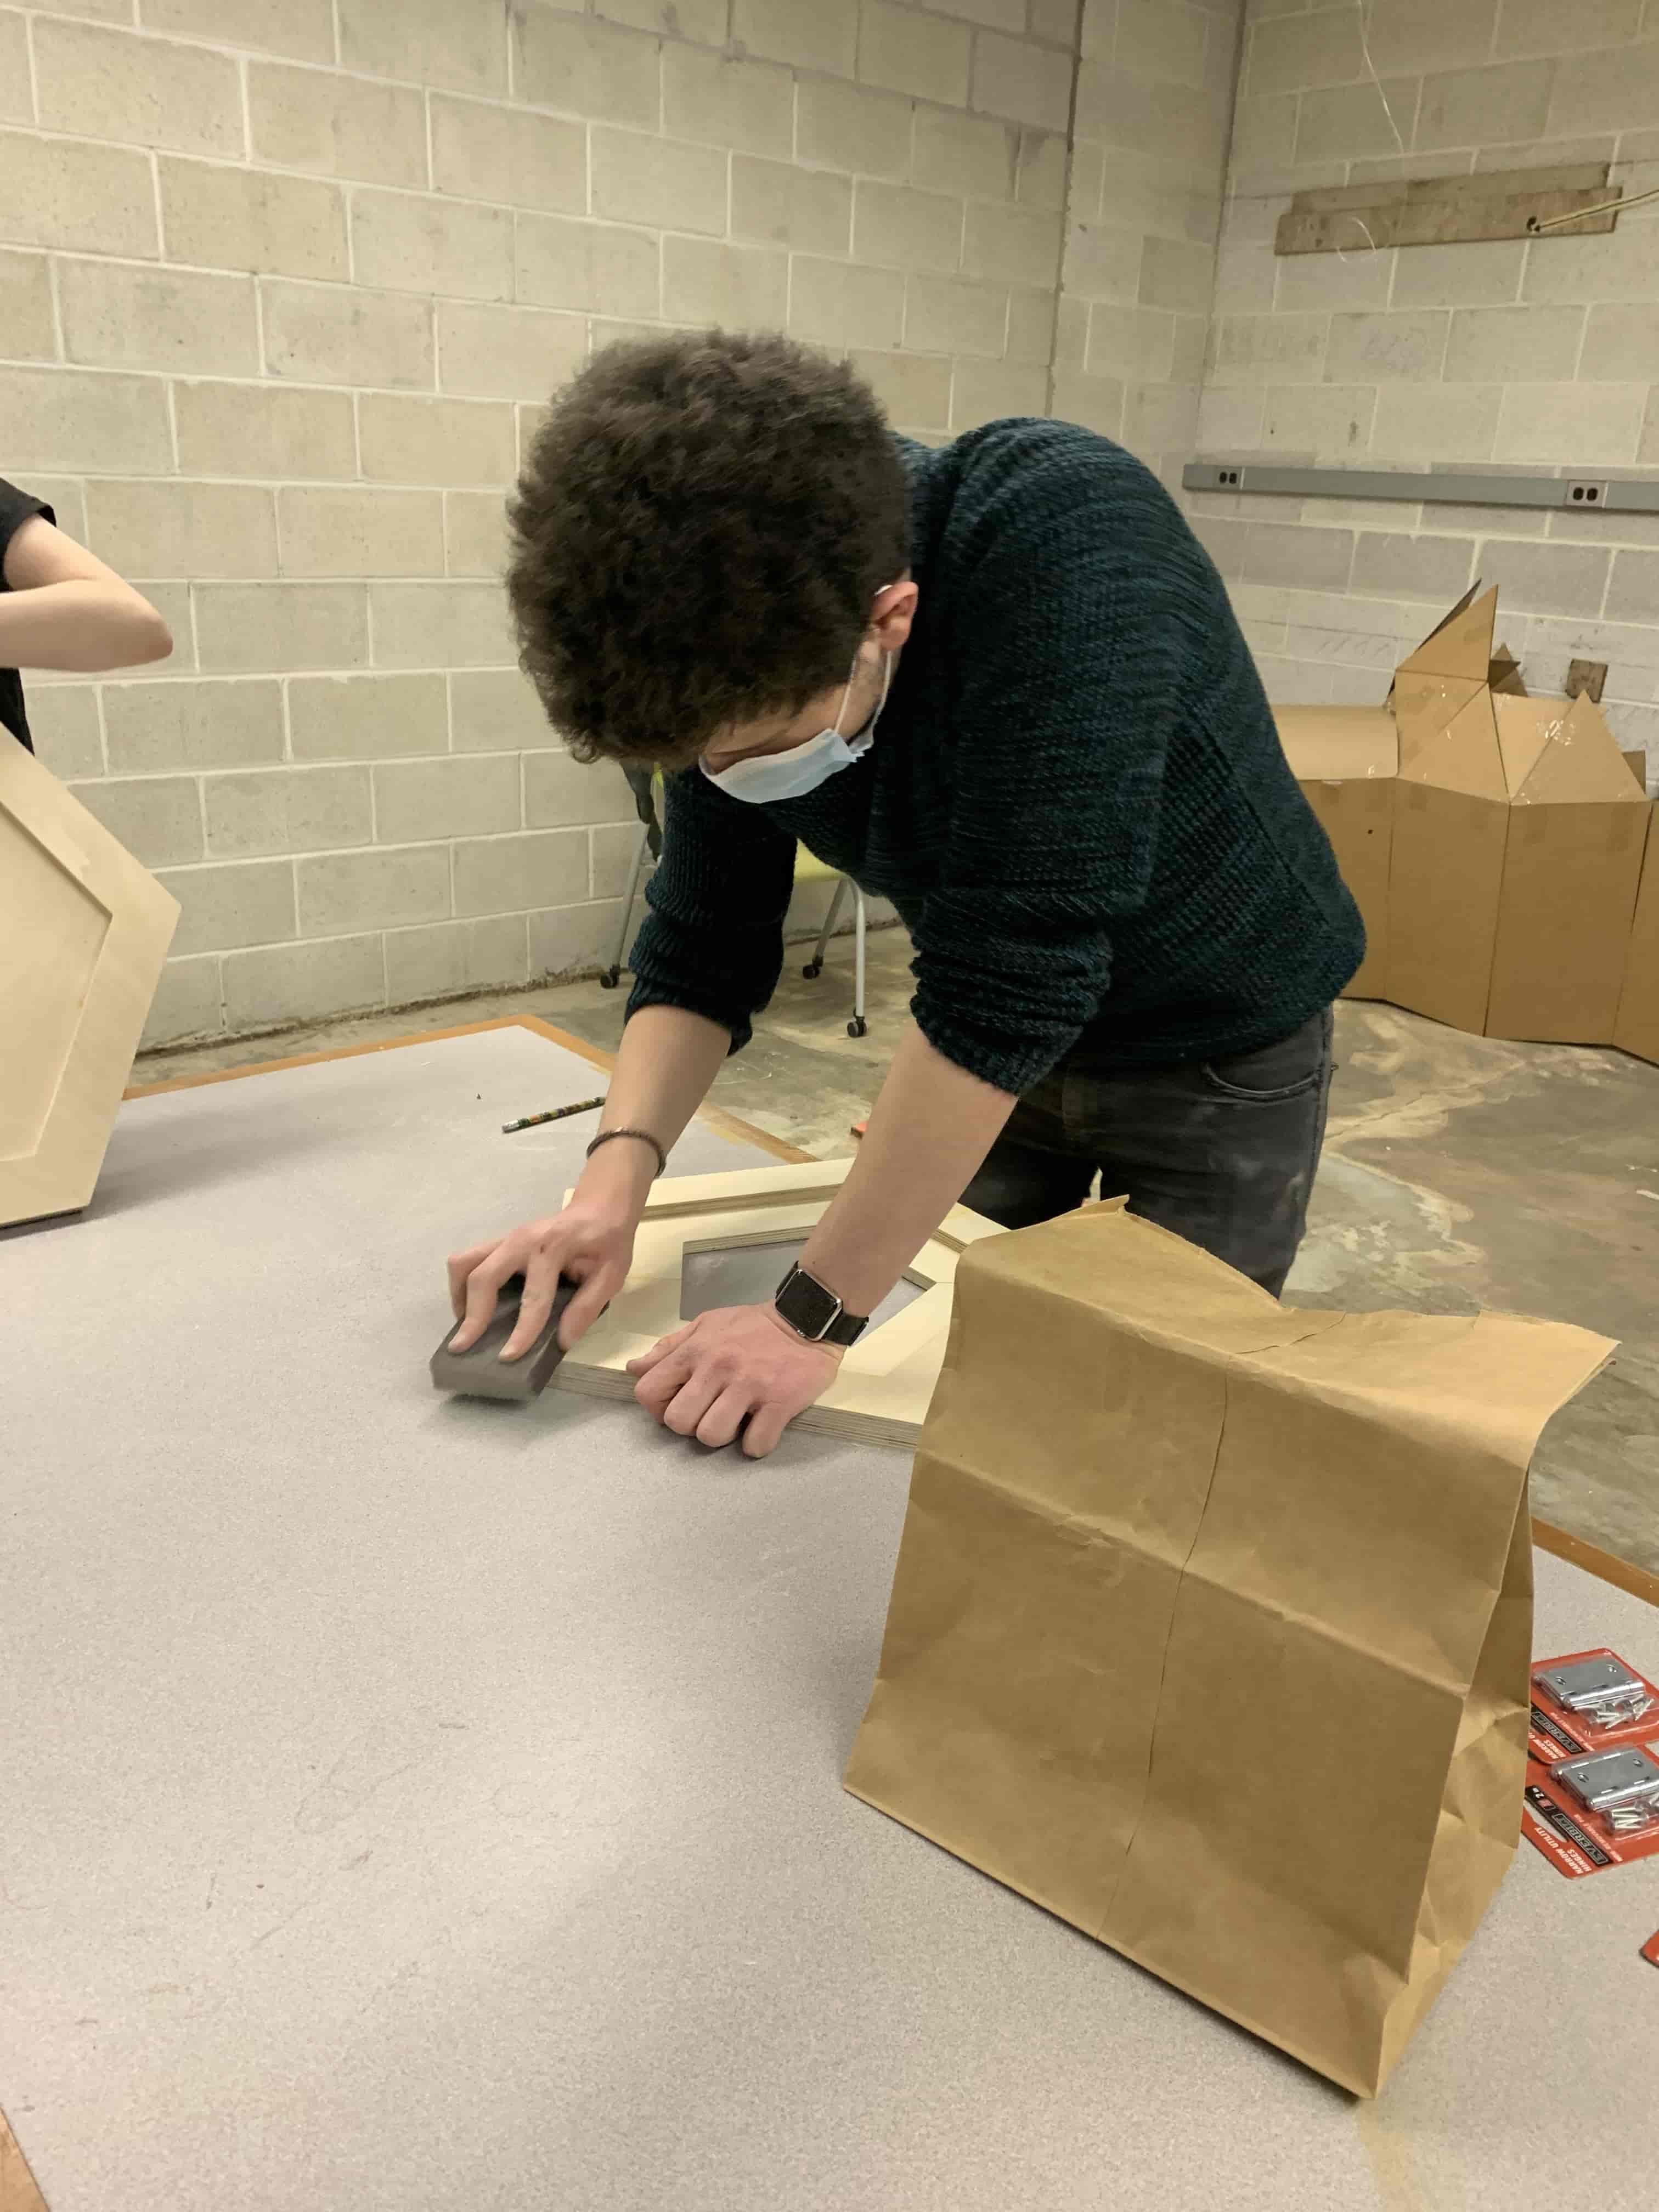
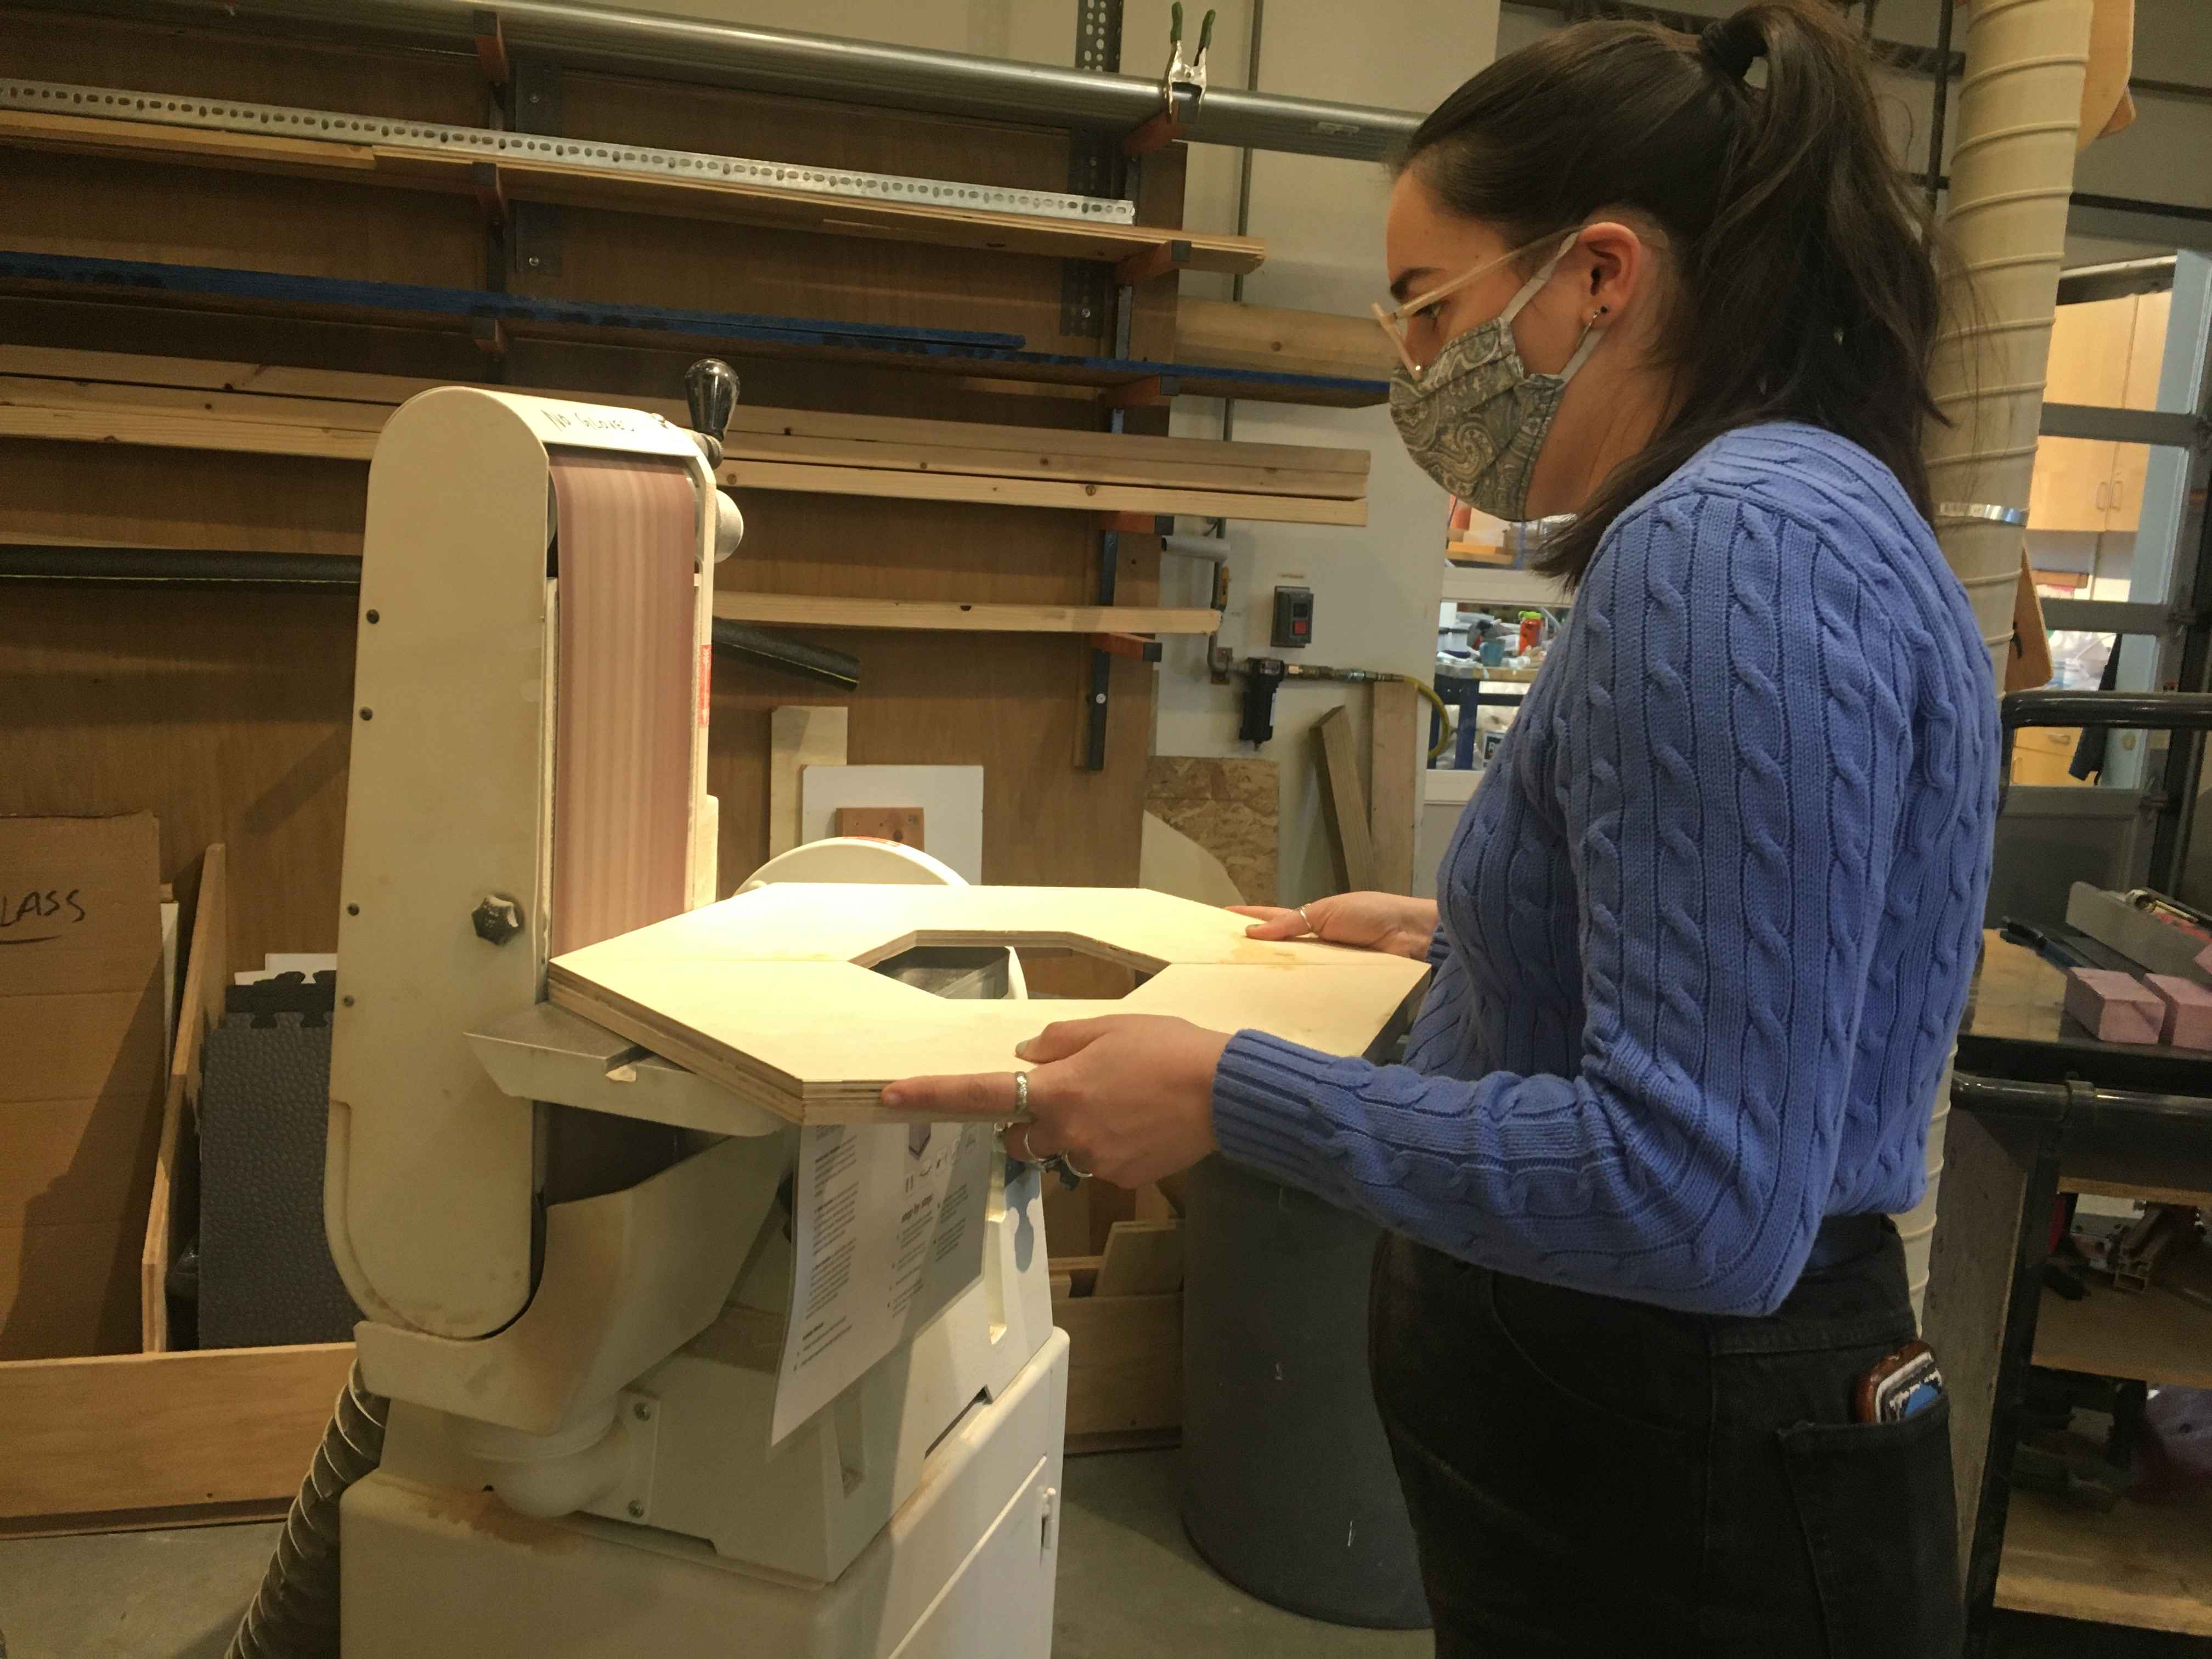
Sanding
I don't have a whole lot to write about here we needed to sand the material to make it so we wouldn't be convered in splinters and to get rid of the tabs. We did this with sandpaper and elbow grease as well several different machines. Mostly just being a small handheld sander and a sander that is in the art studio on campus.
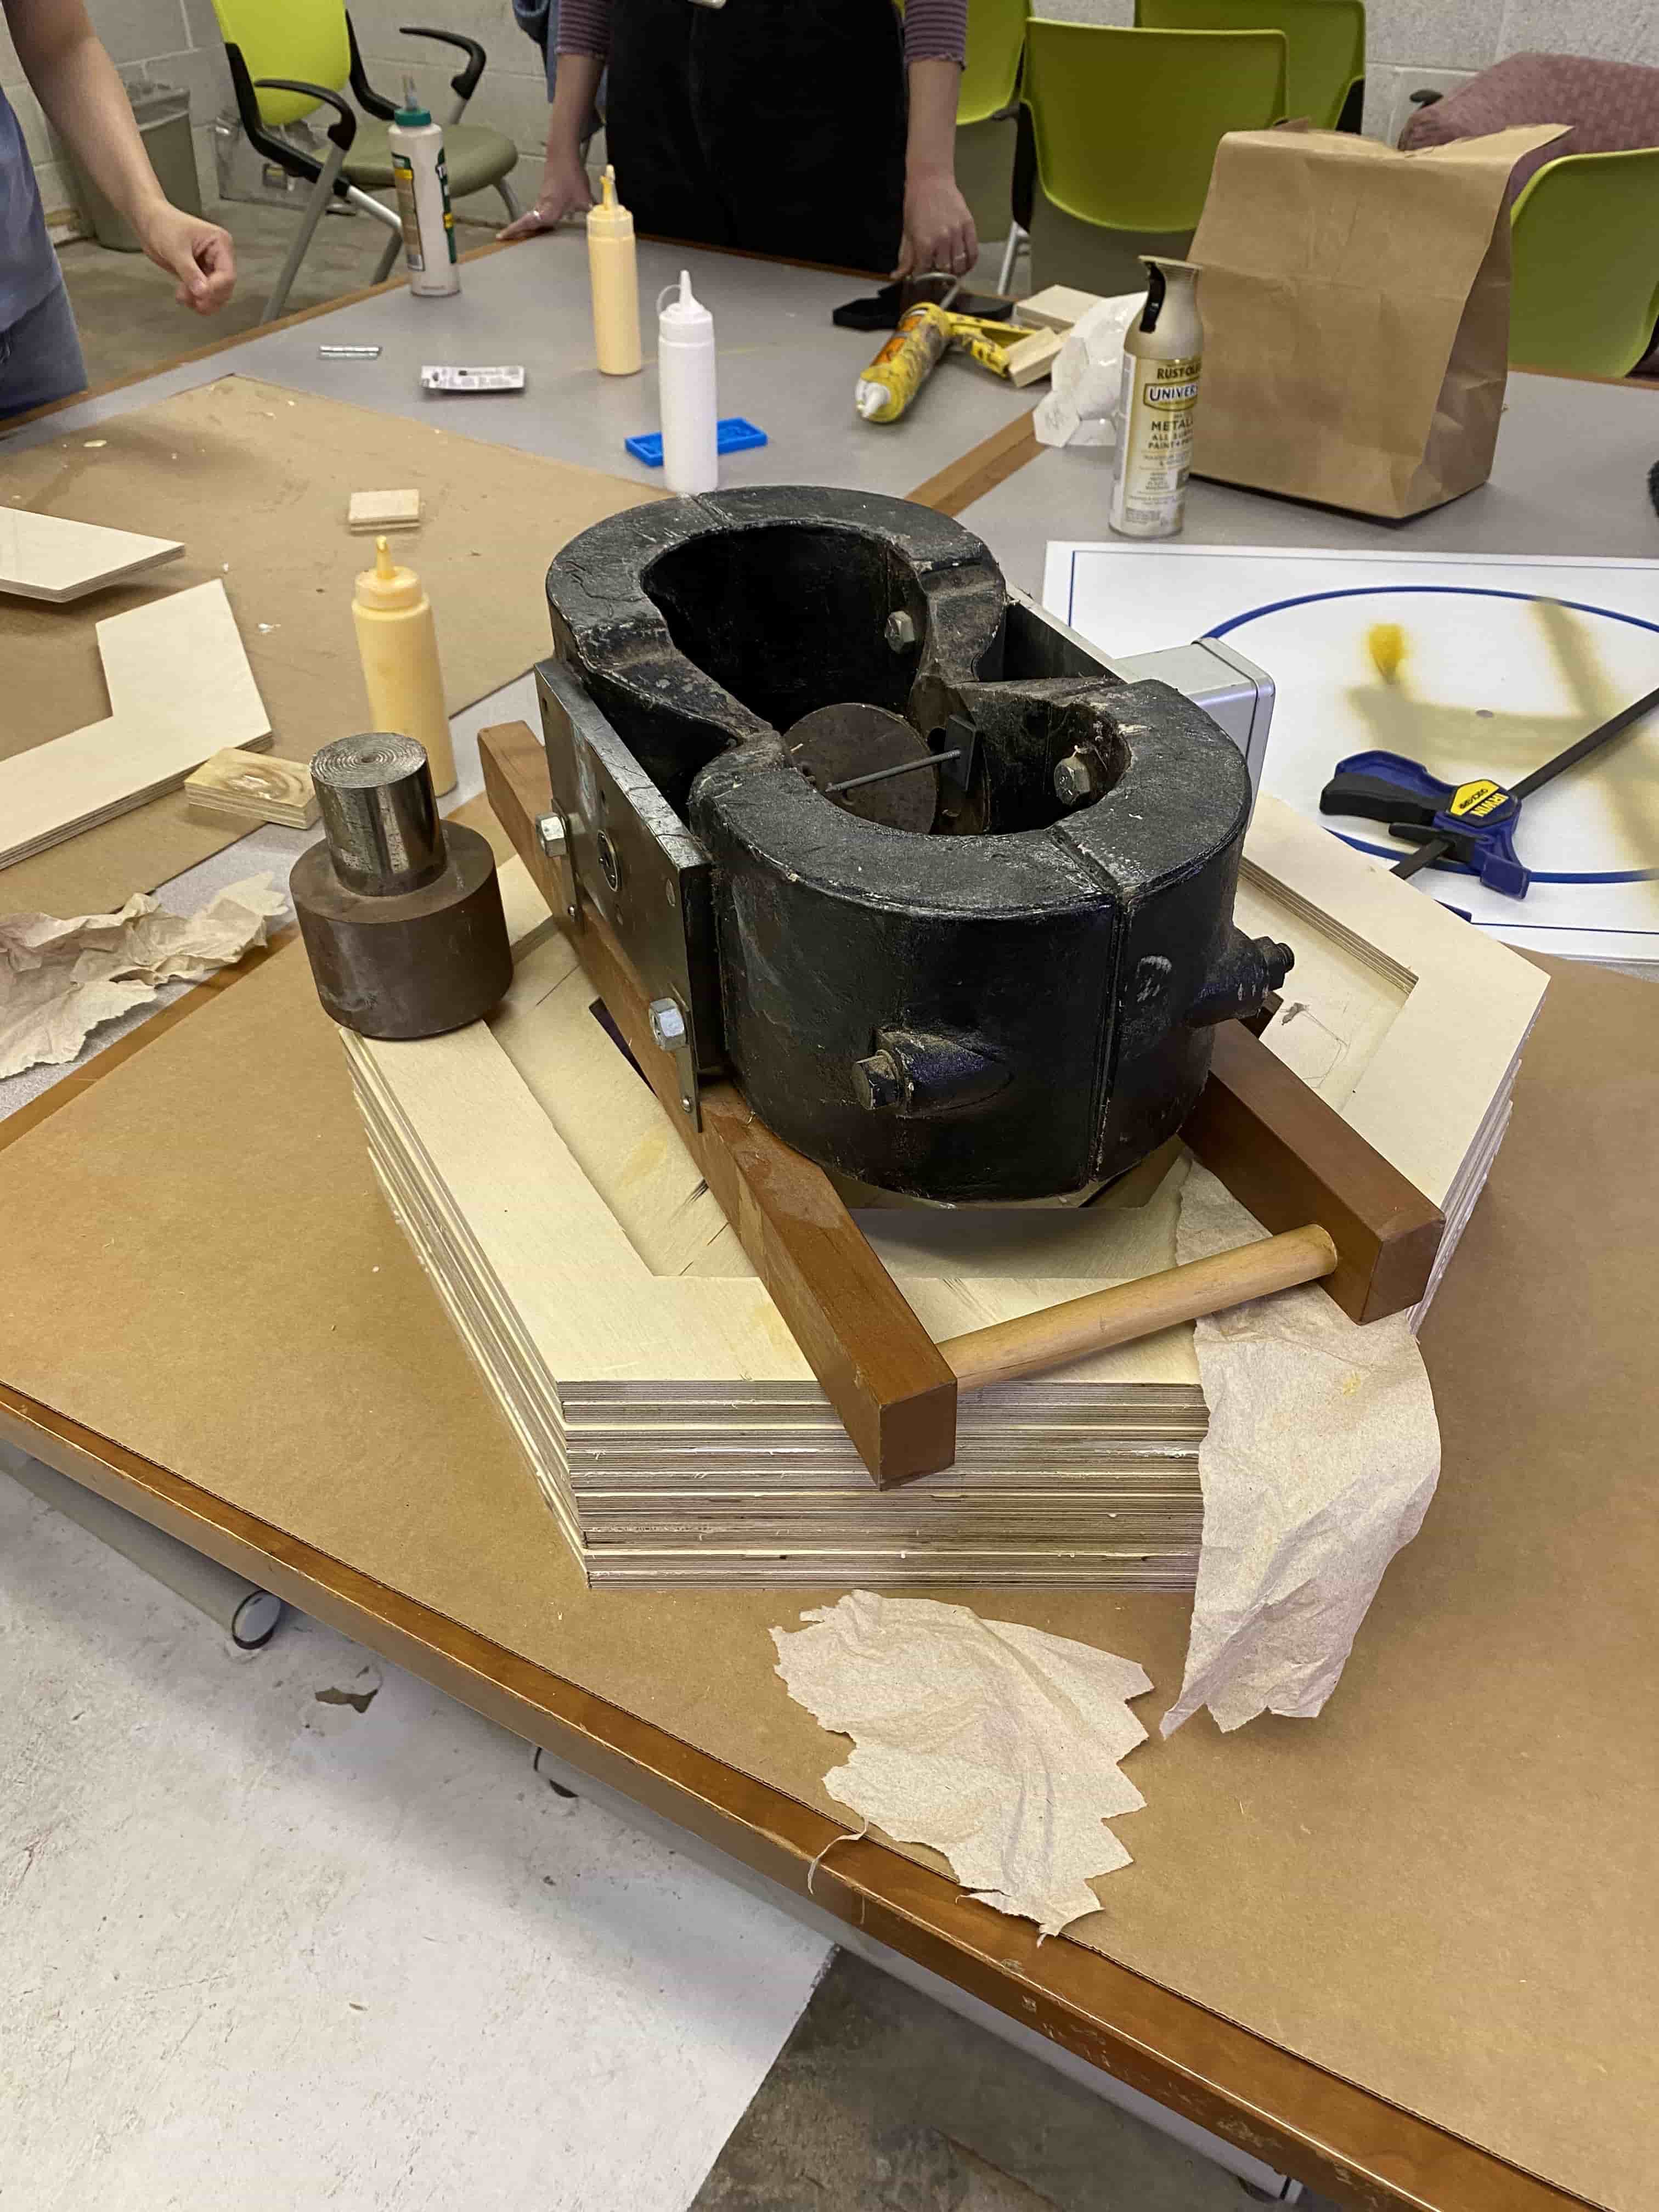
Glueing
Since we were doing half shapes we felt the best way to ensure structual intergrity would be to have them layer with a turn in each layer so that each layer would hold the other together. With this being the case we needed to go through and glue all of our pieces together and hold them to make sure that they actually stuck. We started by trying to hold them with vices, but we didn't have nearly enough so we ended up just pressing them together with body weight before stacking them all together and hoping that would do the trick. Turns out it did! Which is pretty cool.

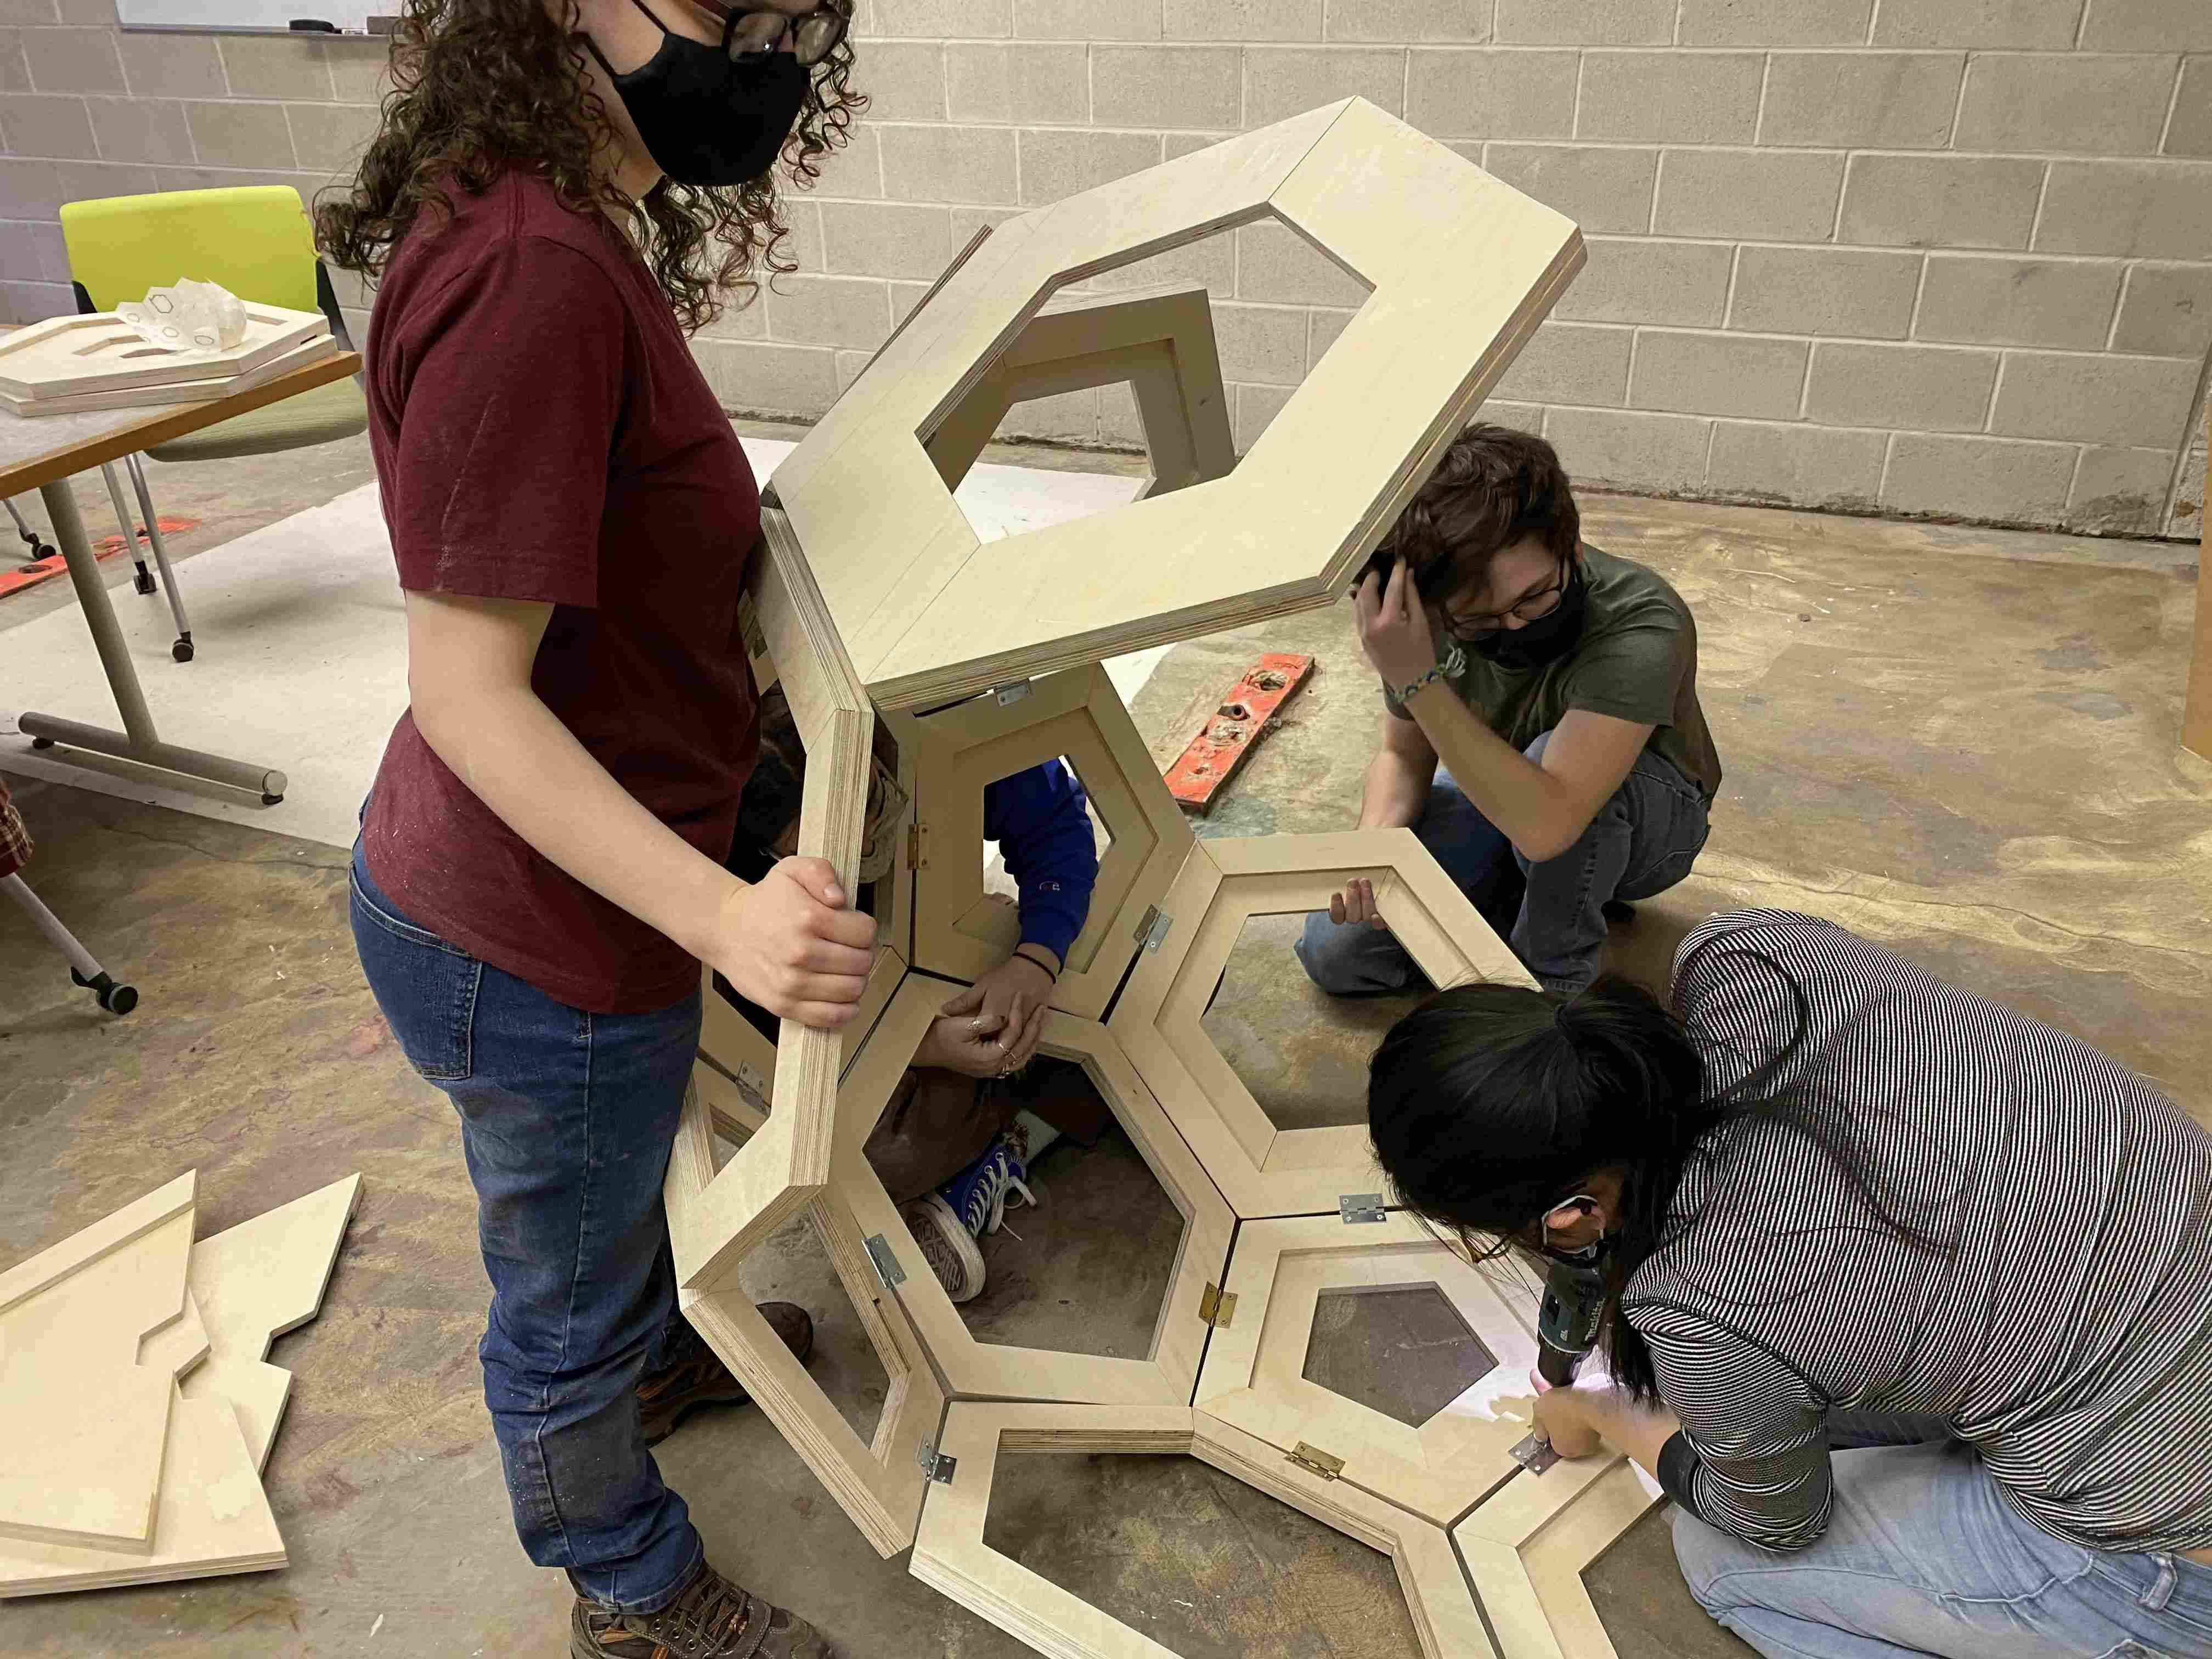
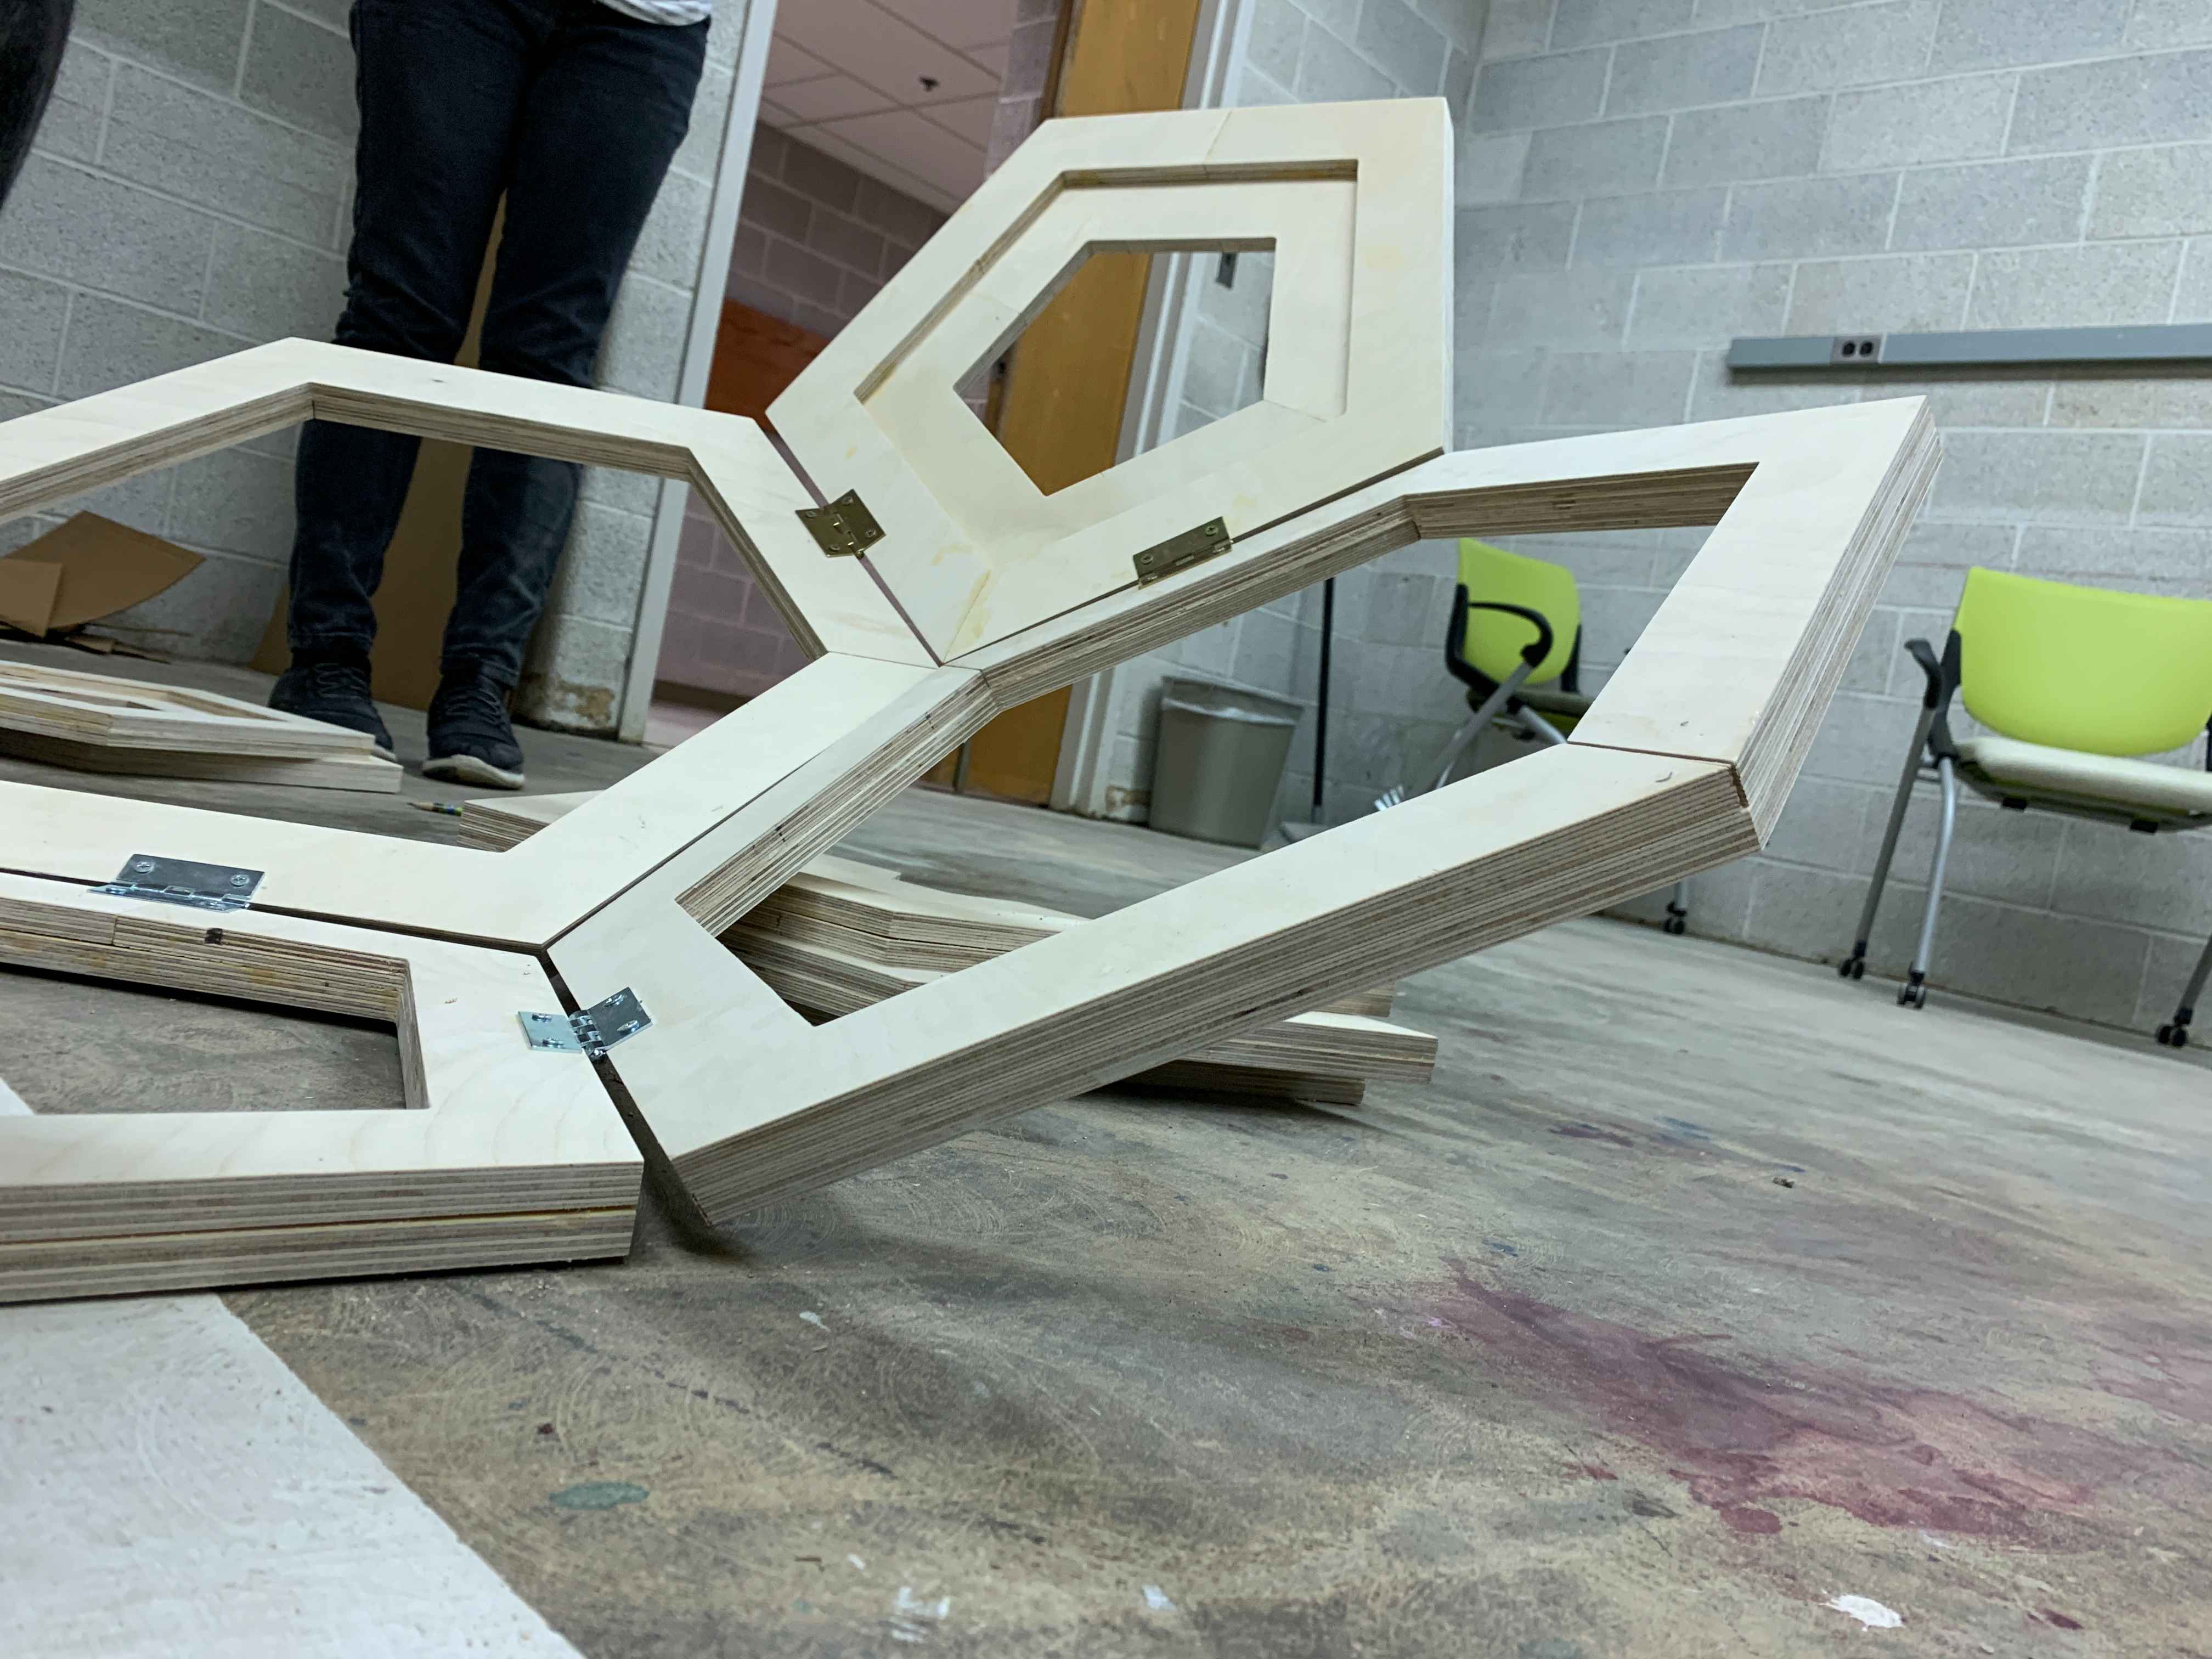
Construction
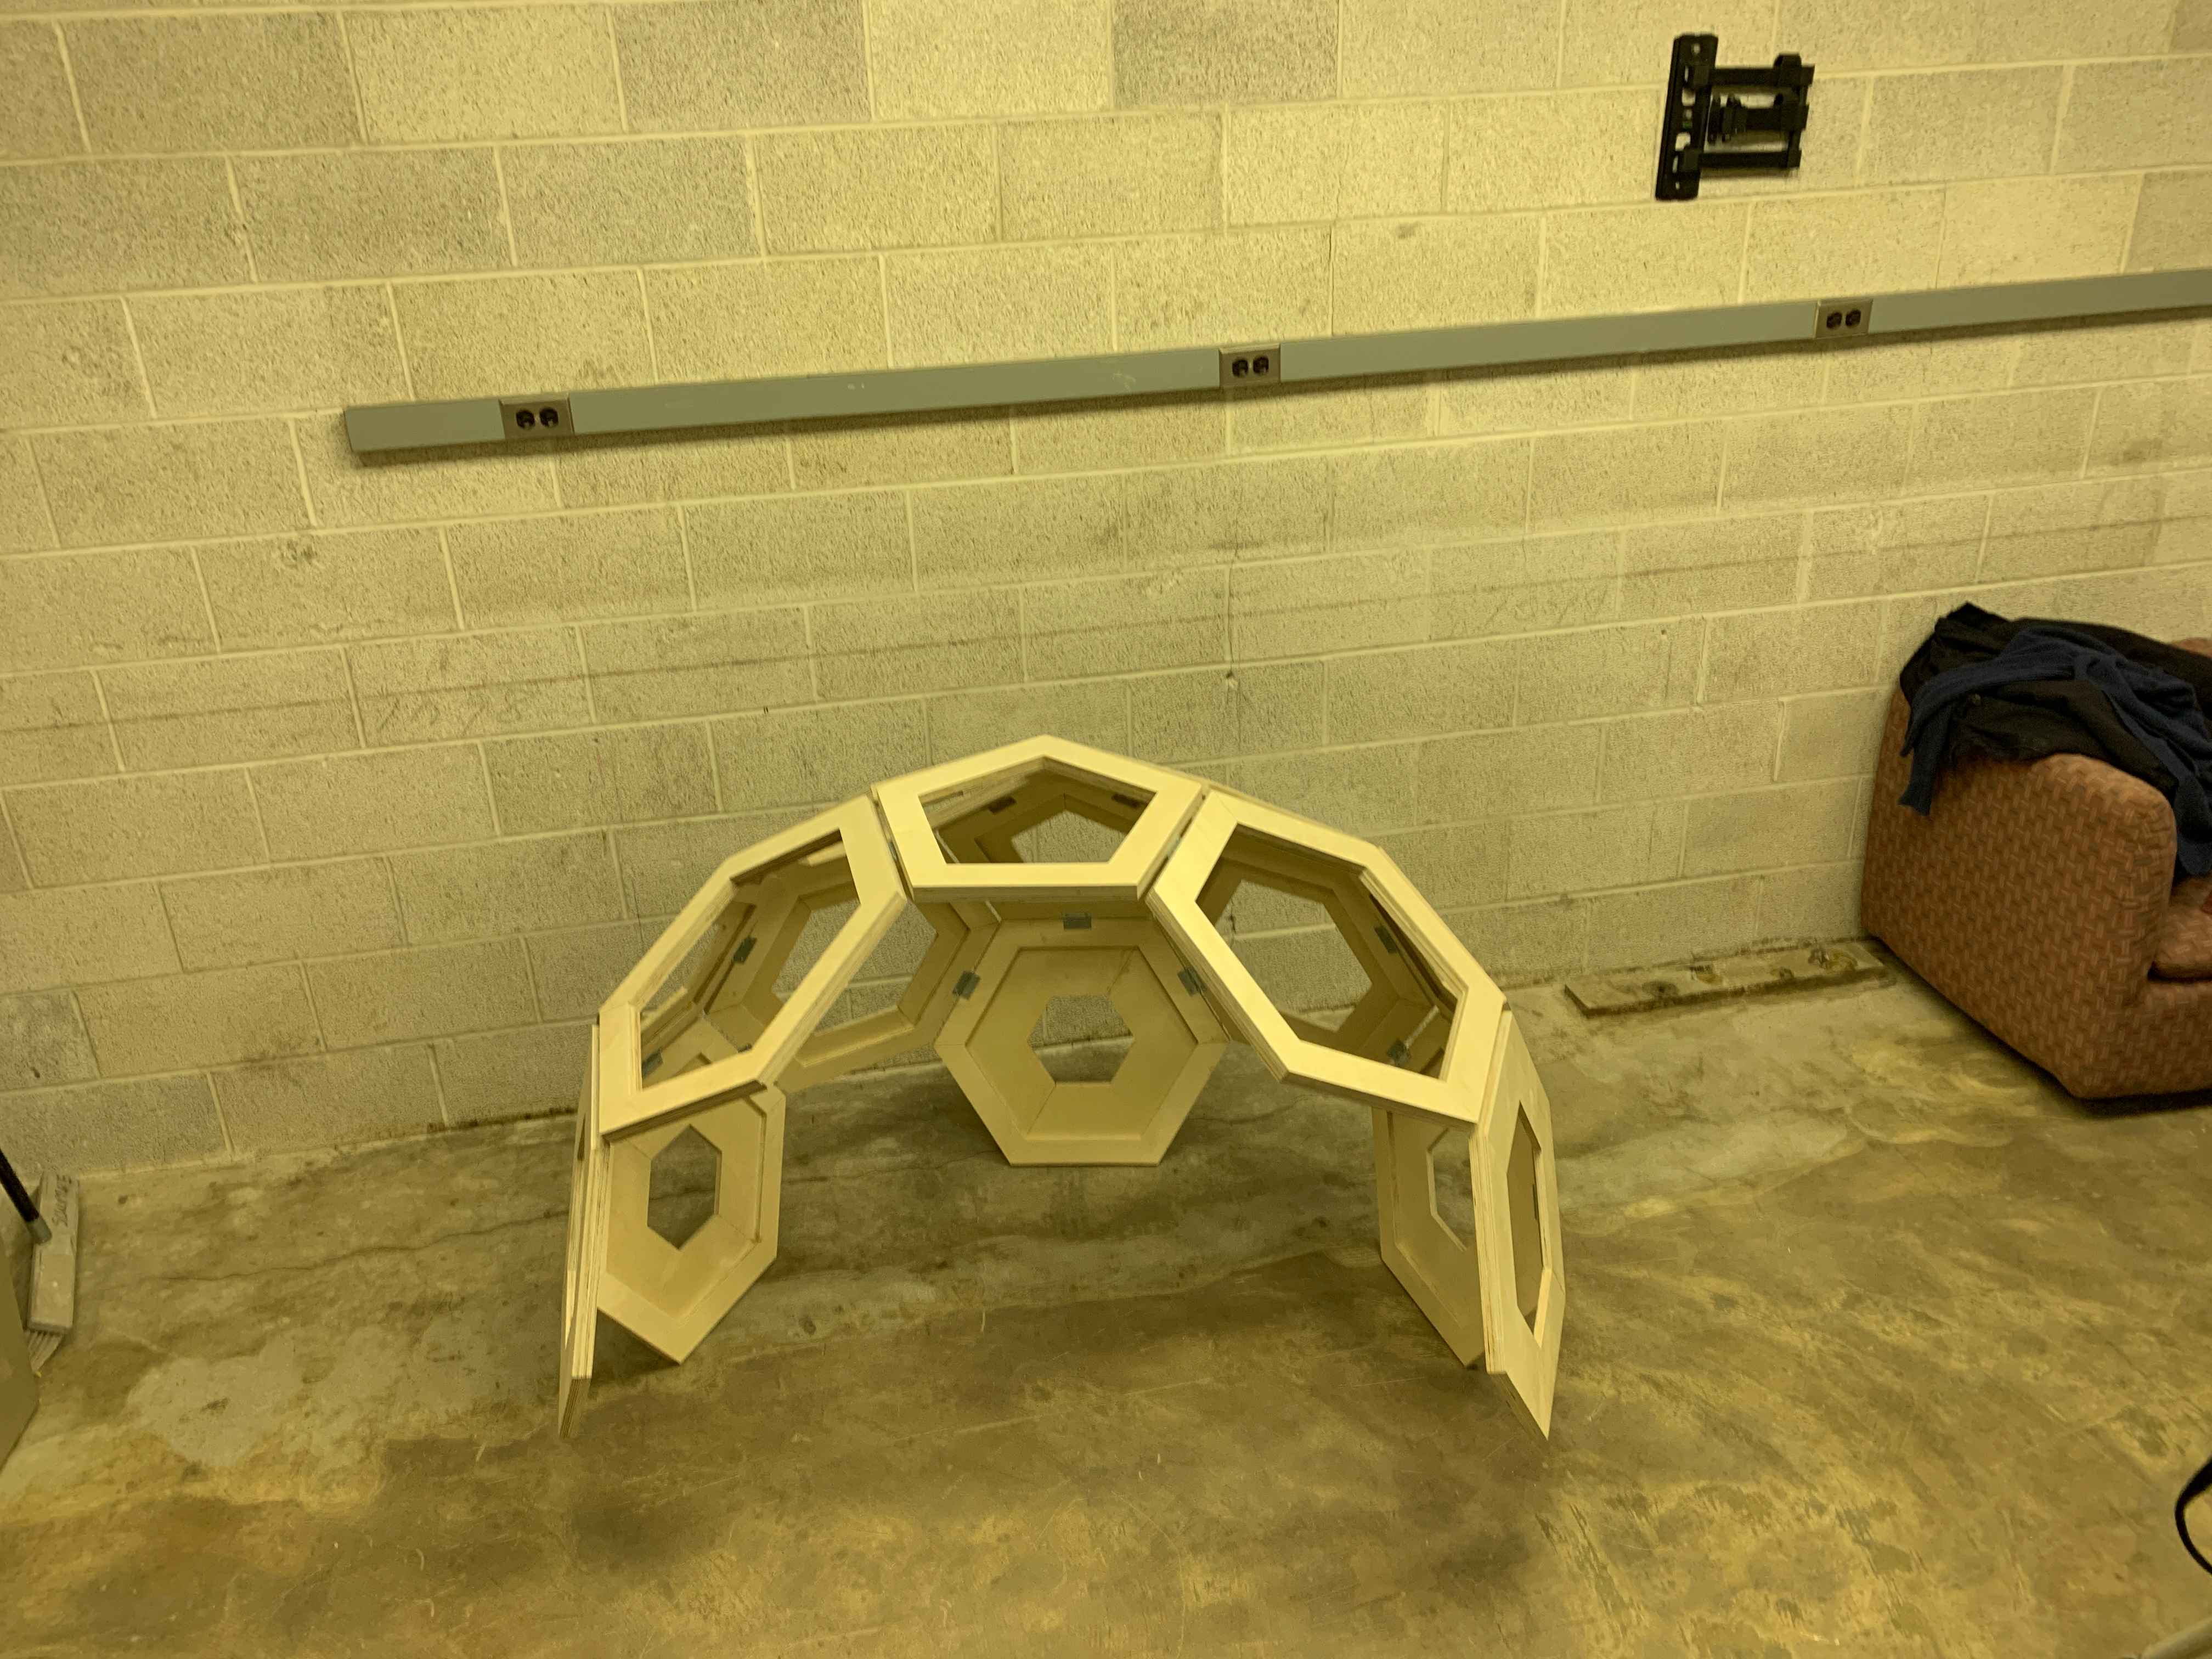
To get these pieces to hold together into a structure we felt that it would be best to use door hinges since they can vary with angles, and are also strong upon certain axis. So our thought was that so long as we have everything properly strung together then the shape will end up holding it's self together. It turns out that it did! The only problem is that because of the angles, and shapes the bottom row was actually pulling inwards too much, so that it was becoming a sphere. At this point we realized that we probably shouldn't go any further, and stopped with a gazeebo that is slightly shorter than we would've liked but still looks pretty cool.