Second week assignment is Computer aided Designing.I never used any CAD software before. So its challanging task for me to learn new .I got confused where to start and what to do . and discussed with my local instructor. Mr. Prasad gives as introduction about Solid work , Mr.Nikhil More introduced to Free cad. We made plan for this week. So, I started working as per our plan.First I started working on Raster software then Vector software. After finishing these two I started working on 3D software.
Assignment-2
COMPUTER AIDED DESIGNING
OBJECTIVE
Learning outcomes
What is Raster?
Raster graphics are consist of pixels.A raster graphic,such as a gif or jpeg is an array of pixels having various colors together form an image.When we increase the pixelsor zooming it ,image will get blur.( wikipedia)
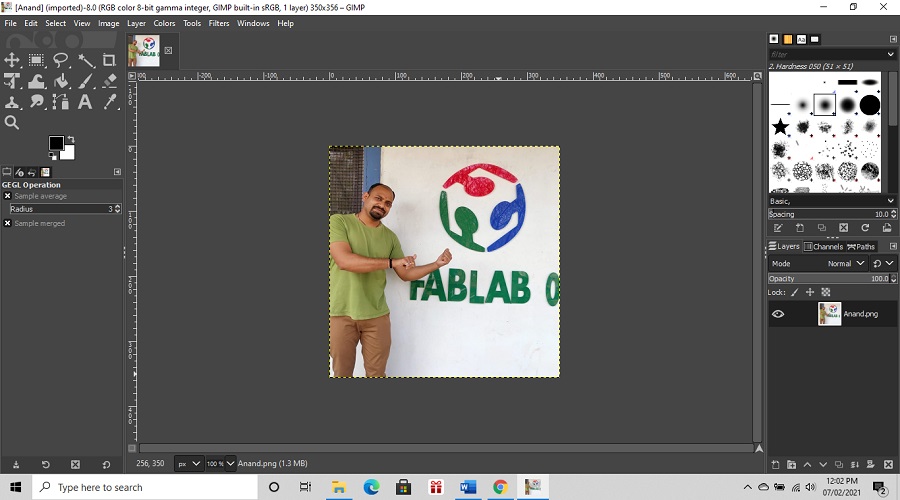
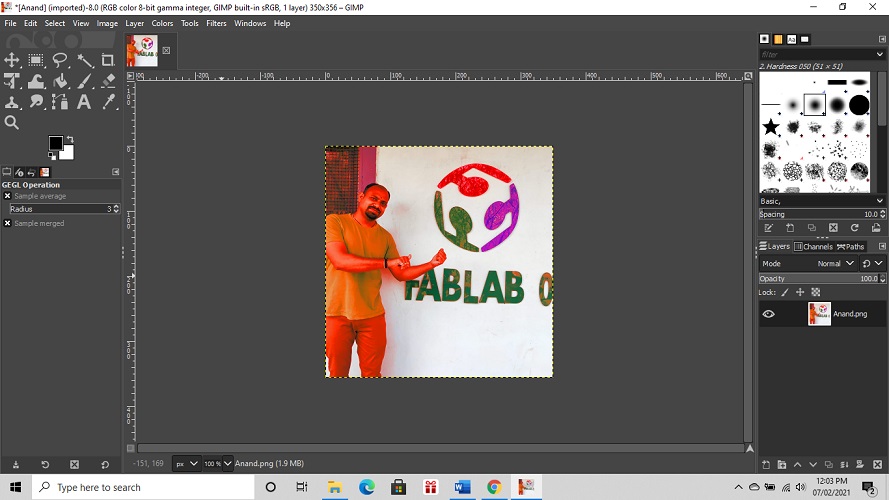
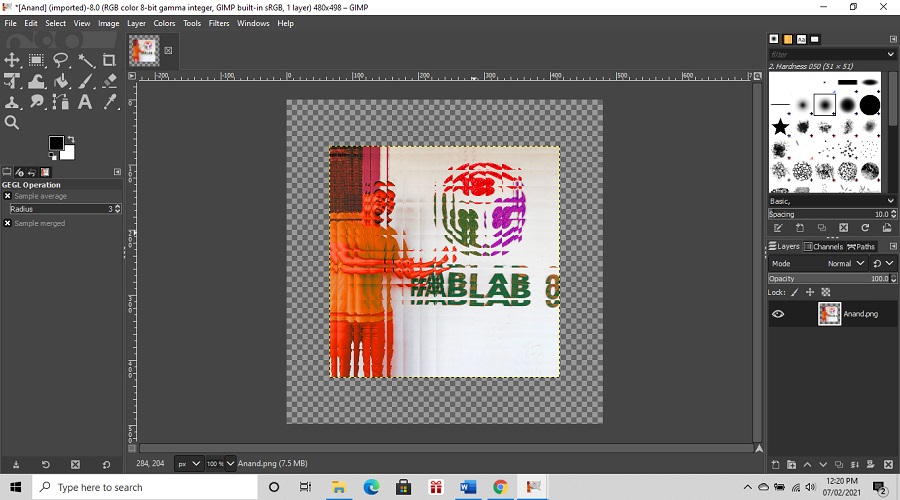
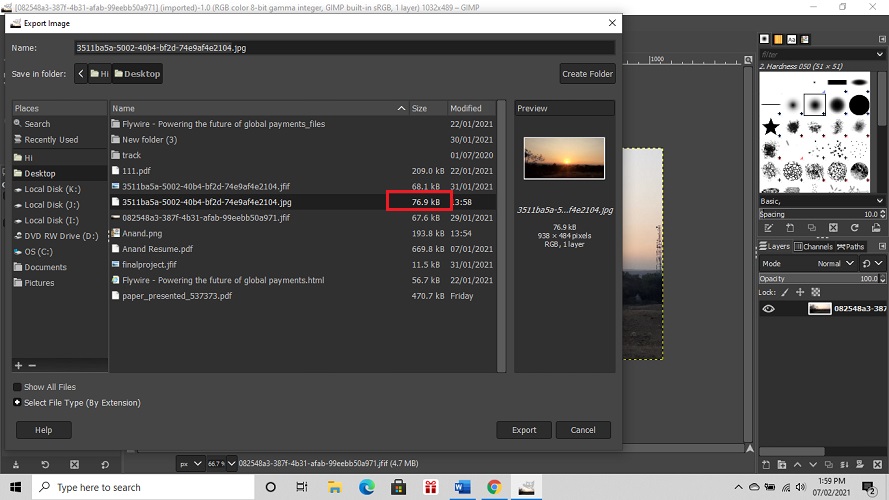
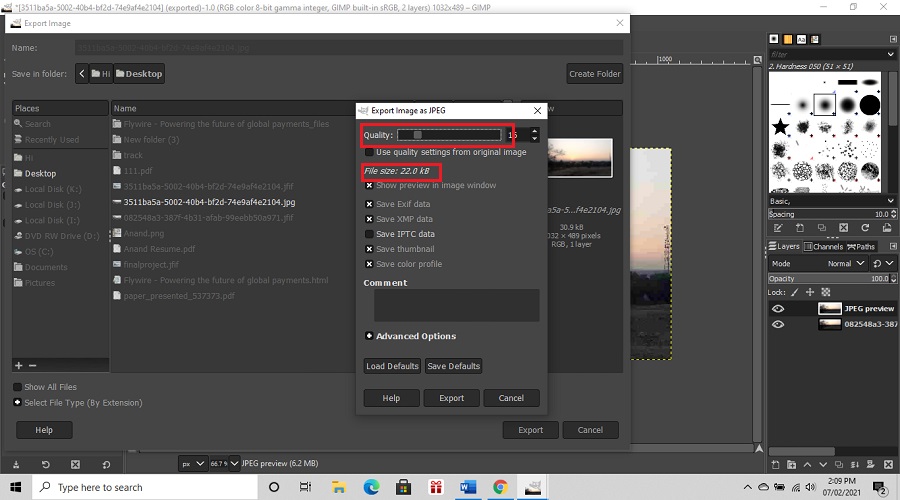
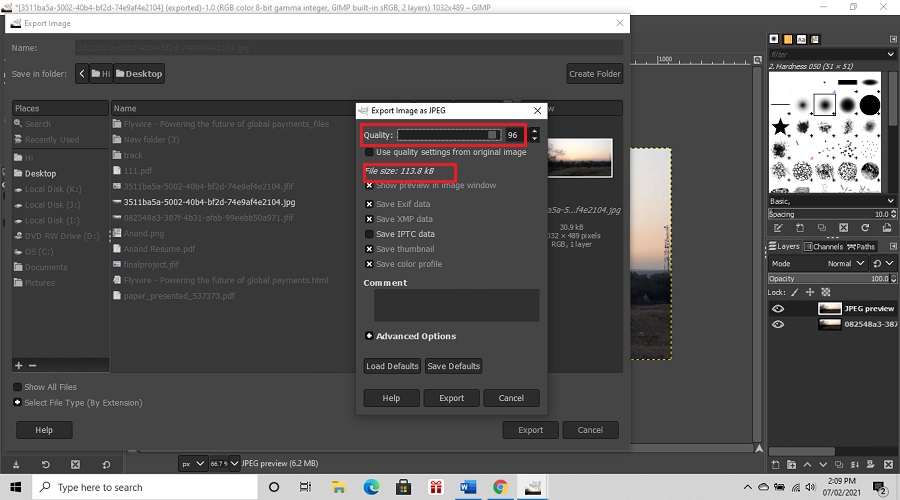
ABOUT GIMP
GIMP stand for GNU Image Manipulation Program GIMP is a free and open-source raster graphics editorused for image manipulation (retouching) and image editing, free-form drawing, transcoding between different image file formats, and more specialized tasks.(wikipedia)


What is Vector?
Vector graphics are not made up of pixels.Vector composed of lines or path that are either straight or curved.Image can be scaled to large value without losing quality. Image will not get blur.Bacause of this designs are made using vector software.(wikipedia)
About Inkscape
Inkscape is a free and open-source vector graphics editor used to create vector images, primarily in Scalable Vector Graphics (SVG) format. Other formats can be imported and exported.(wikipedia)

3D Softweres
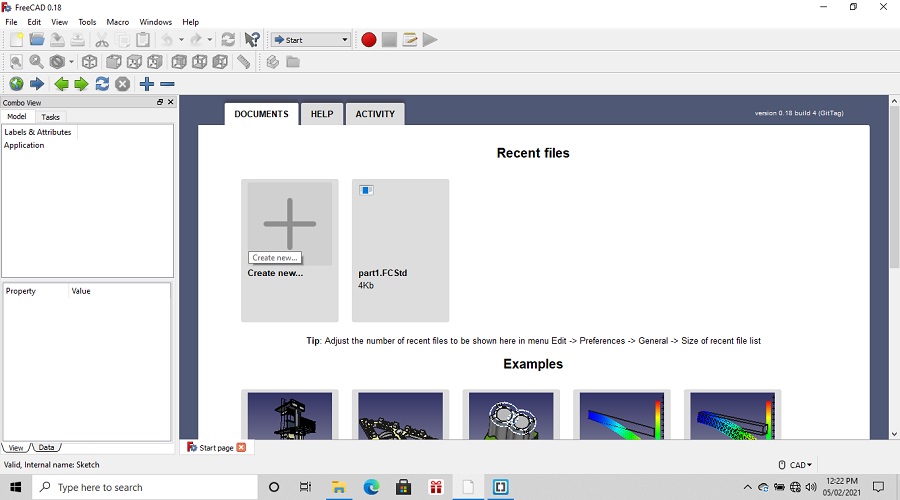
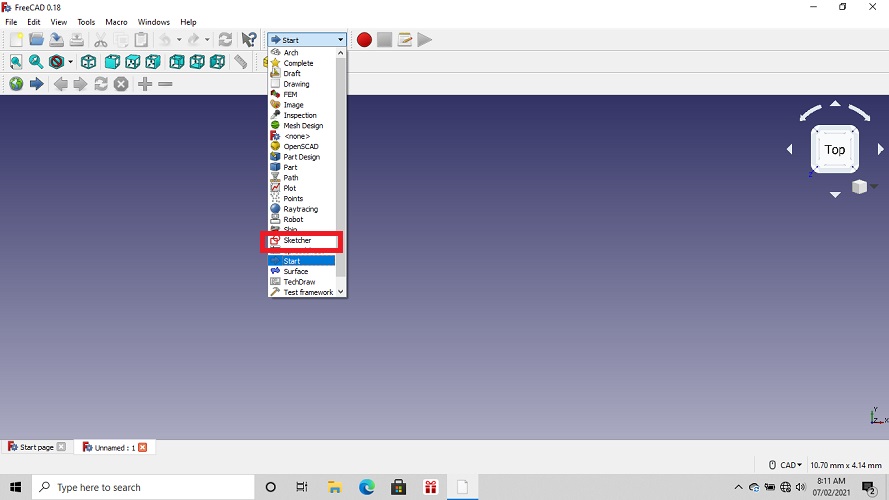
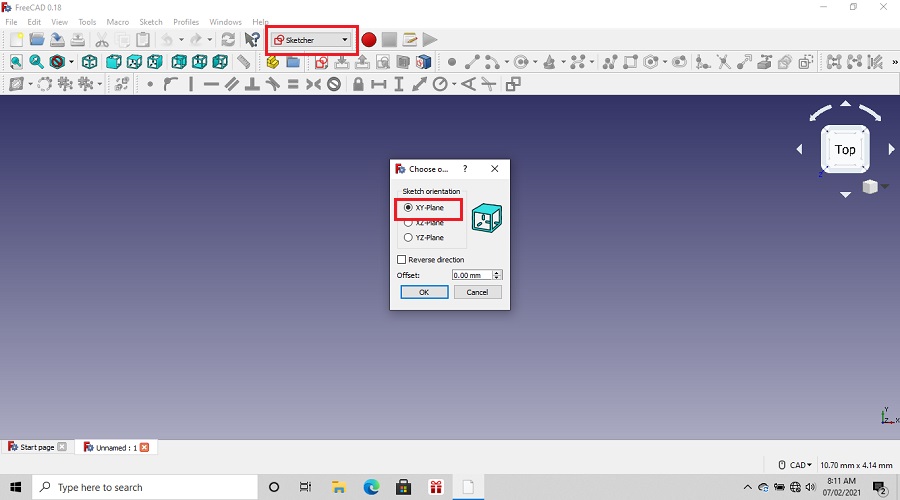
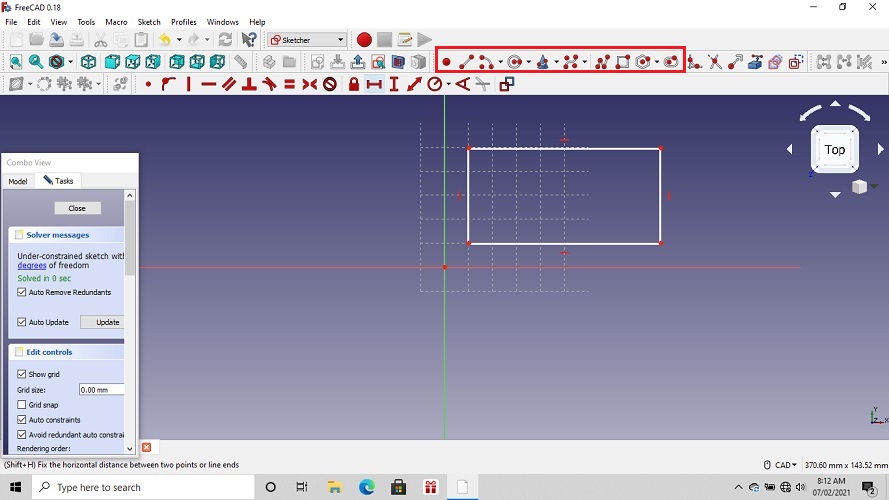
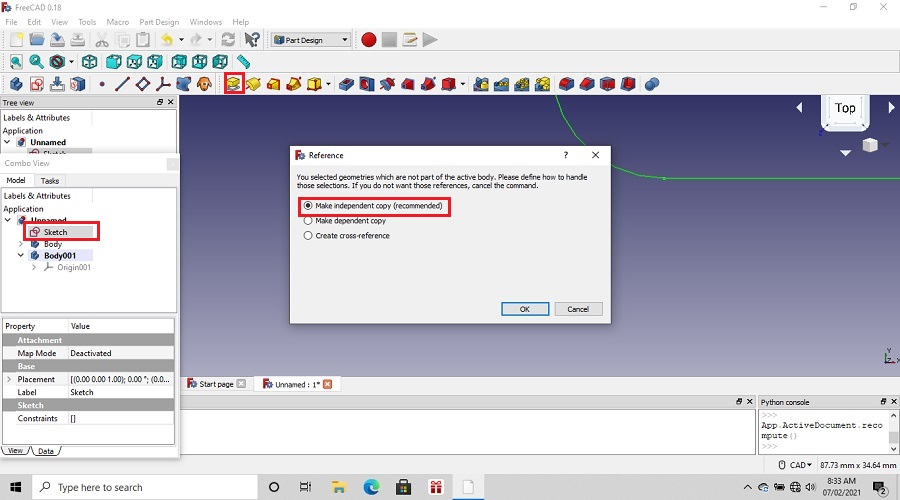
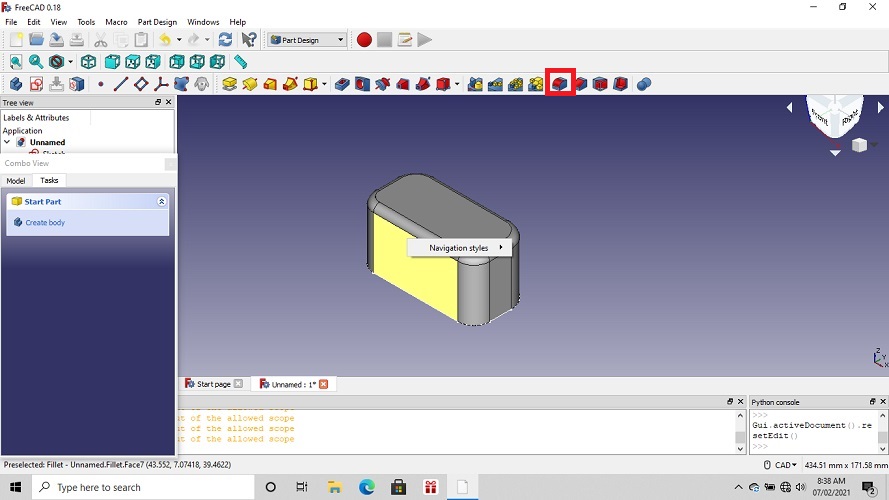
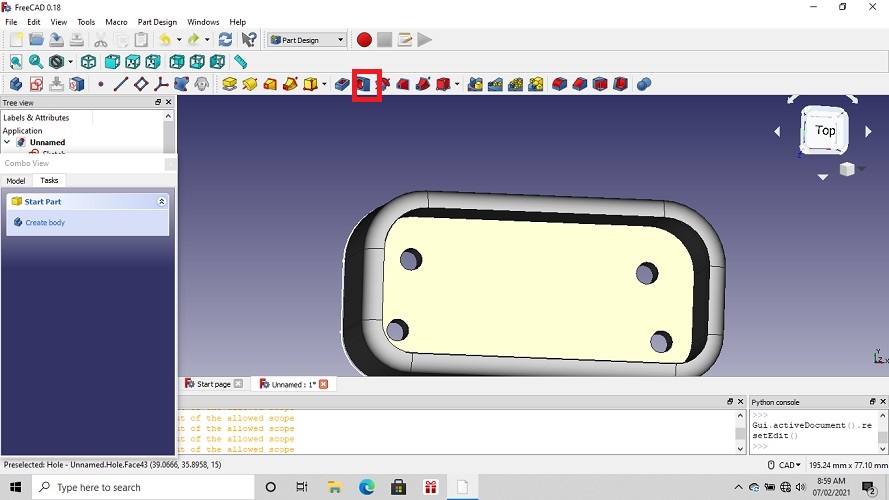
ABout FreeCAD
FreeCAD is a free and open-source (under the LGPLv2+ license) general-purpose parametric 3D computer-aided design (CAD) modeler and a building information modeling (BIM) software with finite element method (FEM) support. FreeCAD is intended for mechanical engineering product design but also expands to a wider range of uses around engineering, such as architecture or electrical engineering. Because of the free and open-source nature of the software, users can extend the functionality of the software using the Python programming language.(wikipedia)


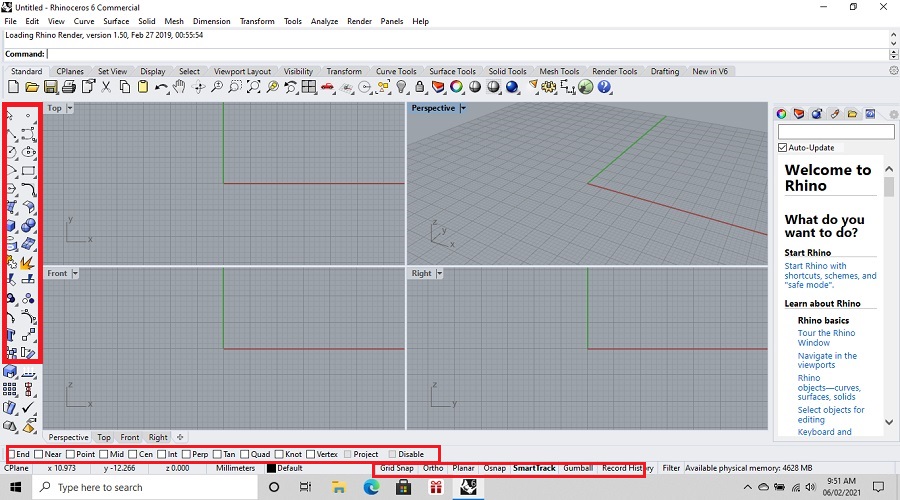
About Rhino.6
Rhino is basically used to create, edit, analyze, document, render, animate, and translate NURBS curves, surfaces and solids, subdivision geometry (SubD), point clouds, and polygon meshes. There are no limits on complexity, degree, or size beyond those of hardware..(wikipedia)
It has some special features like
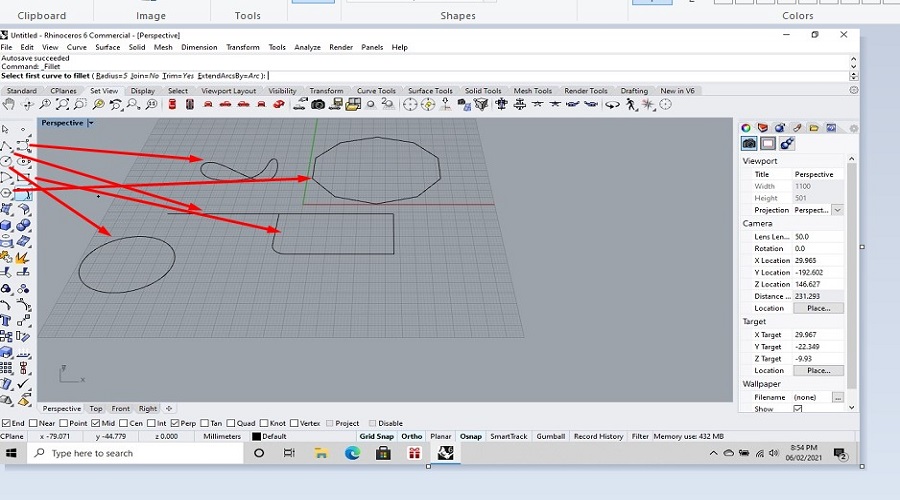
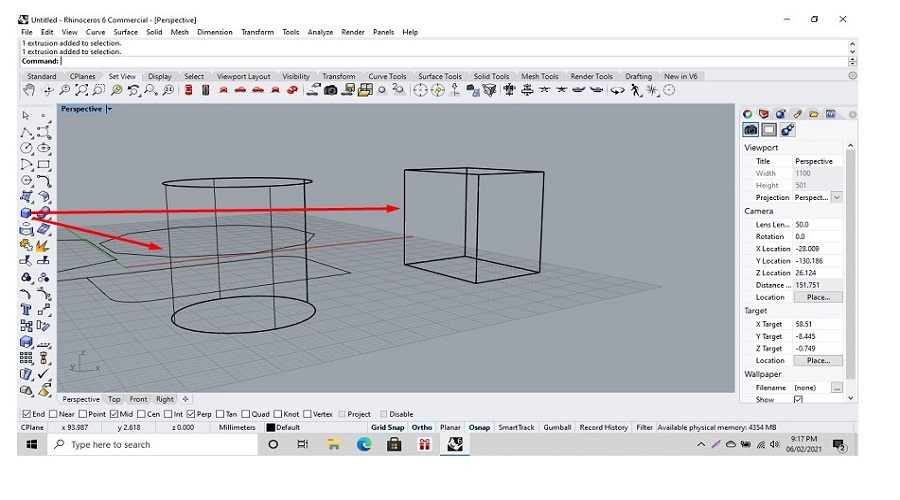
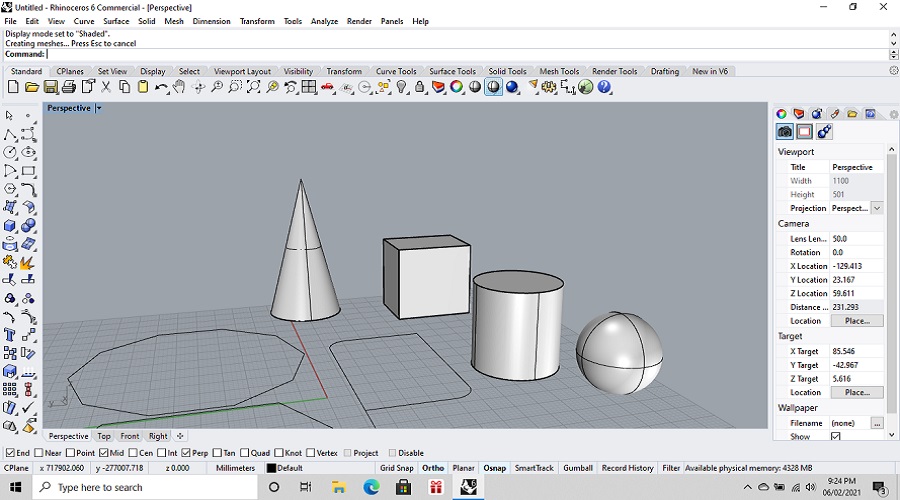
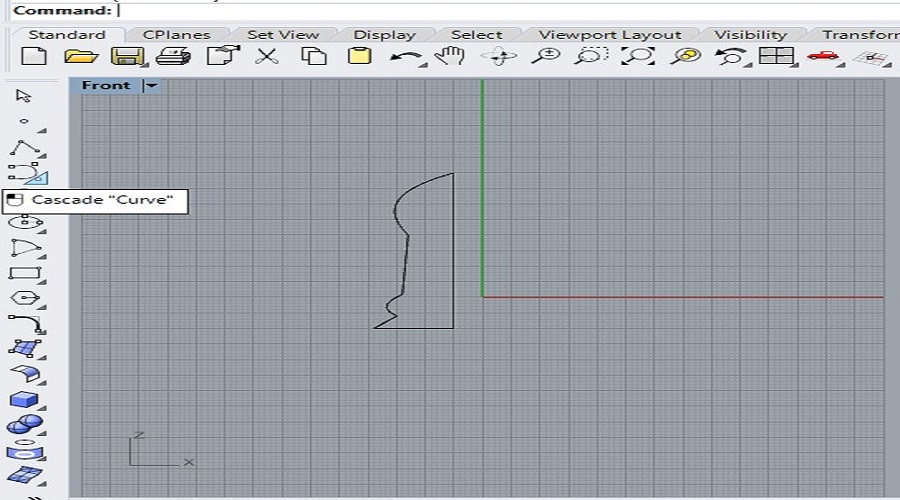
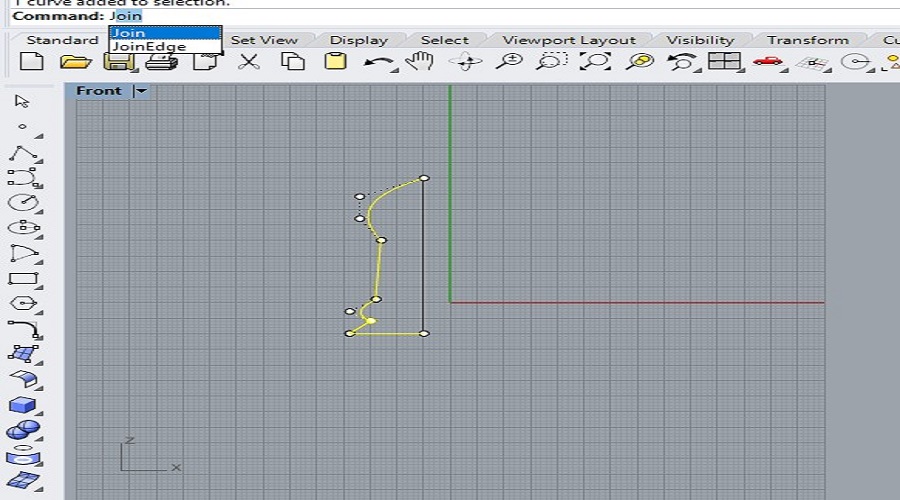
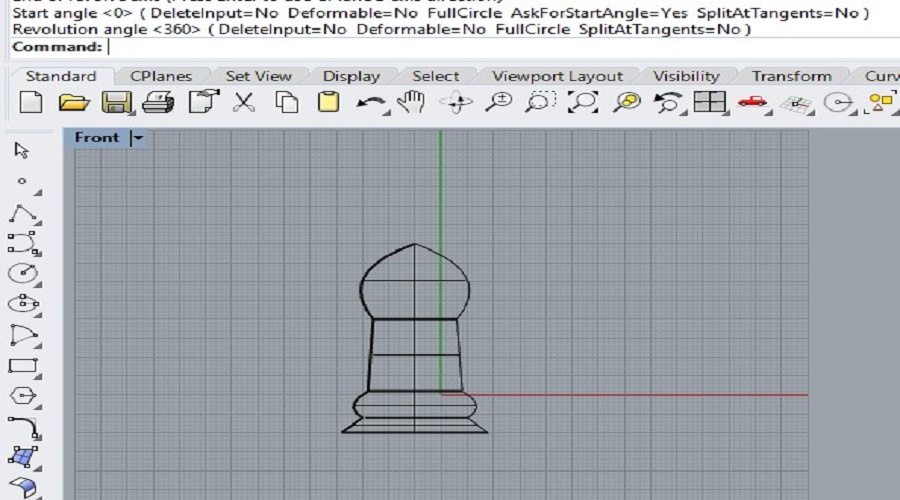
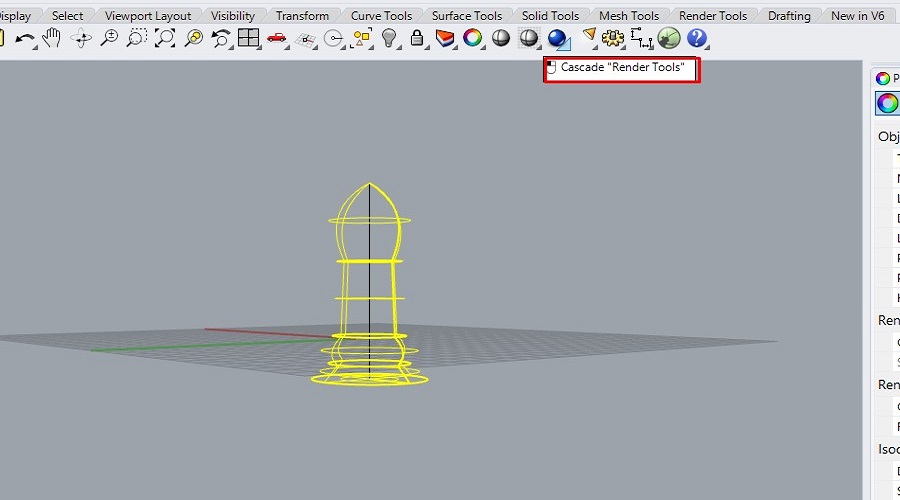
Trying to design Chess pawn as object in Rhino.
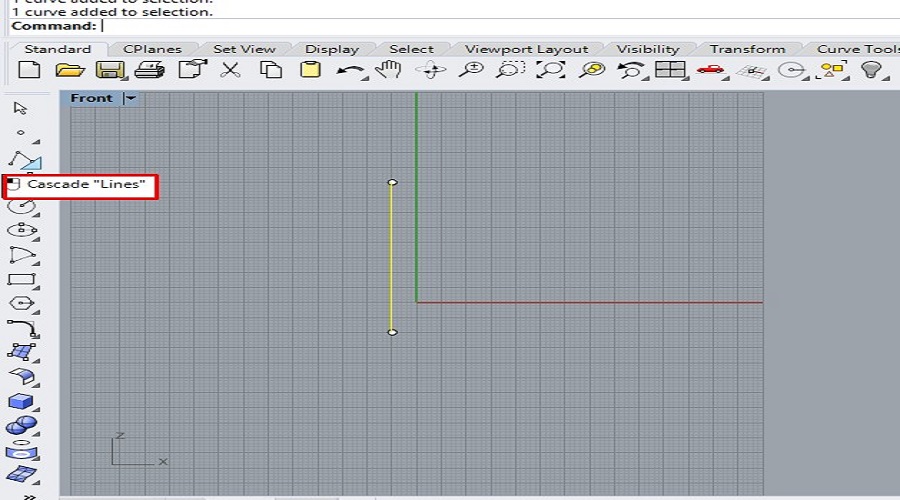

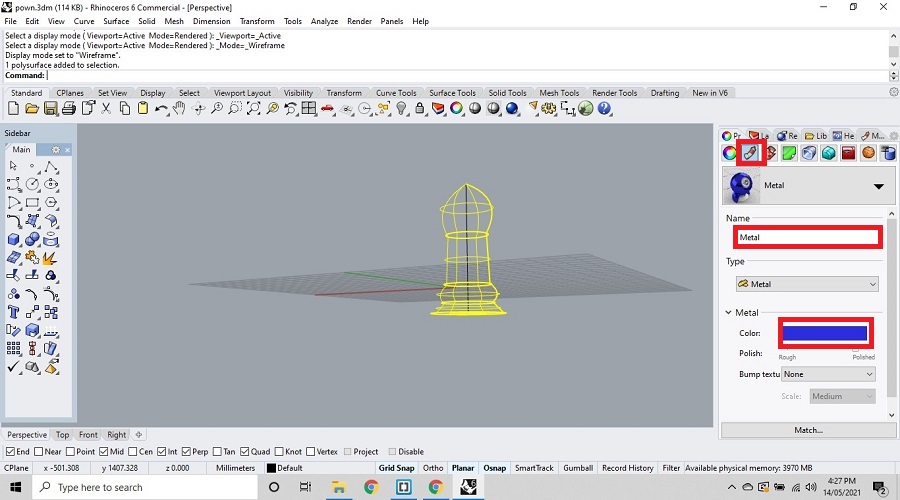
Now click on "Cascade Render" tool.The rendering get started.
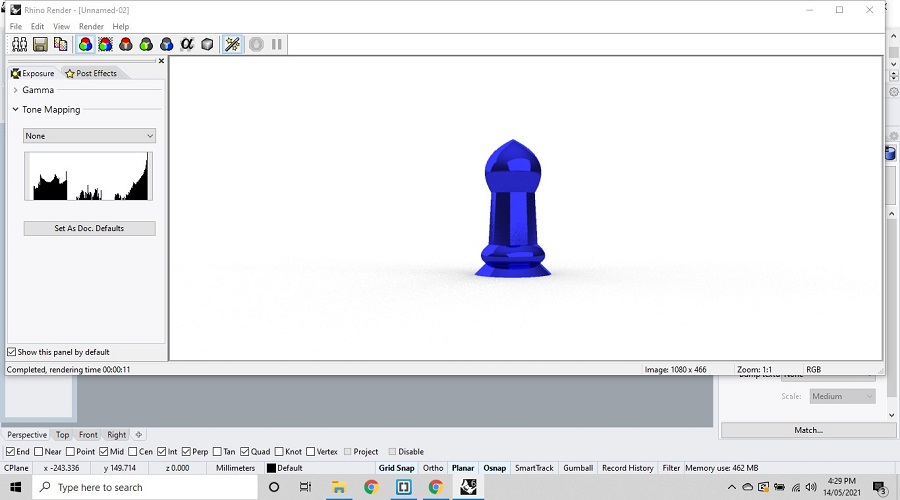
The rendering image of an object given shown below.
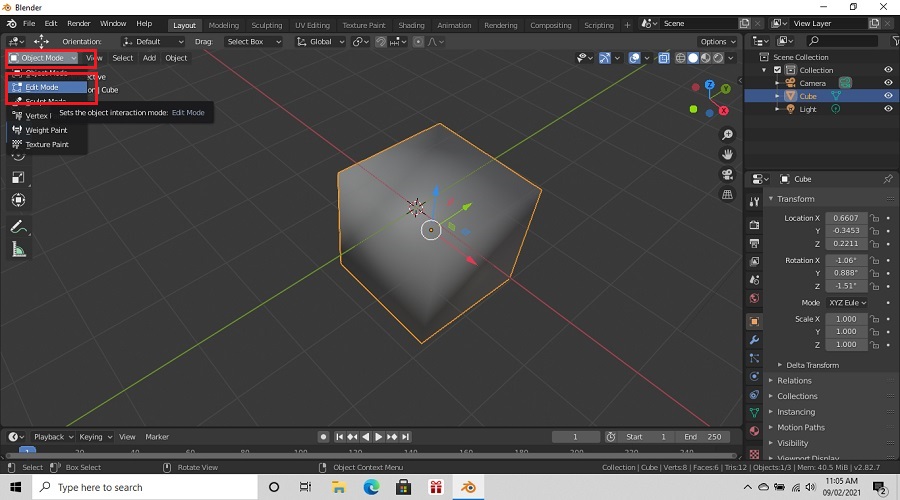
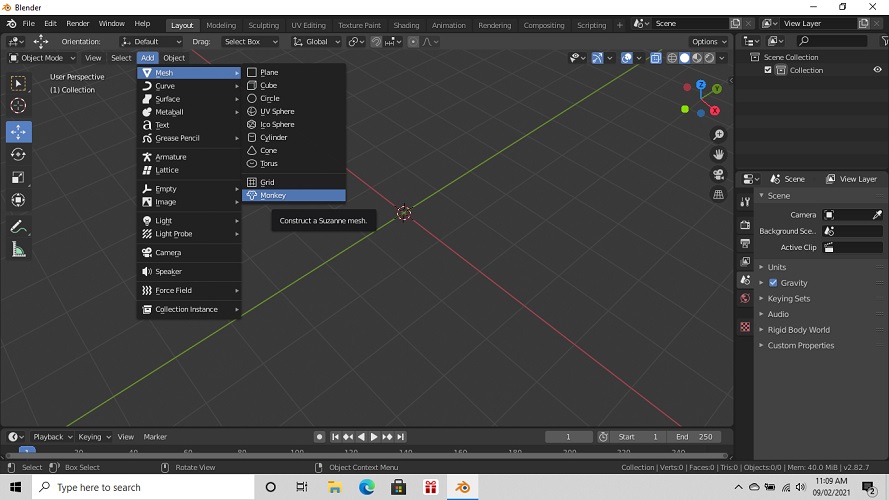
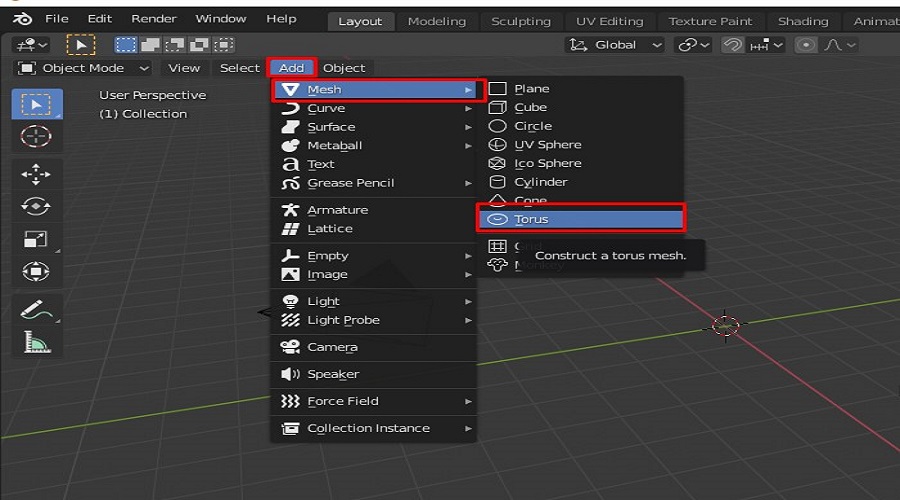
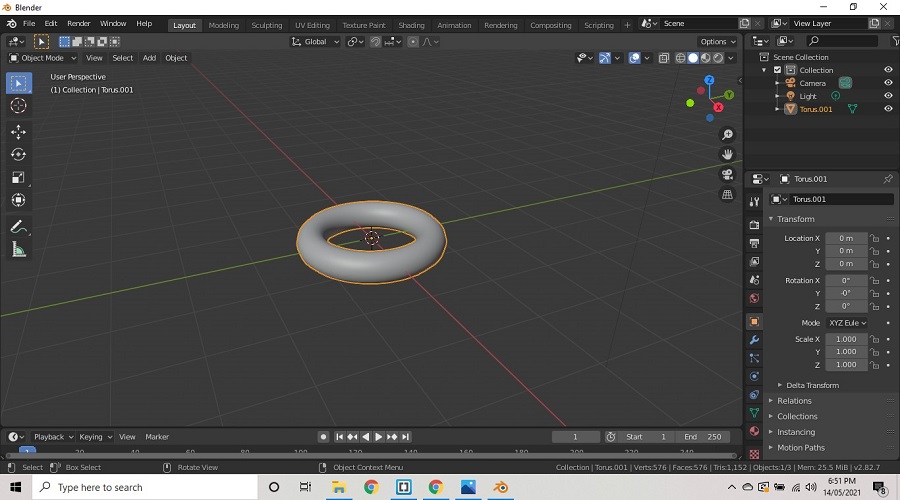
About Blender
Blender is a free and open-source 3D computer graphics software toolset used for creating animated films, visual effects, art, 3D printed models, motion graphics, interactive 3D applications, virtual reality, and computer games. Blender's features include 3D modeling, UV unwrapping, texturing, raster graphics editing, rigging and skinning, fluid and smoke simulation, particle simulation, soft body simulation, sculpting, animating, match moving, rendering, motion graphics, video editing, and compositing.(wikipedia)
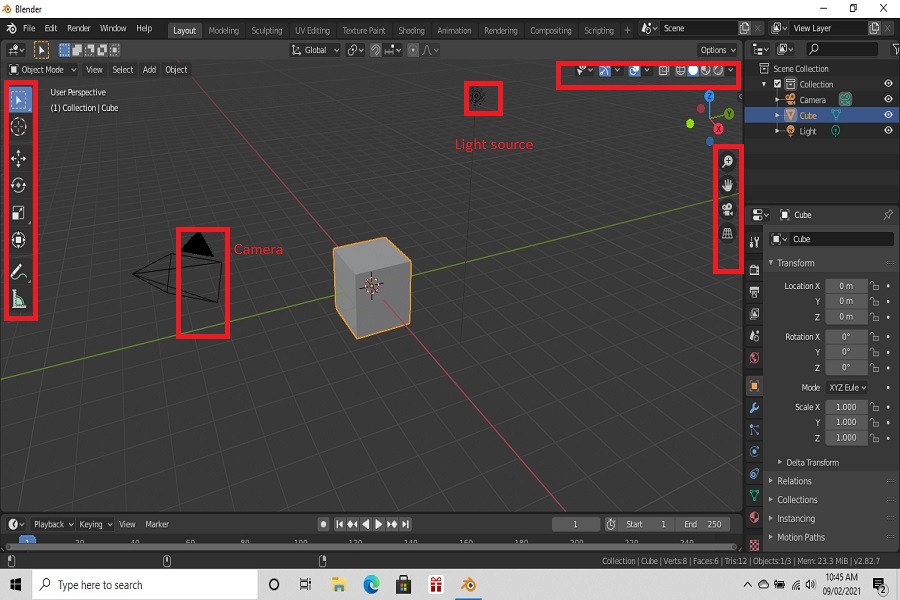
Some of keys are
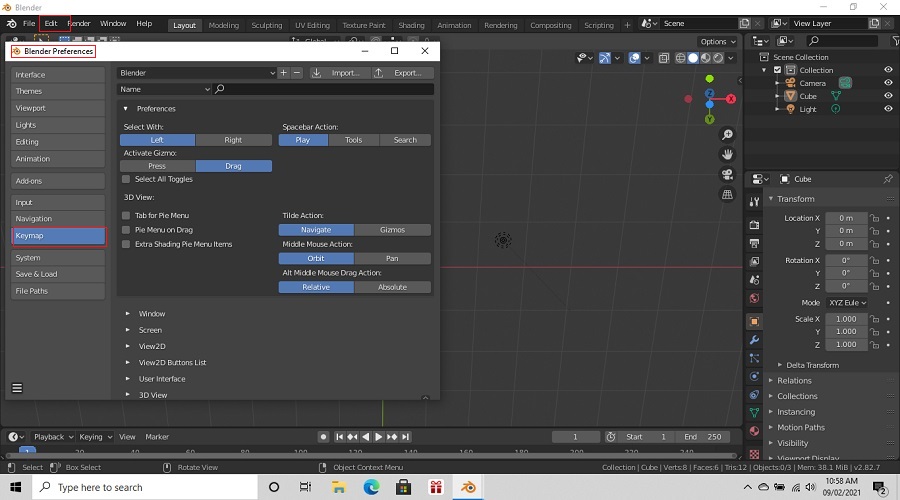
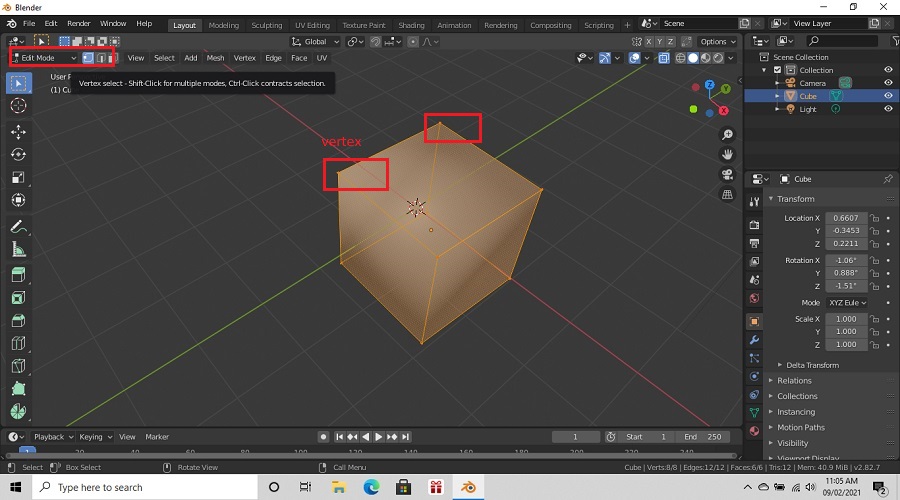
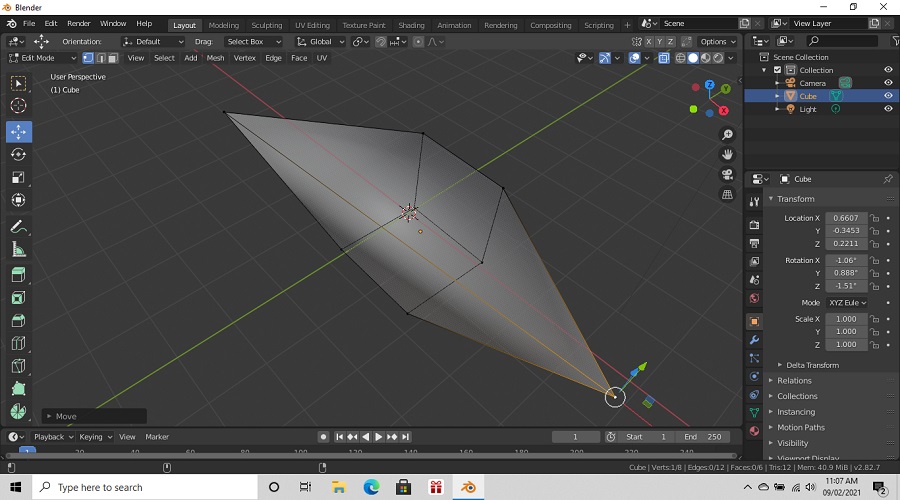
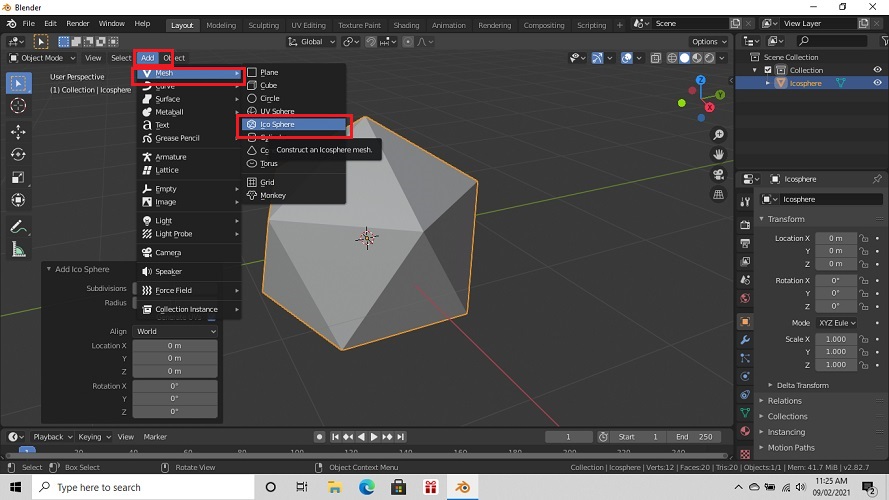
For editing given object
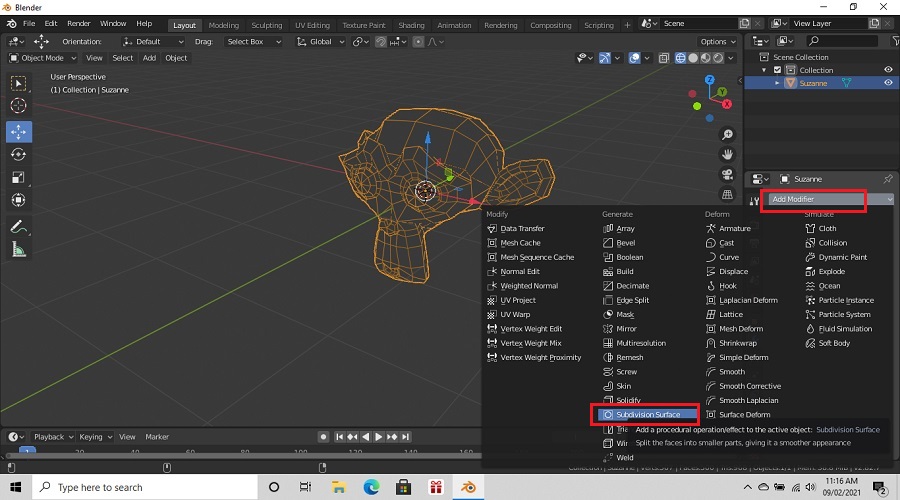
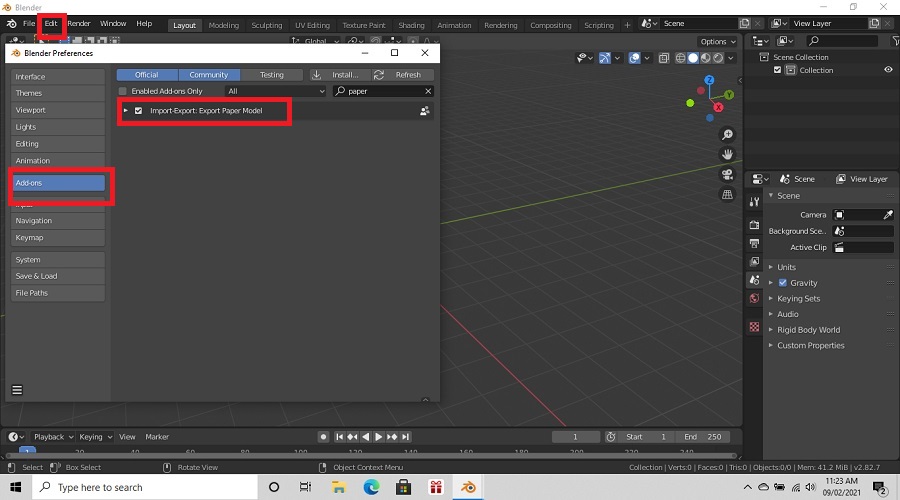
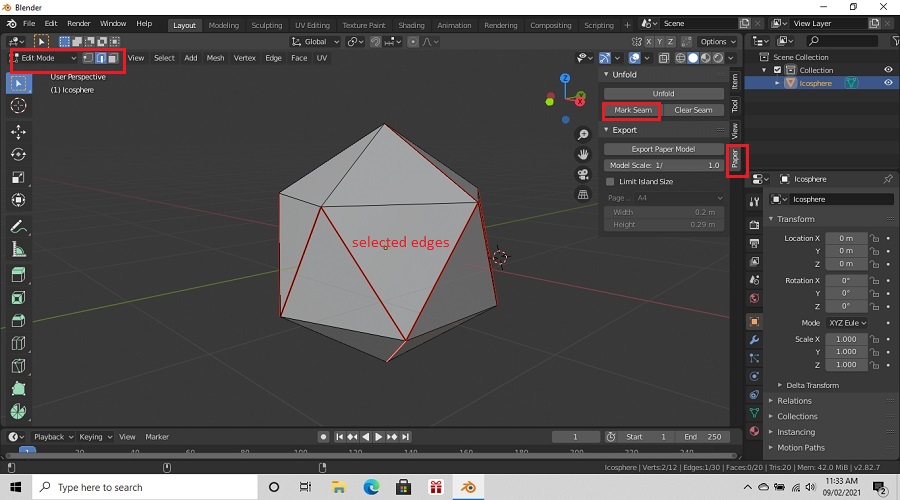
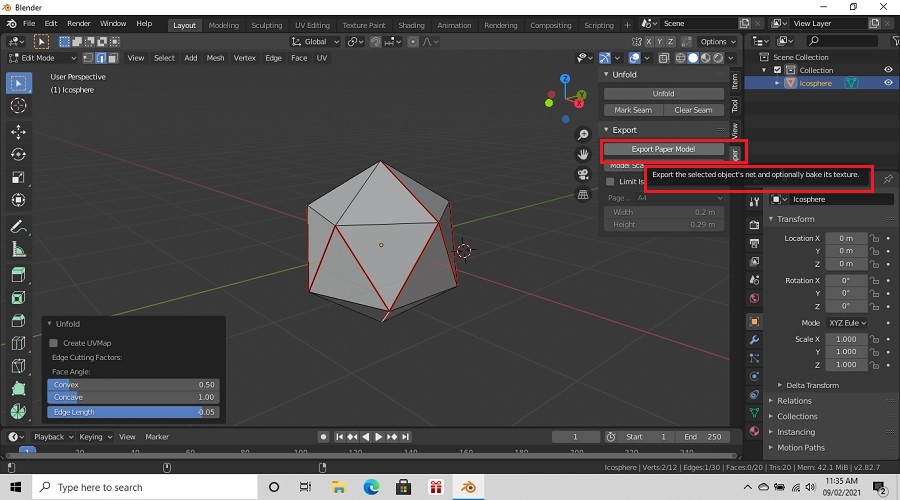
Paper fold through Paper Model

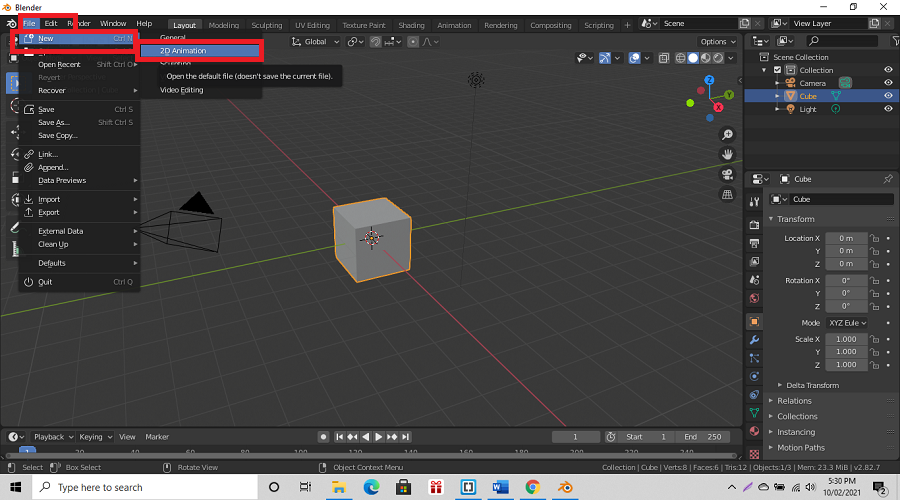
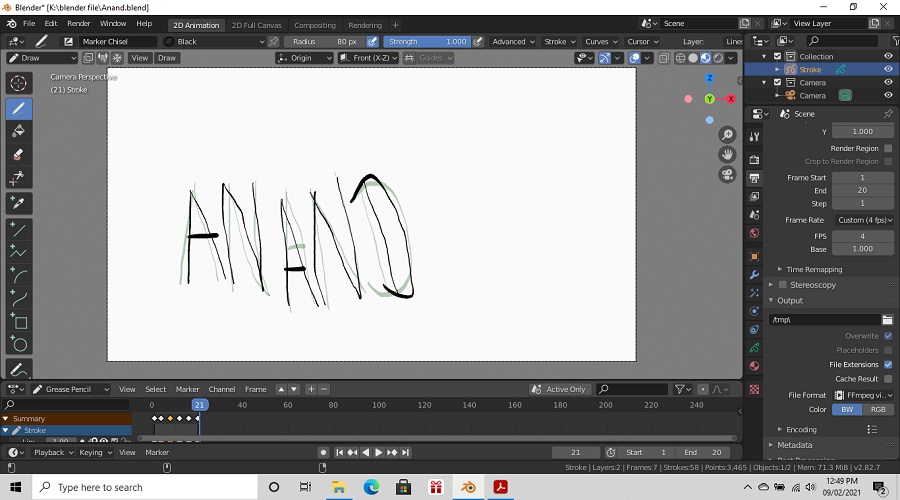
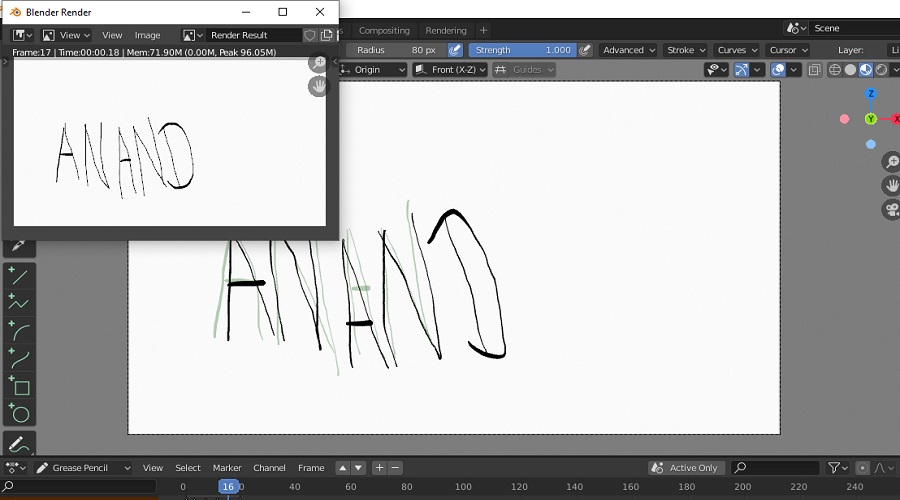
About 2D Animation
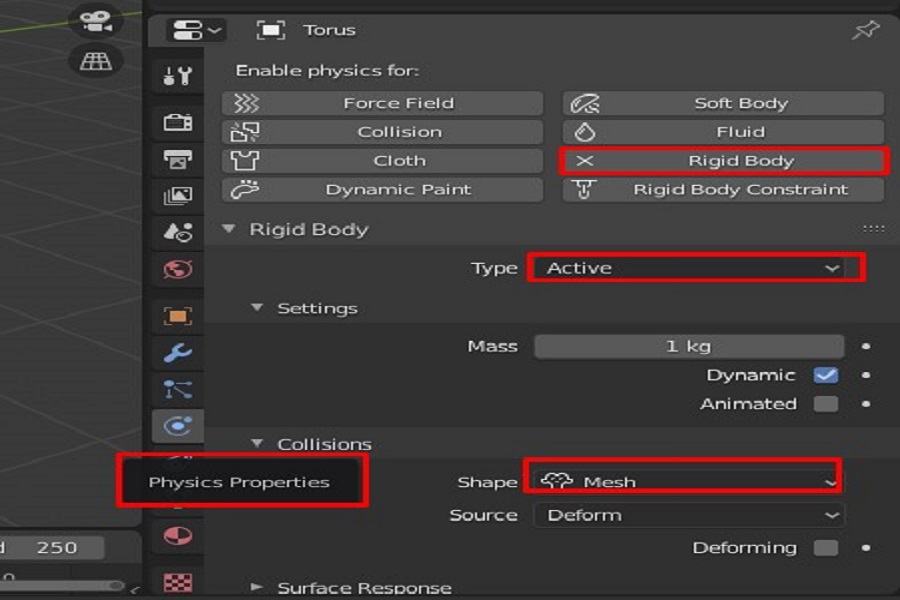
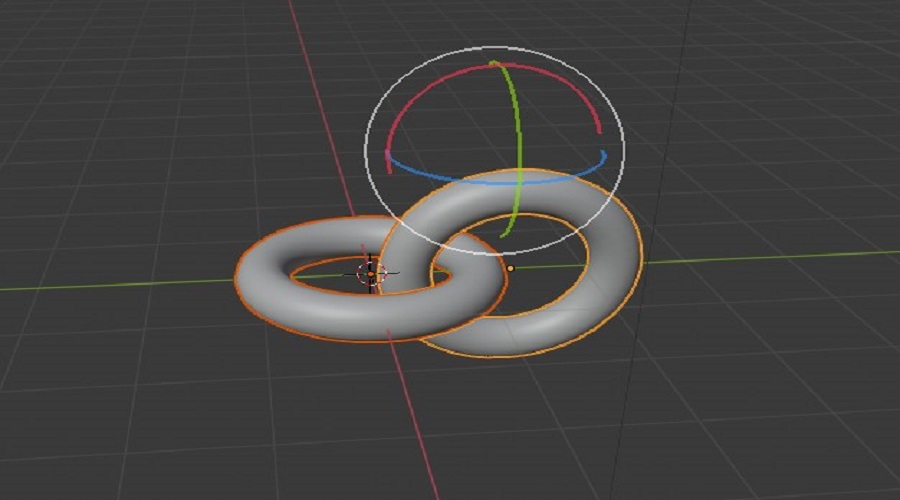
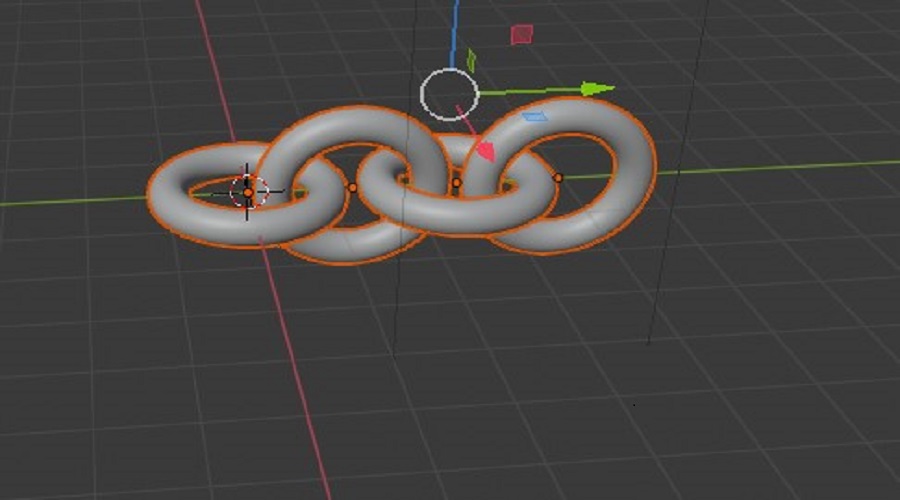
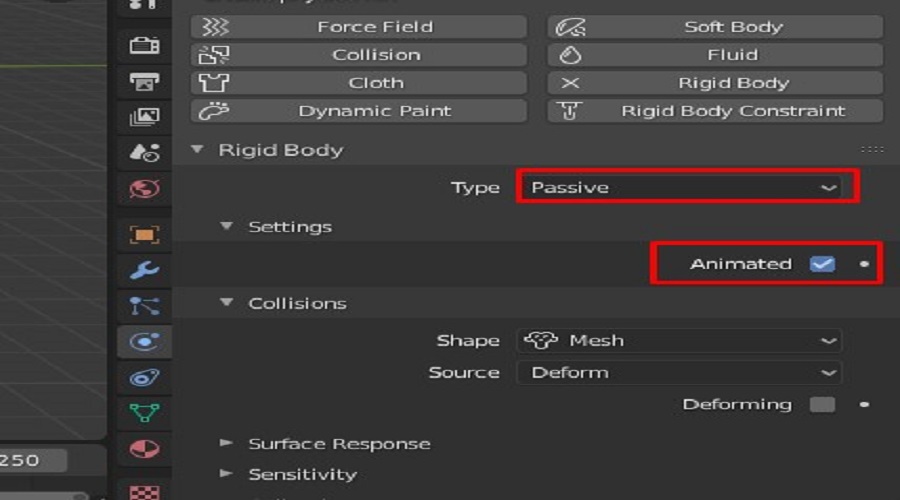
About Simulation.
A simulation is the imitation of the operation of a real-world process or system over time. Simulations require the use of models; the model represents the key characteristics or behaviors of the selected system or process, whereas the simulation represents the evolution of the model over time. Often, computers are used to execute the simulation.Simulation is used in many contexts, such as simulation of technology for performance tuning or optimizing, safety engineering, testing, training, education, and video games. Simulation is also used with scientific modelling of natural systems or human systems to gain insight into their functioning, as in economics. Simulation can be used to show the eventual real effects of alternative conditions and courses of action. Simulation is also used when the real system cannot be engaged, because it may not be accessible, or it may be dangerous or unacceptable to engage, or it is being designed but not yet built, or it may simply not exist.(wikipedia)
Learning outcomes
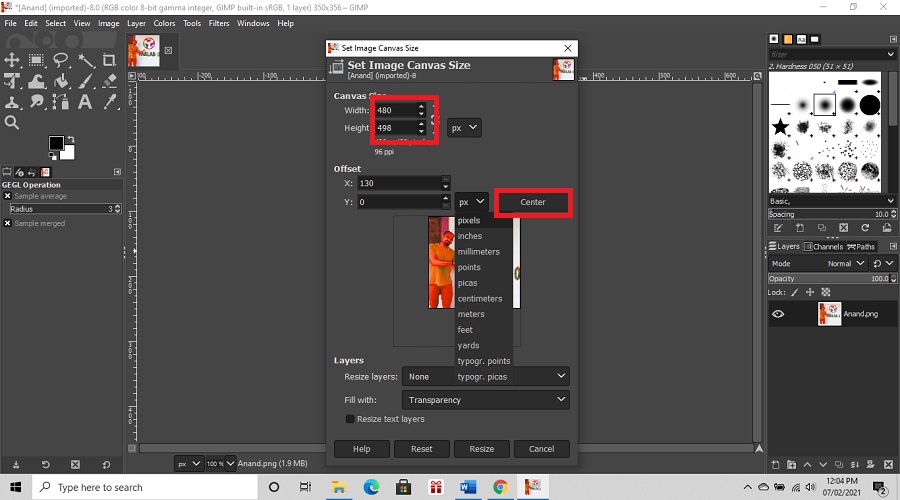
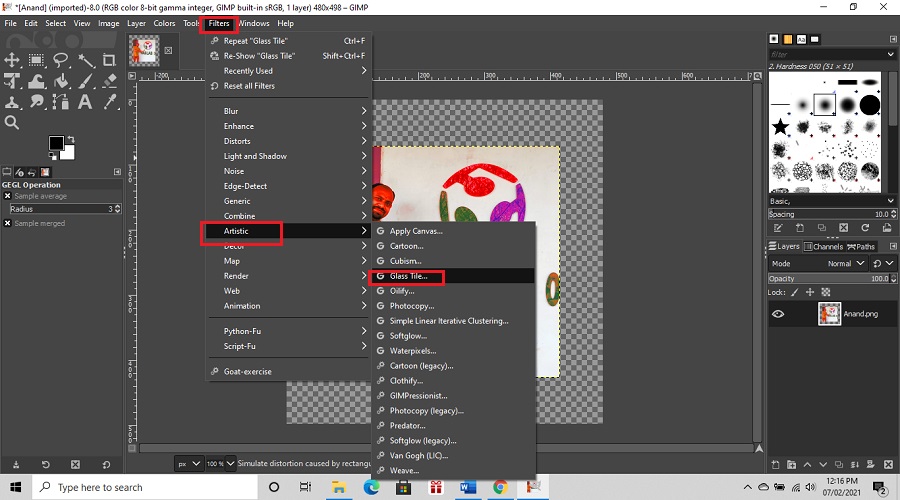
- I learnt how to use 2D raster GIMP software and its application like change image color,size etc.
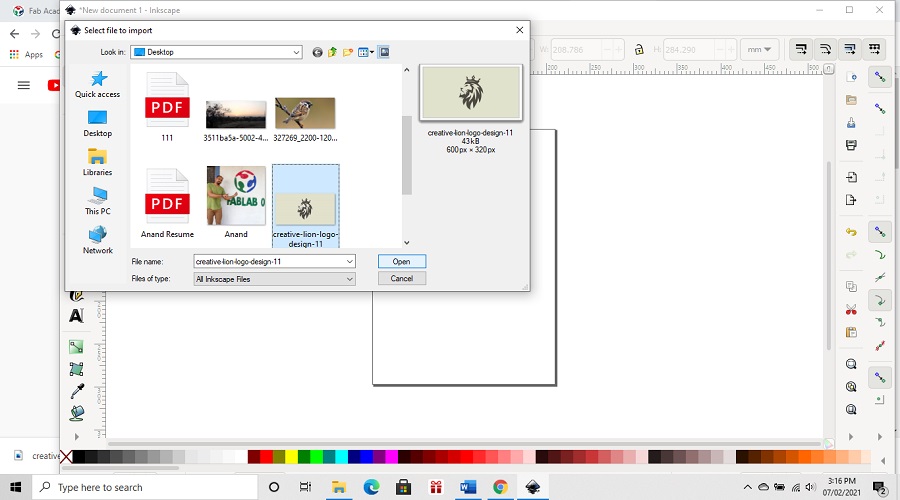
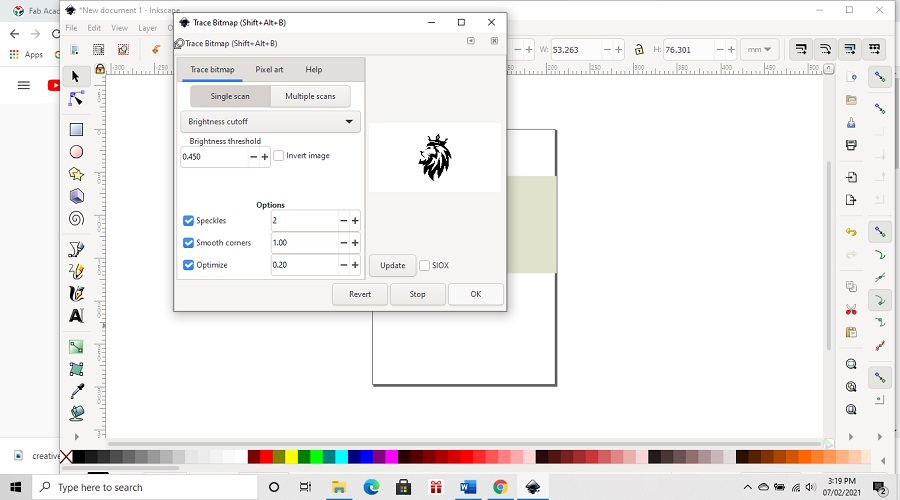
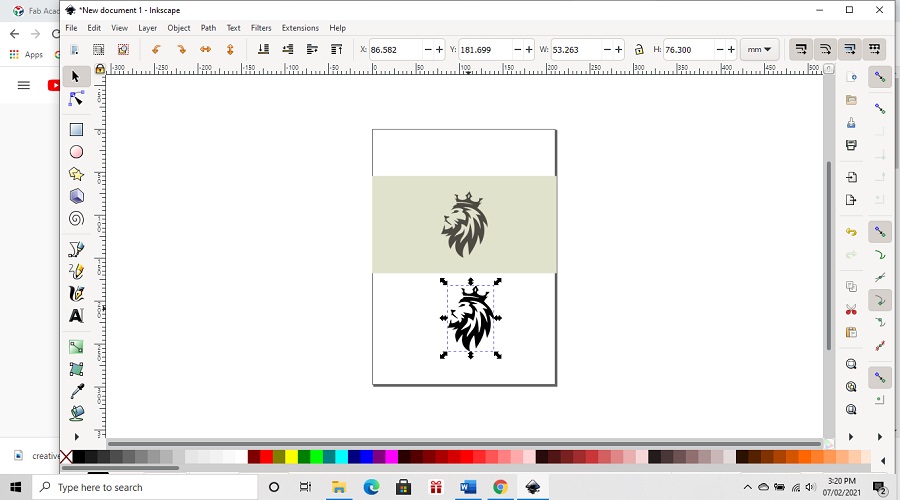
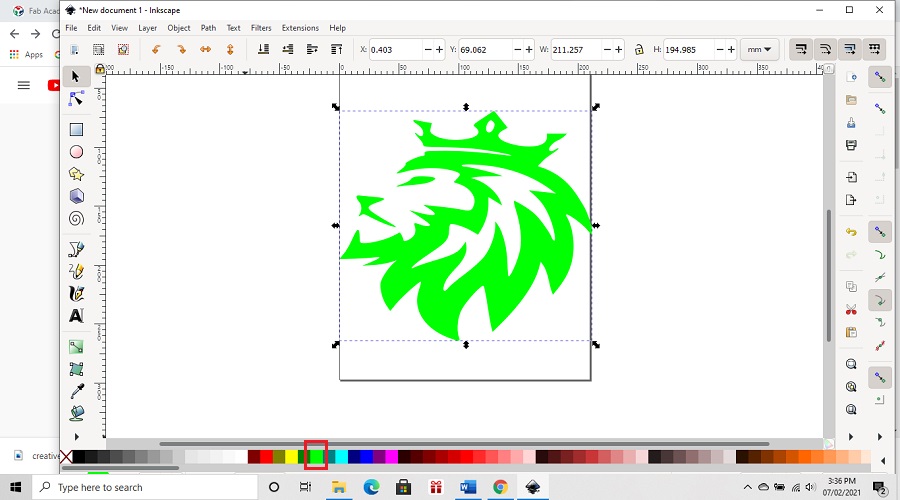
- I learnt how to use 2D vector Inkscape software using Inkscape bitmap trace for logo formation and finding about vector image.
- I learnt three 3D cad designing software such as FreeCad ,Rhino.6 and Blender .
- This is totally new thing i have learn in this week.
- I found that Freecad is quite difficult to use but it is precised while Rhino and blender easy to used.
- The interface of Rhino is very user friendly also with commond line you can perform any operation with its detail action.
- Blender is mostly use for animation purpose.
- Its amazing to used paper fold concept of making paper model in Blender.
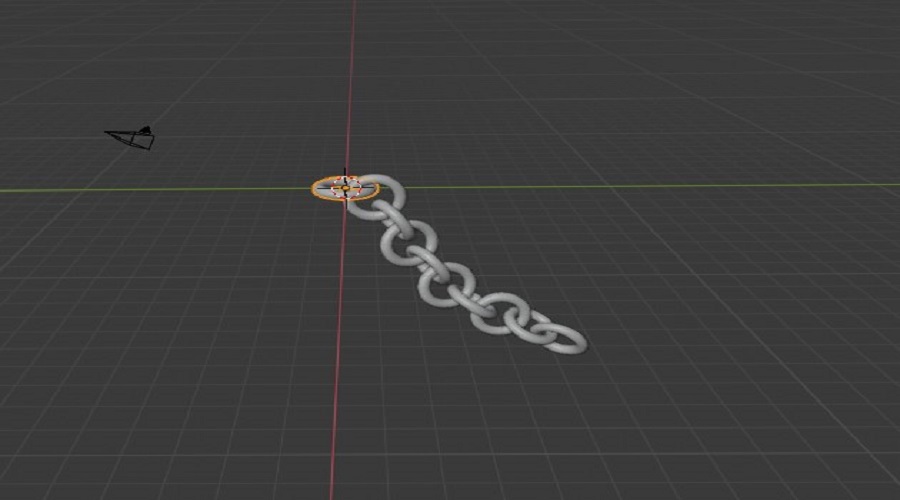
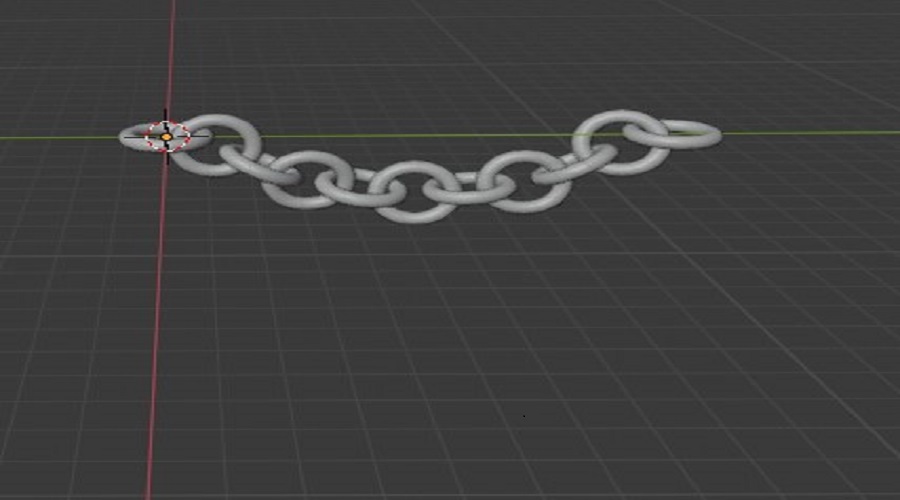
- Its good learning thing to use simulation tool in Blender.
Downloads
SAMS-Smart Azolla Multiplier System by Anand S. Tale is licensed under CC BY-SA 4.0![]()
![]()
![]()