
Interface and Application Programming
Group assignment:
Compare as many tool options as possible.
Individual assignment:
- Write an application that interfaces a user with an input and/or output device that you made
Group assignment
Group Page LinkIndividual assignment
MIT App Inventor
MIT App Inventor is a visual programming environment that allows everyone to build fully functional apps
for Android and iOS smartphones and tablets.
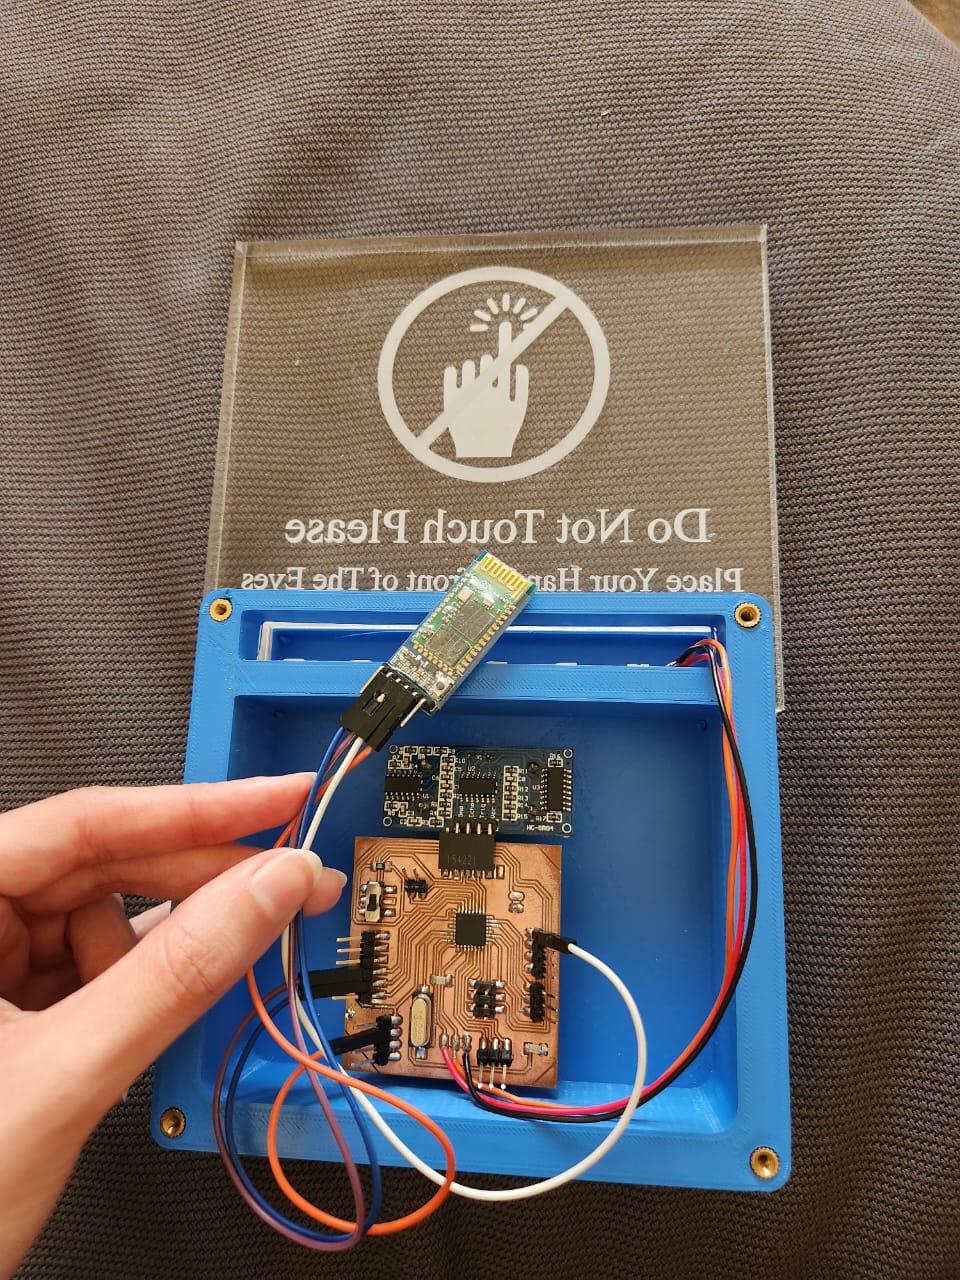
I designed an application that interfaces with the Ultrasonic sensor in my Final Project by using the MIT App Inventor and establish wireless connection between bluetooth in the ATmega328P microcontroller with bluetooth in a smart phone or tablet.
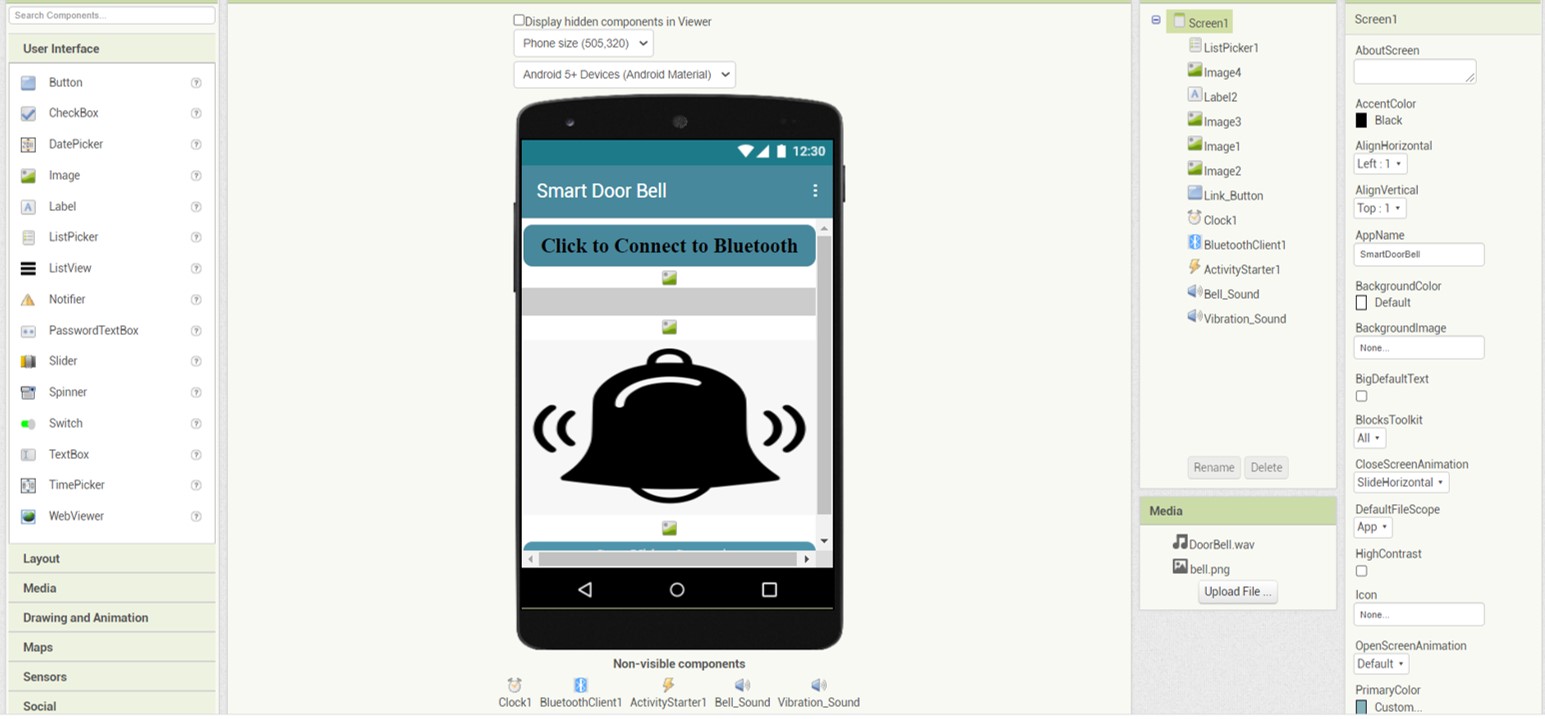
First, I designed how the app will look like in the smart device as shown in the following image. in the left side there is the User Interface, from here users can choose what items they need and drag them to the the place they want it to be in the screen. I selected a List Piker and I put it on the top of the screen, and from the right side I edited the settings. I made the font bold and black colored and I wrote "Click to Connect to Bluetooth". And in the same way I added the other items. I added bell image, Clock and BluetoothClient that I need to establish bluetooth communication. And I added bell sound and vibration sound. These are the non-visible components and they appear down in the page.
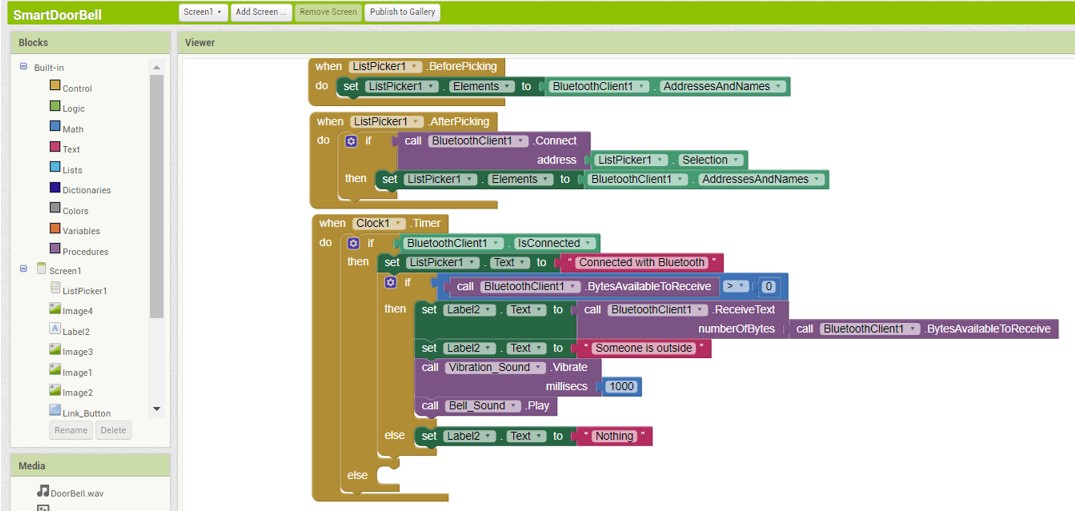
Then I started making the programming blocks as shown in the following image. From the left side I can choose the blocks I need. I added block for the list picker to show all the available bluetooth addresses in the smart device. The second block is to connect with bluetooth. The third block is to show the statement "Connected with Bluetooth" if connection has been established and do the following:
If bytes received from the sensor then show the statement "Someone is Outside" and generate bell sound and vibrate the smart device. If nothing received then show "Nothing".
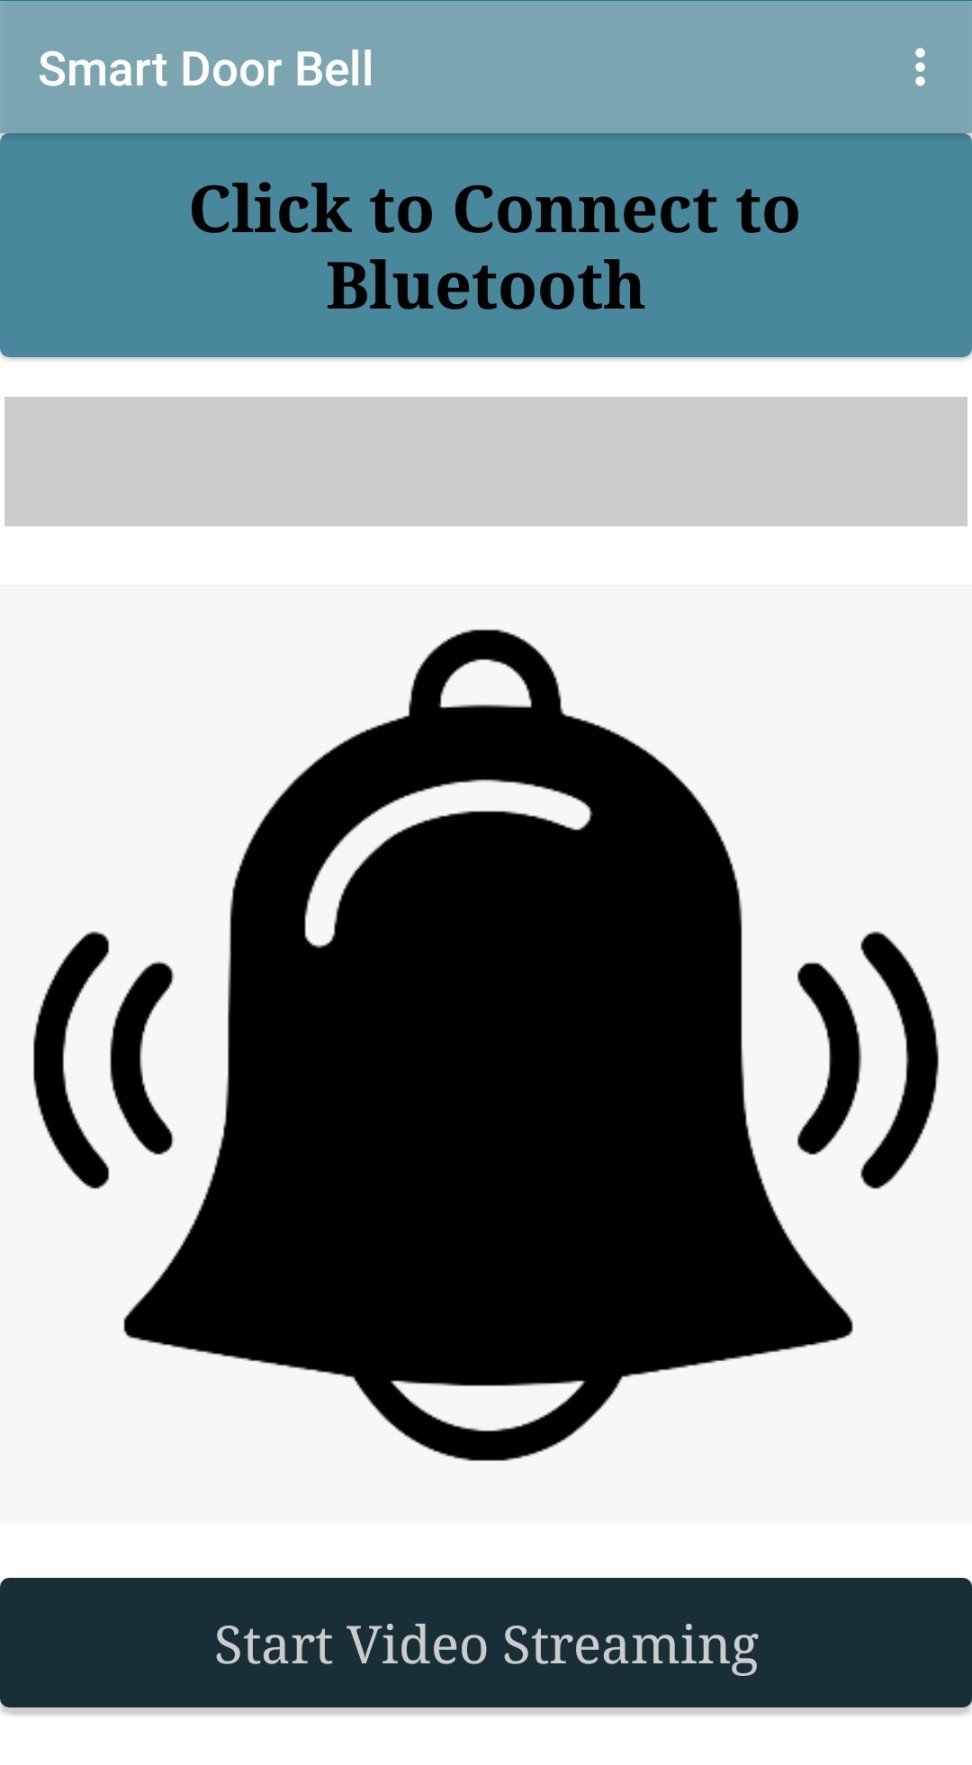
The following image shows how the app looks like in an Android Smarthphone
I used the same app with atmega328p board and ESP32CAM board
Using Atmega328p
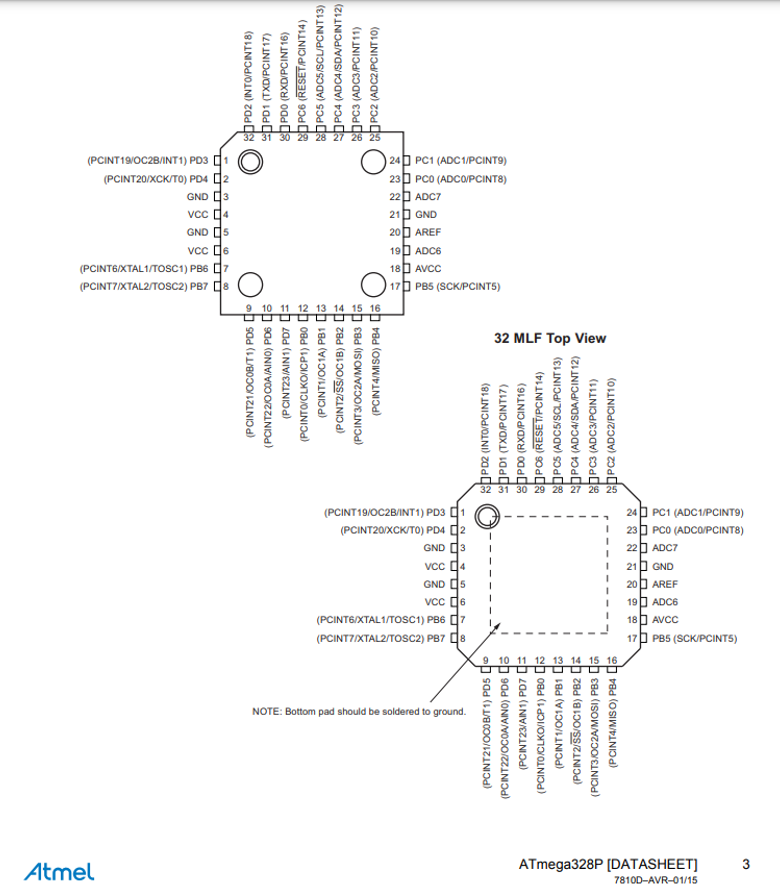
The images below shows the pinout of the Atmega328P microcontroller I used and the code I updated to program the app with the ultrasonic sensor.
The Trig pin of the ultrasonic sensor is connected to the Analog-to-Digital convertor pin PC2(ADC2) in the ATmega328P and Echo pin in the ultrasonic sensor is connected to pin PC3(ADC3) in the microcontroller.
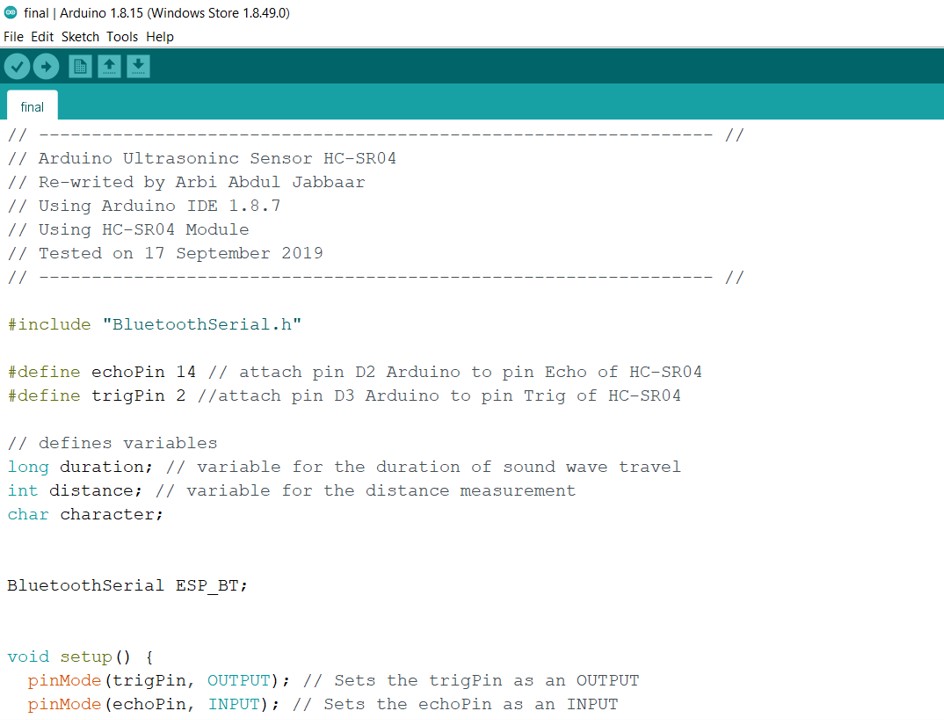
I used this CODE to program atmega328p bord with mit app
Using ESP32CAM
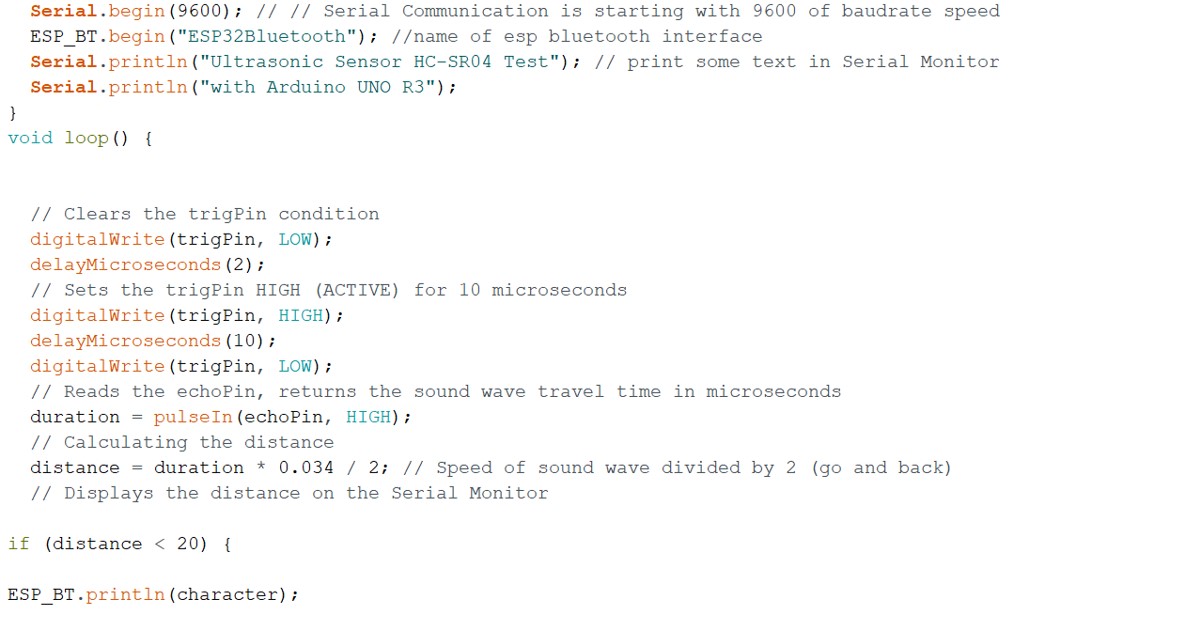
I chose the code of Abri Abdul Jabbaar was written for the ultrasonic sensor and I updated by adding lines for bluetooth connection with the app and an if statement to send character through bluetooth if an object detected in a distance less than 20cm.
Later on I updated the code of my final project to program a Neopixle LEDs strip to light up with blue color.
I attached all code file below in the files list.
The following video shows how the sensor works with the app.
Files list:
| Sensor and App Code | Arduino IDE File |
| ESP32CAM Code | Arduino IDE File |
| Atmega328p Code | Arduino IDE File |
| Smart DoorBell App | MIT App |
Close Project