Dressing pizza machine
Group members
1. Concept
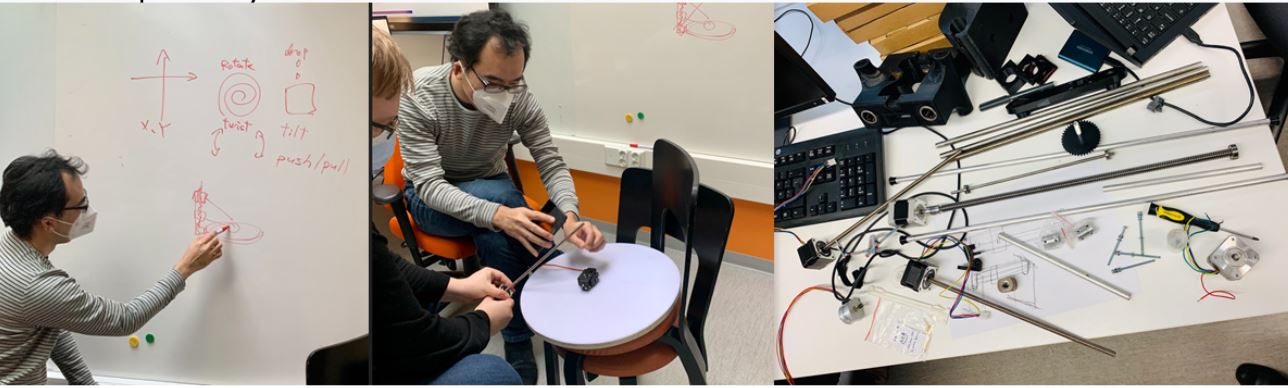
1.1 Discussion
We have studied with multiple candidates such
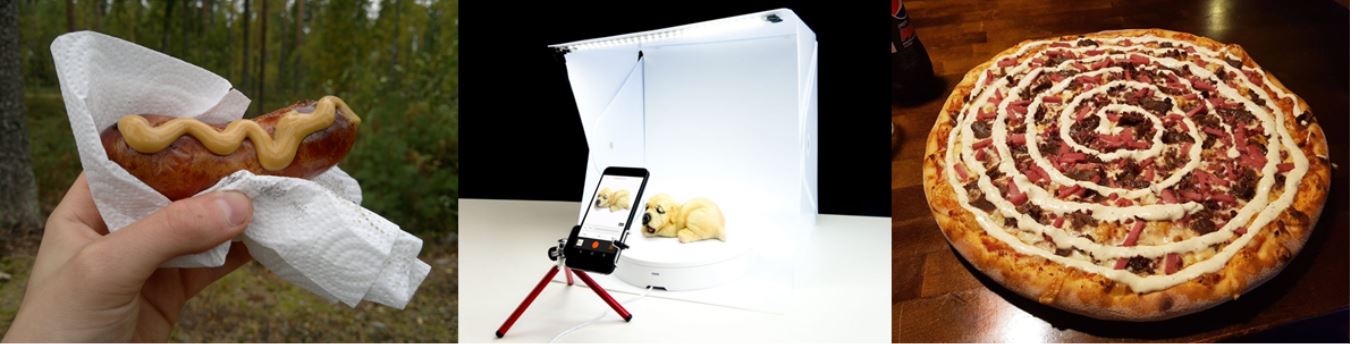
- Sausage mustard dresser (Finnish mustard (sinappi) for Finnish sausage (makkara).
- Automated 3D scanner with mobile phone. Turntable with height/tilt adjustable mobile phone holder.
- Pizza dressing machine. Combining ideas of above, mayonnaise dispenser to pizza with turntable.
1.2 Decision
We decided "Pizza dressing machine" for this Machine/Automation assignment.
The reasons are,
1. Mustard to sausage is too simple with only one axis movement.
2. Photogrammetry time lapse automation is challenge to get the result with many controls.
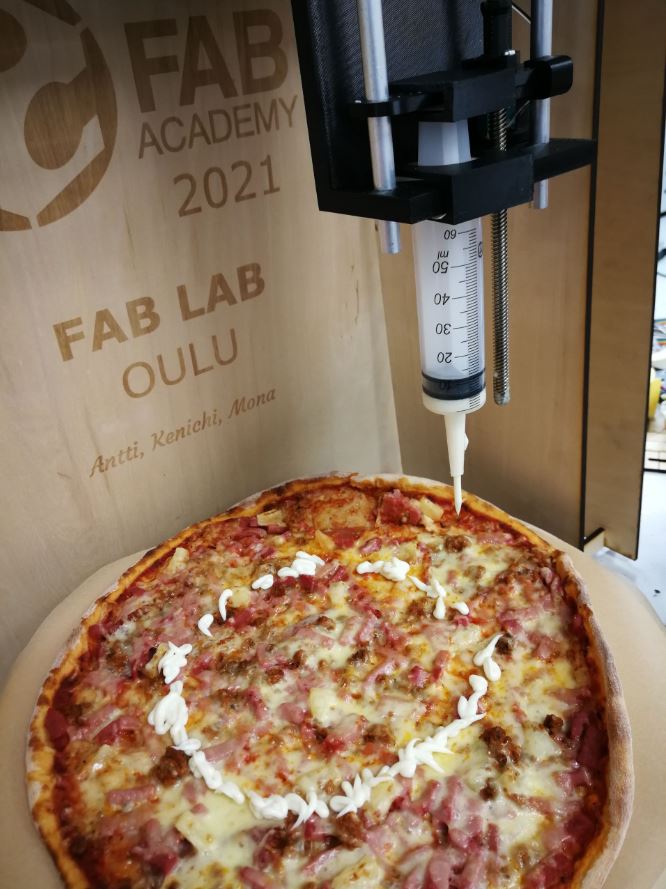
3. Mayonnaise for Pizza makes automation with rotation, actuation and sliding movement, but also Pizza with Mayonnaise is somehow a local special here in Oulu Finland.
2. Specification
2.1 Requirements
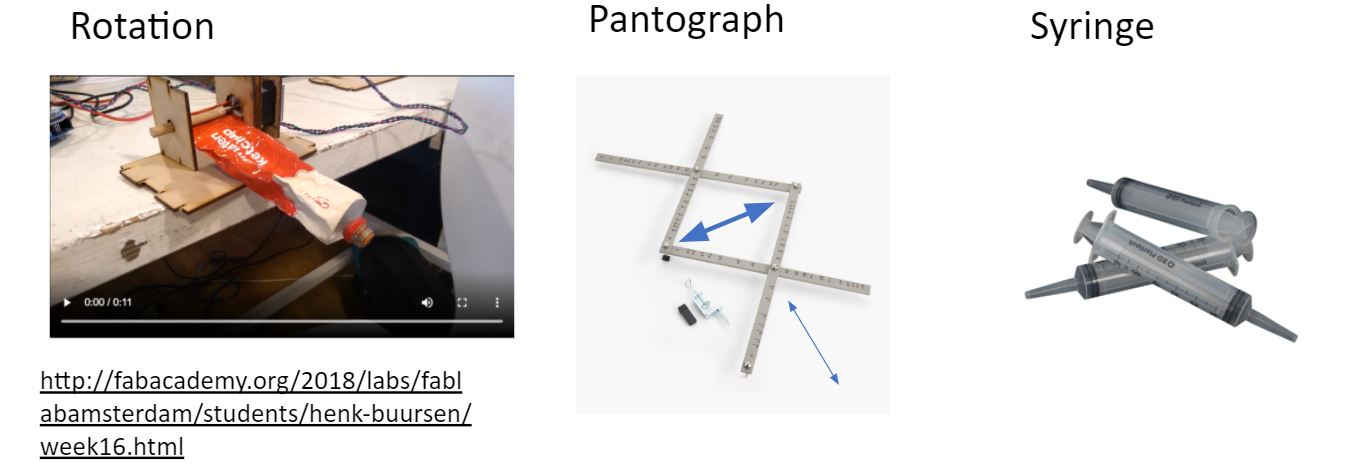
- Dress mayonnaise on the pizza nicely with rotating the pizza and sliding the syringe.
- Fulfill the rotation of pizza and L-size capable.
- Spread mayonnaise into X-axis with rotation.
- Pushing mayonnaise into pizza.
We studied how to drop the mayonnaise.... decided to use syringe as more simple and precisely dispensing.
2.2 Specifications
- A 40cm diameter of turntable with stepping motor control.
- A Syringe slider moving X-axis by stepping motor control.
- A Syringe actuator pushing force by stepping motor control.

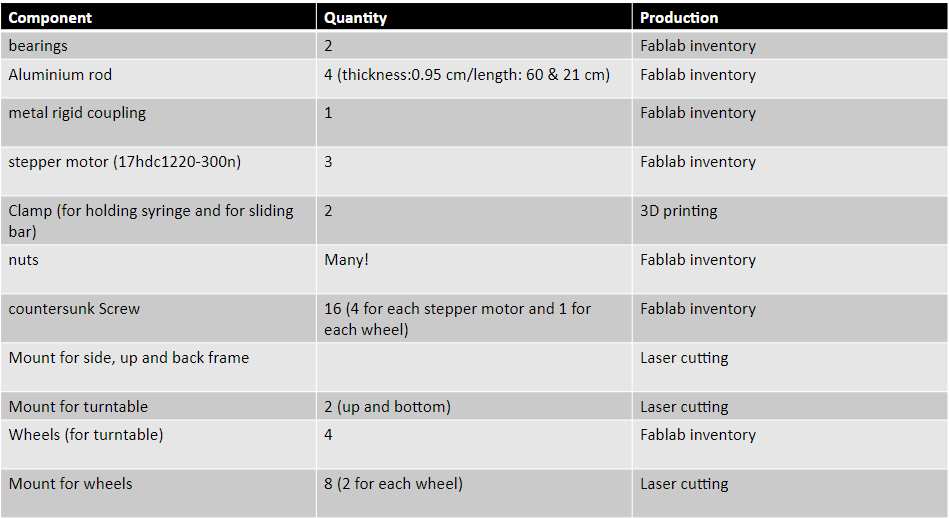
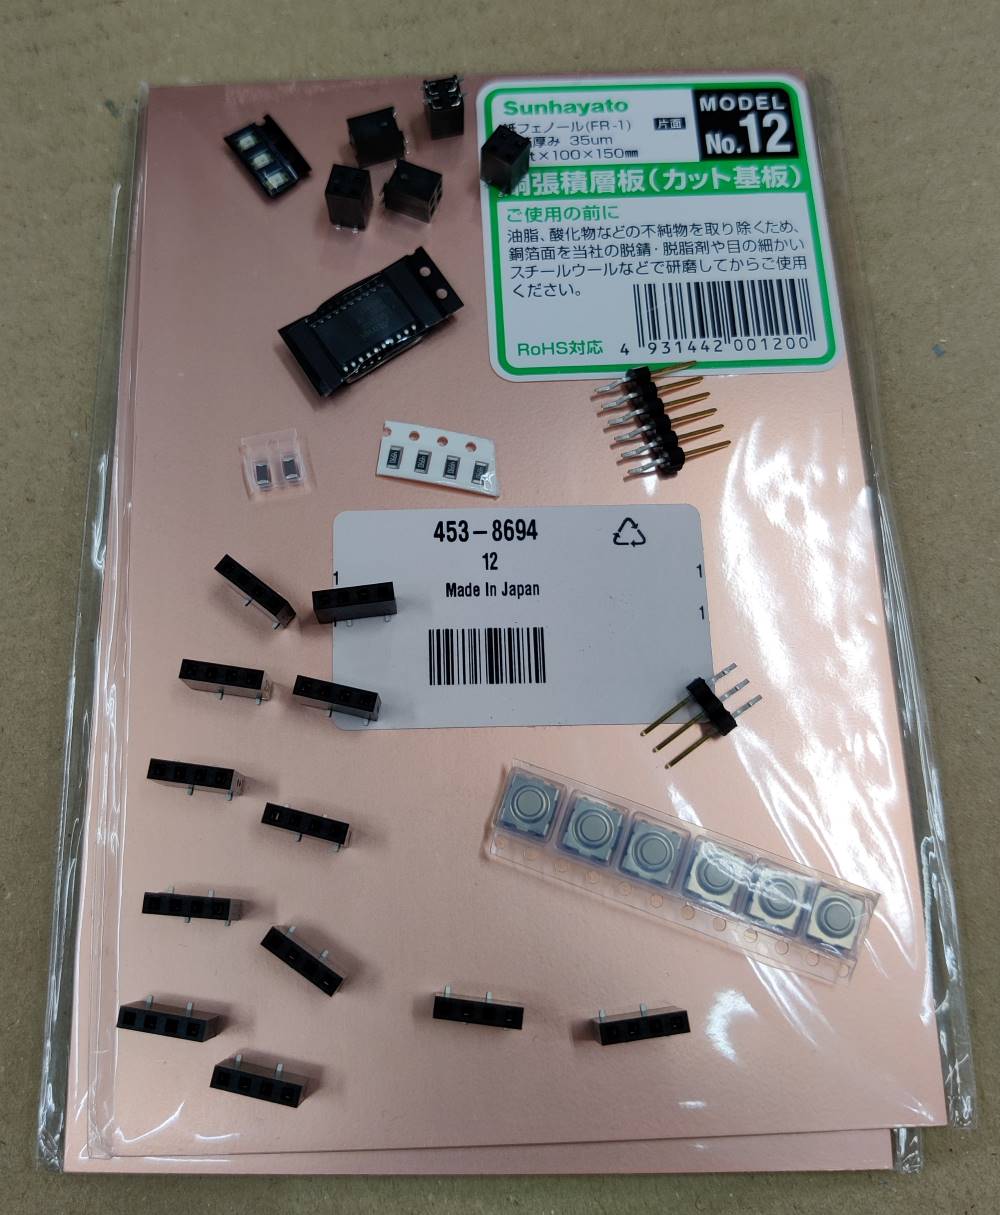
2.3 List of components
2.4 Planning
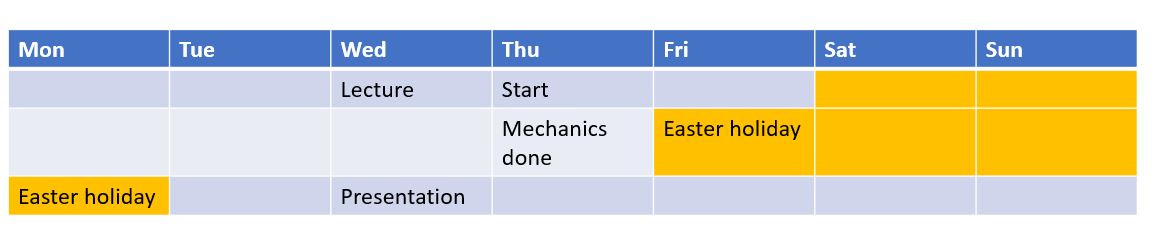
We planned how/when to finish this project, 2 weeks project but during Easter holiday we cannot work in Fablab. Time was tight.
- Antti: Electronics
- Mona: Frame and whole structure management
- Ken: 3D design for syringe and slider mechanics
We set the target all mechanics (Laser cut, 3D print) done before Easter holiday then focusing integration during/after the holiday weekend.
3. Design
3.1 Mechanical design
3.1.1 Syringe actuator
For dispensing mayonnaise, we build a syringe holder actuated by stepper motor of NEMA17.
Syringe actuation components.
3D Design for syringe and stepper motor holdings.
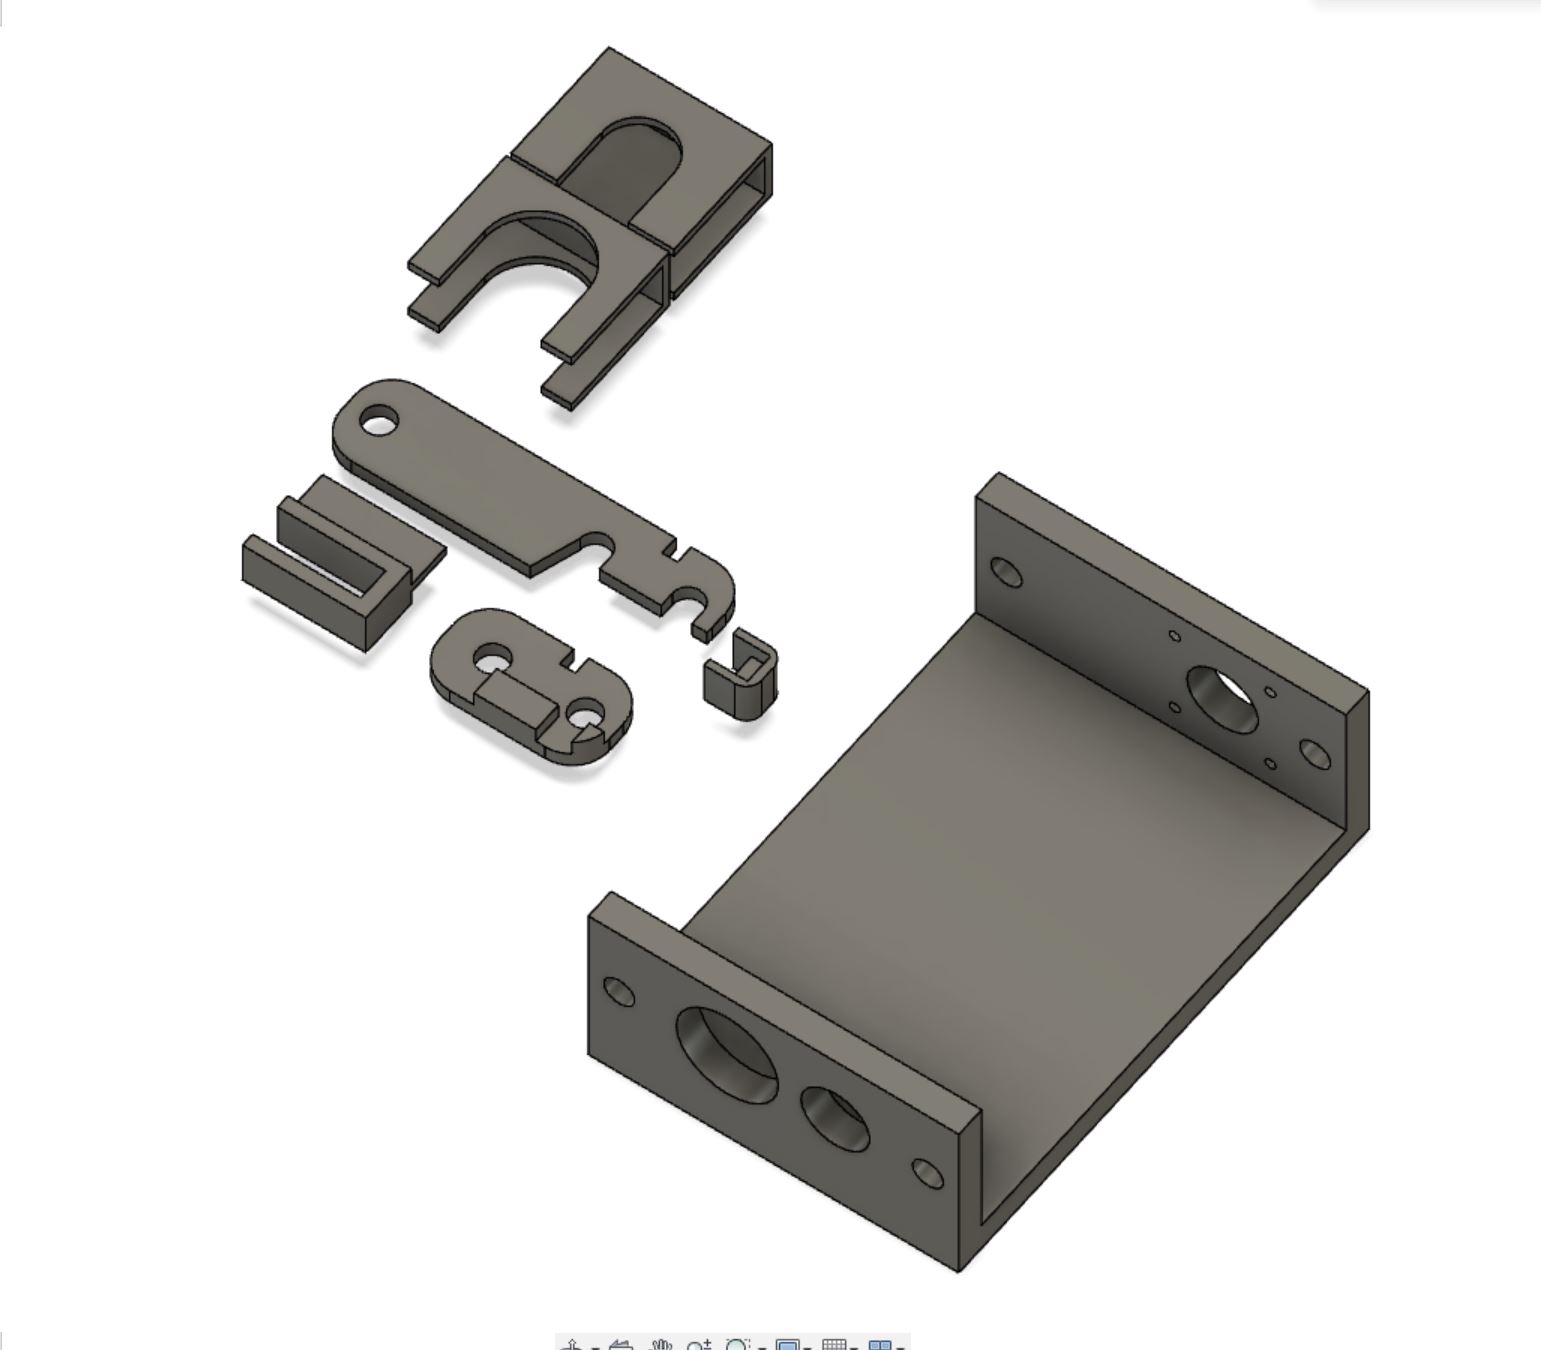
Added some clips to hold firmly the syringe to move both of up and down directions.
The details are describled in Ken's Indiviual assighment.
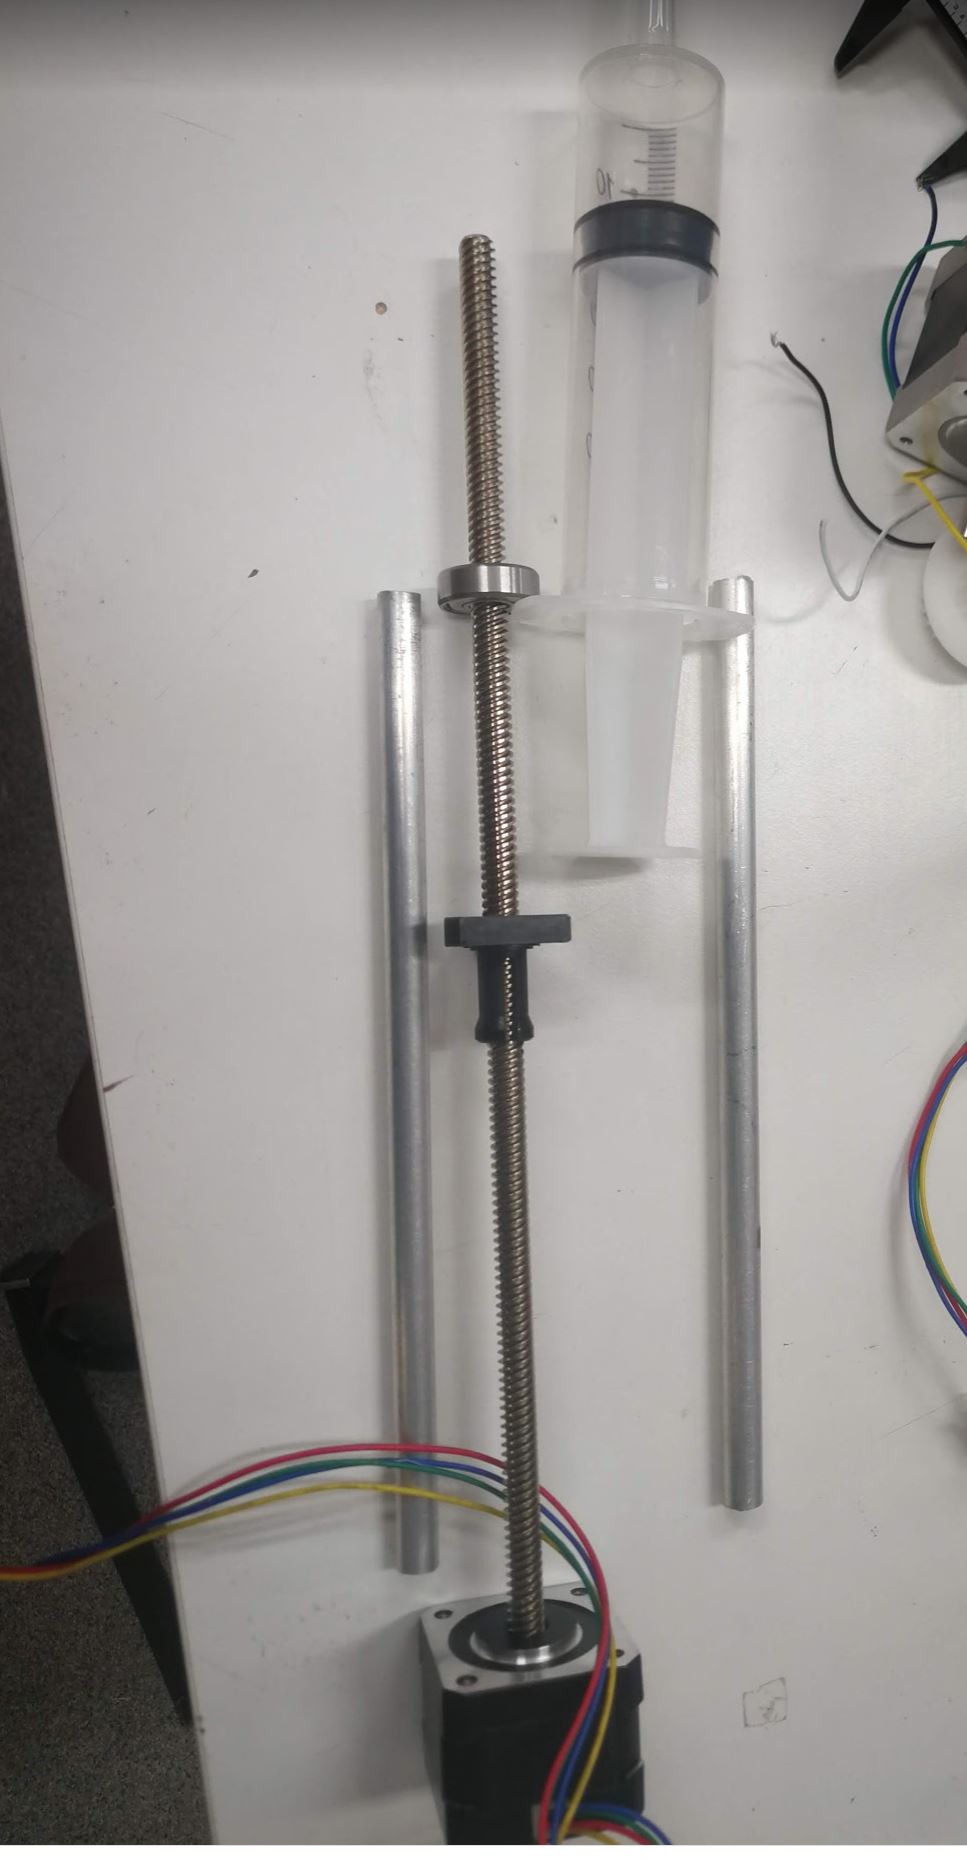
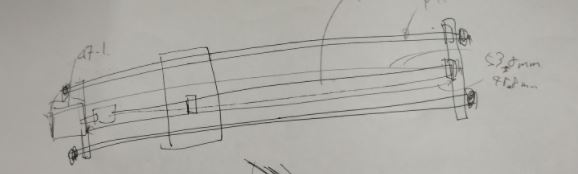
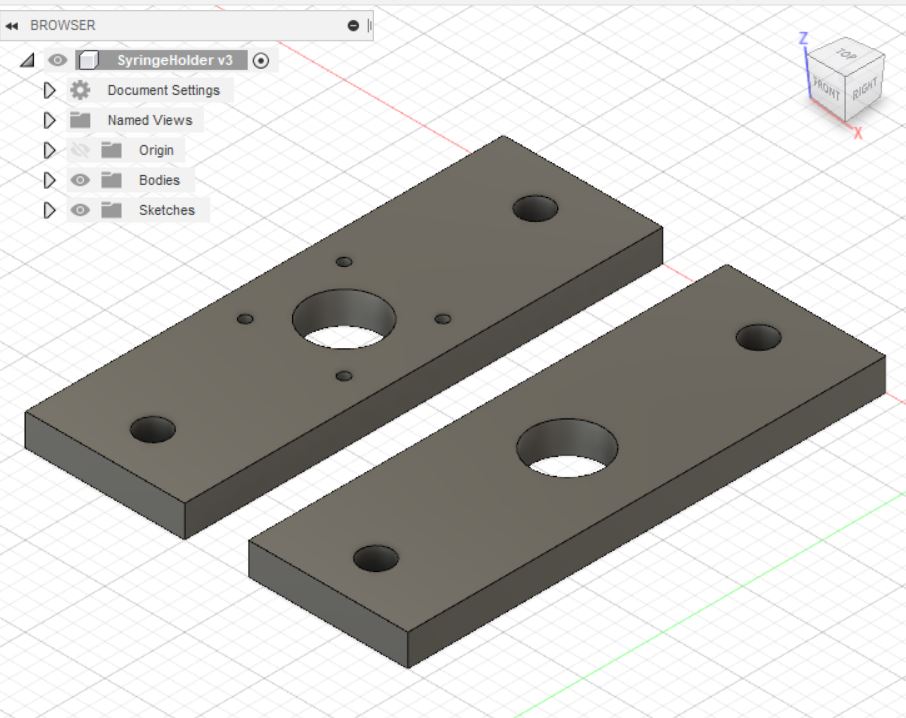
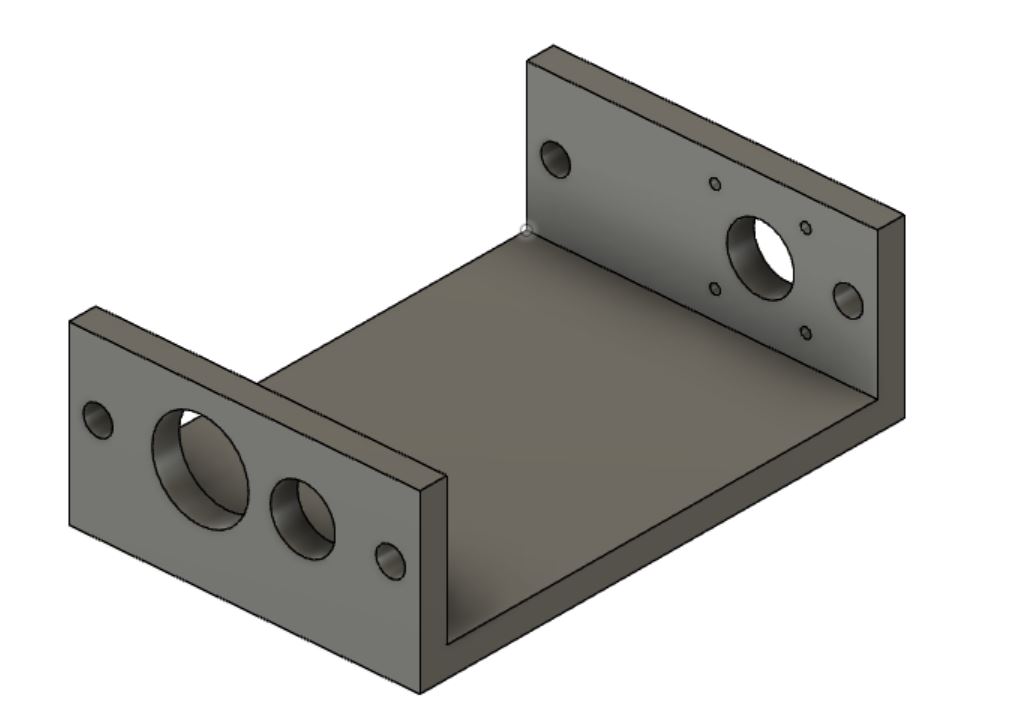
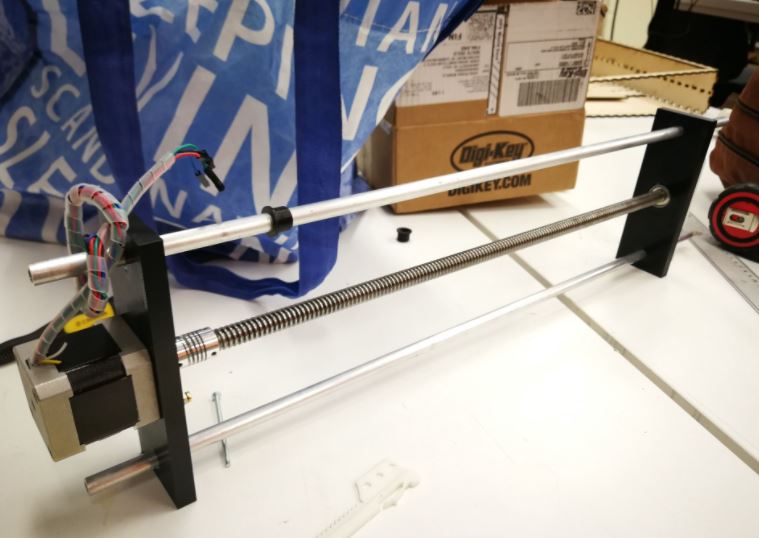
3.1.2 Syringe slider
Syringe is needed to slide X direction with slide. To slide the above syringe actuator, prepare the bars, holder of syringe and holder of NEMA17 stepper motor.

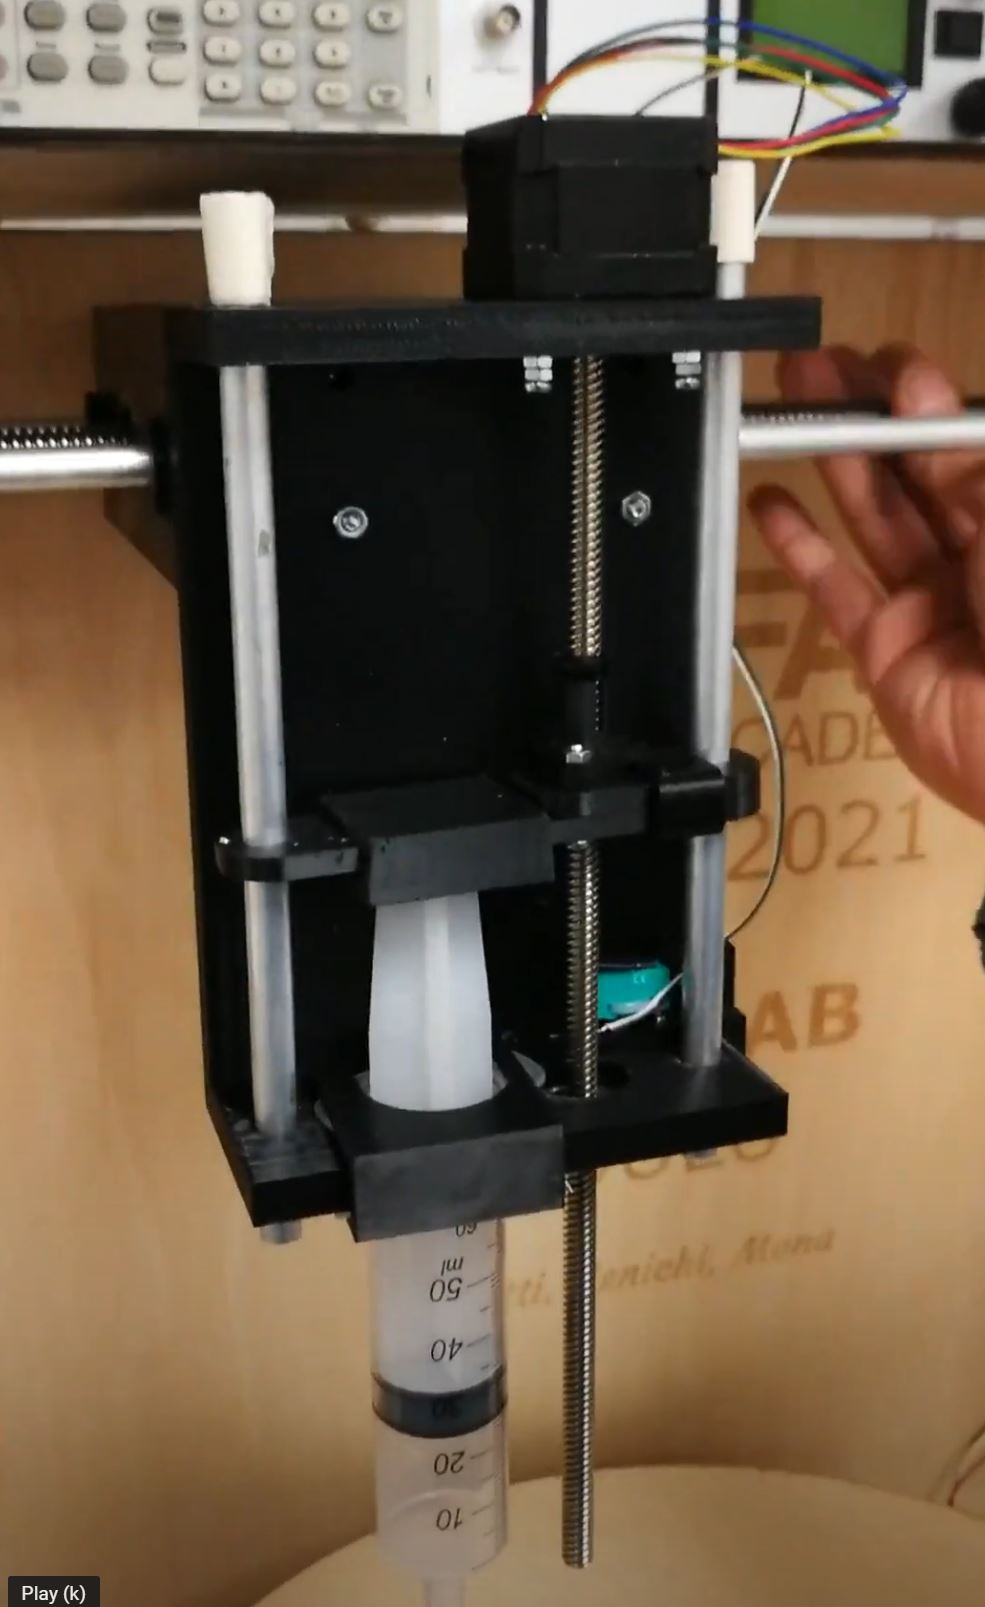
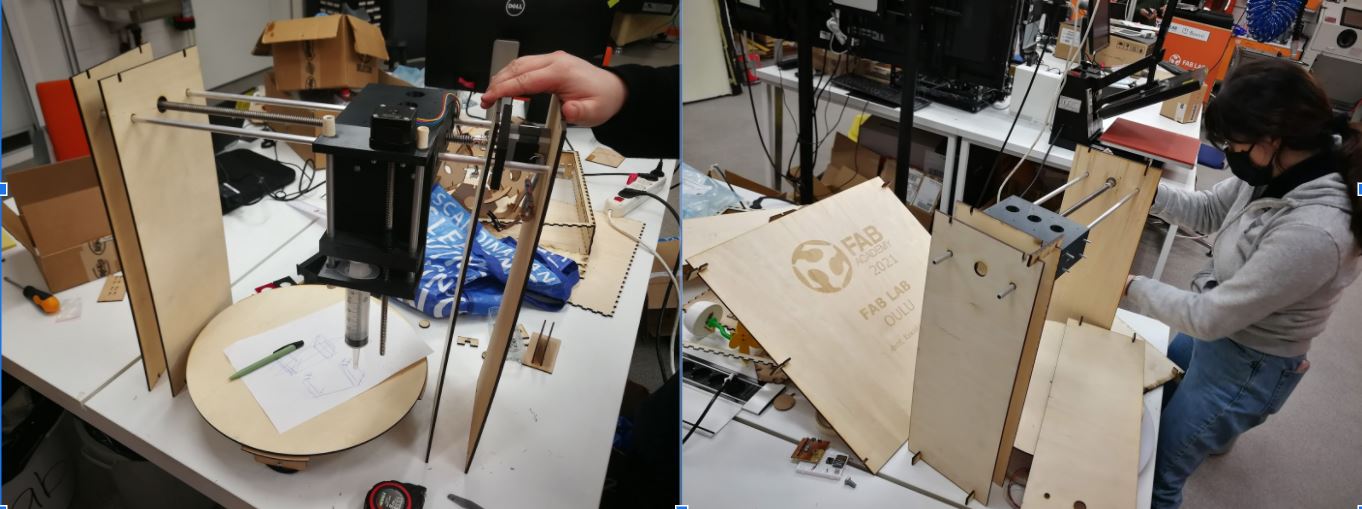
3.1.3 Frame
The frame has been designed in Fusion 360. For each side, we made two frames for better support of the body. Then, holes were added for holding motor and the sliding bars.
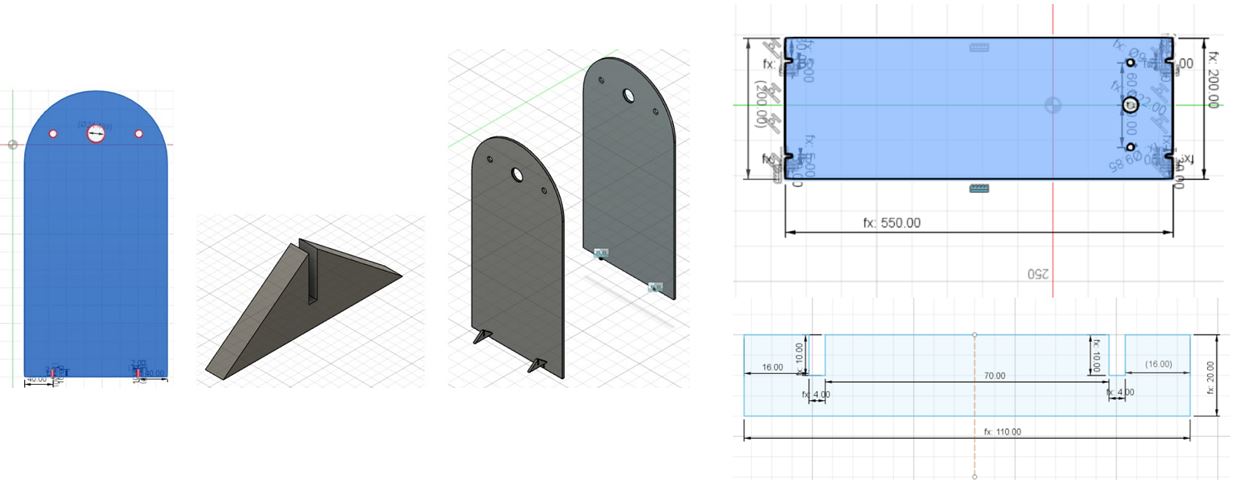
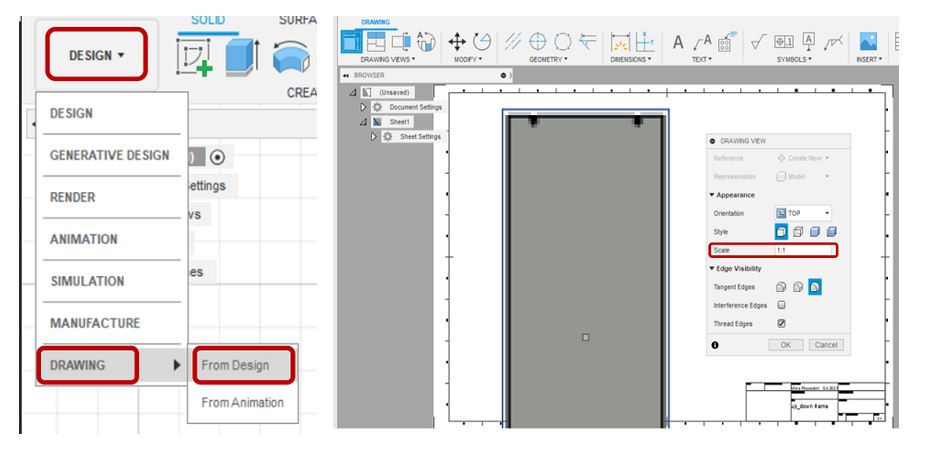
To cut the components with the laser-cutter, you just need to go to DESIGN->DRAWING->From Design. Then, in drawing view, set the Scale as 1:1.
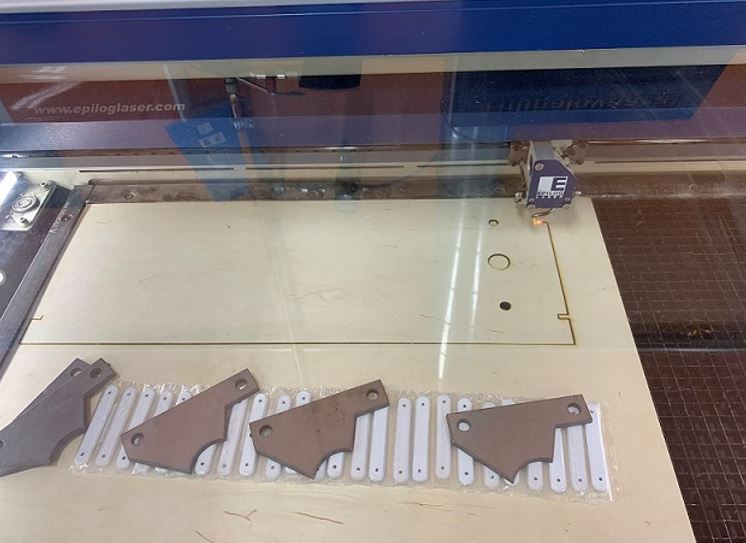
For laser-cutting, we used plywood (4mm) board as the material and Epilog Fusion M2 40 Laser machine.
After assembling test, we realized the design needed to be modified and fit the slot sizes and also, made the joints for the frames to be connected.
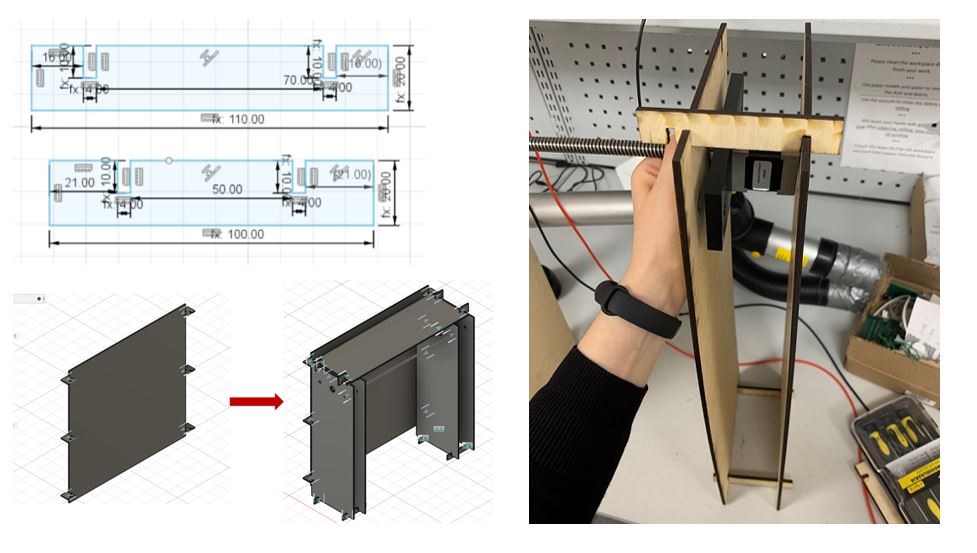
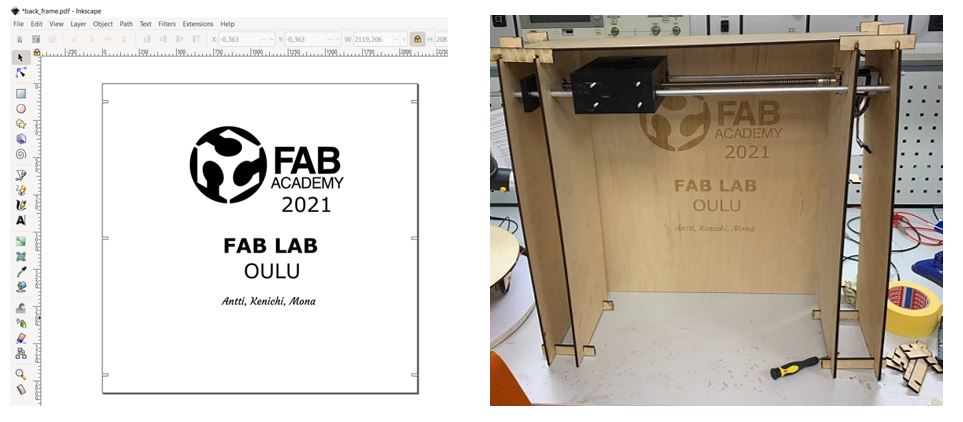
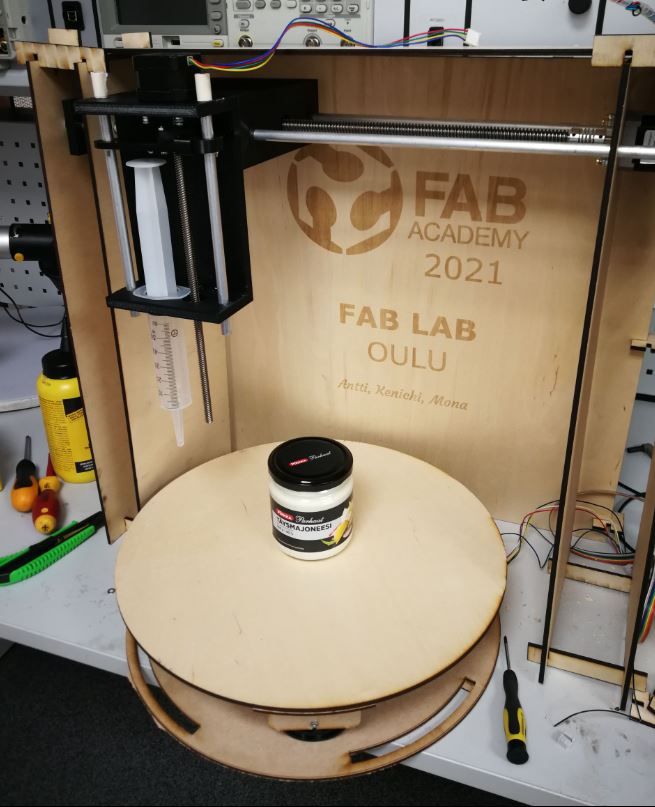
To customize our work, we used Inkspace for the backside frame with Fab Academy logo and our names!
3.1.4 Turntable
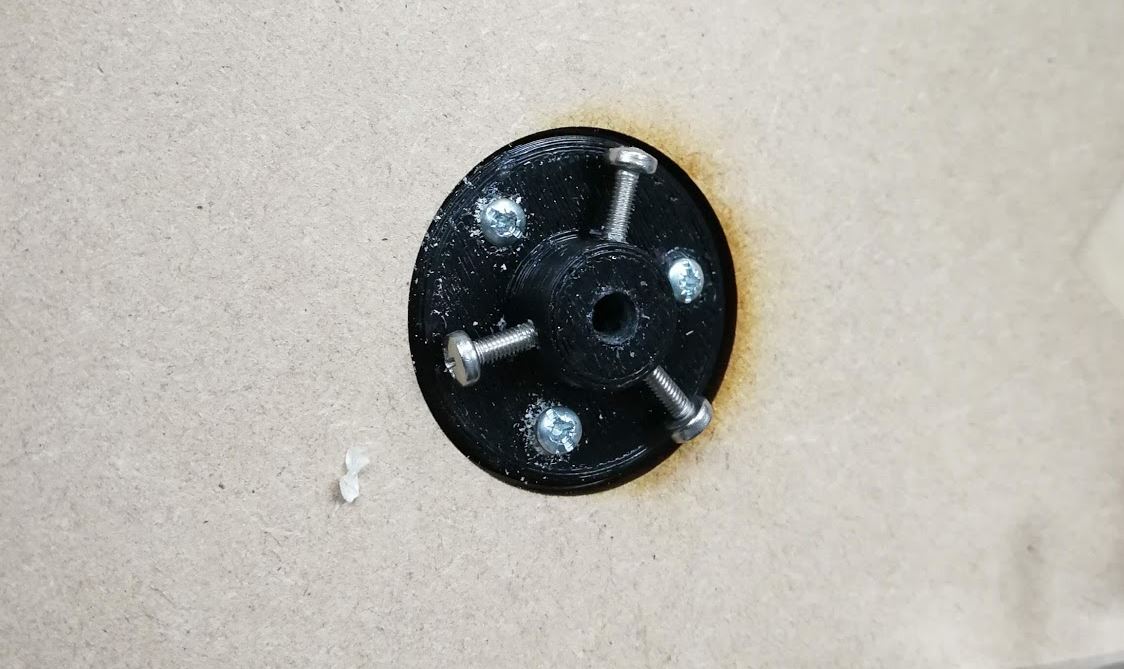
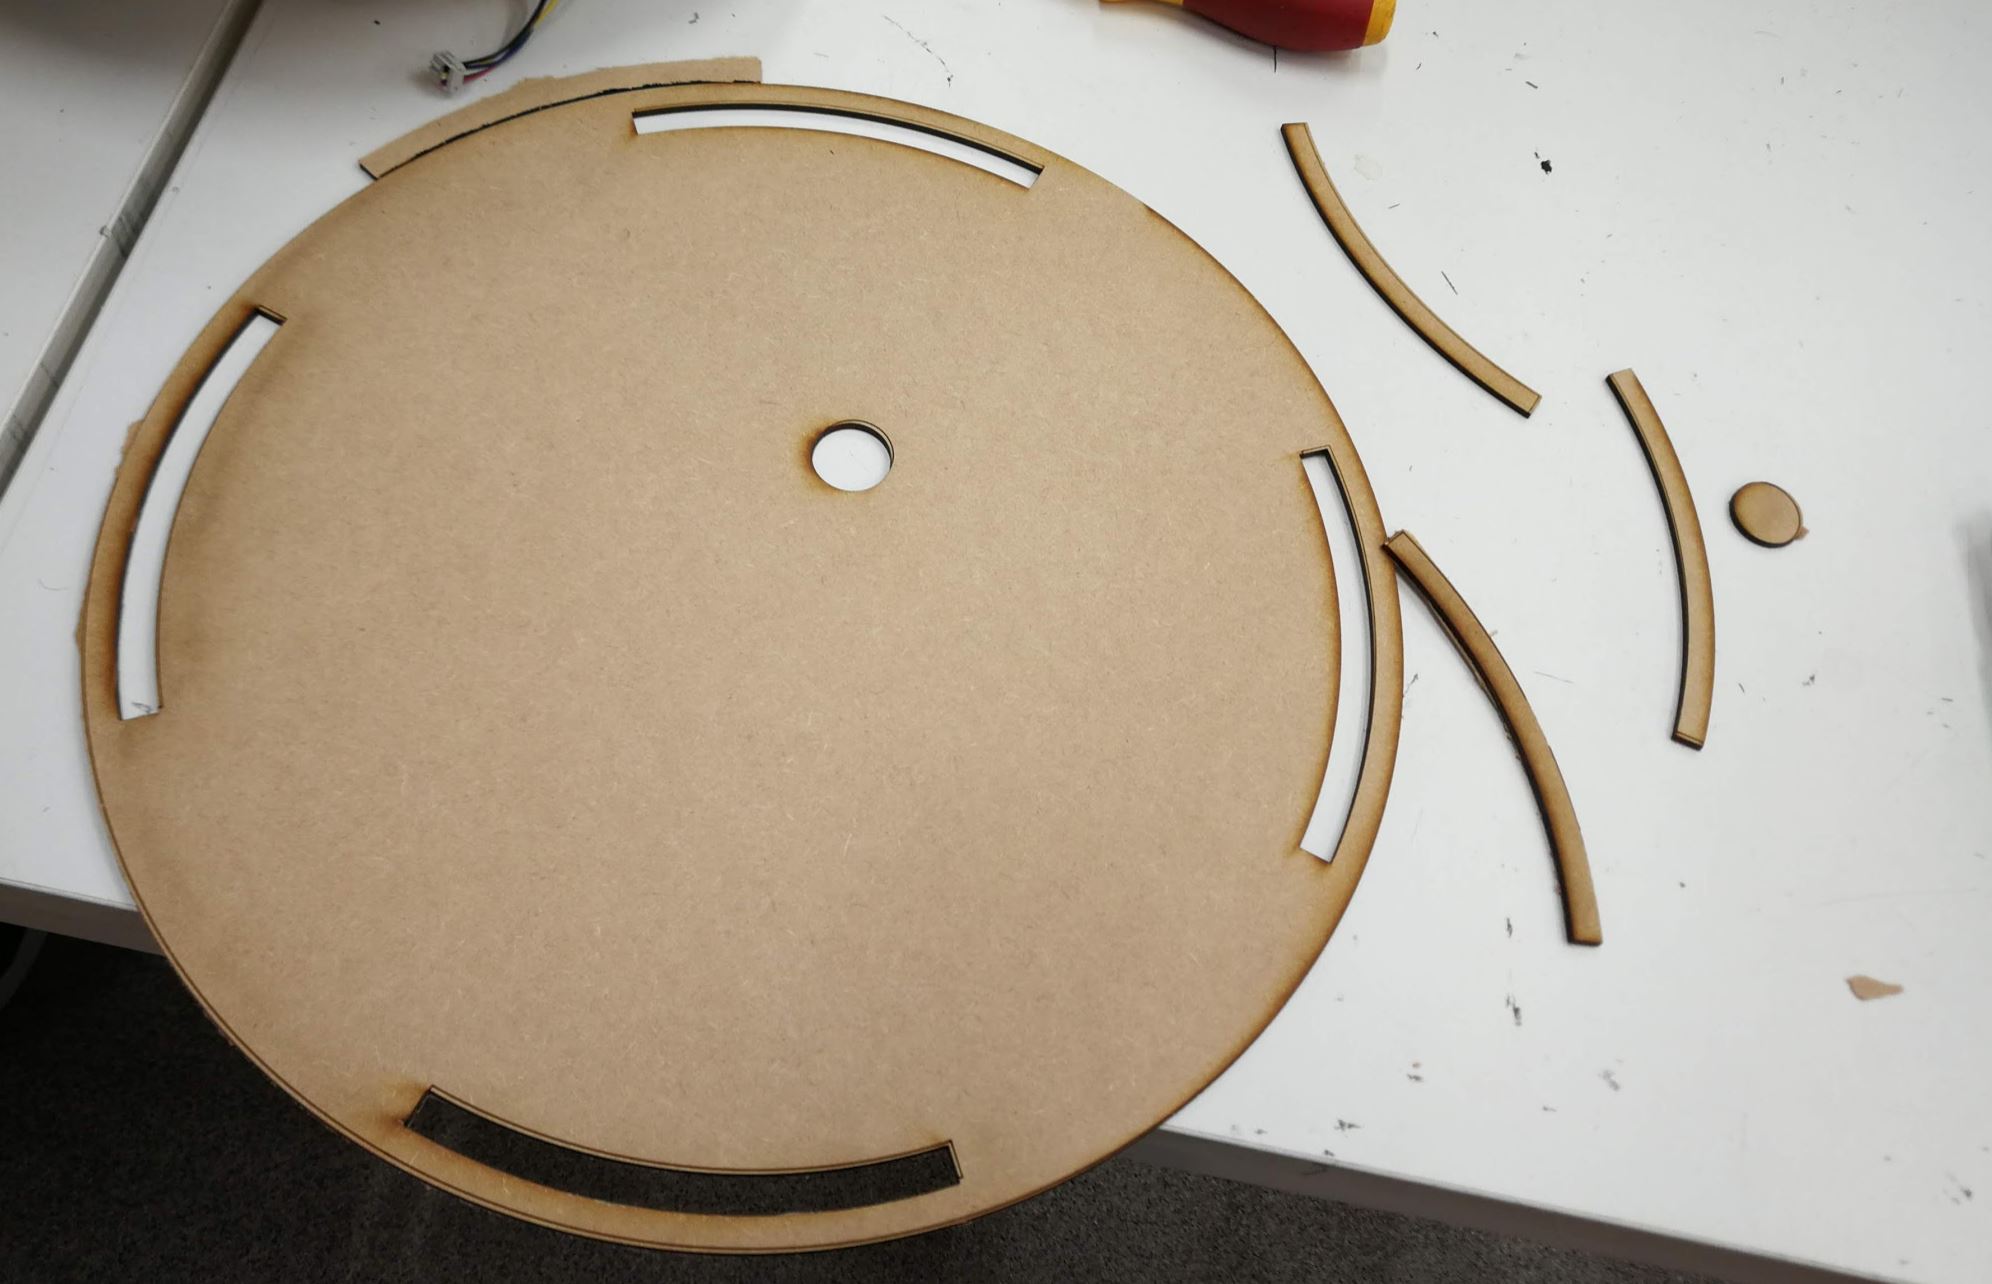
A turntable for pizza rotation is made by laser cut of MDF 3mm. We found the plastic rollers in Fablab wearhouse, designed the roller supports and structure of turntable. The hub between NEMA17 stepper motor and turntable is made by 3D print from thingiverse example.
Designed by Fusion360 and export DXF file and convert to PDF for laser cutter print same method as above frame.
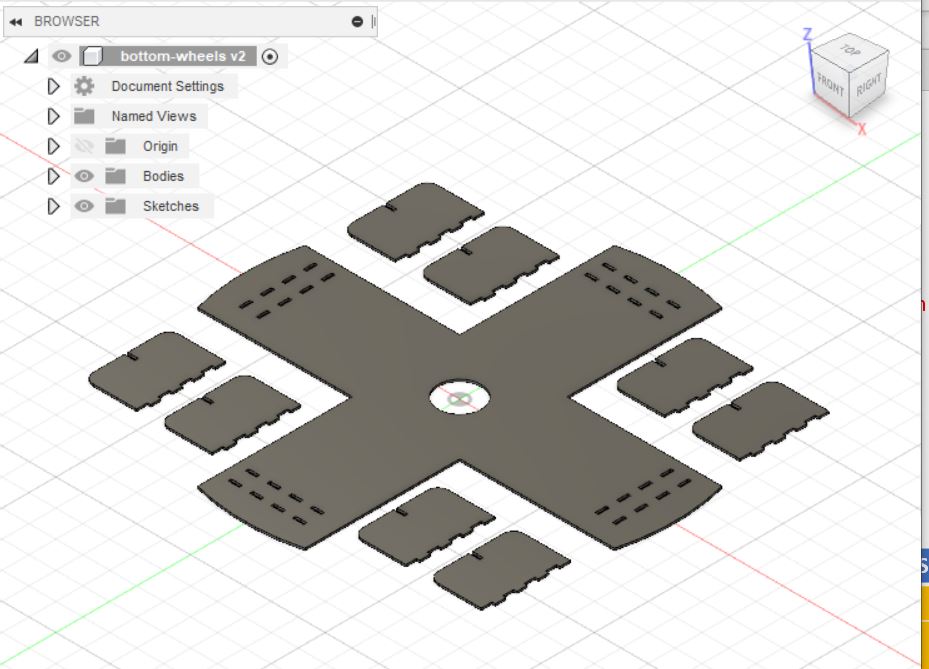

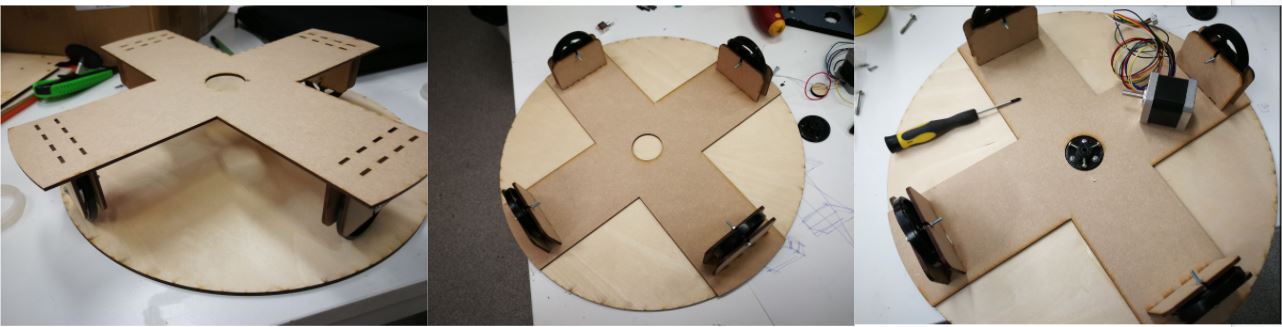
After integration, cabling to NEMA17 stepper motor's became problem. The cable is run over by wheels. Solution was added one MDF board underneath of Stepper motor and made a hole which can go through the cable. Also make a space for cabling at bottom, cut 4 parts from the circle to lift up the board with 3mm of MDF thickness.
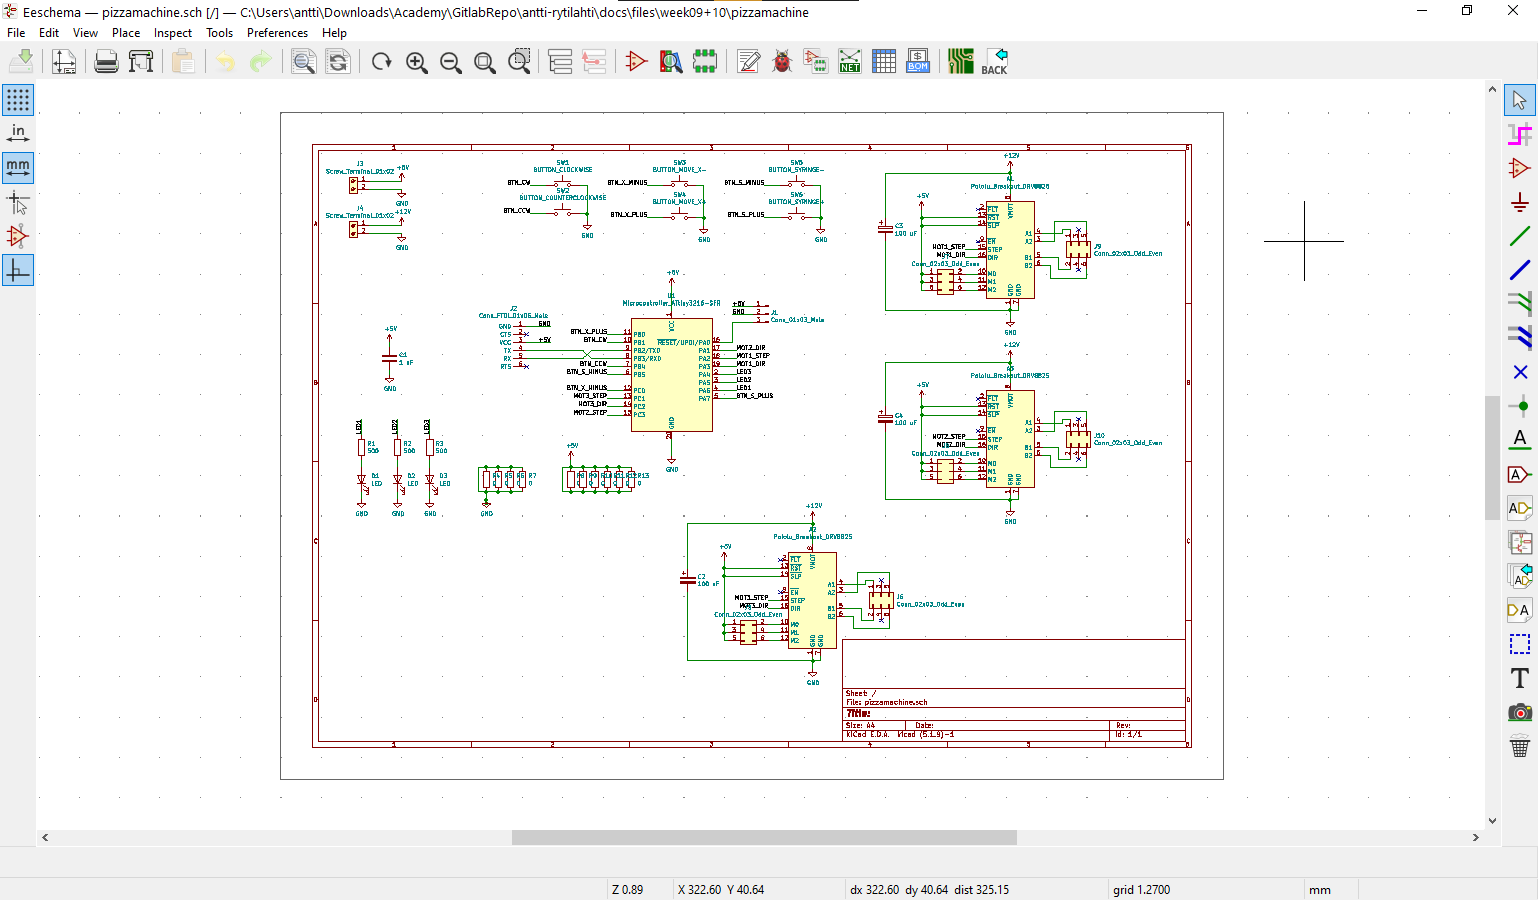
3.2 Electronics design
Our project needs 3 stepper motors and their drivers, plus input devices. Previously we had used ATtiny412, so for microcontroller easy options would be ATtiny1614 or ATtiny3216. We might run out of pins with ATtiny1614, so we chose ATtiny3216.
Availability of stepper drivers limited our options, so we chose Pololu's version TI DRV8825 module since it was the first module we could find three of a kind. It also proved to be good choice since there were good resources for it, especially lastminuteengineers.com had a helpful documentation.
None of us had previous design experince with stepper motors, so we wanted to keep "all options open" and placed headers for microstep enable pins. All microcontroller pins were used: remaining pins after stepper drivers (2 pins per driver), UPDI header and FTDI header were allocated to six buttons (button for each direction for three motors) and three leds, because those pins could be repurposed easily, if needed.
Selecting power headers was a bit difficult, since we were told to avoid through-hole components. Initial plan was to bend legs of some through-hole header to enable smd-style mounting, but it only ended up ripping off the pads of 12 volt power rail. As a quick fix, wires were soldered directly on pcb.
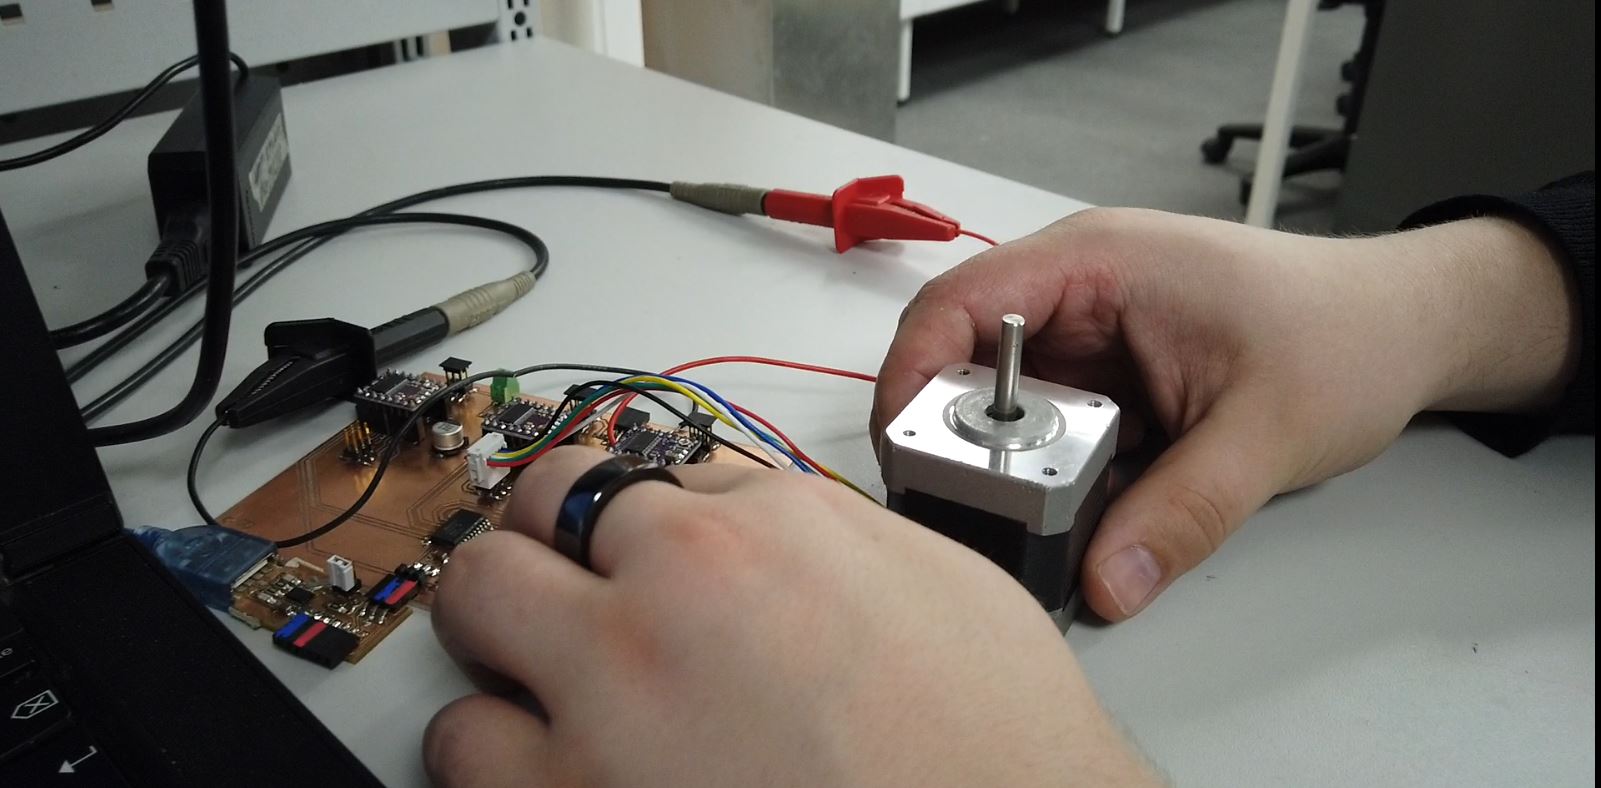
Stepper drivers were calibrated for 500 mA current each before inserting to pcb. Calibration explained in Pololu's and Lastminuteengineers' sites.
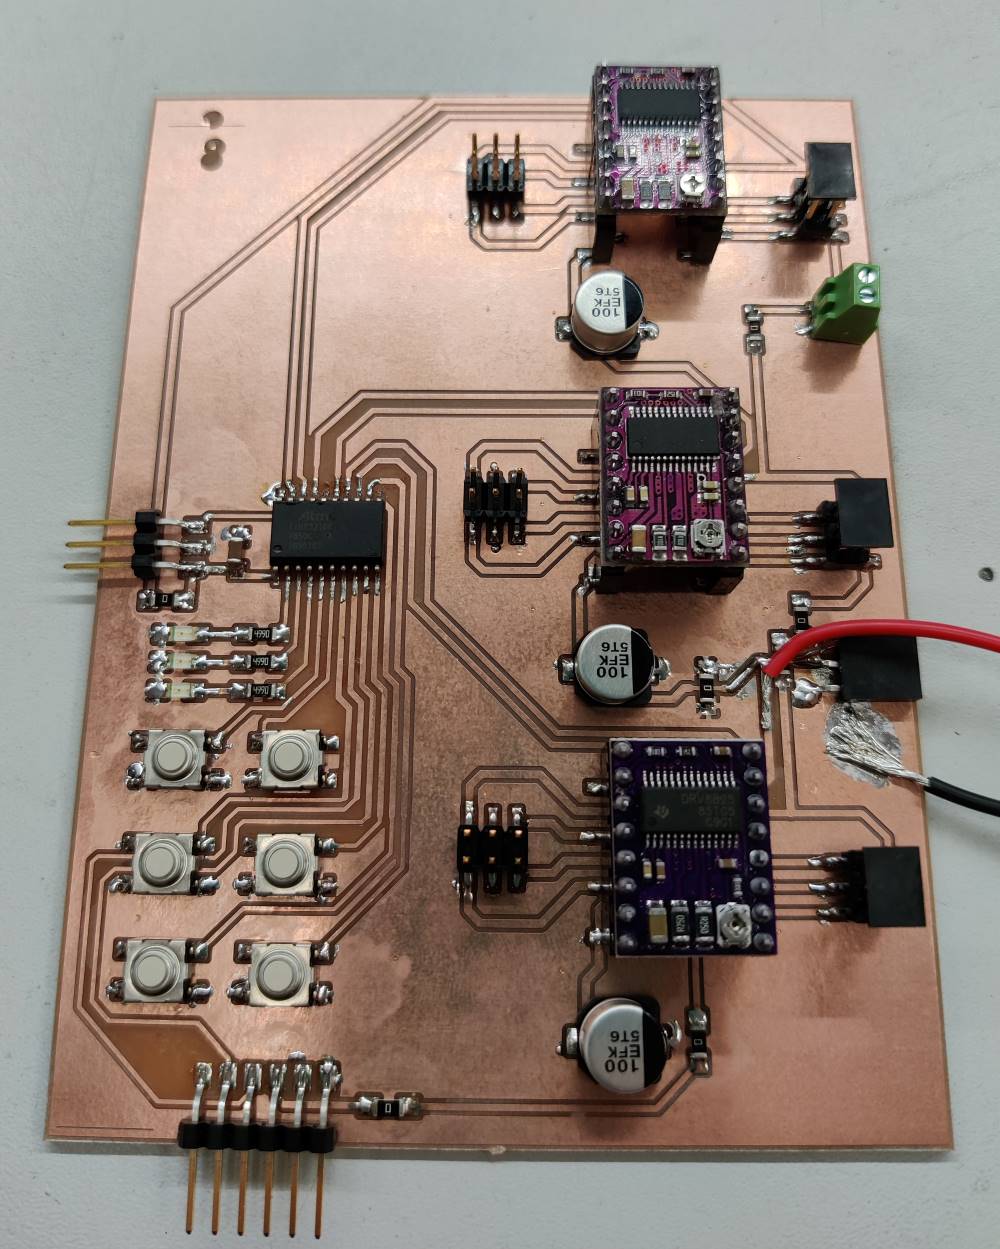
PCB
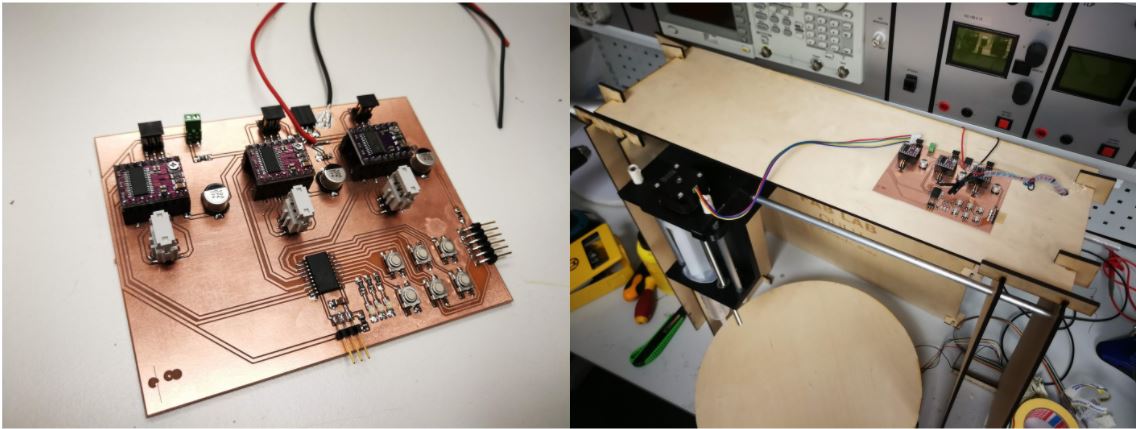
4. Final assembly
5. Embedded Coding
To test stepper drivers, and to find suitable microstepping setting for each one, manual driving of motors were necessary. Code for that needs input reading, for which we used buttons, and output control, which was setting step and dir pins of motors.
Here is our input reading code. It is not beautiful, but it was quick to write and it works.
byte pollButton() {
  byte buttons = 0b00000000;

  if (!digitalRead(BTN_A_MINUS)) {
    buttons |= 0b00000001;
  }
  if (!digitalRead(BTN_A_PLUS)) {
    buttons |= 0b00000010;
  }
  if (!digitalRead(BTN_B_MINUS)) {
    buttons |= 0b00000100;
  }
  if (!digitalRead(BTN_B_PLUS)) {
    buttons |= 0b00001000;
  }
  if (!digitalRead(BTN_C_MINUS)) {
    buttons |= 0b00010000;
  }
  if (!digitalRead(BTN_C_PLUS)) {
    buttons |= 0b00100000;
  }

  return buttons;
}
6. Test function
6.1 description
This machine provides the three actuators,
1. Pushing mayonnaise (or some liquid) out from syringe
2. Syringe slides vertical direction
3. The object (Pizza, others) can be rotated by turntable
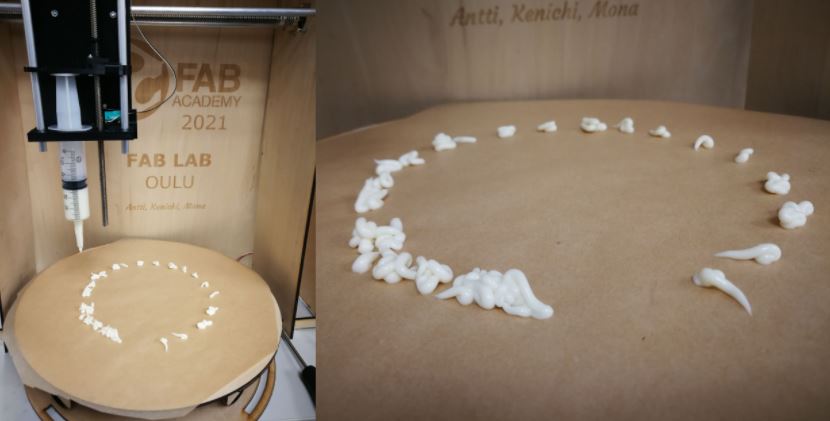
6.2 Short movie
Test the basic mechanical functions.
And this was the result running by manually hand pushing rotation.
And electronics control part is tested with Arduino IDE with test programs of,
- Basic PCB test with LED
- Stepper motor test program
- Pizza machine button operational program
The power of technology!!
7. Future development opportunities
Syringe holder: Basic functions are met with requirements such dipping mayonnaise to pizza. However, if this would be commercialized, the quantity of mayonnaise is not enough. Future option can be 1. use bigger syringe, 2. change the dispensing method from syringe to pushing the normal commercial mayonnaise bottle.
Frame: We can have some modifications in the design including using 3d printed joints for the frame instead of plywood lasercut for more reliable supprort, but because of limited time for this week, we could not have that.
Electronics & coding: Project should start to utilize AccelStepper or MultiStepper Arduino libraries for smoother stepper operation. Project could also be developed to be GRBL compliant and to be able to receive move commands via UART, this would enable Pizza machine to draw with mayonnaise.
Used files
Syringe actuator
Silder
Frame
Turntable
Embedded electronics