
Week 3
Assignment 1- Vinyl cutter
A vinyl cutter is a type of computer-controlled machine.
This blade is used to cut out shapes and letters from sheets of thin self-adhesive plastic (vinyl).
The vinyl can then be stuck to a variety of surfaces depending on the adhesive and type of material.
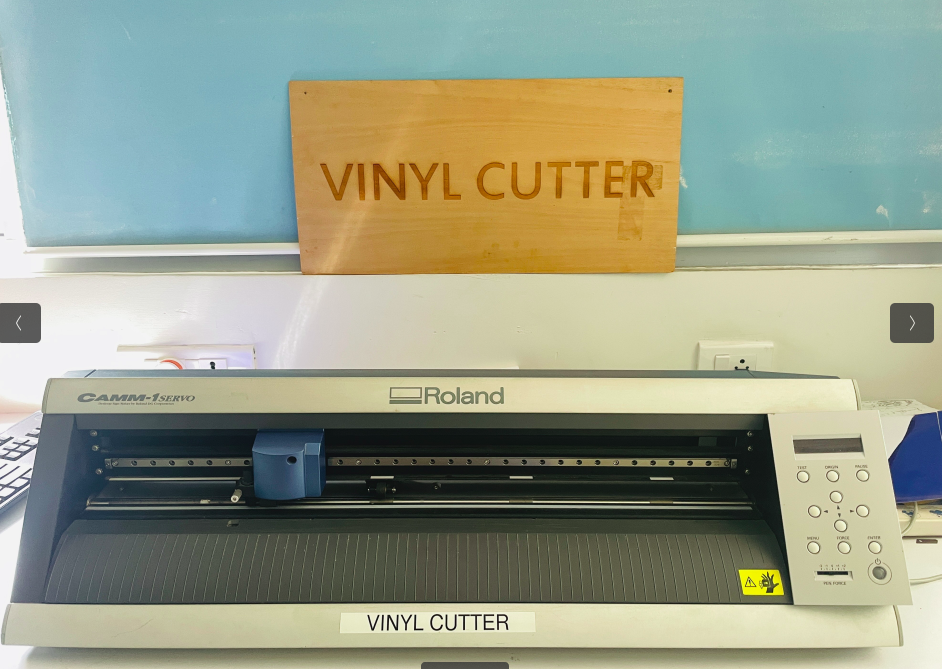
we were introduced to the vinyl cutter i learned about the tools and supporting systems of the cutter
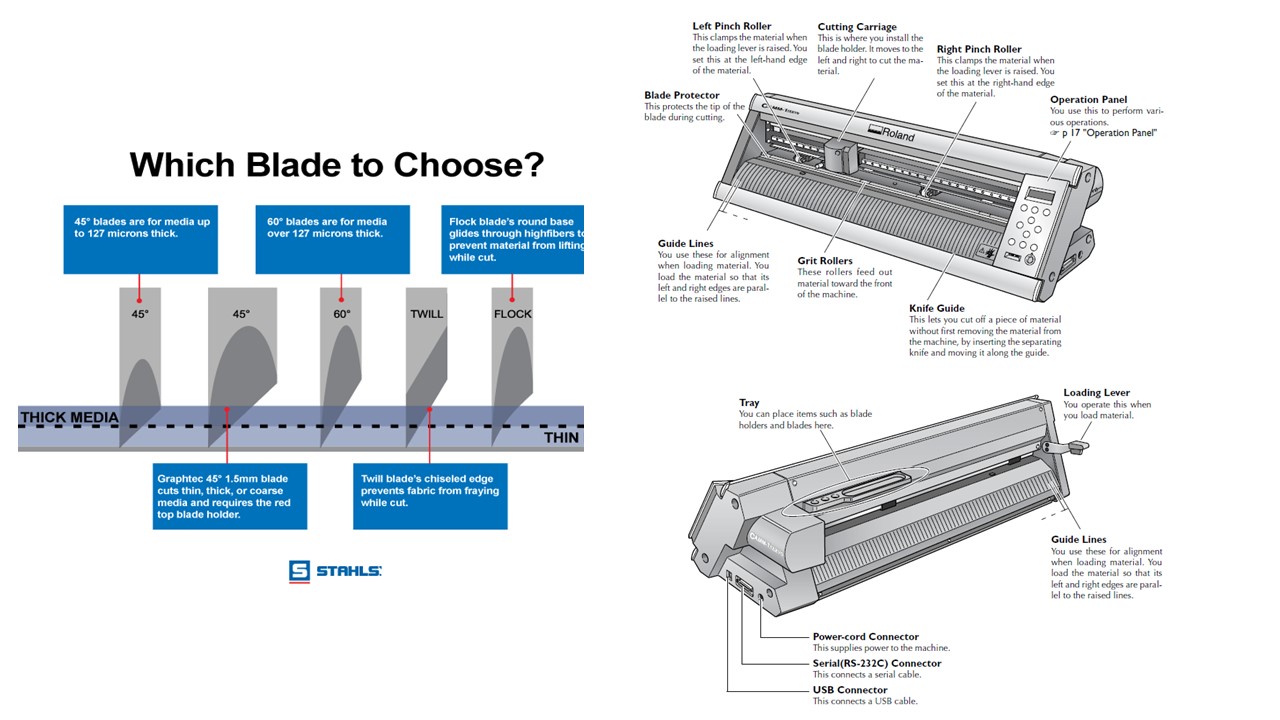
1.The Pinch roller is released and the material is loaded manually through the Grit Roller.
2.The grit rollers should be right above the markings and the pinch roller is locked into position.
3.The material is moved to required location.
4.The machine then automatically takes the width of the material and diplays it in the screen.
5.Now the origin is set using the button and a trail cut is conducted to check the velocity and force Once the cutting is over,
the material is then removed using a knife swept through the knife guide

so in order to complete the assignment i had to trace the bitmap so i used inkscape to get the workdone.
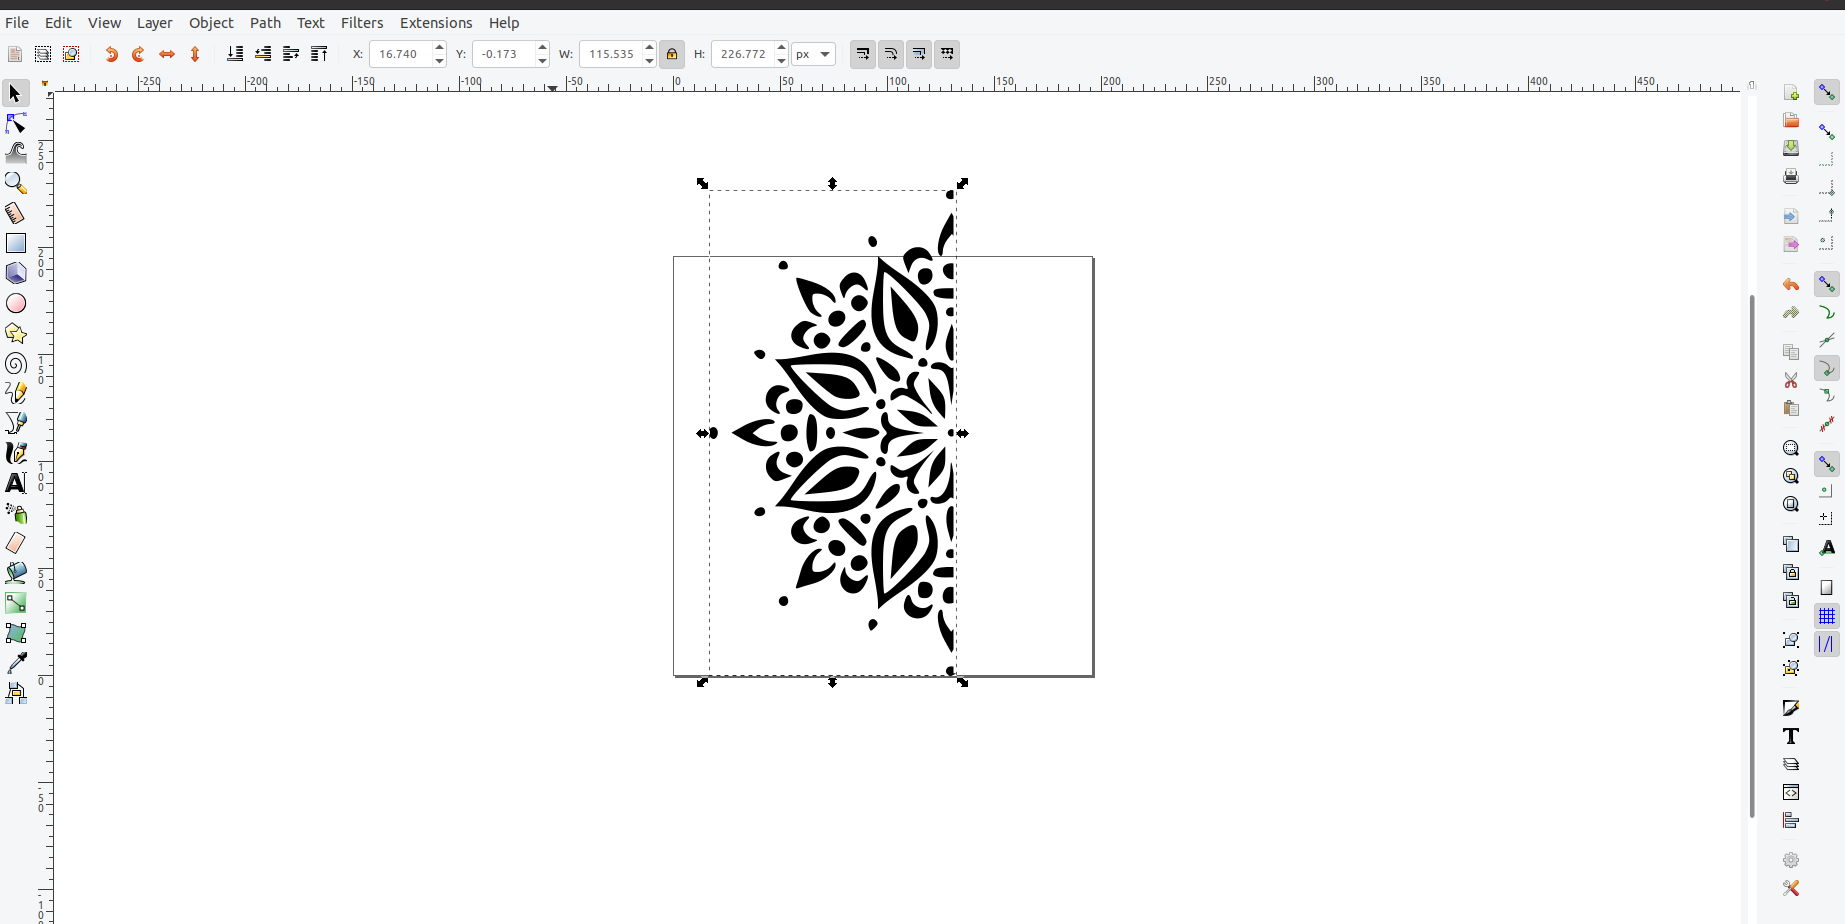
as part of the design i made my mandala art into half so that it fits my phone case and traced the bitmap by adjusting the threshold and other
options.later on saved the file in svg format and loaded the svg file.
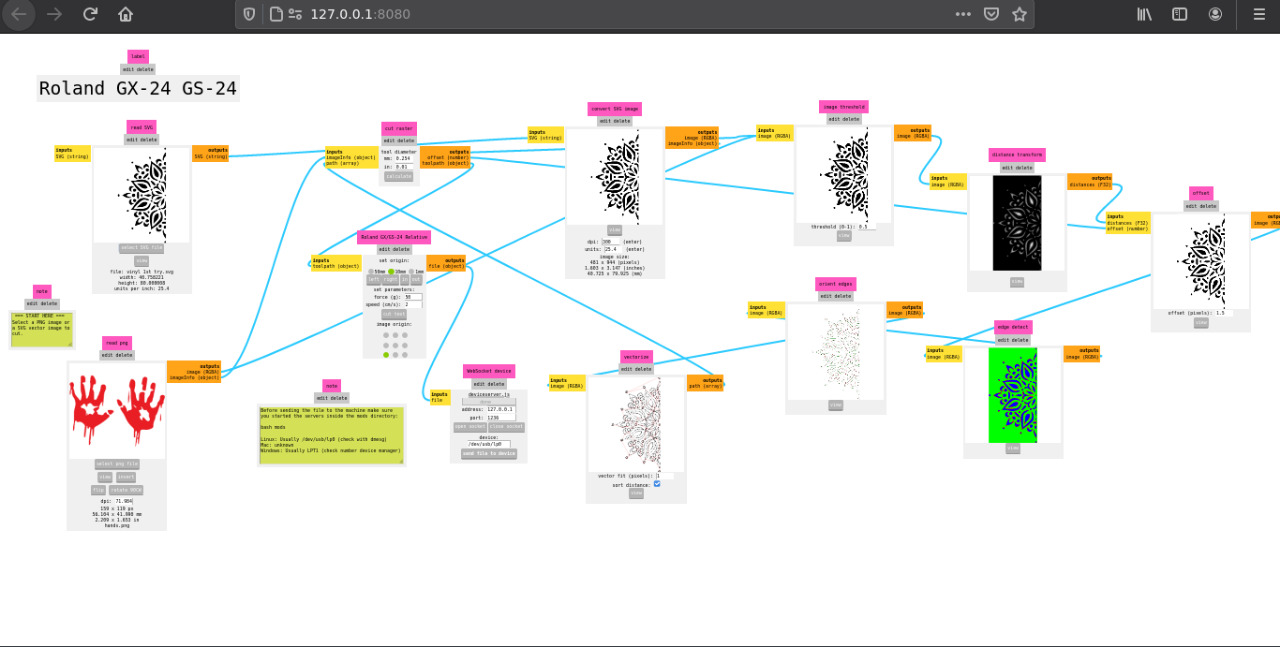
HOW TO SETUP MODS?
1.Need to install Mods using Git Bash
2.Need to type inside the mods file directory to start it
bash start-servers 3.Need to select Roland GX-24 and need to upload the PNG file
4.Need to run the calculation and need to setup velocity and force (40 cm/s & 110gf)
Since the parameters are change now you need to close and open the socket
5.Need to run the code by clicking button called
Send File to Device.
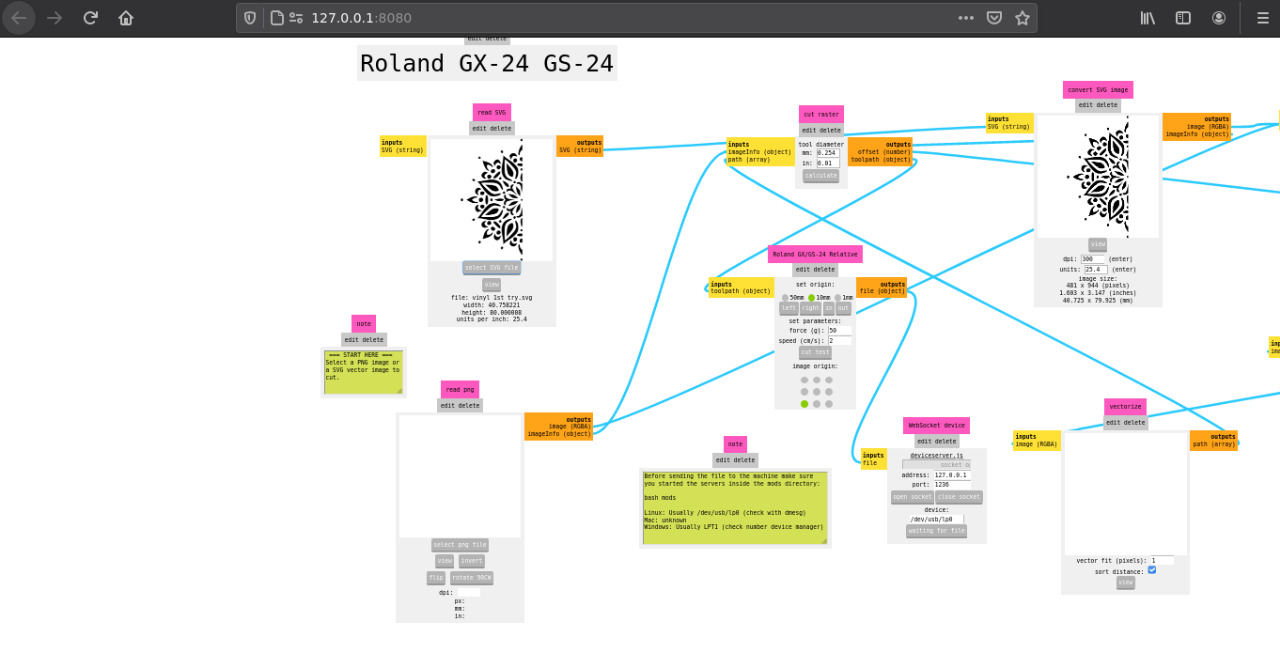
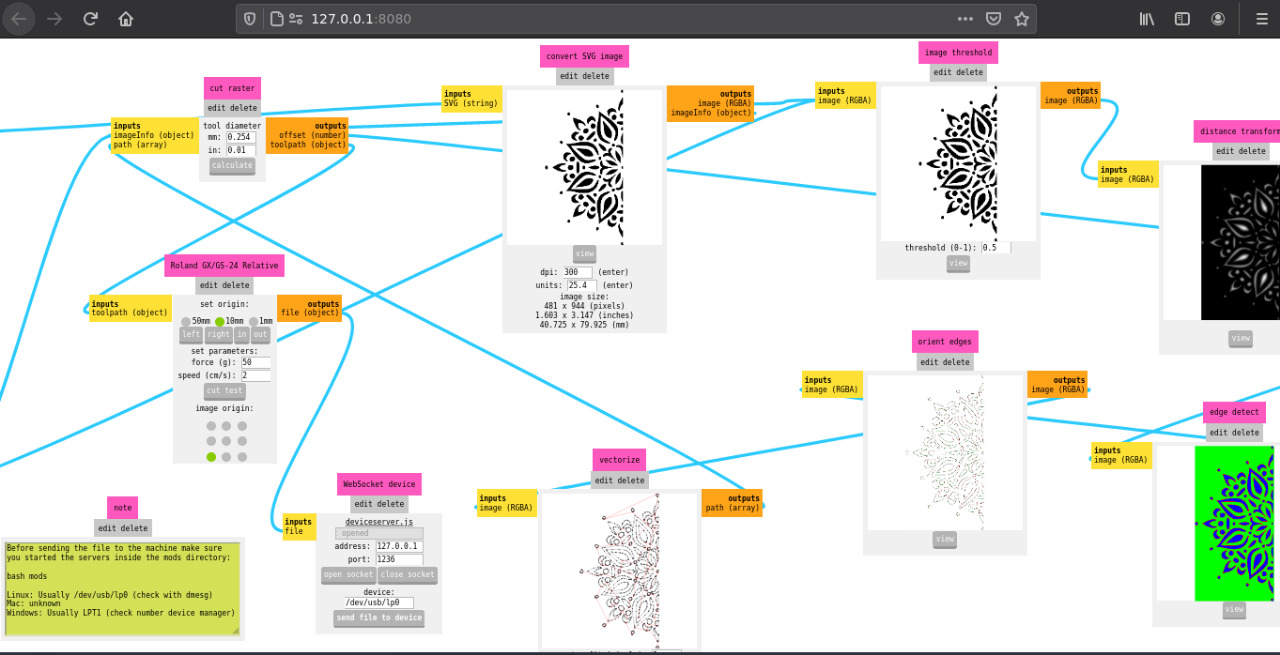
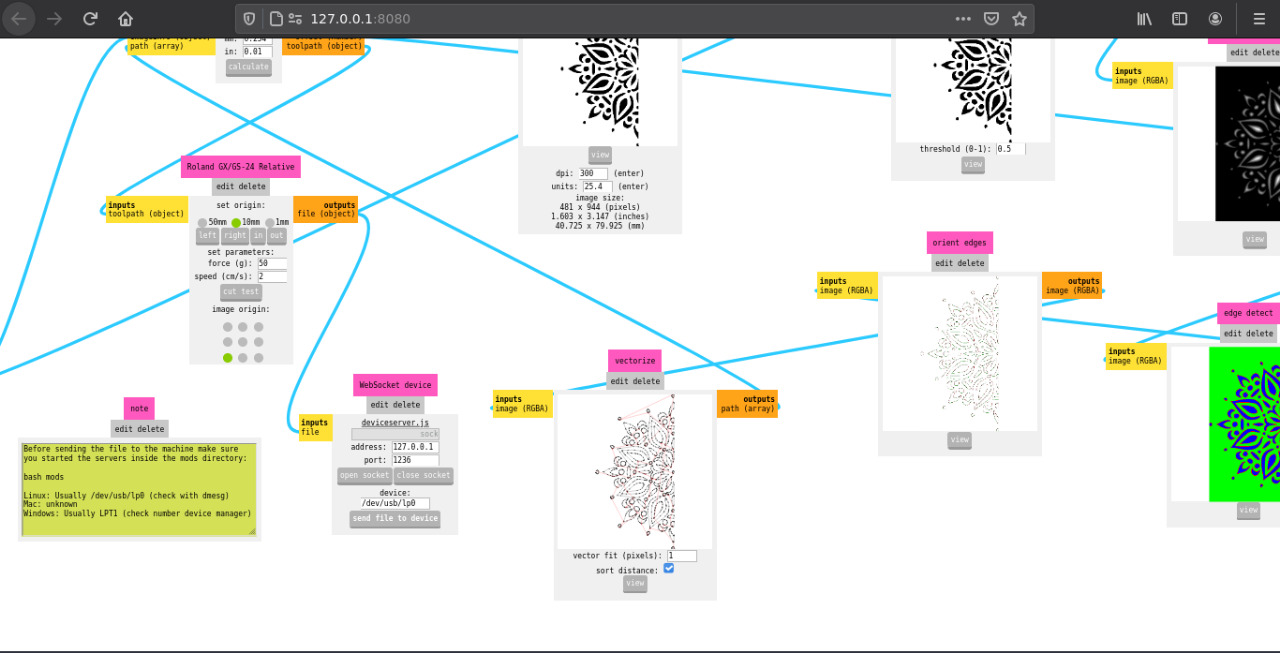
After the whole process the printing started and it was such a satisfying experience, after getting the print done
the most difficult was to peel out the details because it was more of an intricate design.
OUTCOME AND REFERENCES


Assignment 2- Laser cutter
