Final Project
My initial idea for the final project was to design a portable cloth dryer for my apartment. The idea about this cloth dryer came into my mind in response to a hardship that I am facing now. I used to be a day scholar for almost 21 years and since I am enrolled in Fab Academy, I had to live in a motel. The real problem arised when I tried to wash and dry my cloths. The cloths took a long time to get dried and the available conventional dryers are not at all cheap and portable. Since this is a problem that I am presently facing, I thought of making an energy efficient yet portable dryer for my personal use.The idea about this cloth dryer came into my mind in response to a hardship that I am facing now. I used to be a day scholar for almost 21 years and since I am enrolled in Fab Academy, I had to live in a motel. The real problem arised when I tried to wash and dry my cloths. The cloths took a long time to get dried and the available conventional dryers are not at all cheap and portable. Since this is a problem that I am presently facing, I thought of making an energy efficient yet portable dryer for my personal use.
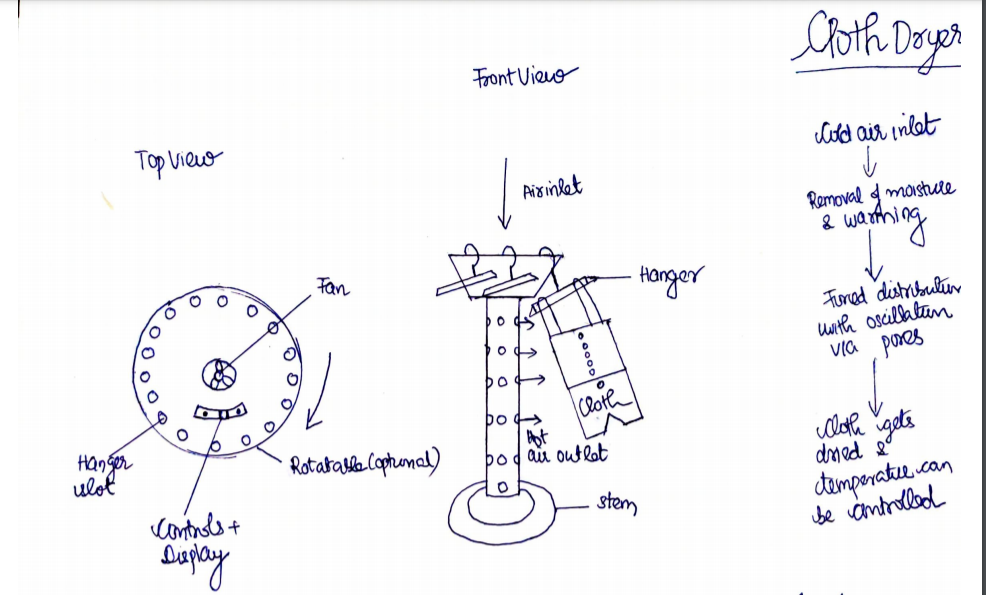
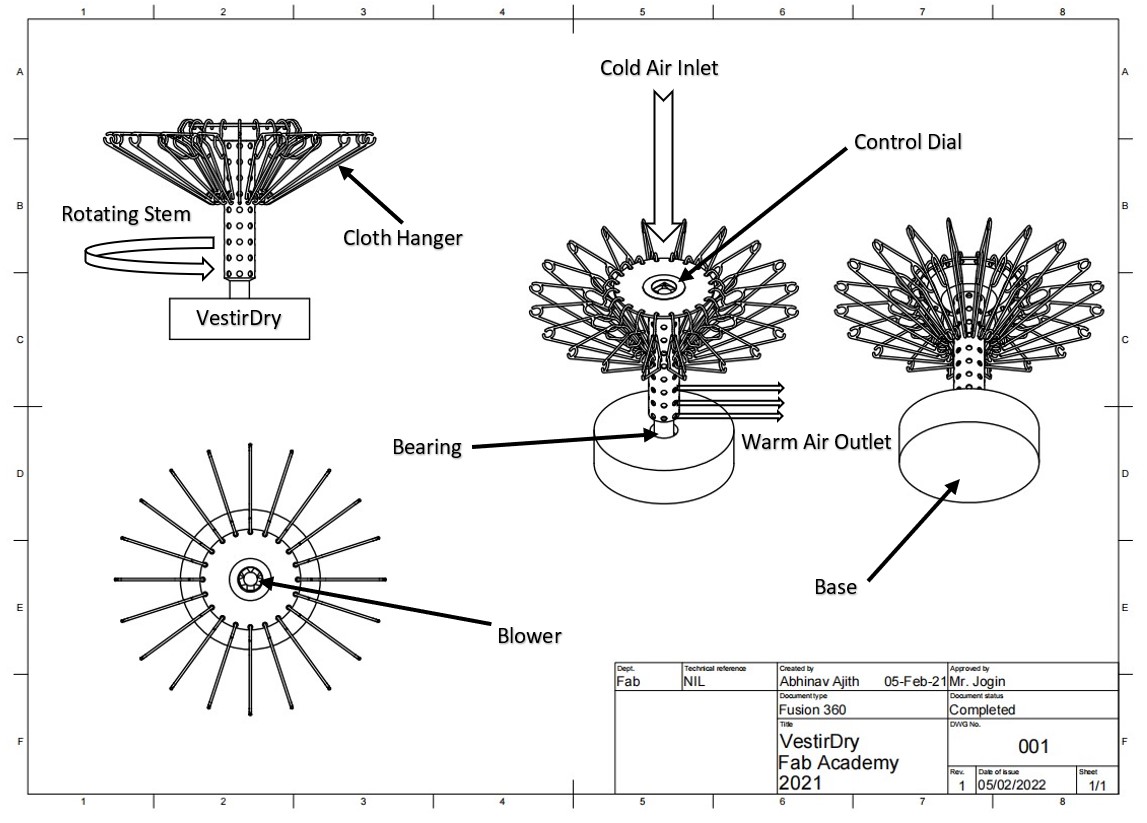
The technology behind the project is quite simple & it will definitely utilize all the tools available in a Fab Lab. The product comprises of mainly 3 parts: head, stem & a stand. The air will be sucked in from the top using a blower, where the humid air will be dehumidified using materials/hot air. If hot air is used a nichrome wire based heater (similar to a hair dryer) is attached along with the blower thereby dehumifiying the air. The hot air is then passed through various pores (which maybe provided with osciallation for uniform distribution) and is fed to the cloths that need to be dried. The whole system will only be similar to the size of a coffee table and can be used in small rooms. The temperature of the dryer can be set manually or remotely via a mobile device. The dryer will automatically turn off once the required temperature has been reached thereby preventing the risk of cloth damage.
Even though I deseperately needed this project, the lockdown in my state forced me to change the project. I am no longer staying in my apartment, and after a lot of introspection, I feel that it's time to change the project to a better or cooler one which can be completed in given time. In addition, getting materials for the stem (middle part) and for the given dimensions was difficult which all forced me to change the project to complete this academy.
The final project idea is to create a table top weather map for the state of Kerala, where it depict the rainfall warnings through visual indications. In layman terms, each district will have a LED alert system where it continuosly change it's color depending upon the data from disaster management authorities. This device will always be connected to the internet and the user can easily check whether they are in risk or not just by looking. You might be thinking, why I had named the project as "Maruti". Maruti is a Sanskrit word referring to Hanuman, son of Vayudeva, the Hindu Wind God Vayu. Since the weather is mainly controlled by the action of winds, I beleive this name is a perfect fit for the project.
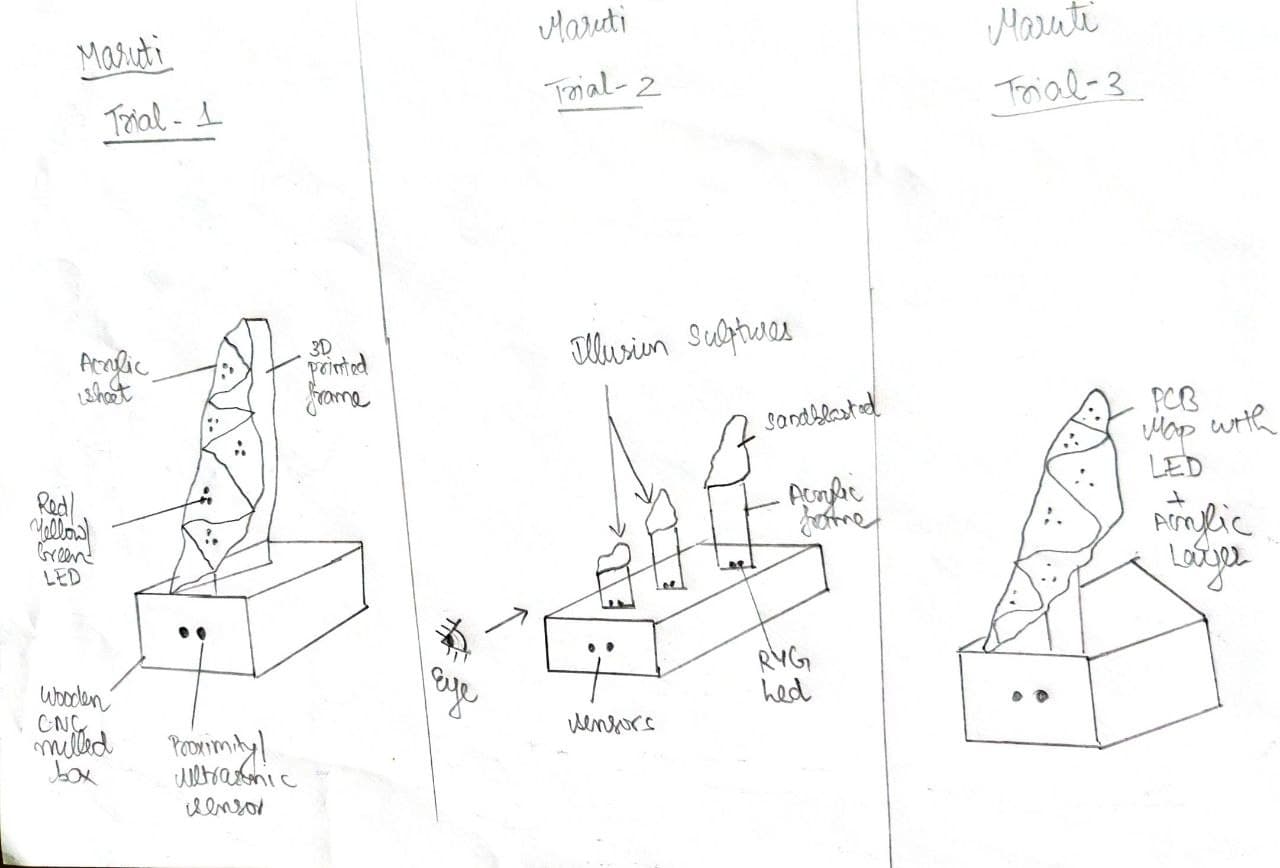
Based on the above figure, there are actually 3 different methods that I had found to approach this project. I will explain each of them below:
- Trail 1: Acrylic map with 3D printed housing
- Trial 2: Illusion Sculptures
- Trial 3: Custom desinged PCB Map
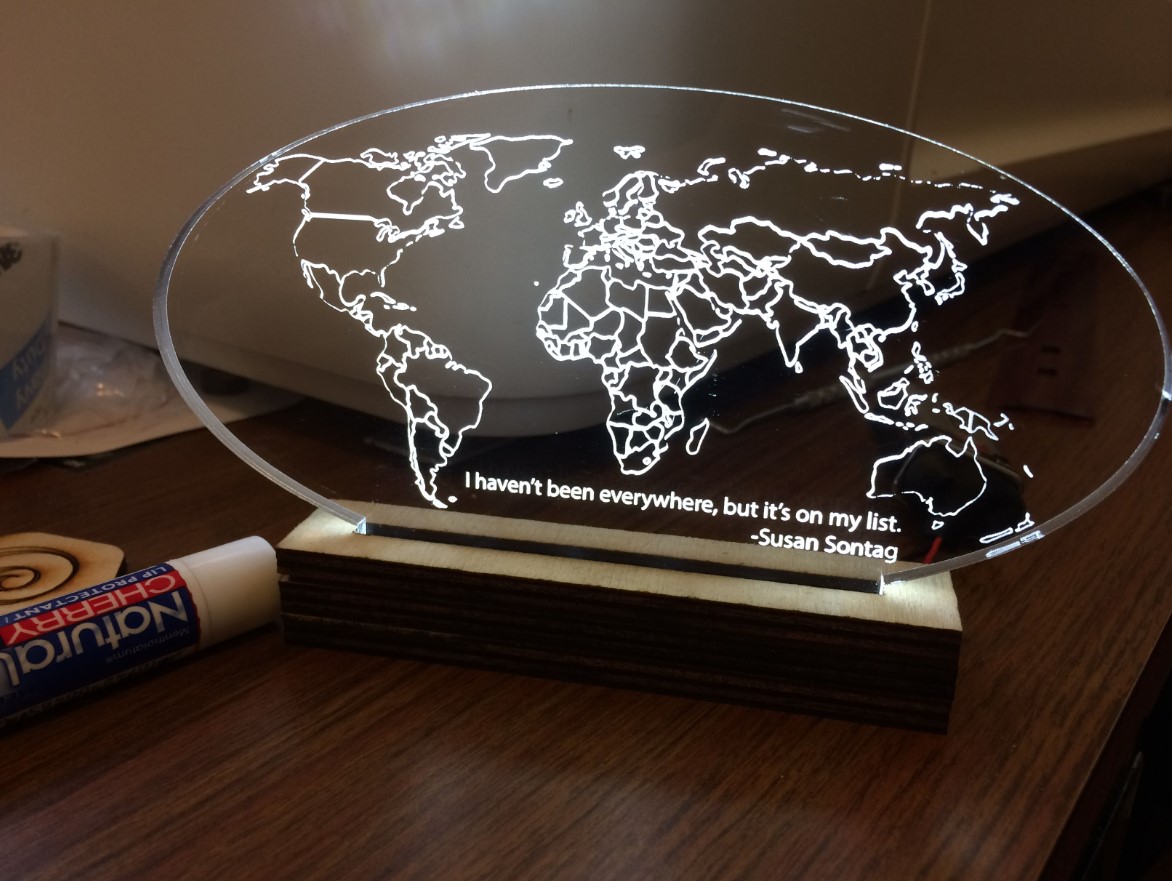
For this path, the base of the device remains the same while the portion with the map changes. I will be making the map using laser cutting process and the different districts will be seperated either using engraving process or by sandblasting. For this trail, a 3D printed case similar to the shape of acrylic sheet will enclose the LEDs while the acrylic map fits over them. The main disadvantage of this method, is that the beauty with transparent maps are lost and the light distribution may not be uniform. There is also another possibility that I will use acrylic frame to hold the LEDs
This path will be quite interesting if I can make this within the deadline. Here I will be making each district as seperate entities with individual LED lighting from the bottom. The cool thing about this design is that the map will only be visible if it's view from right spot (ie front). This technology is commonly used for art showcases but I found it quite interesting. Instead of hanging the map, I will support it from the bottom as individual districts. The below mentioned video gives an example about this cool technique
In this way, there will a custom milled PCB with LEDs in it without any extra wires connecting them to the microcontroller. The PCB will have the shape of the map and an acrylic sheet will be placed above it for aestheic purposes. Fortunately, I recently found a project called Dynamic Covid Tracking Map and this method I think will be much easier to make within the timespan.

The following are the process that I am planning to use for the final project:
| |
|
|---|---|
| 3D Printing | To make the base |
| PCB Designing & Milling | To fabricate the main control board |
| CNC Milling | To make the map |
| Vinyl Cutting | To decorate the rear side of the map |
| Soldering | To attach the electronic components to the board |