Laser cutting Group assignment
This section describes the process to obtain the Kerf of the machine. There are many types of tests and patterns to obtain it in this case I will make a fairly simple one that consists of cutting several pieces of the same size and then measure the difference between the internal and external cut area.
The test pattern I am using is as follows.
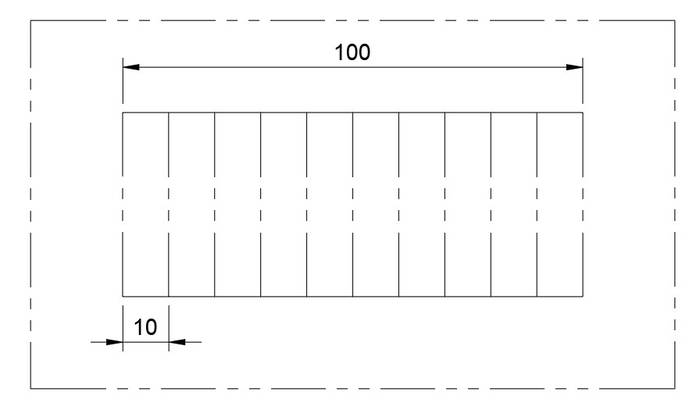
The test parameters are: Speed: 25% Power: 75% and Frequency: 10 hz
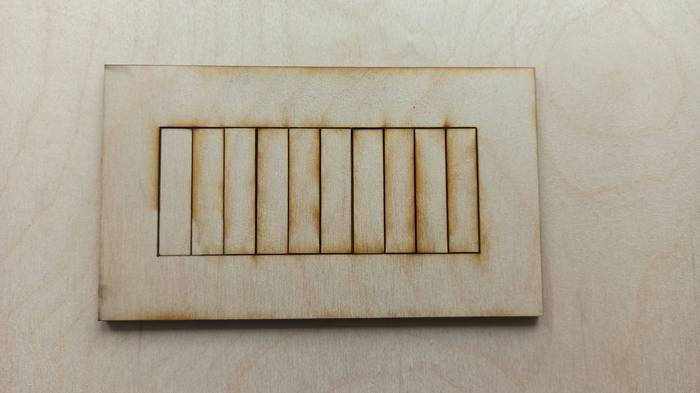
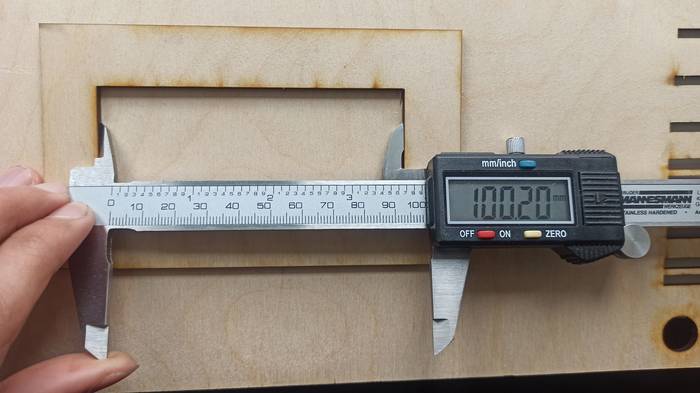
The next is to measure the outside ouf the cut, in this case 100.20mm
And also measure the length of the parts together, in this case 97.85mm.
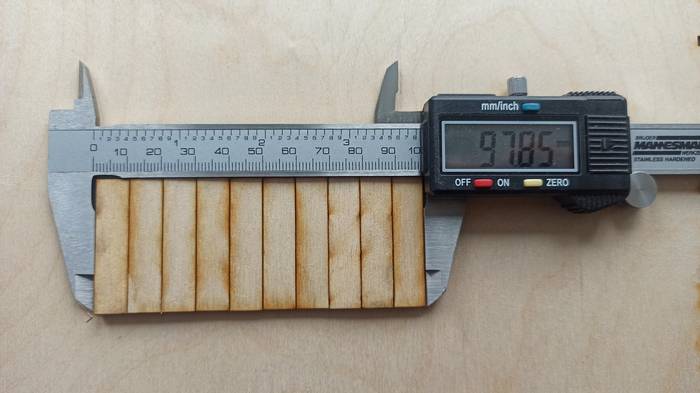
Doing a little math we can get the Kerf with this formula: (external_cut - internal_cut)/number_of_cuts - (100.20- 97.85)/11 = 0.2136
In summary the kerf for this machine, with these parameters and this material is 0.2136mm
Kerf measurement
Kerf is the width of material removed by a cutting process, in this case by the laser. In order to get tight joints, we should take in account this measurement as an offset from the the surfaces to joint in the design.
Since the kerf depends no only on the cutter we use, but on the material properties and the cutting parameters, the best moment to measure it is once we have the official cutting parameters for our project.
In order to measure the kerf, one of the technics consists on cutting some small pieces of the material we are going to use > measure them > compare them with the design measurements:
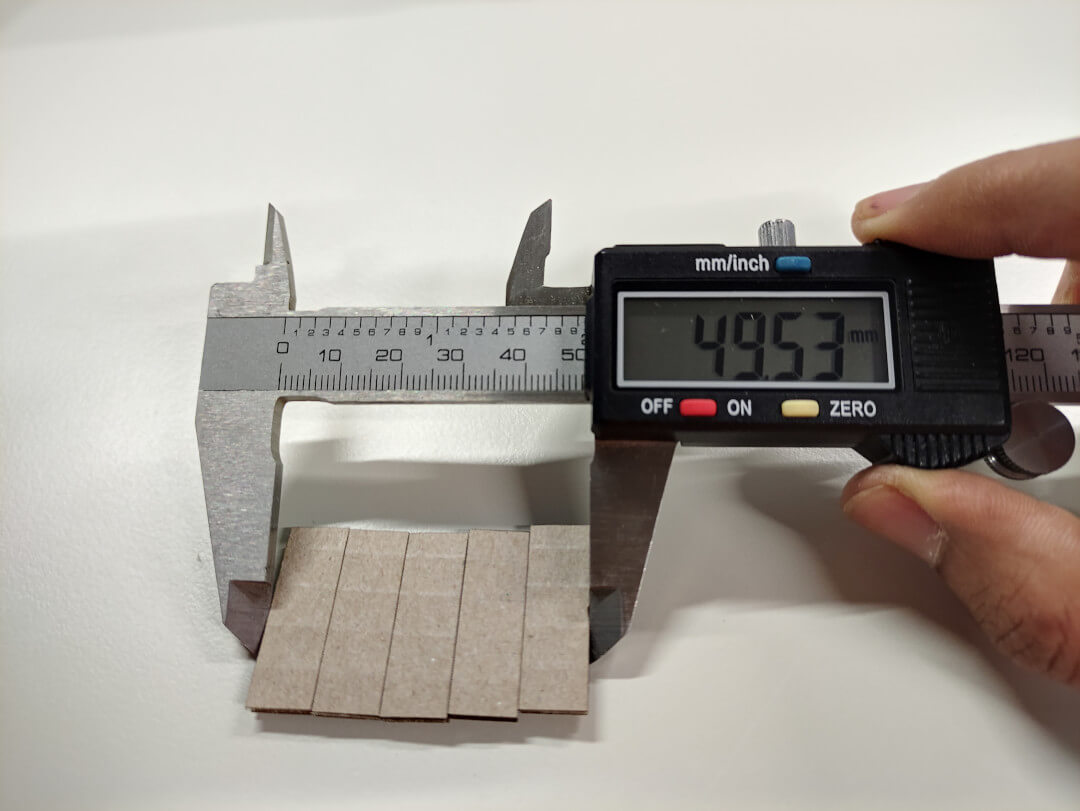
- I cut 5 pieces of 10mm wide.
- Then some calculation:
- Amount of pieces: N = 5
- Designed total length: DTL = 5 x 10mm = 50mm
- Real total length: RTL = 49.53mm
- Kerf = (DTL - RTL) / N = (50mm - 49.53mm) / 5 = 0.47mm / 5 ≈ 0.1mm
Parameters
These are the processes that we can make in a laser cutter:
- Cutting.
- Engraving.
- Marking.There are some parameters we need to setup before printing, all of the depend on what process we are going to make, and on the material we use.
- Speed, given in percentage, describes the movement of the laser head. Fast speeds lead to short exposure times, slow speeds lead to long exposure times:
- * High speeds for engraving.
* Low speeds for cutting.- Power, given in percentage, describes the output power of the laser. 100% is maximum power:
- * High power for cutting.
* Low power for engraving.- Frequency specifies the number of laser pulses per second and is used only for cutting:
- * High frequency = high heat.
* Low frequency = low heat.On Laser cutter
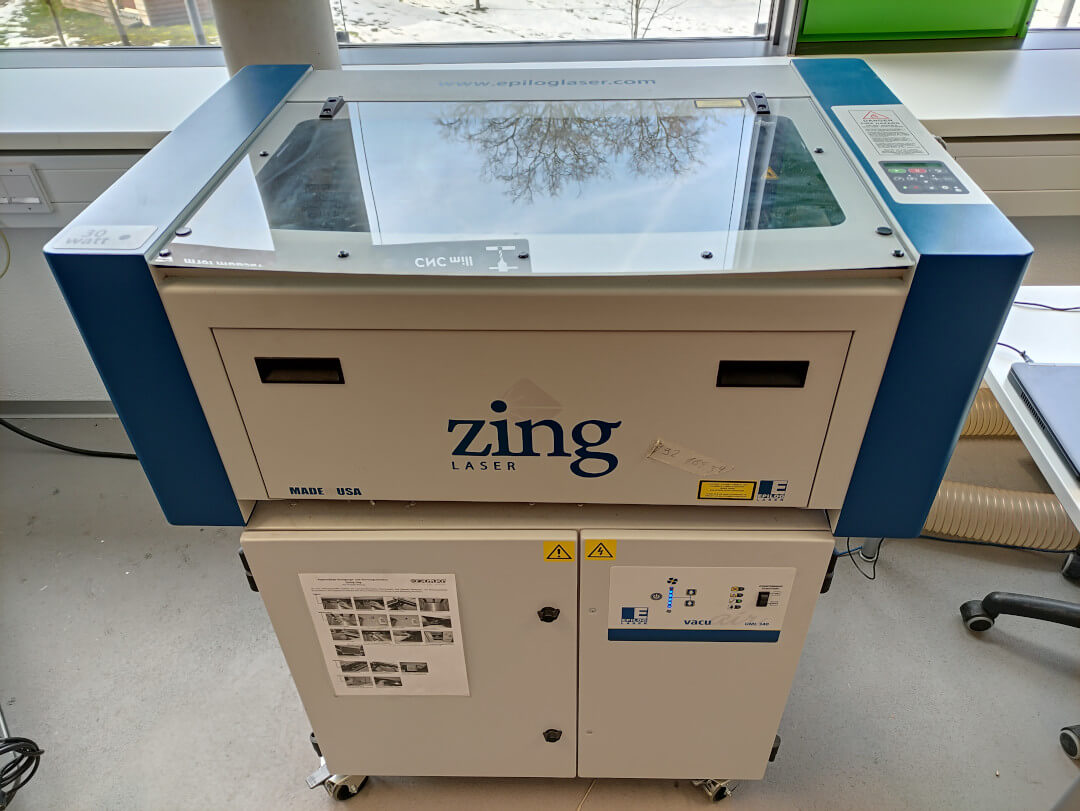
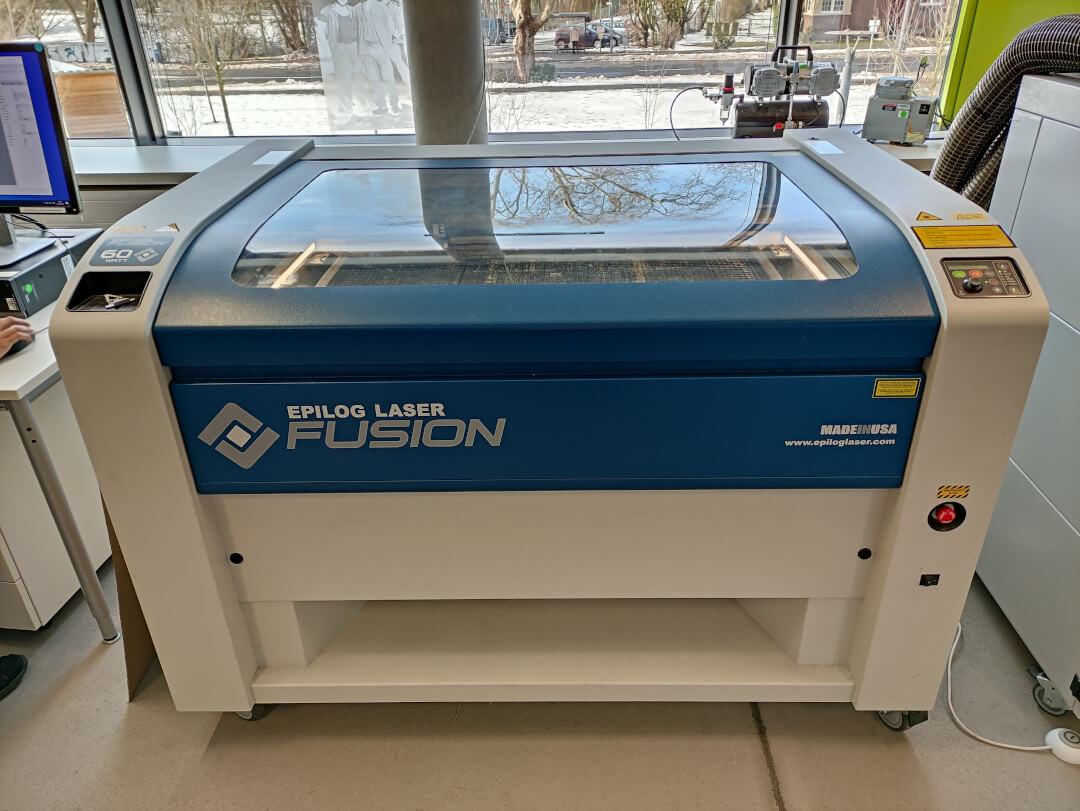
It’s worth to mention that there are two CO2 laser cutters at the FabLab:
-
Epilog Zing 30 Watts, which we call “The small one”:
-
Epilog Fusion 60 Watts, which we call “The big one”:
-
Turn on the laser cutter and wait for it to initialize.
- Put the material to cut on the bed and make sure it’s flat.
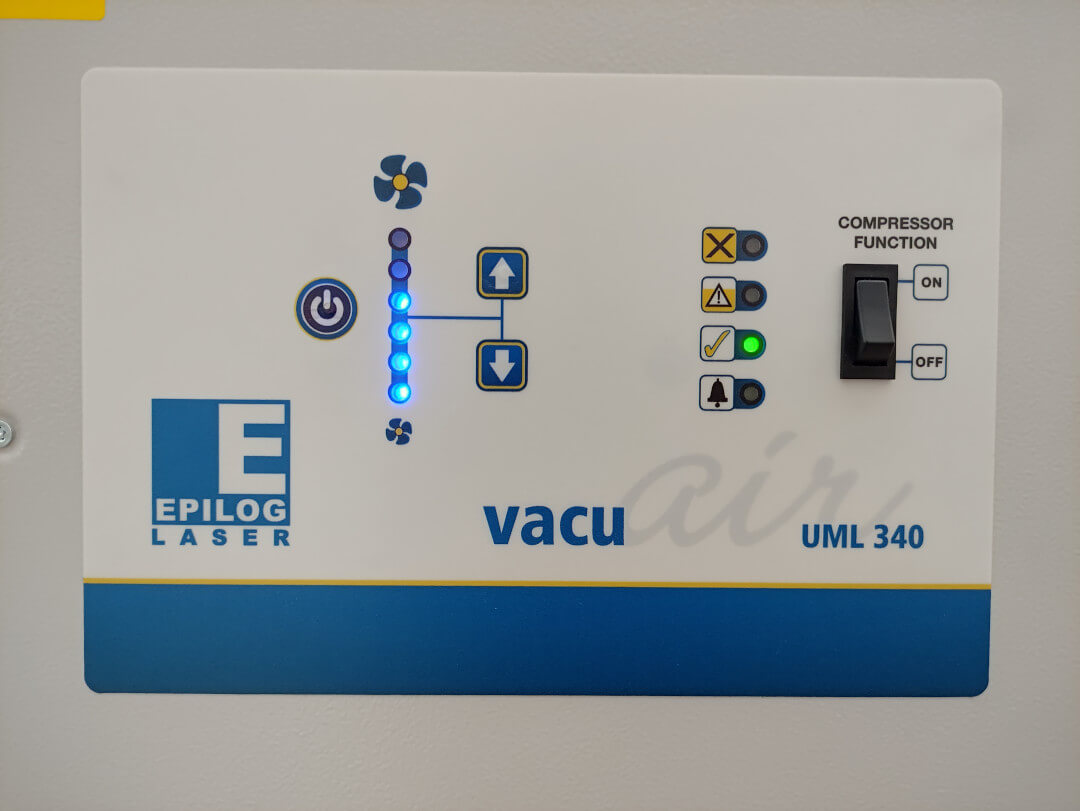
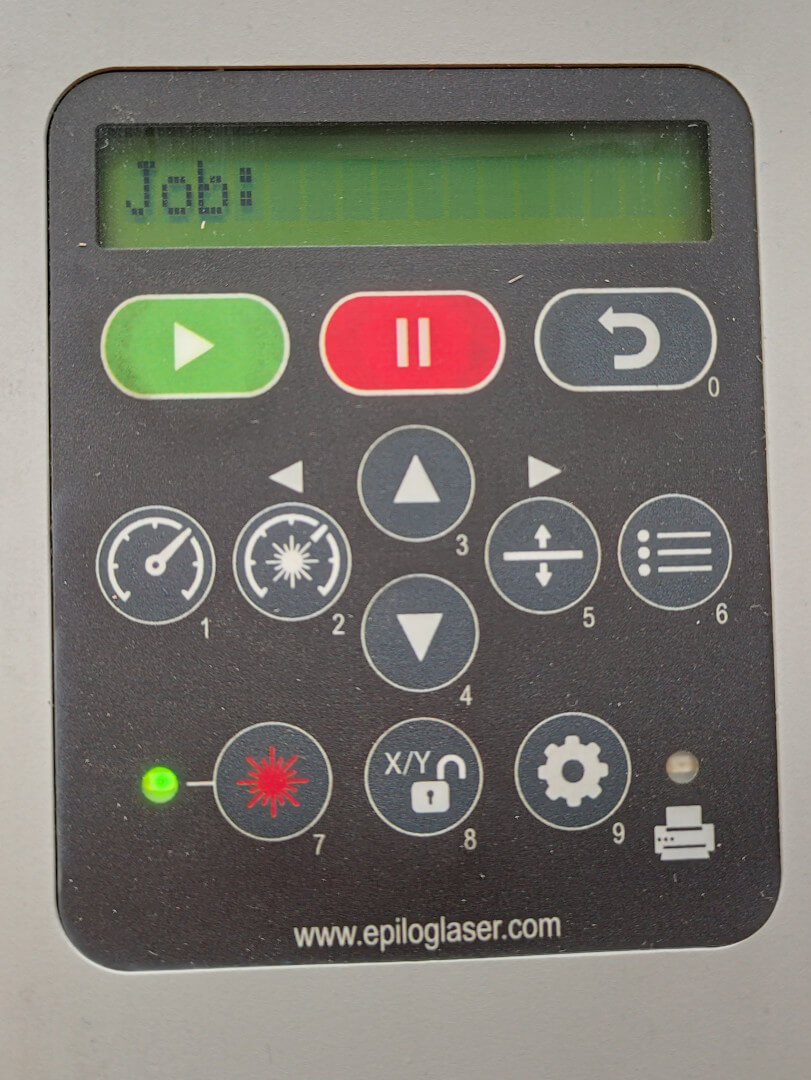
User control interface:
-
Turn on the laser bean:
- Press Button 7.
-
Change home position:
- Press Button 8.
- Move the laser head with your hand.
- Press PLAY.
-
Focus the laser:
- Press Button 5.
- Move the bed using Buttons 3 and 4.
- Use the focus tool, when should barely touch the sheet.
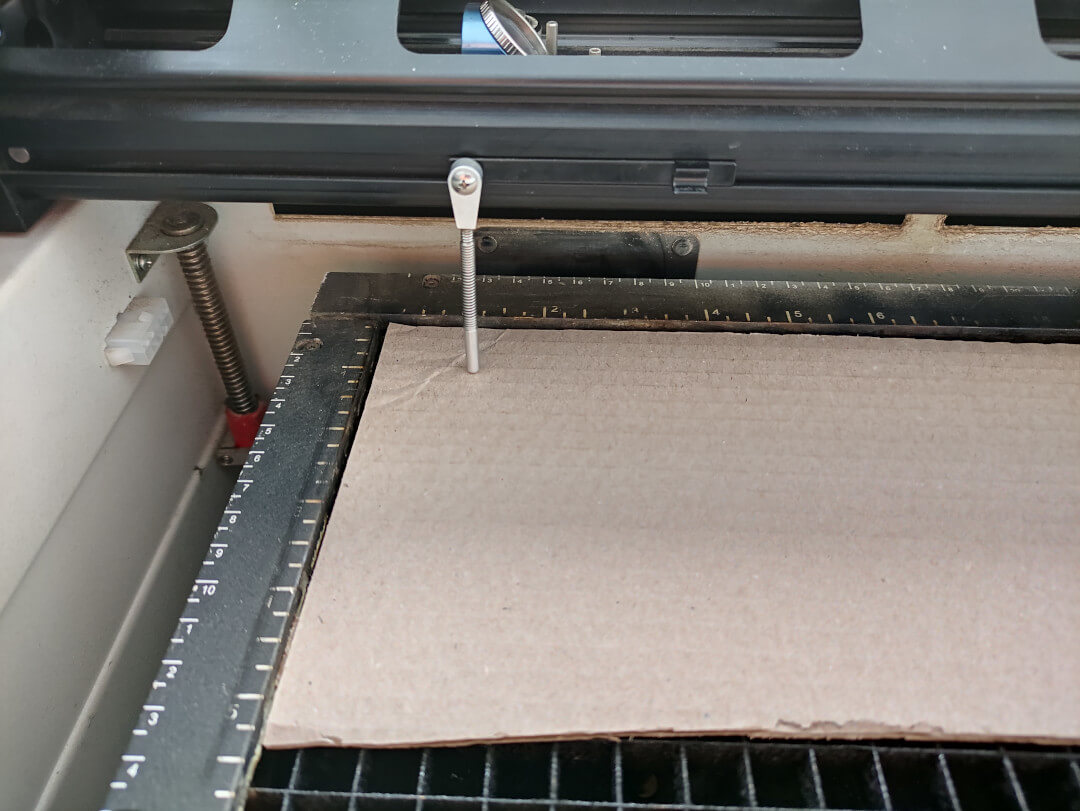
Note: The position of the bed doesn’t need to be kept. When done, lift the tool back to its place.
-
Turn on the vacuum cleaner: