INDIVIDUAL CONTRIBUTION TASKS IN OUR GROUP ASSIGNMENT:
STRUCTURE, DESIGN, VISUAL VIEW OF CONTROL PANEL
- As in the first week of Fab Academy I learned HTML and CSS to build my website, I didn't spend a lot of time learning new ways to build web interface.
- The structure of the control panel is that users define four values - direction, turns, speed and angle.
- To accept user entered values is needed click on the buttons.
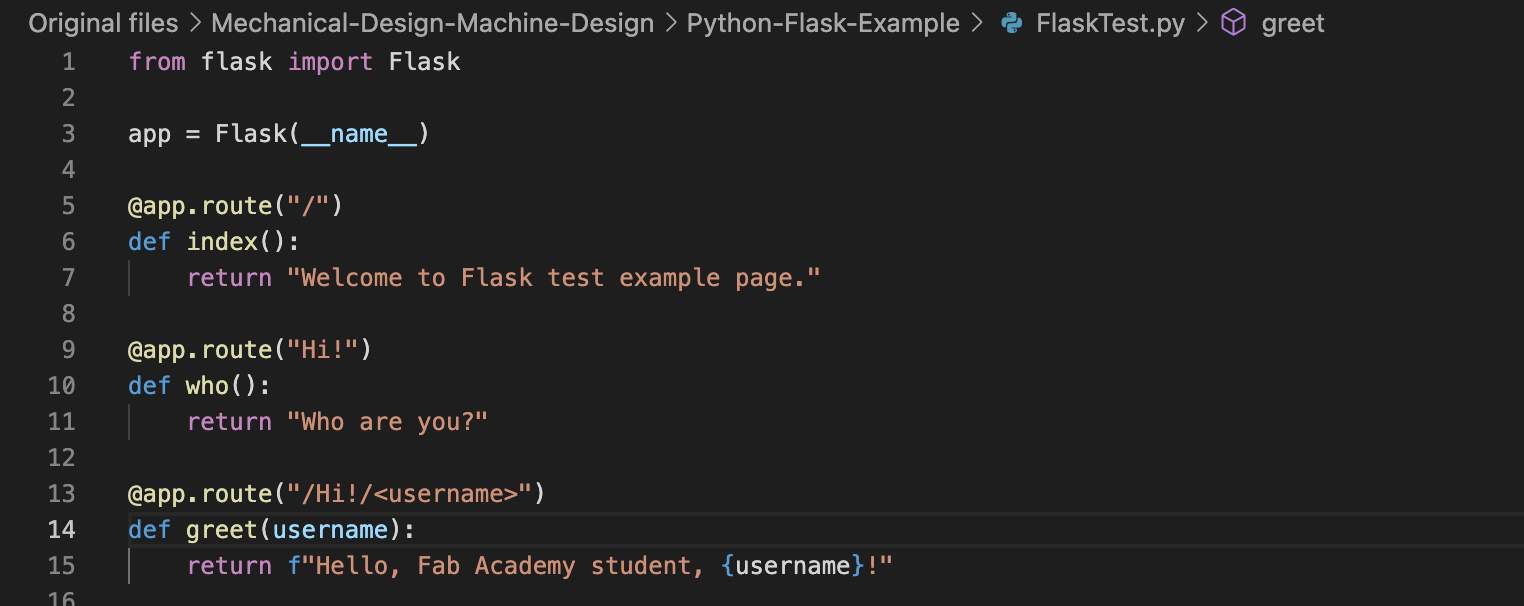
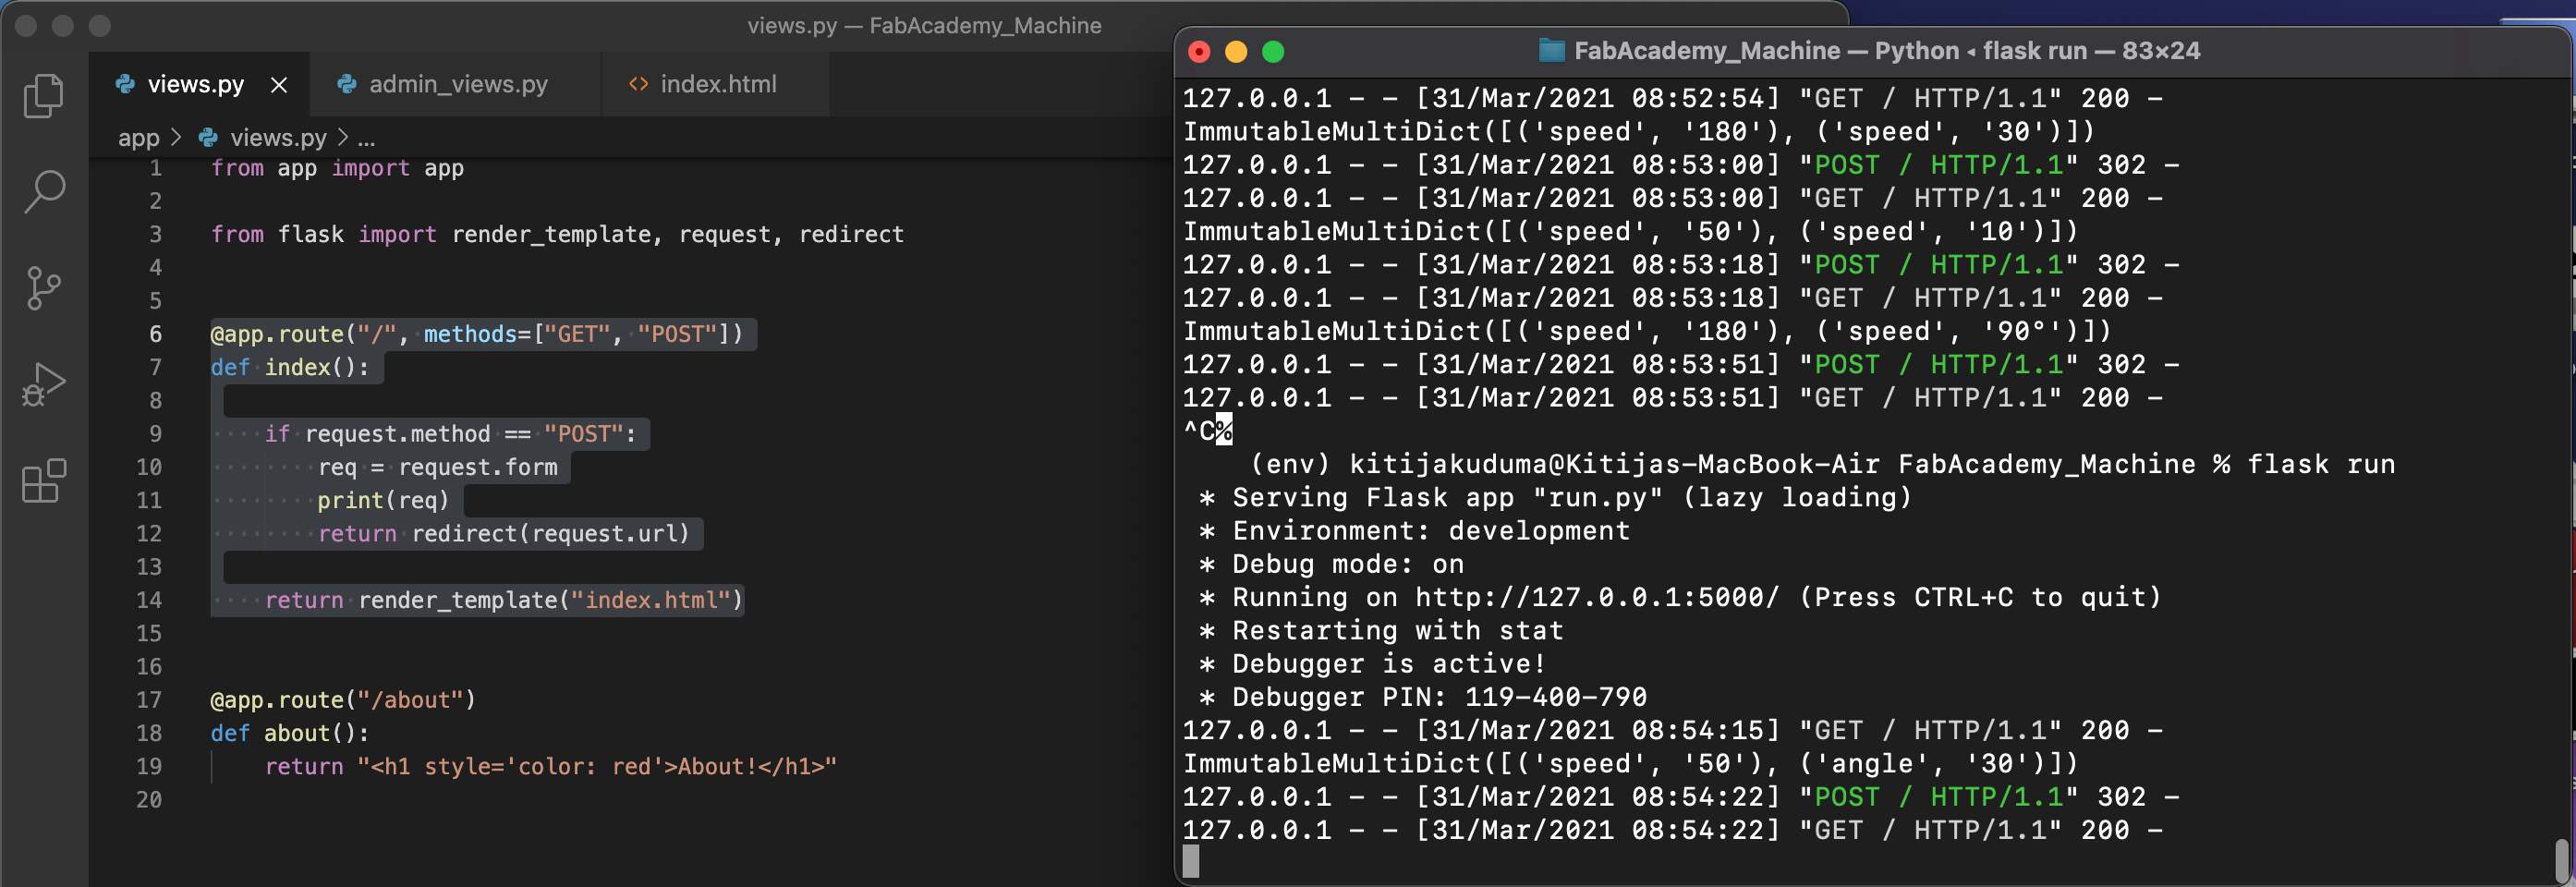
CREATE PYTHON SERVER WITH FLASK
To understand what actually is Flask in Python and how it use in my case I watched more than 7 Youtube video tutorial by Julian Nash in these topics:
.. but how I did it?
pip list. If a
new version is available you will receive notice about that. For upgrade pip - pip3 install --upgrade pippip3 install flaskcd command I go to the folder when I want to create and storage this project and create a new file.I learned a new command from Terminal to create a new folder. Use the command
touch [filename].pypython3 -m venv [foldername],
then source env/bin/activate.
In tutorials what I watched (see above) it was done - I also did that without deep analyze why, but later my Fab Academy
mentor Kris explained that in this case it isn't necessary, virtual environment is useful when at the same time you work with
different Python version and packages and in some case it could be in conflict, but if you don't want uninstall packages, then
virtual environment is way how to avoid it. flask run command, but there is a big chance that you will be notified something like
WARNING: This is a development server. Do not use it in a production deployment. This means that in your interface will NOT be visible
debug information, just a message "Internal Server Error" and not always it helps developer to understand where the problem is.
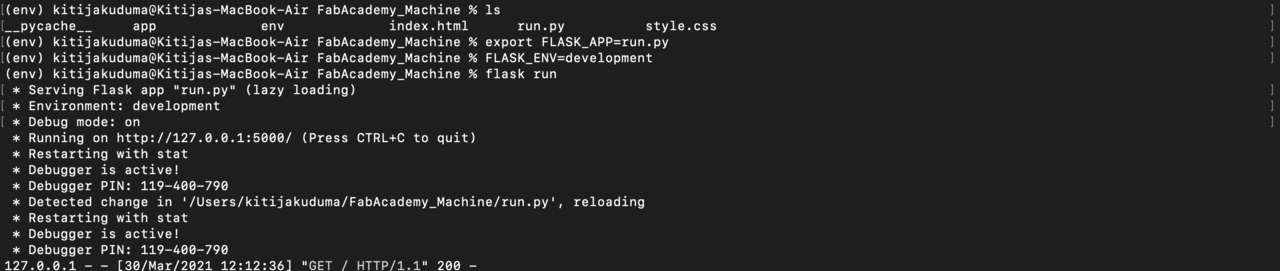
To solve it try this command export FLASK_APP=[filename].py, then export FLASK_ENV=development
and again flask run.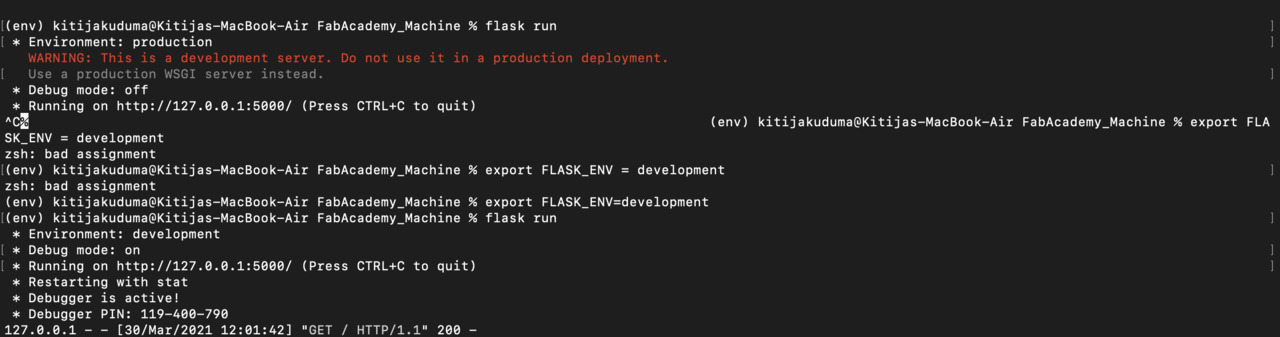
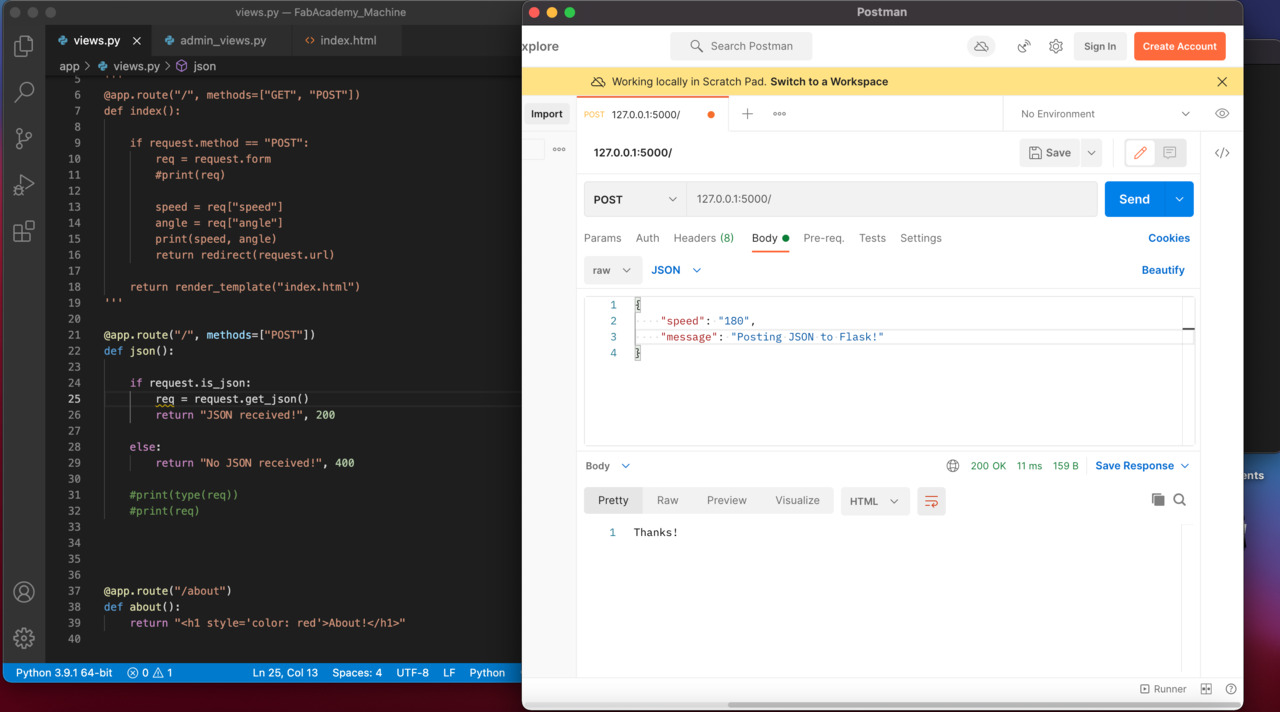
PYTHON SERVER & WEB INTERFACE COMMUNICATION | JQUERY AJAX
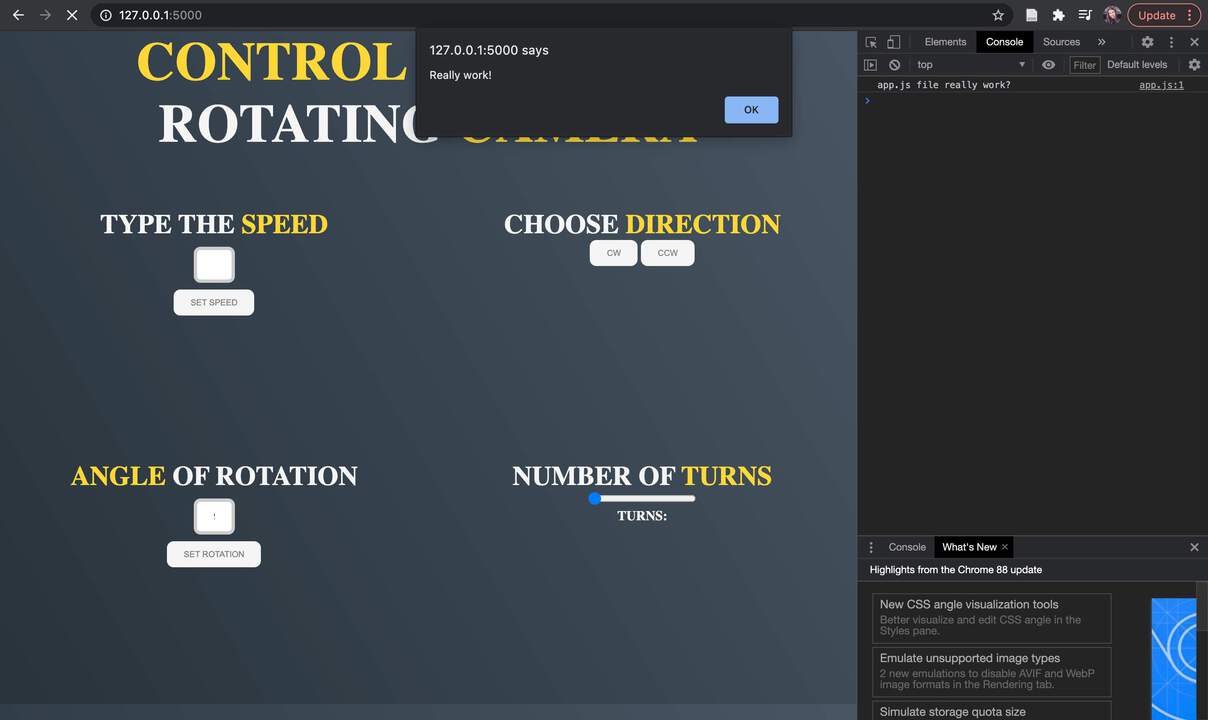
- At this part when I start to build data send and receive part I understood that some elements of my control panel design is needed change
            $("#btnSet").click(function (e) {
                var speedValue = $("#speed").val();
                var angleValue = $("#angle").val();
                var turnsValue = $("#turns").val();
                var directionValue = $("#mydirection :selected").val();
                alert(`Speed : ${speedValue} Angle : ${angleValue} Turns : ${turnsValue} Direction : ${directionValue}`);
                $.ajax({
                    url:"/",
                    type: "POST",
                    data:{"Speed": speedValue,
                    "Angle": angleValue,
                    "Turns": turnsValue,
                    "Direction": directionValue
                    },
                    success: function(response){
                        console.log(response);
                    },
                    error: function (error){
                        console.log(e)
                    }
                });
                e.preventDefault();
            })
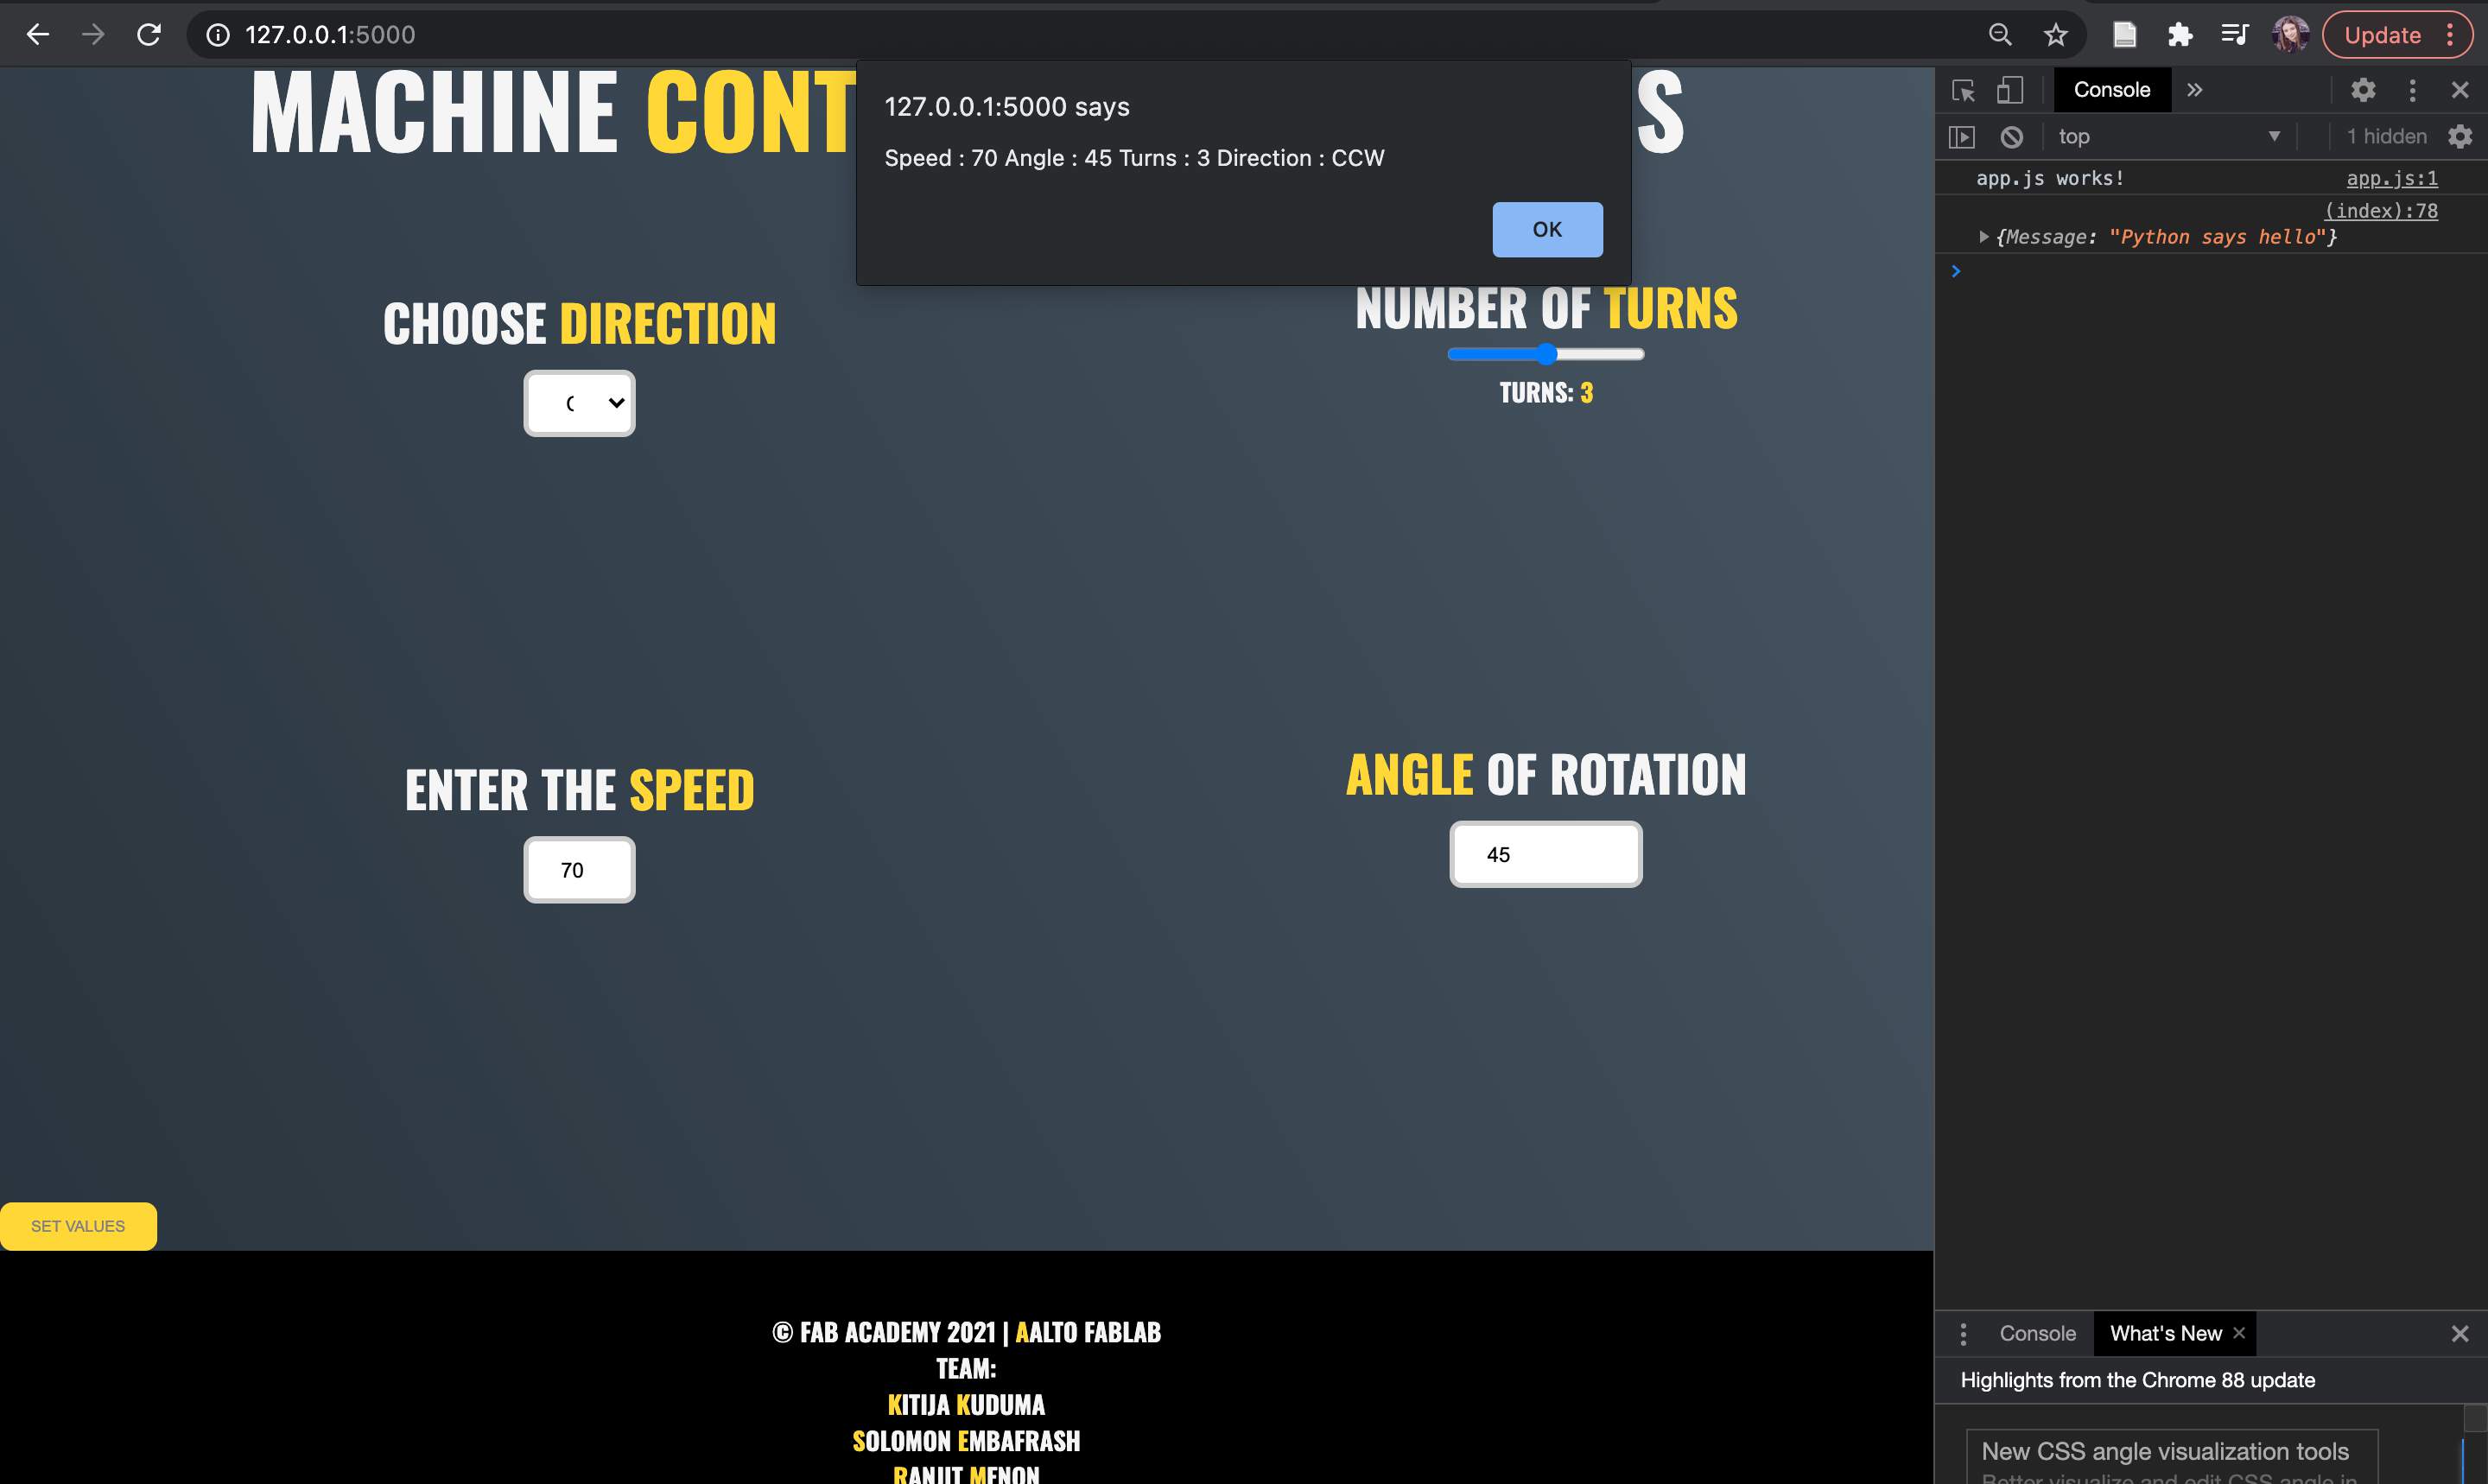
methods=["GET", "POST"]❗ This part really fascinated me - I put values in web interface and in local server I can see that values are received!
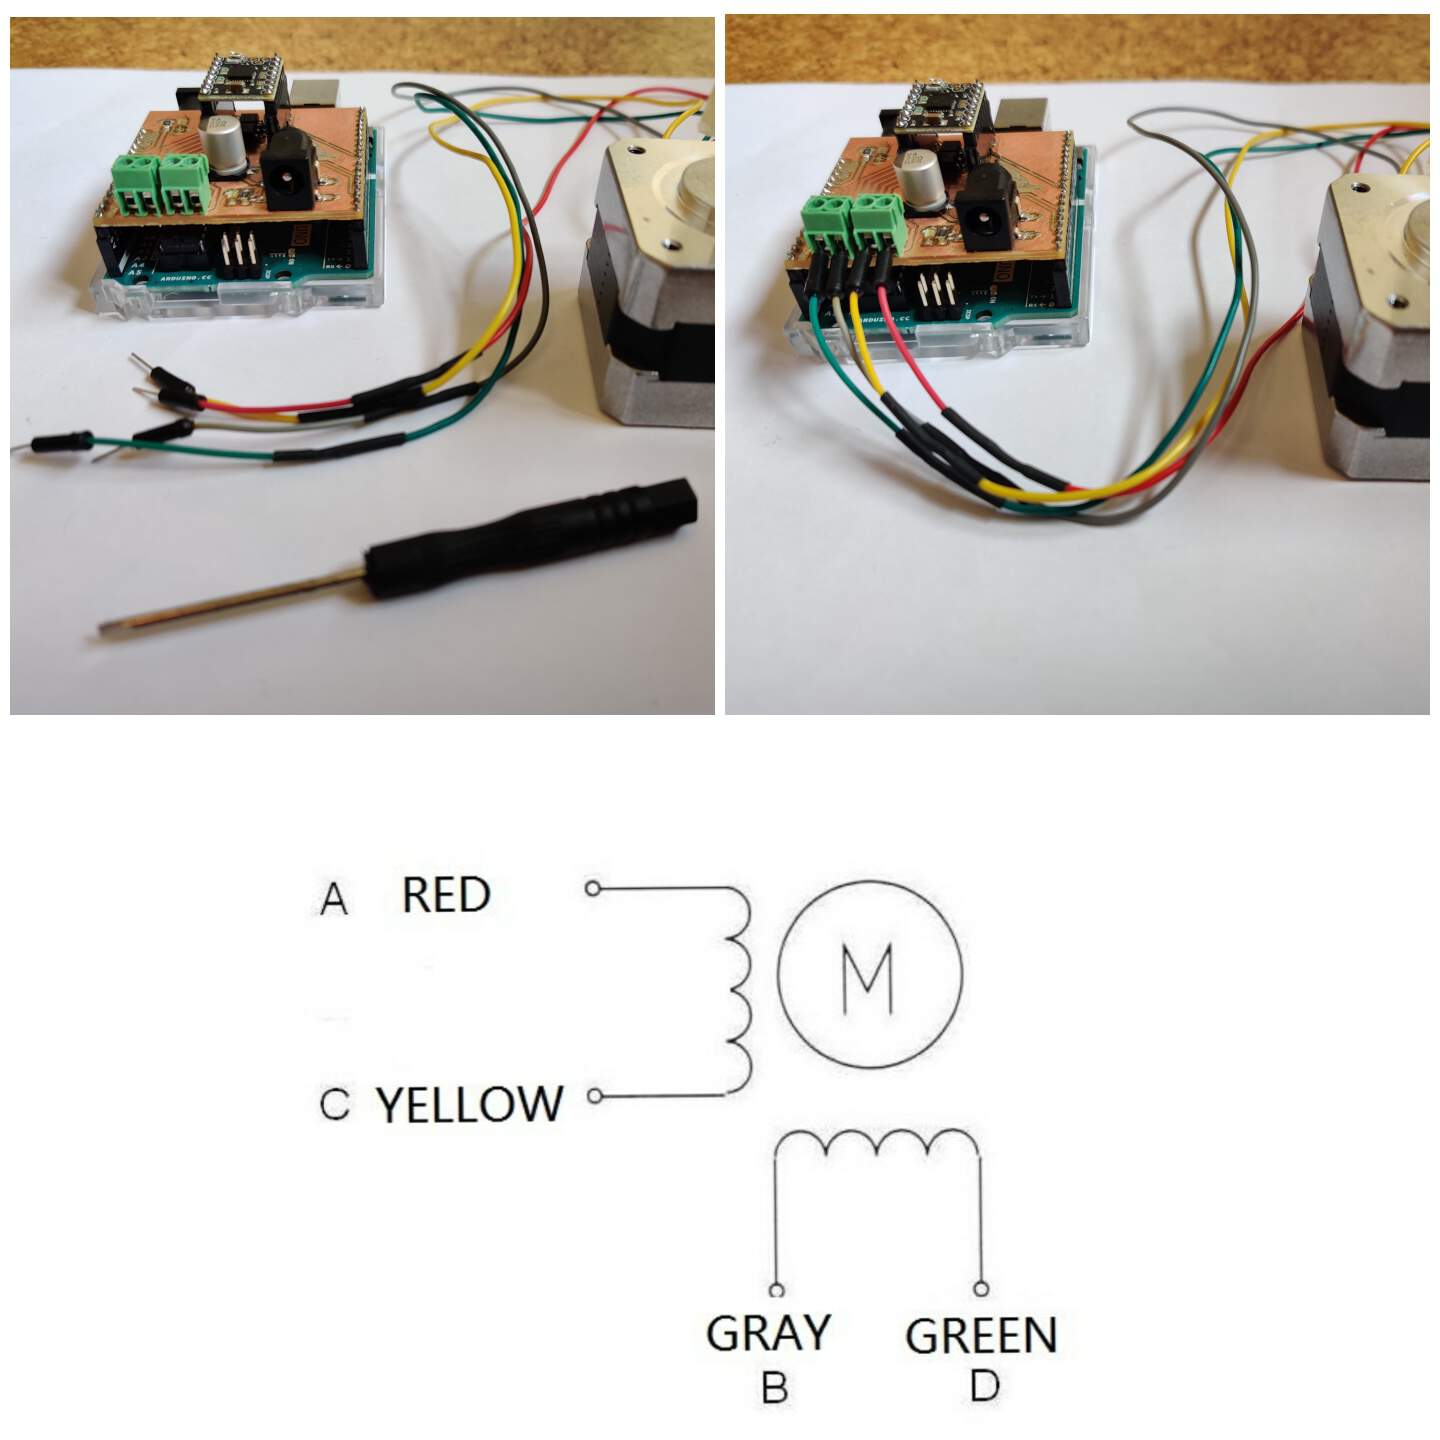
CONNECT ARDUINO, STEPPER SHIELD, MOTOR & WORK WITH GRBL
- As my teammates had done the electronics part I can start work with how to control the motor.
- I learned something new what is related with datasheet - now I know how to find and to know which wires and where are needed to connect together. For my tests I used a 12V stepper motor and datasheet I found on digikey.com, but the same way works with the 5V stepper motor what our group used for the machine - just find the necessary datasheet.
- Then I downloaded the grbl library from GitHub by gnea as a .ZIP folder, then extracted it and in Arduino added it like a library. Then I tried open grblUpload file in Arduino and when I clicked on the Upload button, I received the error message. First of all I checked which Board type I chose, then Serial Port number - all is right! Then I spent a time to understand where is the problem. The problem was that when I extract the folder it has the "grbl" folder which has the subfolder "grbl" and the reason for the error message is that Arduino can't find this library path. What I need to do - just export files from subfolder to master folder. Easy explained if you know that, yeah?
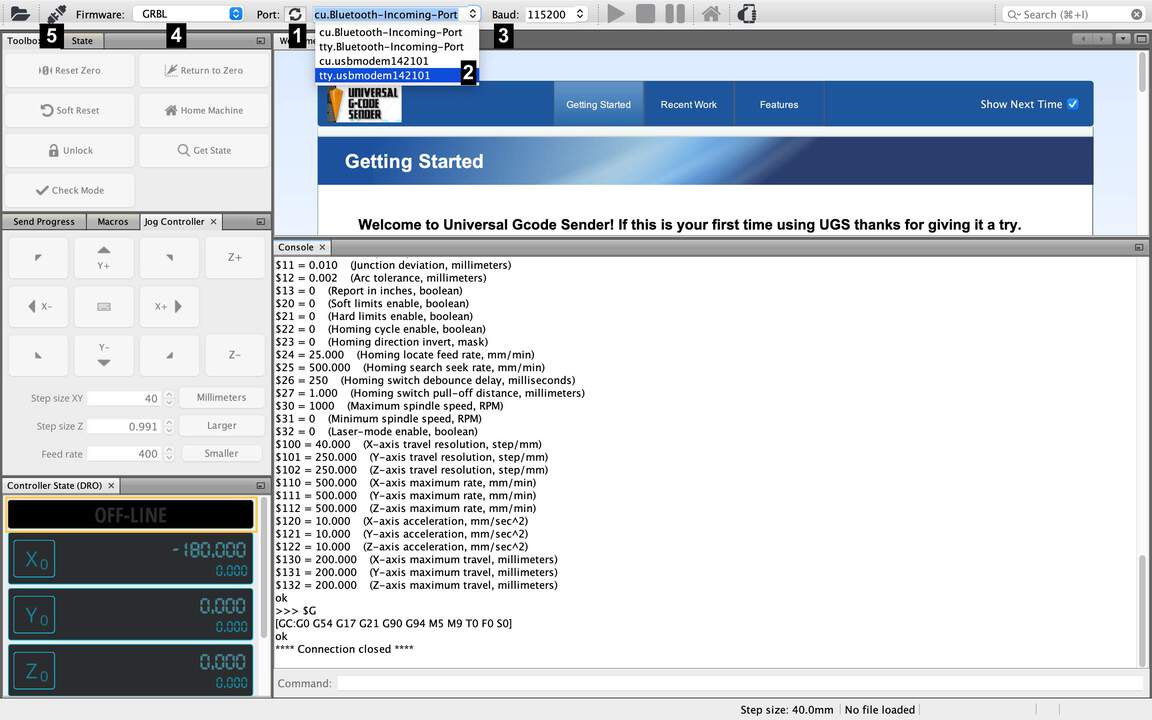
- Then I installed Universal Gcode Platform software and tried to connect, but it doesn't work. First of all I checked which port I use - all is right! Reason why it cannot connect is that at the same time I had opened the Arduino Serial Monitor. Lesson of this - if you want to work with software, close the Serial Monitor - now it sounds logical that it isn't possible at the same time to use one port to two different platforms to send G-code. Again - easy explained if you know that, yeah?
- To activate G-code in python I added some code lines which I learned from the same GitHub repository by gnea:
            # Open grbl serial port
            s  = serial.Serial('/dev/tty.usbmodem142101',115200)
            # Wake up grbl
            s.write("\r\n\r\n".encode())
            time.sleep(2)   # Wait for grbl to initialize
            s.flushInput()  # Flush startup text in serial input
"$J=G21G91X"
and know that I plan the structure of the if..else statement.PROGRAMMING LOGIC OF MOTOR
- Structure of my programming logic starts with that program checking which direction the user chose in the web interface and after that - turns which user chose.
@app.route("/", methods=["GET", "POST"])
def index():
gcode = "$J=G21G91X"
if request.method == "POST":
print(request.form)
directionReceived = request.form.get("Direction")
if directionReceived == "CCW" :
gcode = gcode + "-"
turning = request.form.get("Turns")
xValue = int(turning) * 40
gcode = gcode + str(xValue)
gcode = gcode + "F400\n"
print("gcode:" + gcode)
s.write(gcode.encode())
Message = {"Message":"Python says hello"}
return Message
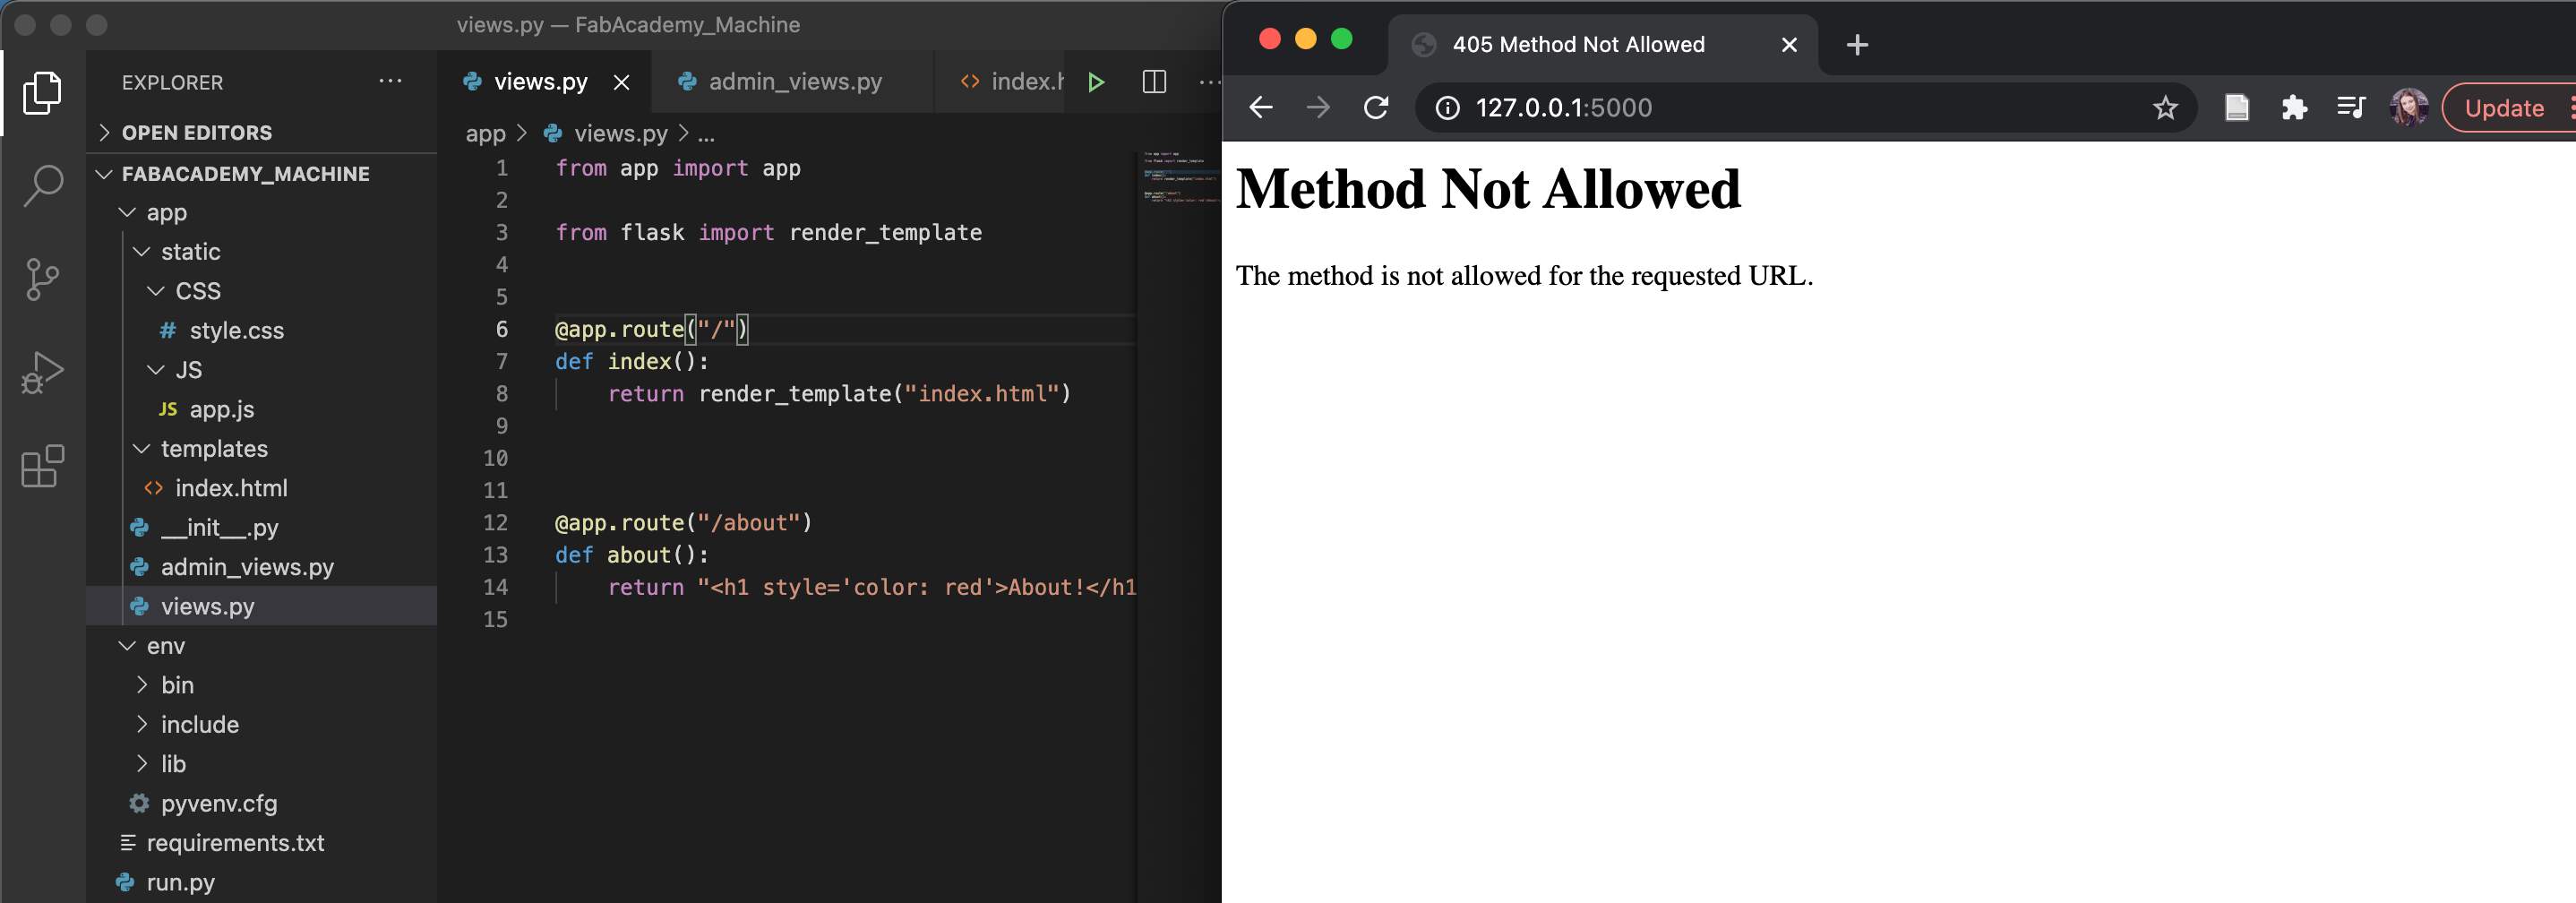
return render_template("index.html")
FEATURE: PROGRAMMING LOGIC OF CAPTURING IMAGE FROM CAMERA
- Thinking of future development opportunities for this project our team thought that it would be useful if our platform not just can rotate, but have a camera which can automatically capture image from camera in best solution - within a user-defined time interval, but for mminimum - on click.
- Before programming code it is necessary to install OpenCV with command
pip3 install opencv python - Then I following by Youtube video tutorial by Coding Shiksha, but for me not all things didn't work immediately.
- First thing - in video tutorial after OpenCV installation it is enough to write import cv2, but in my case I received error message that cv2 can't be recognize. I solved it with command
from cv2 import cv2 - The second thing - in video tutorial after add all command lines and start project from Terminal - it works, in my case - not, but then I remembered then for running file from Terminal
I always need to write
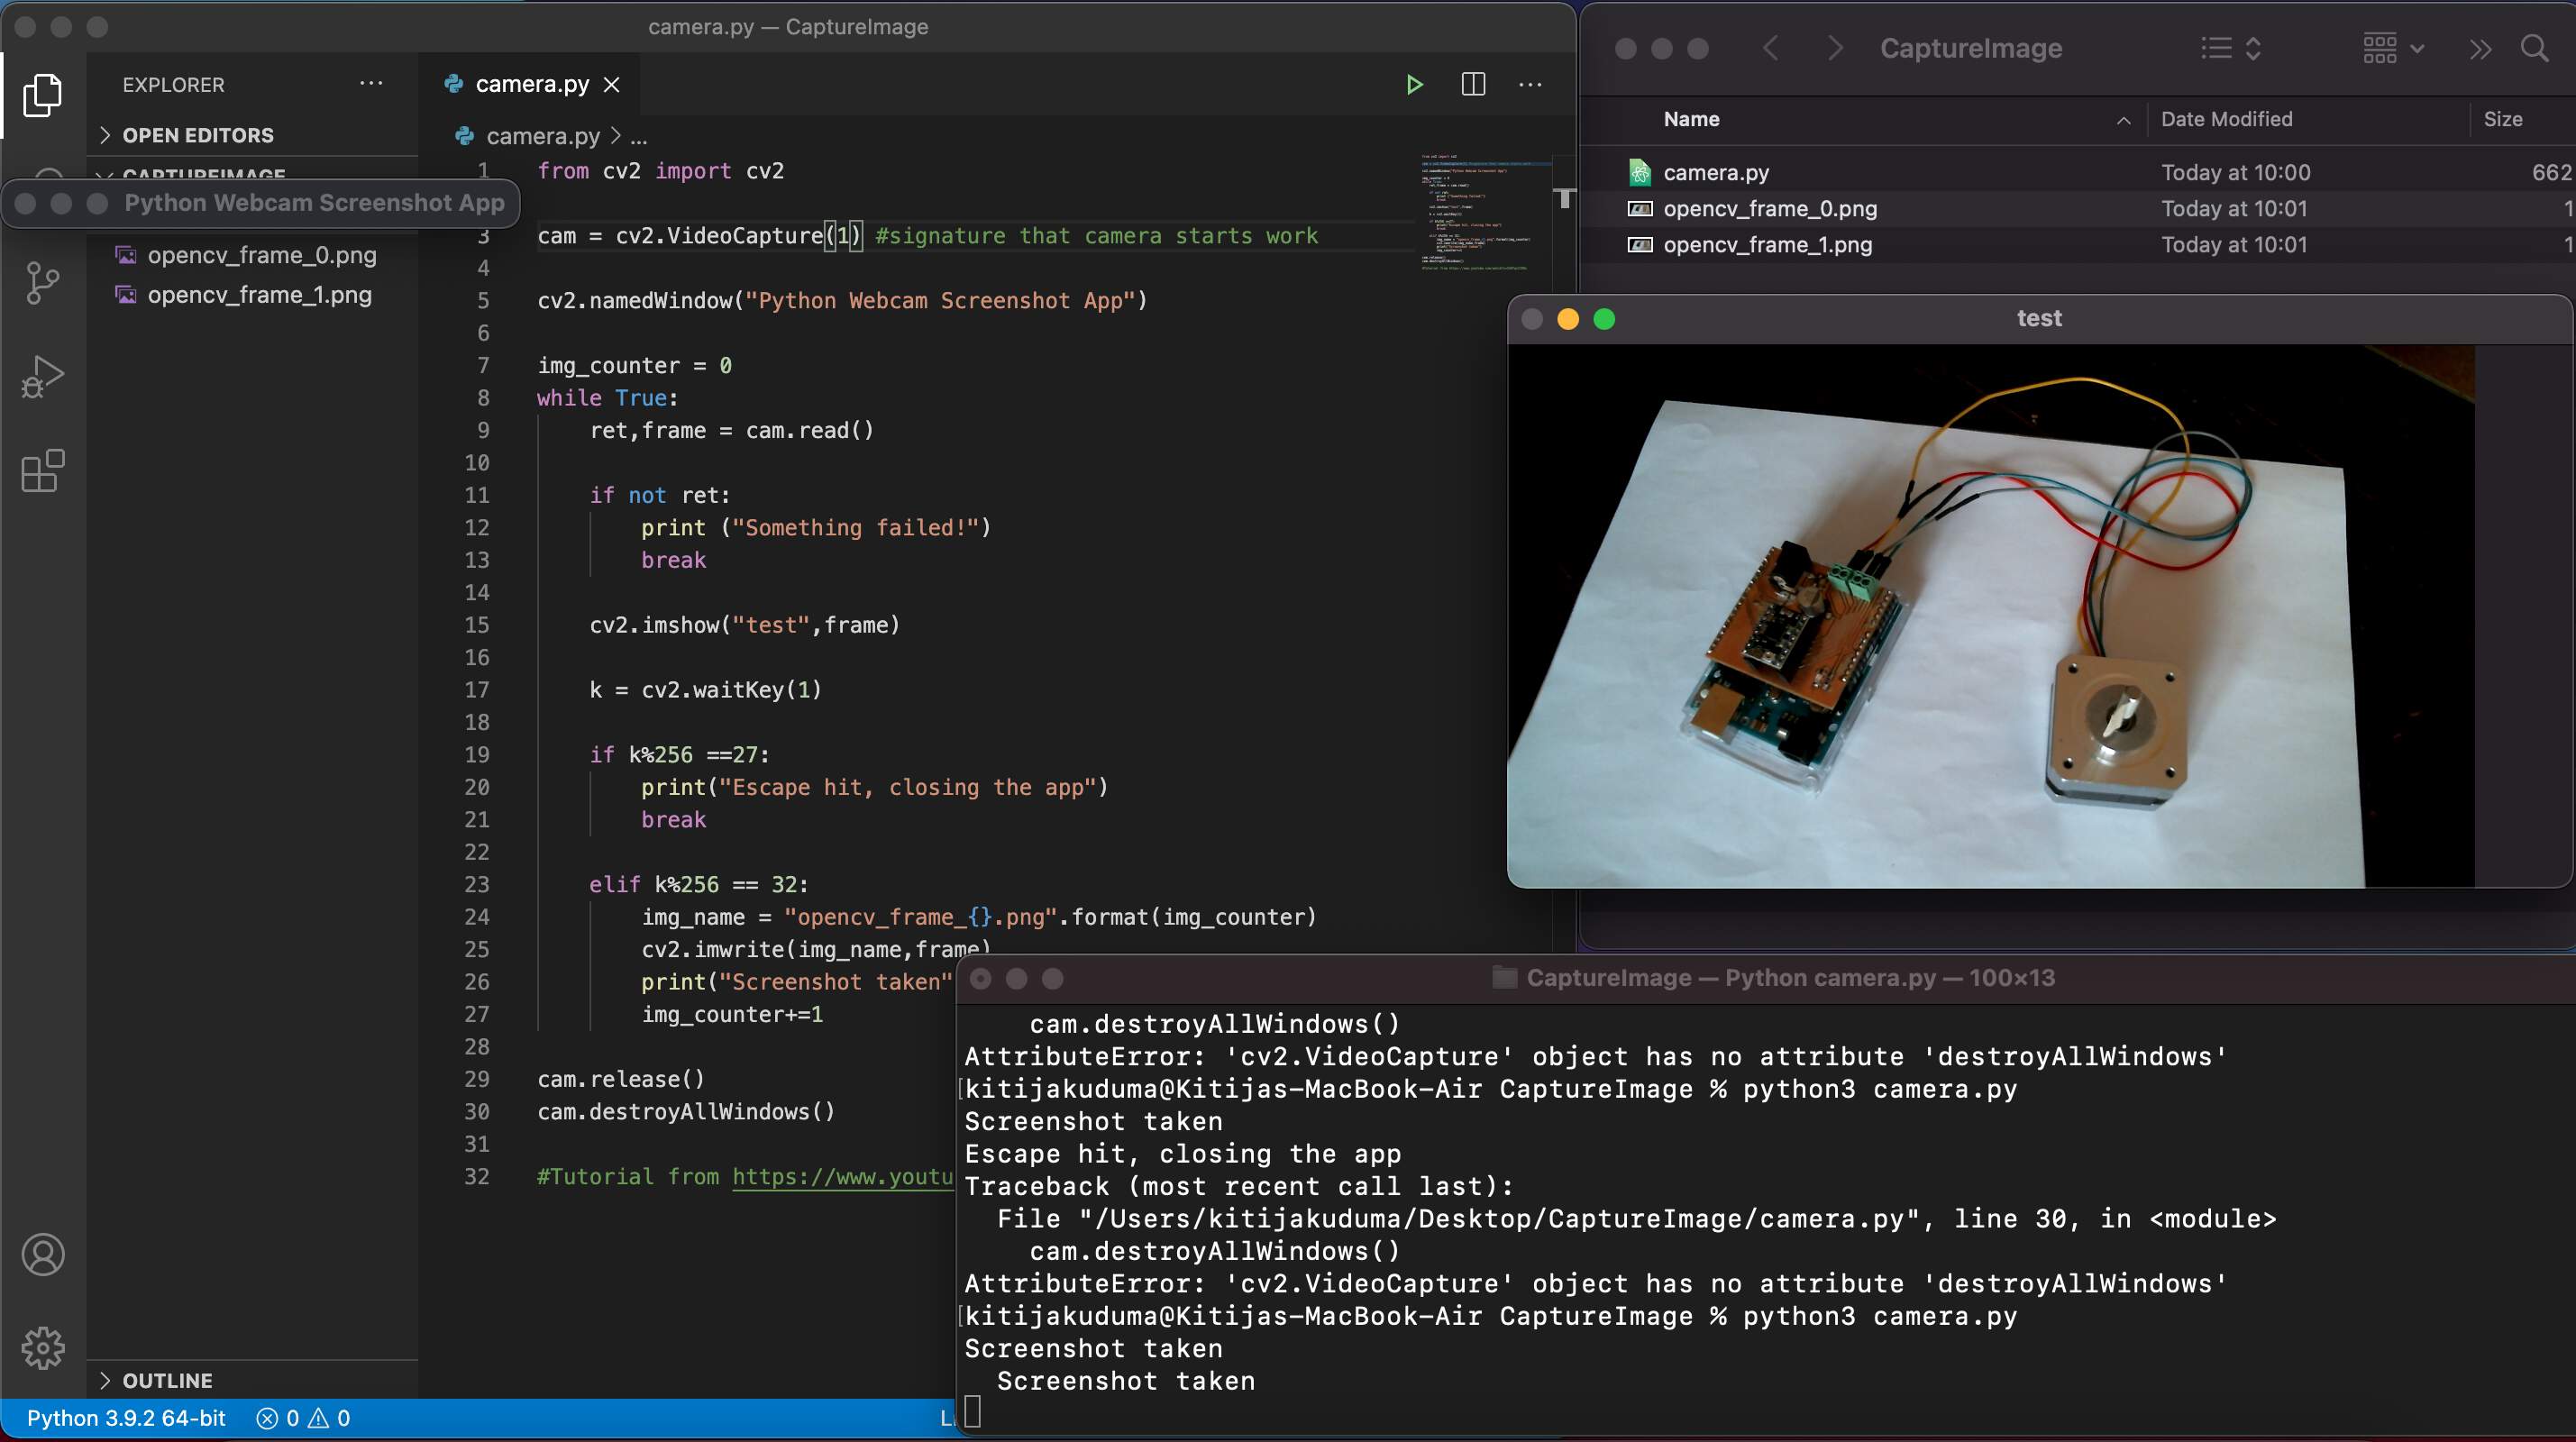
python3 [filename].pynot just python [filename].py - And the last thing - when code runs and camera window is open I can't see realtime image, but at the same time looks that code and camera works. I solved it with change a port of camera.
In video name of camera is cam = cv2.VideoCapture(0), but in my case - first of all I have two cameras, one is built in computer, the second like an input device. For that I need if I want work with
built camera (just for example, because in this project it isn't logical), then code is
cam = cv2.VideoCapture(1), but when with input device, thencam = cv2.VideoCapture(2) - Below you can see code for minimum case - camera open with python code and when user click space on keyboard automatically image is capturing and saving in project folder:
            from cv2 import cv2
            cam = cv2.VideoCapture(2) #signature that camera starts work
            cv2.namedWindow("Python Webcam Screenshot App")

            img_counter = 0
            while True:
                ret,frame = cam.read()

                if not ret:
                    print ("Something failed!")
                    break

                cv2.imshow("test",frame)
                k = cv2.waitKey(1)

                if k%256 ==27:
                    print("Escape hit, closing the app")
                    break

                elif k%256 == 32:
                    img_name = "opencv_frame_{}.png".format(img_counter)
                    cv2.imwrite(img_name,frame)
                    print("Screenshot taken")
                    img_counter+=1

            cam.release()
            cam.destroyAllWindows()
FINAL PROCESS & RESULT
- In videos you can see three episodes - one of them how motor rotate in CW direction, second - CCW direction with other turns' value and third - the best result what we have when all parts are integrated together. In the third video it is necessary to listen, because at the end you can hear that our group machine has some mechanical problems. More about that on the groupmates websites.