VINYL CUTTING
A BRIEF HISTORY OF ZIIC LOGO
Did you read "About me"? I told about my job - I work at Science and Education Innovation Center of city Liepaja. In English abbreviation it sounds like a SEIC, but in Latvian it is a ZIIC (Zinātnes un izglītības inovāciju centrs). We have the logo, but just .png., .jpg and .psd (raster graphic) original files. Now, I want to create our logo in a vector graphic.
STEP 1 : RASTER --> VECTOR
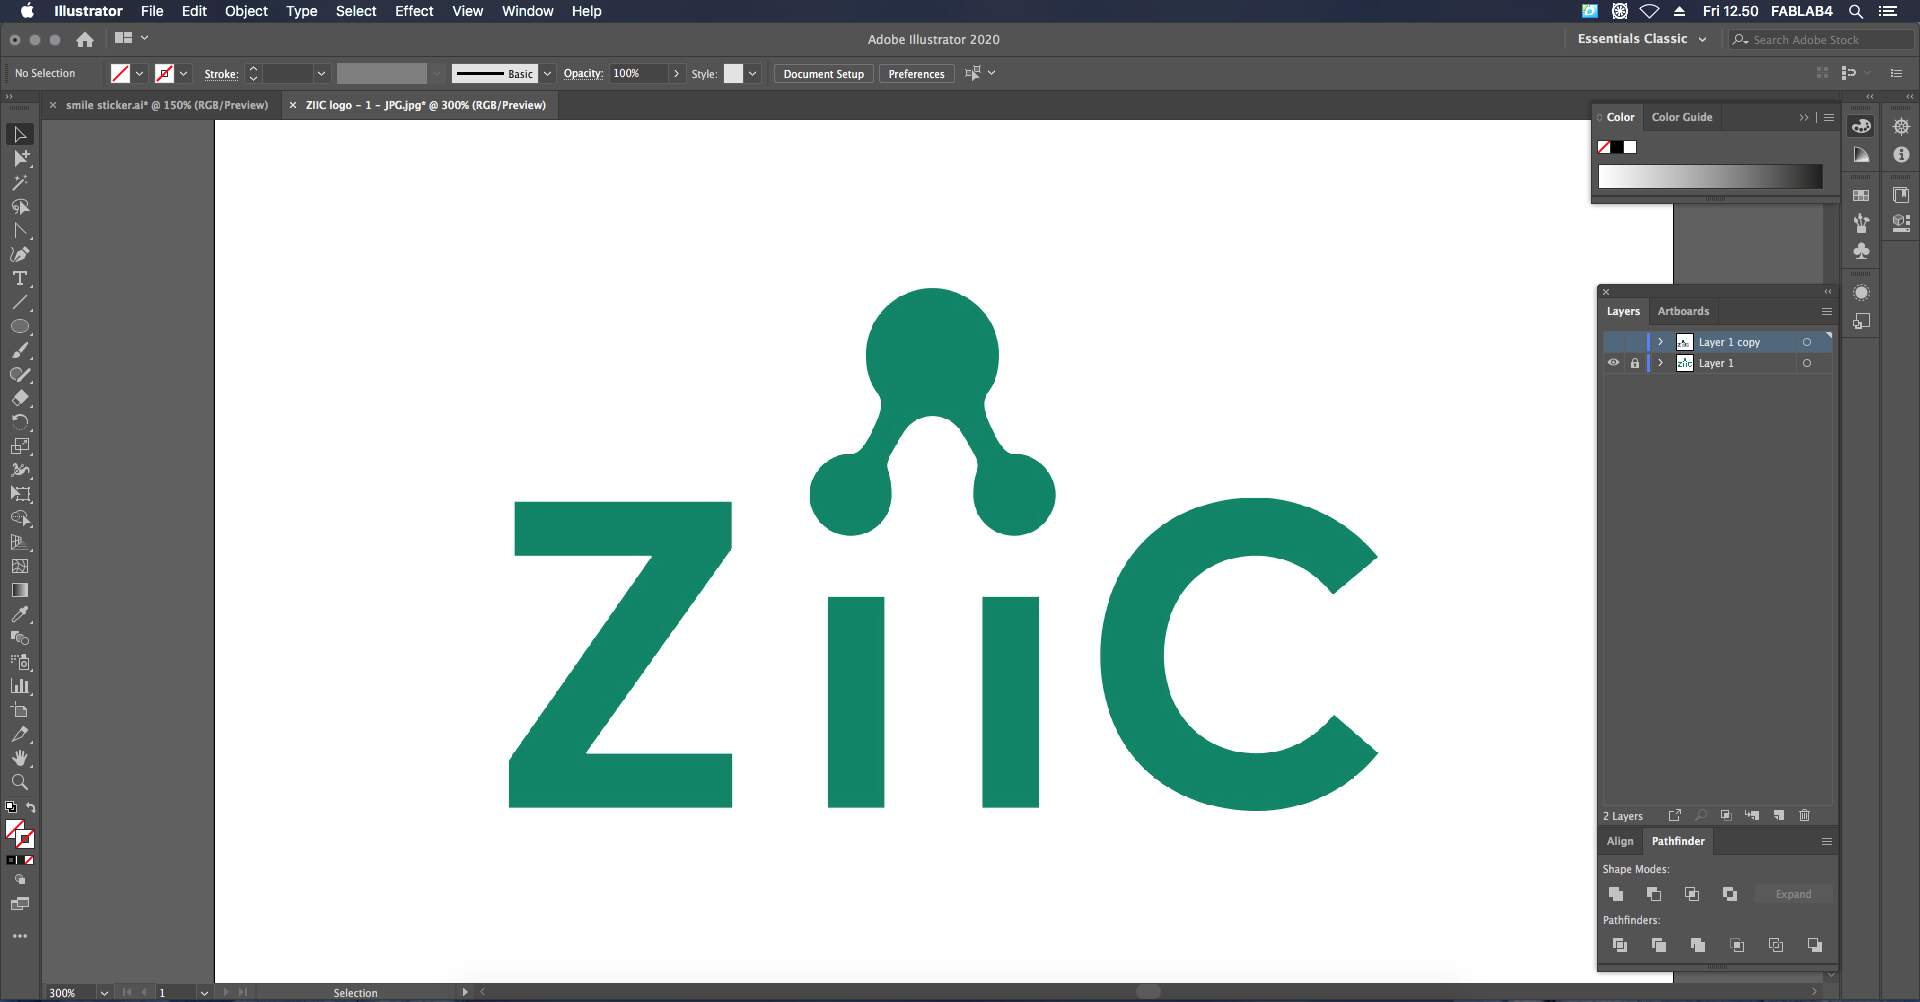
- Open .jpg file in Illustrator. Duplicate layer. In new layer choose Pen Tool (Add Anchor Point Tool) and redraw the letters. For lines it is easy, but for specific lines I used Anchor Point Tool to customize angle. For circle parts choose Rectangle Tool (Ellipse Tool). When I created one letter area I start work with Color Fill and Stroke, fill - without color, stroke - black.
- About Molecule model parts - I used Group function to combine separate parts in one object. I drew also a Rectangle for logo area - it would necessary later for cutting part.
STEP 2 : WORK WITH VINYL CUTTER "ROLAND"
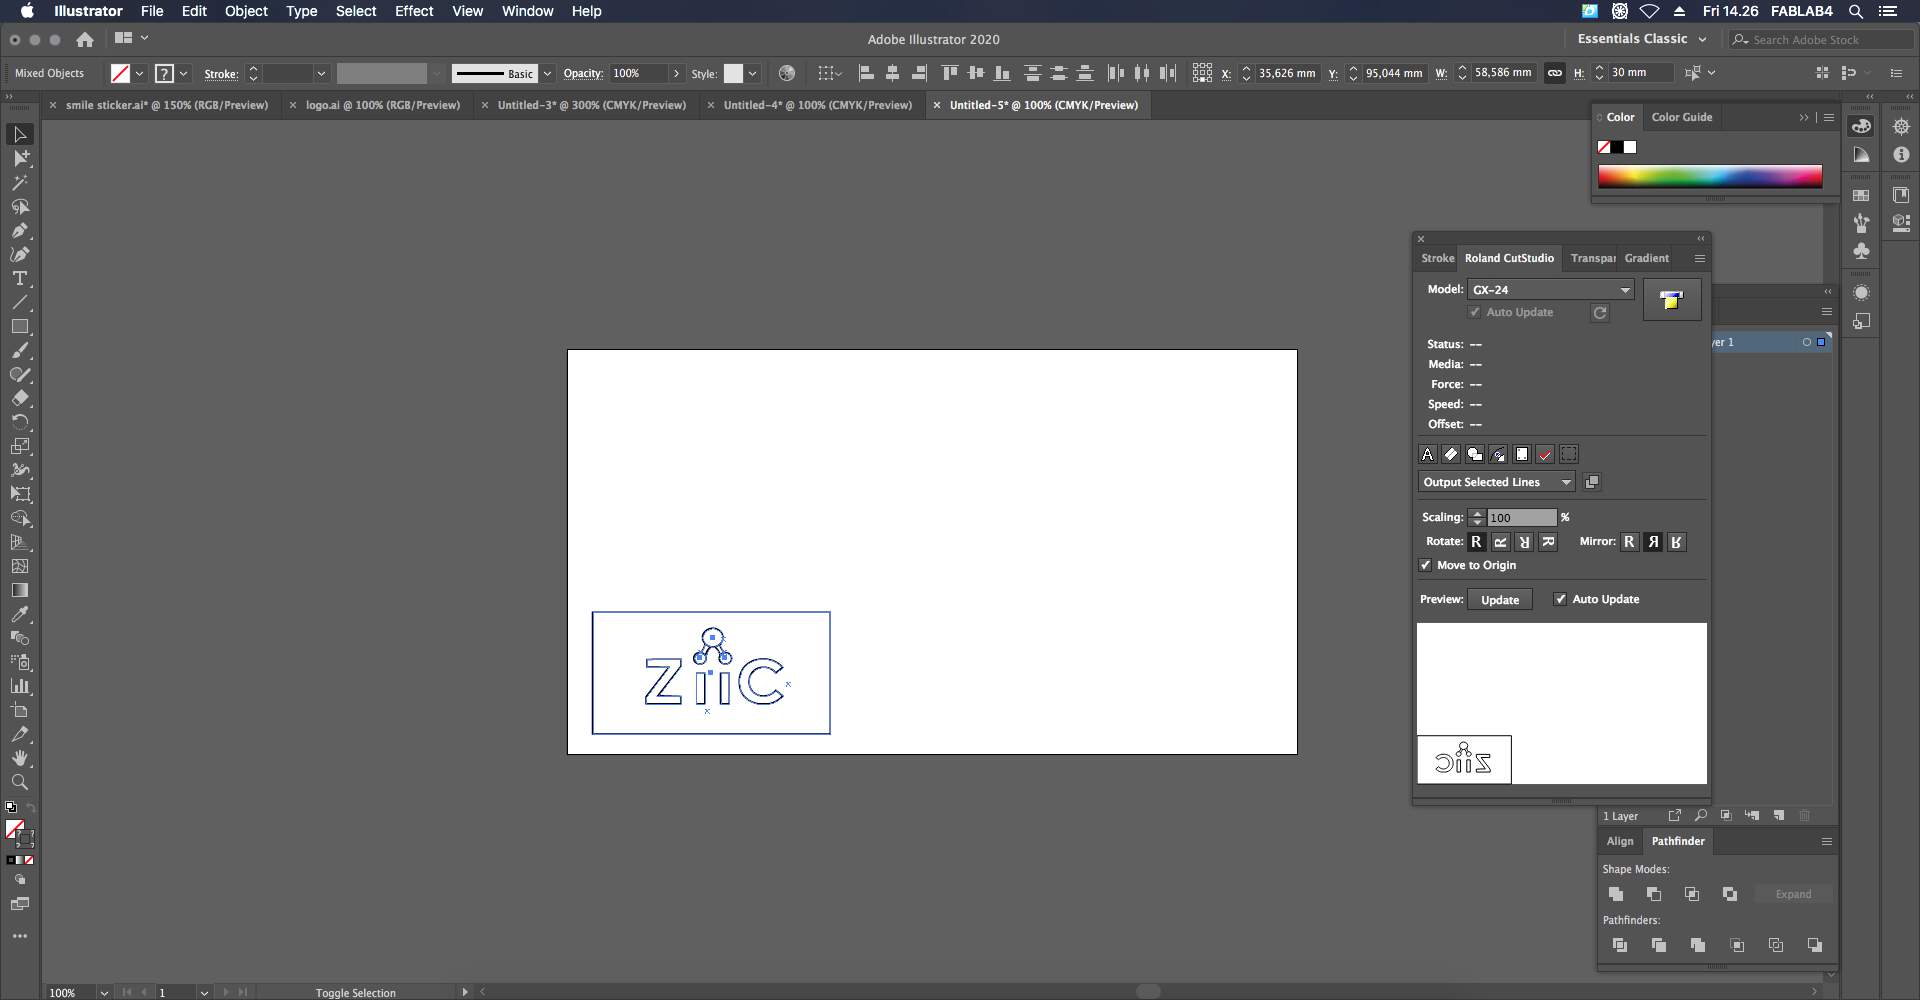
- Open Menu - Window - Extensions - open Roland CutStudio.
- ❗ Don't forget - Mirror design!
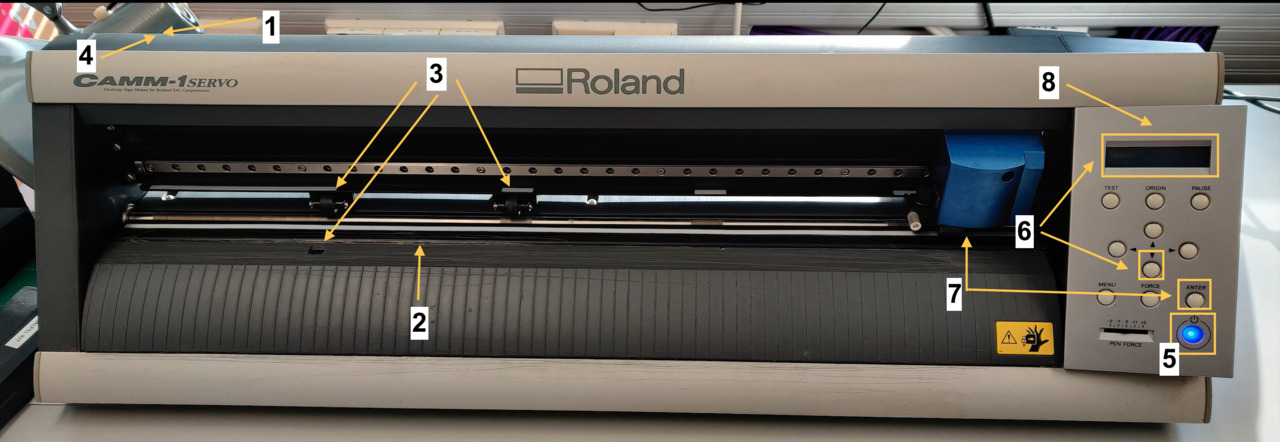
- (1) Unlock hook, this hook is to fix paper, (2) load paper, (3) custom wheels, one - the paper start position, second - the paper end position. Wheels always stand on white line area. Customize wheels from back side. One of the paper edge is located near by sensor. (4) Now, lock the hook! (5) turn on the button. (6) Click on the down button and choose "Edge". (7) Click on the ENTER button and Carriage start to slip. (8) On the display appear paper width size, if I want to know length size, then choose "Piece". This size I wrote in Illustrator like a page size. Important - check design size and be sure that fits in paper size. After that in Illustrator I click on the Roland CutStudio button and vinyl cutter start works. After 4 seconds I have logo, but it's not all!
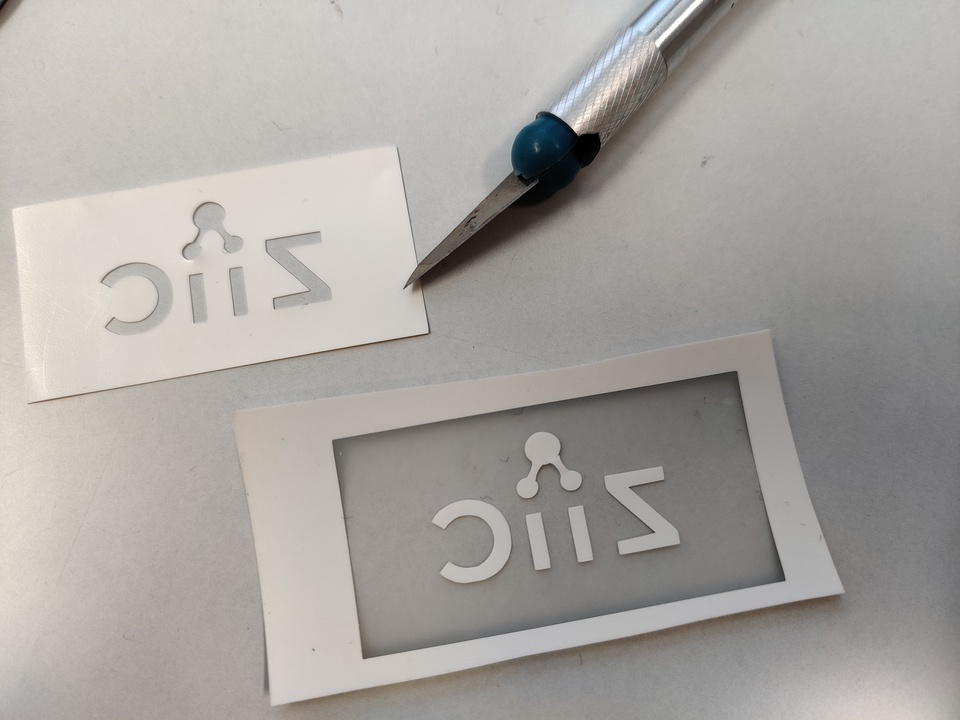
- With knife cut out what I don't want.
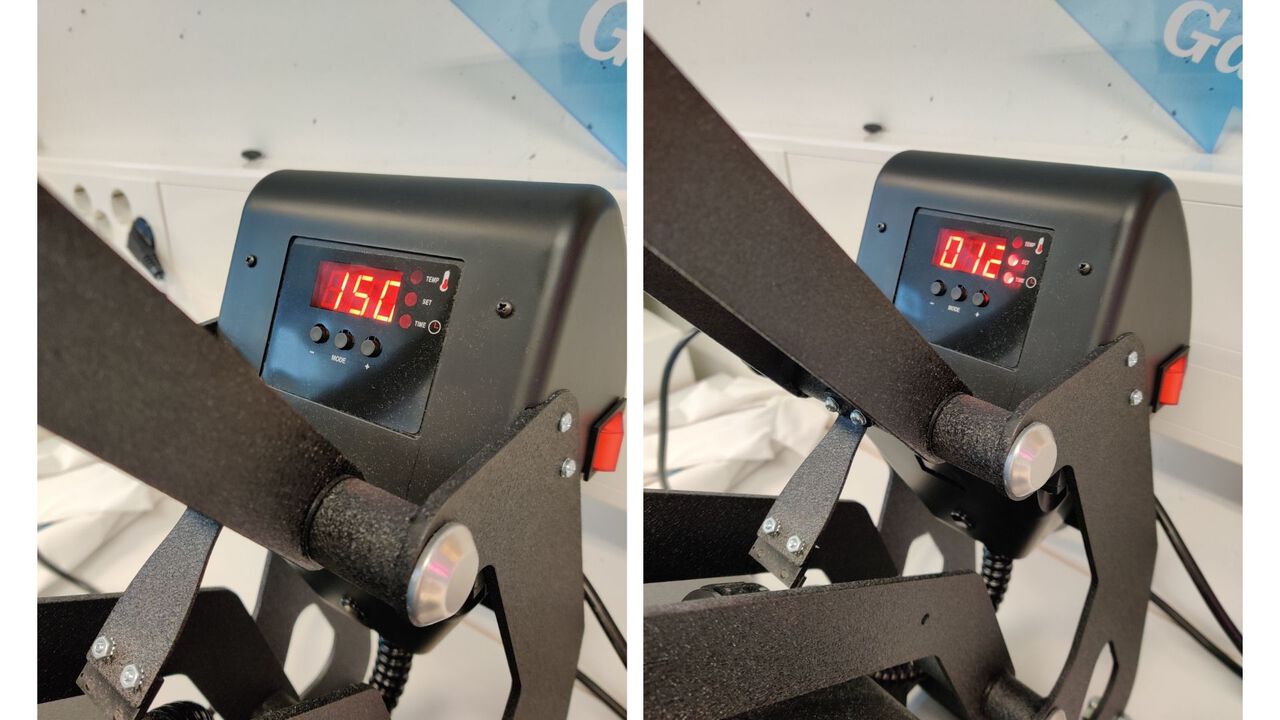
STEP 3 : WORK WITH HEAT PRESS
- Switch on the heat press button. Set the temperature - 150° and time - 12 sec. Wait until temperature is ready.
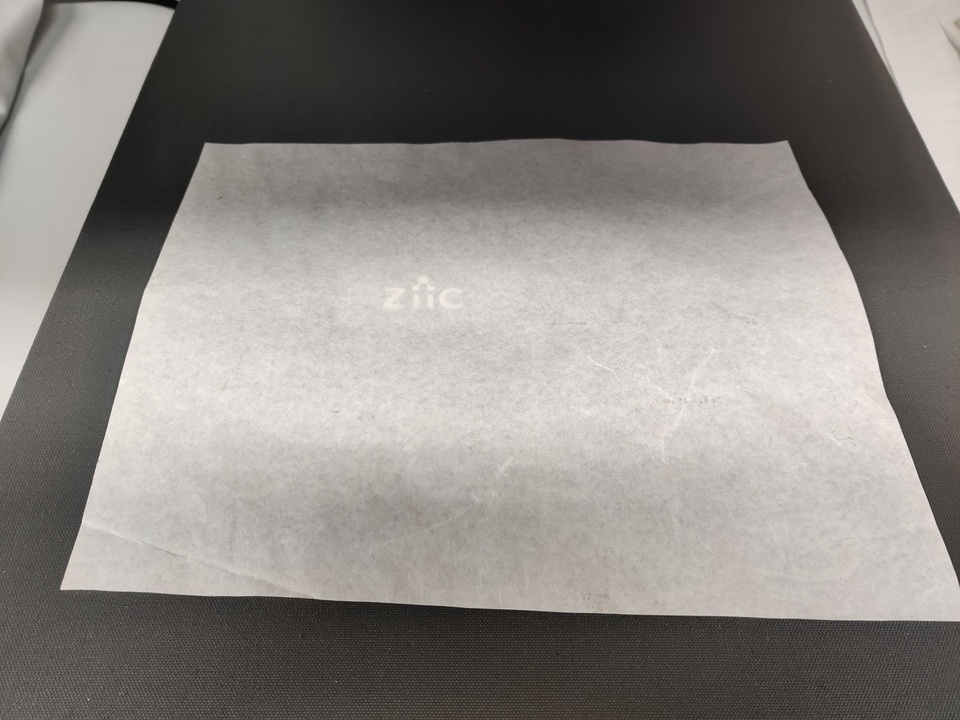
- Put material, then I put sticker in place, where I want. I used baking sheet for material safety. Close heat press and just wait!
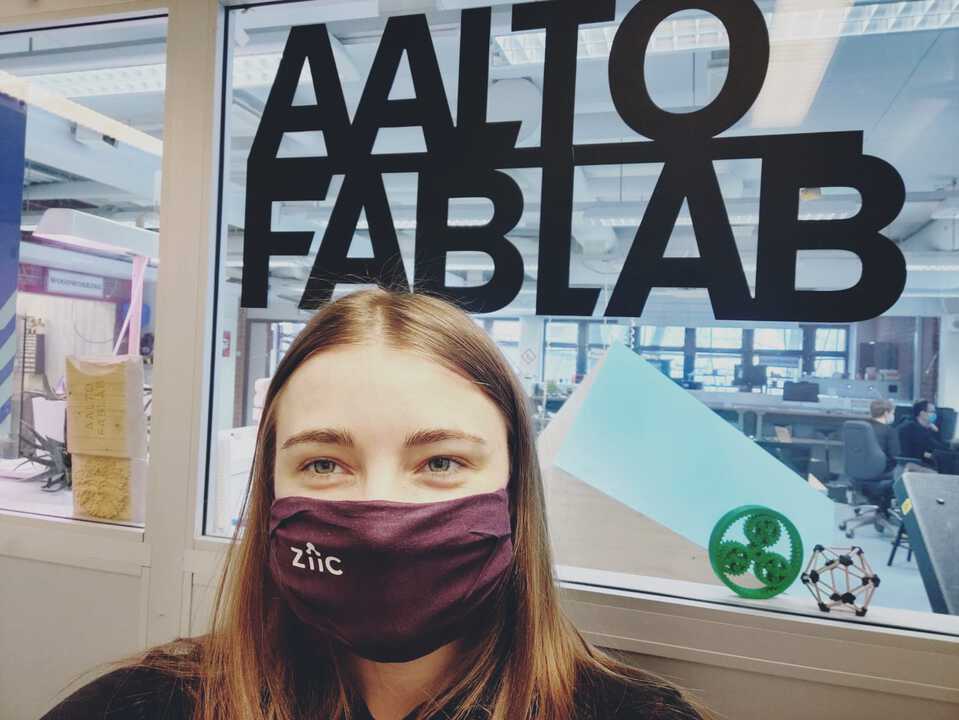
THIS IS A RESULT - PERSONALIZED FACE MASK
SLIGHT DEROGATION:
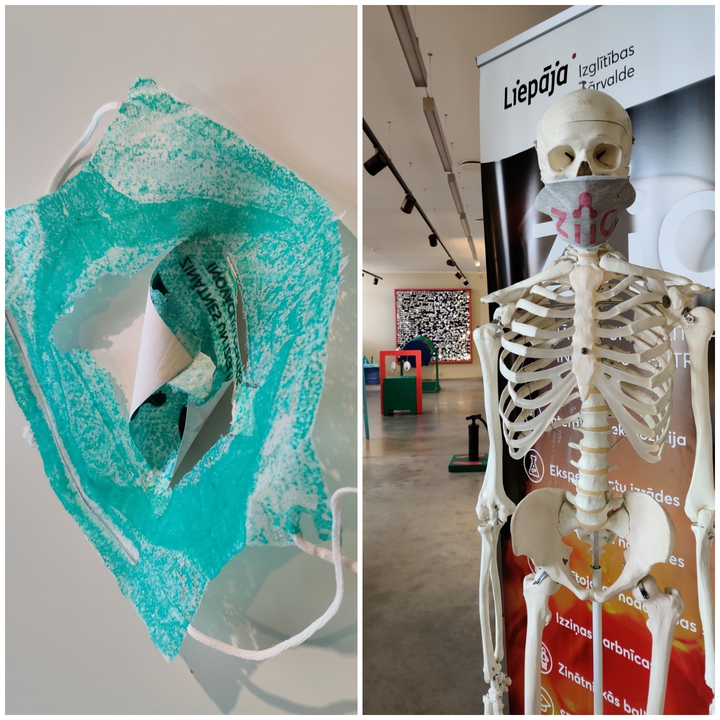
- Some months ago I tried at work experiment with disposable mask - try to me - it doesn't work, haha! I did it in sublimation technology - not a vinyl cutter, but I'm sure technology doesn't matter in this case. As I really wanted something wear to our skeleton I printed logo on a piece of fabric.
- CONCLUSION - I like more work with vinyl cutter - that is more difficult, because I need skills in Illustrator, but result is better!
LASER CUTTING
GROUP ASSIGNMENT
- This is the first time, when we need work in group. I have a nice group members - Solomon Embafrash and Ranjit Menon. They are continuing students and they have more practice in laser cutting and they can really help me to understand - nice step from theory to practice! We divide responsibilities:
- With laser cutting machine we work together.
- I took pictures and optimize it.
- Ranjit wrote description.
- Solomon added it in he's website.
INDIVIDUAL ASSIGNMENT
- My inspiration - Instructables "scientiffic" author (google).
STEP 1 :
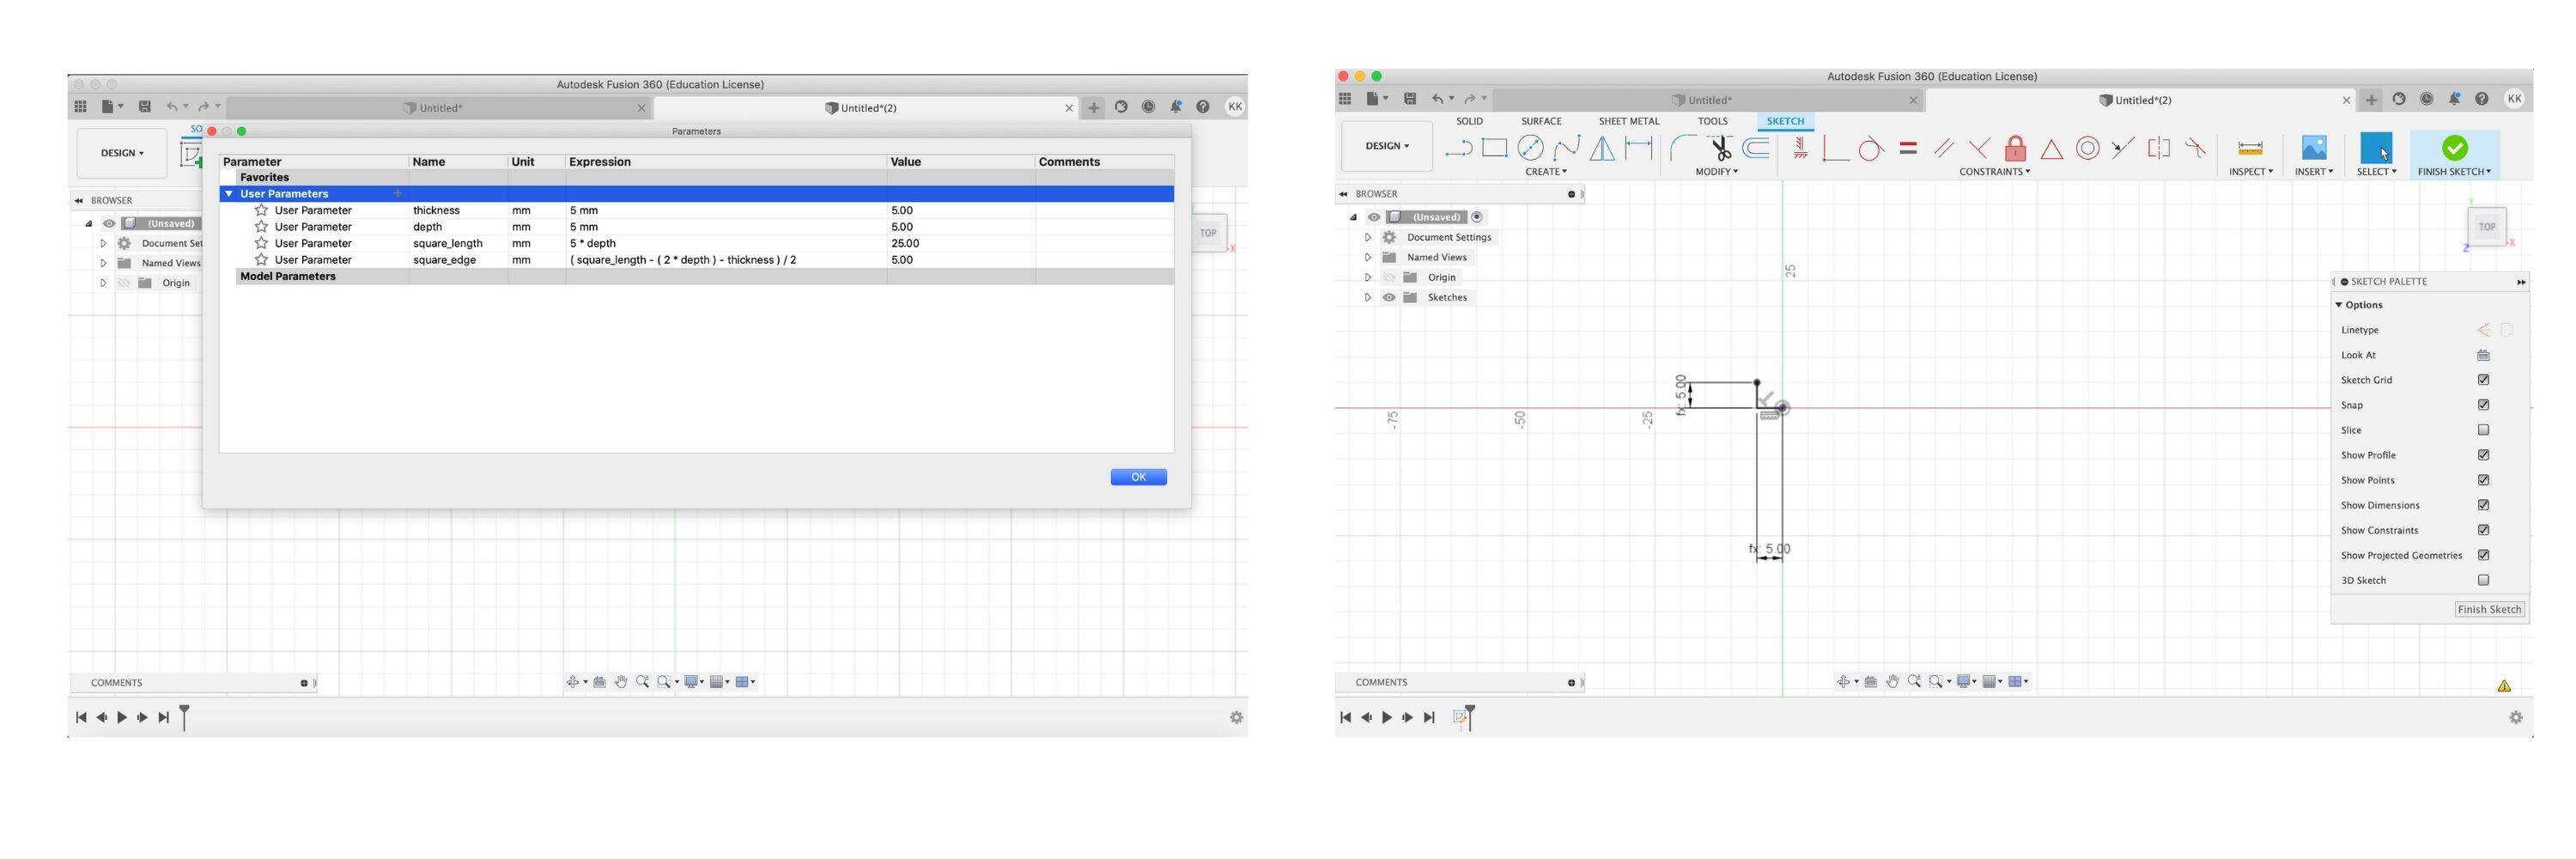
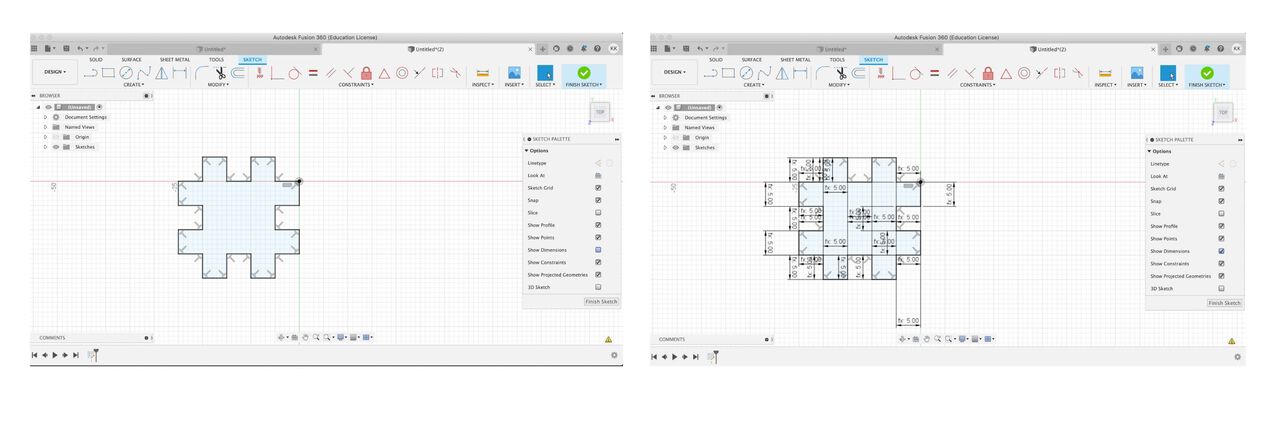
- I start with define parametrs for square - choose Modify - change Parametrs.
- To easier drawing process - in sketch pallete Show Dimension button is invisible. When I finished, I made it visible. Now, you can see how I draw square define not random values, but work through with parametrs.
- Why working with parametrs is so easy? I just change one parametr - thickness and result for all object parts I can see in just seconds!
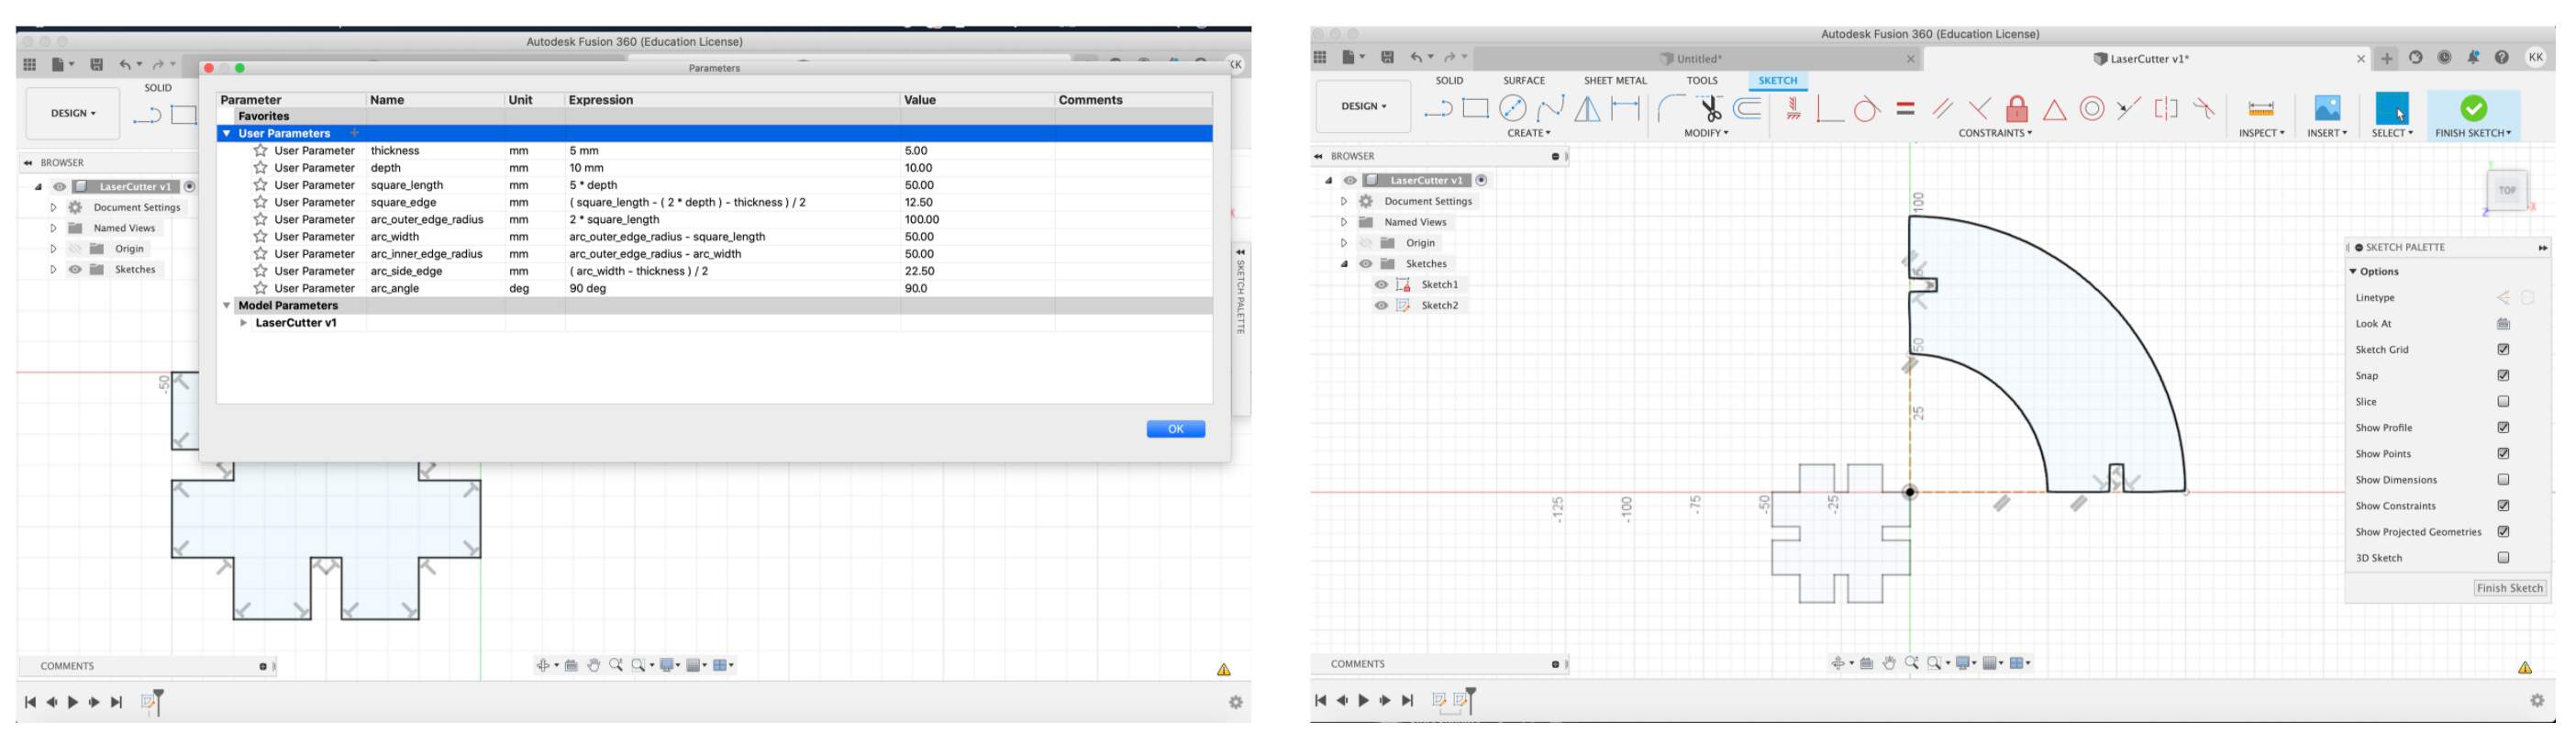
- Then I define parametrs for second object - this part was really difficult to understand interaction and dependence on the square.

STEP 2 : EXPORT TO WORK WITH CORELDRAW
- I encountered with problem - when I try export to .dxf and then open in Coreldraw - it cannot open! Then I fixed problem - I need install plugin Shaper Utilities and then in section Tools I have button Export to Origin. For select, just click on object body. I don't know why, but I can select just separate part. Now, I have two .svg files and I am ready to open it in Coreldraw.
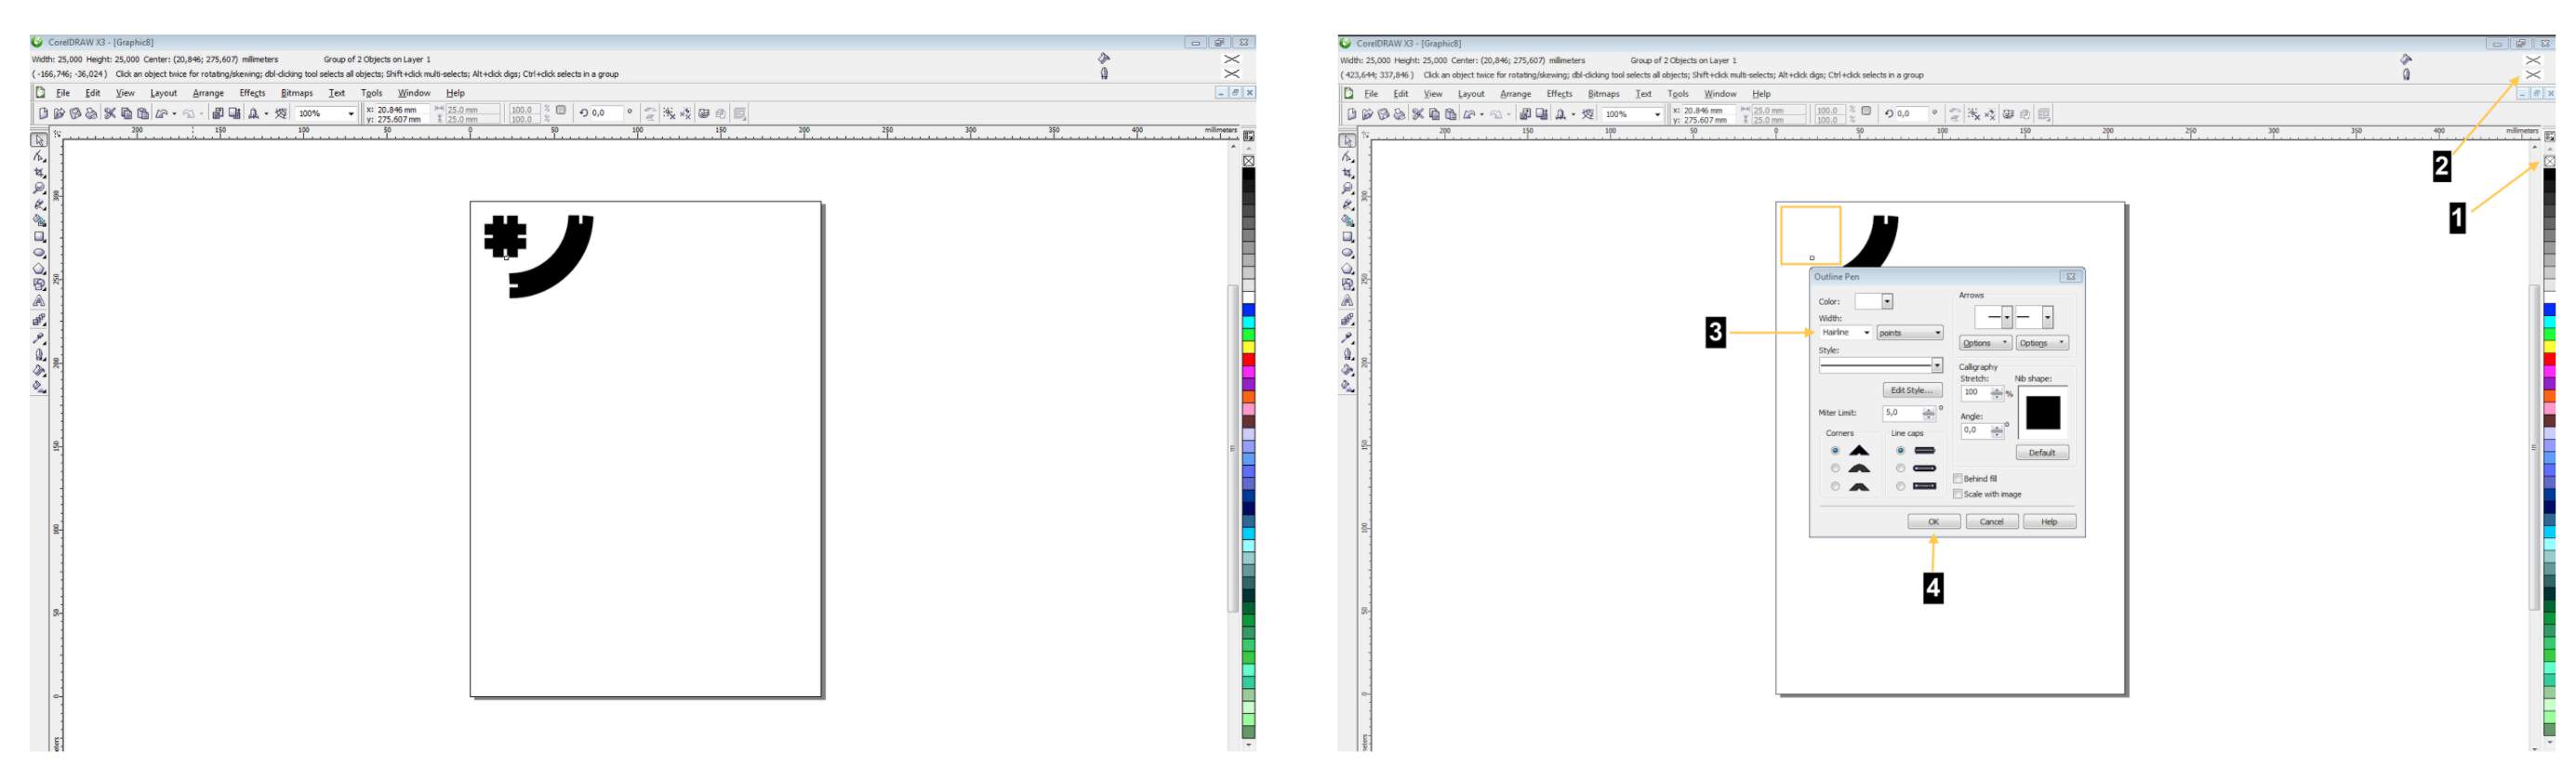
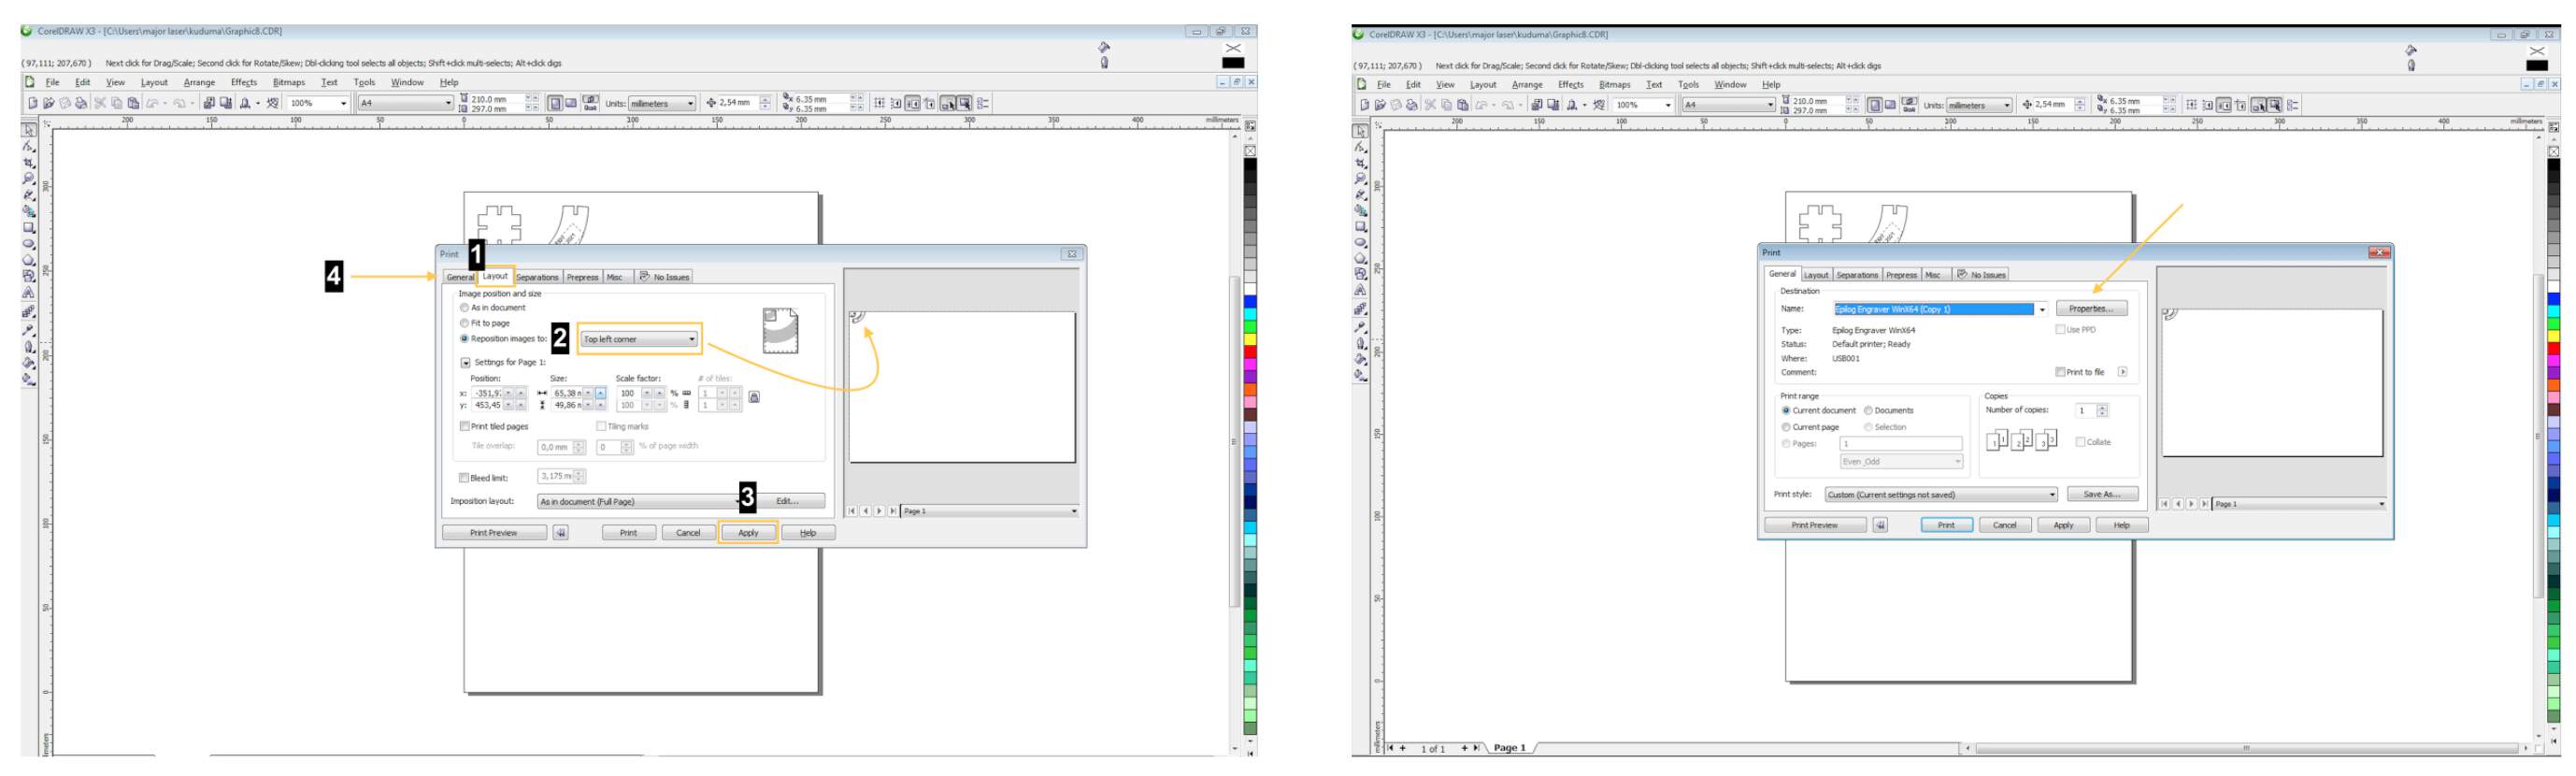
- I import my files in Coreldraw. I select one of object and change (1) color - no fill, (2) then open Outline form pallete. (3) choose width - Hairline and (4) click OK.
- Then I click shortcut ctrl+p, (1) go to Layout section and (2) choose Top left corner. (3) then I click Apply and (4) go to General section. In General section I choose Properties.
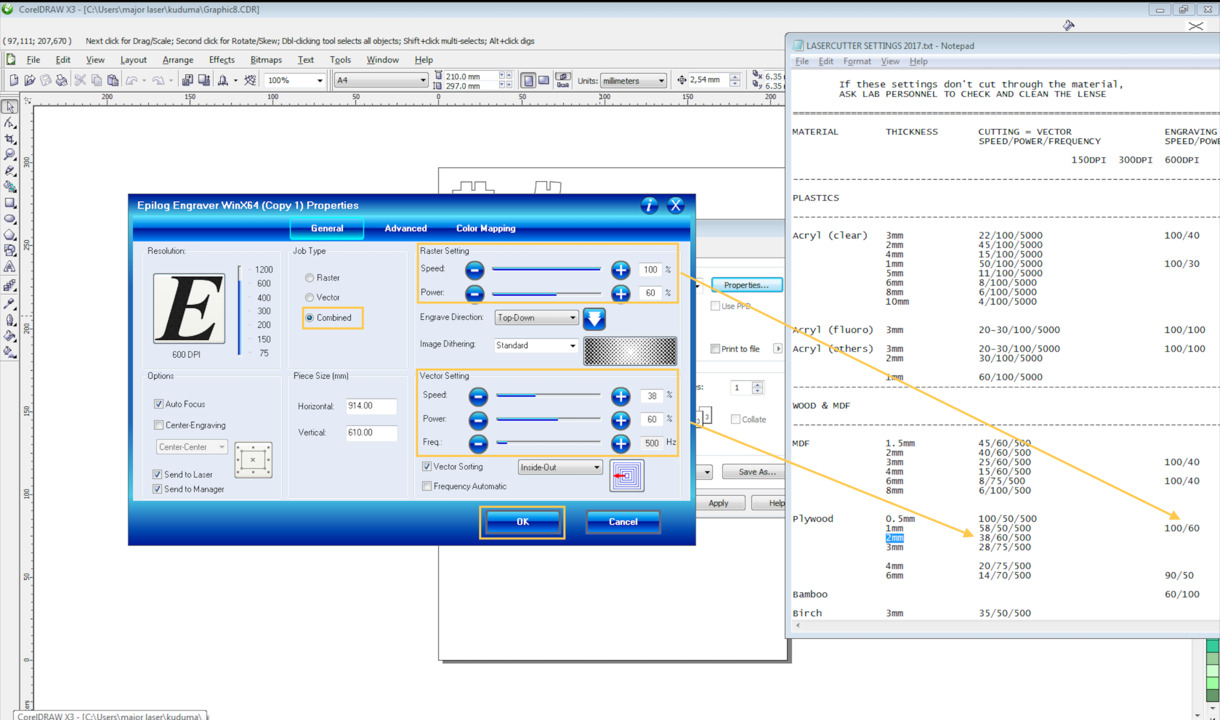
- As I want cutting and engraving in Job Type I choose Combined, but if I would just cutting, I use - vector, for engraving - raster. I use values what is recommend in laser cutter settings file. For raster optimal values are 100/60 and for vector - 38/60/500.
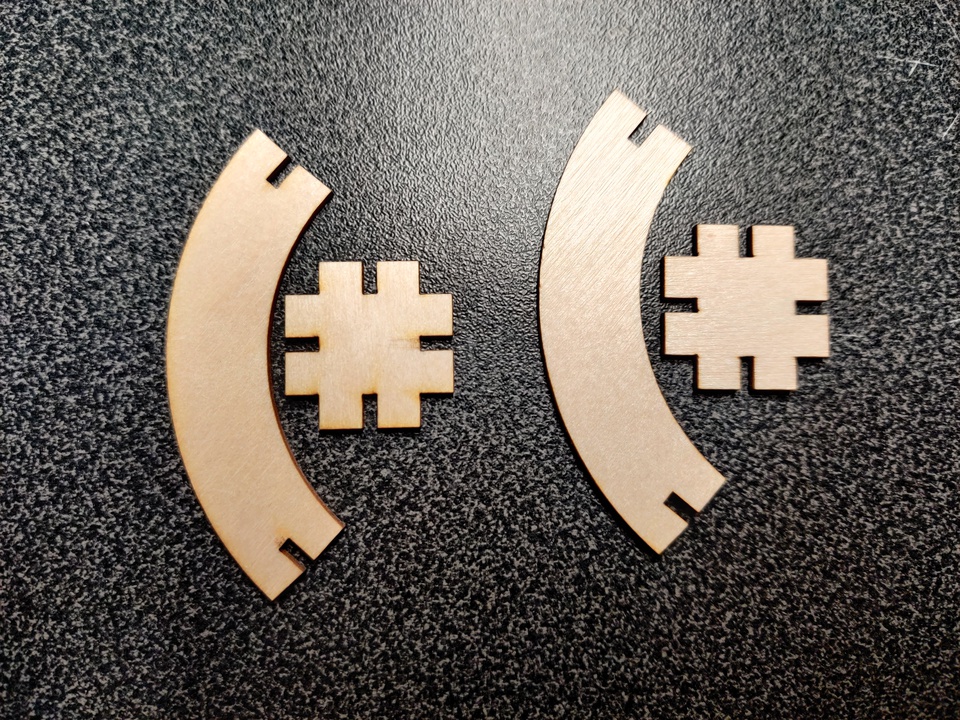
- I experimented also with smoke-unsmoke effect. In final picture you can see parts with unsmoke, but also with smoke effect, it just because I don't repeat cutting for parts what I cutting before (just for material saving).

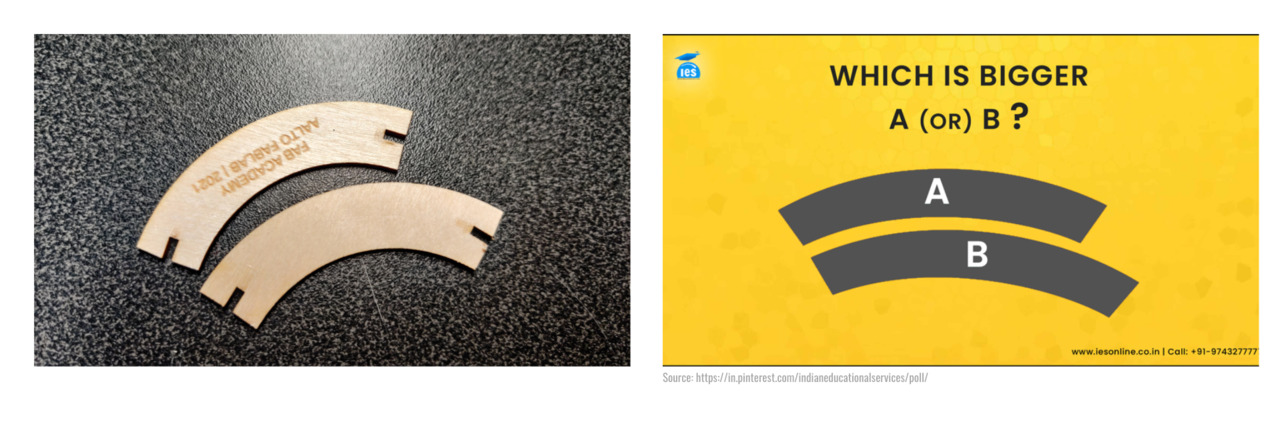
STEP 3 : FUNNY PART
- Puzzle task! Which part is bigger? Seems that B ?! Yes, for our eyes, but actually it's just optical illusion and both of them is the same size.
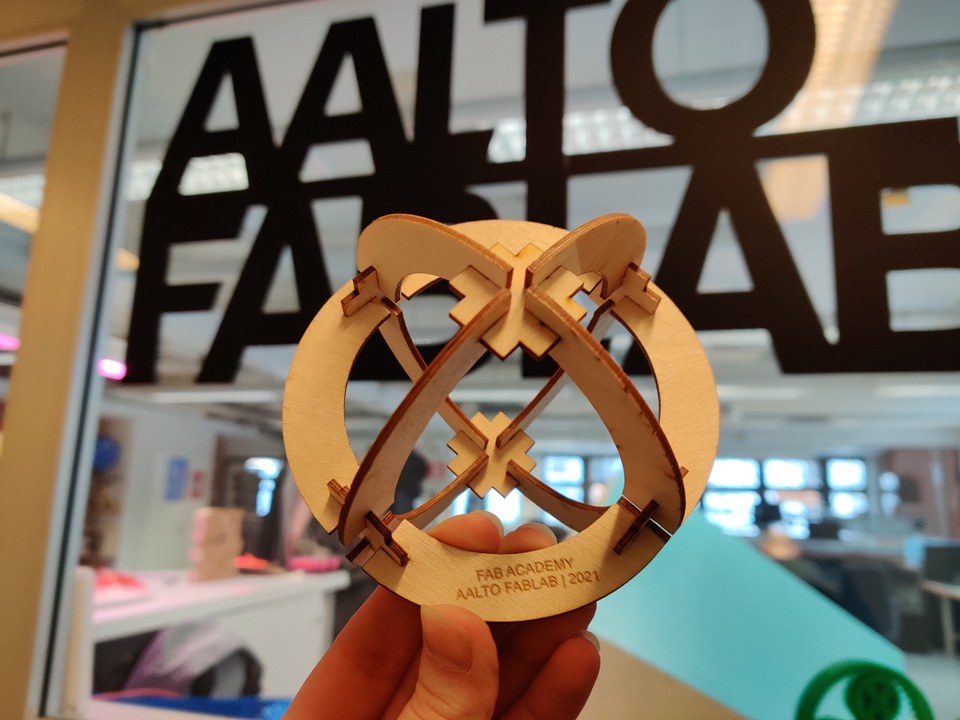
THIS IS A RESULT - GEOMETRY IN MY HAND.
CONCLUSION:
- How good it would be if at school in geometry classes pupils can make something like this. Do this experiment I really understand how geometry integrate in physical life - when I went to school, I just drew on the paper and I thought that geometry is something unusable.
- First time when I cutting my model, I understand that in real life objects are too big, then I decrease depth value from 10 mm to 5 mm and result was really good! And again I understood how easier is life with parametrs - I just change one parametr's value and all parts of objects proportionally reduce.
- Of course working with parametrs is easier, but there is some challenges - difficult part is figure out formulas - dependence, interaction. If you are not a very good in geometry (and I am not), then it is really challenge. But the result is worth it!
- If I have more time I would like to experiment with thickness, because in my experiments I conclused that 2 mm is too much, 1.95 mm - slightly small.