Theory
Have you encountered a situation when you receive an attachment file from a colleague in an e-mail that needs to be changed?
You find that the request for change has been sent also to other colleagues. You also thought, how efficient is the management
of file versions? GitLab is great for collaboration and version control.
Below is everything about GitLab installation, setup and
most importantly - usability!
A BRIEF HISTORY OF GITLAB
- GitLab founded Sytse Sijbrandij and Dmitriy Zaporozhets in 2014. Do you agree that is very hard always remember famous people names?
In this case it will be easier, because surname "Zaporozhets" also means Soviet Ukraine car model. Search on Google this car and
I am sure - now to remember one of the GitLab founder is easy!
- GitLab written in Ruby programming language. In TIOBE Index at January, 2021 it is in 15th place. Ruby is object-oriented programming language. There's more than one way to do the same thing. In daily not very often you can hear about that developers use this language, but famous companies use Ruby, for example, Twitter, Airbnb and Basecamp (by the way - this platform is good for collaboration and version control in non-technology projects).
- GitLab is the world's largest all-remote company.
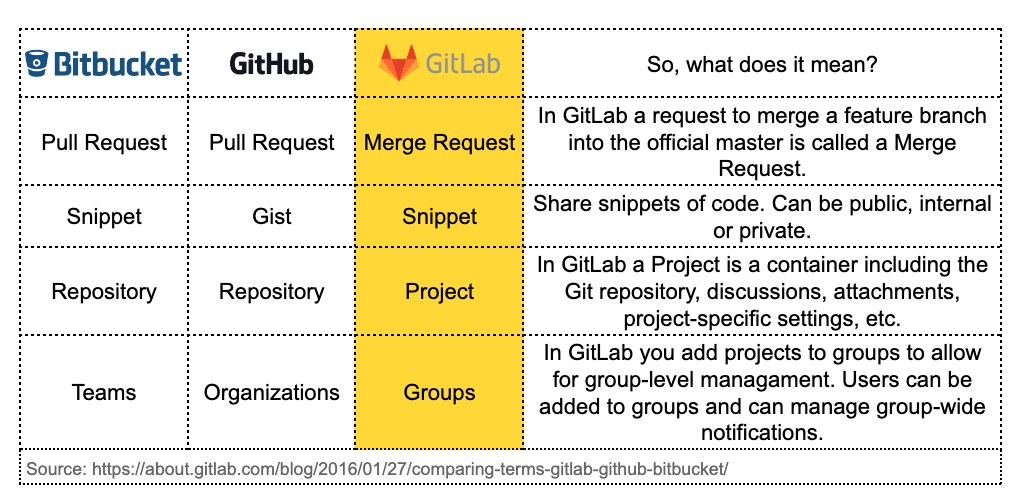
COMPARING GITLAB TERMINOLOGY
WEBSITE AT FAB ACADEMY MEANS 'ALL WHAT YOU DO - DOCUMENTED IT'
- All what you can see in my website was created by HTML, CSS and JS. How all these works together?
Very good explanation - see below in GIF.
Practical
BEFORE STEPS:
- I installed Homebrew for easier software installation process in future.
- I installed Visual Studio Code (platform for programming). Then I found place in my computer, where I want to keep my website project local.
- After that I open VS:
File - New File - Save As "index.html"and save it in the same place where is created the project folder. Repeat - create"style.css"
- And just start search tutorials, watch Youtube and importantly - modify other ideas and experiment with my own website. All what you can see in my website - it's just a result a lot of experiments.
STEP 1 : INSTALL, SETUP GIT FOR WEBSITE VERSION CONTROL
- First check that you don't have GIT installed. How? In terminal command line write
git --versionNo surprises? Then install git. - Add GIT username and set e-mail.
git config –-global user.name “MY_USERNAME”
git config -–global user.email “MY@MAIL.COM” - Generate
SSH key,let's see keygen. How?
❗ It's hidden file. On Mac use keyboard shortcut Command + Shift + Period. - Copy key and paste to GIT on the web version.
- Clone repository, which Fab Academy created for each students
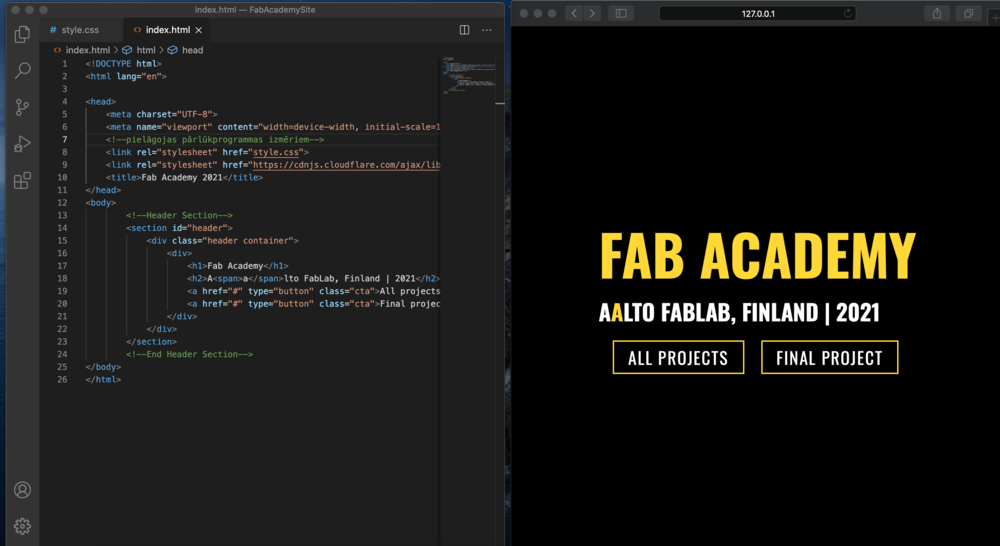
git clone[and paste here repository link] - Below you can see screenshot a header of my website.
- Now I want replace initial files with my own HTML, CSS files and push it on GIT.
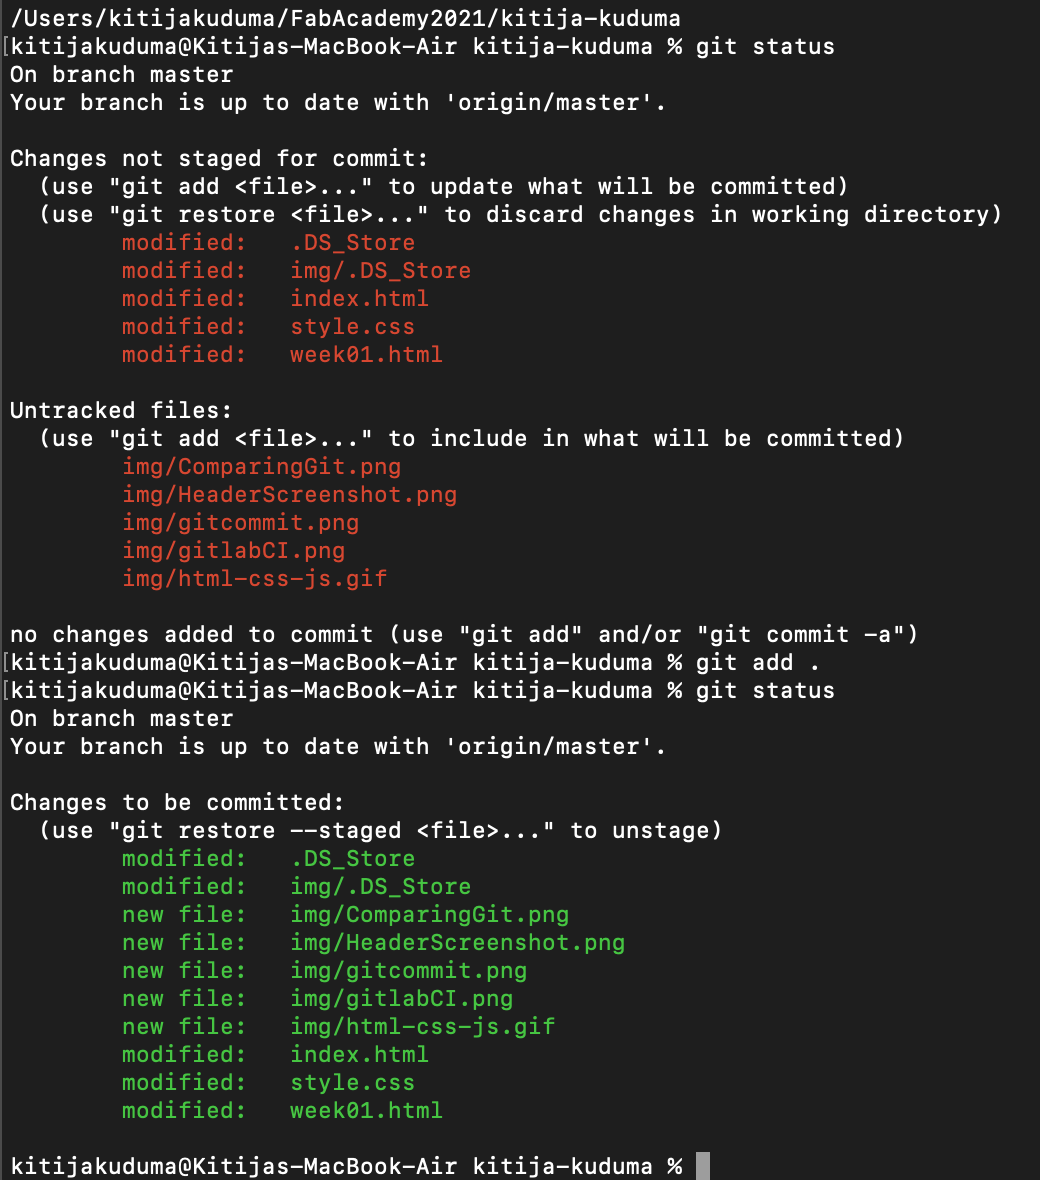
- Check
git status - Then add all or part of files with command
git add [FileName]
❗ if you want to add all files, just write a dot -git add . git commit -m ''In quotes write structured info about changes.- Don't forget! After commit -
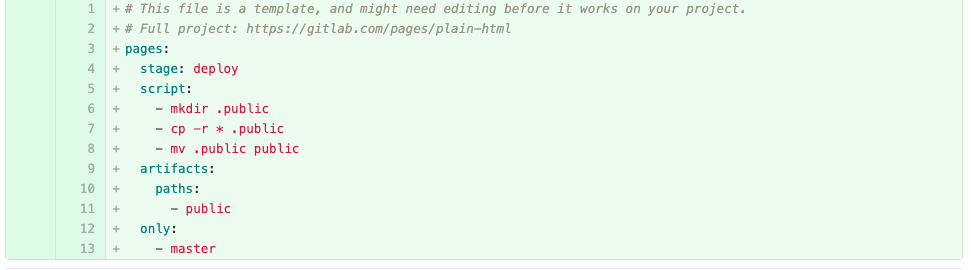
git push - Add a new file, select a template type .gitlab-cy.yml, apply a template HTML and commit changes.
- .. Whoulaa! Website is publish!
- ❗ Don't forget! After GitCI for local do this
git pull - Made some changes? Always remember this algorithm:
STEP 2 : PROGRAMMING WEBSITE
STEP 3 : PUBLISH WEBSITE WITH GITLAB CI
git statusgit add .git commit -m ''git push
STEP 4 : IMAGE OPTIMIZATION (MAC OS)
- I installed
brew install imagemagick - ❗ Remember, for this step you need install homebrew before.
- ImageMagick depends on Ghostscript fonts. To install them, type:
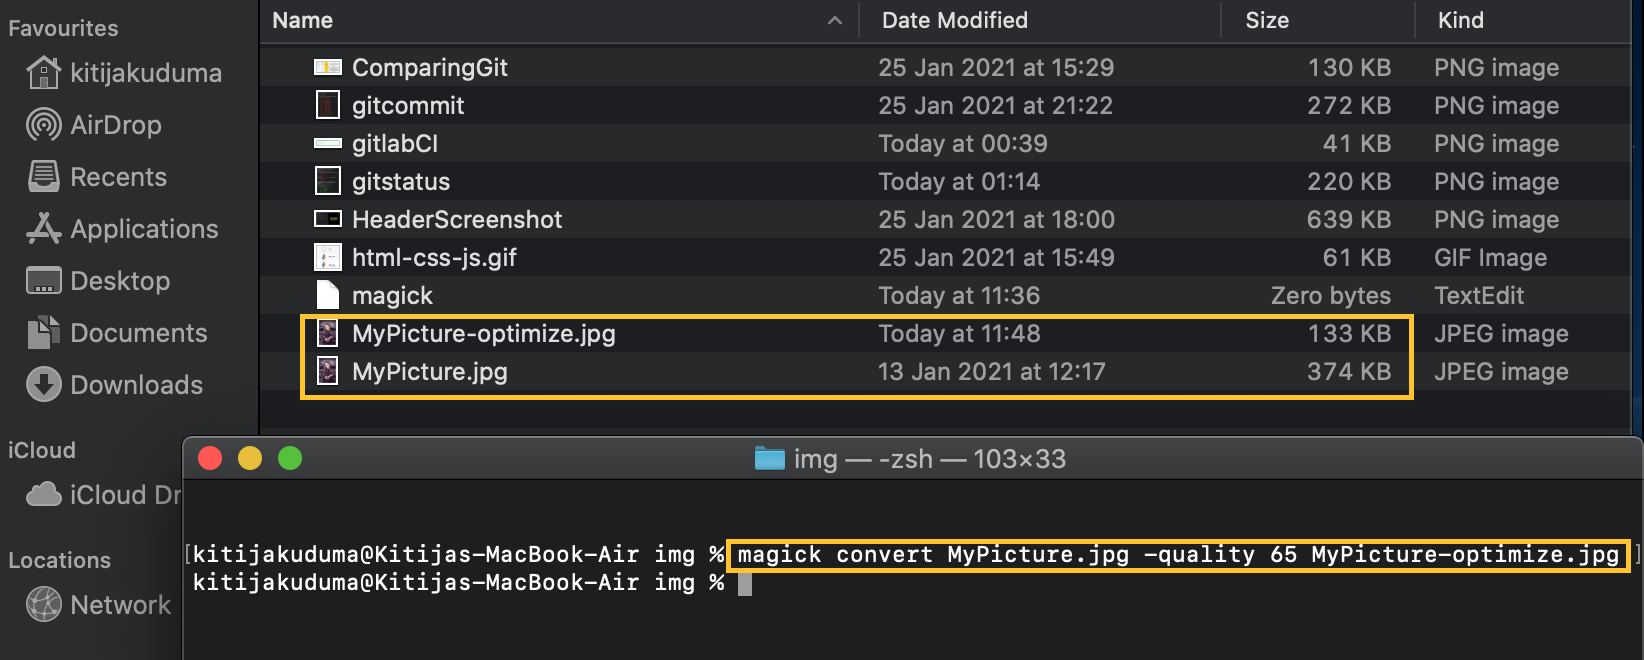
brew install ghostscript - Optimize image, type:
magick convert "MyFile" -quality 65 "NewMyFile"magick convert "MyFile" -resize 1280x720 "NewMyFile"
STEP 5 : VIDEO OPTIMIZATION
- I installed
brew install ffmpeg - For optimize video, type:
ffmpeg -i "[filename.mp4]" -vf scale=1280x720 "[filename-opt.mp4]"- For create video without audio, type:
ffmpeg -i "[filename-opt.mp4]" -vcodec libx264 -b:v 1000k -vf scale=-2:1080 -an "[filename-opt-no-audio.mp4]"- For rotate video 180°:
ffmpeg -i [VIDEO-WITHOUTROTATION.mp4] -vf "rotate=PI:bilinear=0,format=yuv420p" \ -metadata:s:v rotate=0 -codec:v libx264 -codec:a copy [VIDEO-WITHROTATATION.mp4]
STEP 6 : CLONING A REPOSITORY
git clone [LinkWhatYouWantClone]git remote updategit pull