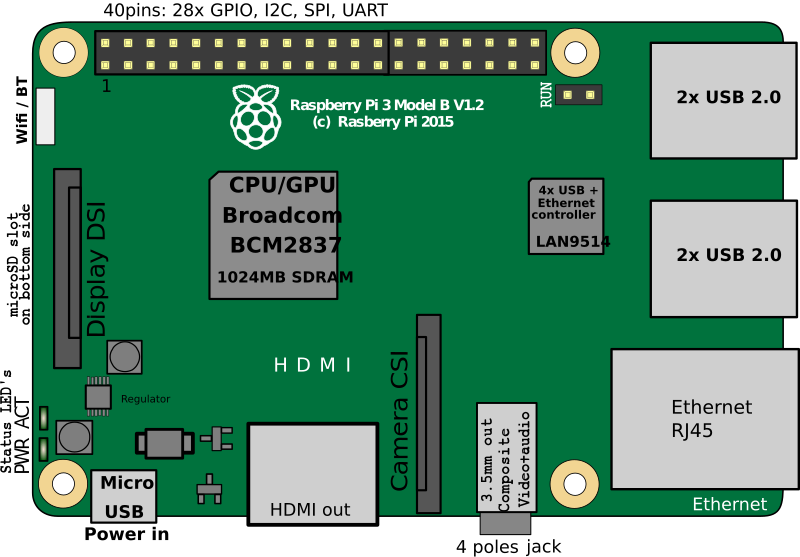
The raspberry pi3 is a single board computer. It has all necessary components to function as a simple computer, you can connect a display, mouse and keyboard, as well as SD cards, headphones, camera, touchscreen and ethernet cable.
Its main processor integrates CPU and GPU, and it is capable of running an OS, which is stored on the SD card.S
The Raspberry Pi 3 Model B uses a Broadcom BCM2837 SoC with a 1.2 GHz 64-bit quad-core ARM Cortex-A53 processor.
The Raspberry Pi3 has also have a 40-pin GPIO connector, this is general purpose input-output connector. These include GPIO, I2C, SPI, UART and power pins.
GPIO pins can be programmed for hardware, communication and electronics applications, and they can be setup and configured via software from the system OS.

Once you have connected all perfiferals and prepared a boot drive, you can turn on the Raspberry and you will be presented wit a desktop, much like any other OS in any computer.
From within the OS, several programs can be used to create and run code, some are software-only and some interface with the GPIO pins on the board.

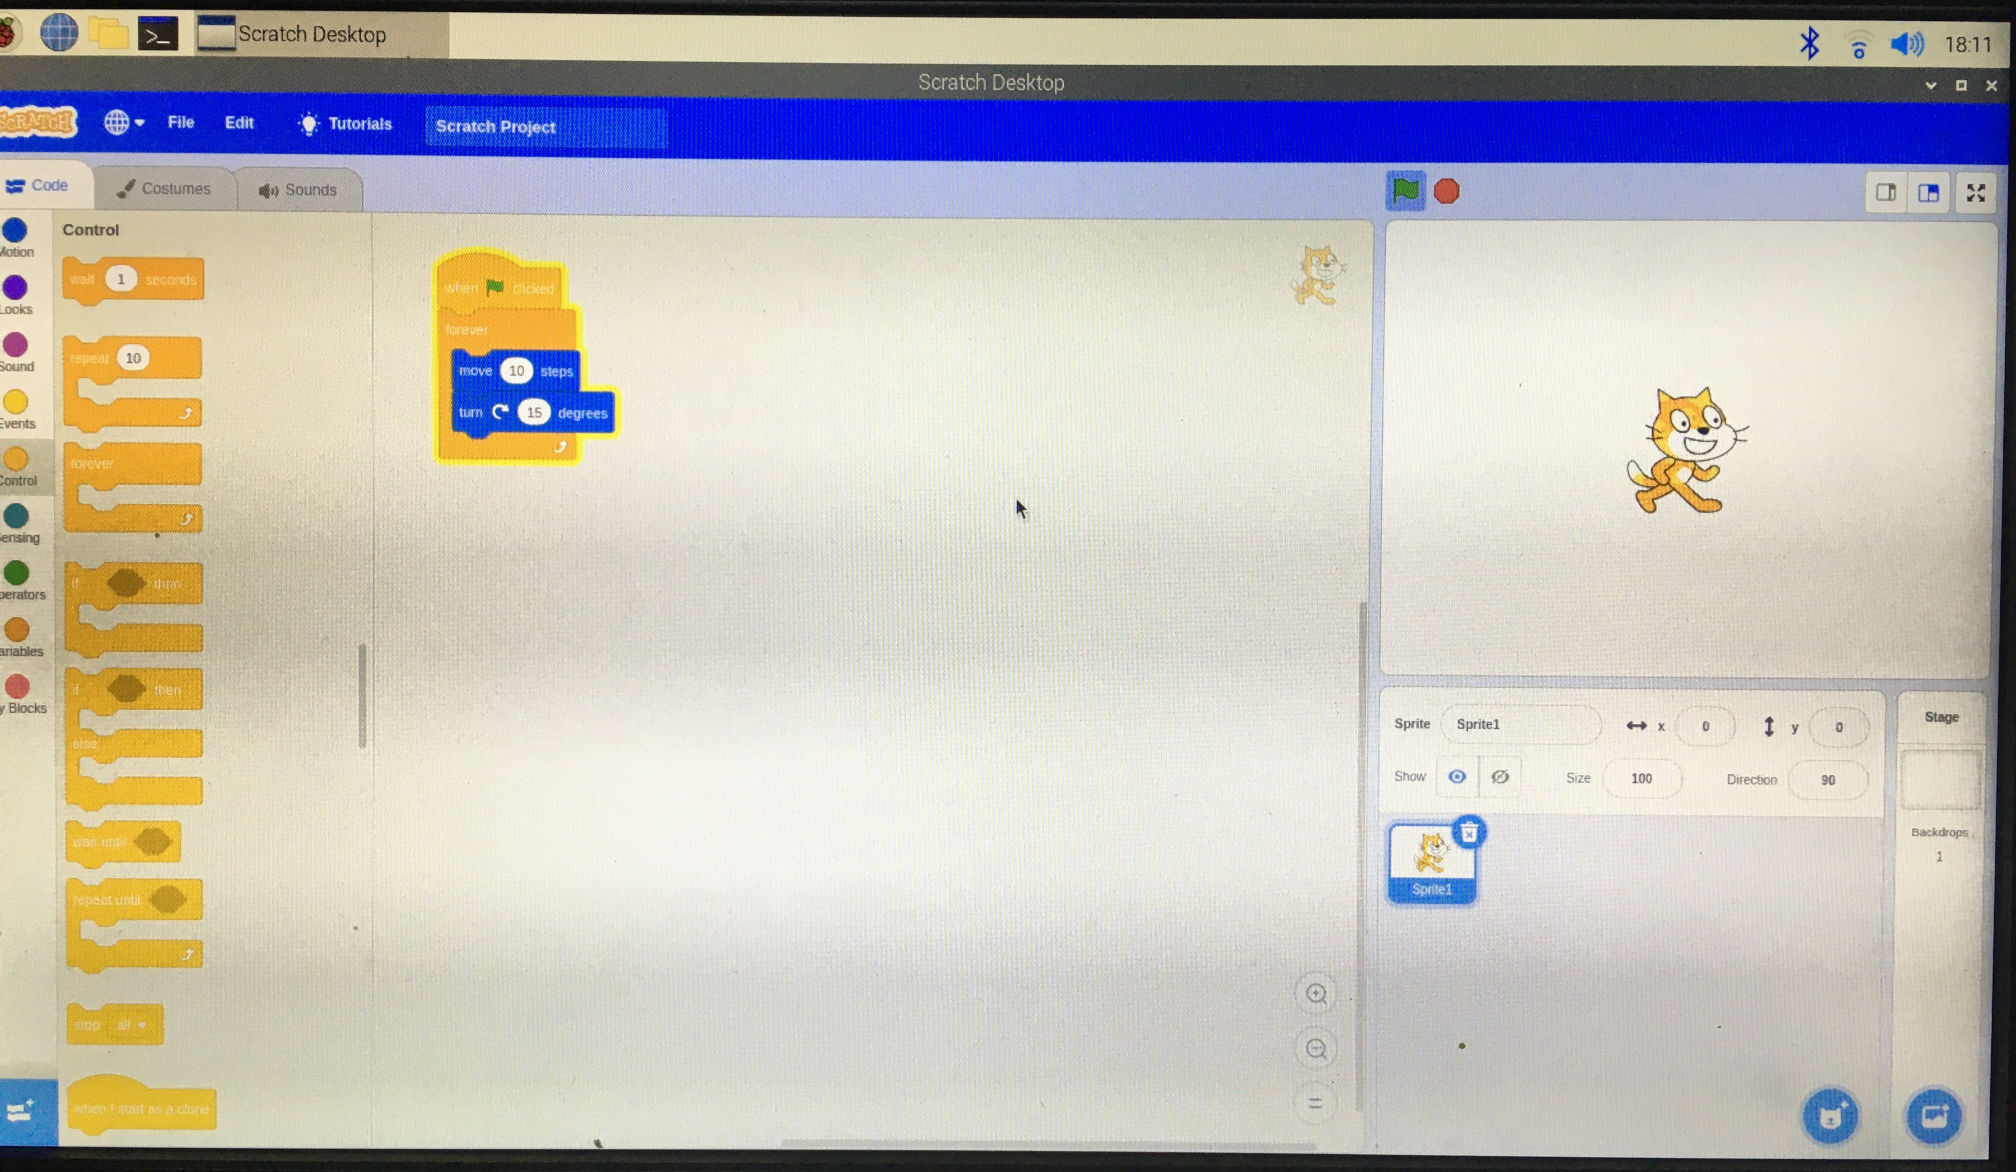
Scratch is a free programming language and online community where you can create your own interactive stories, games, and animations (from scratch.mid.edu).
Scratch is a visual programming language. It uses blocks of code to "write" programs. It's targeted primarily at children to lear to code.

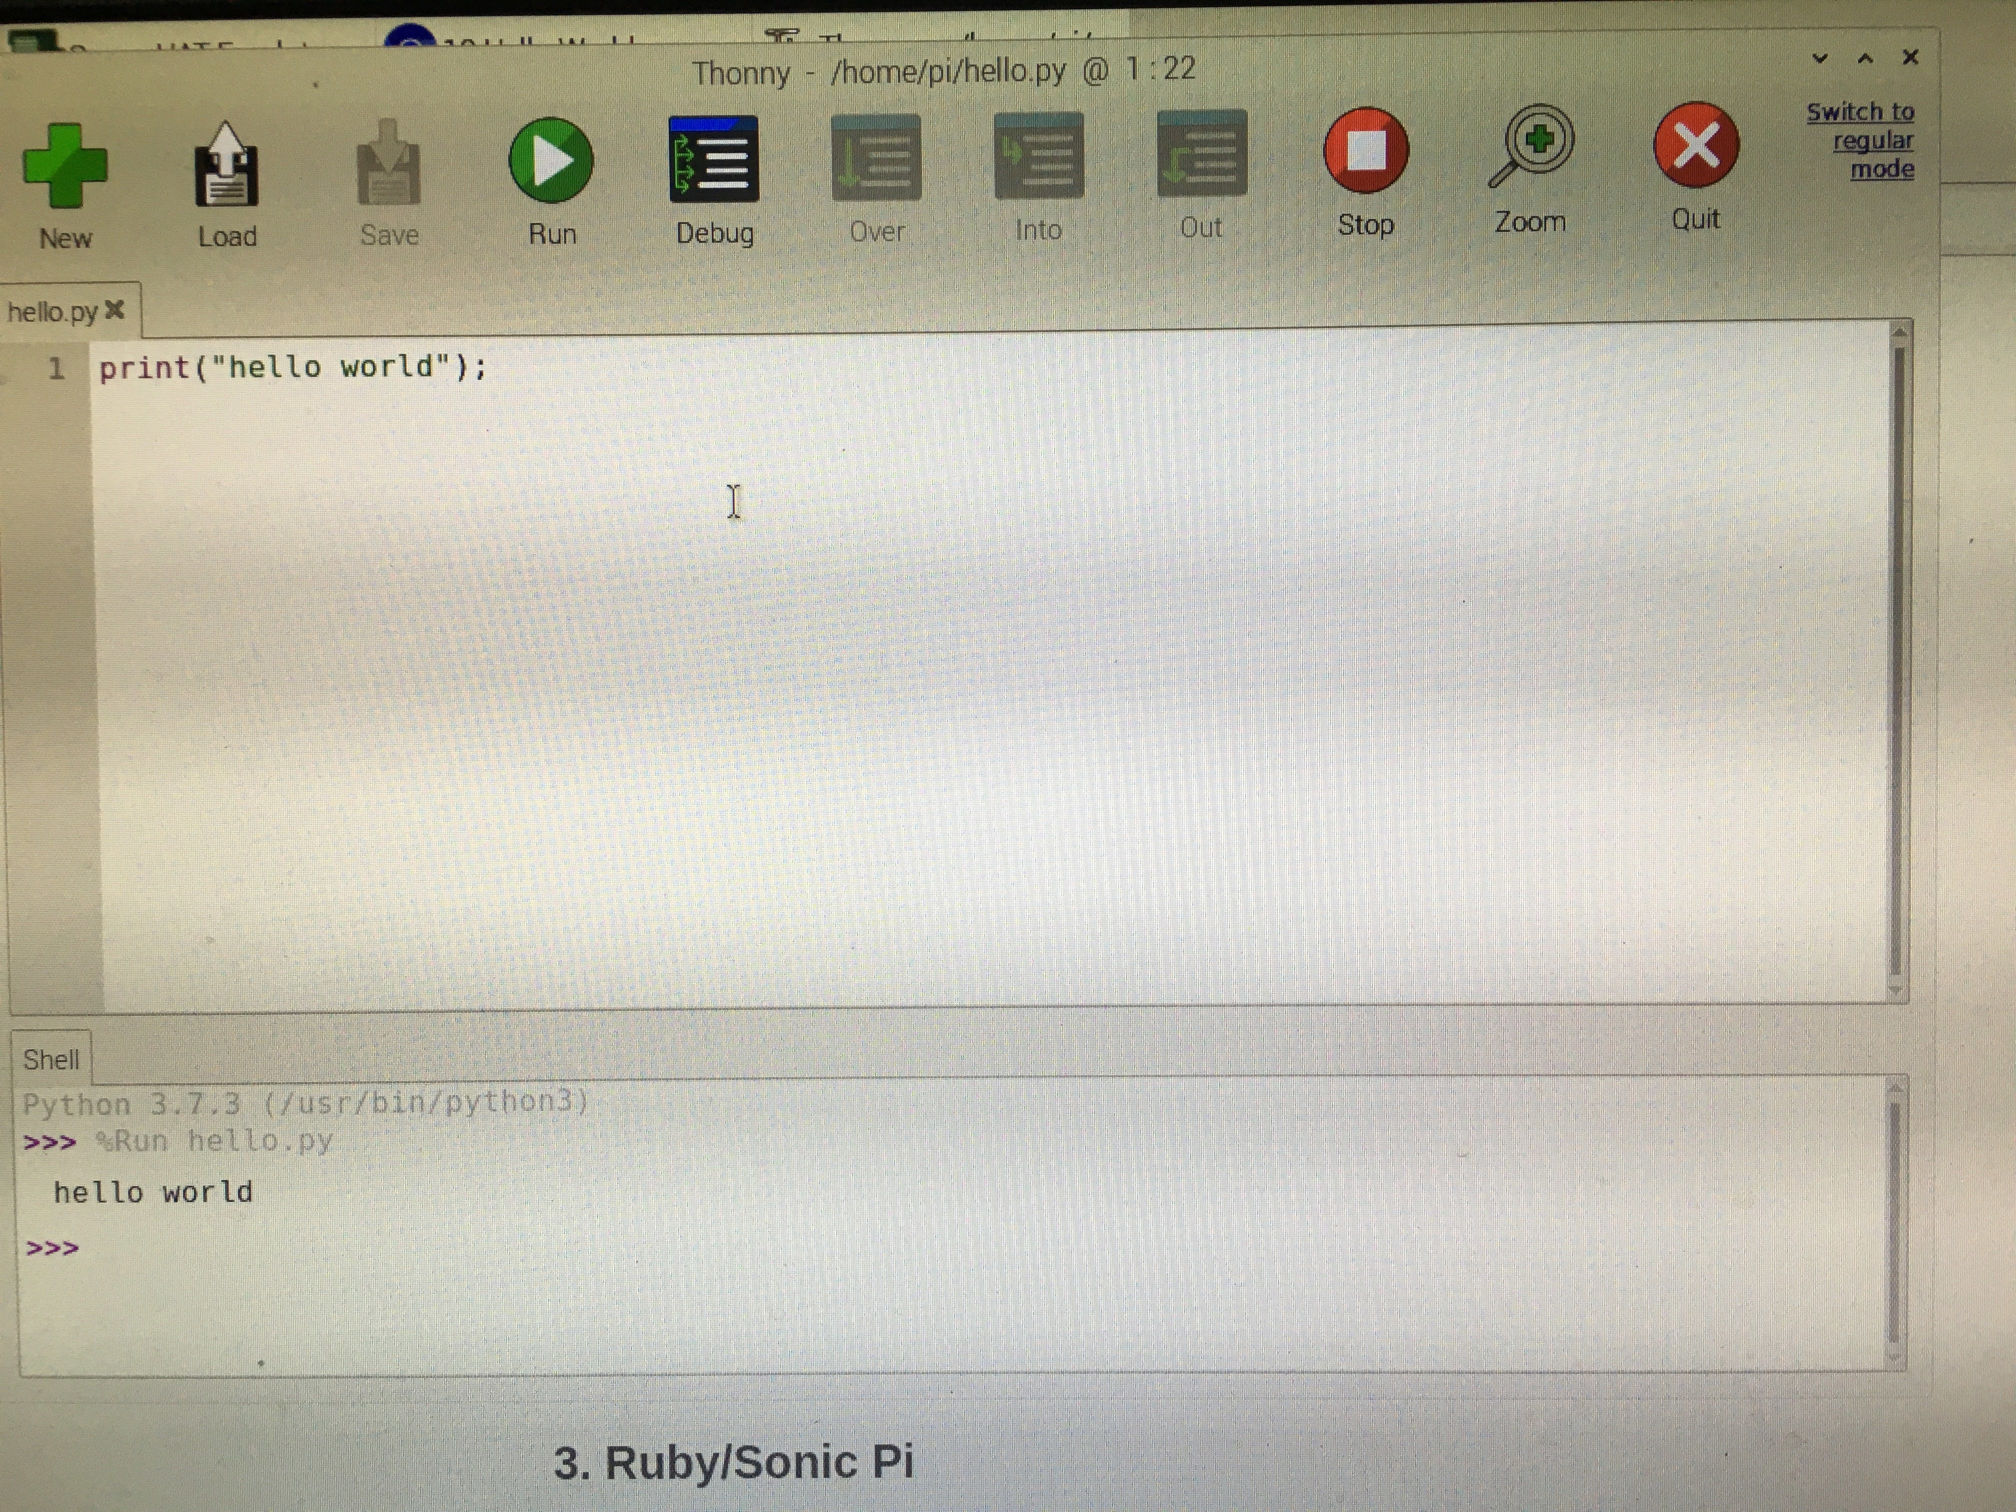
Python is a popular programming language that works well as an entry point for beginners. Because one of Python's main objectives was to be readable and stick to simple English, its "hello world" program is as simple as possible
As mentioned, the Raspberry Pi has GPIO pins that can be digitally controlled by coding the board. It works in a similar way as the Arduino, in which you connect an external circuit and write code that will be executed by the board to control the circuit.
Before working with the GPIO pins port, install the Python library with the following command:
$ sudo apt-get install python-rpi.gpio python3-rpi.gpio
After that you can use any Python IDE to start writing code. Basically, the code will initialize the GPIO ports and switch the LED port between on and off for a defined ammount of time.
import RPi.GPIO as GPIO # Import Raspberry Pi GPIO library
from time import sleep # Import the sleep function from the time module
GPIO.setwarnings(False) # Ignore warning for now
GPIO.setmode(GPIO.BOARD) # Use physical pin numbering
GPIO.setup(8, GPIO.OUT, initial=GPIO.LOW) # Set pin 8 to be an output pin and set initial value to low (off)
while True: # Run forever
GPIO.output(8, GPIO.HIGH) # Turn on
sleep(1) # Sleep for 1 second
sleep(1) # Sleep for 1 second
GPIO.output(8, GPIO.LOW) # Turn off
sleep(1) # Sleep for 1 second
When finished, save it as blinking_led.py and run it either inside your IDE or in the console with:
$ python blinking_led.py