Exercise 5. 😁 3D Scanning and Printing 🦕 🐶
At the end of this exercise, I should be able to:
1. Test the design rules of 3D printer.
2. Document and describe the advantages and limitation of 3D printer.
3. Design using Fusion360 and 3D print an object that could not be easily made substractively.
4. 3D scan an object and print it using 3D printer.
Test The Design Rules of 3D Printer (Group Work)
This exercise was done together with Ting
Kok Eng and Yeo Gau Siong using the Ultimaker 2+ 3D printers in T14 level 4 Fab Lab of Singapore Polytechnic.
The slicer used is Ultimaker
Cura 4.5 and the models used are available from the FabAcademy site.
The details of the steps can seen HERE.
Personal reflections in testing the design rules of 3D printer:🤔
(1) The levelling of the base plate must be done properly.
(2) Always carefully observe the slicing steps in Cura. When Cura proposes support to be added, it shows that the support is really needed in the printing process.
(3) Always observe the printing of the initial layer height. If the initial layer height is not being printed properly, the printing process can be stopped and then the necessary changes could be done without wasting time and material.
Design and 3D Print an Object That Can’t Be Easily Made Substractively😮😏😊
For this exercise, I wanted to make a whistle. A whistle can’t be easily made substractively because the pea (ball) inside the whistle. Substractive manufacturing can’t be used to make an object inside an object.
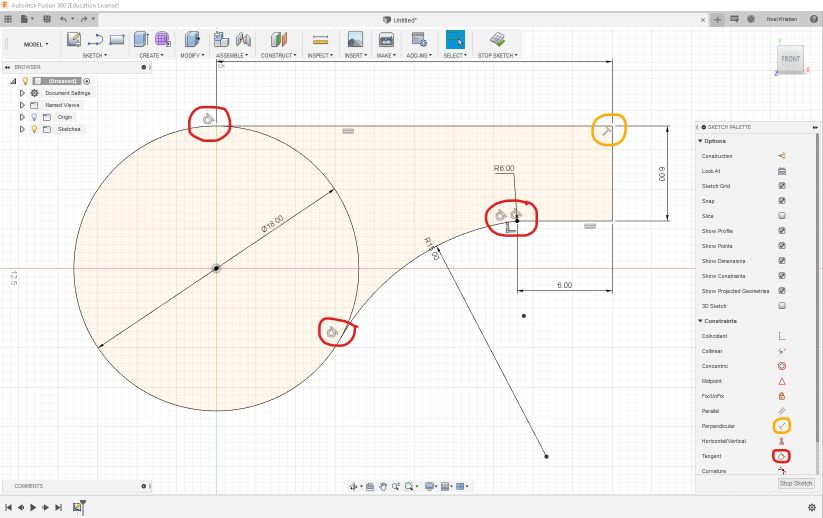
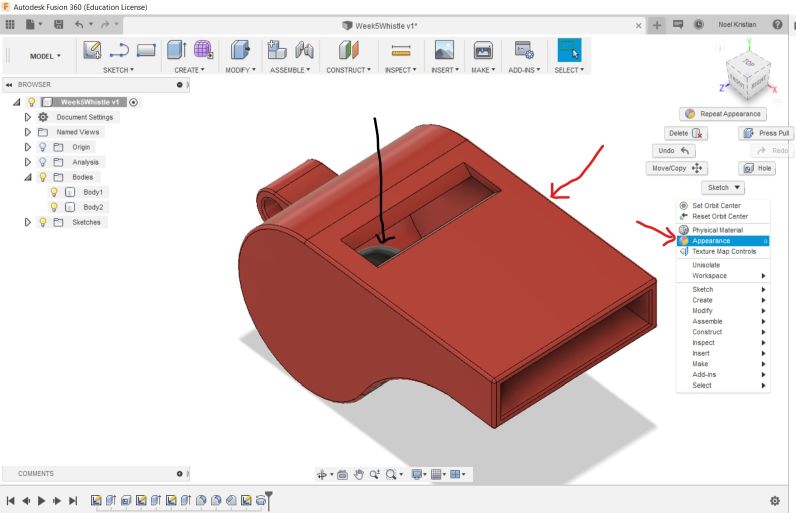
The first step in this exercise is to create the design in Fusion 360. In this exercise, I learnt:
1. Using “constraints” in creating the lines example perpendicular and tangents.
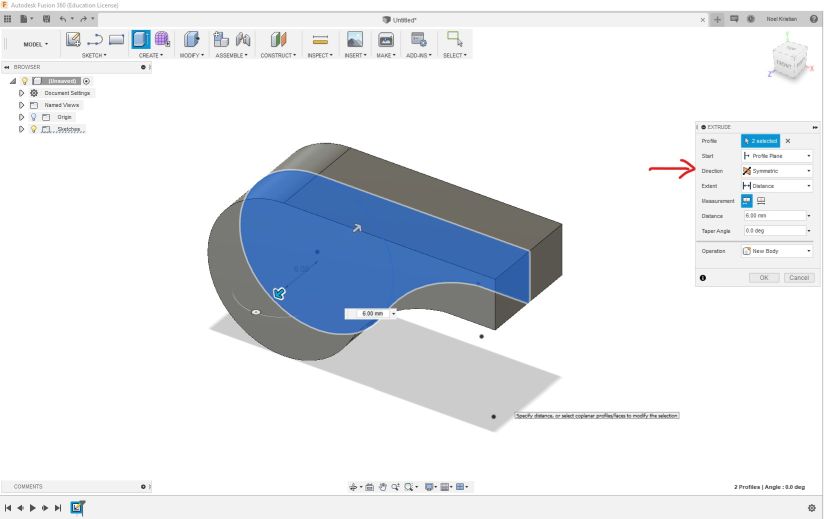
 2. Using “Press-pull” (type “Q”) to create body from lines in symmetric direction.
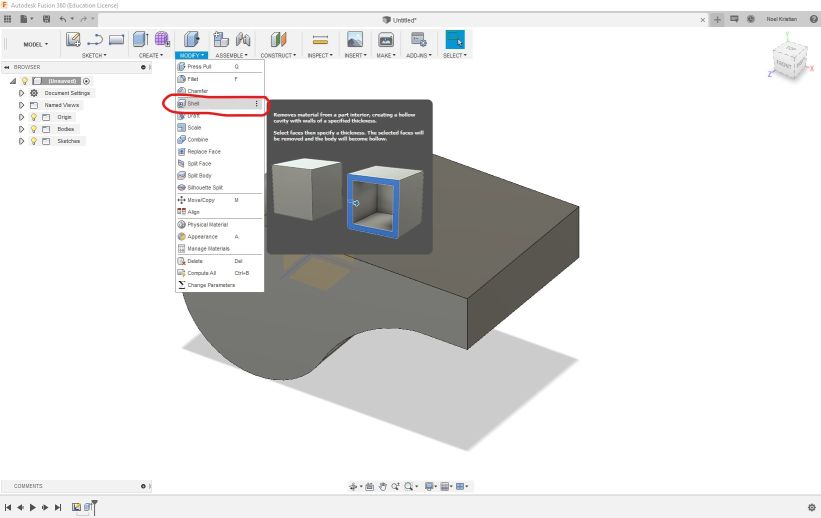
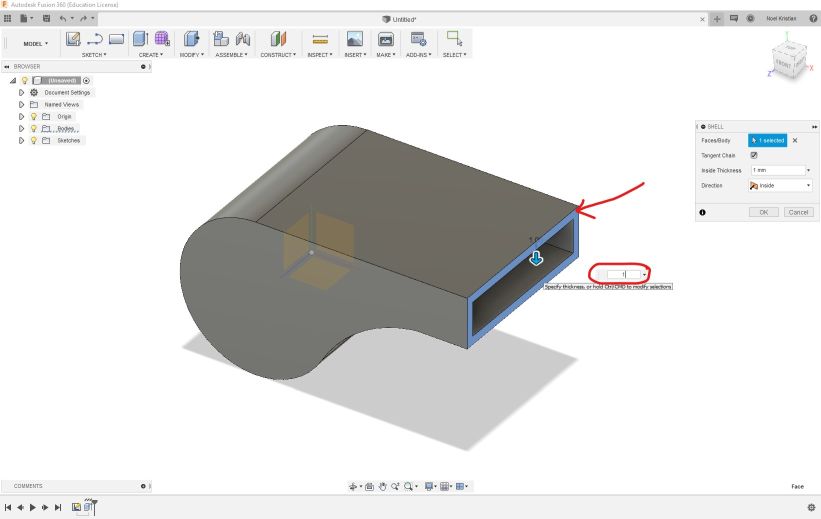
 3. Using “Shell” to remove material from part of body (interior) to create hollow object with specified thickness.
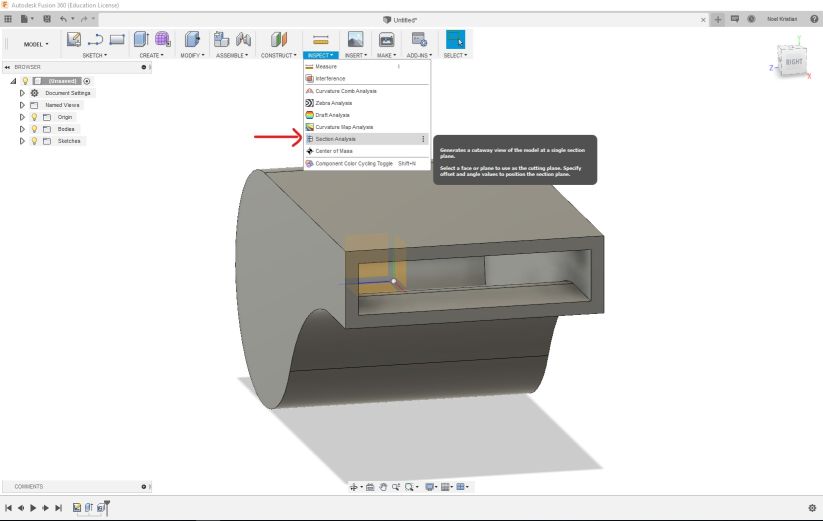
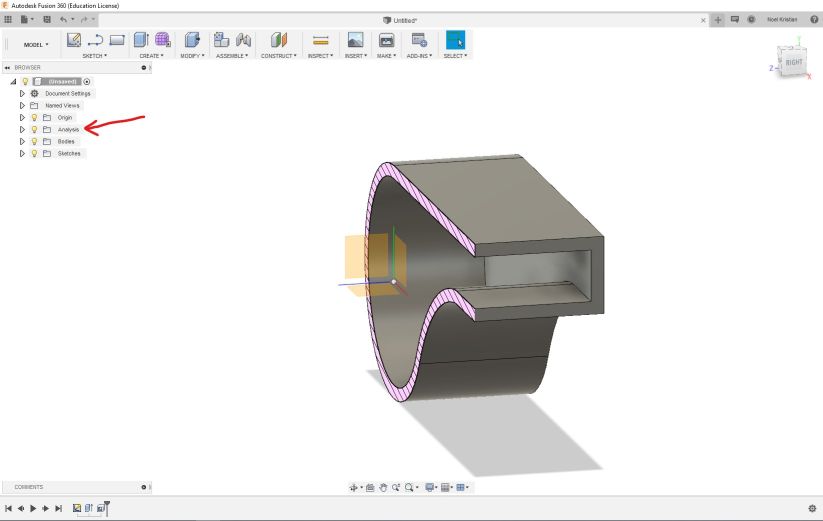
 4. Using “Section Analysis” to view a cutaway view of the model on the selected plane.

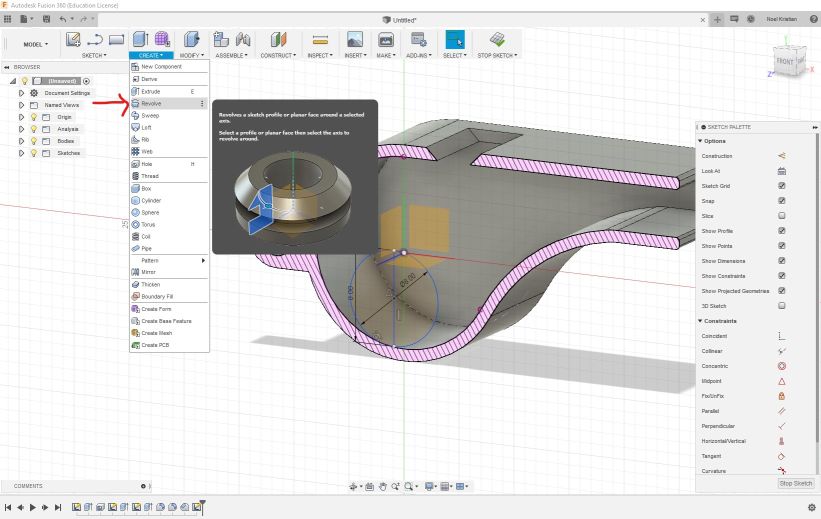
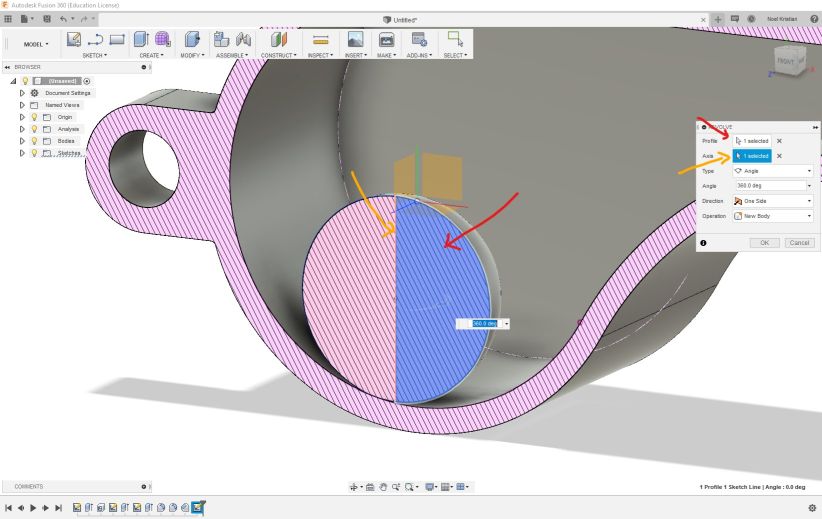
 5. Using “Revolve” to create a body, in this case to create the pea from line and circle.
 6. Using “Appearance” to change the color of different bodies. In this context the pea is black color and the whistle body is red color.
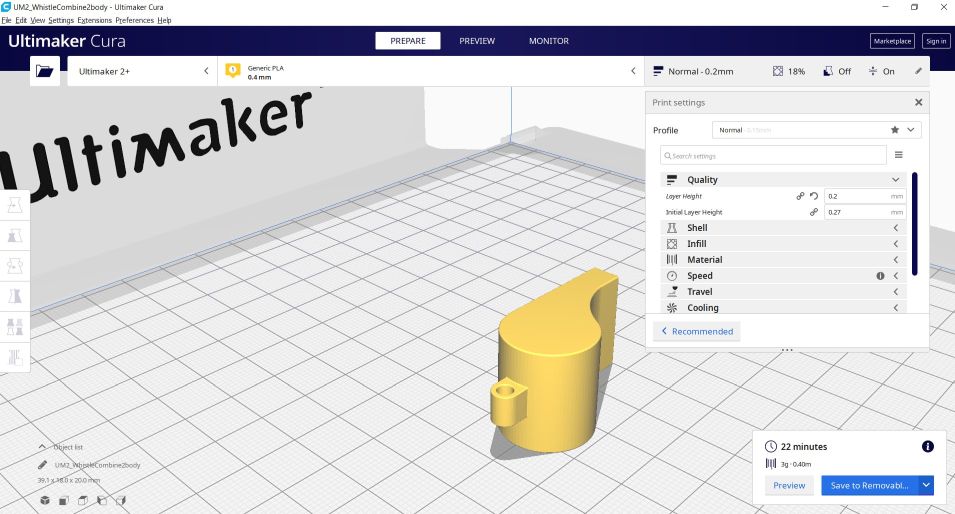
 Using Cura slicer, the gcode file is generated and now the file is ready to be used in the 3D printer
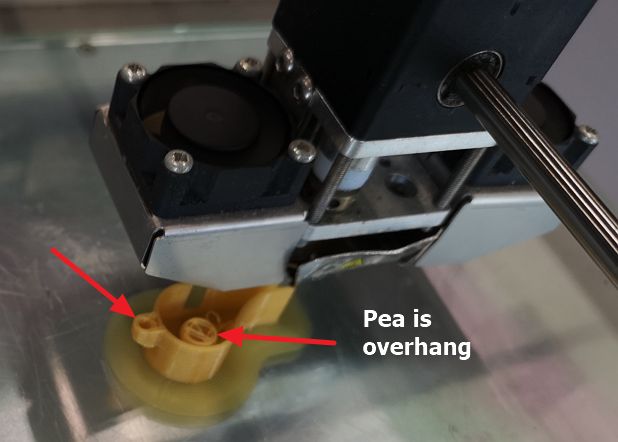
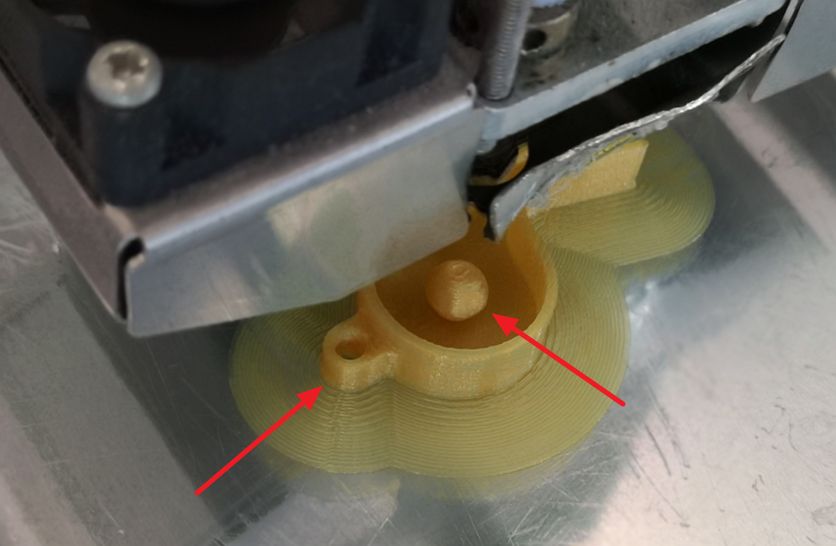
 The 3D printing in action
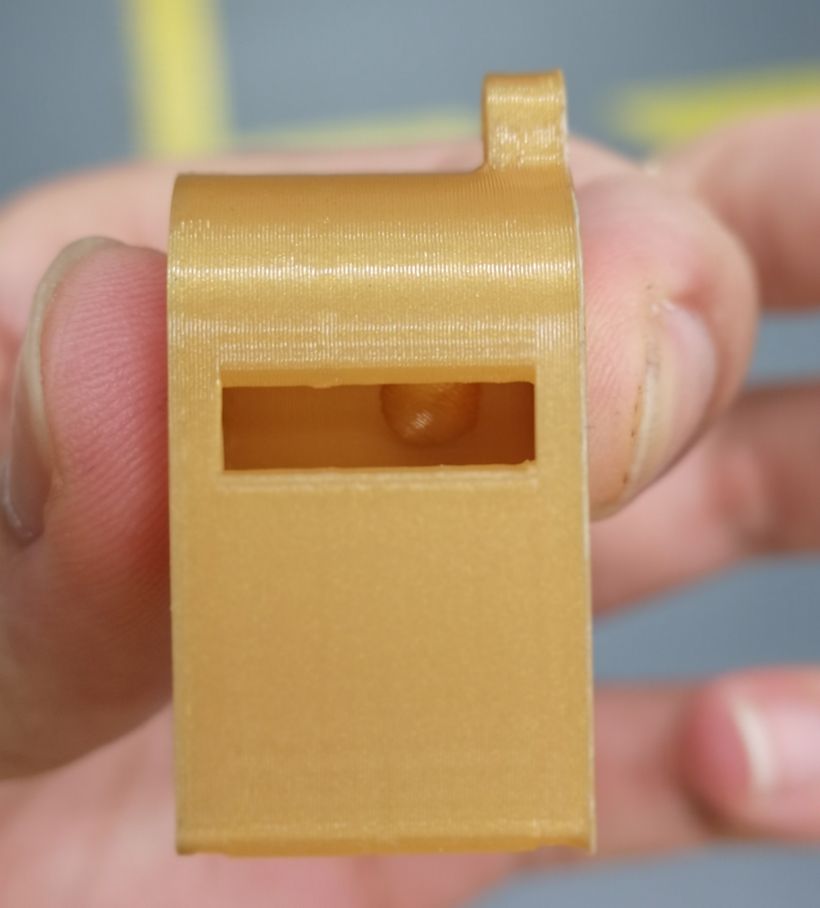
 The 3D printed result:
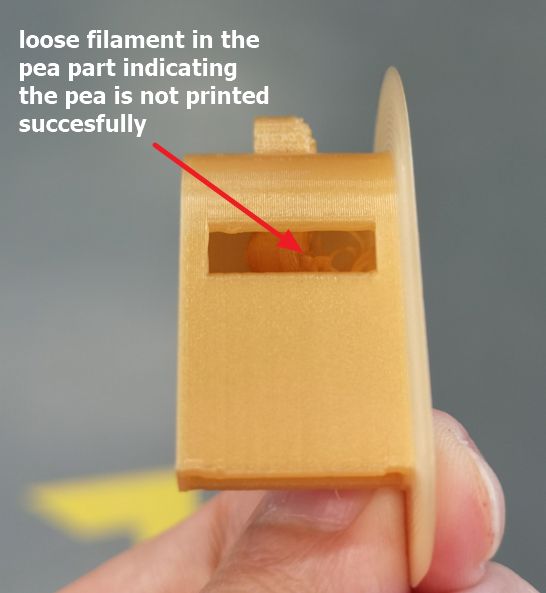
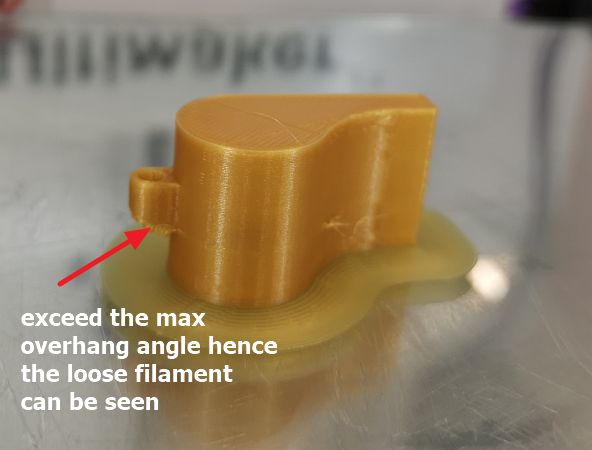 The pea part inside the whistle body:
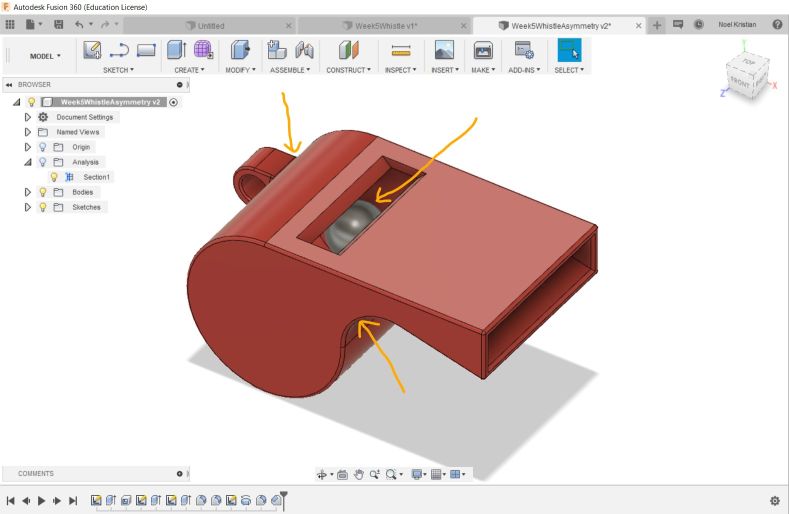
Version 2 of the whistle:😊😊
This time I made the neck section near the circle to be smaller; this will make the velocity of the air passing through to be higher hence more pressure differential. To solve the overhang issues on the pea and the front part, I moved these 2 parts to the bottom part. Below is the screen-capture of the design.
 Version 2 is being printed
 The result:
 Testing the whistle:
The model can be rotated and zoomed with the mouse/trackpad.
Download Whistle Design files👇
3D Scan an Object🐶🦖
In this exercise, I tried 3 different tools/methods to scan objects, namely:
1. NextEngine Desktop 3D scanner.
2. Handheld Sense 2 scanner.
3. Camera and Autodesk RECAP software.
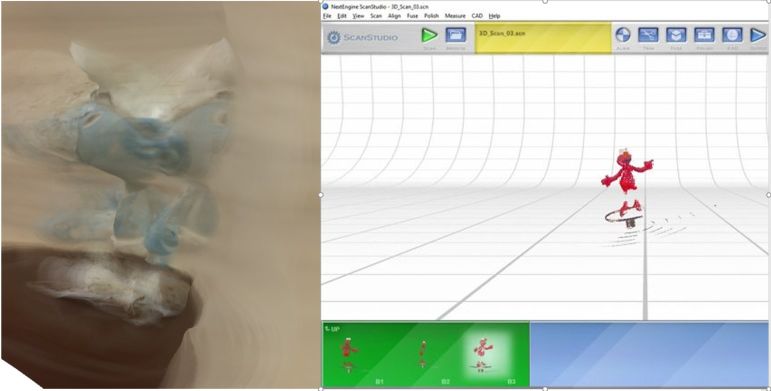
1. NextEngine Desktop 3D Scanner👎👎😀
The first one is NextEngine Desktop 3D scanner and ScanStudio software.
 It is rather simple to use because there’s a rotating plate to put the object and once the scanner is started, the user just need to wait until the scanning is done.
But the scanning process took quite substantial amount of time and the results has many holes when the object scanned is as small as the picture shown below.
Because of these holes, the time needed for post-processing (cleaning up, erasing, filling, creating surfaces) is very tedious and lengthy.
One of the software recommended for the post-processing is Meshmixer by Autodesk.
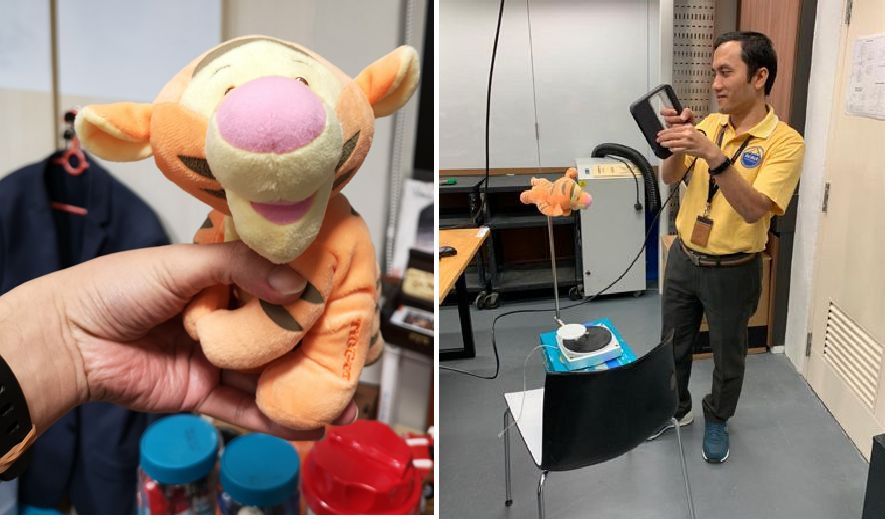
2. Handheld Sense 2 Scanner👎😀
The second tool is a handheld Sense 2 Scanner by 3D Systems.
 This scanner is relatively easy to start. The only challenge is to rotate the object or to turn the handheld scanner to obtain the view of the object 360 degree from the top, from horizontal view and from the bottom.
When the rotation of the object is not done properly, the result will be distorted like in the picture below. I was sitting on a swivel chair and I rotated slowly but the result came out like below.

to download the .stl file of the 3D scanned object (FACE).
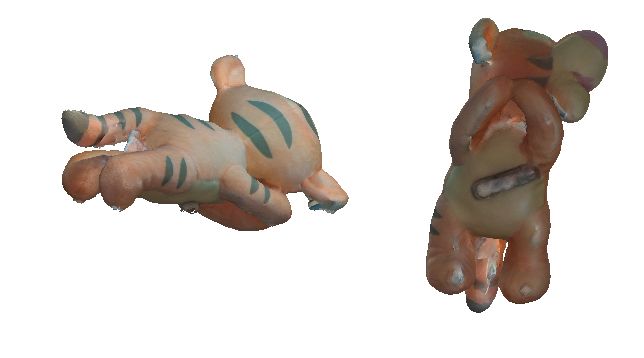
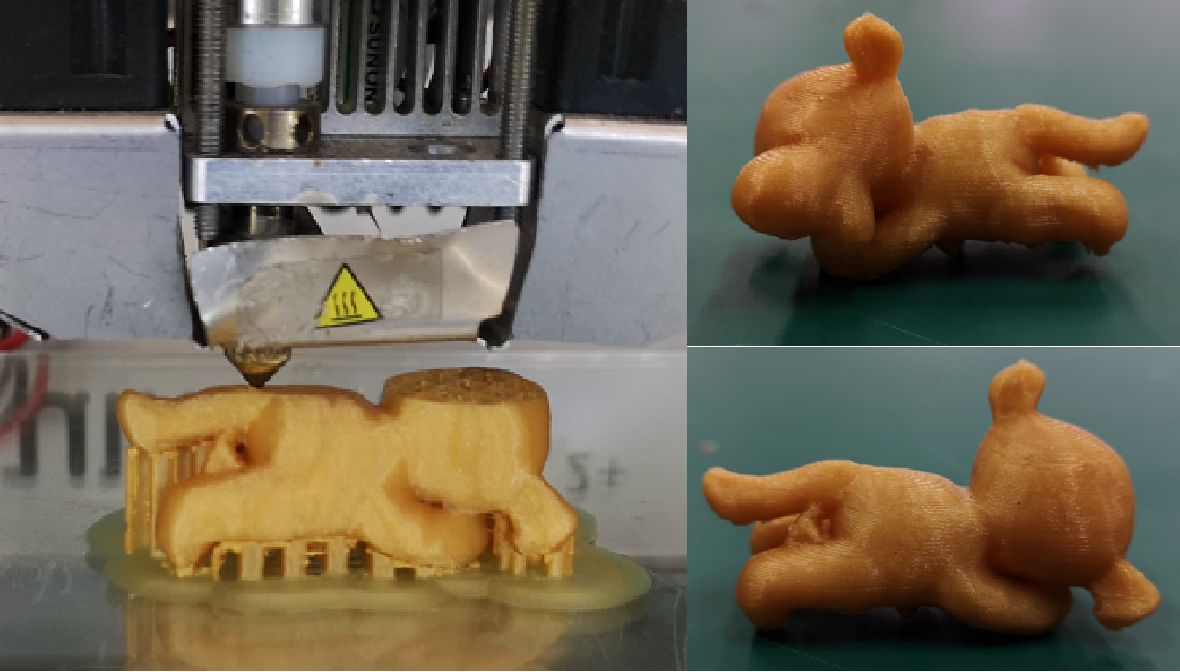
I tried to use a smaller object and this time I used a turn plate so that I don’t need to turn when scanning the object. All I need to do is to turn the plate.
 The results are much better as shown below
 I printed the model and the result was not good because I was too confident that support is not needed (I forgot about my personal reflection in testing 3D printer 😥. The not-so-good result is shown below.
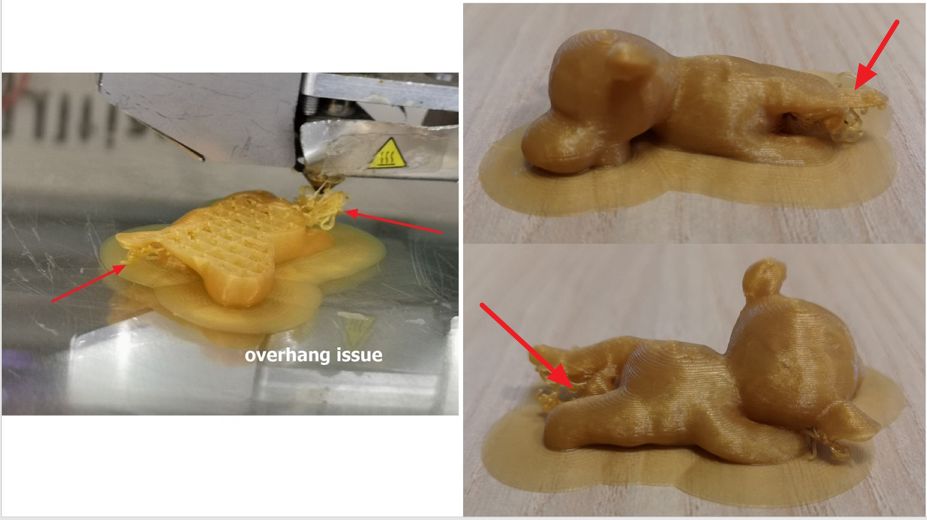 Learning for this experience, I added the support function in Cura and the result is shown below. It is much better that the first version. There's no more overhang issue.
to download the .stl file of the 3D scanned object (TIGER).
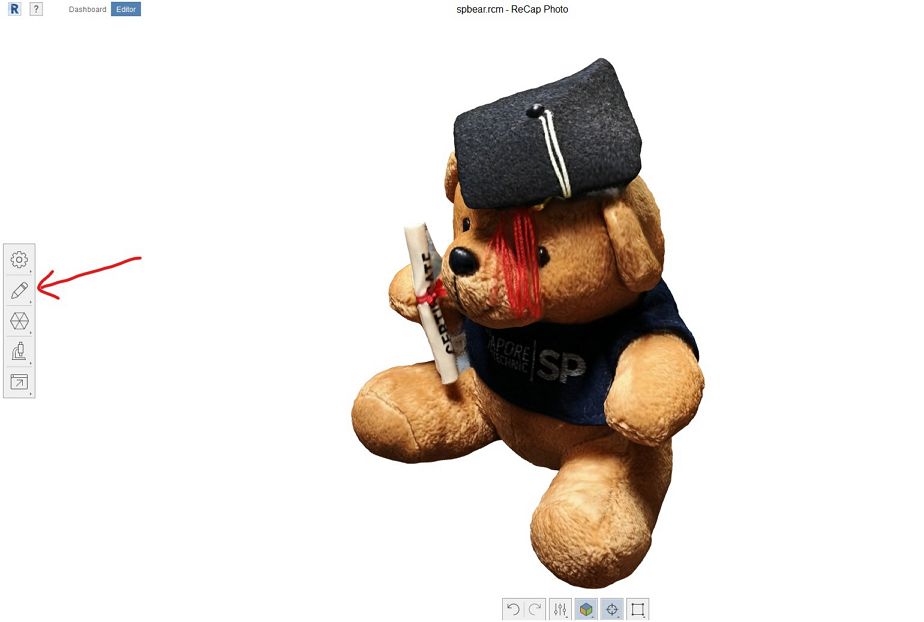
3. Camera and Autodesk RECAP software👍👍👍😊
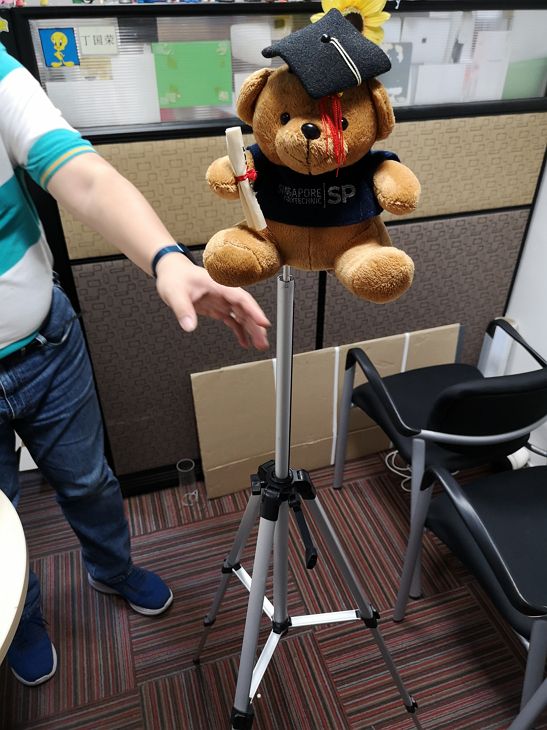
The third tool is a common handphone camera and 3D Scanning processing software Autodesk RECAP. First I used a teddy bear soft-toy and attached it to a tripod.
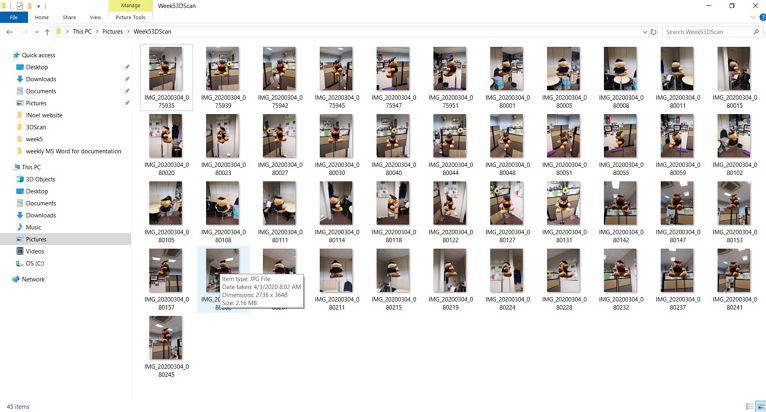
 I took 45 photos of the object circling horizontally, from the top and from the bottom with more or less same distance.
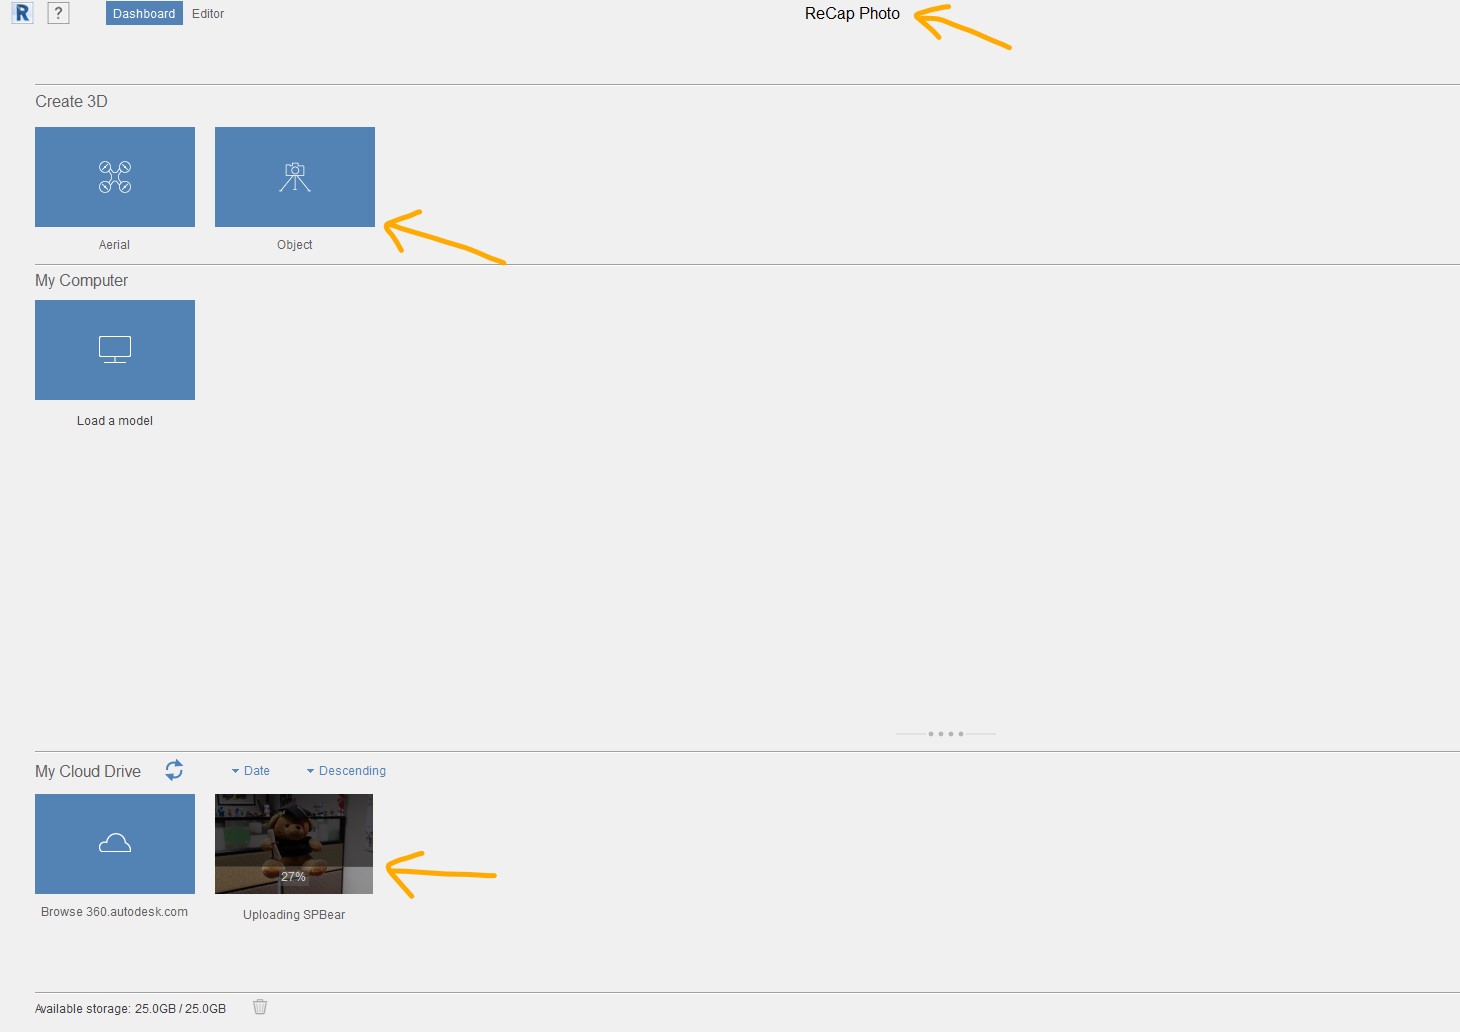
 The 45 photos were then uploaded into the cloud using recap photo software -> select object and then the photos will be uploaded and processed in the cloud.
 It took 3 hours for the processing in the cloud to finish. But the result is very good, only requires a bit of editing using slicer in the recap photo.
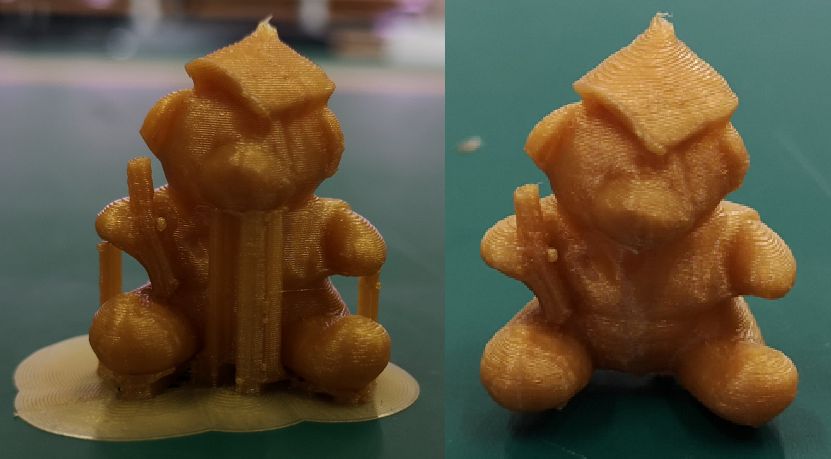
 Save the file as .stl and slice it in Cura software and sent to 3D printer. The result is shown below.
to download the .stl file of the 3D scanned object (TEDDY BEAR).