Computer-Controlled cutting
Assigment objectives
- Week 3 Group assignment
- Design and laser cut of a composite parametric object
- Design and laser cut a car using parametric design
- Vinyl cutter: cutting the leaf village insigna (Naruto)
Summary
This week was supposed to use computer-controlled cutting, we had a
Week 3 Group assignment
Design and laser cut of a composite parametric object
Design
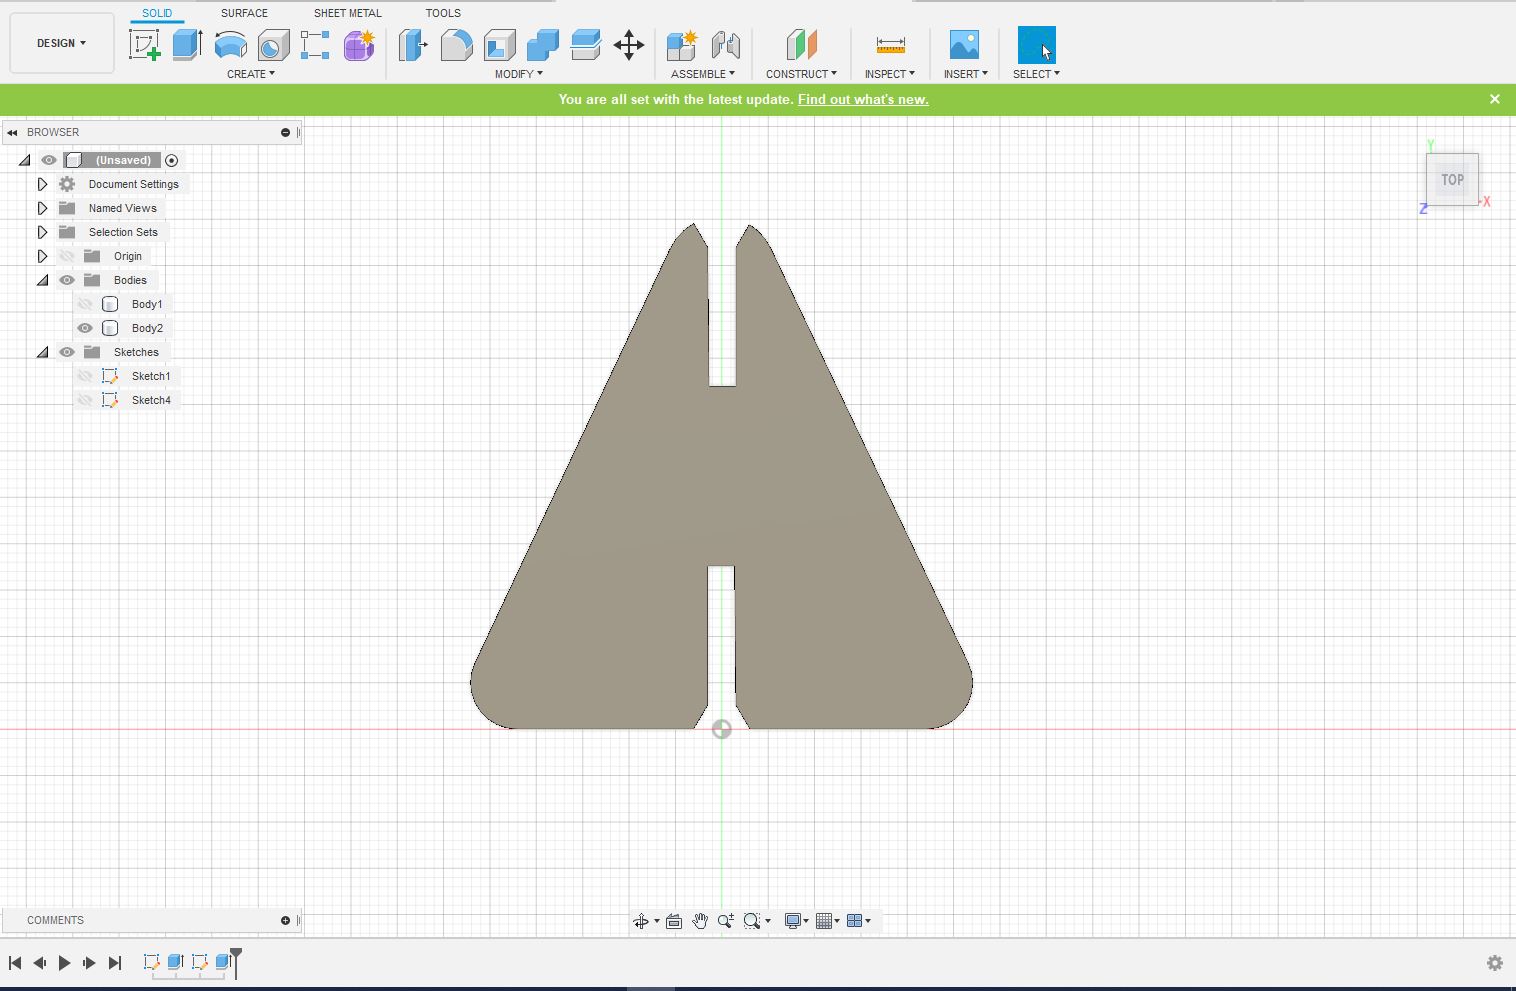
For the composite parametric object I decided to use simple geometric figures to design them, these figures are squares and triangles
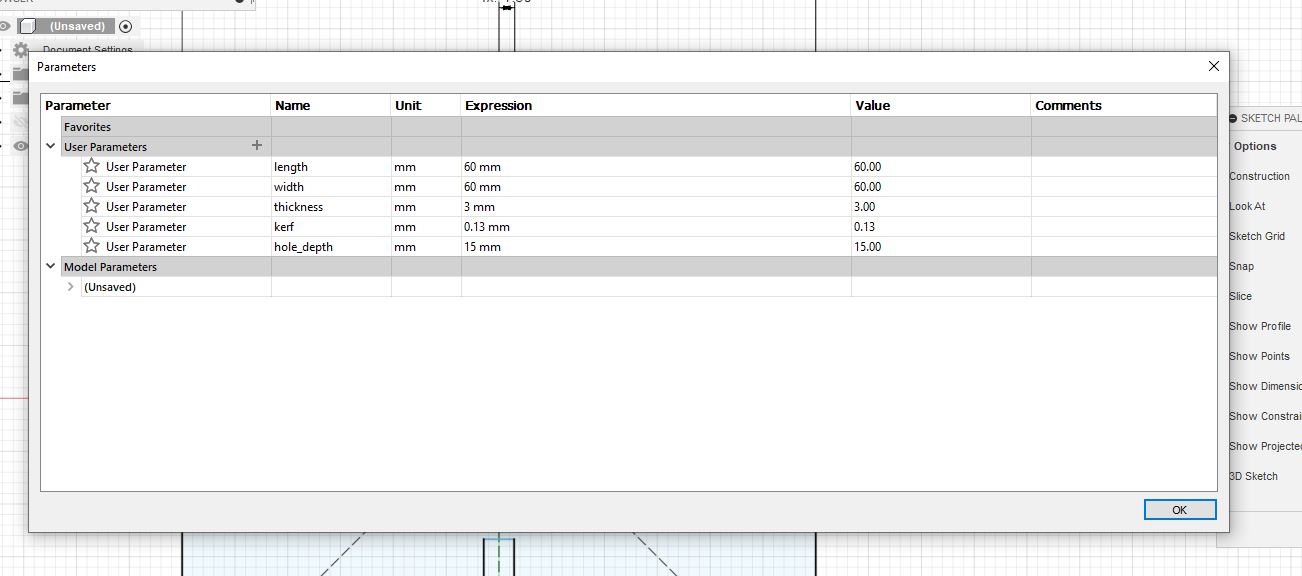
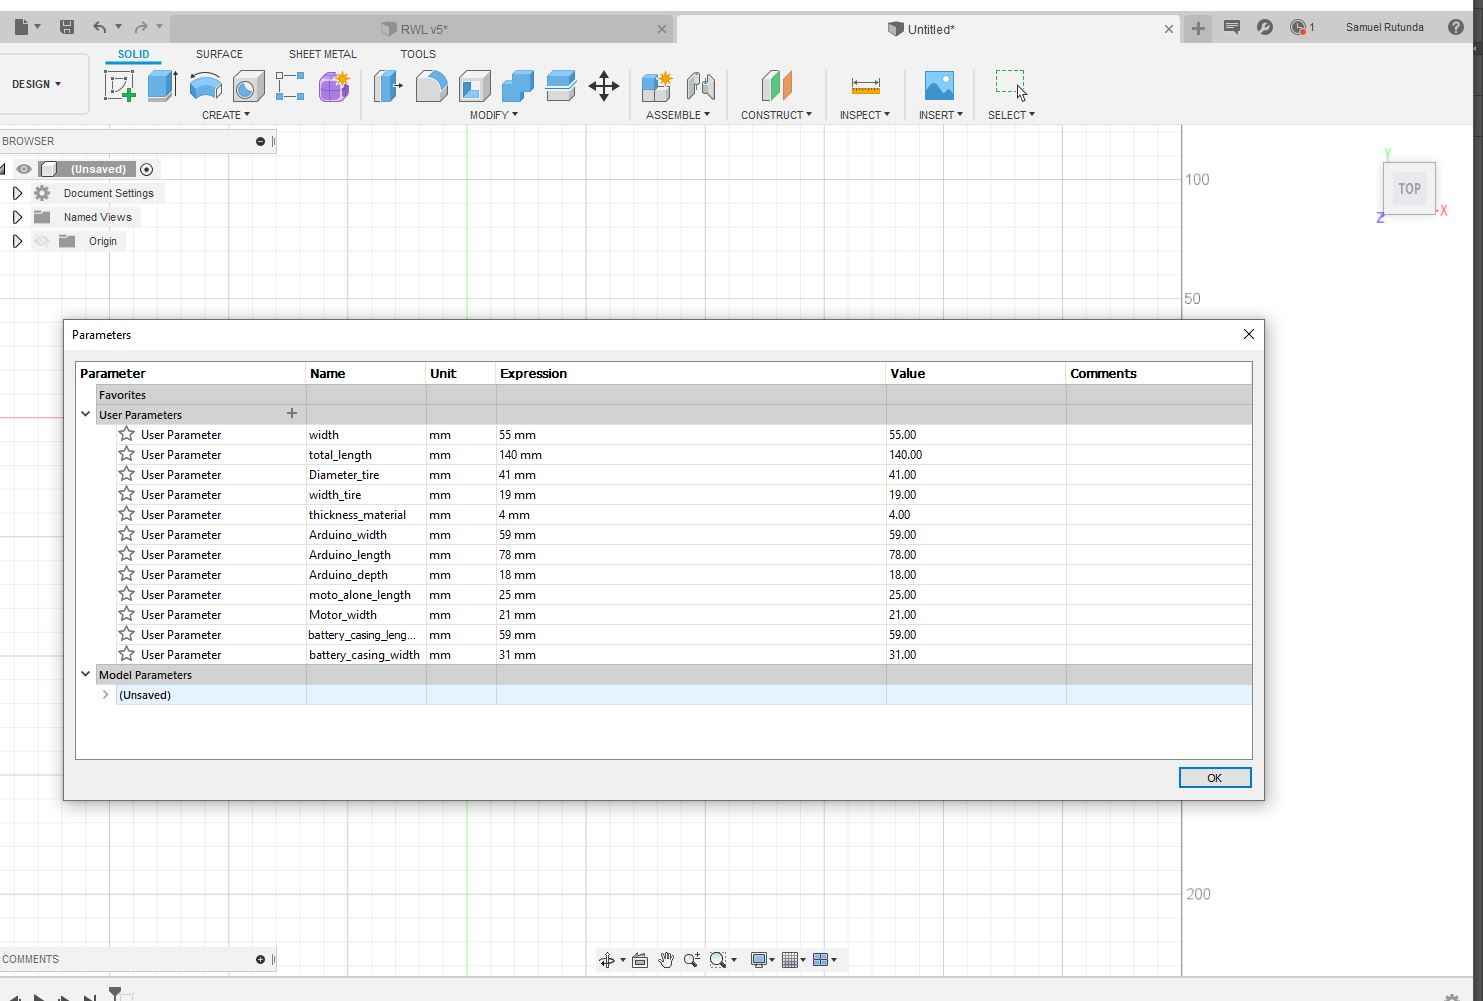
I started by first setting the parametric design, these include the length, the width, the thickness, the kerf and the whole depth
I started by drawing a square, then inserted in the holes on the sides, in the center of each side a whole where one can use to connect with other figures as seen in the picture below
p>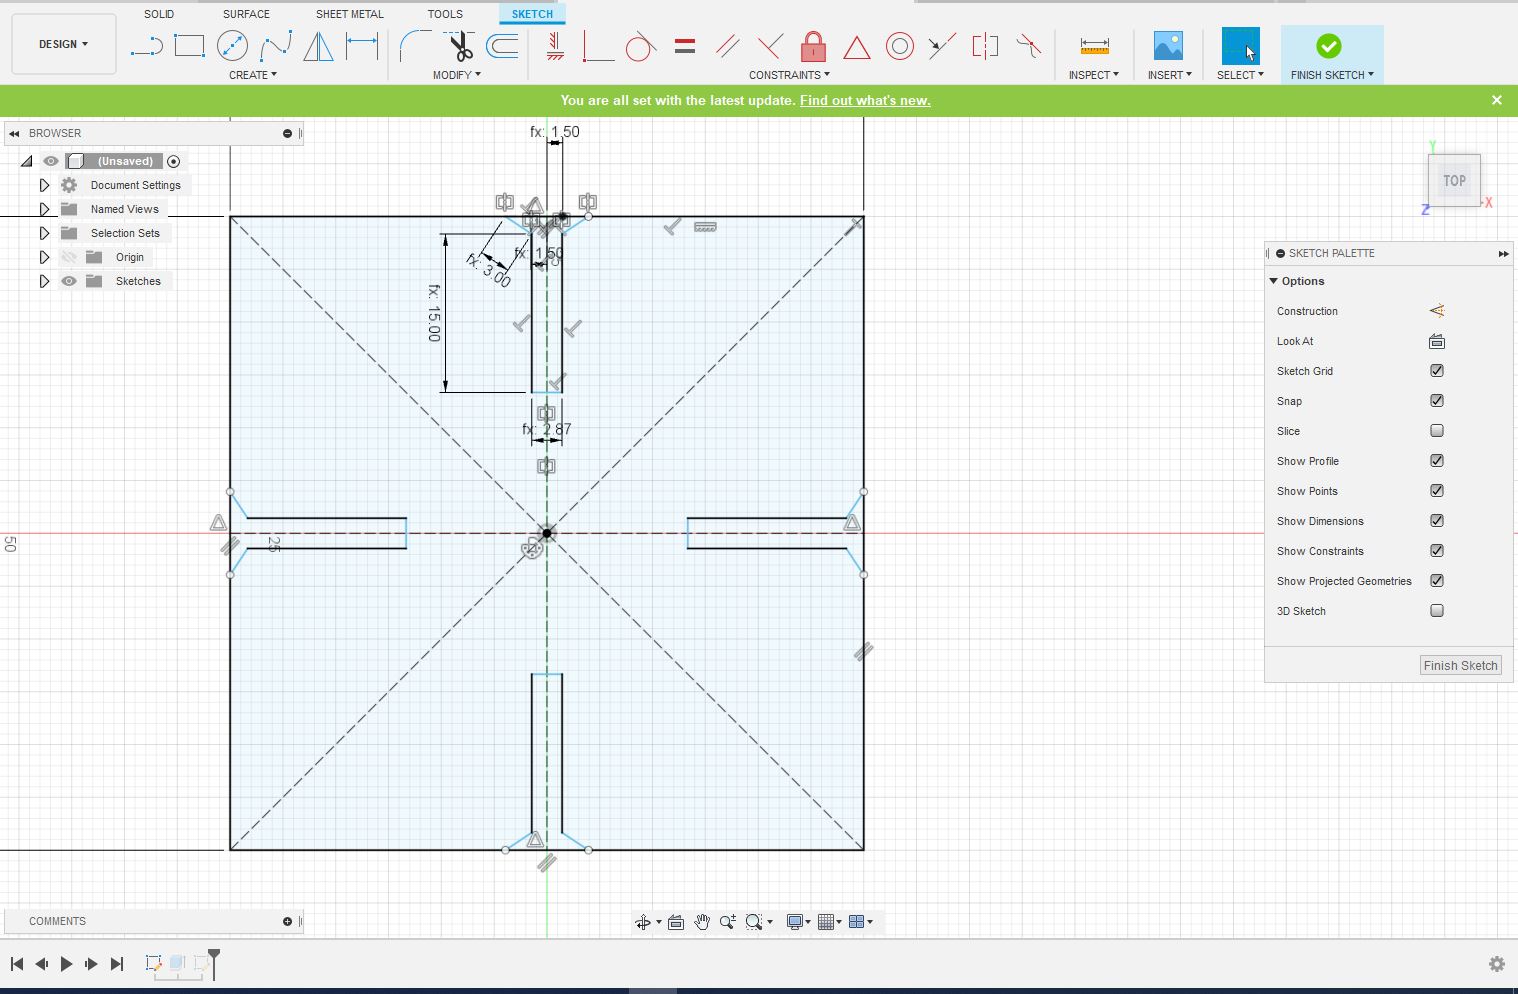
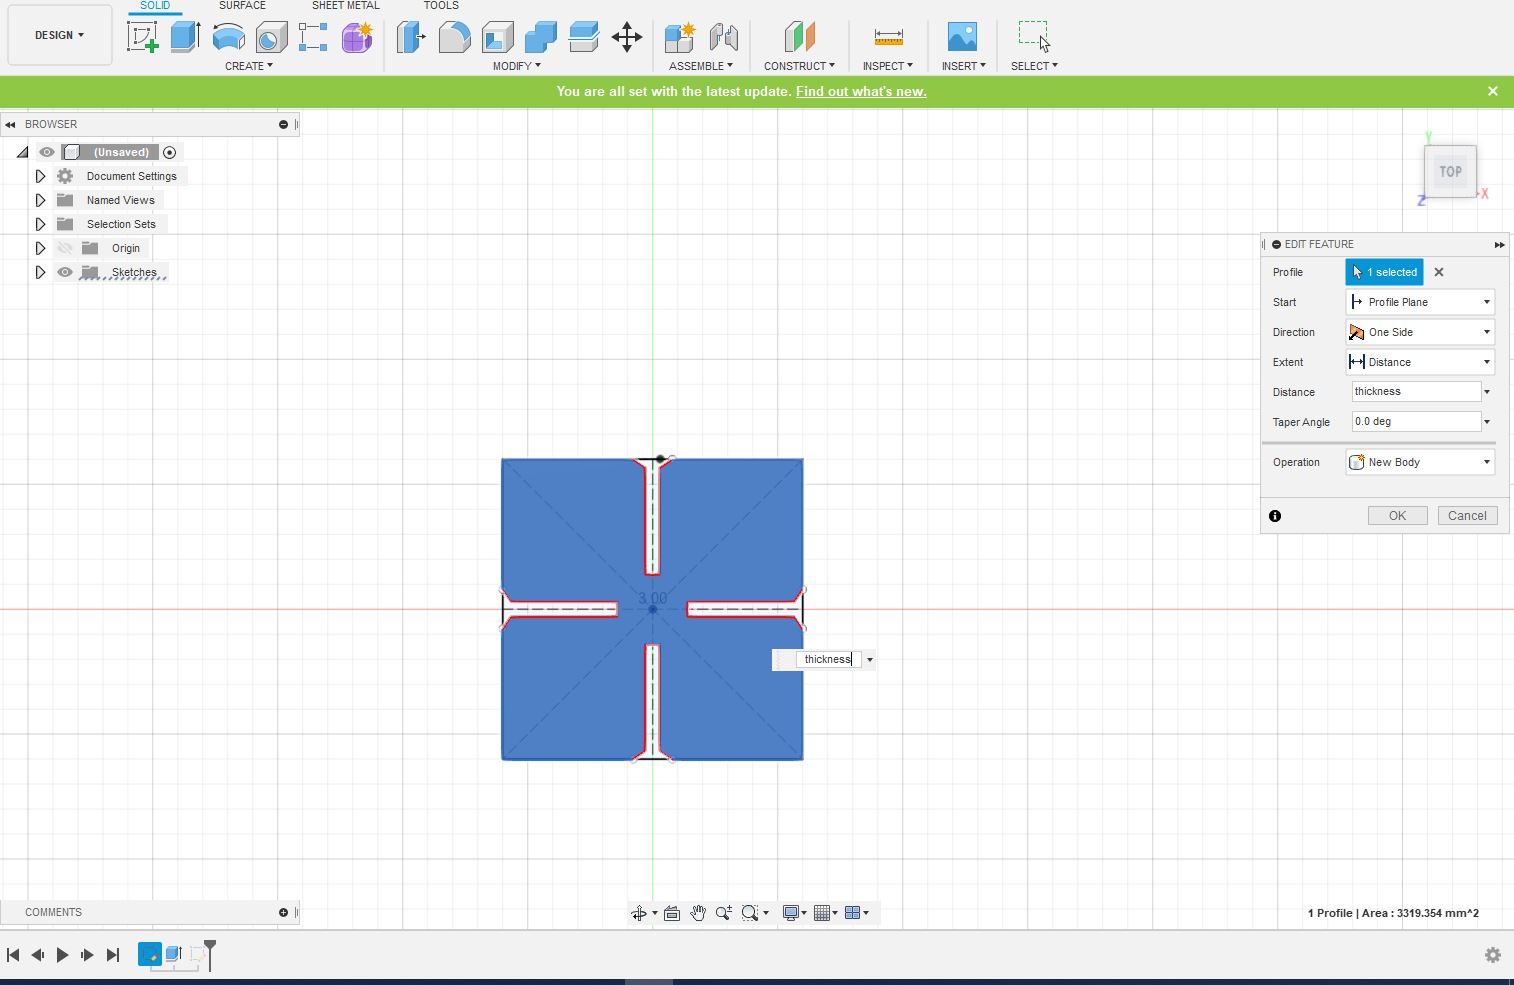
After drawing, I extruded the design, using the width defined in the parametric design
Then I created an extra triangular shaped composite material, using the length of the parametric design, I added the holes on 3 sides of the triangle and I made its corned shapes more curved

Then I extruded the triangle using the width of the parametric design
Laser cutting
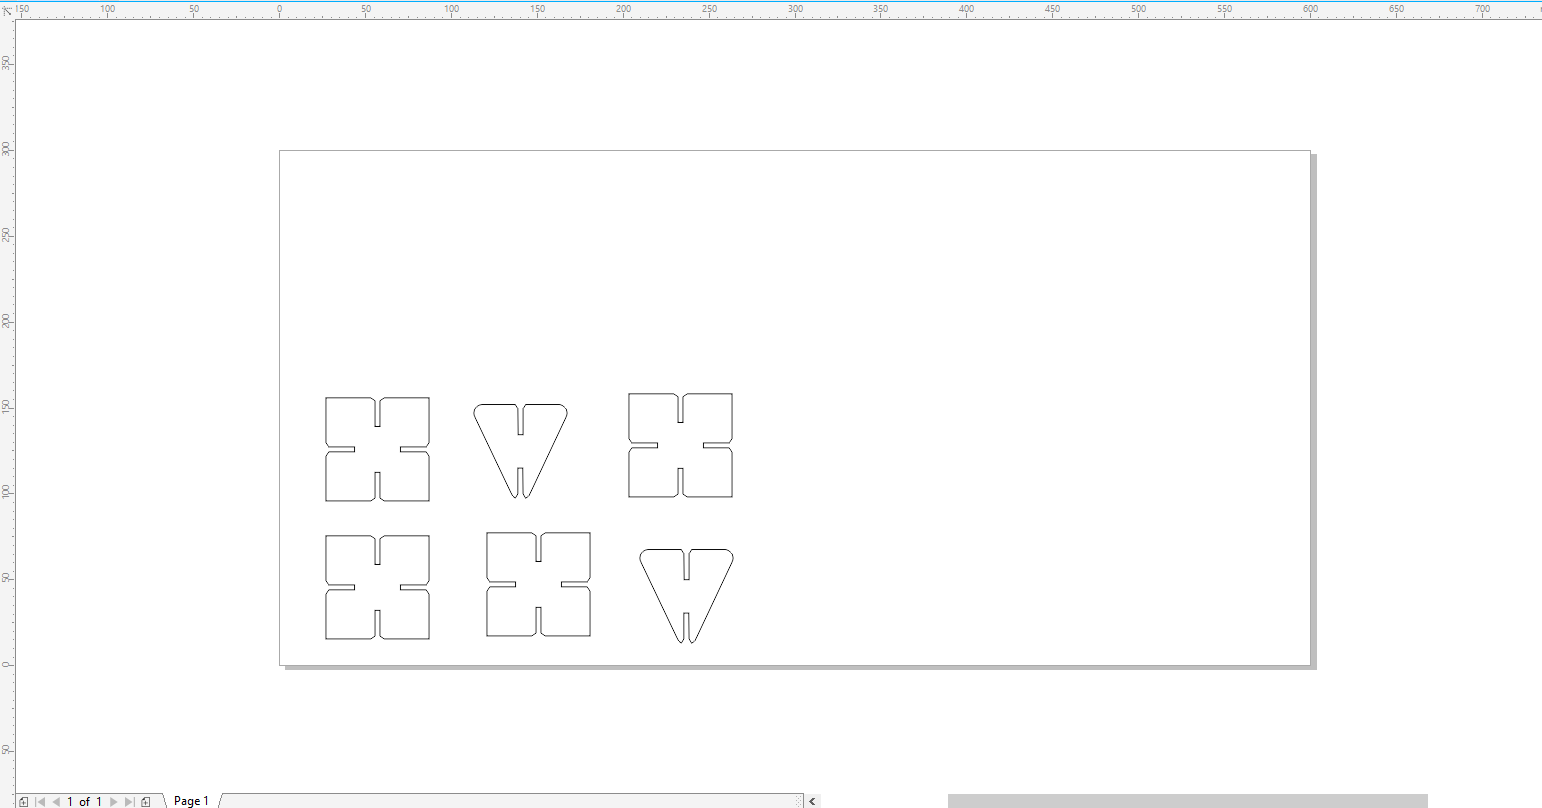
for the laser cutter, I used the coredraw software, I had to extract the DXF file from the fusion software, then export them to the coredraw
I cut 4 squares and 2 triangles, the material used was the cardboard
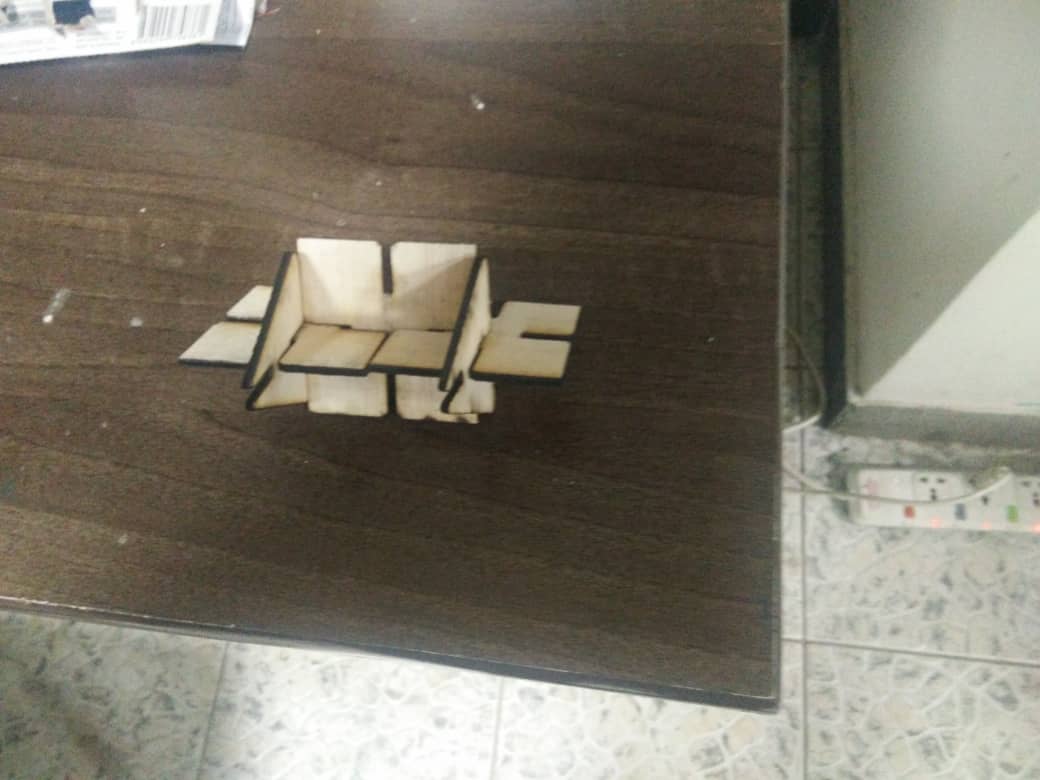
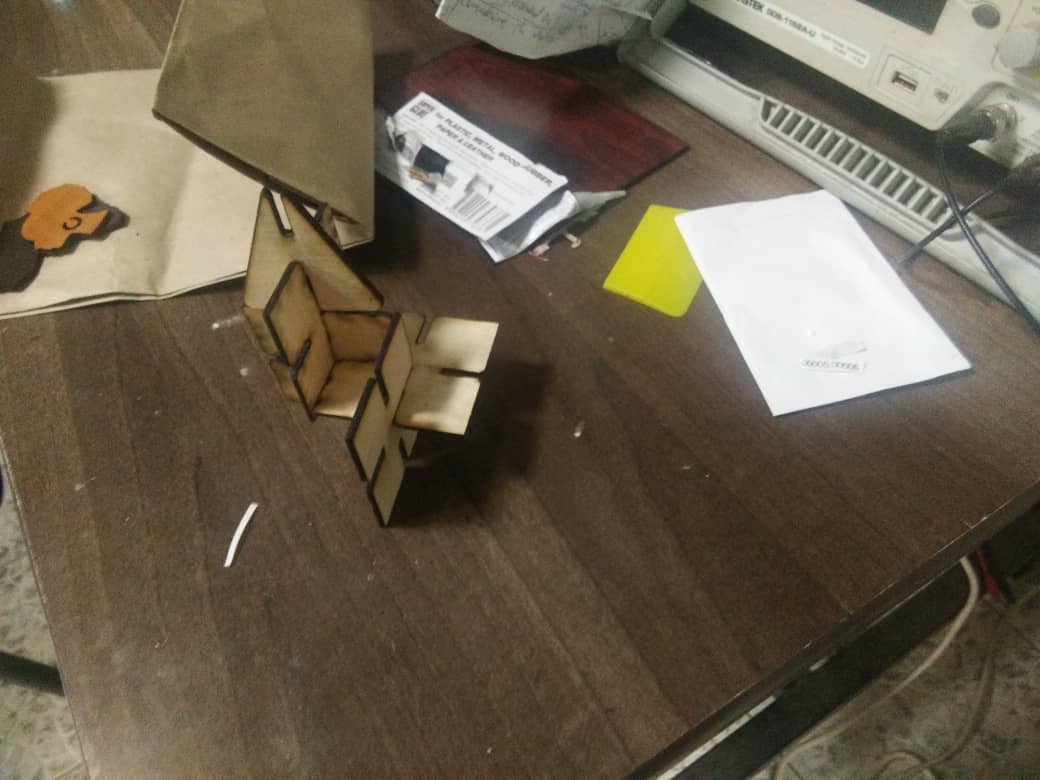
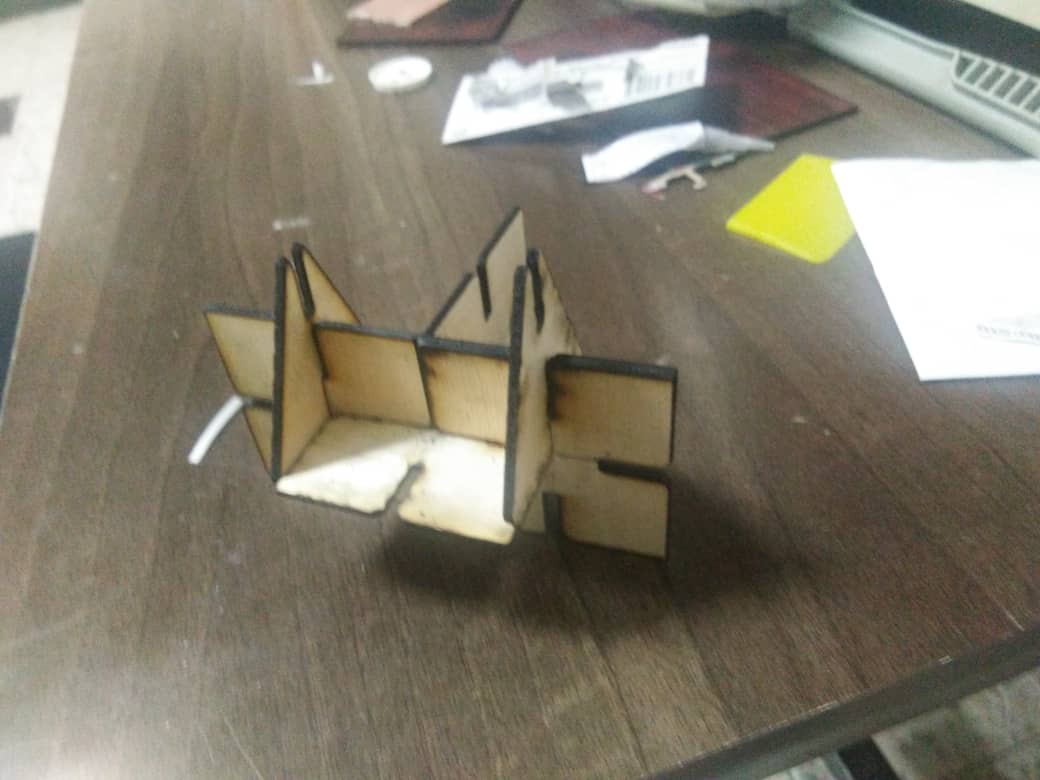
So I assembled the composite material in 3 ways
Here is the first way of assembling it
Here is the second way of assembling the composite material
Here is the third and last way I tried to assemble the composite objects
Design and laser cut a car using parametric design
Design
In this week assignment, design using parametric design, I decided to design one of my final project, A car.
The car had to be made of 5 parts, the chassis, 2 front wheel part, and 2 backwheel parts. To design, I added the parametric design such as the thickness of the car, the length of the car and the width of the car, The reason I added some extra parametric parameters was that I wanted to add the length and width of the car in case I want to change them in the future. In the presence this car is basic and has no electronic component, in the future I want the car to be remote controlled
The next step consist at designing the chassis, To design the chassis I used the sketch option, then matched all the parametric designs, i.e. the length of the car, the tichness of the car, the width of the car, the diameter of the wheel
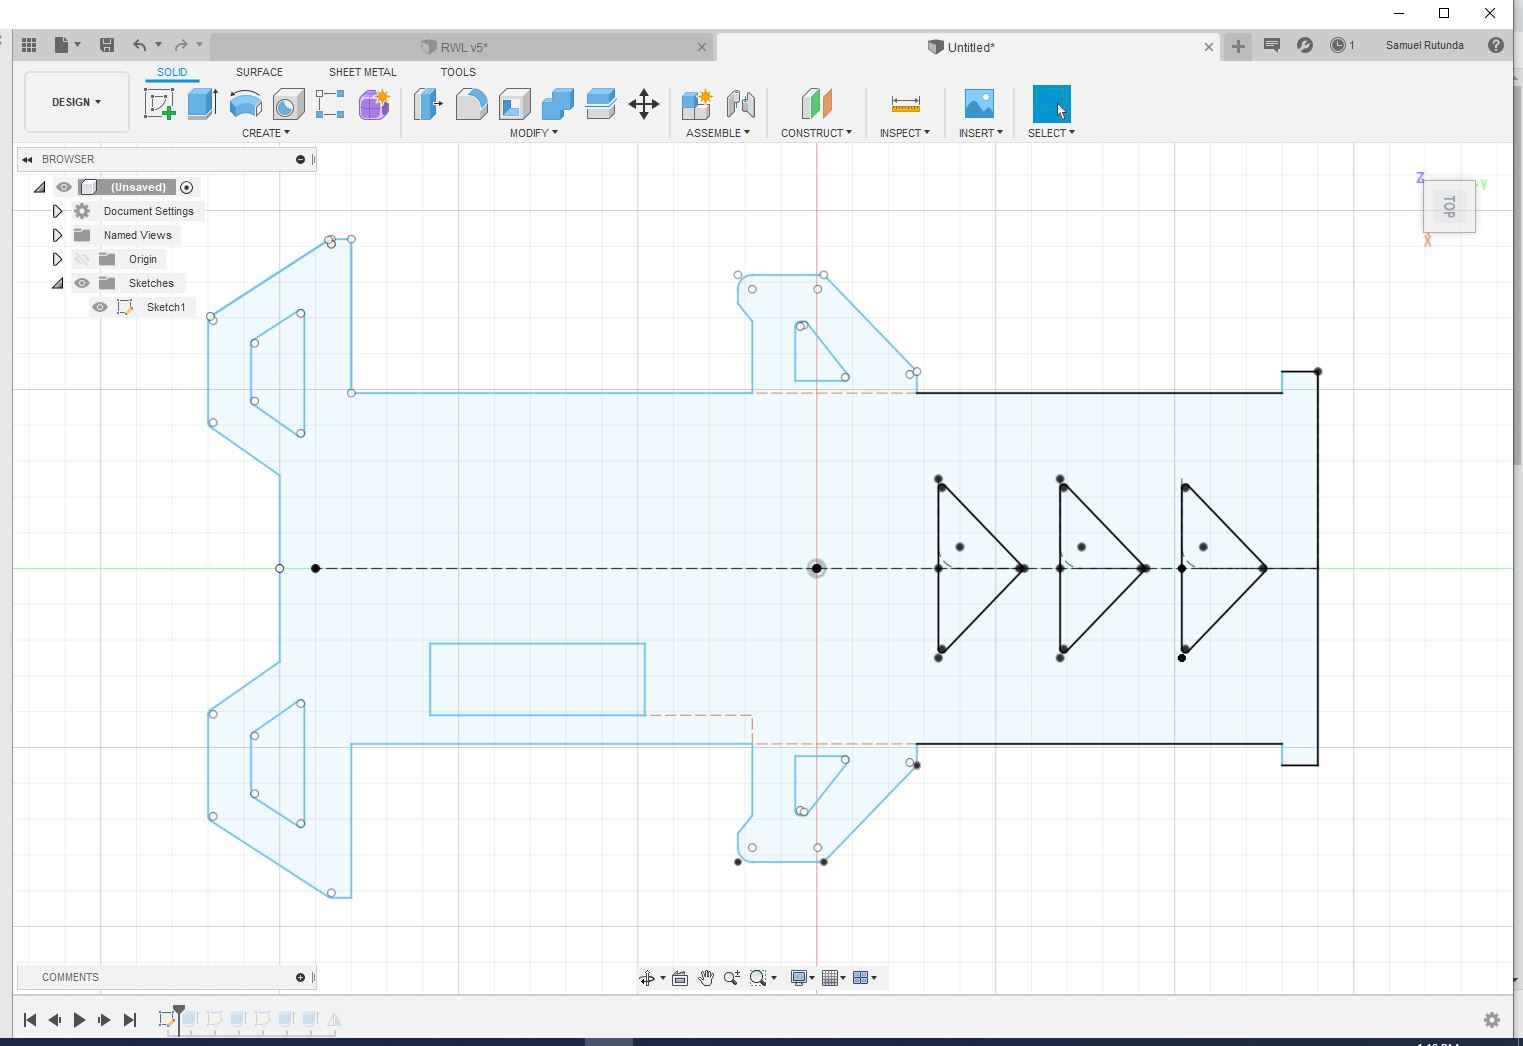
the next step is to extrude the sketch into a solid object, note the thickness depends on the one set by the parametric design
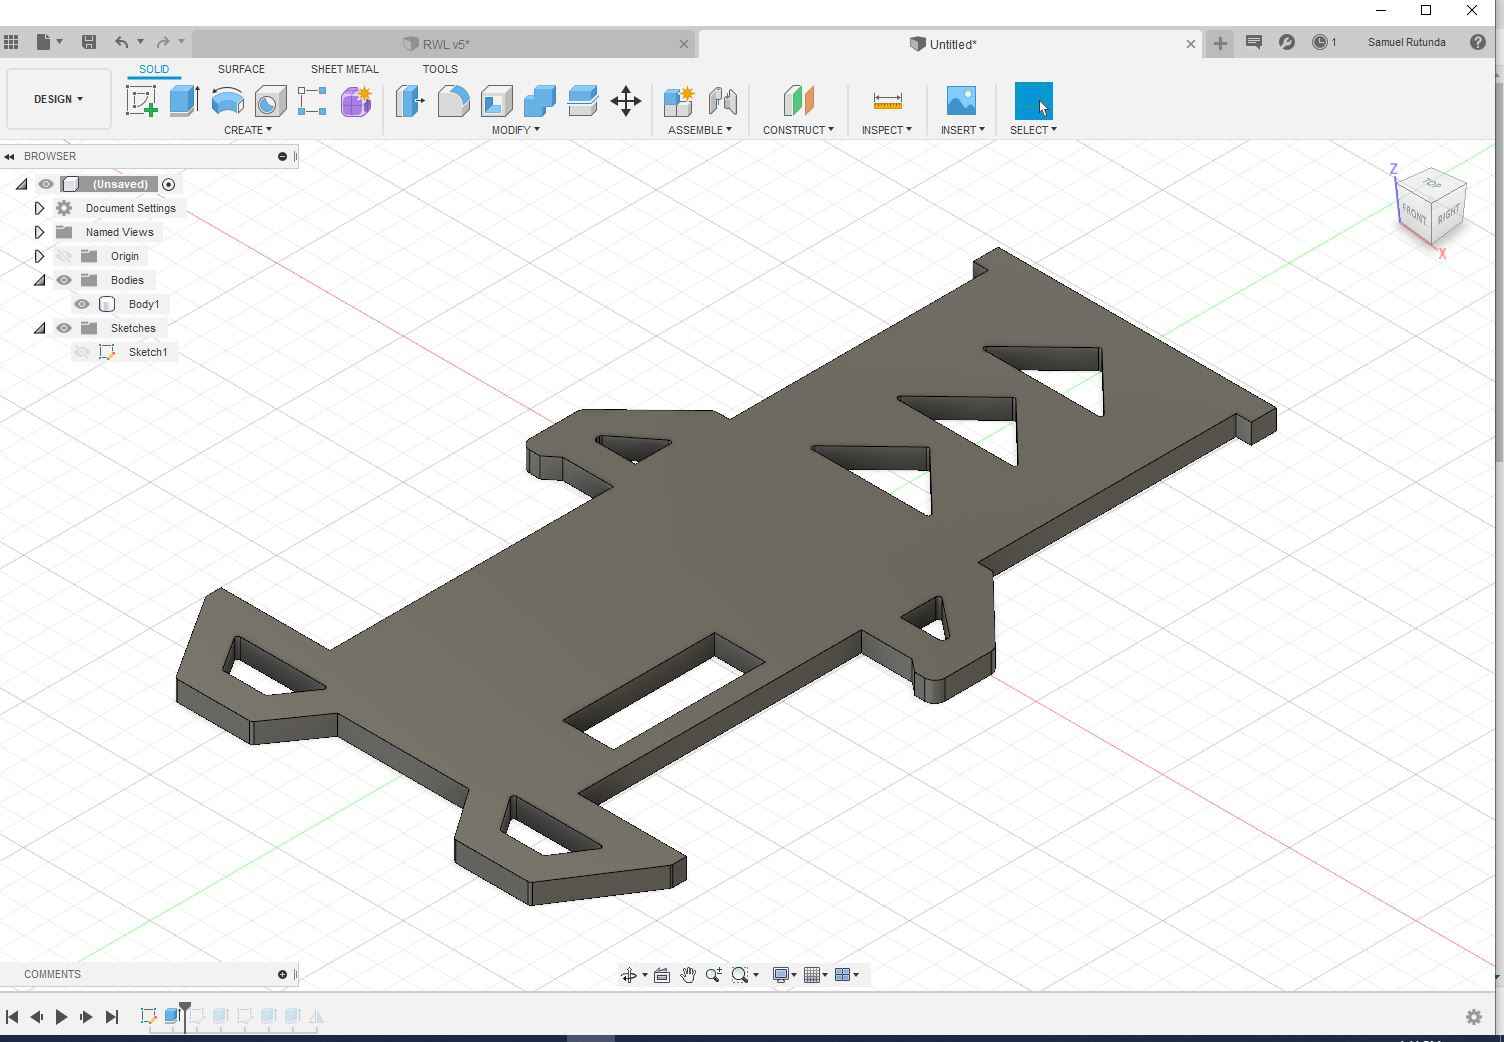
Now comes the side part, we we must design where the wheels will connect to the body,I designed the right side first. At the bottom I drew a 2 mm hall where the a piece of metal will link the wheel, and the above designs is just for aesthetic reasons
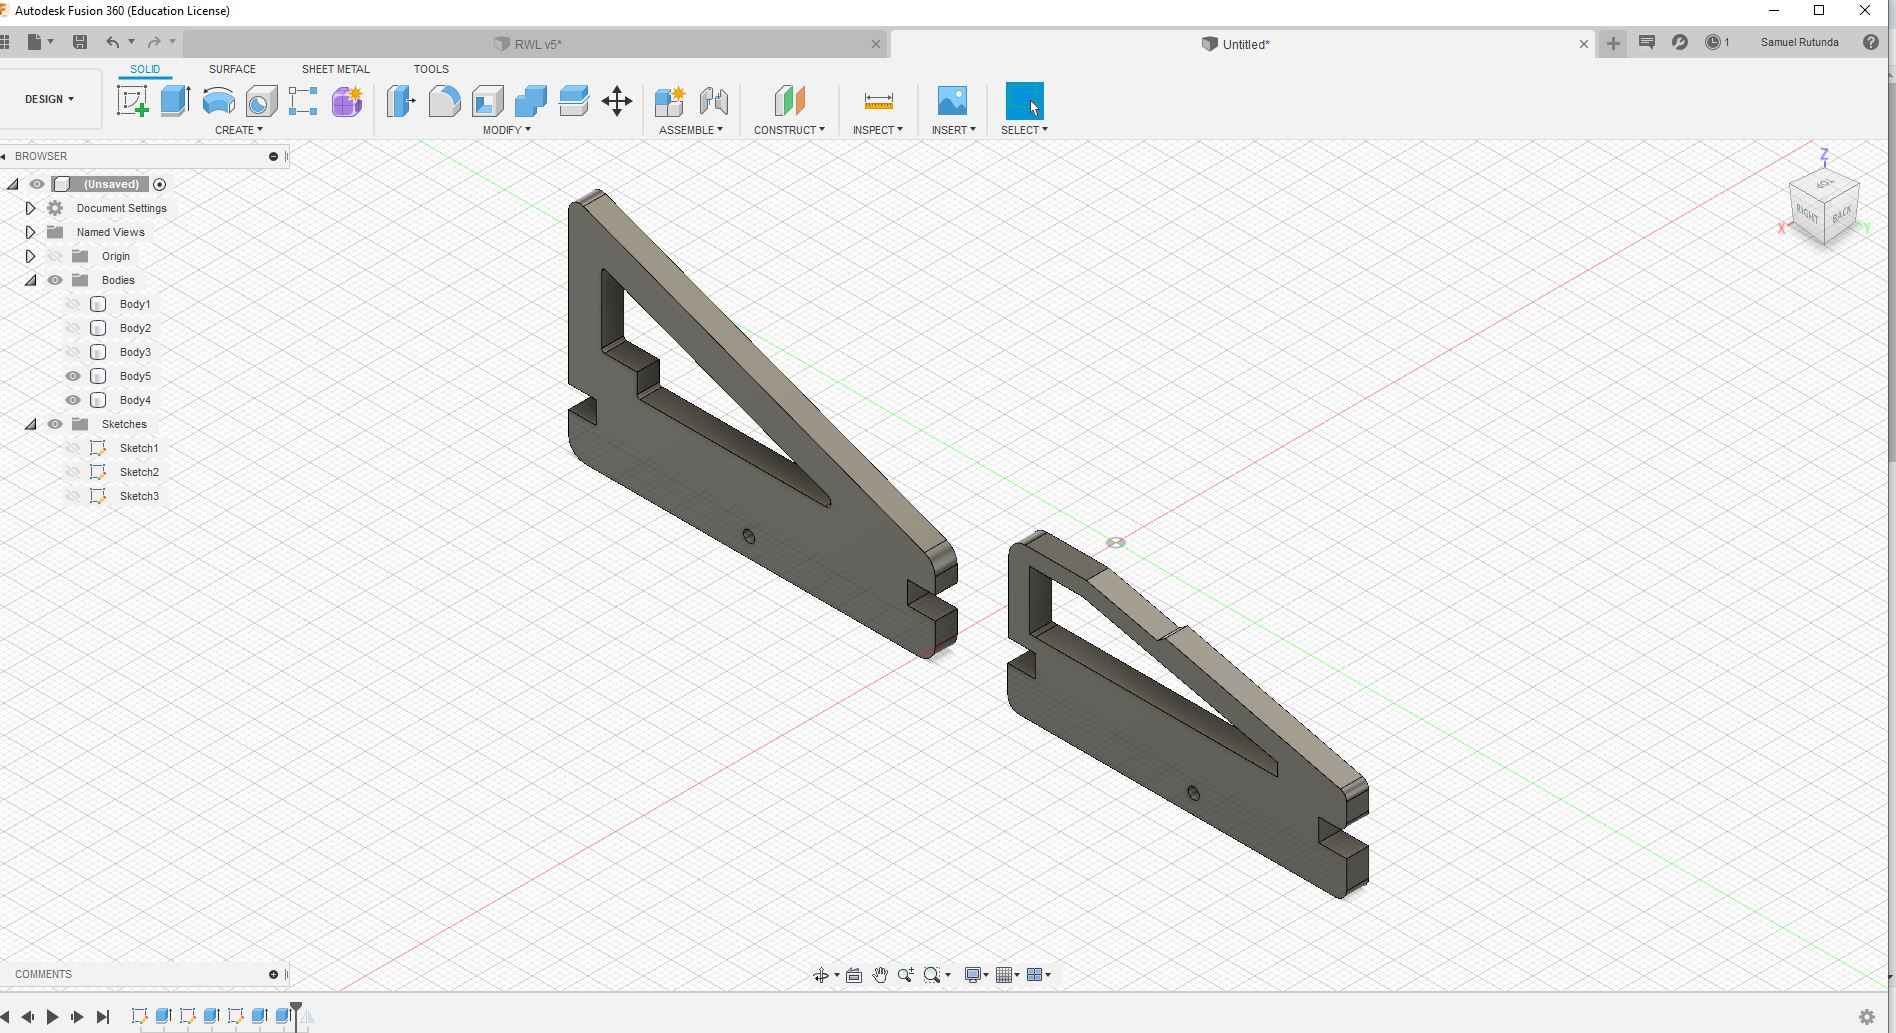
After I had to make a mirror to go to the left side of the car, the mirror has the y-axis as its mirror axis
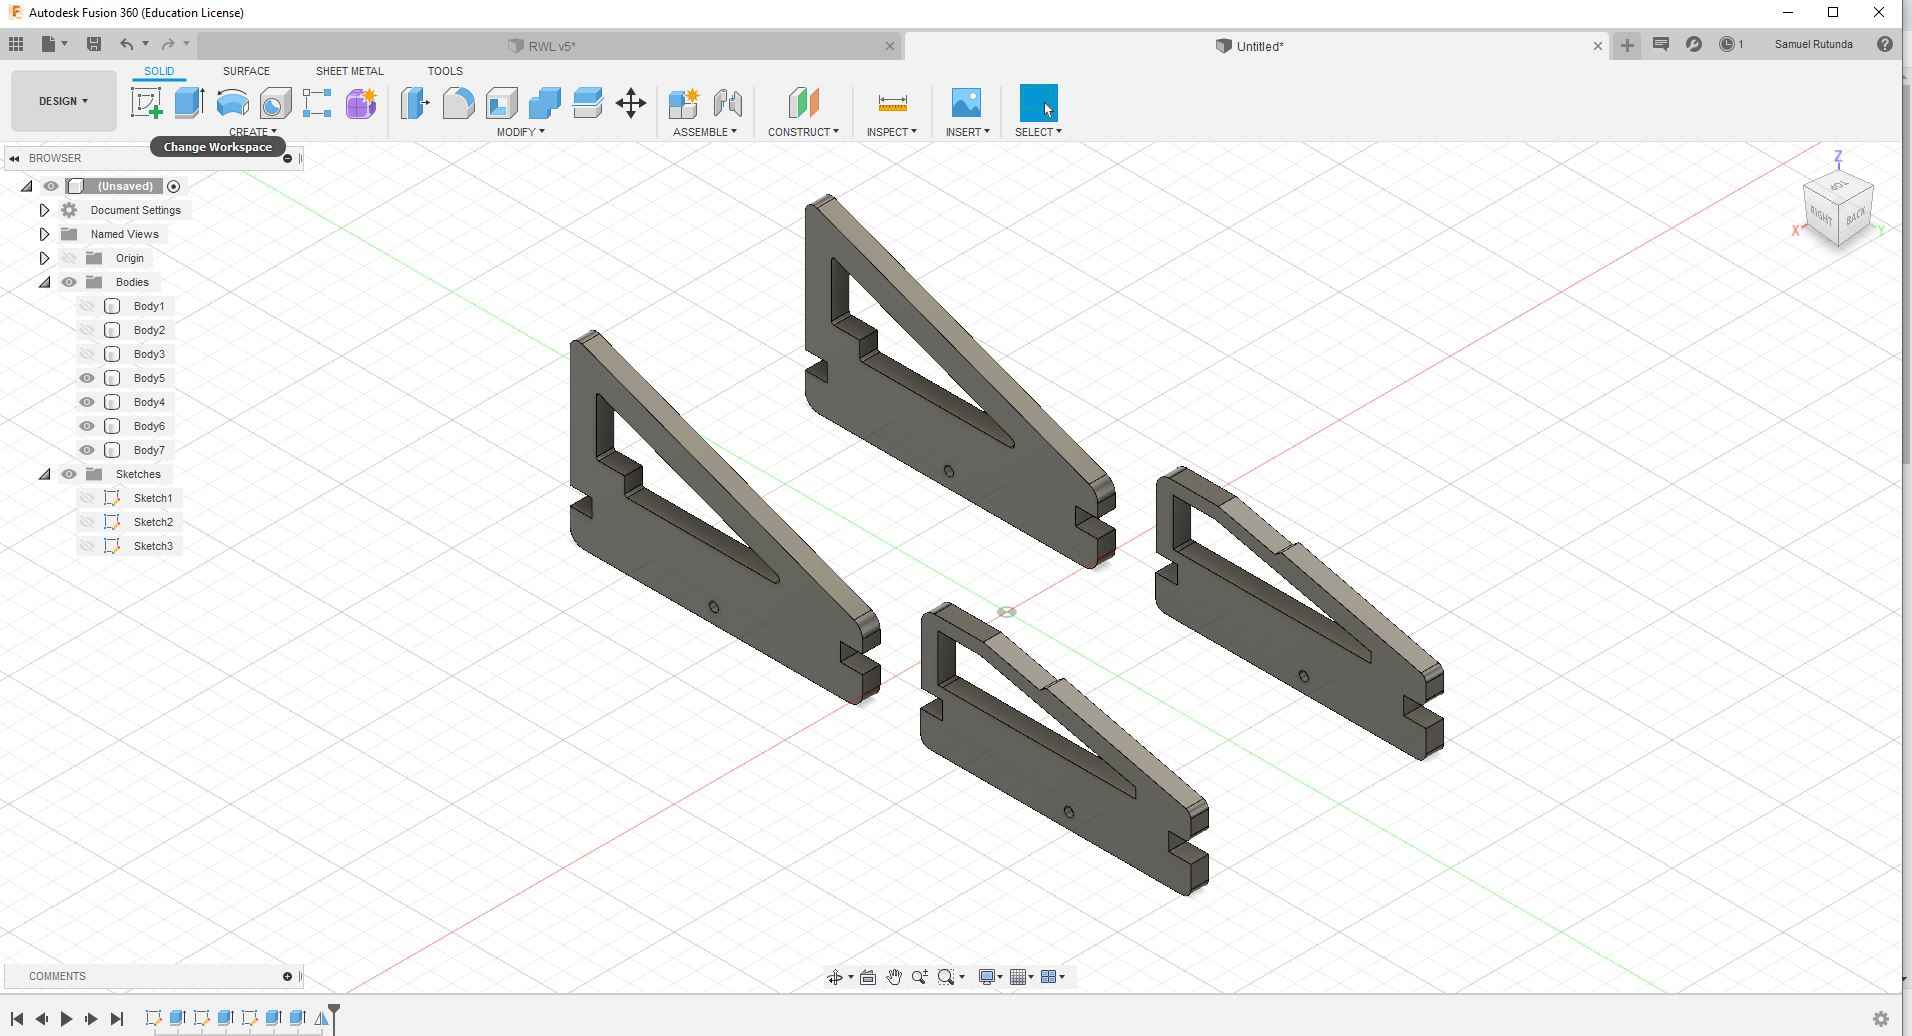
Then the design was done, now I had to create the dxf file of the each part, to create the dxf you select each part, then sketch it, once you sketch you reselect and click finish sketch, then go to the new created sketch and right click, the click save as dxf
Here is the final design assembled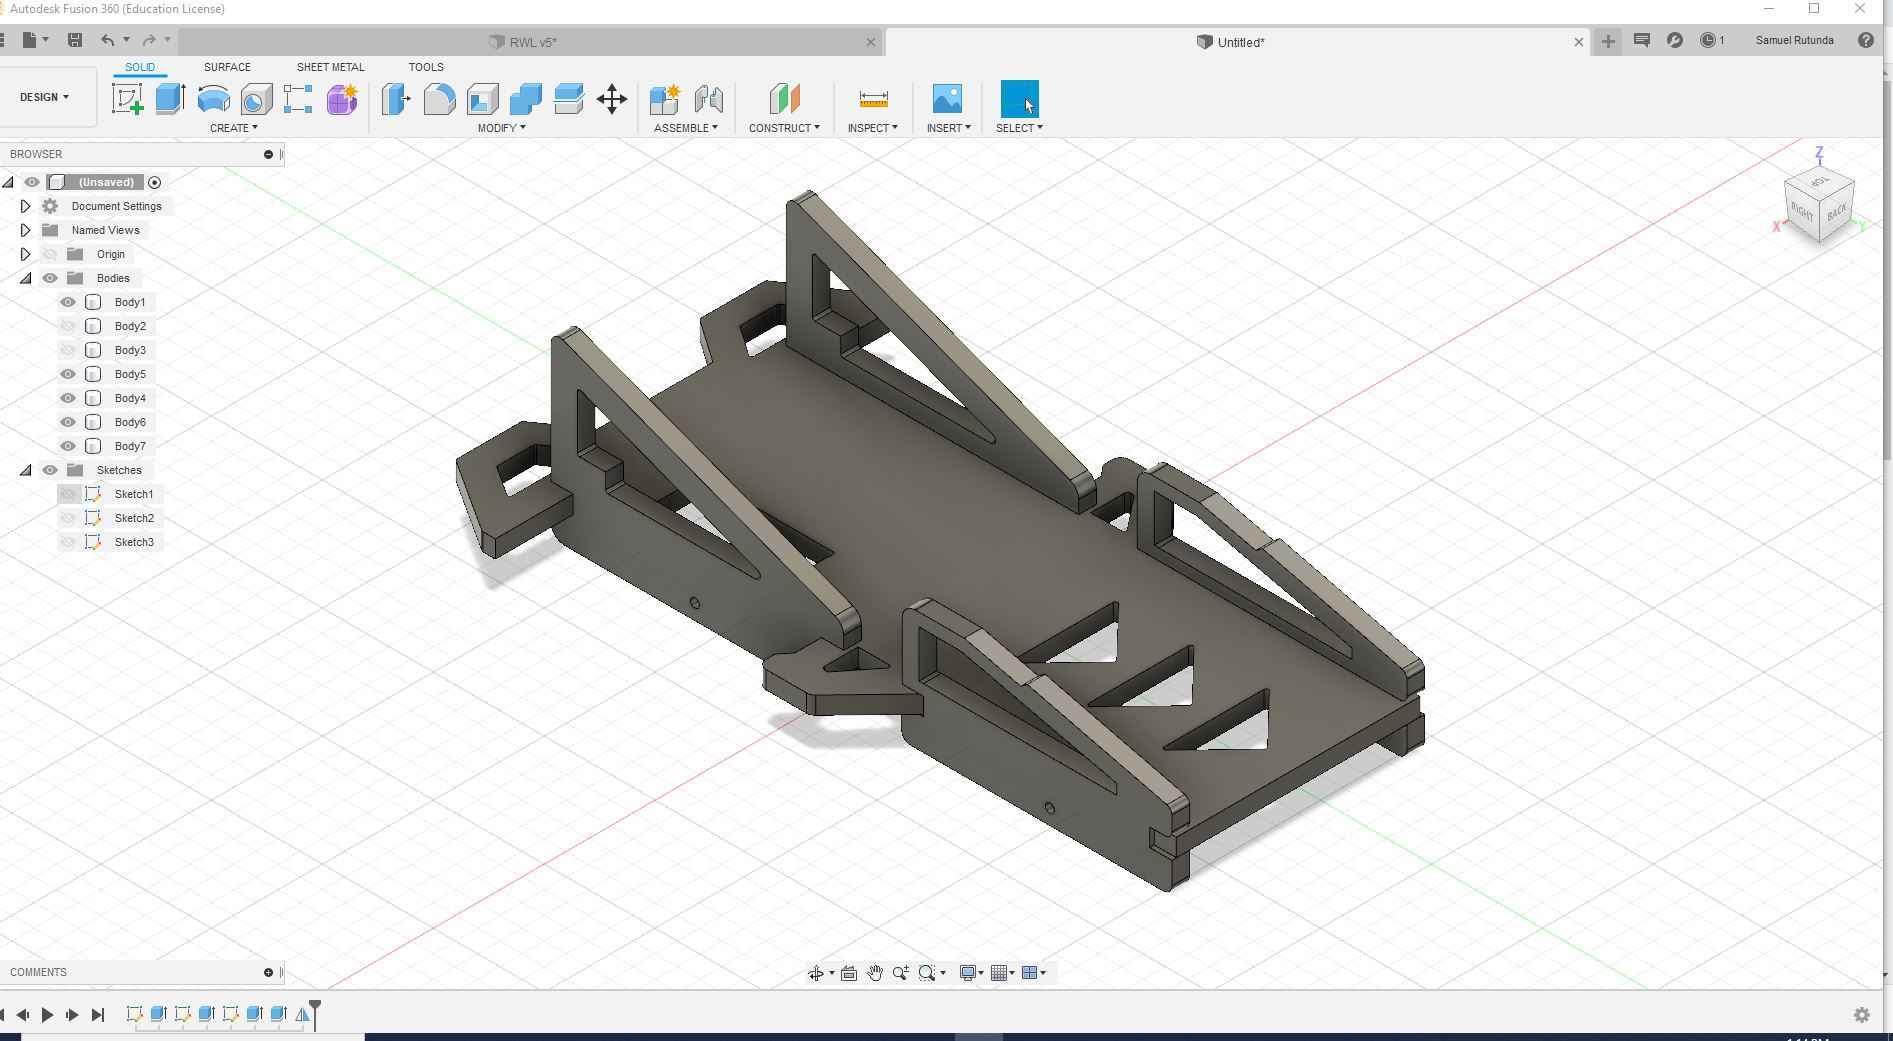
Laser cut
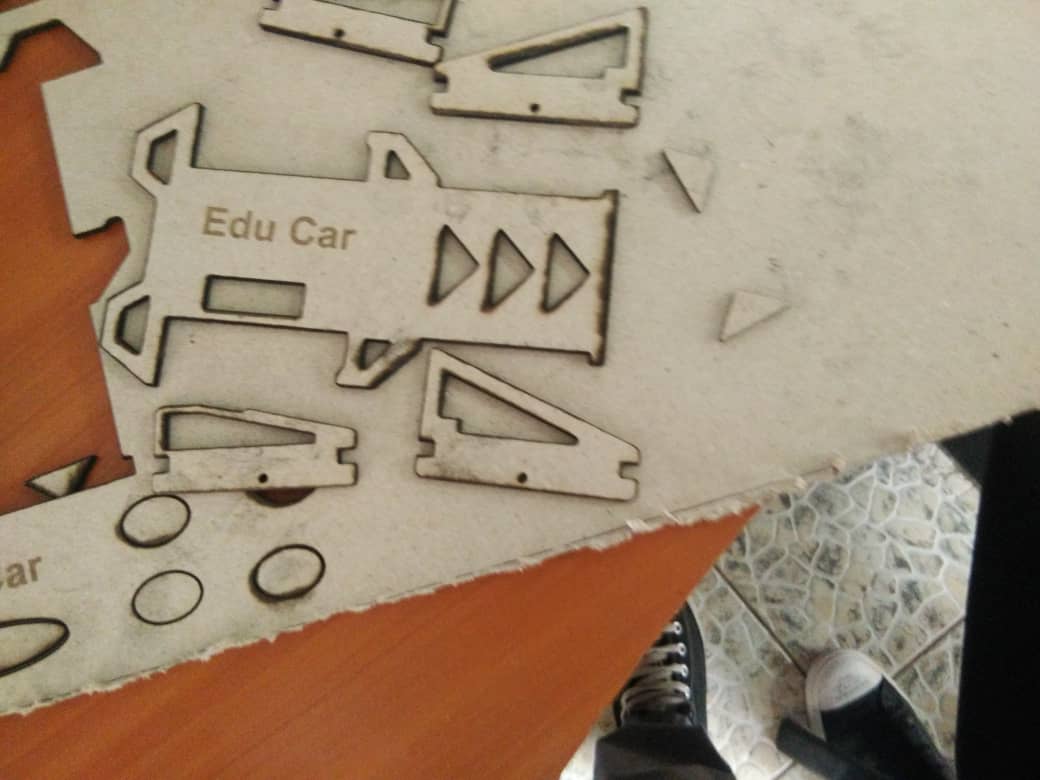
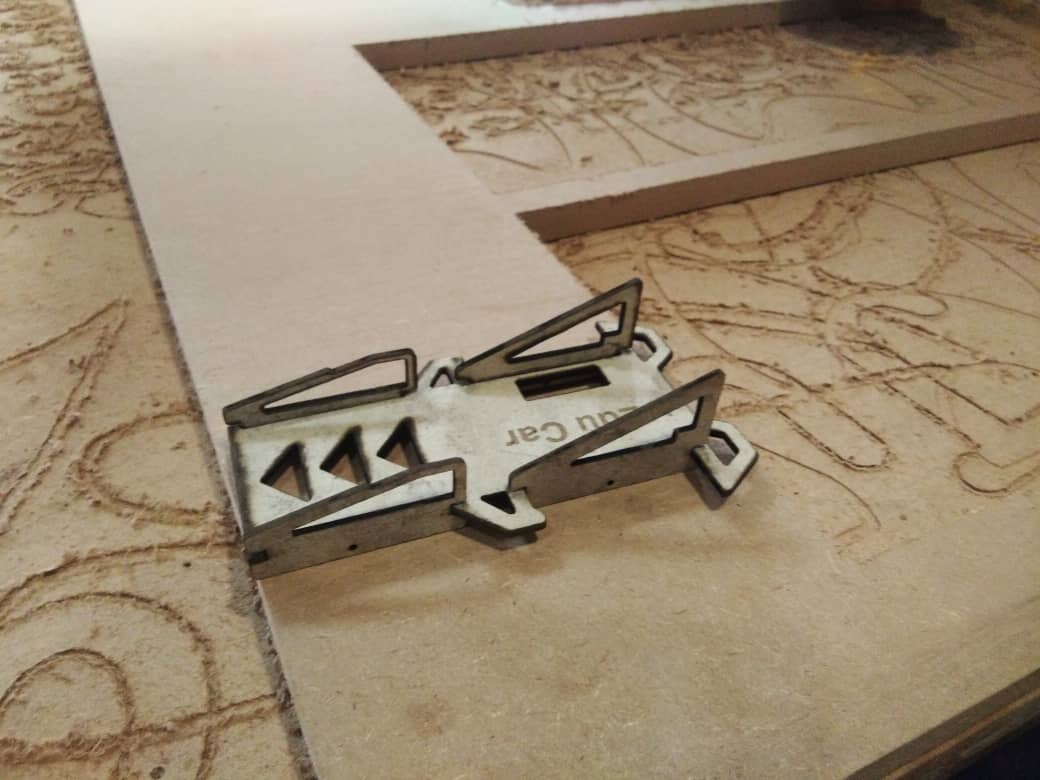
To Laser cut I had to get the right material thickness, I used a cardboard with the thickness of 3mm, and added some writtings on the car
Below is the picture before I assemble it
Now after I assembled it
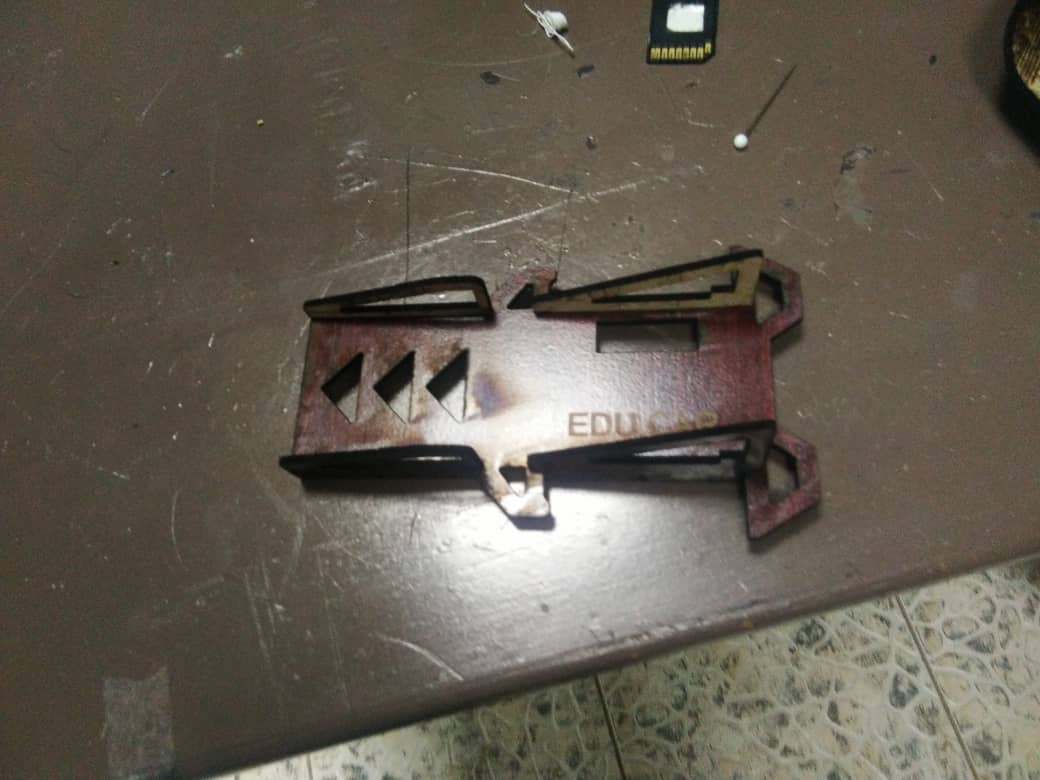
I also wanted to print using another material and I choose a 3mm MDF
Vinyl cutter: cutting the leaf village insigna (Naruto)
Design
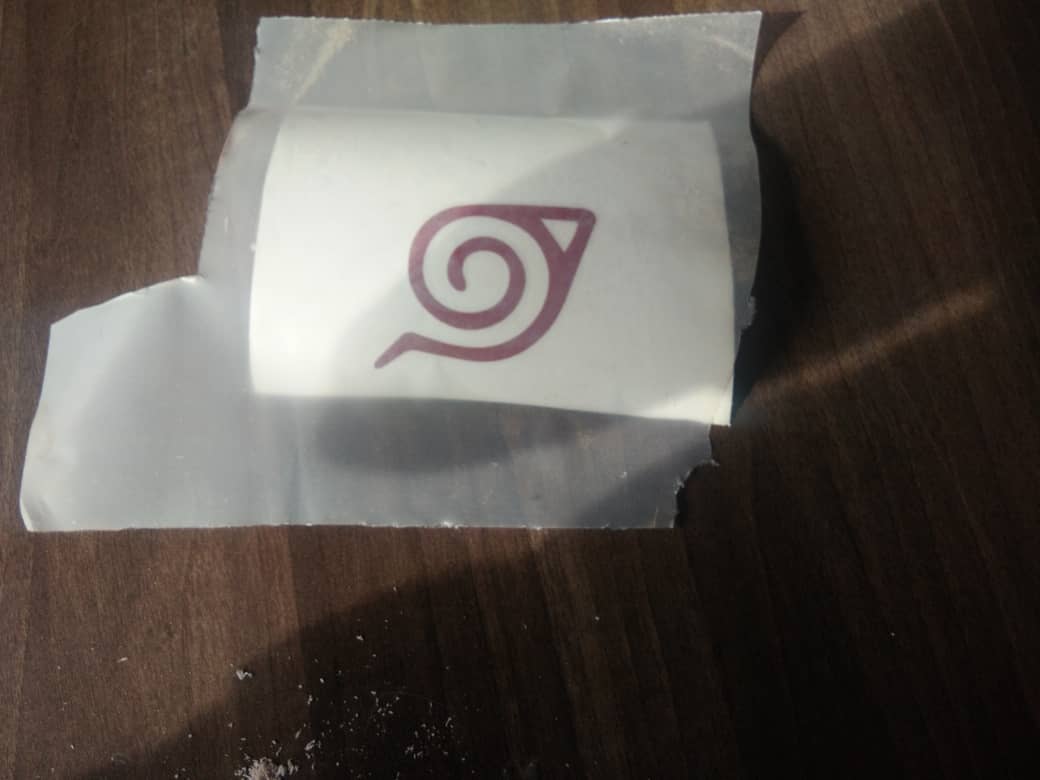
For the vinly cutter I decided to use the logo of 5 villages from the famous Japanese manga "Naruto"
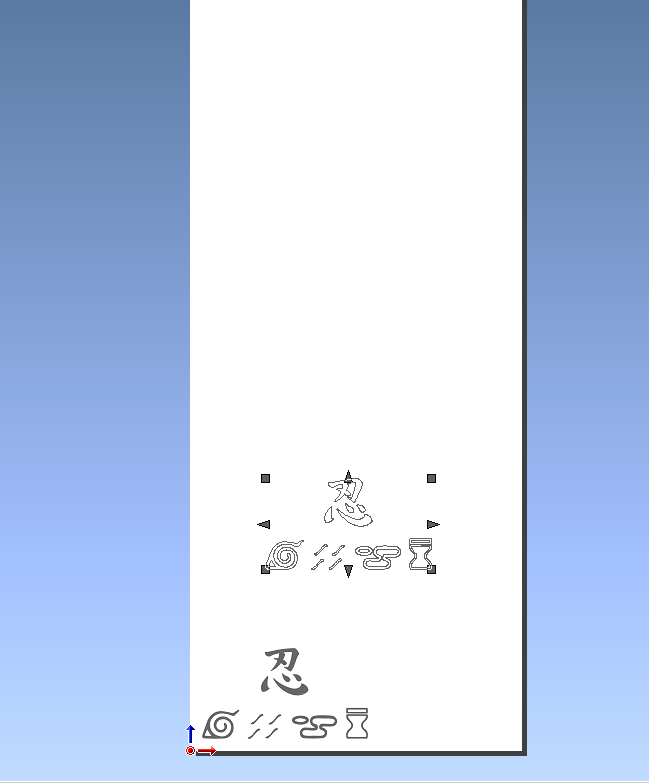
using adobe illustrator I trace the lines of the logo and I arranged them in a way the coalition logo goes on the center top and the 4 village logos goes at the bottom

Vinyl Cutting
To use the vinyl cutter, I used the cutstudio software and the machine to cut is the roland GX-24
I imported the file I wanted to cut and placed it at the bottom left of the page, then extracted the contour
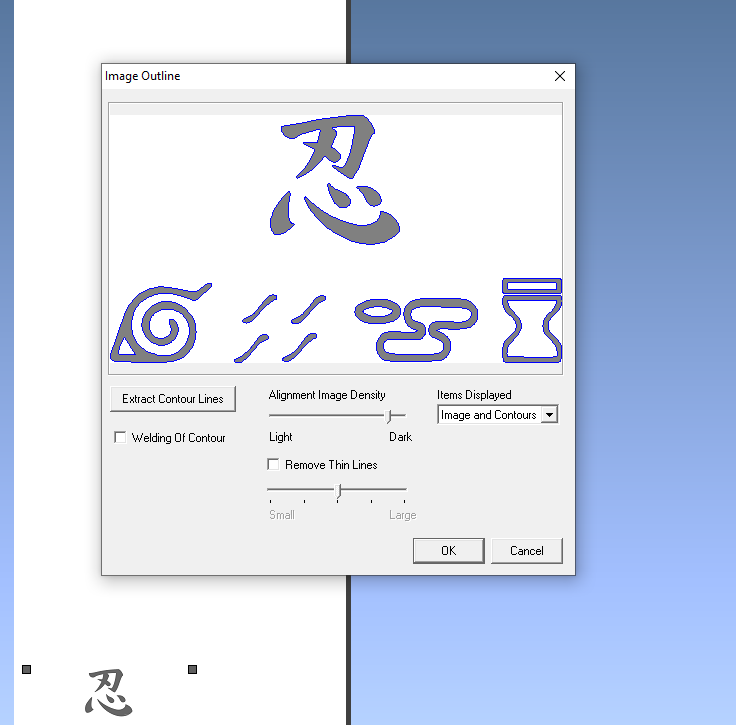
Then I separated the original imported file from the extracted one, I move the original image and leave the extracted at the defined position. After I delete the original image since it has served its purpose
I inserted the vinyl in the machine and setting it according to my desire, then I choose the option cut
p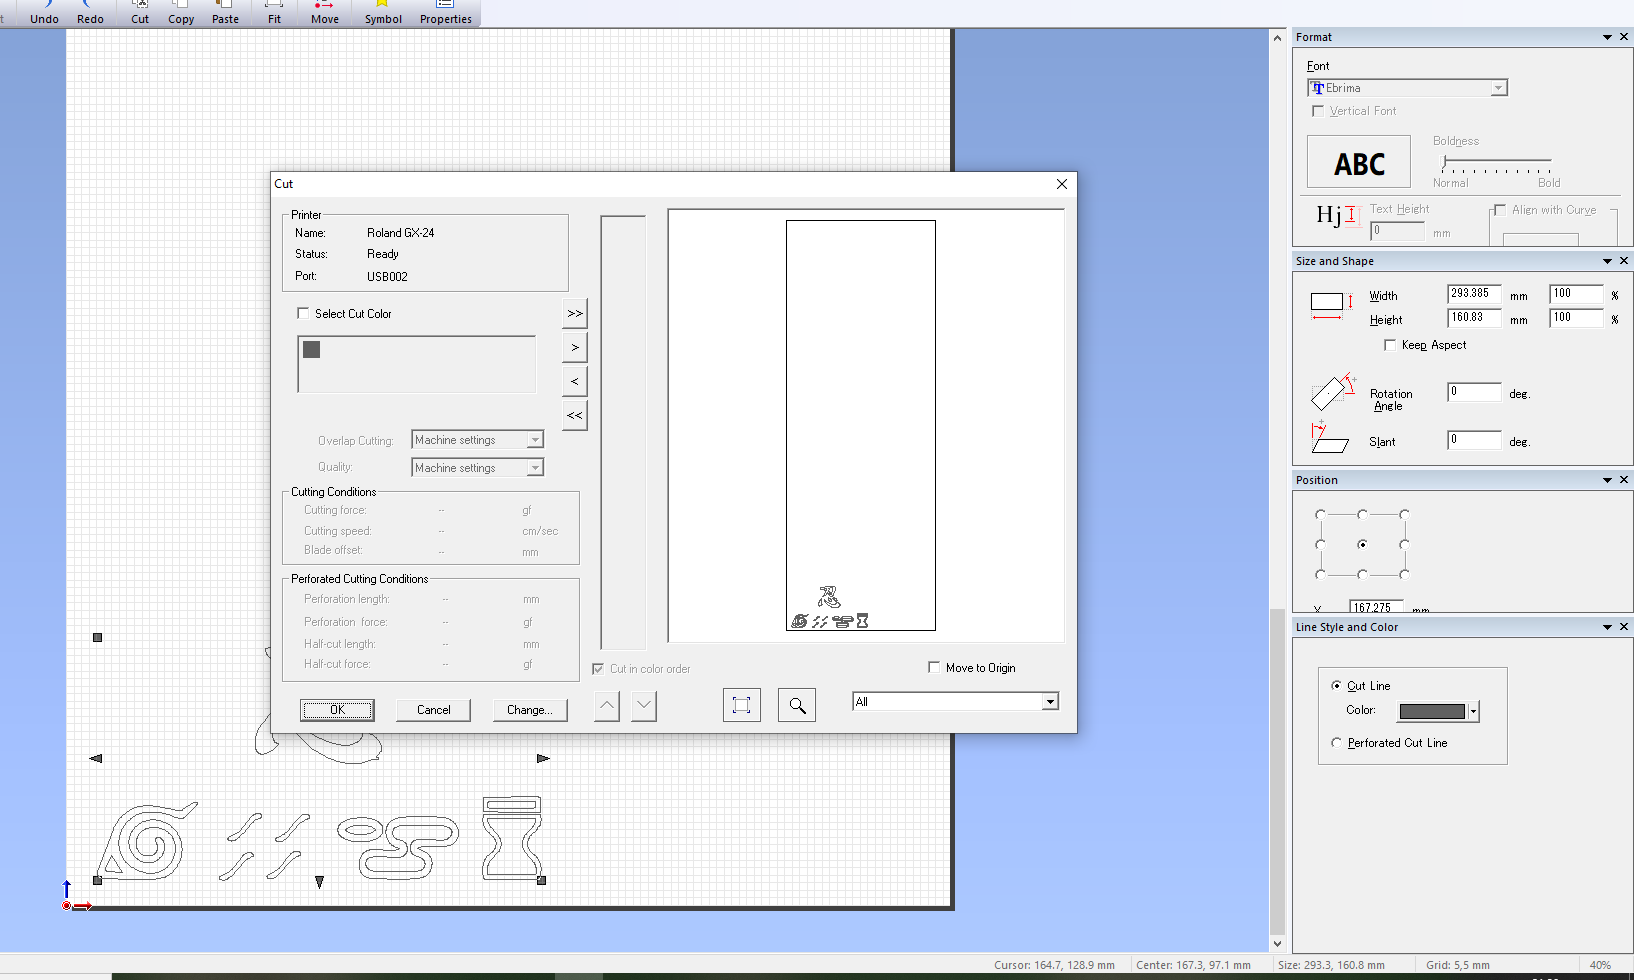
For the vinyl sheet I picked the red color
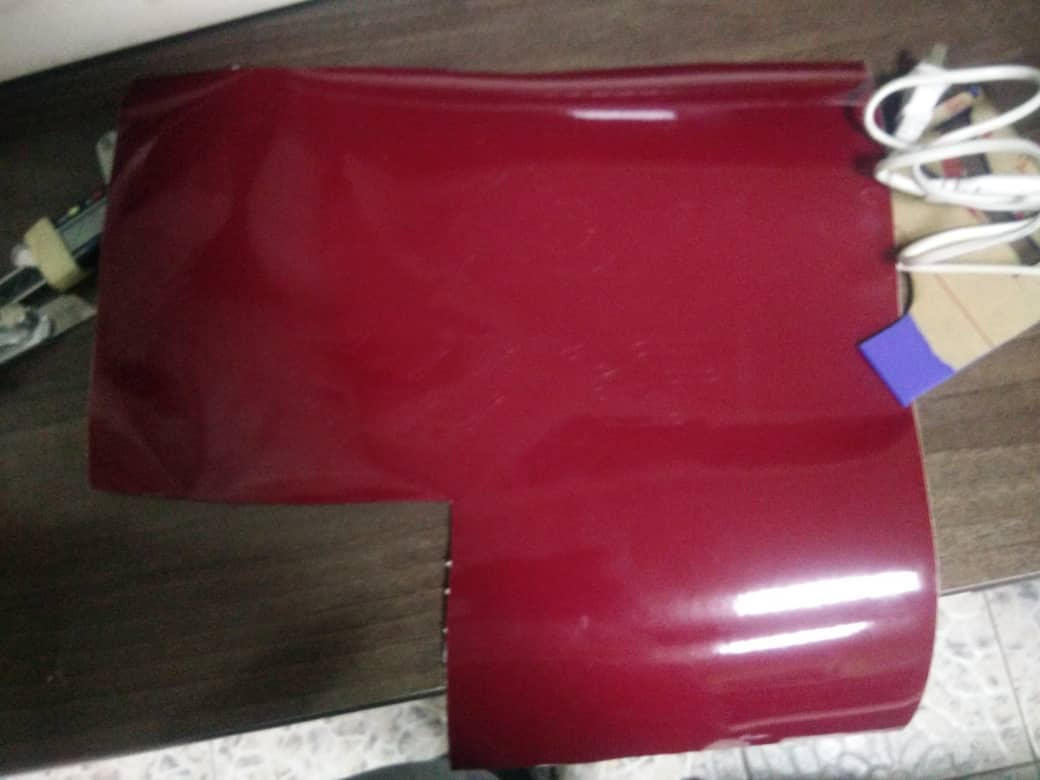
Once cut, I decided to separate each picture and here is the picture of the Leaf village before putting it on a wall