ASSIGNMENTS
Group
- - Test the design rules for your 3D printer(s)
Individual
- - Design and 3D print an object (small, few cm3, limited by printer time)that could not be made subtractively
- - 3D scan an object (and optionally print it)
TOOLS and SOFTWARE
Onshape
Ultimaker 3D Printer
Range Vision Scanner
Designing on On Shape
To complete this part of the assigment, I decided to use a software that I'm familiar with. Therefore, I decided to go with Onshape which is a cloud-based product development platform and its really similar to SolidWorks. Then, I wanted to design a small planting pot to put on my desk. These are the steps I followed to complete the design on Onshape :
- 1- Fisrt, I created a new document by going to Create > Document > Rename the document.
.png)
- 2- In the workspace, I opened the document menu from the top left corner, selected workspace units and changed it to milliemeter. Then, I changed my view to front using the cube on the top right corner.
.png)
- 3- After that, I created a new sketch by using the "Sketch" tool in the top toolbar and chose front as the sketch plane.
.png)
.png)
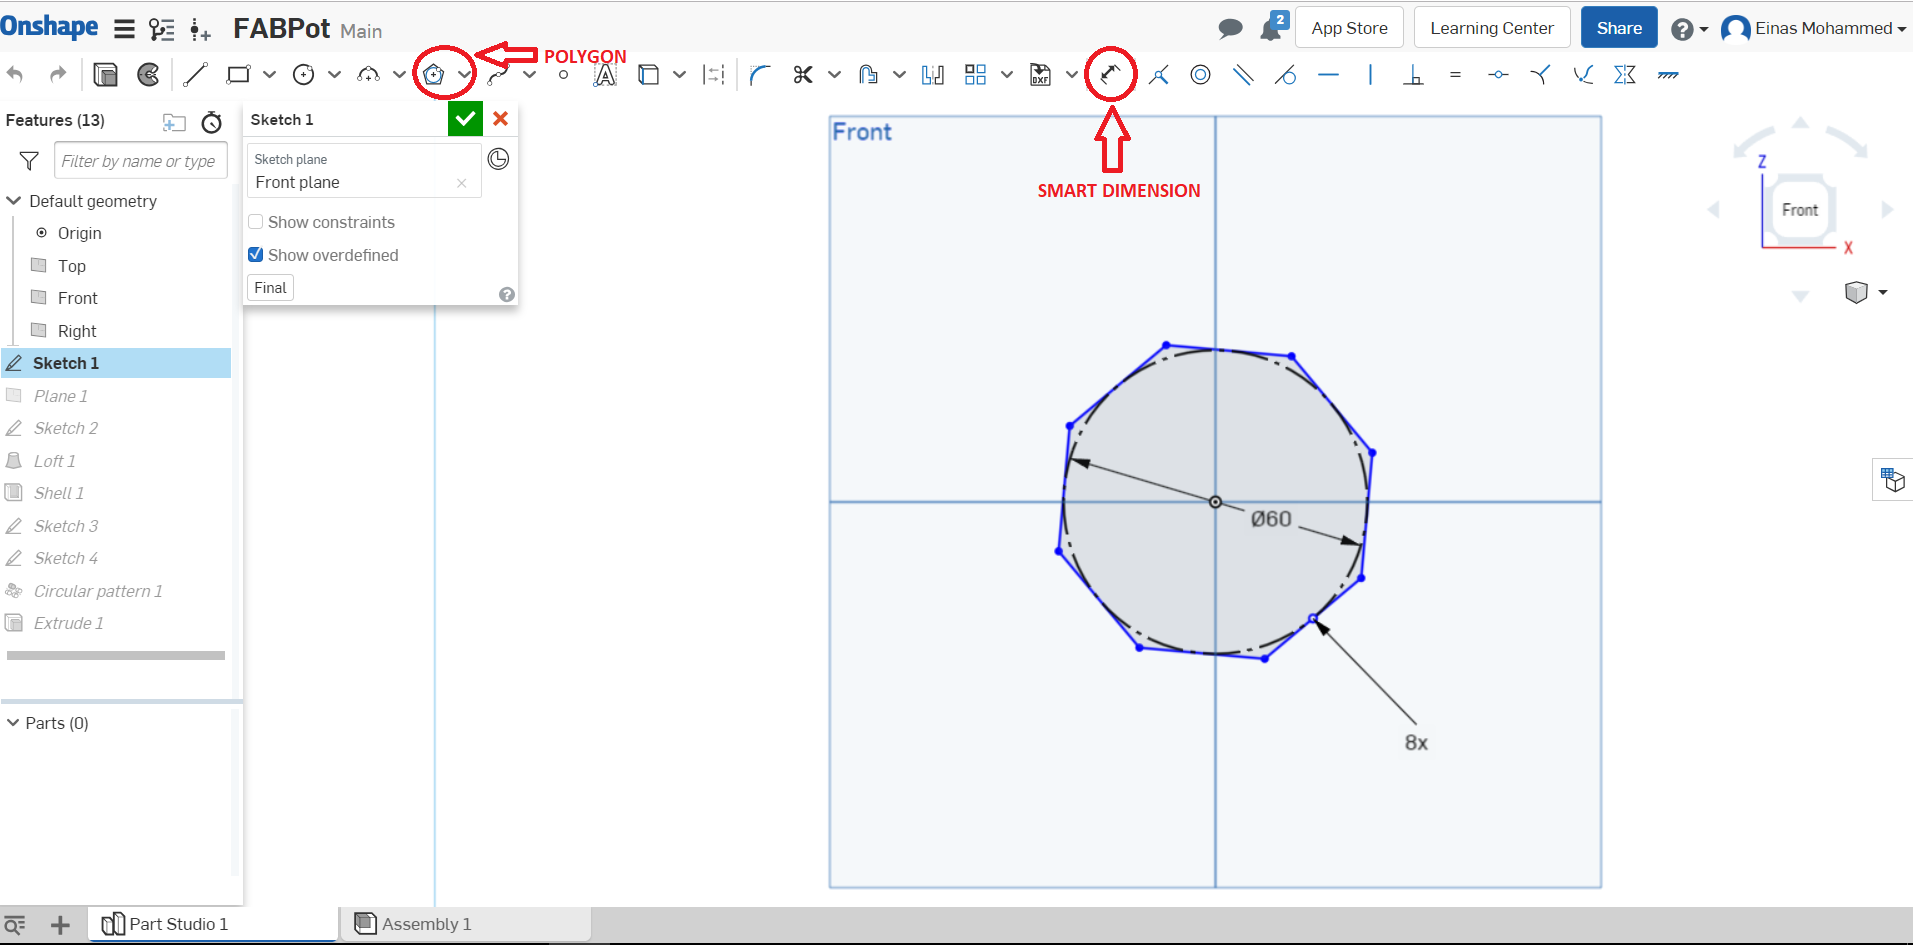
- 4- I wanted the pot to look a bit different than the typical circular shape. So, while the sketch window was open, I selected the "Polygon" tool from the top sketch toolbar and drew the plygon and increased the number of sides to 8 so it becomes an Octagon. This will represent the bottom side of the pot.
- 5- To change the diameter of the shape, I used the "Smart Dimension" tool from the top sketch toolbar and clicked on two sides opposite to eachother and set the diameter to 60mm. Then, I confirmed the sketch by clicking the green tick button.
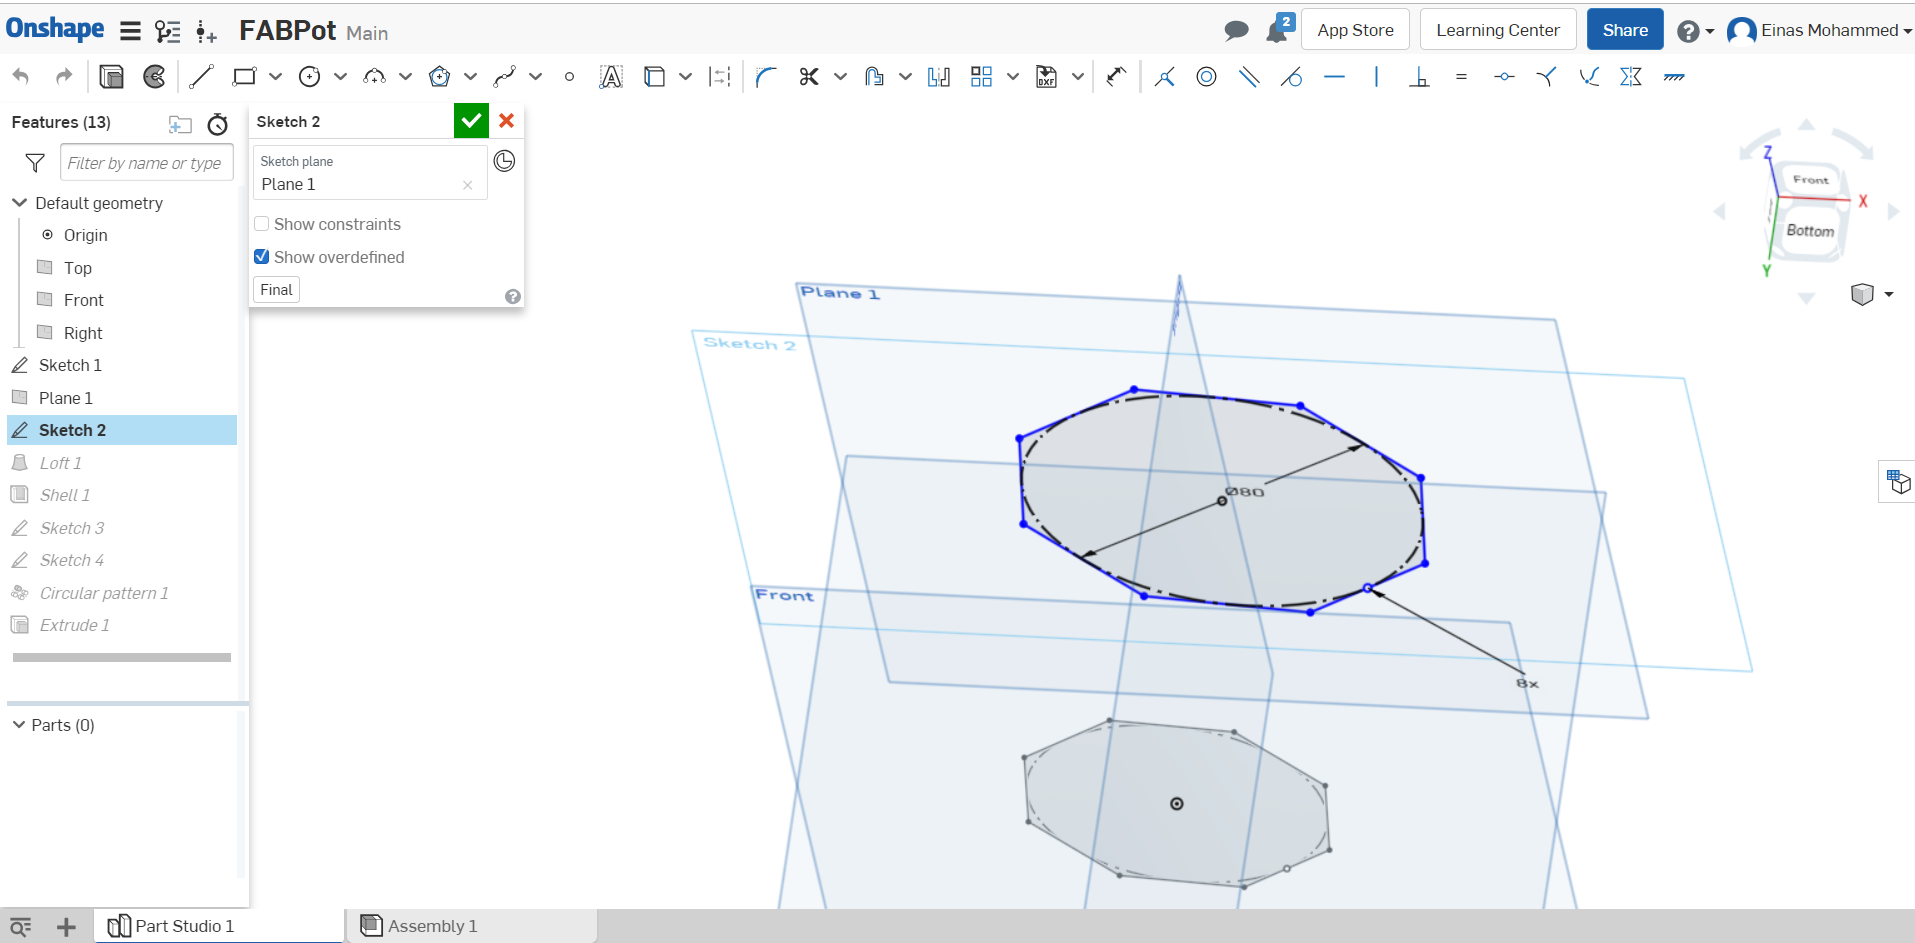
- 6- Now, I added another plane so that I can draw another Octagon on top of the previous one. To do that, I went to Plane > Select entities and then click on the front plane to set it > Change the offset to 70mm which represents the height of my pot.

- 7- To add the top part of the pot, I followed the same steps in 3 and 4. But, this time I changed the diameter of the Octagon to 80mm.
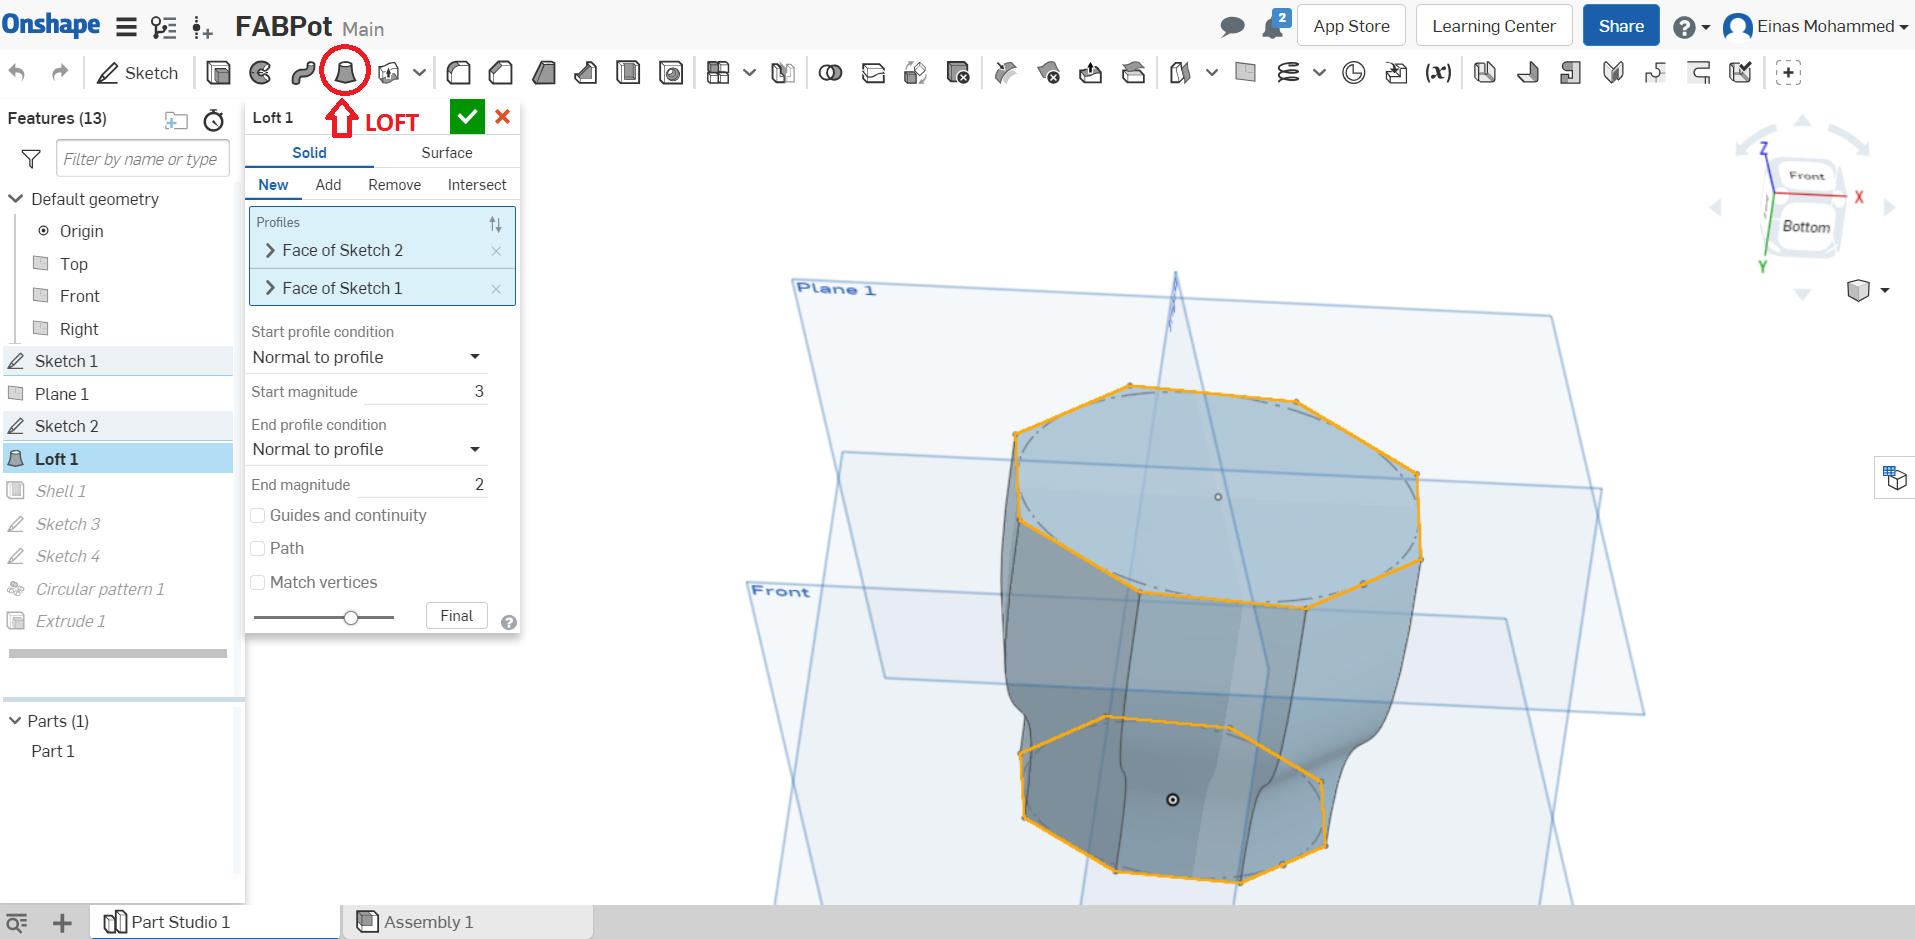
- 8- Now, to create the body of pot, I used the "Loft" tool from the top toolbar which will create a shape using curves. In the loft window, I selected both sketch 1 and sketch 2 in profiles which means the curve will be created to fill the space between these two curves (Octagons). Then, I started to tinker around with the different settings of the loft until I was satisfied with the shape I got. Once I was done, I confirmed the loft by clicking the green tick button.
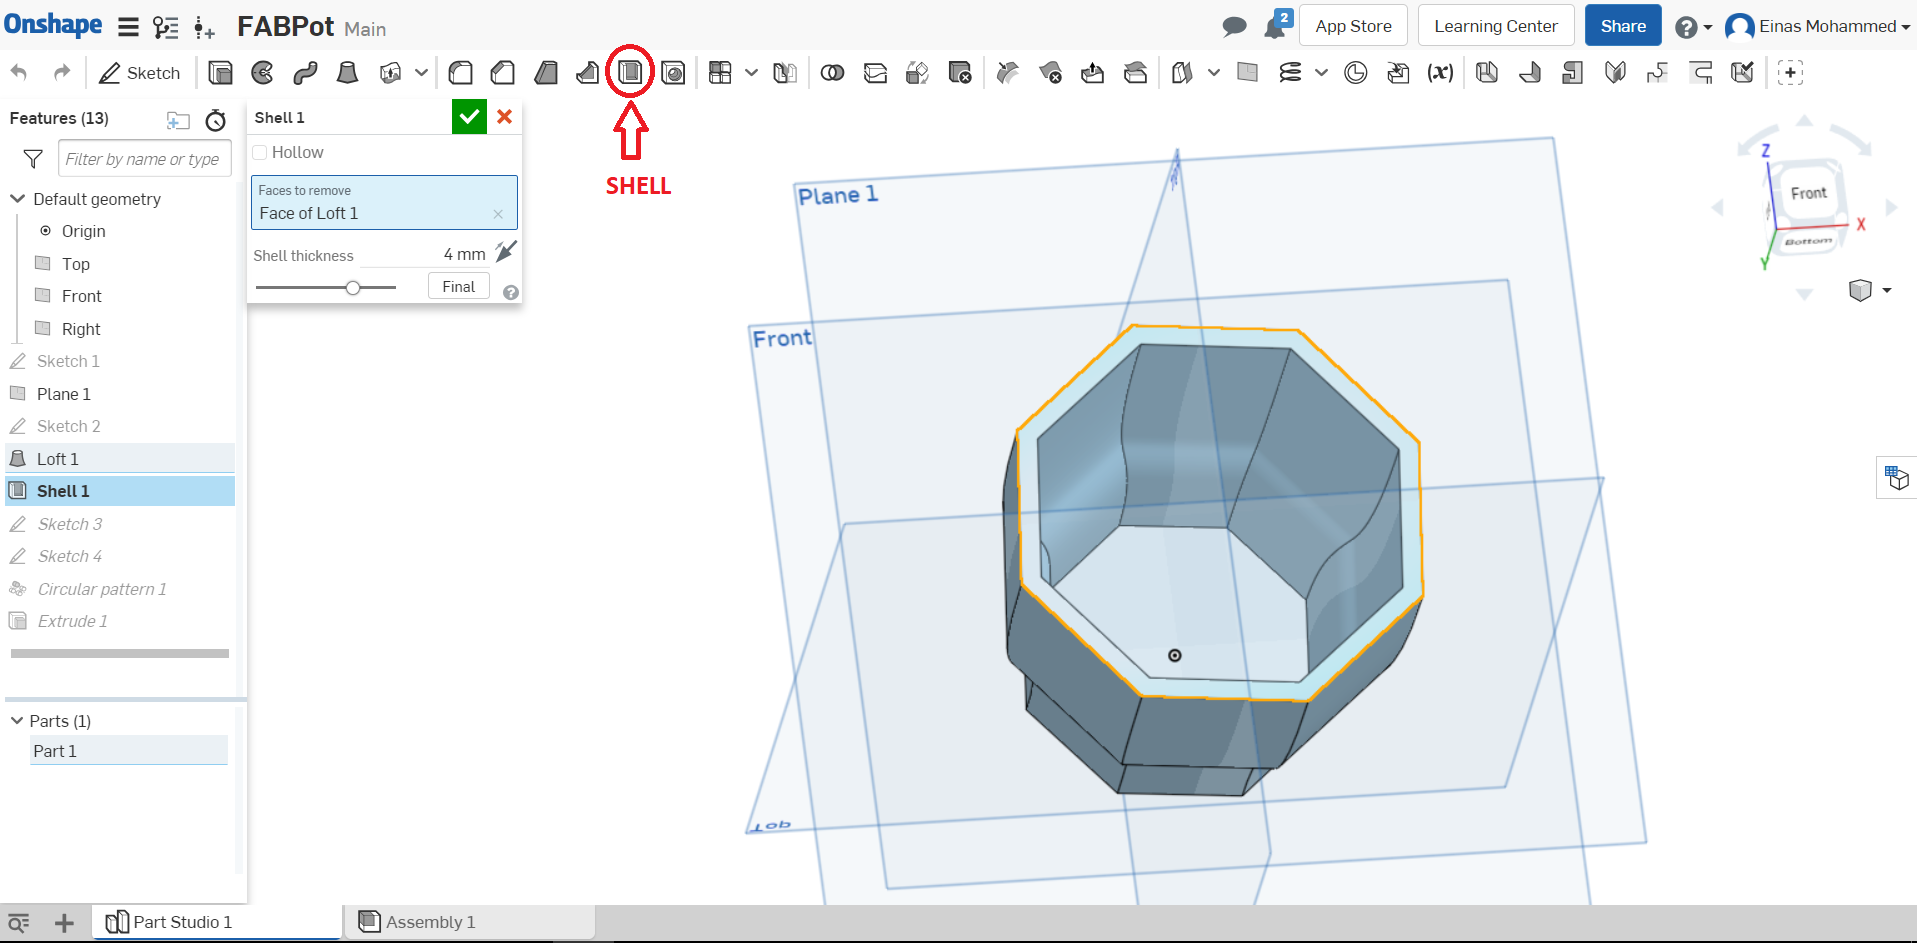
- 9- Next, I needed to make the pot hollow from the inside. Hence, I used the "Shell" tool and set "Faces to remove" to Face of loft 1 by clicking on the face of the pot and changed the thickness of the shell to 4mm. (The arrow on the right of the thickness will determine the direction of the shell.
- 10- I wanted to create small holes at the bottom of the pot to help with the circulation of water and air. To do that, I created a new sketch and selected "Top" as my sketch plane and I drew a line that extends a few millimeters away from the center of the bottom Octagon.
- 11- I created another sketch and selected the "Face of Loft 1" to be the sketch plane. Then, I used the "Circule" tool to draw a small circule with diameter of 4mm. (Diameter can be changed using the "Smart Dimension" tool.
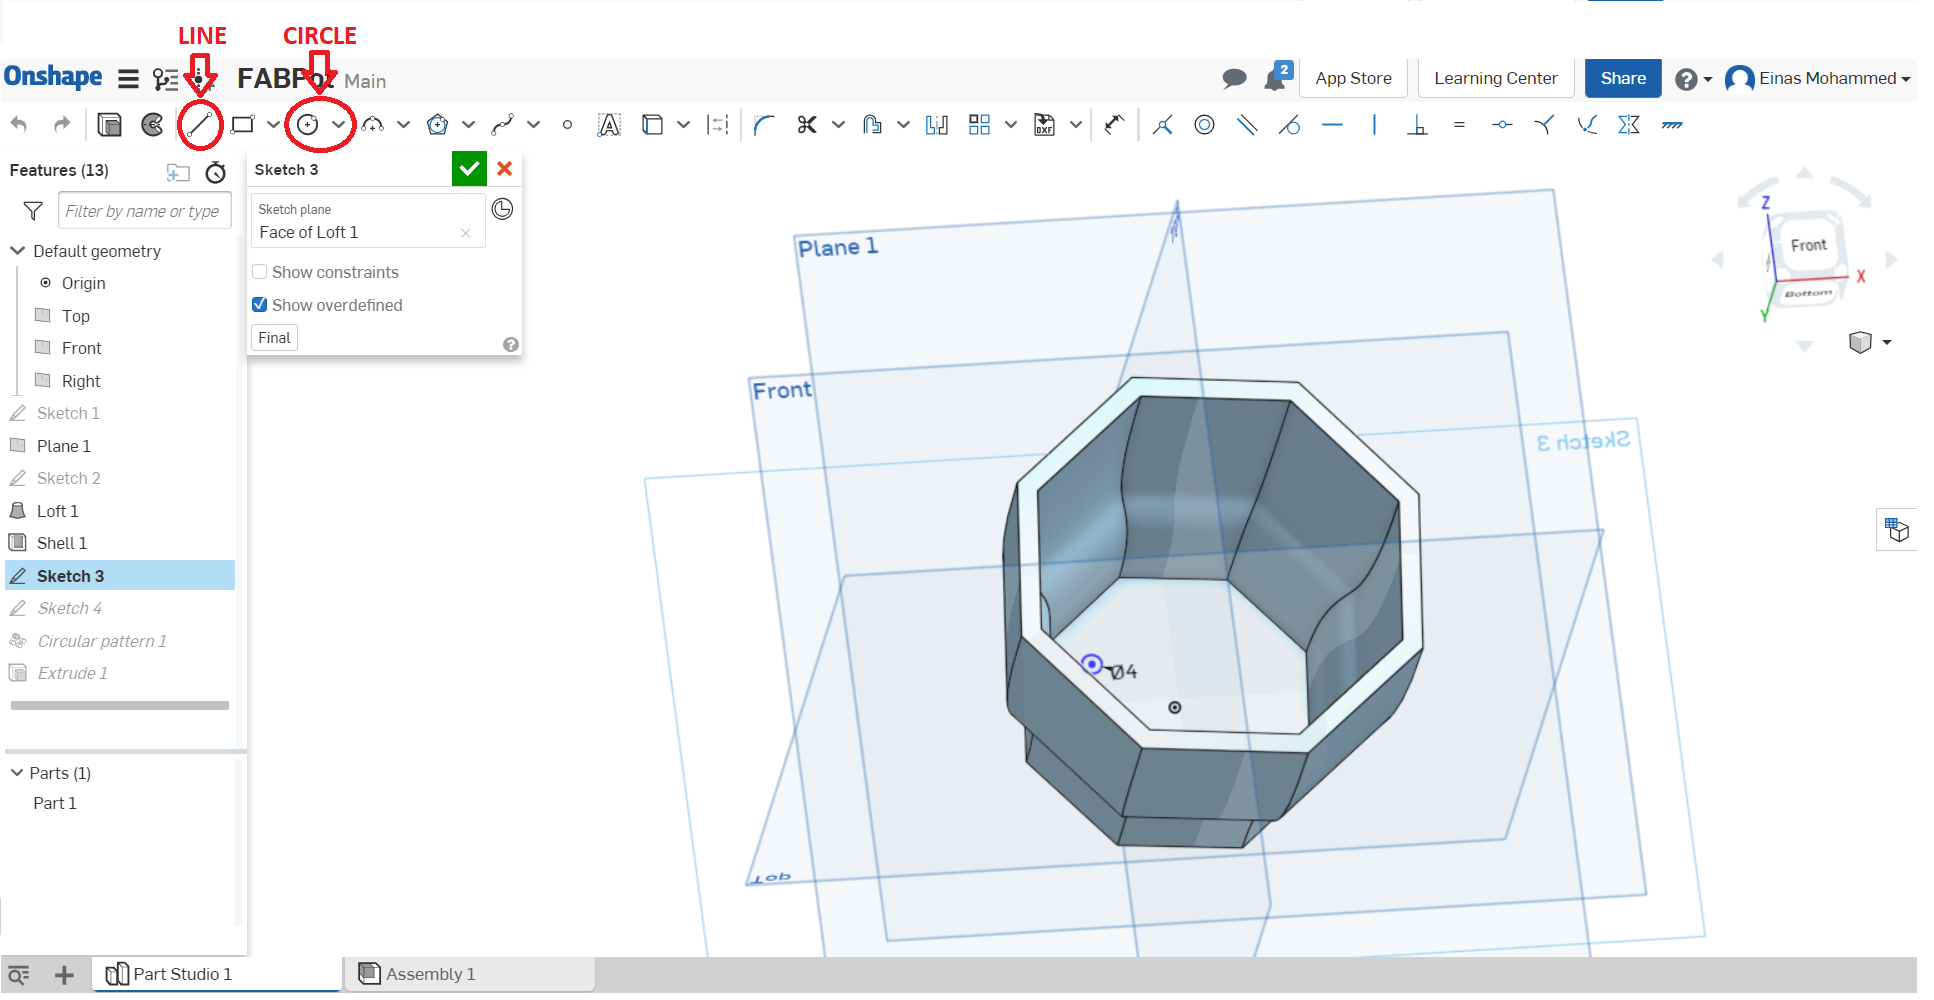
- 12- To repeat the circle, I used the "Linear Pattern" tool and selected "Circular Pattern" instead of drawing the circules manually. In the circular pattern window, I selected the circle as "features to pattern" and the line from step 8 to be the "Axis of pattern". Also, I changed the angle to 360 deg and change the number of circles to 8.

- 11- I needed the holes to be hollow so, I clicked on the "Extrude". In the extrude menue, I chose remove, selected the circular pattern as the "Faces and sketch regions to extrude" and made it a through all. Finally, I confirmed the extrude by clicking the green tick.

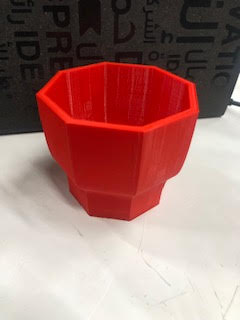
- Here's the final design !
Preparing the Model
Now it's time to 3D print my planting pot. In QBIC Fablab, we have two brands of 3D printers; Ultimaker and Formlabs and I have decided to go with the Ultimaker printer.
- 1- Fisrt, I exported my model from Onshape by going to the tabs in the bottom and Righ-click the tab > Export > Choose STL for format.
- I exported the file in a STL format because that's one of the formats used for Ultimaker printers.
- 2- To prepare the file for printing, I used Ultimaker Cura software which prepares the file and translates it into instructions that the printer will understand by slicing the model into layers. Once I opened it, I was asked to select the printer that I have. We have the Ultimaker 2+ printer so I selected that. Now, the software will show a 3D view of the selected printer.
.png)
- 3- Next, I opended the STL file exported from Onshape by clicking on the "Open Fiel" icon in the top left corner and selecting my model file and open it. The model was loaded and shown on the 3D viewer of the printer.
.png)
- 4- Cura allows the user to manipulate and control different aspects of the model such as the position, size and orientation which can be changed from the vertical tool bar on the left. In addition, the printing setup options can be found on the right side.
- Cura keeps the recommended mode by default which is suitable if you want to do a quick print. Other than that, you can select the custom mode and edit few parameters such as:
- - Layer height: is the distance between the layers. This parameter has a significant impact on the quality and time of the print.
- - Infill density: is the amount of plastic inside the print. A higher value means there's more plastic inside the print which makes it heavier and stronger and vise versa.
- - Support: this option generates supoort structures below overhnaging parts.
- - Build plate adhesion: adds a thin layer that acts as a base under the model to ensure that the print doesn't come off the printers' build plate.
- 5- First, I modified the orientation of my model. Then, I tweeked some of the print setup parameters as following:
- - Layer height = 0.15 mm
- - Infill density = 10%
- - Support: I checked the generate support box and selected everywhere
- - Build plate adhesion type: Brim
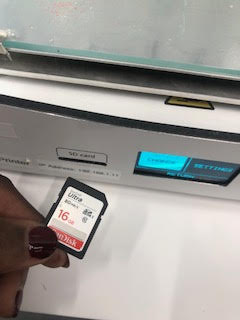
- 6- The model is now ready to be printed. So, I press on "Prepare" button below the print setup. This will prepare the model with the setup I did and show how long will it take, the approximate weight and cost. Then, I inserted the SD card that comes with the printer into my computer and clicked on the "Save to Removable Device"
.png)
3D Printing
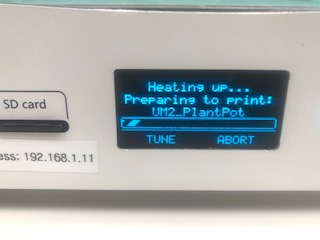
- 7- I inserted the SD card with the saved file into the SD card slot in the printer.
- 8- I used the navigtaion button on the right side of the screen to choose "Print" and selected my file. Now, the printer will start preparing itself to print by heating up.
- Once the printer was done heating up, printing started.
- 5 HOURS LATER ...
3D Scanning