
Week 18 Computer-control Machine
This week we are going to use shopbot, the biggest machine at fablab. I am so excited to design my own funiture.
Weekly Assignment
- Group assignment: test runout, alignment, speeds, feeds, and toolpaths for your machine
- Individual assignment: make (design+mill+assemble) something big.
Group Assignment:
Because of Covid 19, we are not able to go to Shanghaitech University on May or June , we are finnaly be able to use shopbot on July.
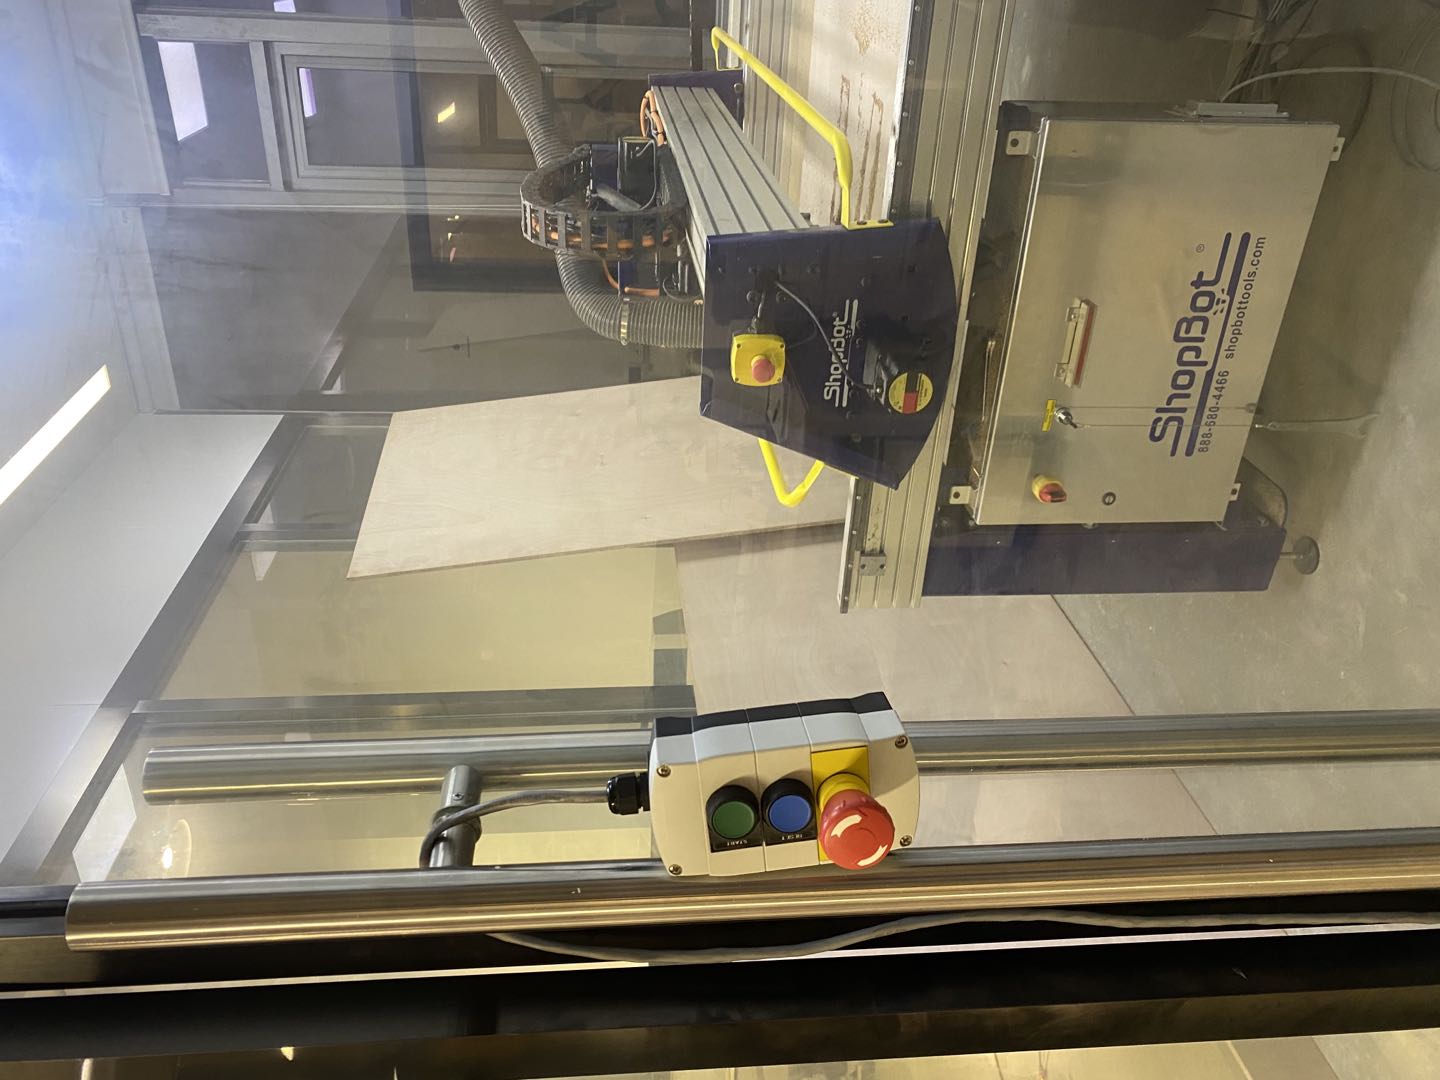
The shopbot in shanghai tech is ShopBot Gantry Tools. You can find ducumentation about it on ShopBot Gantry Tools Documentation
General Safety and Precautions
Shopbot is almost the most dangereous machine in Fablab, we are nervous and excited to use it. Here is what you should know about safty befor you use it.
- Learn and understand safe use of the machine. Do not allow untrained individuals to operate the machine without supervision. Be aware of the location of the Emergency Stop switches at all times. Use shopbot with a partner so they can help to double-check things.
- Eye and ear protection MUST be worn by the machine operator as well as any bystanders or observers. Flying sawdust, material chips, and other debris can cause serious eye injury.
- Wear closed-toe shoes at all times and tie your hair if you have long hair.
- Make sure that your material is properly secured before cutting, and be aware of any small parts that may come loose after being cut. If a small part catches the edge of a spinning bit, it can be thrown forcefully in any direction, causing injury or damage.
- Never place your hands on the rails of the ShopBot. Be aware that the machine may move unexpectedly in any direction, which can cause serious injury if your hands are in the path of movement.
- Never wear gloves while operating the machine. As with any power tool, a glove can get caught in moving or spinning parts and pull your hand into the machinery.
- Never leave a machine running and unattended. Understand that a spinning tool generates friction and heat, creating a risk of fire. This risk is minimized by using correct chip load, using sharp bits, and by always double-checking your files before cutting. Be prepared to pause or stop the cut if something seems incorrect or unsafe.
Drill bits VS router bits vs end mills
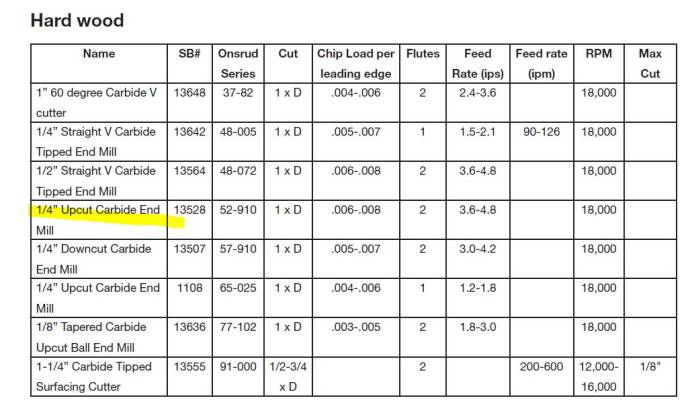
Different materials require different endmills to be machined. But also, different materials require different speeds. If the material is soft, the endmill movement (feed) can be faster. On the other side, hard material requires slower feed and a higher number of rotations per minute. Here is an example of suggested setting for machining soft plywood on ShopBot.Use flat end mill do rough cut and ball end mill to finish it.
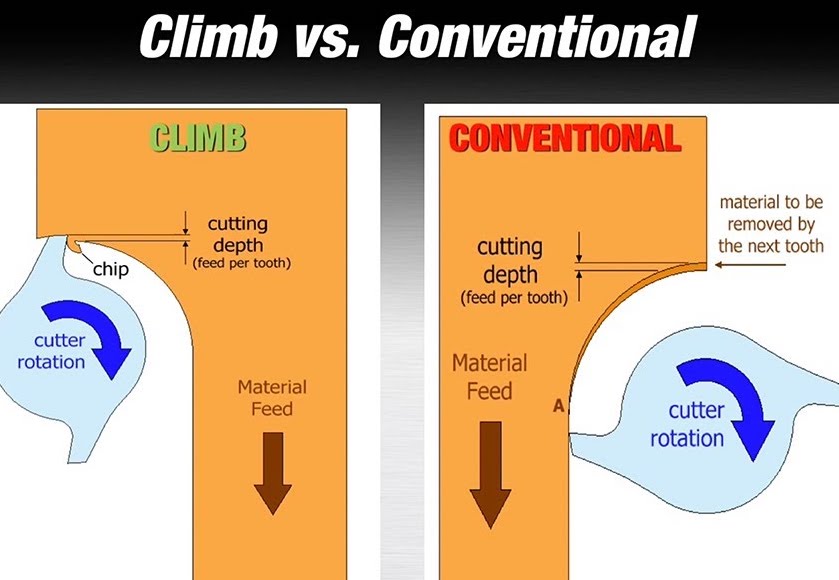
Up VS down, Conventional VSclimb milling
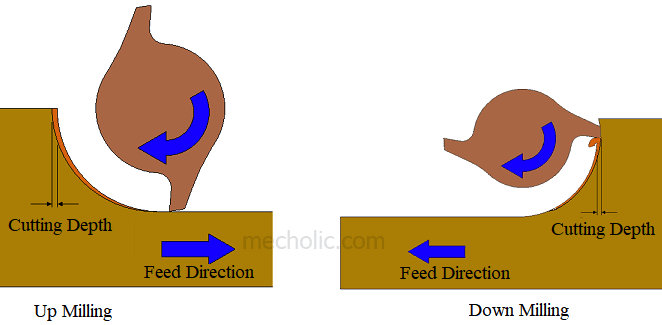
If you are having down cutting mill, you can’t get materiel out. down shallow cut and then do up cut to make it smooth.
Flutes
If flutes don't meet in the middle., there have more chip coming out, if fluets meeting in the middle,center cutting mill can go down.
Flat vs ball endmill
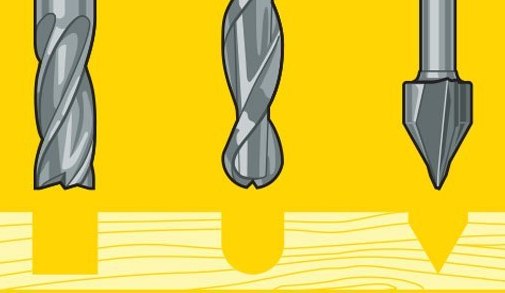
Flat end mill will give you a flat suface at bottom , ball endmill can go deeper but give you a wave surface.
Chip load
Chip load is how much each tool bite in.
Feed rate
Feed rate is inches per minute.
Cut depth
Tool diameter; how far down for each cut
Step over
You need step over to make it smooth; good step over is about tool diameter/2
Fixturing
Bar clamp/vise/wood screws/vucum bed(fast)/glue/tape/encapsulation(封装)
Tool path
kerf is bigger than tool , we call it run out. We should do conventional for rought and climb for finish.
Safty
Neil said shopbot will cut you ,burn you , hit you . You need someone assitant you from doing something stupid or when you have accident you will need help.We need a shopbot buddy just like when you are diving you need a diving buddy to count on and they will save your life if necessary.
CNC and material
- Model name: SHOPBOT Full Size PRSalpha 96-60w/14"Z axis
- Cutting Platform Size: 5'x8' cutting area and 8" of vertical travel
- Material Capability: Plywood, MDF, Soft & Hardwood…seemingly every milling material except metal or anything that requires cutting lubrication
- Data Format: gcode
- Gcode (tool path) Generation Software:3D-CAM, VCarve, Fusion360 (we used Vcarve)
- Data Format(2D): svg, dxf, dwg, eps, ai, pdf, skp
- Data Format(3D): stl, obj
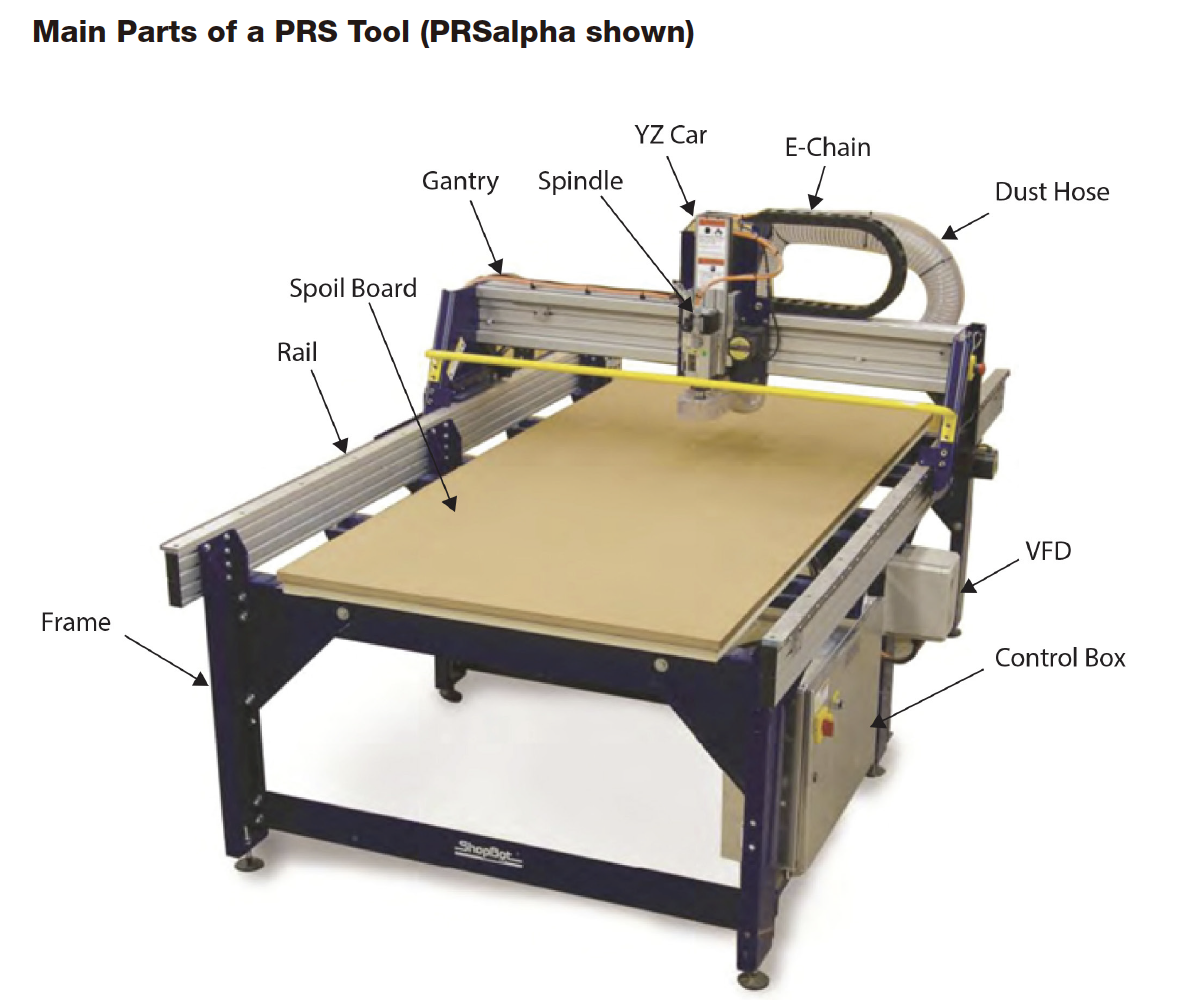
Key conponents of shopbot
:
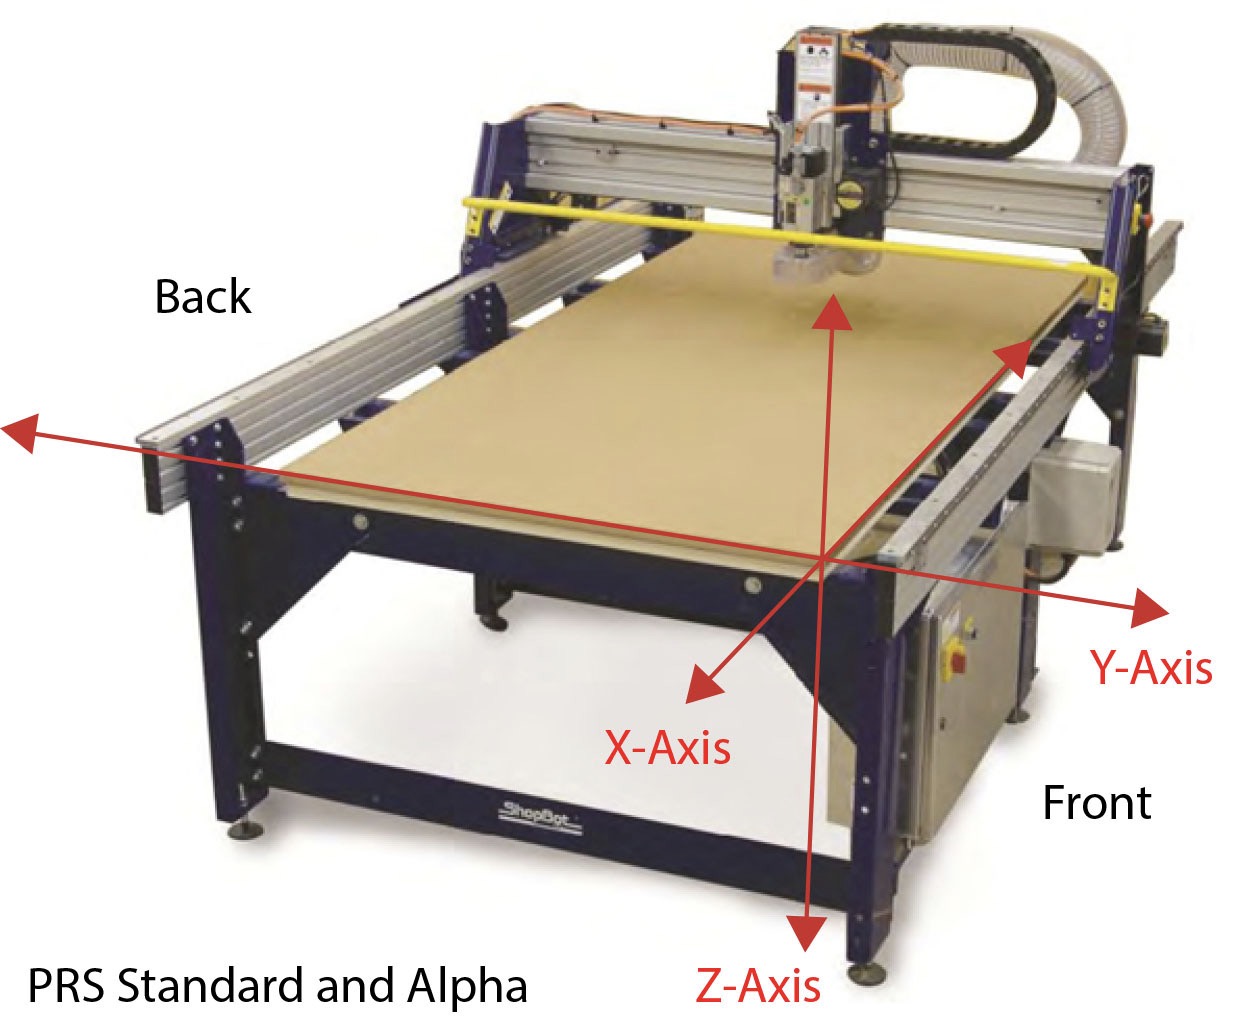
Tool Orientation and Direction of Axes
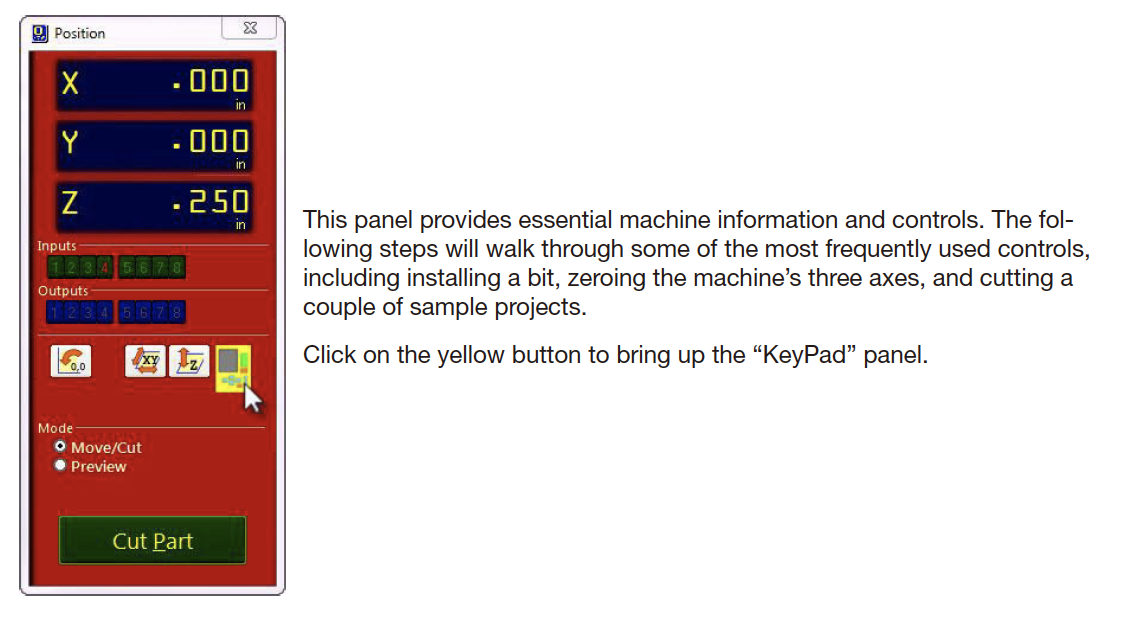
The “Easy” Control Panel
This panel provides essential machine information and controls. The following steps will walk through some of the most frequently used controls, including installing a bit, zeroing the machine’s three axes, and cutting a couple of sample projects. Click on the yellow button to bring up the “KeyPad” panel.
The Keypad
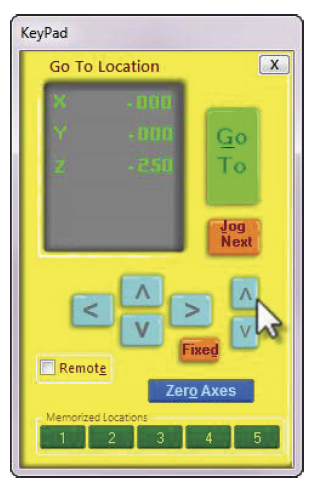
This window allows the user to manually move the X-, Y,- and Z-axes of the machine. Click on the blue arrows to move the spindle/router and gantry. X- and Y-axes can also be moved with the cursor buttons on the computer keyboard. Use the “Page Up” and “Page Down” buttons on the keyboard to move the Z-axis up and down. Move the spindle/router to a safe Z position below the Z proximity switch and near the middle of the deck. Click on the X in the upper right corner to close yellow KeyPad.
Test the spindle/router
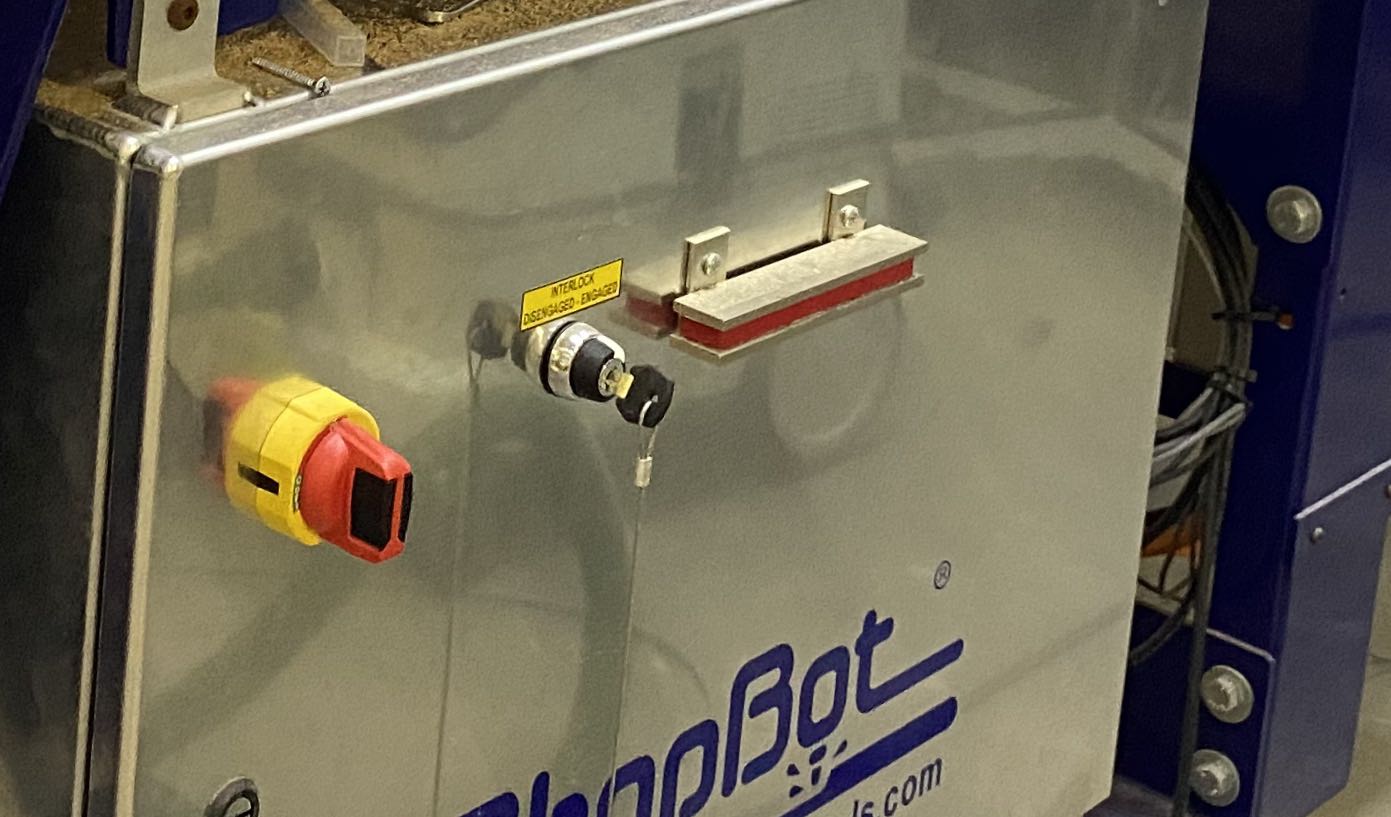
Locate the key attached to the collet wrench. Insert this key into the safety lockout next to the power switch and turn the key to “ENGAGED”. The endmill cannot be changed without taking out the key.
Design test parts
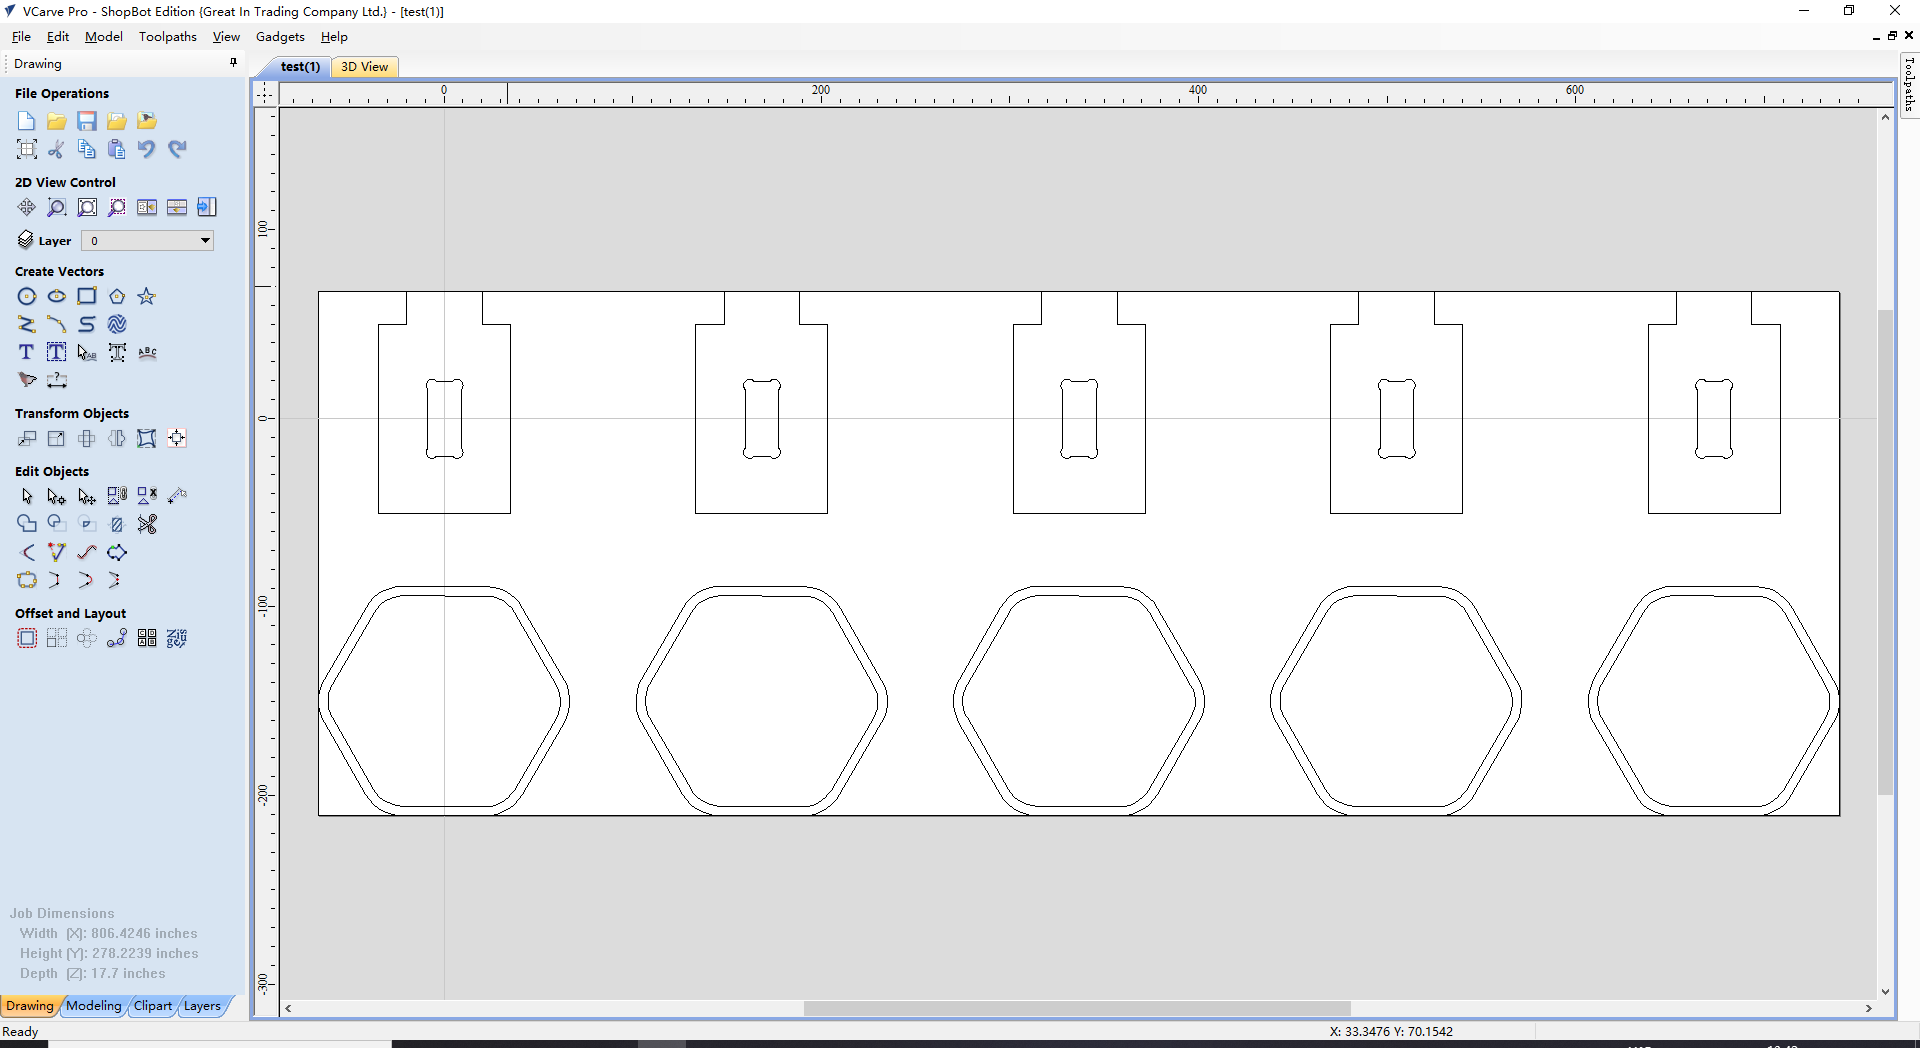
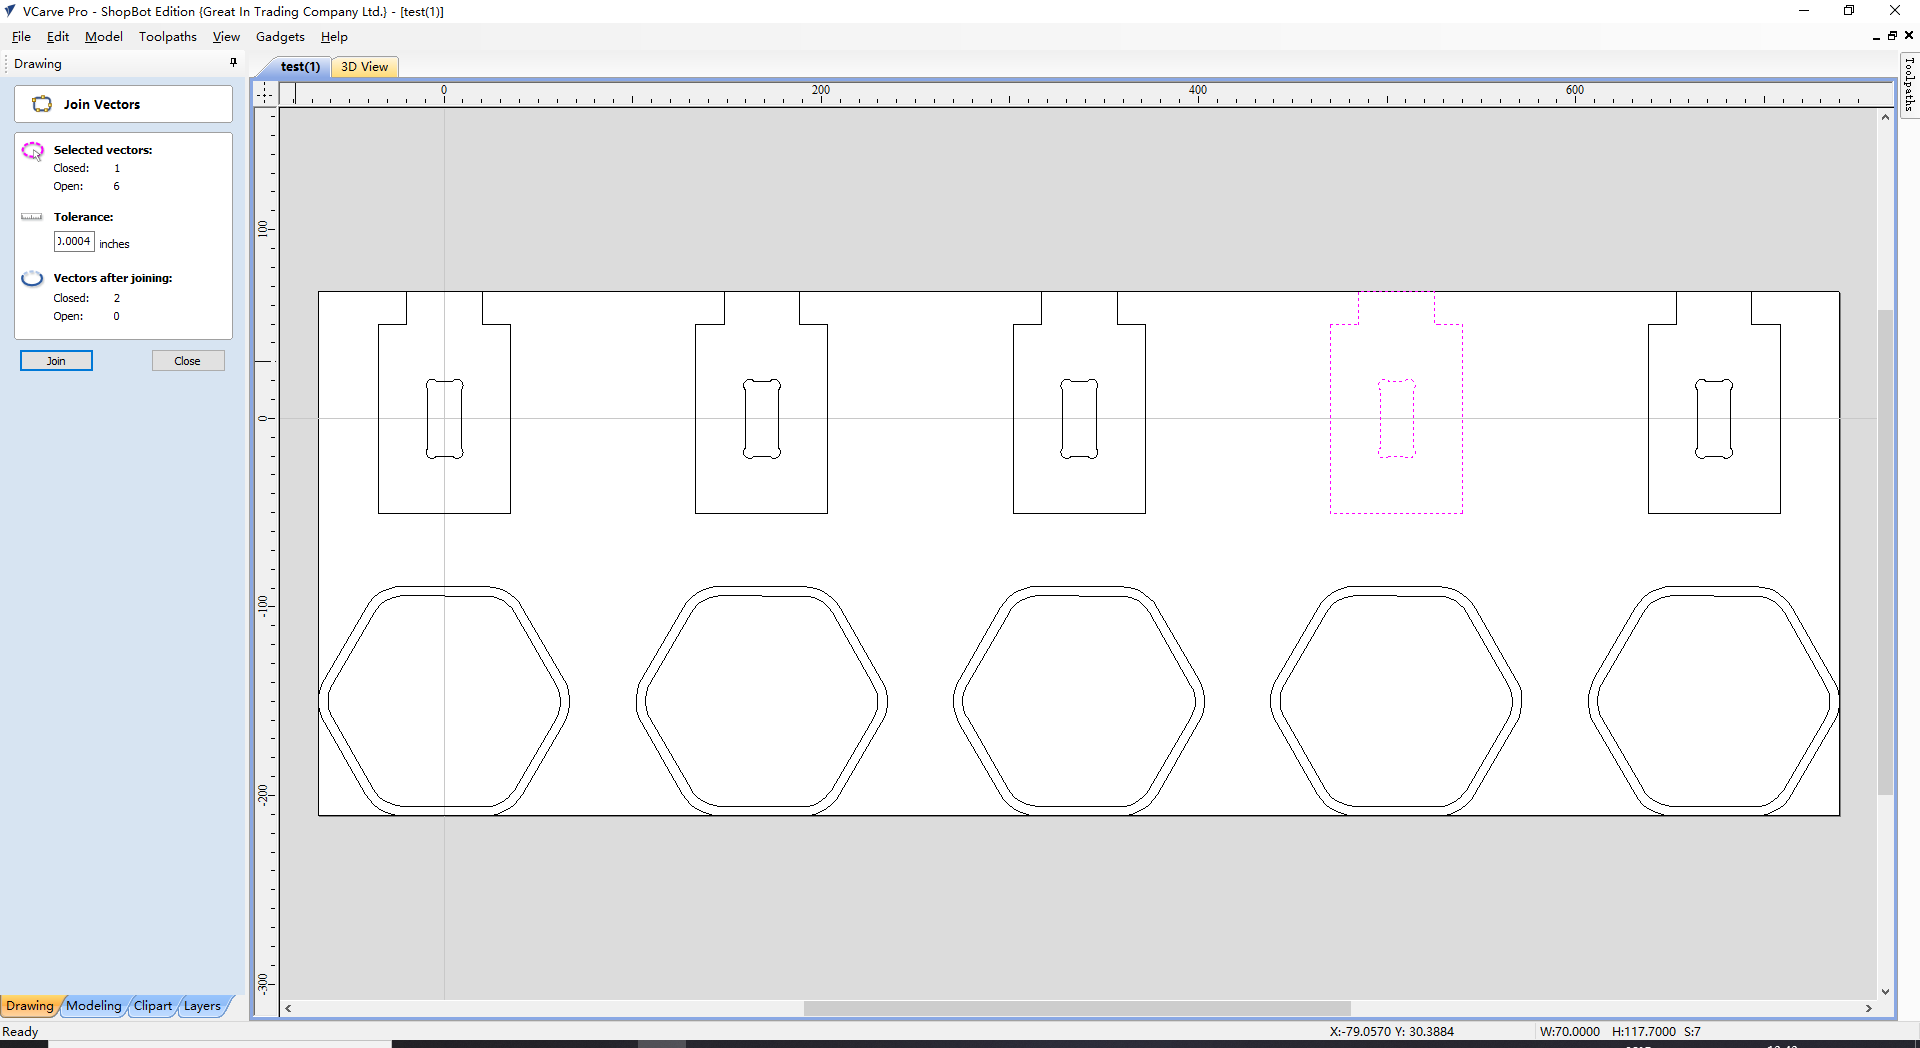
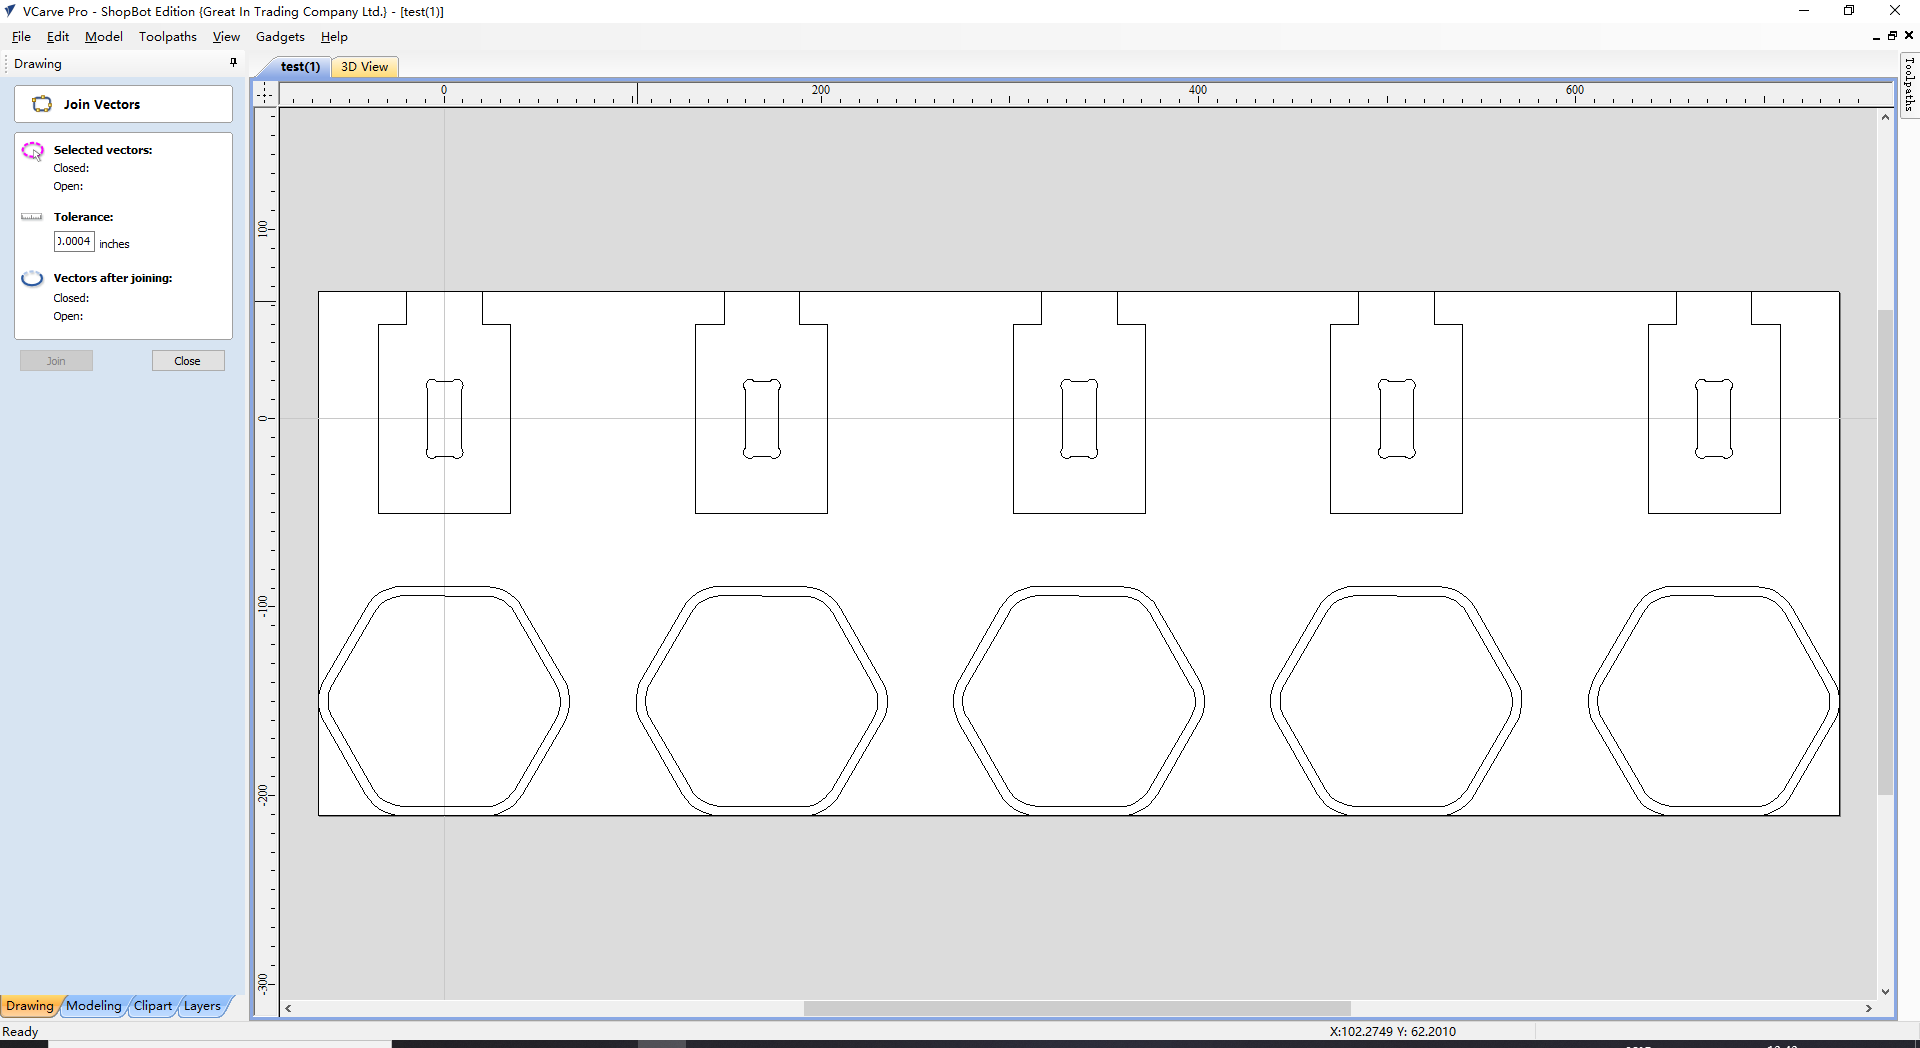
Creating tool path: Joint vectors
Creating tool path: Set endmill, spindle speed, feed rates.
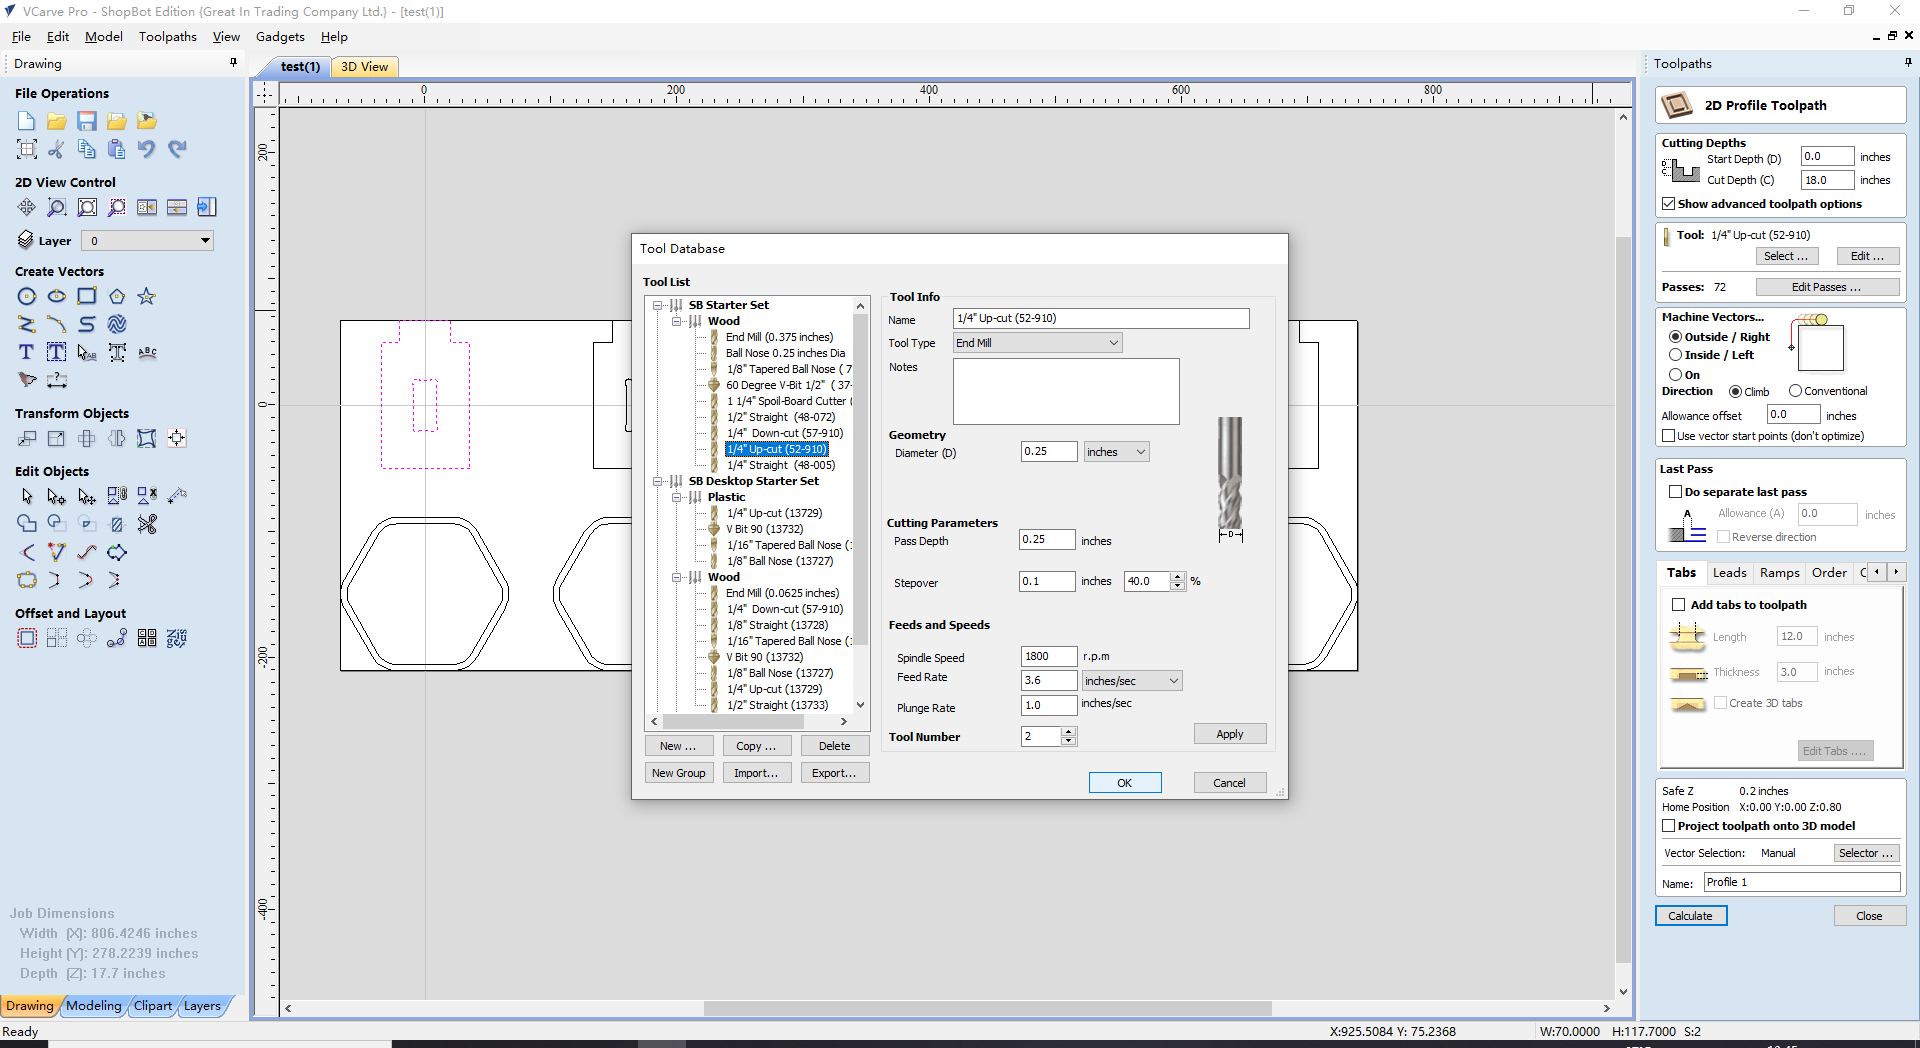
We decide to test 3.0/4.5 feed rates, also test climb and conventional cut.

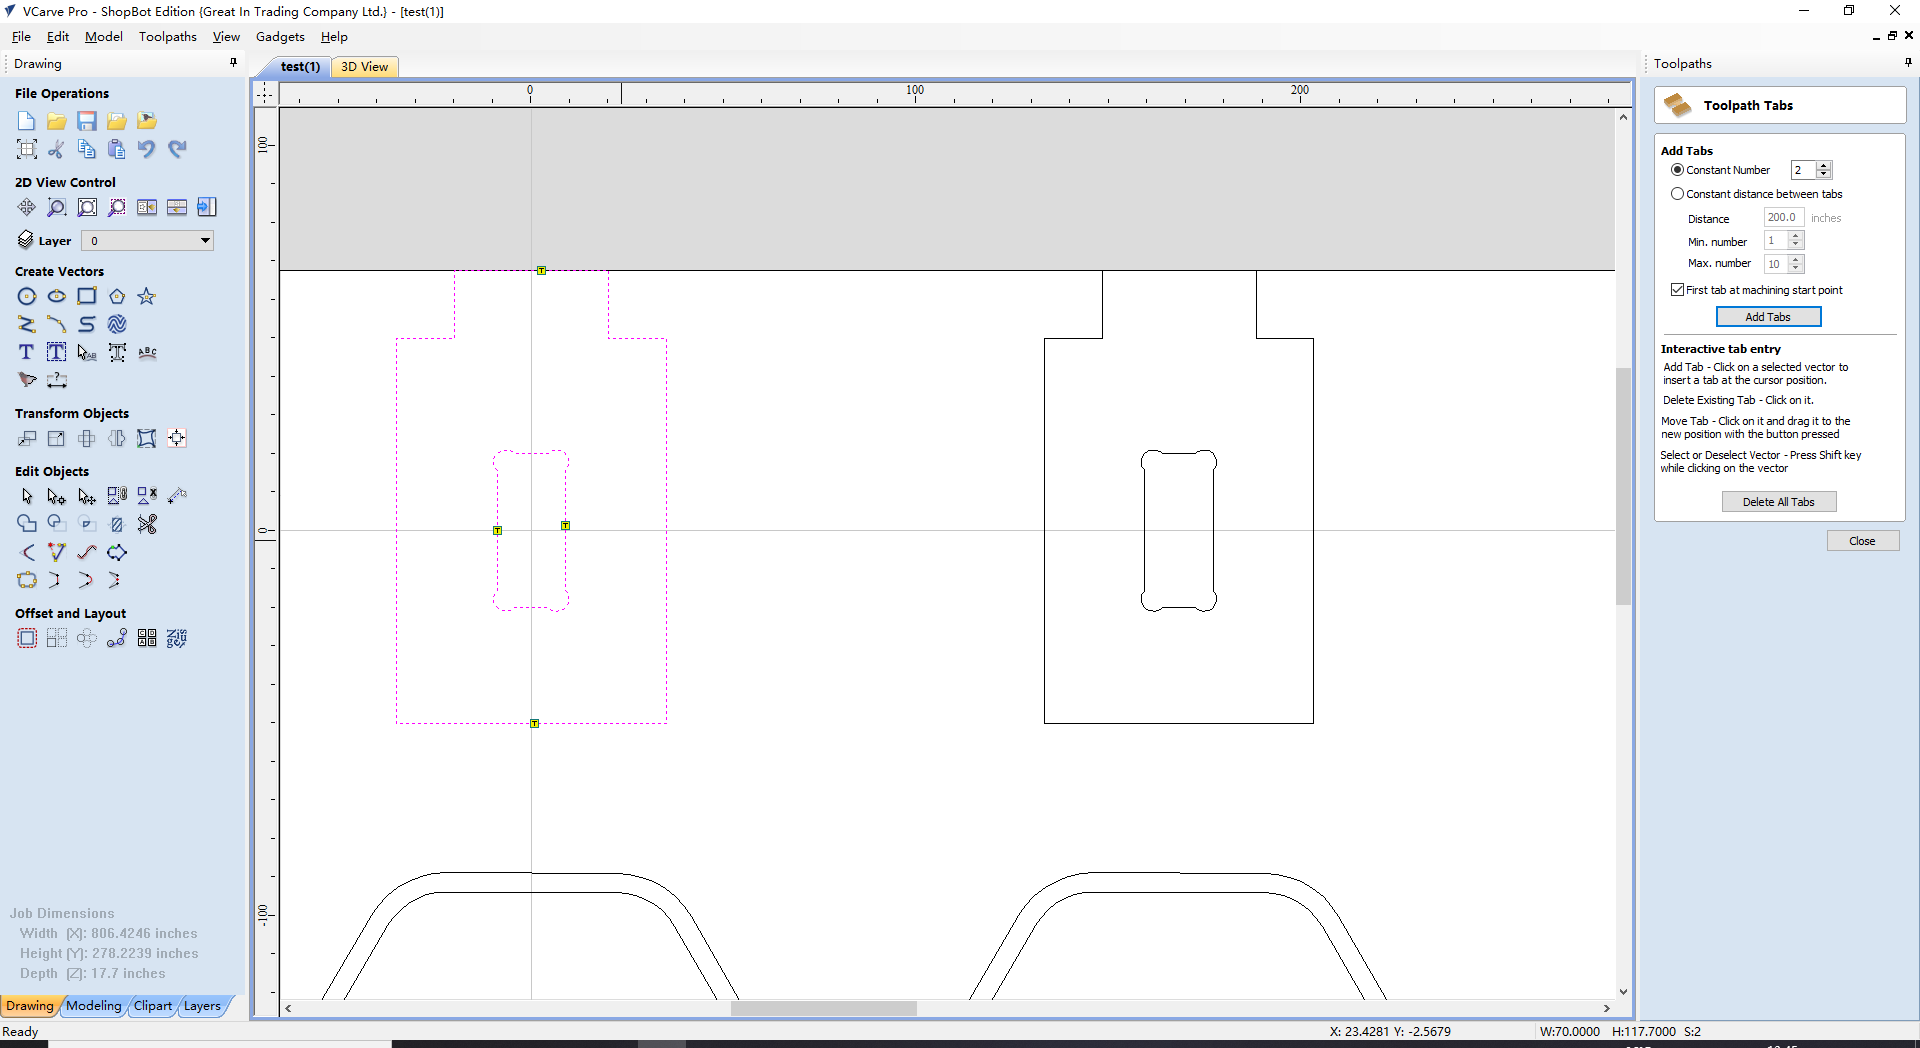
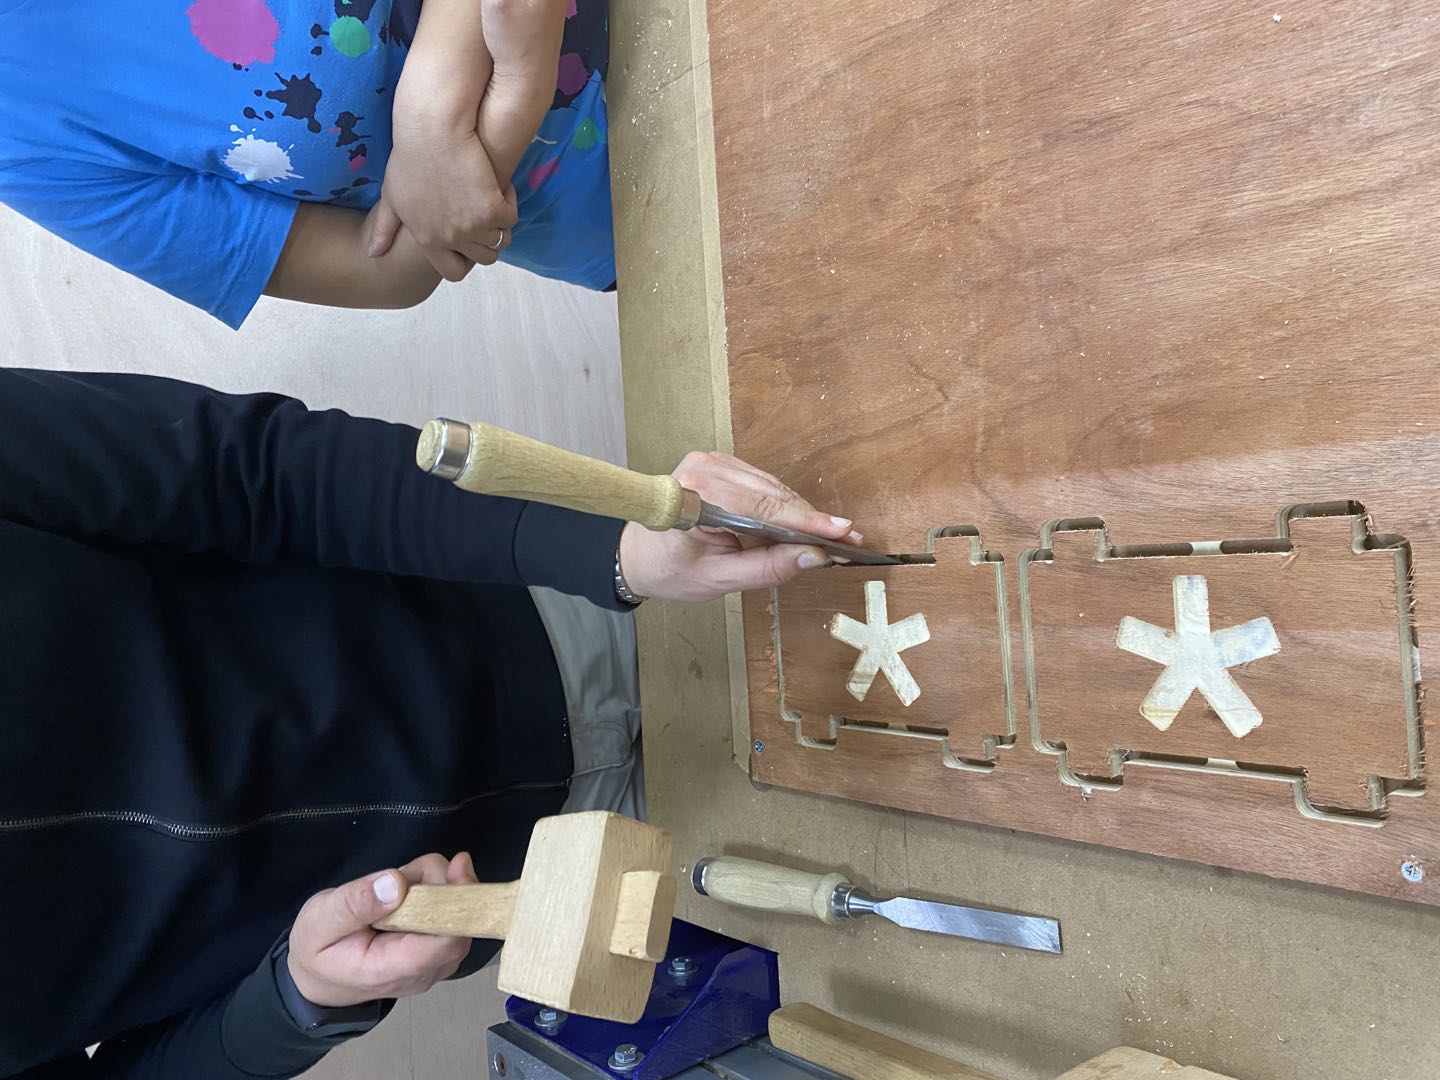
Creating tool path: Add Tabs to toolpath
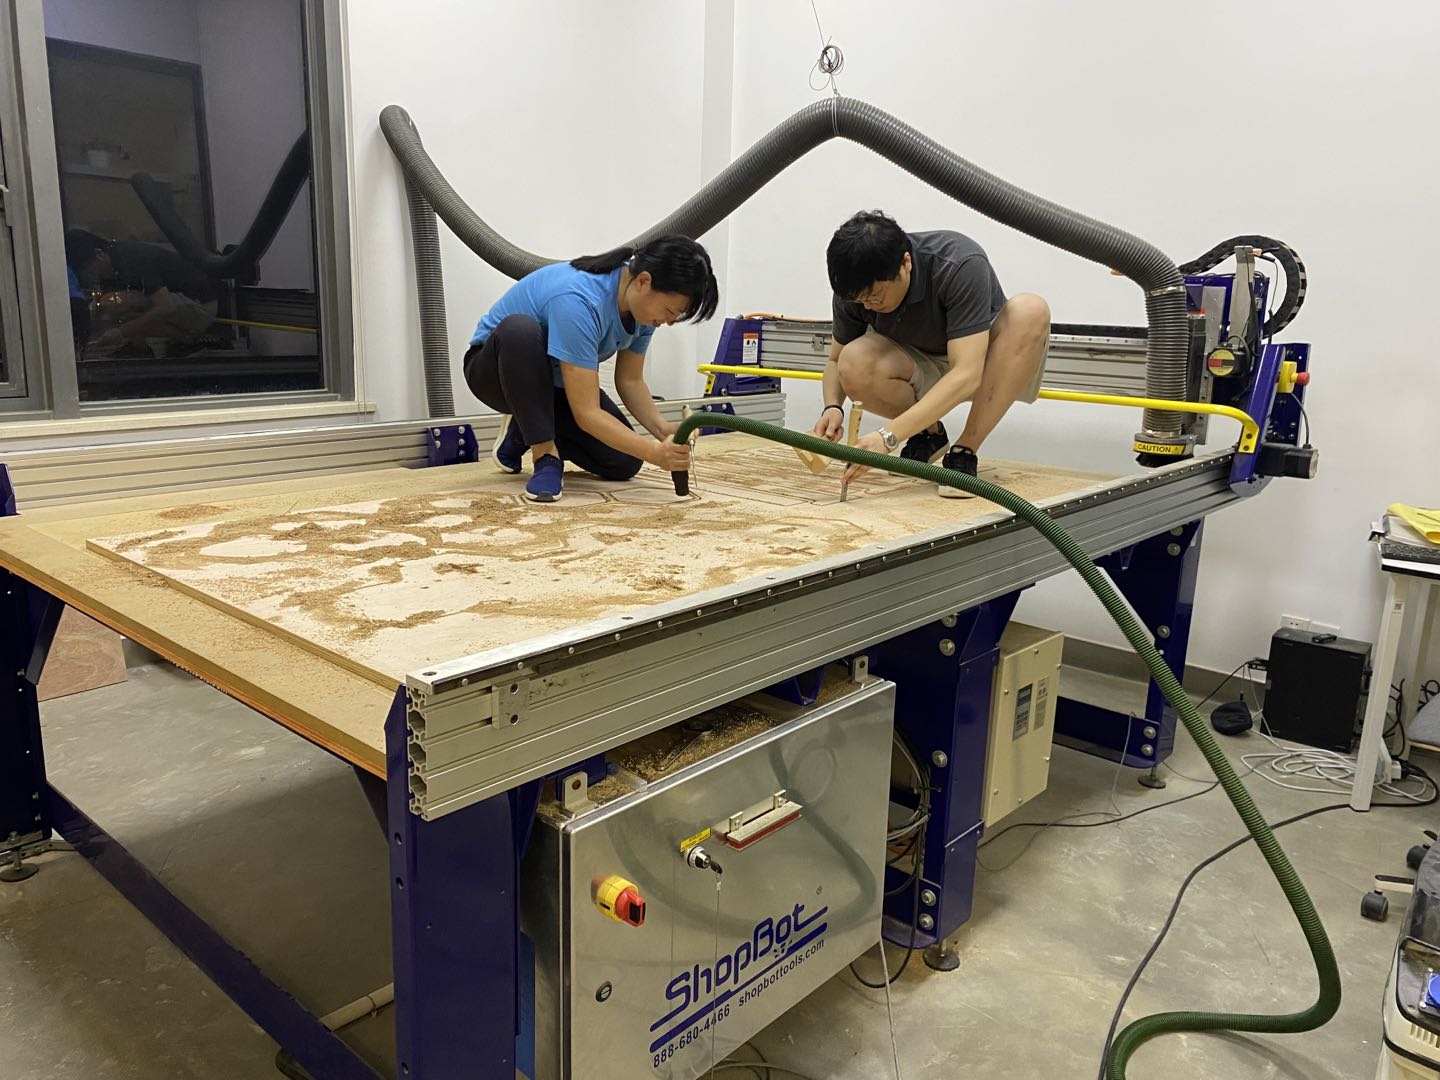
Milling
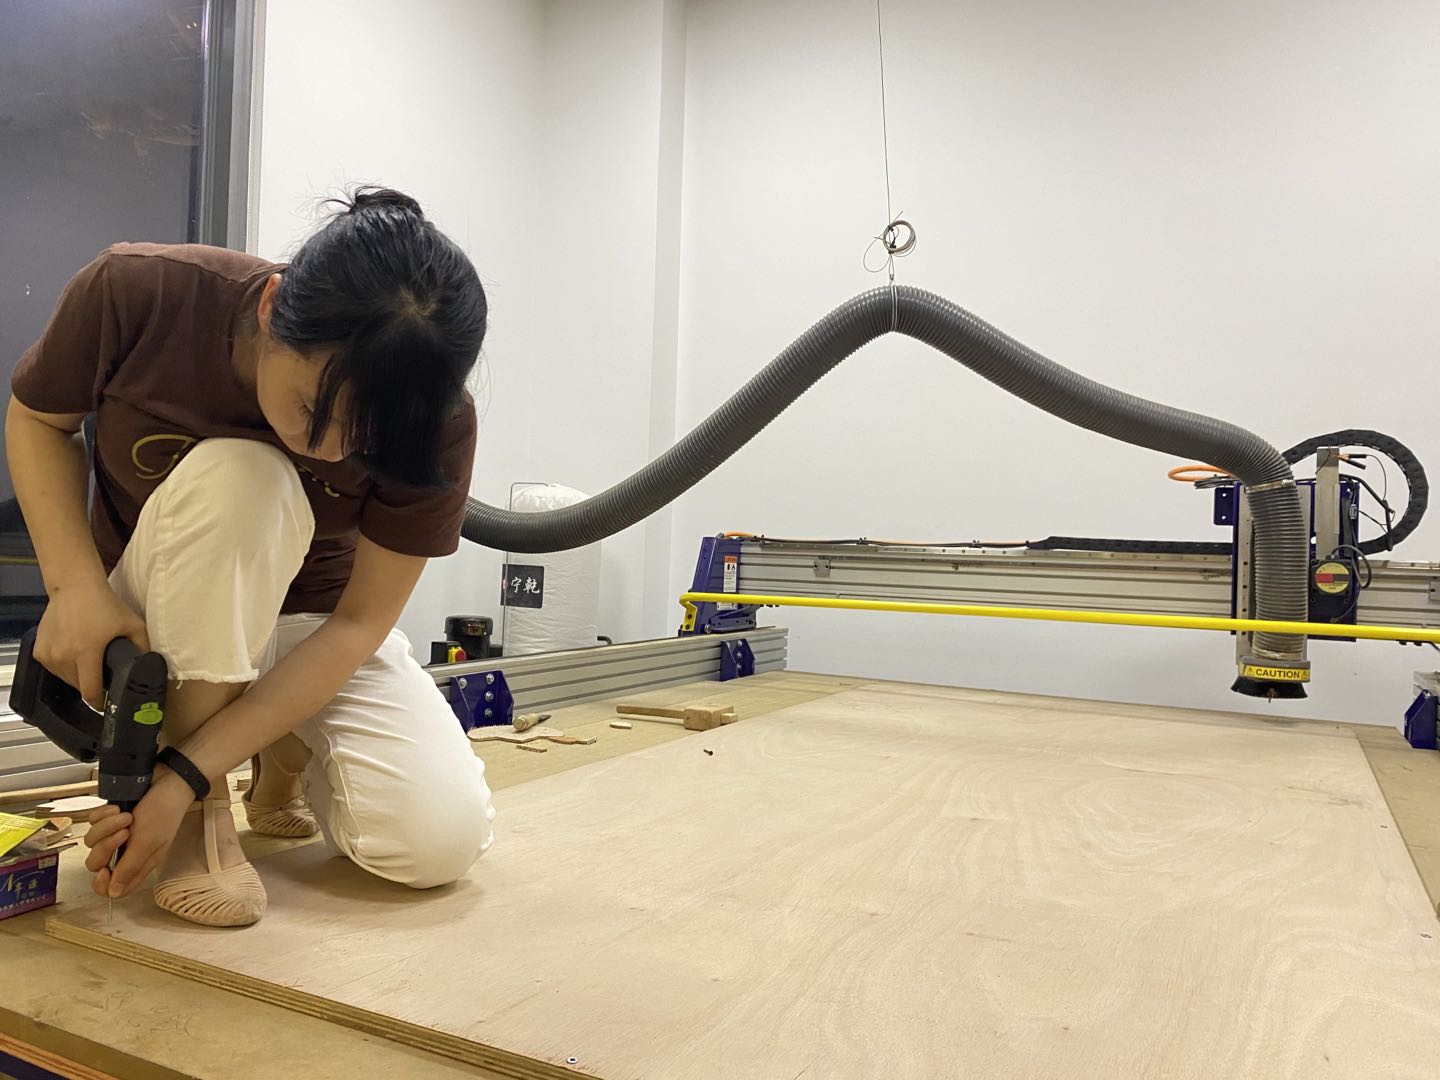
- Use screw driver to screw the board make it properly seated on the bed.
- Set Milling machine XY origin…automatically by pushing the set XY Button
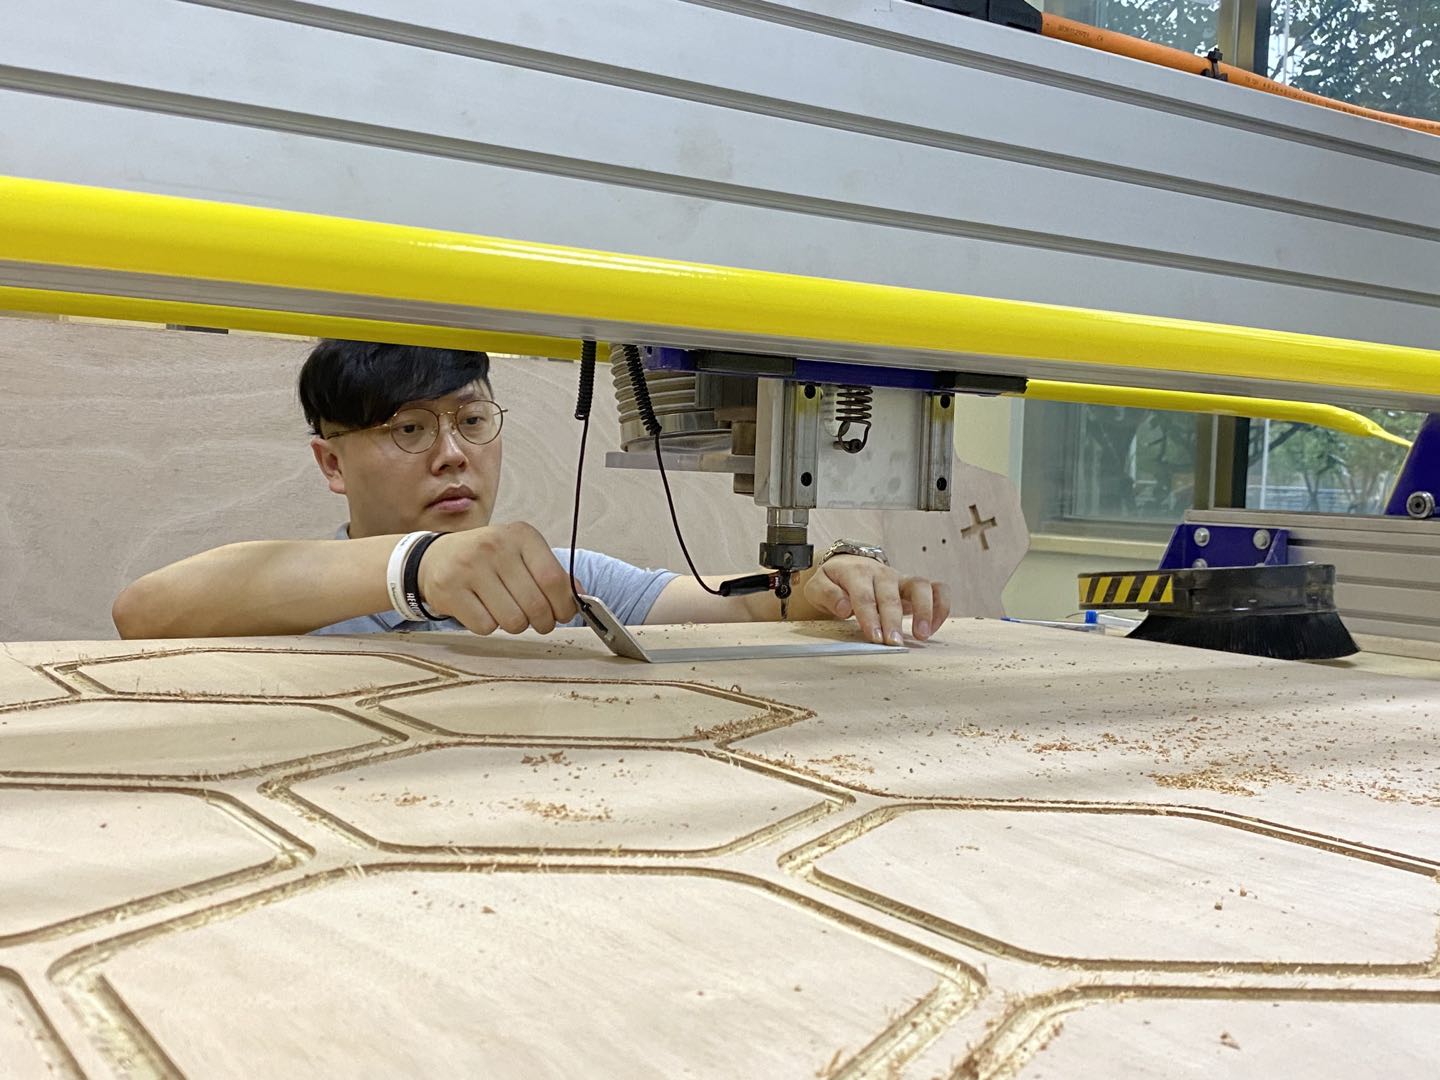
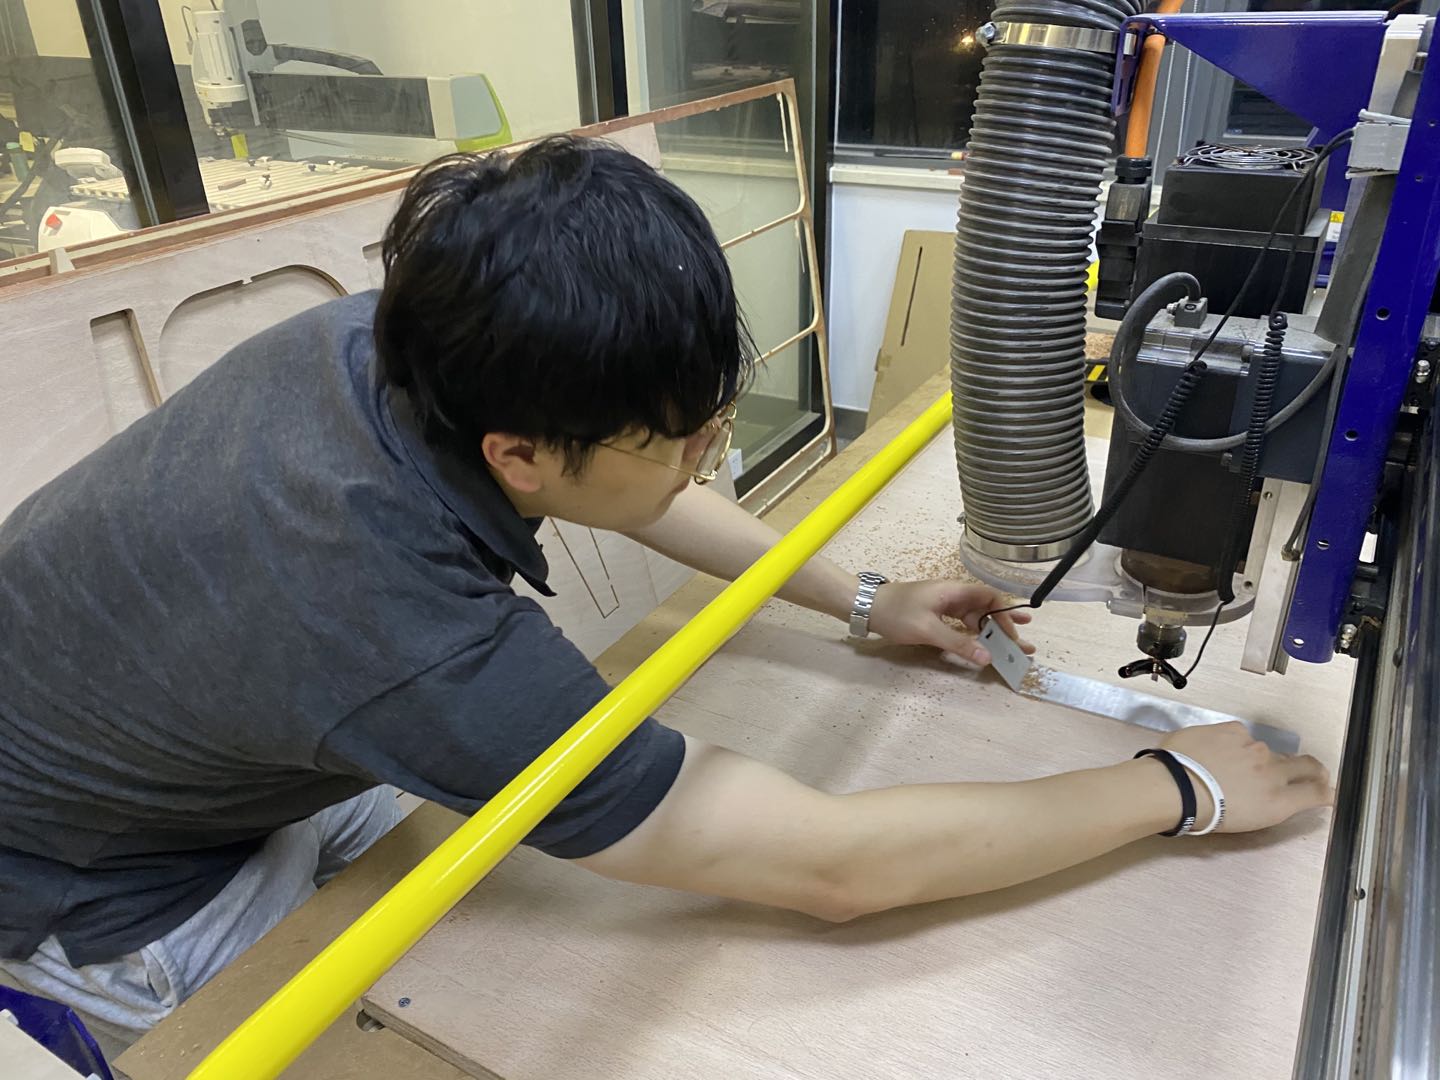
- Set Z origin…requires the use of a conductivity plate (and two people…one to hold the plate the other to work the PC controls)…the end mill slow moves down and touches a metal place put flat on top of the sacrificial layer (conductivity must be tested before running z origin set by touching the metal plate to the end mill tip. Change z-origin temporary to a location at least 50mm above the material and setting this to Zero
- Run an “Air Pass” of the tool path file to observe any strange milling behavior, when satisfied…move on to actual Milling
- Reset z-origin back to actual Zero
- Start the milling process. Turn on Dust collector
- Dis-engage spindle lock by turning the Key
- Run the cut file, spin up the Spindle
- Click OK to mill
- Get out of glass room, put emergency stop button outside as well, observe the milling process attentively from beginning to end, be ready to hit the emergency stop button if any issues arises
Test results
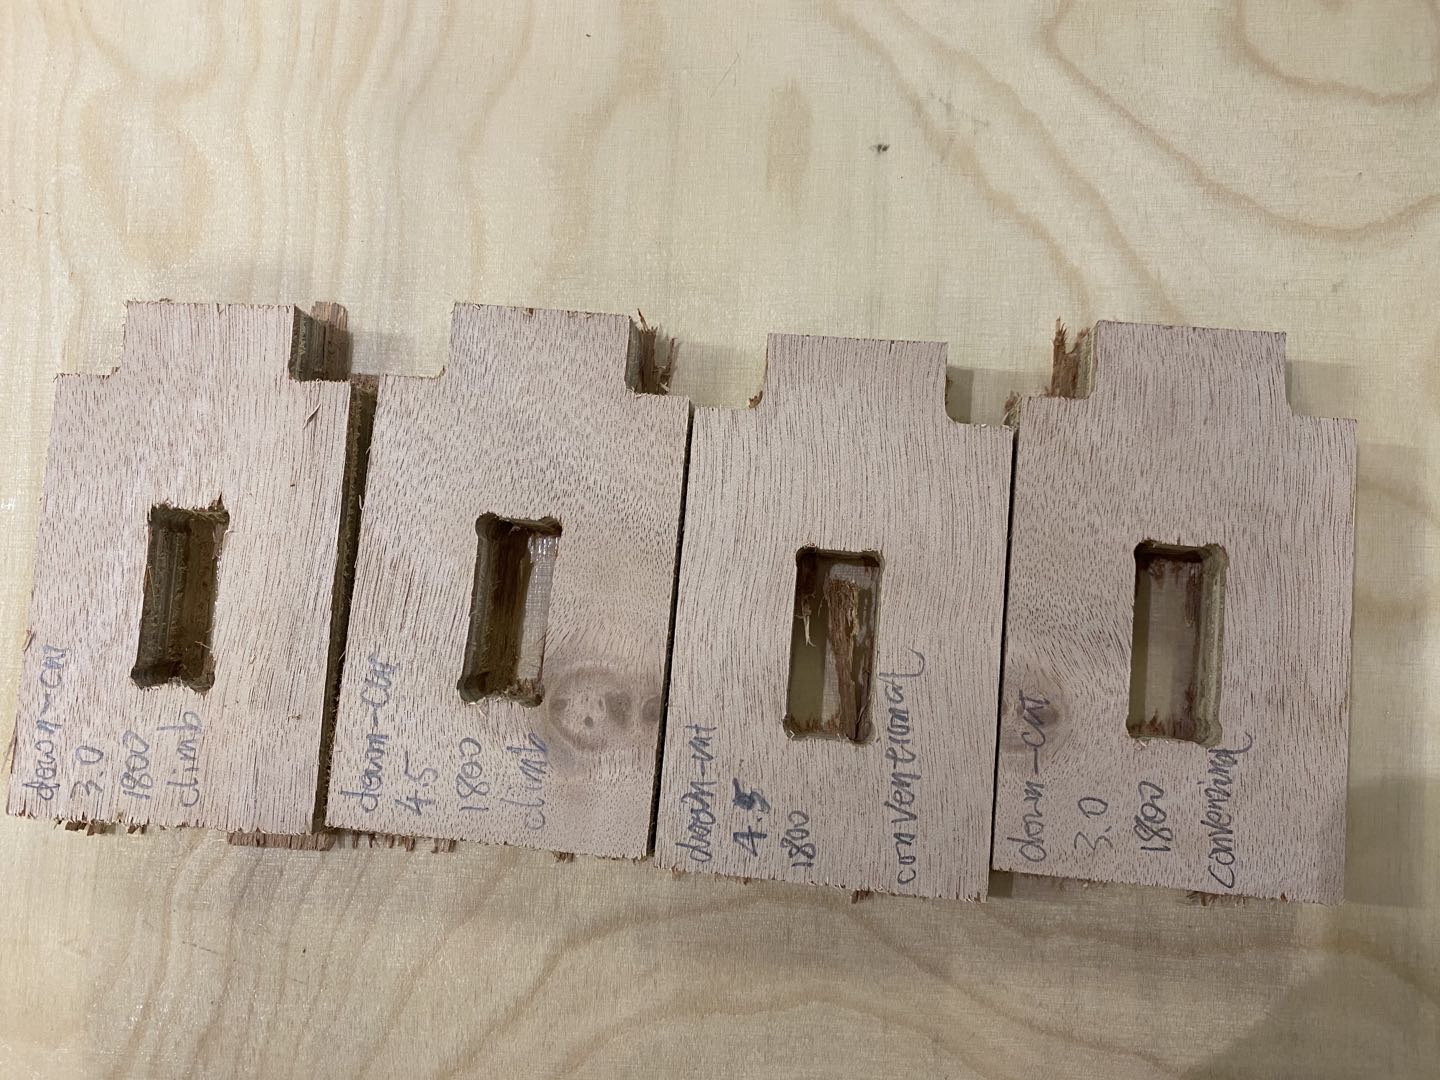
We compare this different test, down cut/4.5 feed rates/conventional is the best cut.
Problems we had:
- When shopbot is running well Nancy get out of room and door hit the stop button, we have to redo everything again. Make sure you put emengency button at some place saft and easy to get.
- Elfe's board crack to different layers, we need to check the board make sure it's good quilty ply wood, end mill is very powerful it will make board into different layers.
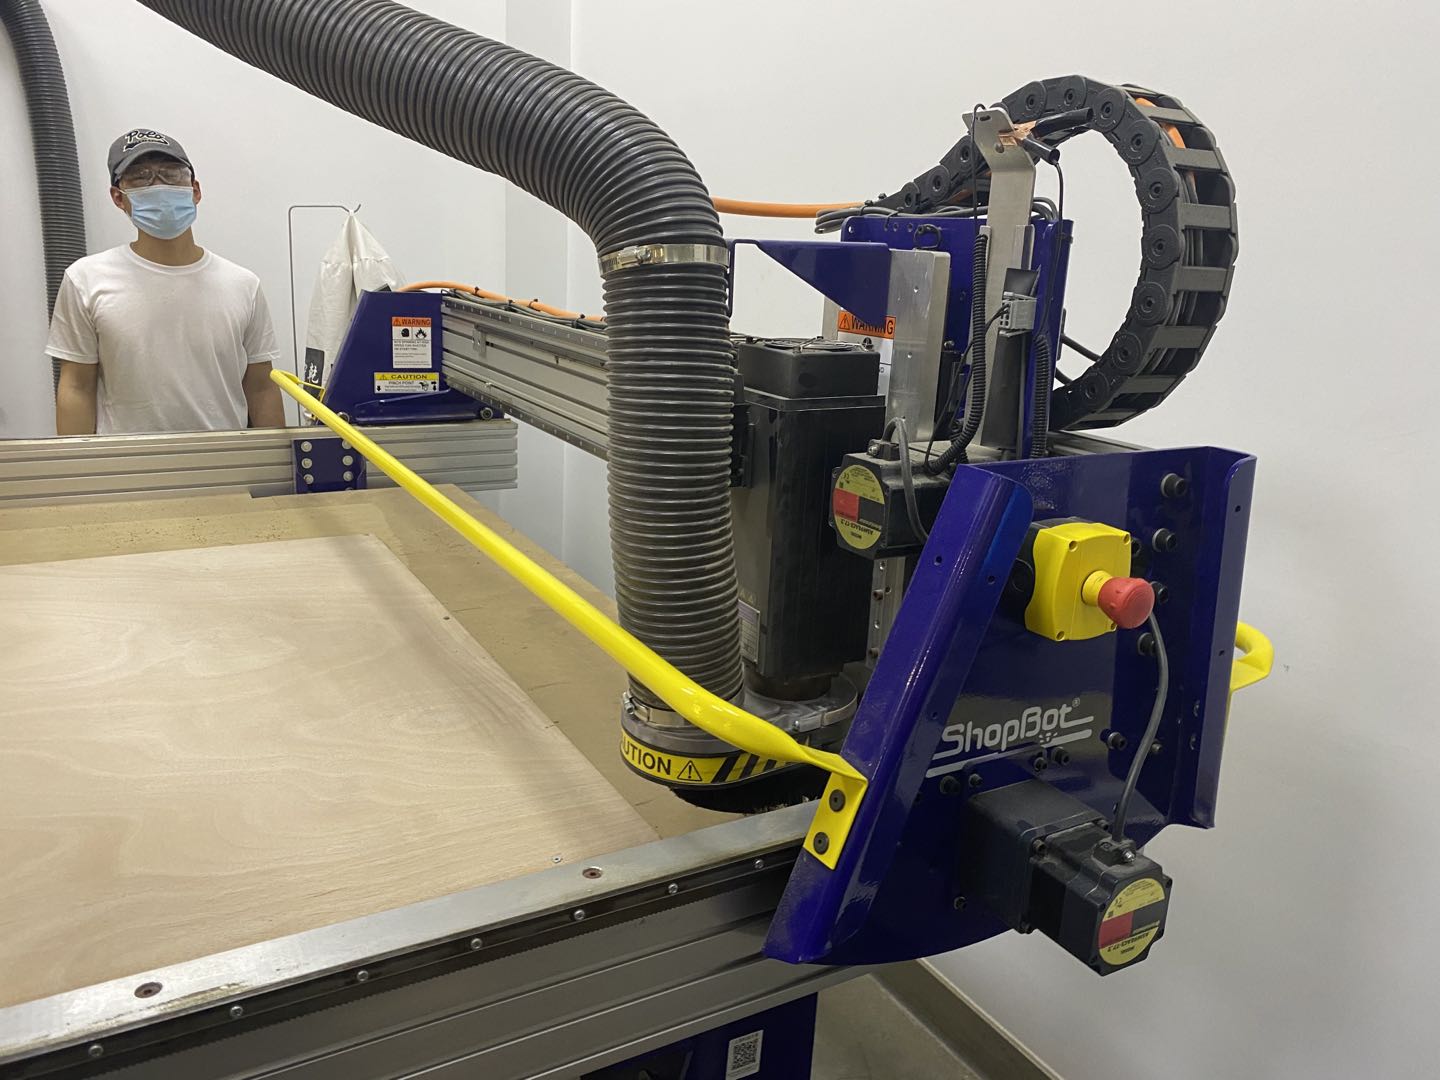
- When you push the spindle you should not push it too much to the edge of bed like the pic below, it might drop down on the floor.(No idea who pushed it though)
Click here to downloard test files
Individual assignment
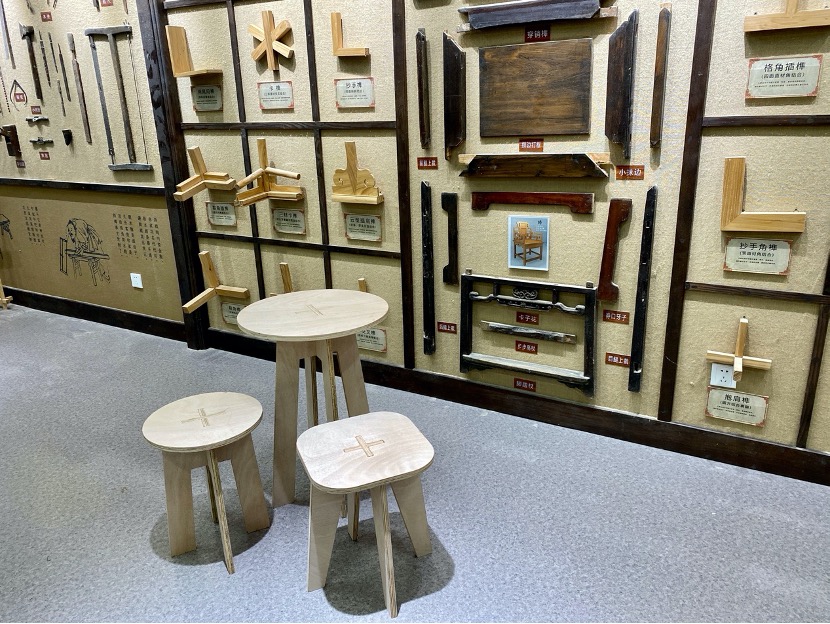
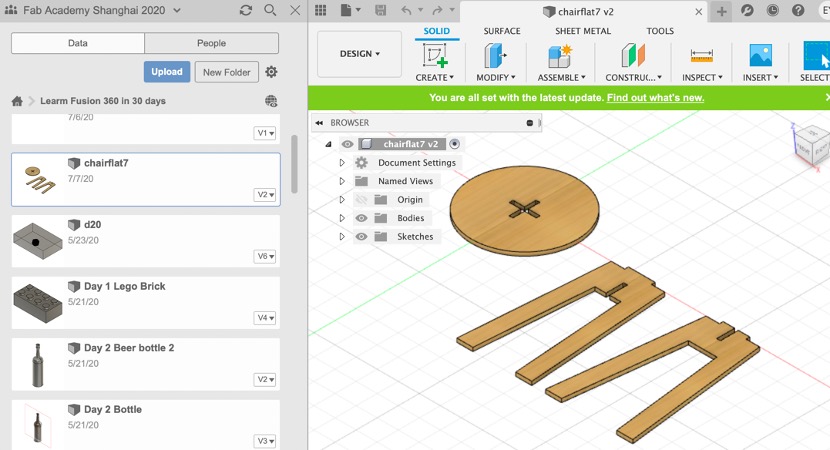
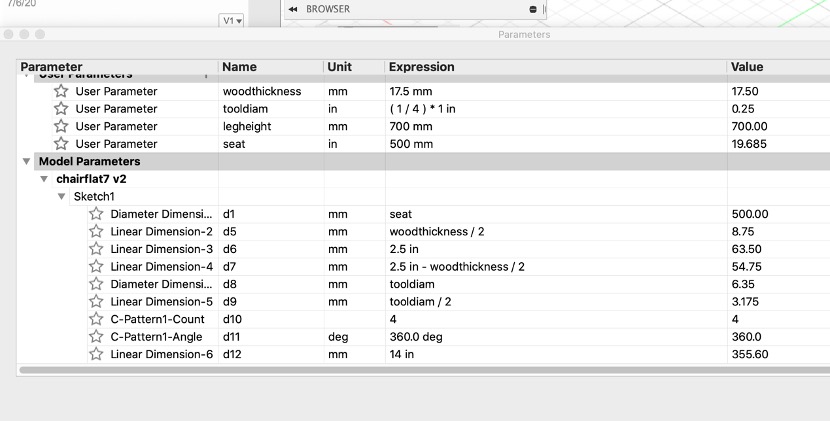
In my living room, I have a sofa. During Covid 19, I have to work at home a lot. I like to sit on the sofa and working with my laptop.For this week’s assignment, I want to make a small laptop table that can match my sofa's height. First, I designed this table on Fashion 360.Check the line and found the design I like the most, then we draw it by myself. It tooks me about 8 hours. Also design it parematic, So when I change the size I can easily make a small chair that has the same shape with this table.
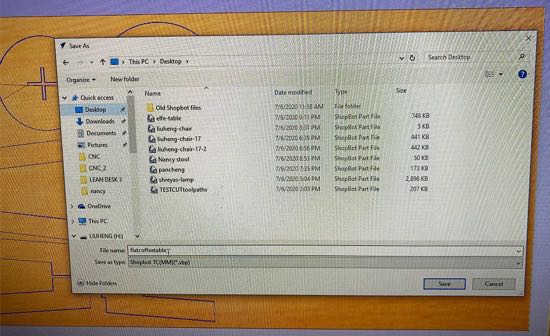
Creat path for shopbot using v-carf, make sure your setting is ok.


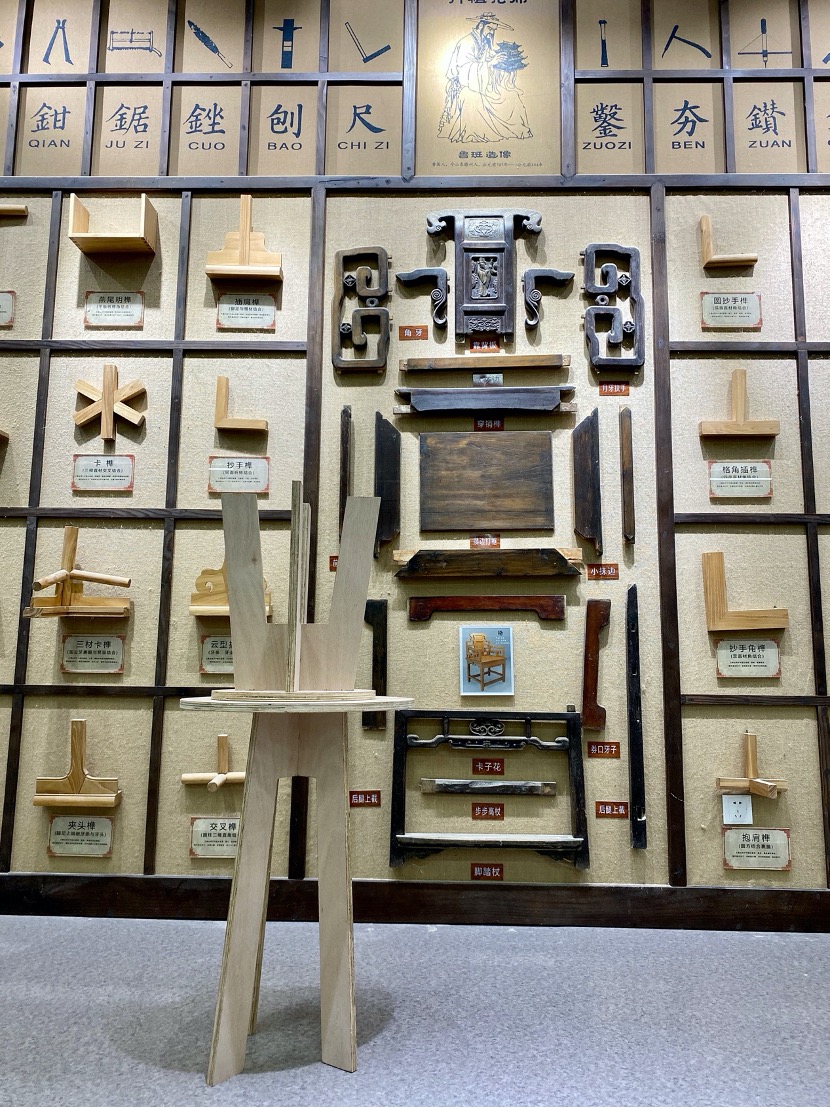
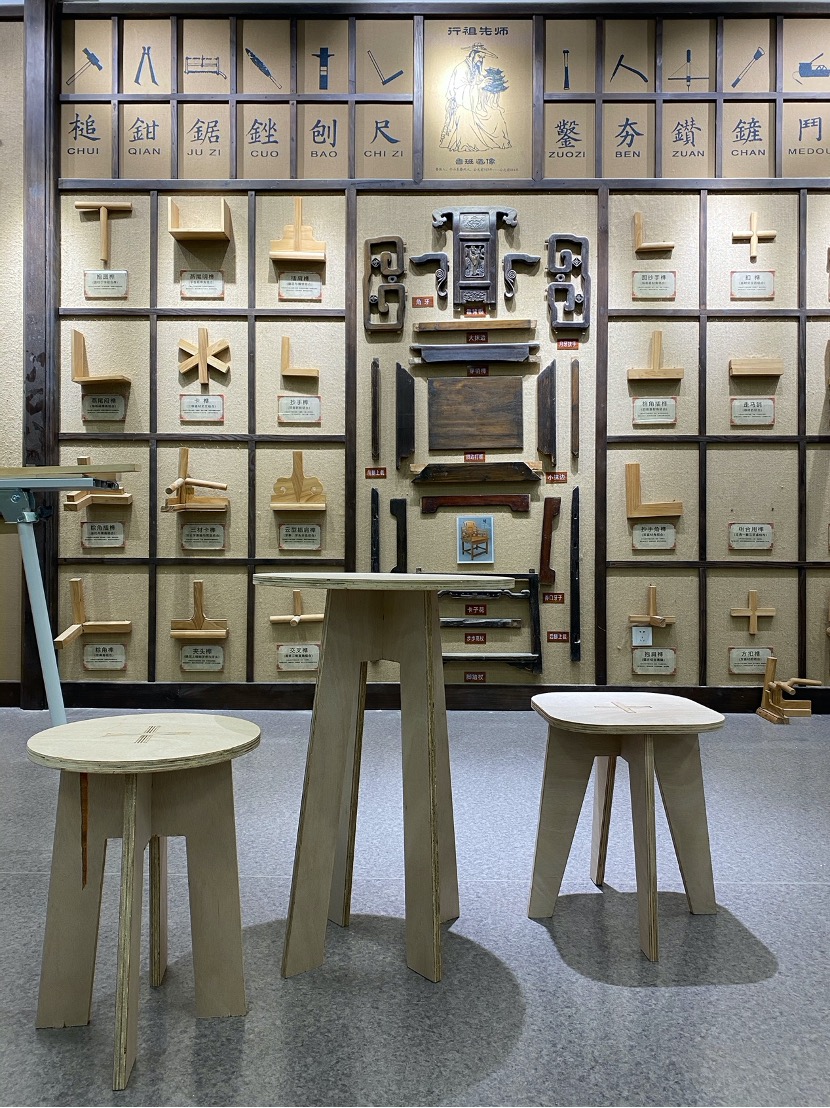
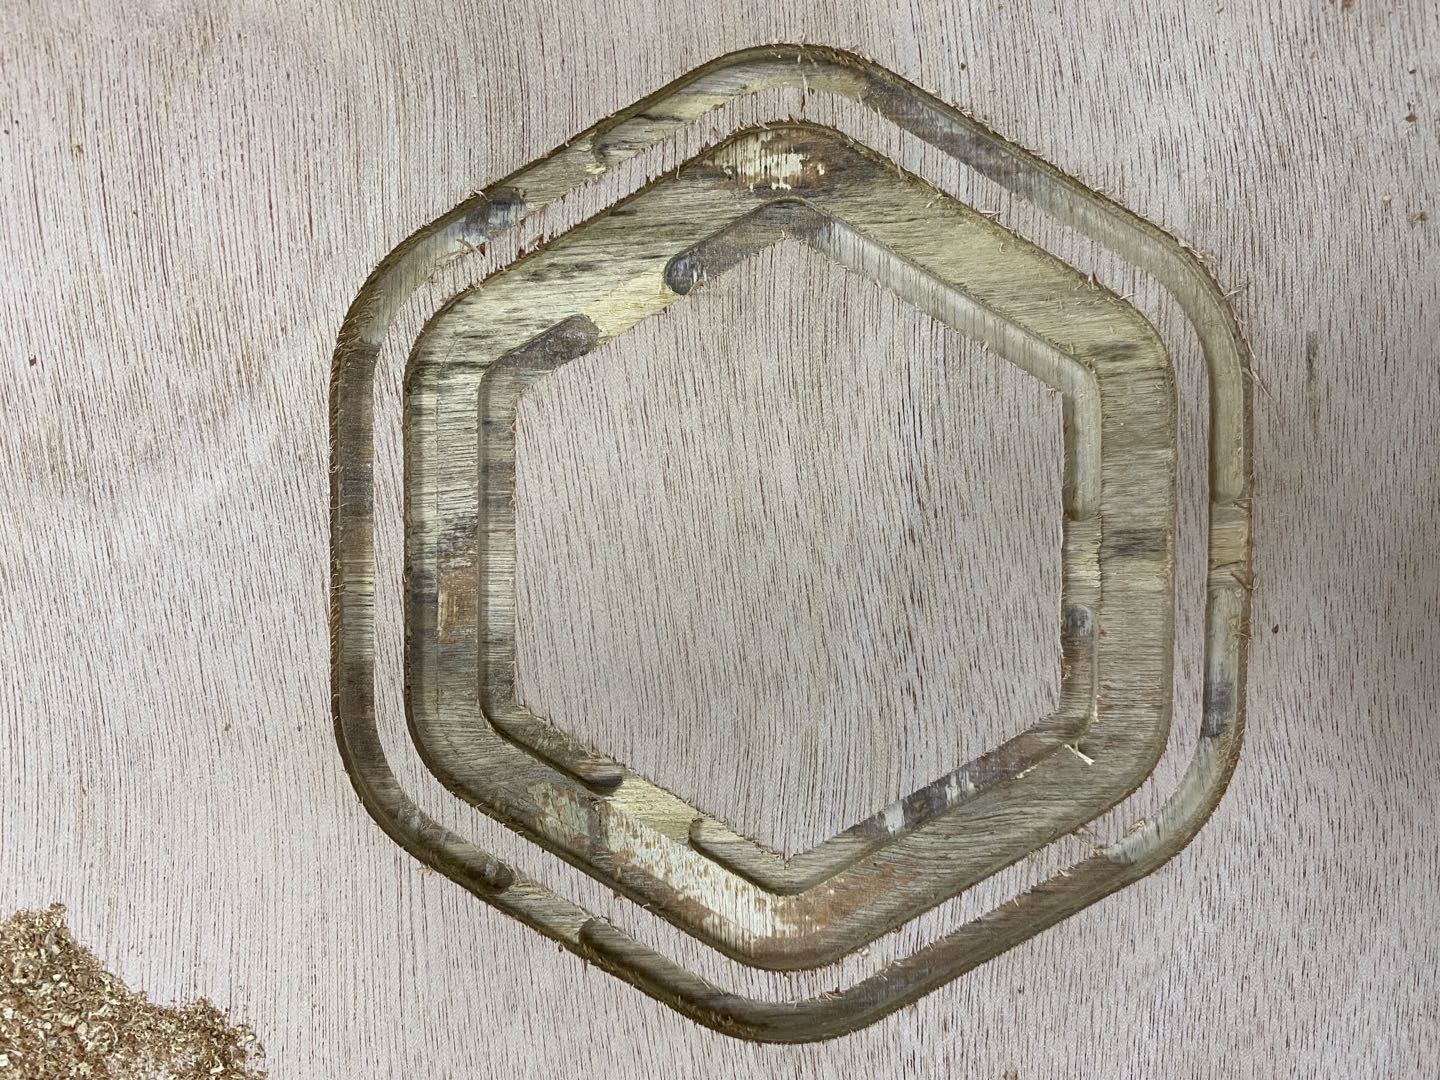
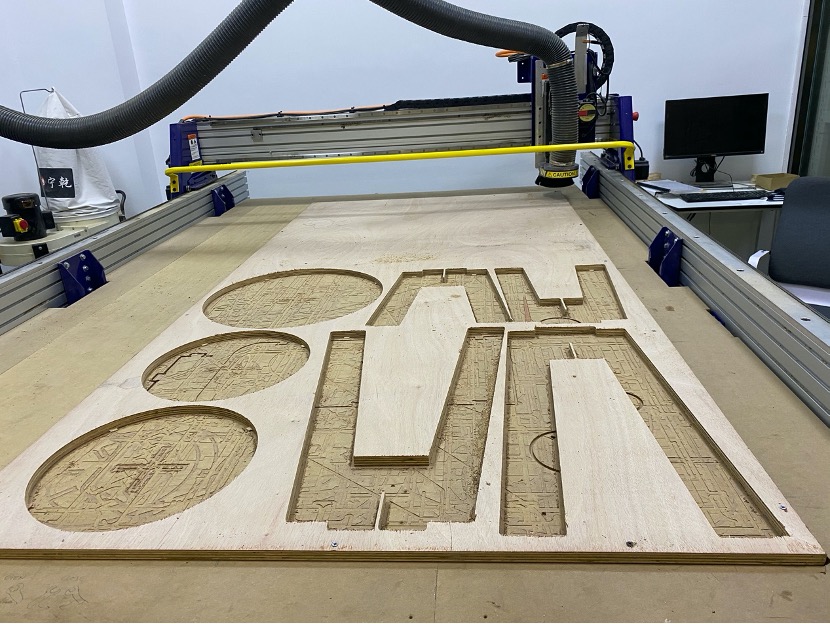
Then I mill it by shopbot, the process is same with what I ducumented in group assignment. As a team we help each other when we use shopbot, just to make the processs safe and fast. After milling we use vacum cleaner to clean the power.
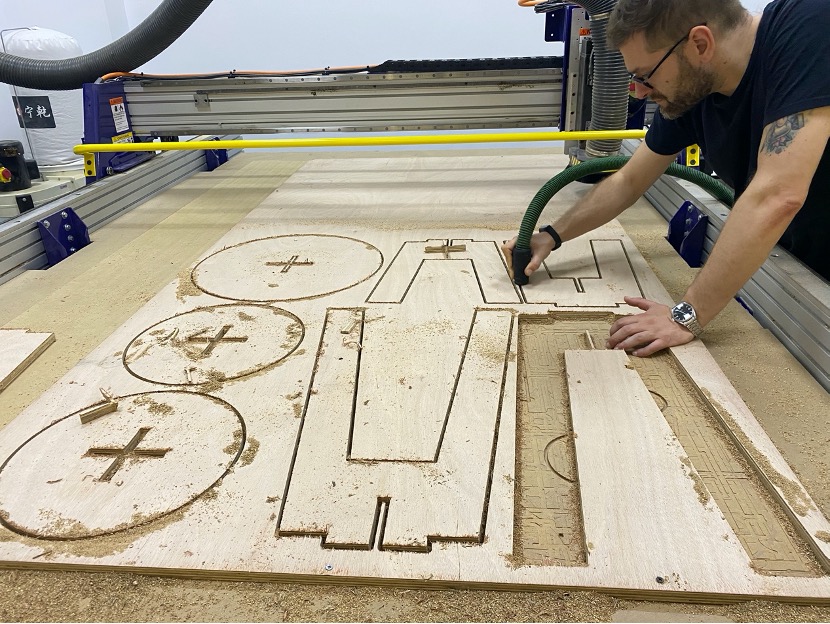
There is an obvious mistake in this picture. I realize after I start to assemble these table and chairs. To use materiel wisely, we put different shapes close, but I made 2 chairs with 2 legs. Each chair actually need 2 legs. My math is terrible. lol. No body found it out until I start to assembling them!
My classmate Liuheng made a similar design of chair, so I put his chair with mine together and took this pics below.