

Week 9 Input Devices
Last week we programmmed the Helloboard, we were very limited in what we could do on the hello world board with a 14 legs attiny 44, especially if we want to work with various sensors. The hello world board still requires an ISP even after burn bootloader. It also has limited pin headers for connecting sensor boards.
This week we will try different sensors with Arduino UNO.
The goal of this week is to design a microcontroller board, add a sensor to it and read it. The board would need to be able to read sensor inputs, and eventually turning inputs into outputs.
Weekly Assignment
- Individual assignment: measure something: add a sensor to a microcontroller board that you have designed and read it
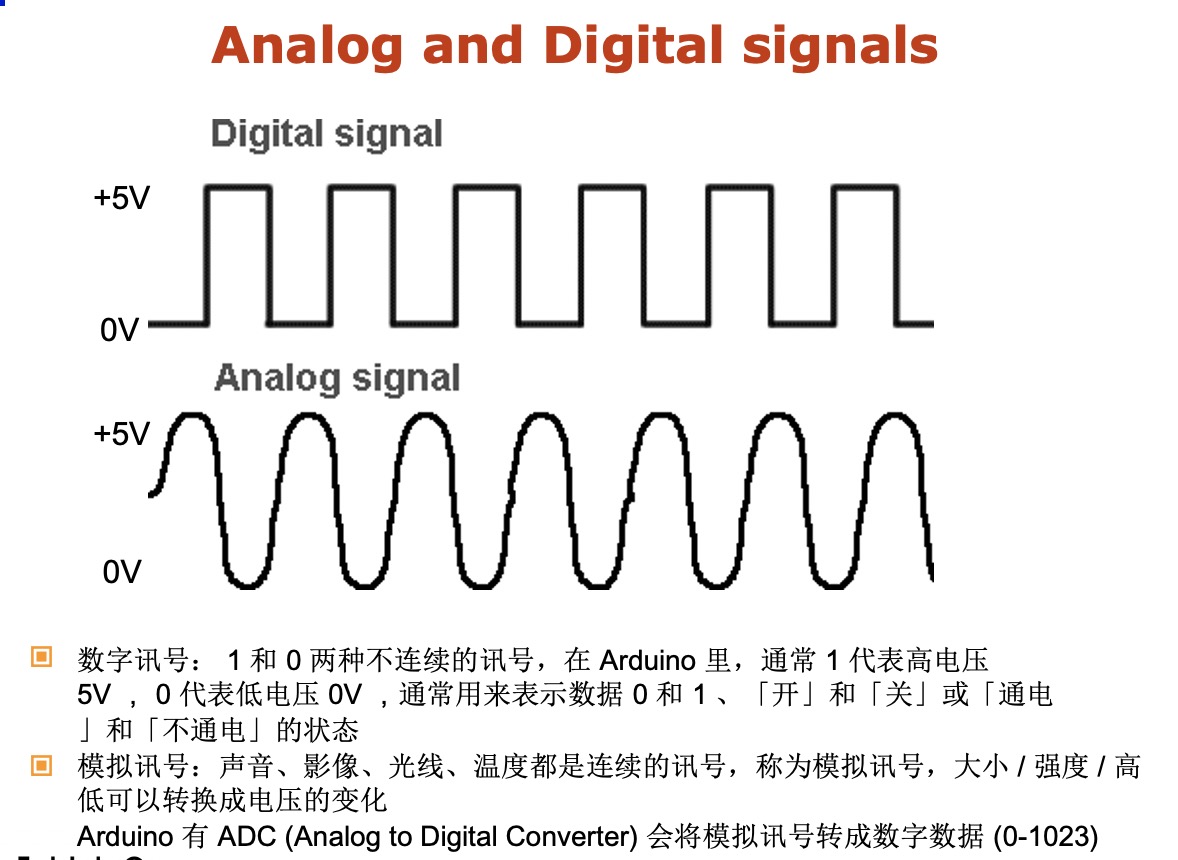
- Group assignment: probe an input device’s analog levels and digital signals. 、
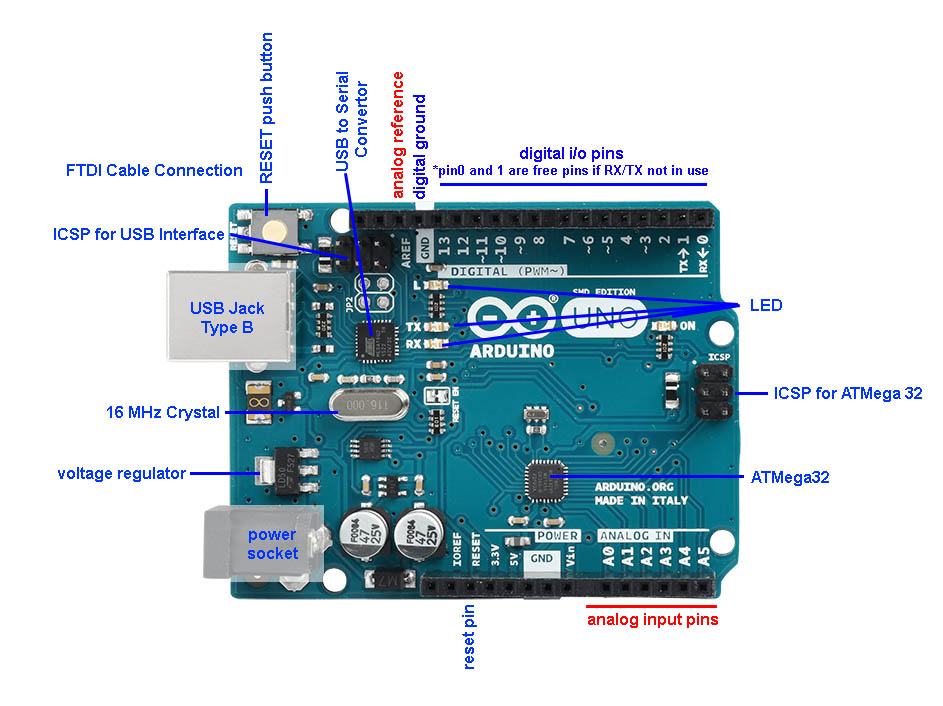
Arduino Board
Two common arduino UNO:
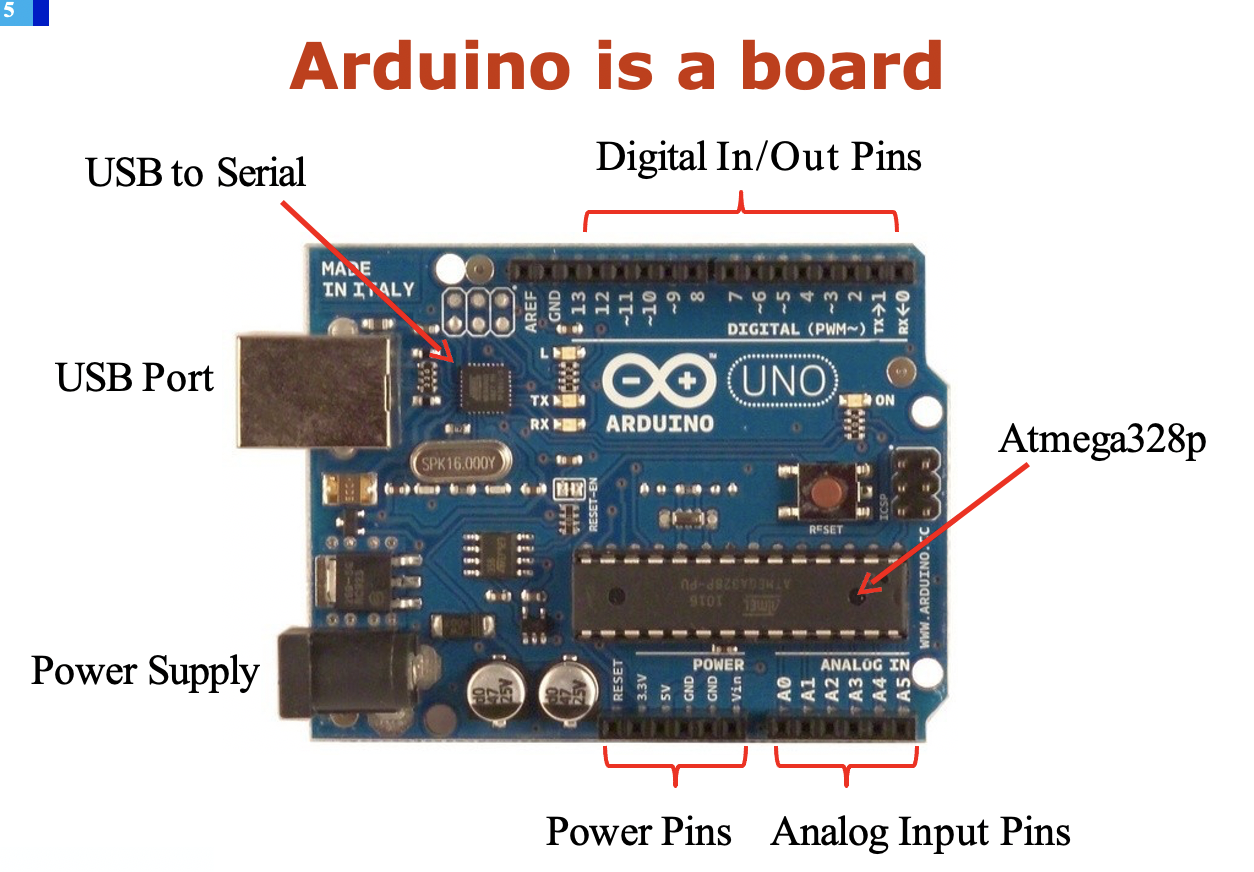
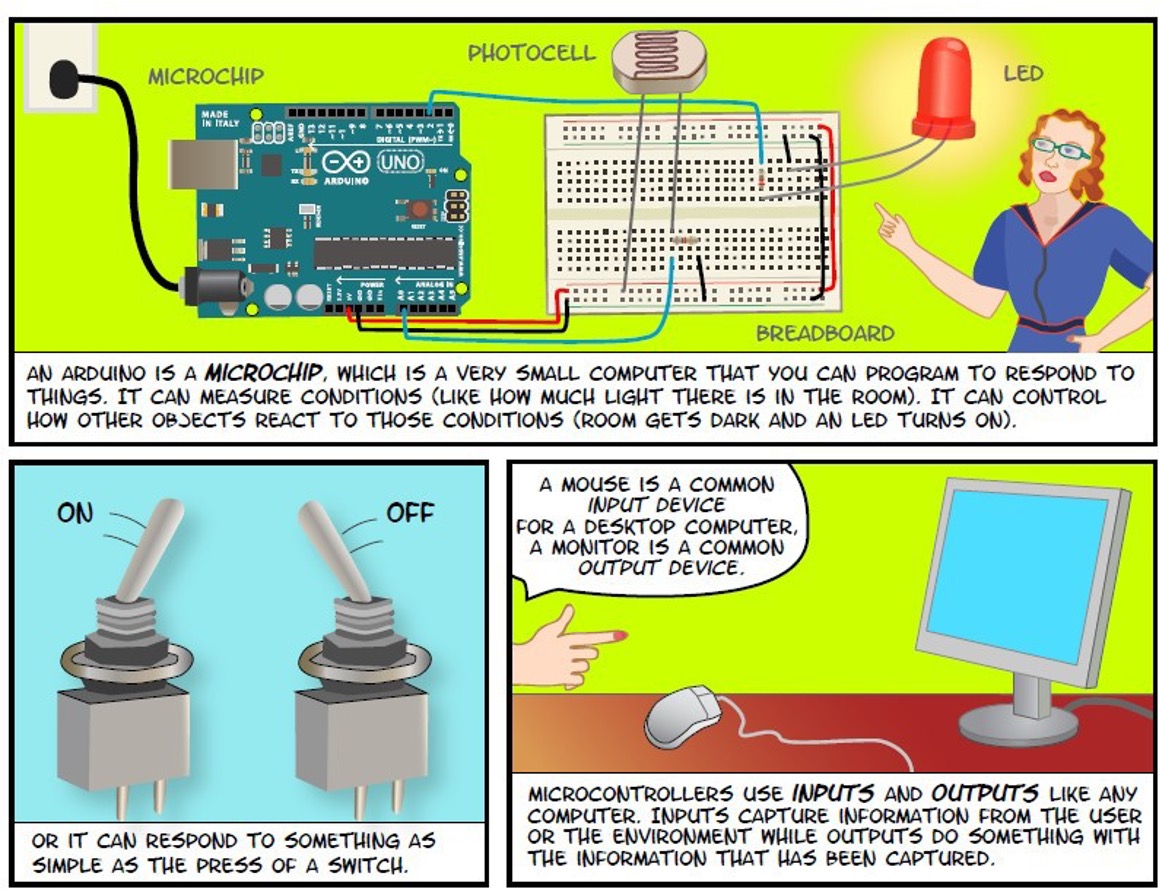
You can use arduino board to connect sensors and actuators
Final project input : Force Sensing Resistor (FSR)
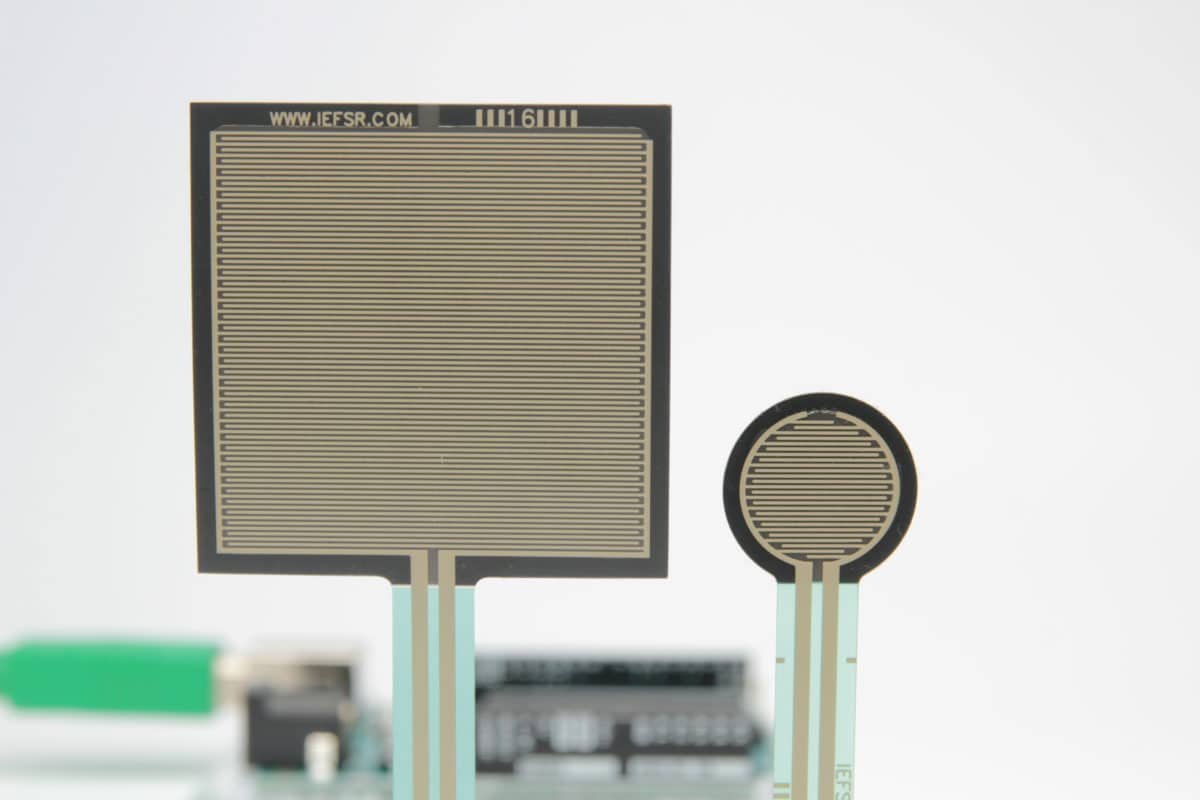
FSRs are super robust pressure sensors that are used in all kinds of industries. You will find them in electronic drums, mobile phones, handheld gaming devices and many more portable electronics. These sensors are easy to use and great for sensing pressure.
The resistance of an FSR depends on the pressure that is applied to the sensing area. The more pressure you apply, the lower the resistance. The resistance range is actually quite large: > 10 MΩ (no pressure) to ~ 200 Ω (max pressure). Most FSRs can sense force in the range of 100 g to 10 kg.
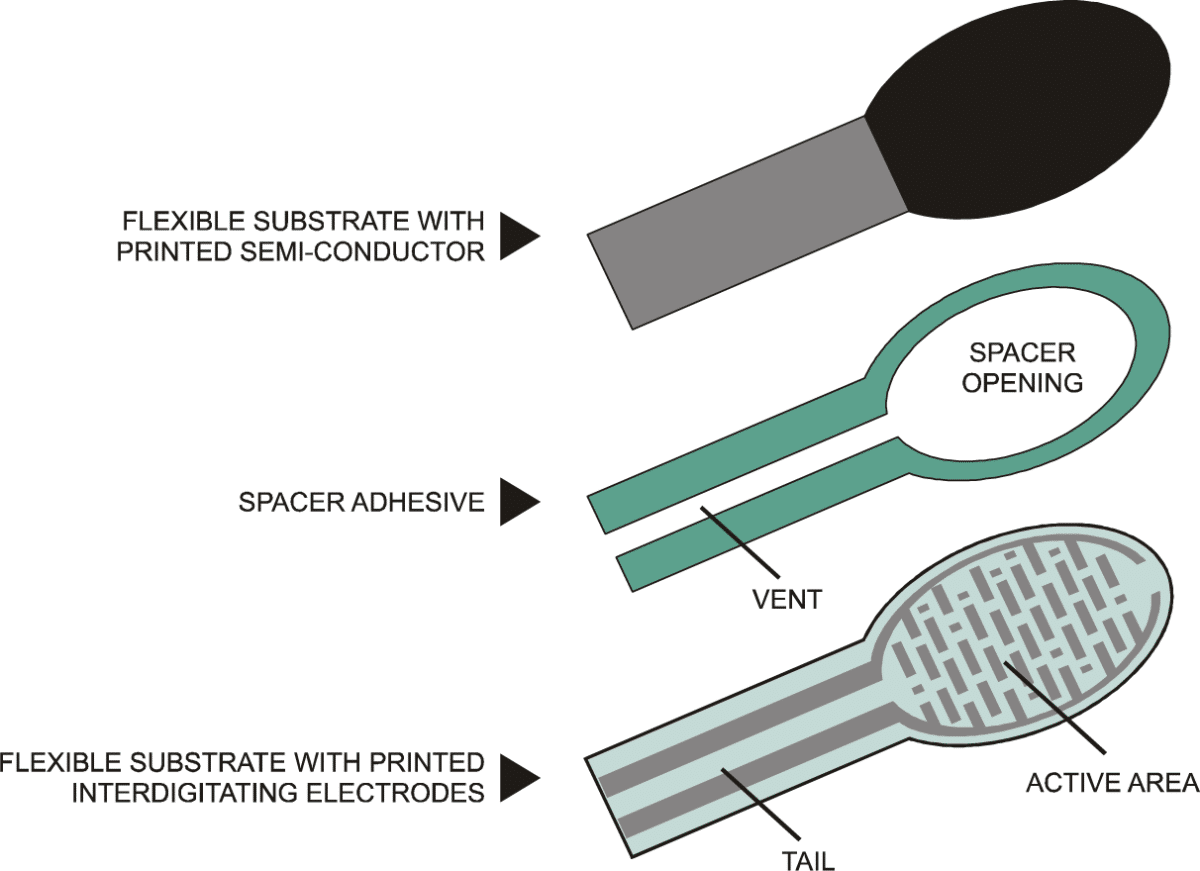
An FSR consists of two membranes and a spacer adhesive. The conducting membranes are separated by a thin air gap when no pressure is applied. One of the membranes contains two traces running from the tail to the sensing area (the round part). These traces are woven together, but not touching. The other membrane is coated with a conducting ink. When you push on the sensor, the ink shorts the two traces together with a resistance that depends on the pressure.
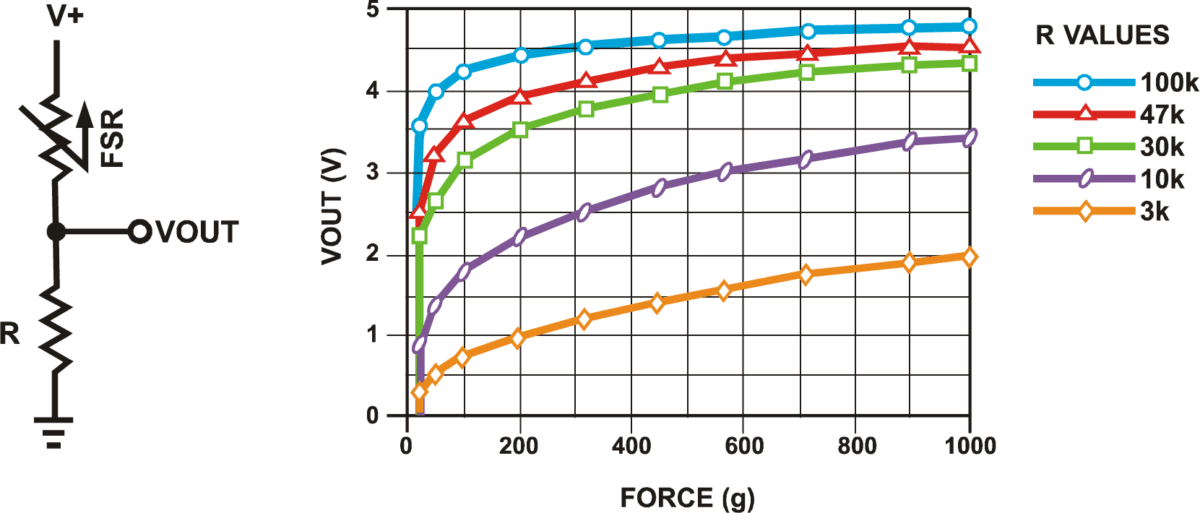
Voltage divider circuit
In order to measure the applied force with an Arduino, I need to build a voltage divider circuit with the FSR and a pull-down resistor. This circuit creates a variable voltage output that can be read by the ADC (analog to digital converter) input of the microcontroller.
Design PCB for my final project:
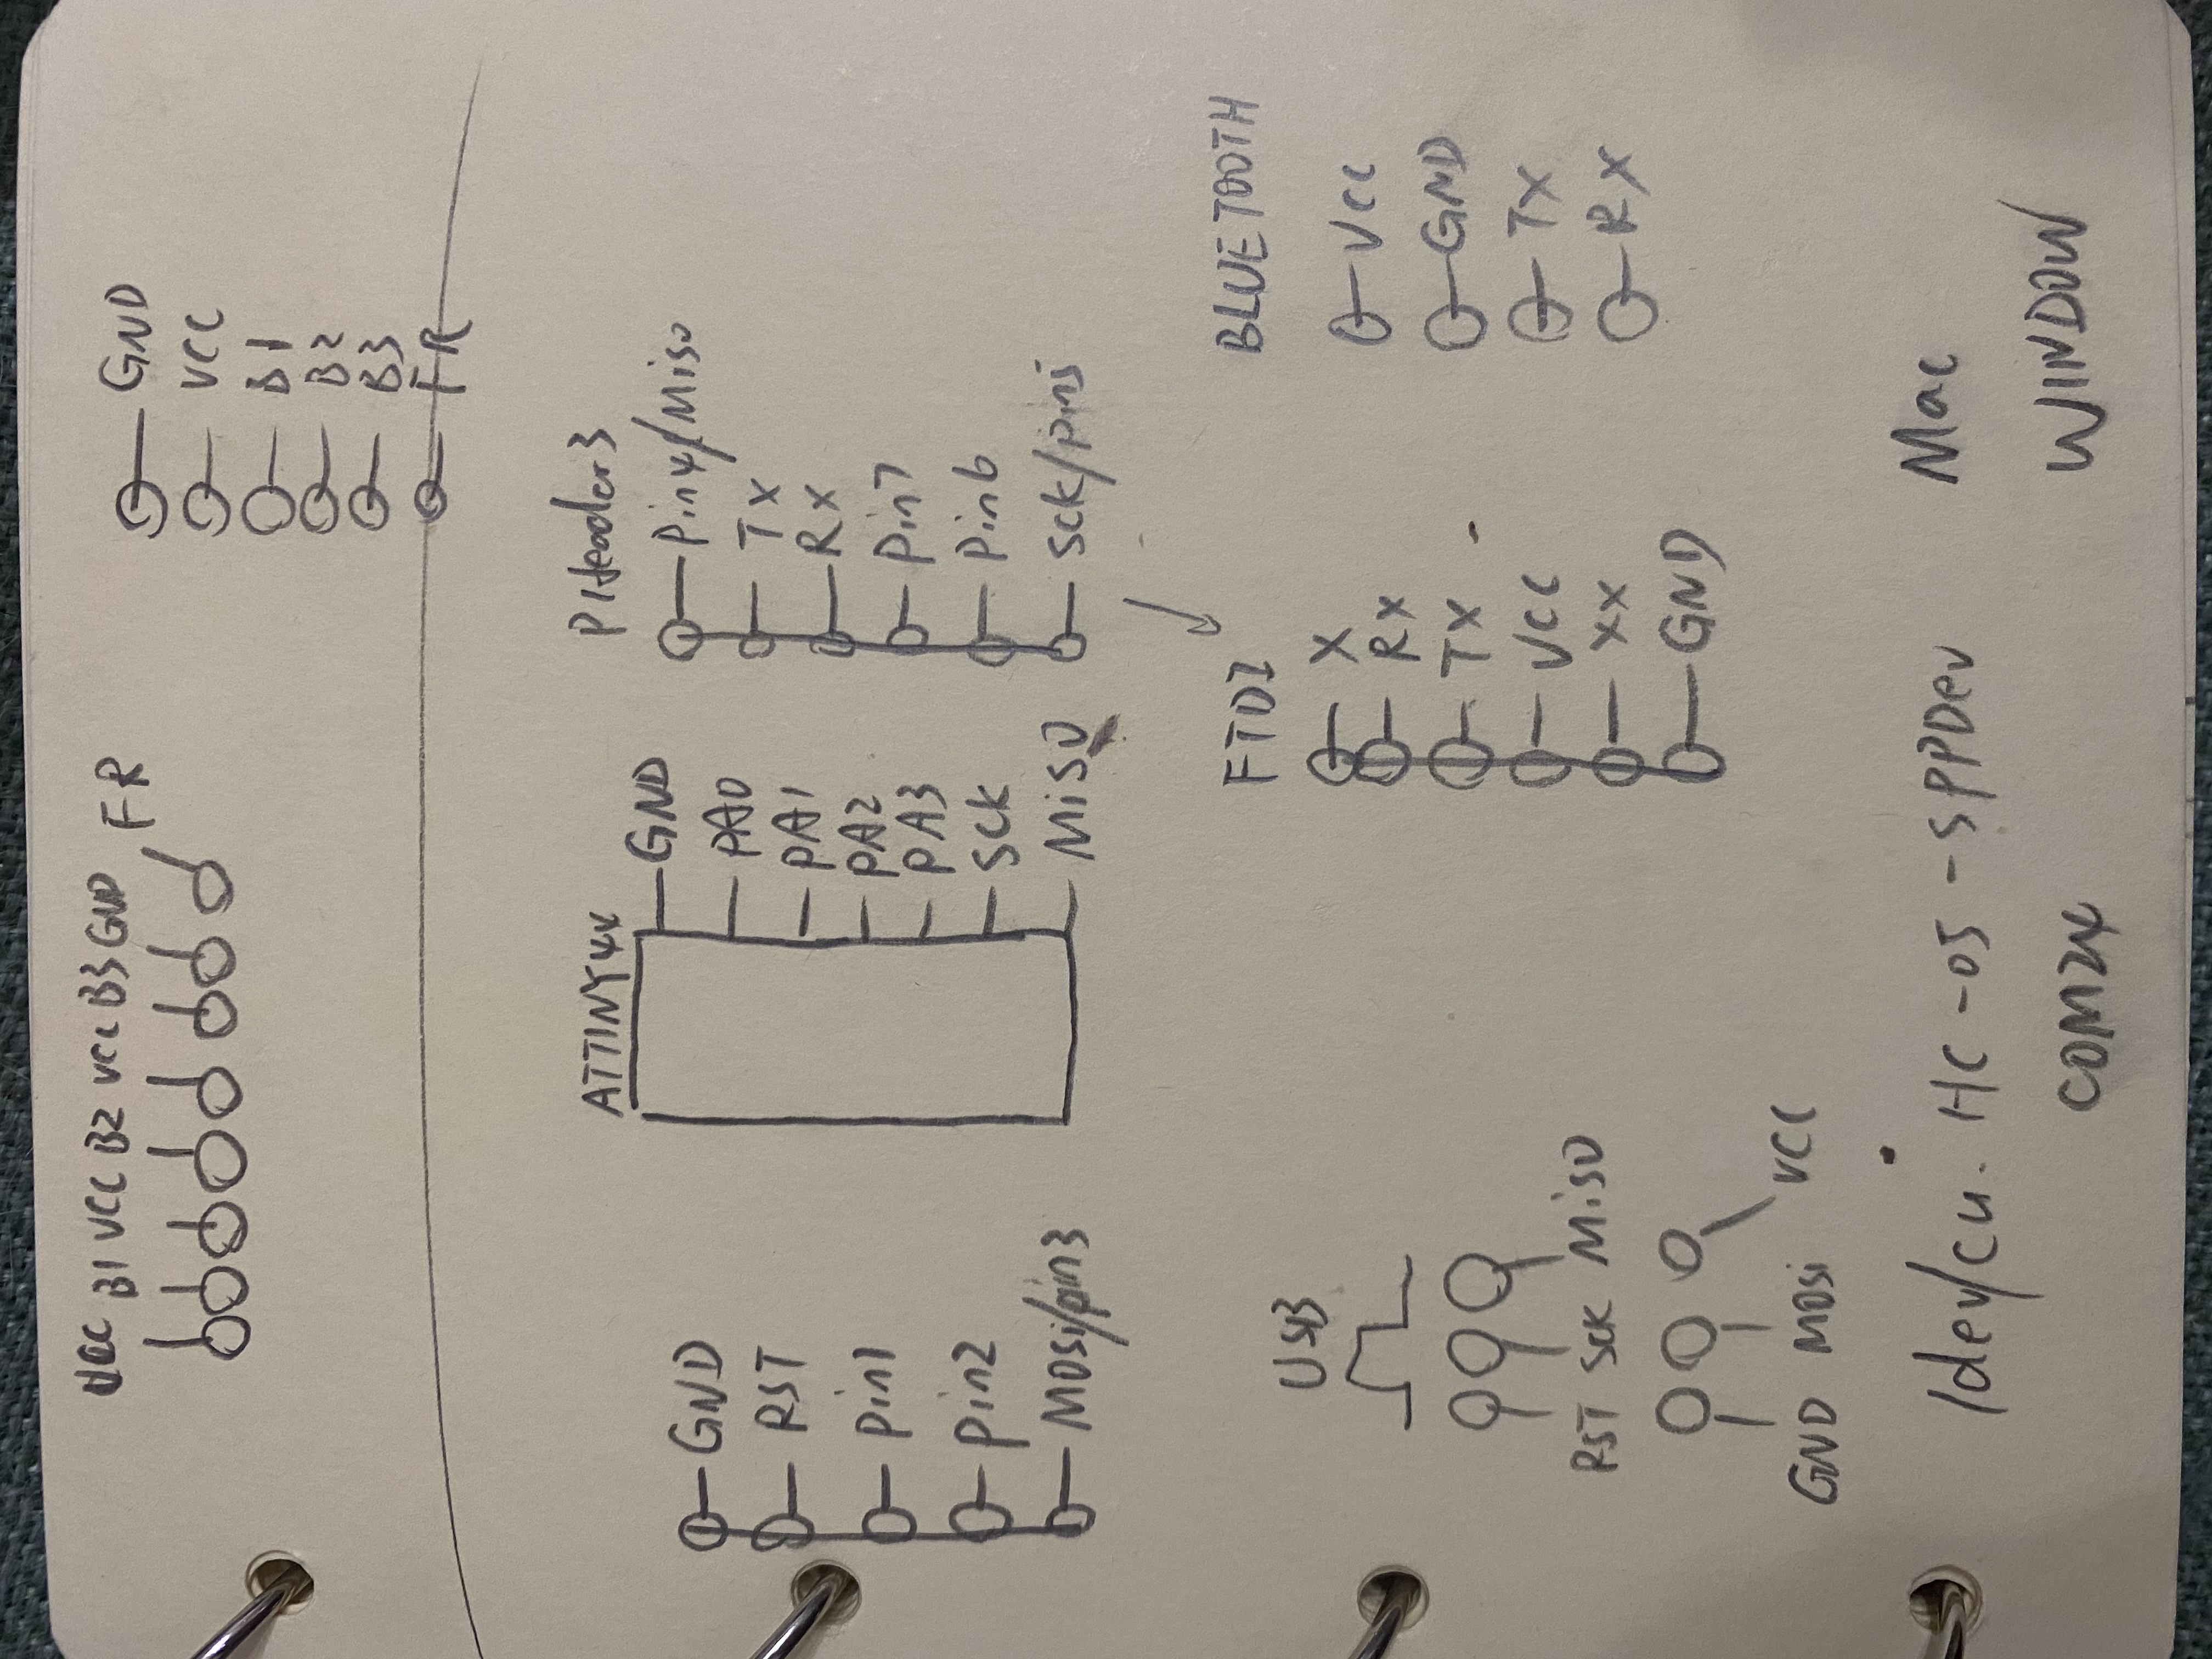
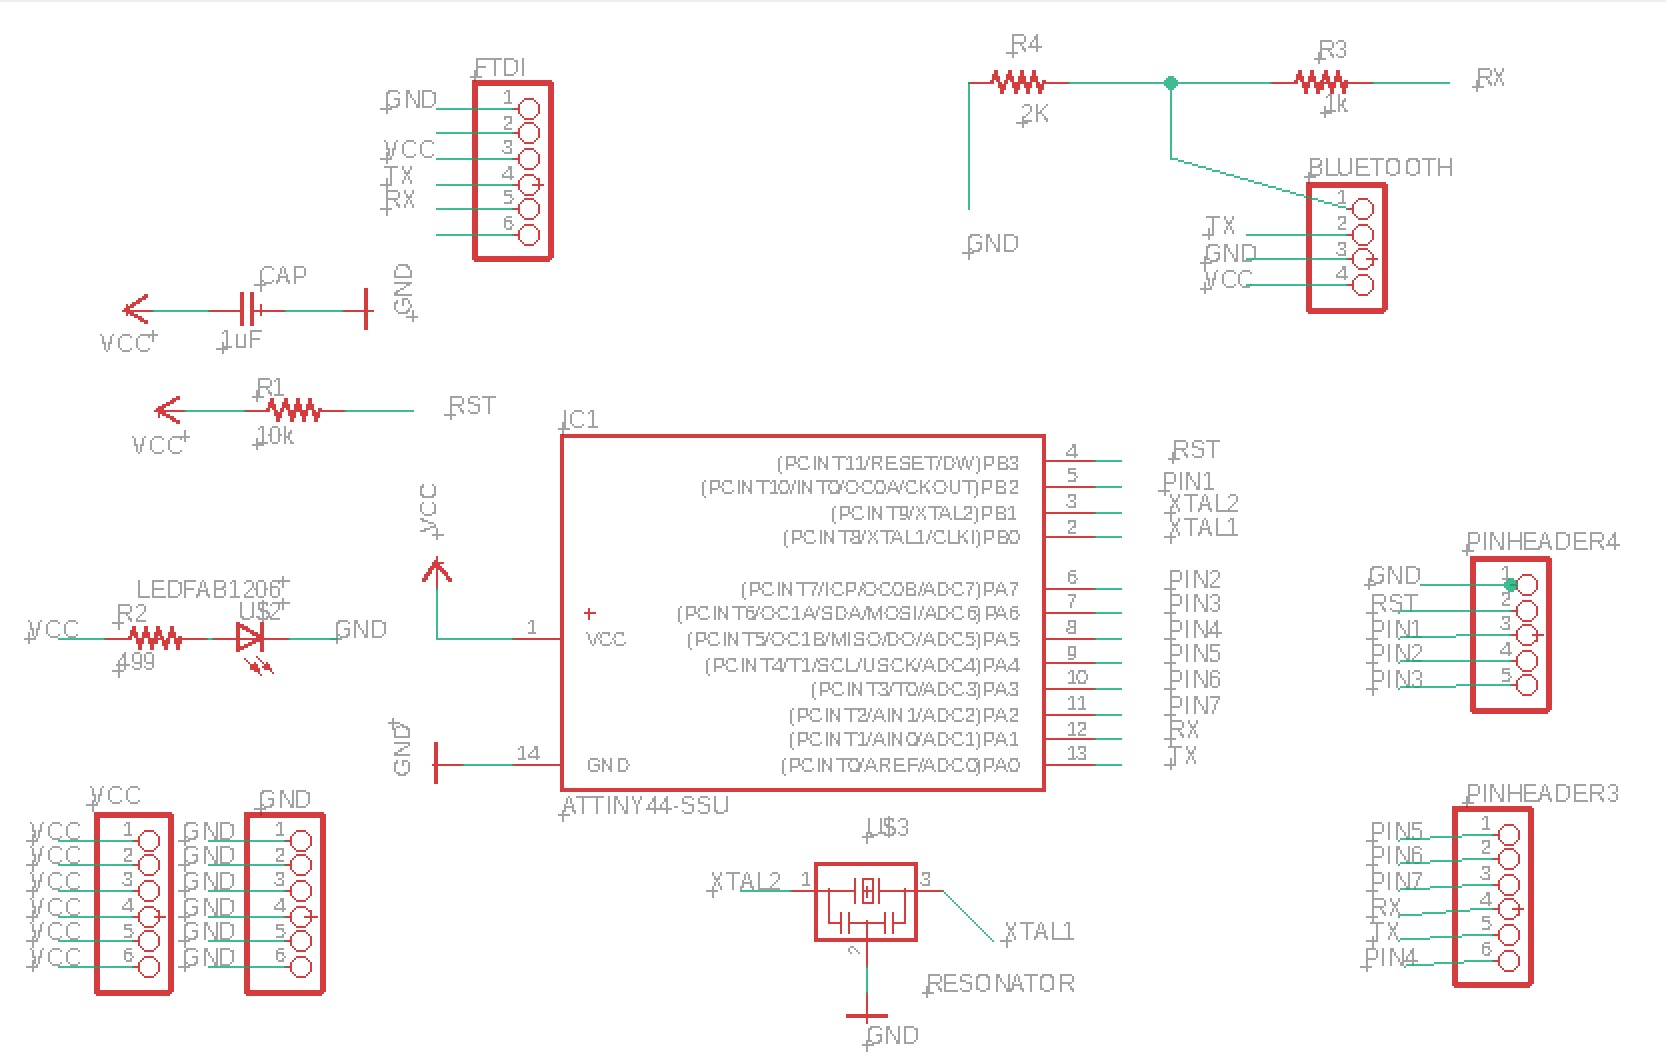
For my final project I need to have 3 buttons and one force resistor as input, bluetooth as output. So I draw the schematic on paper first
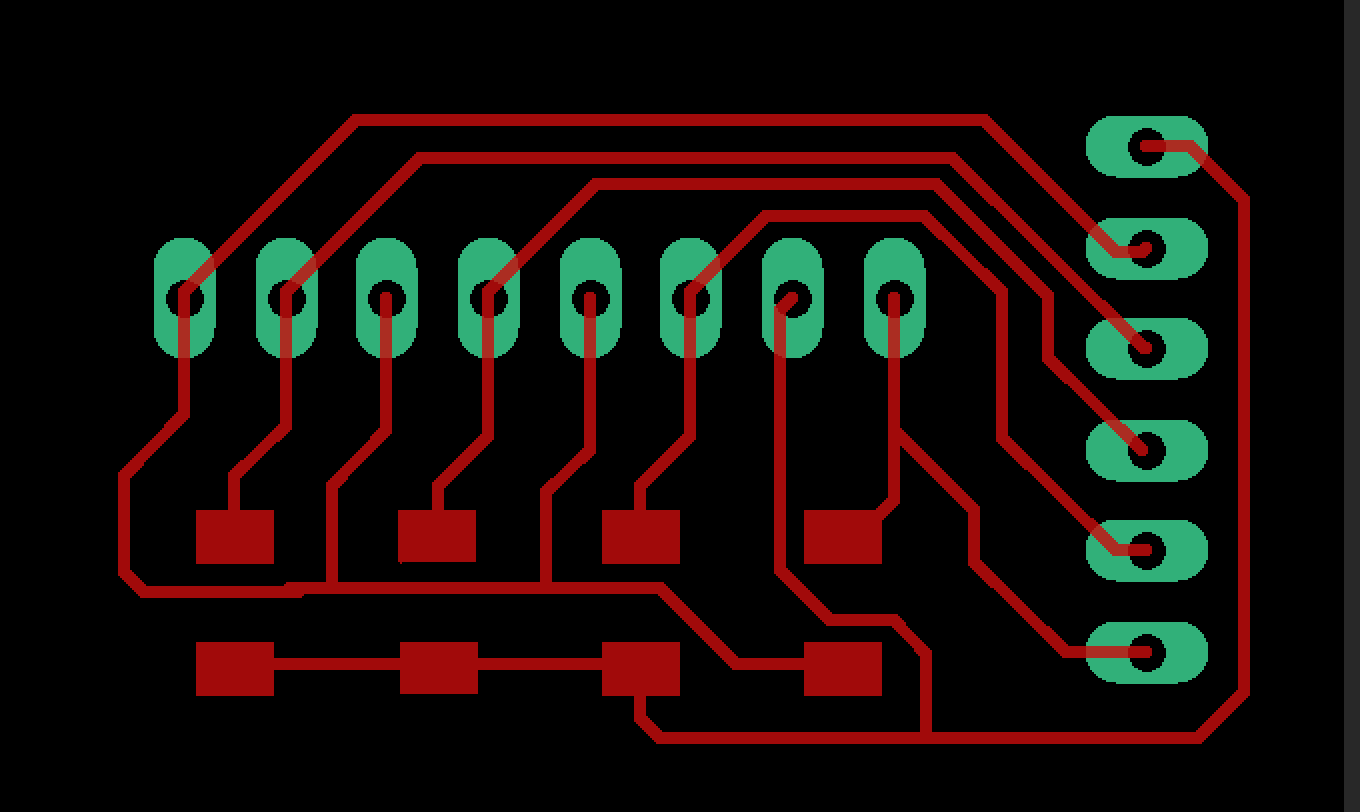
Then I draw it on Eagle. Make sure it has enough pins for buttons, FTDI, bluetooth.

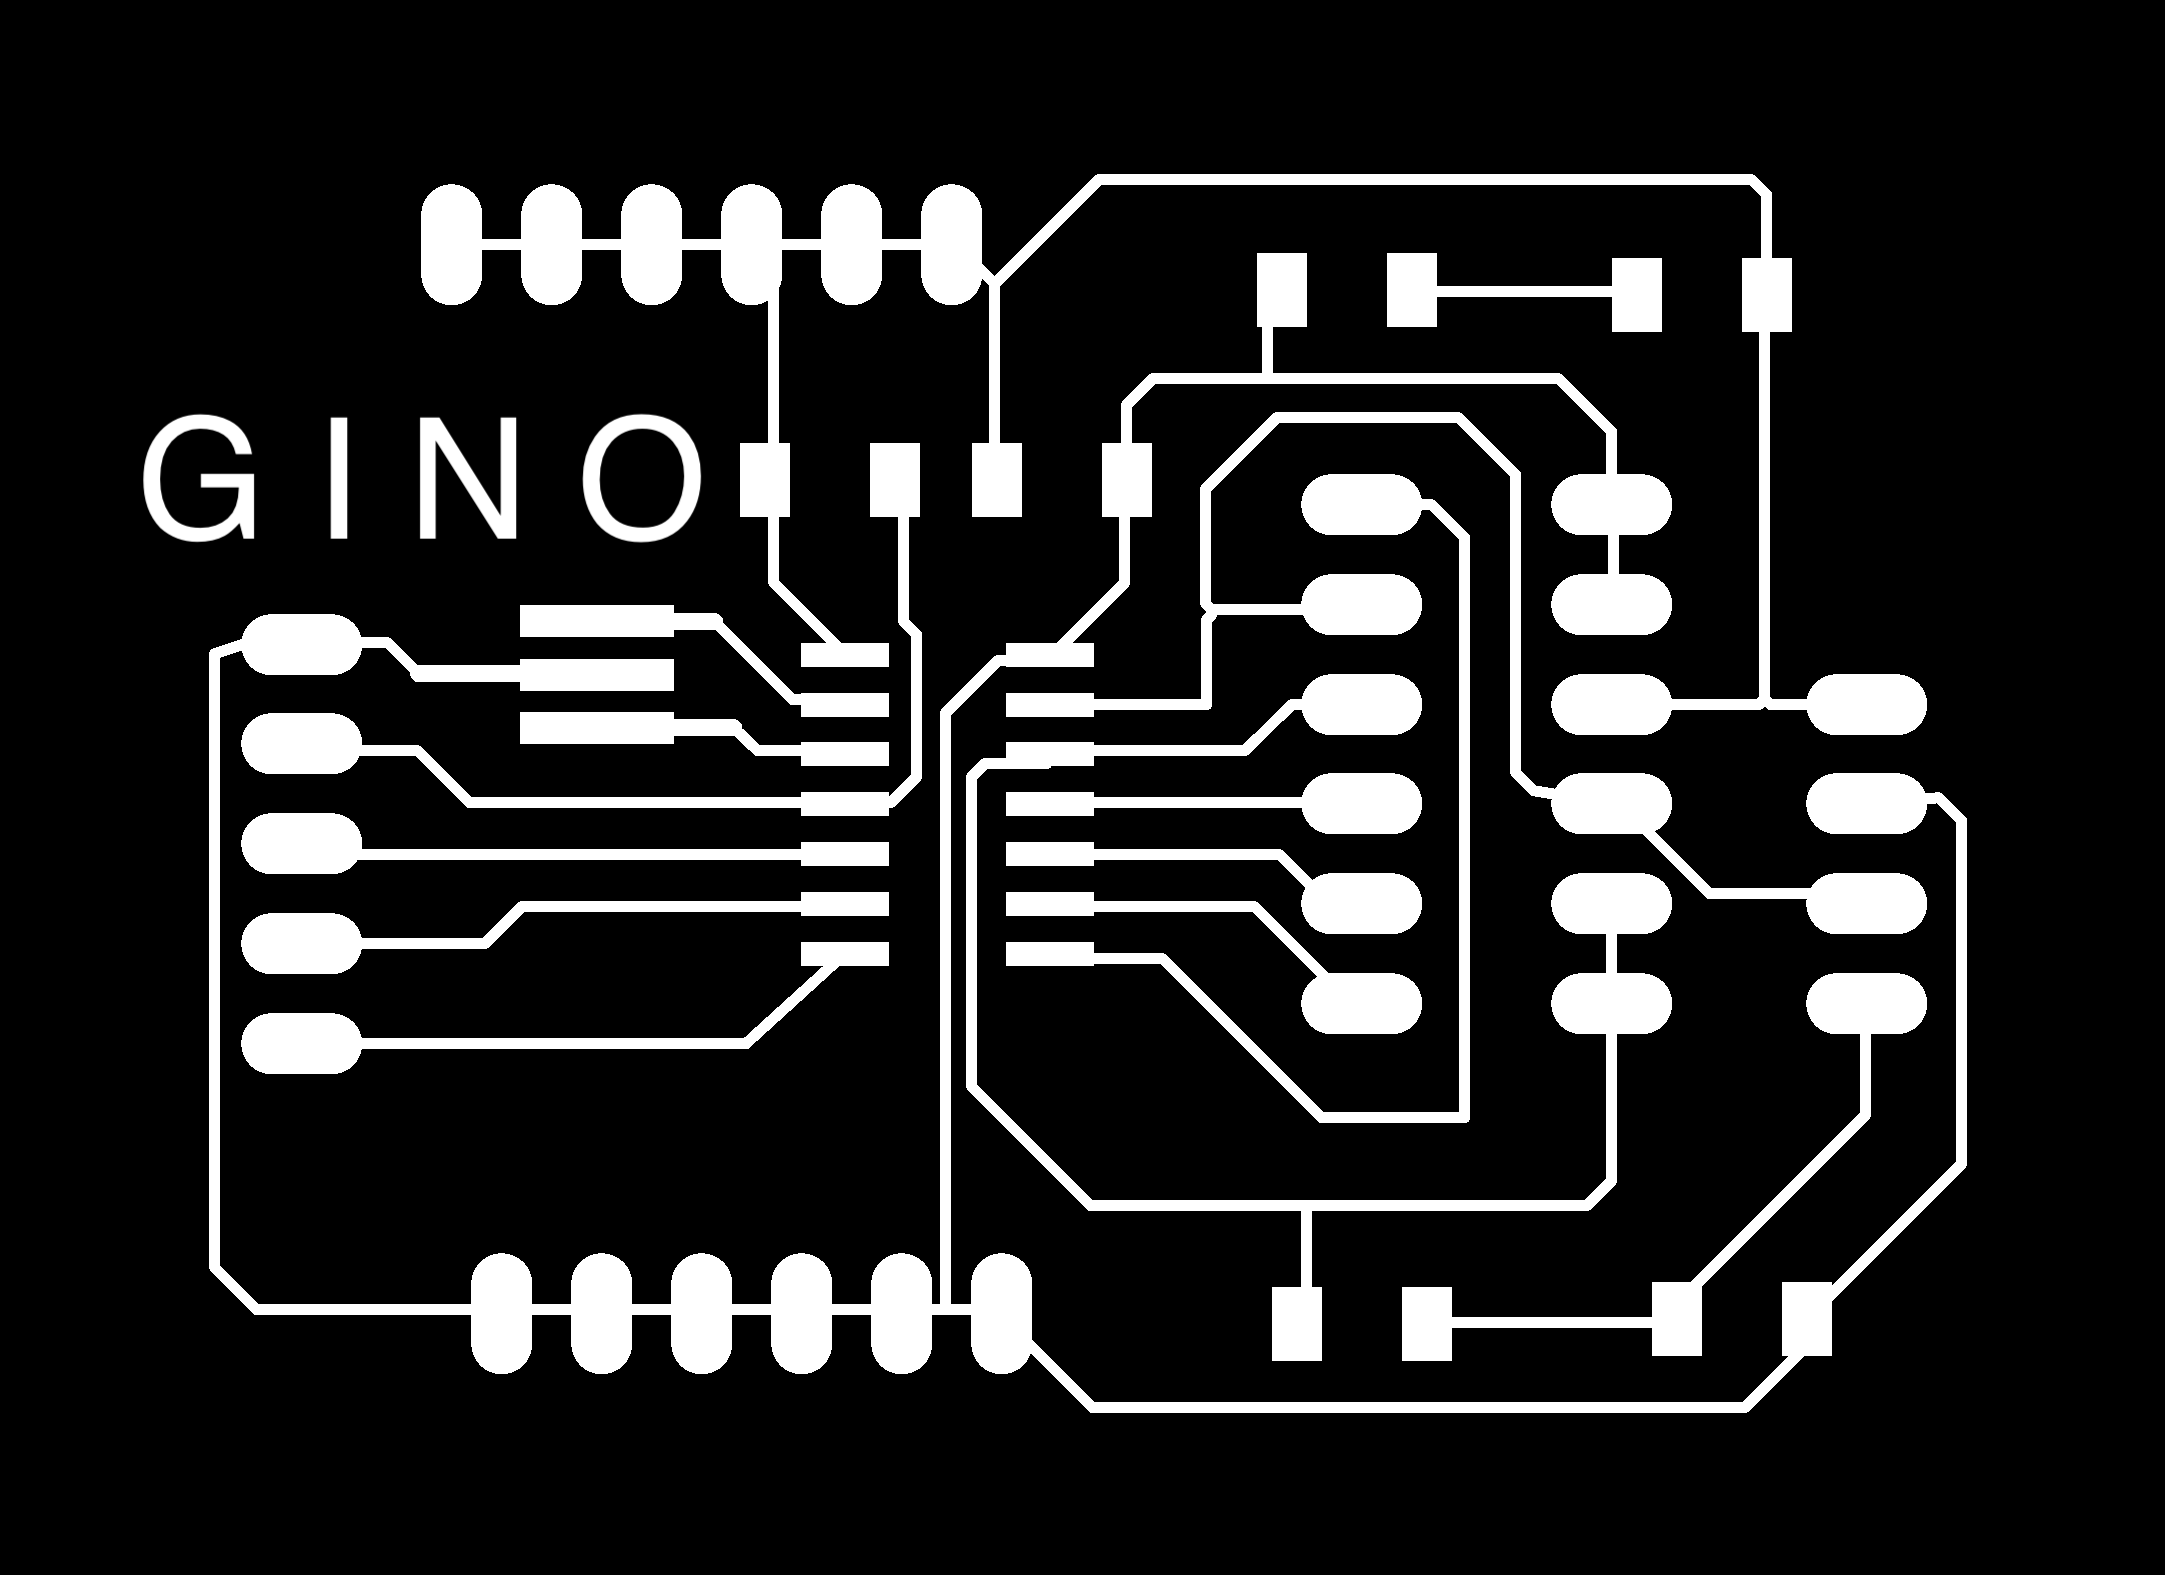
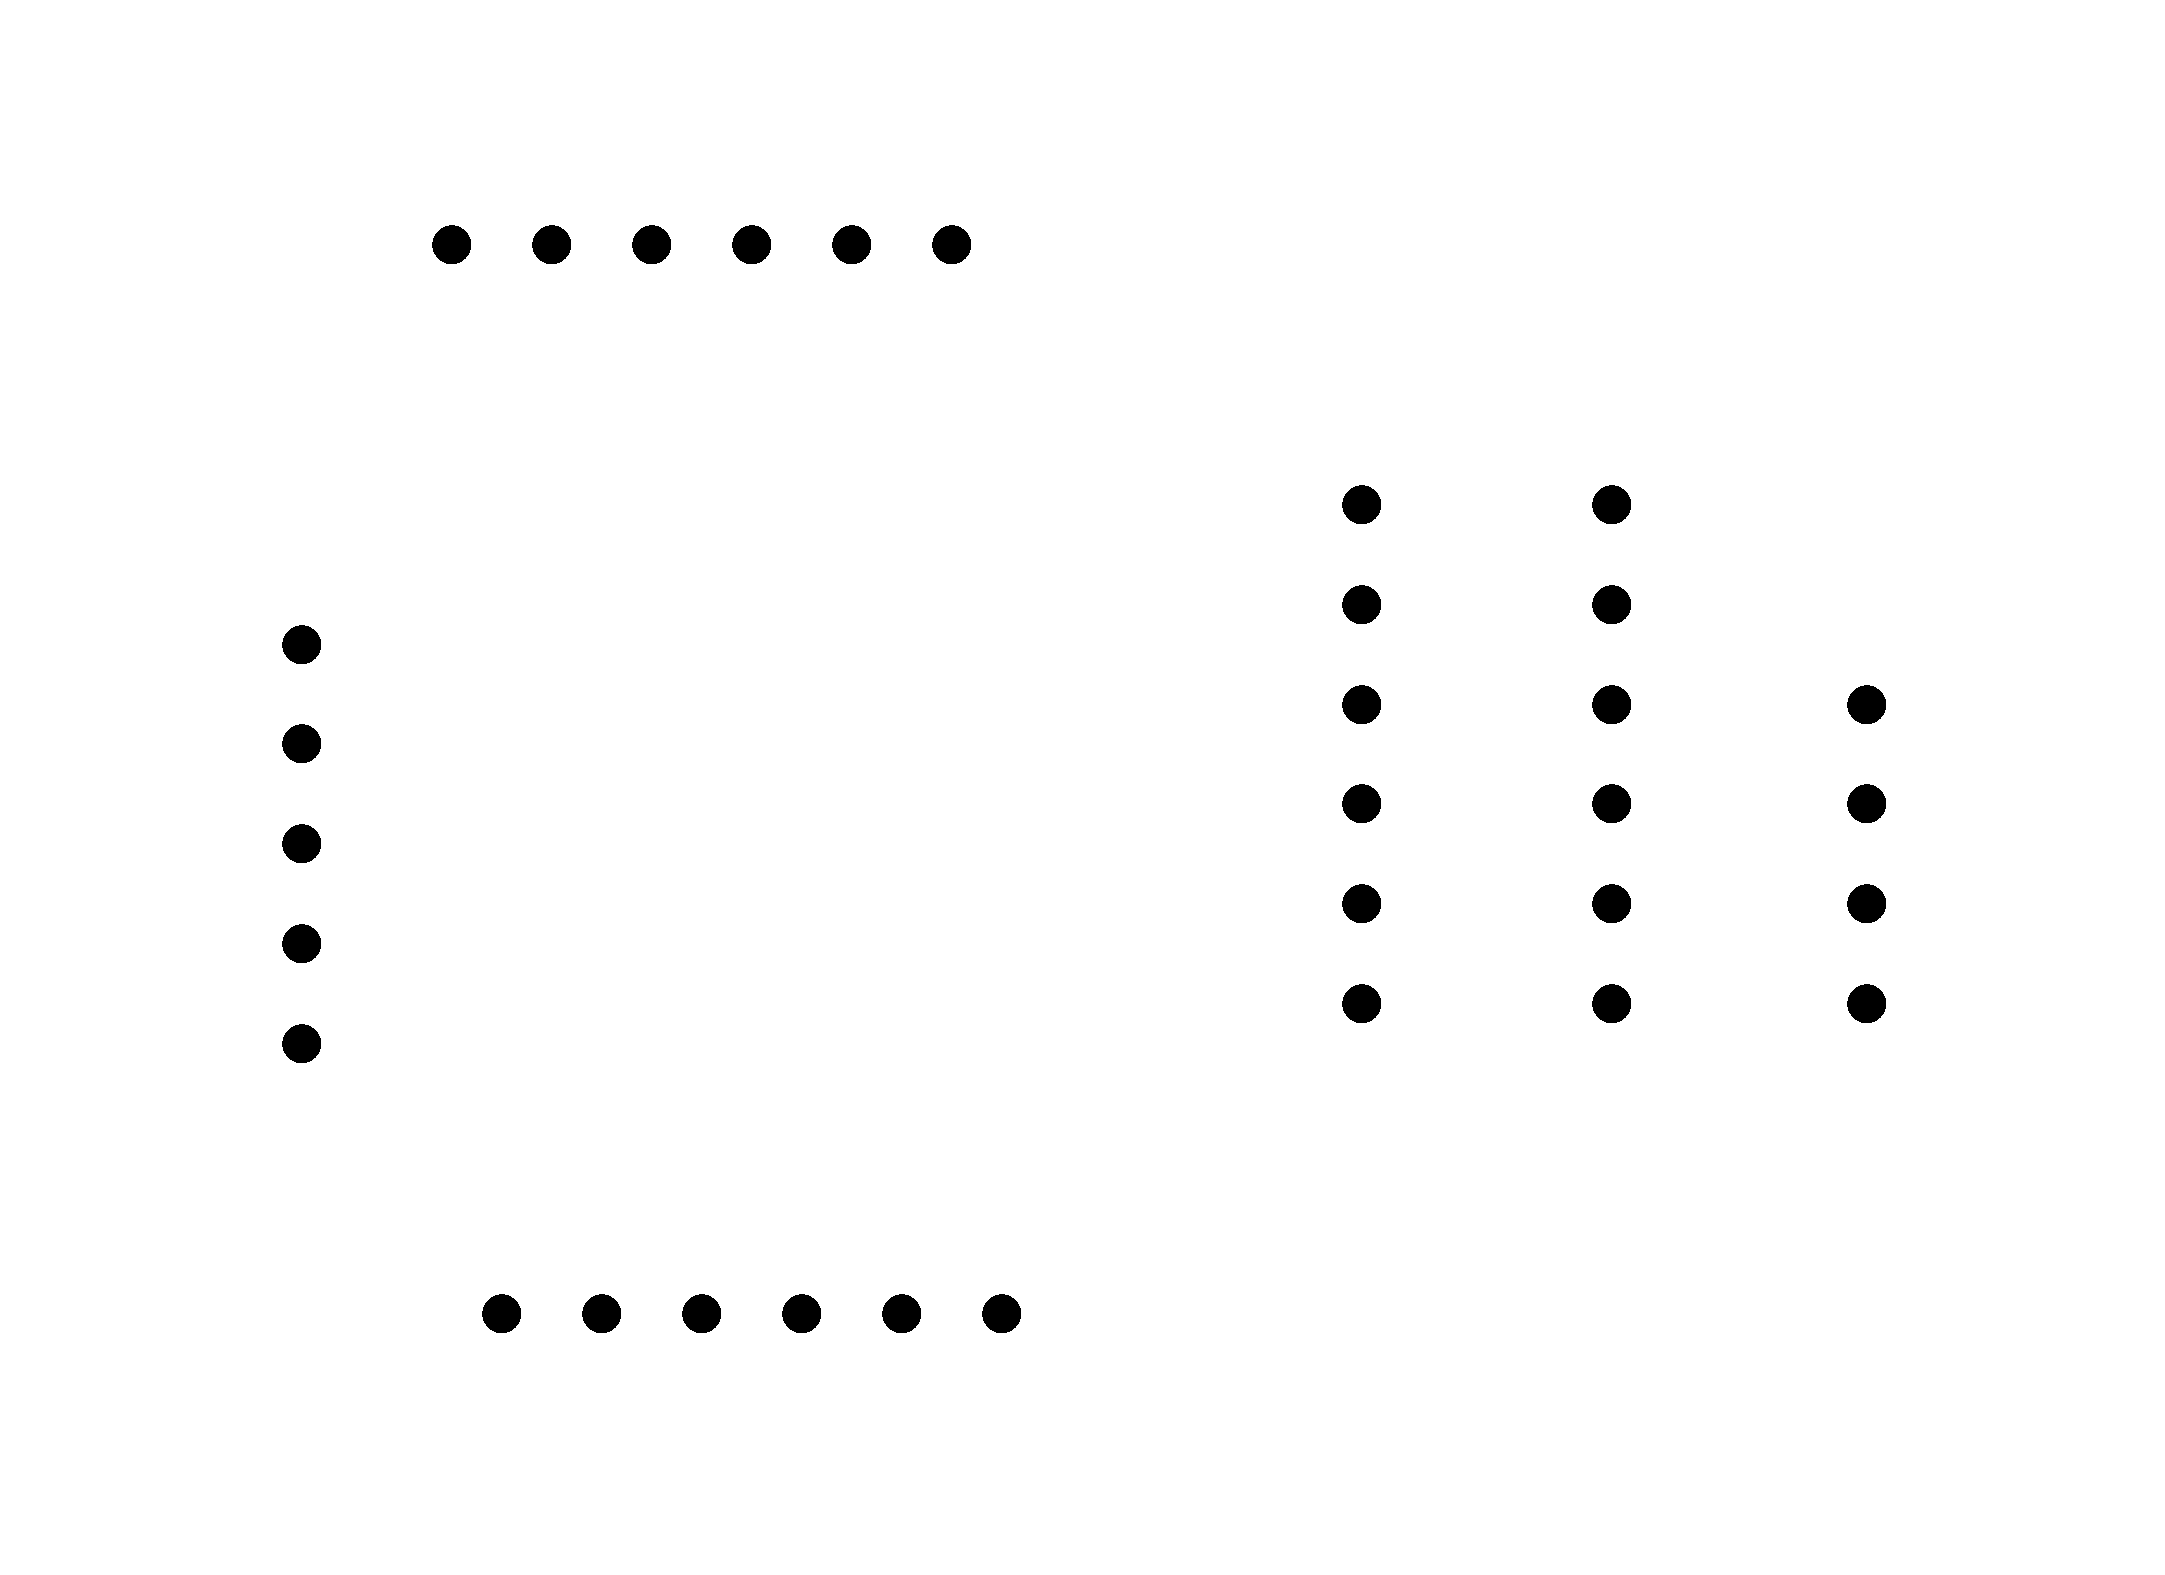
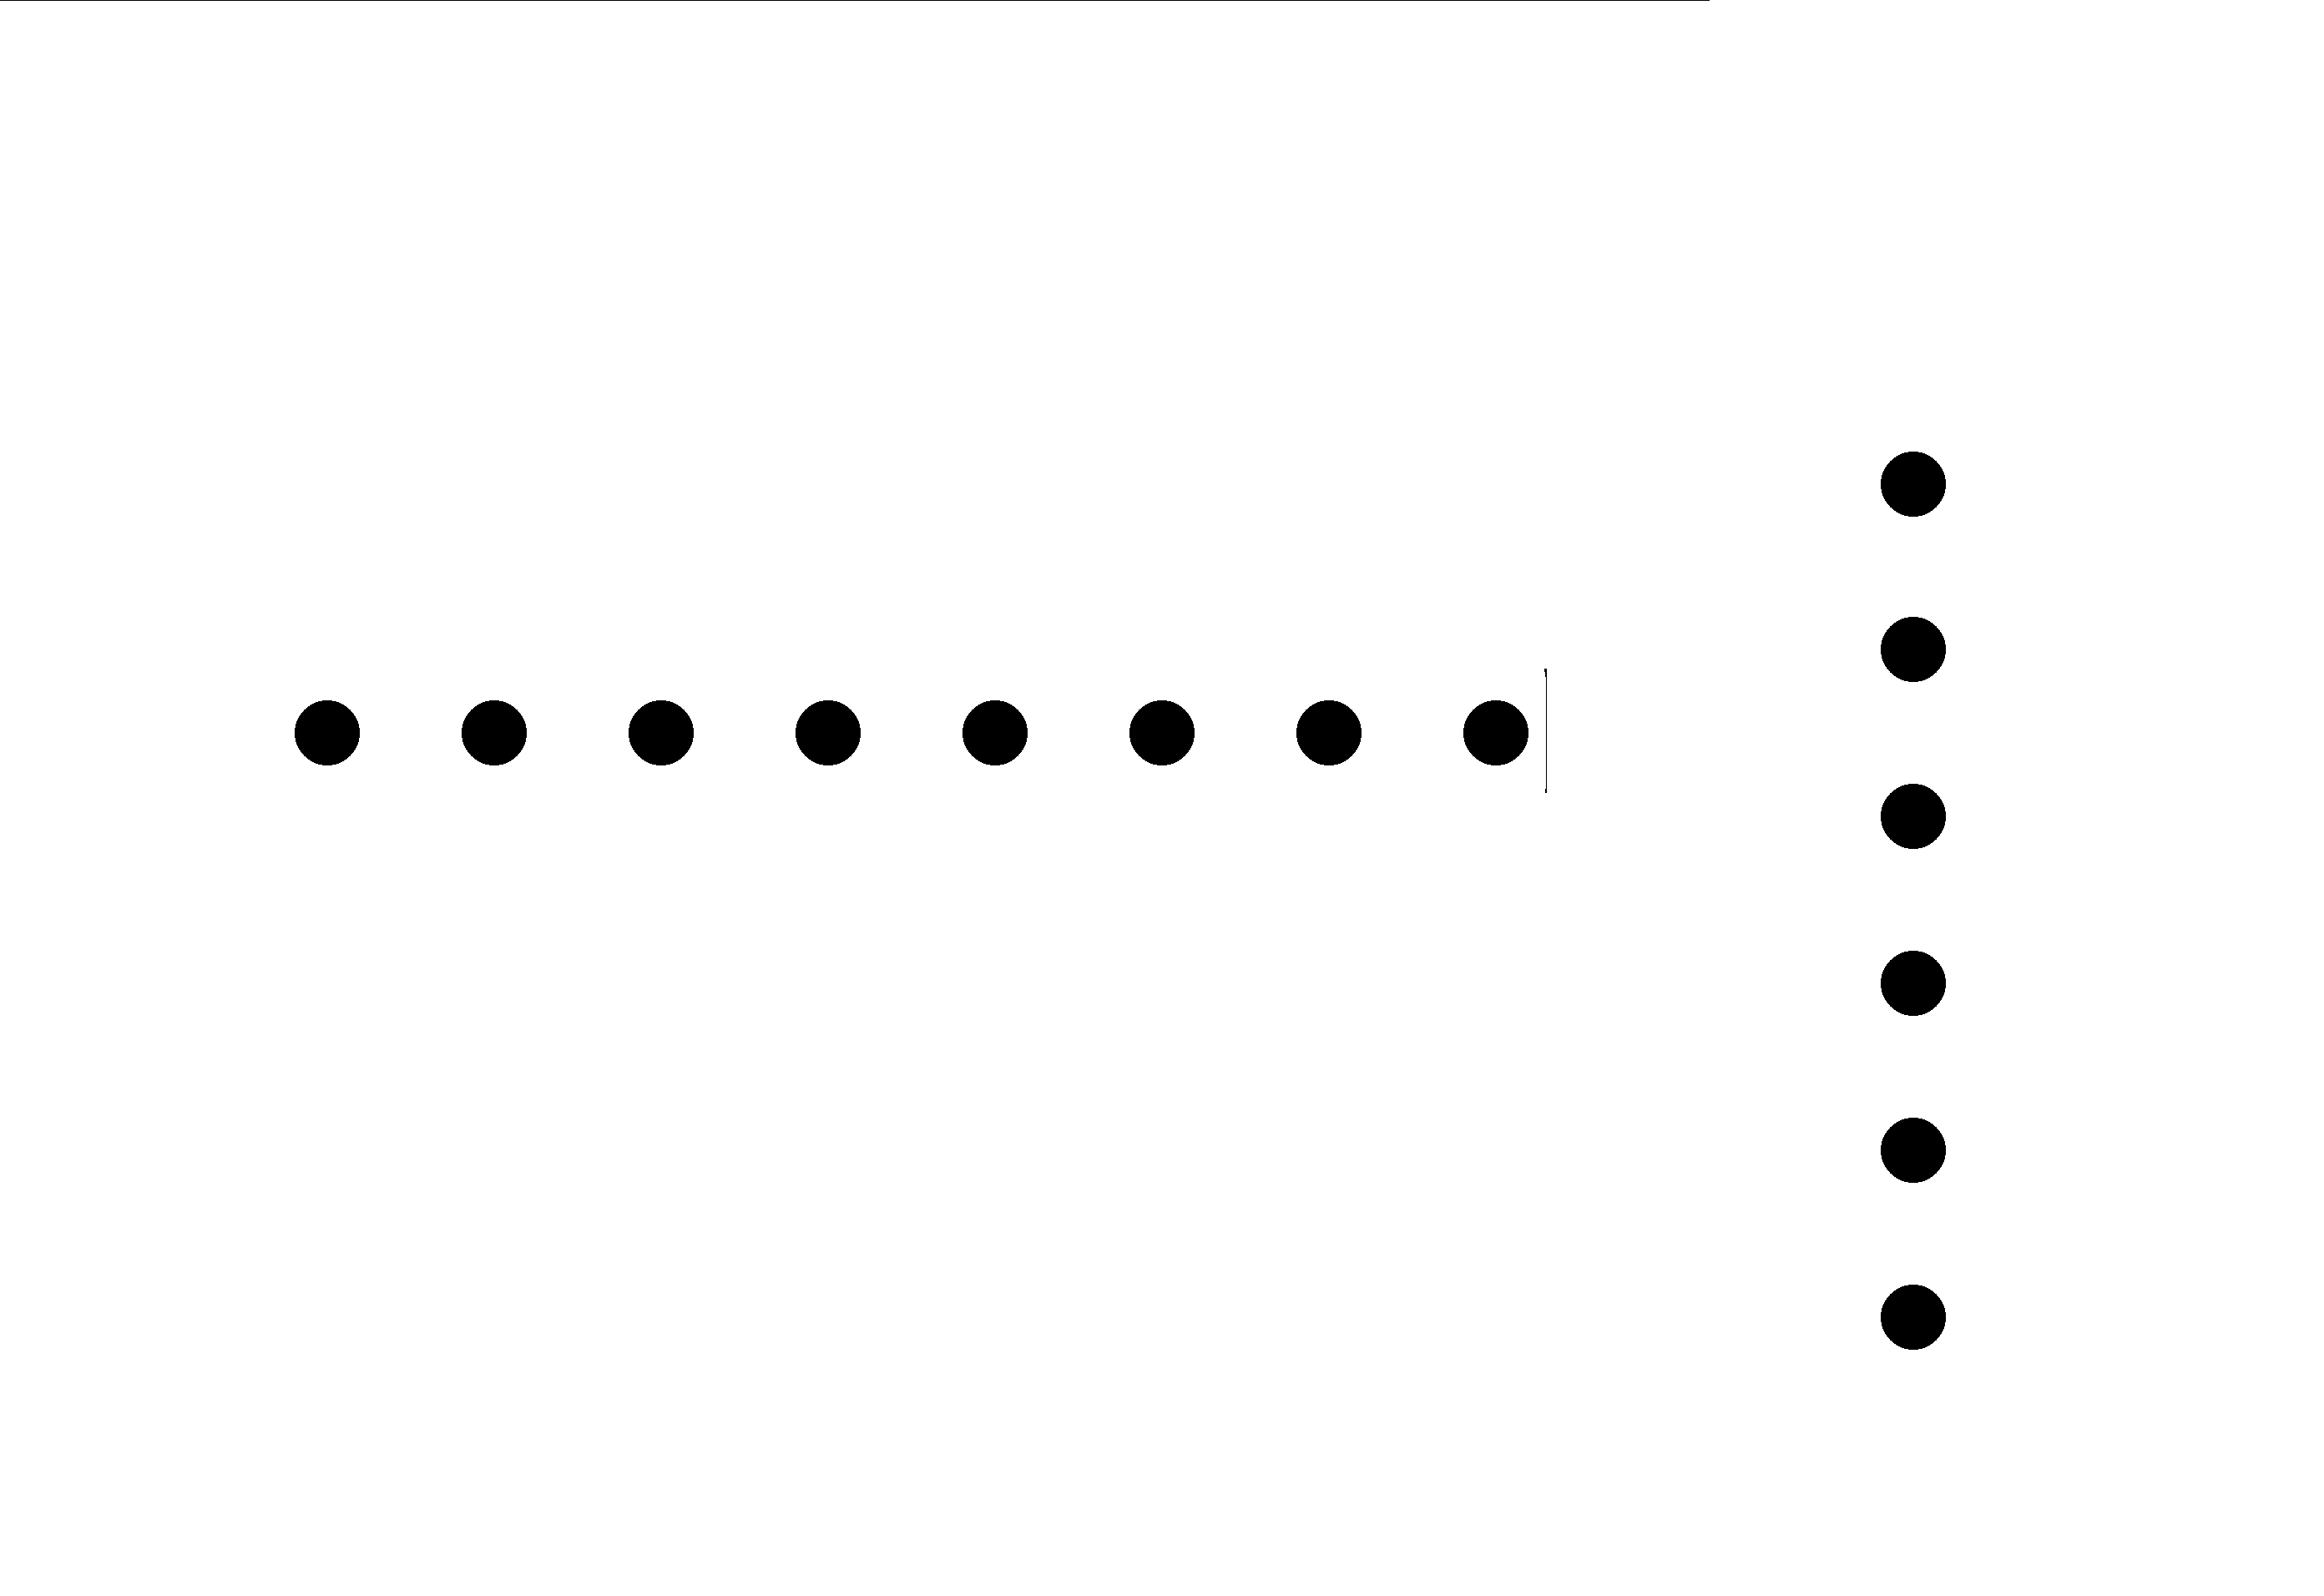
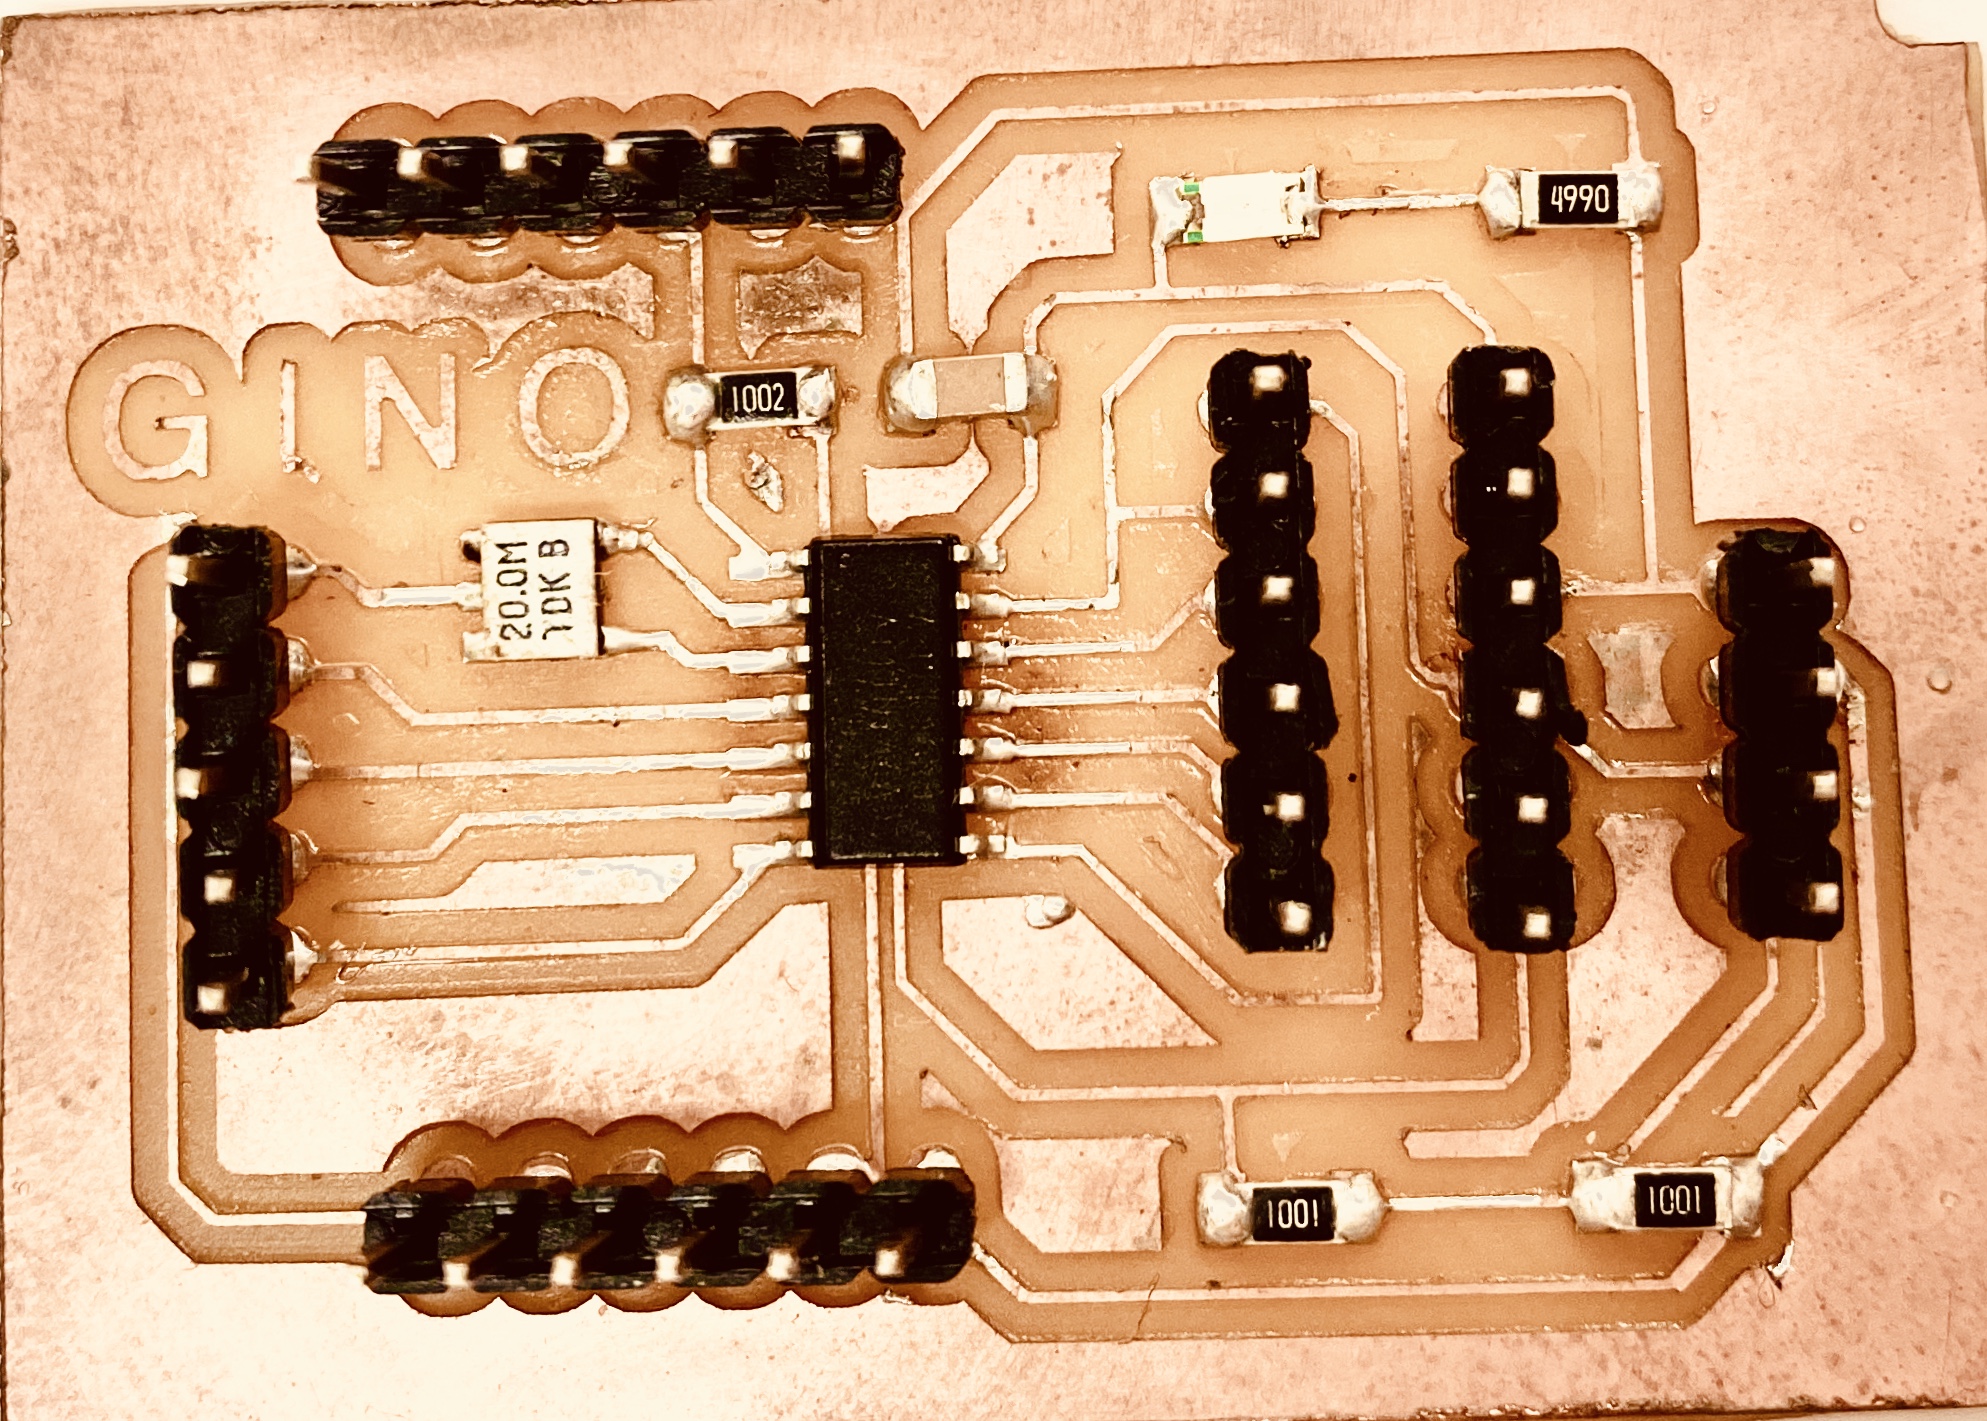
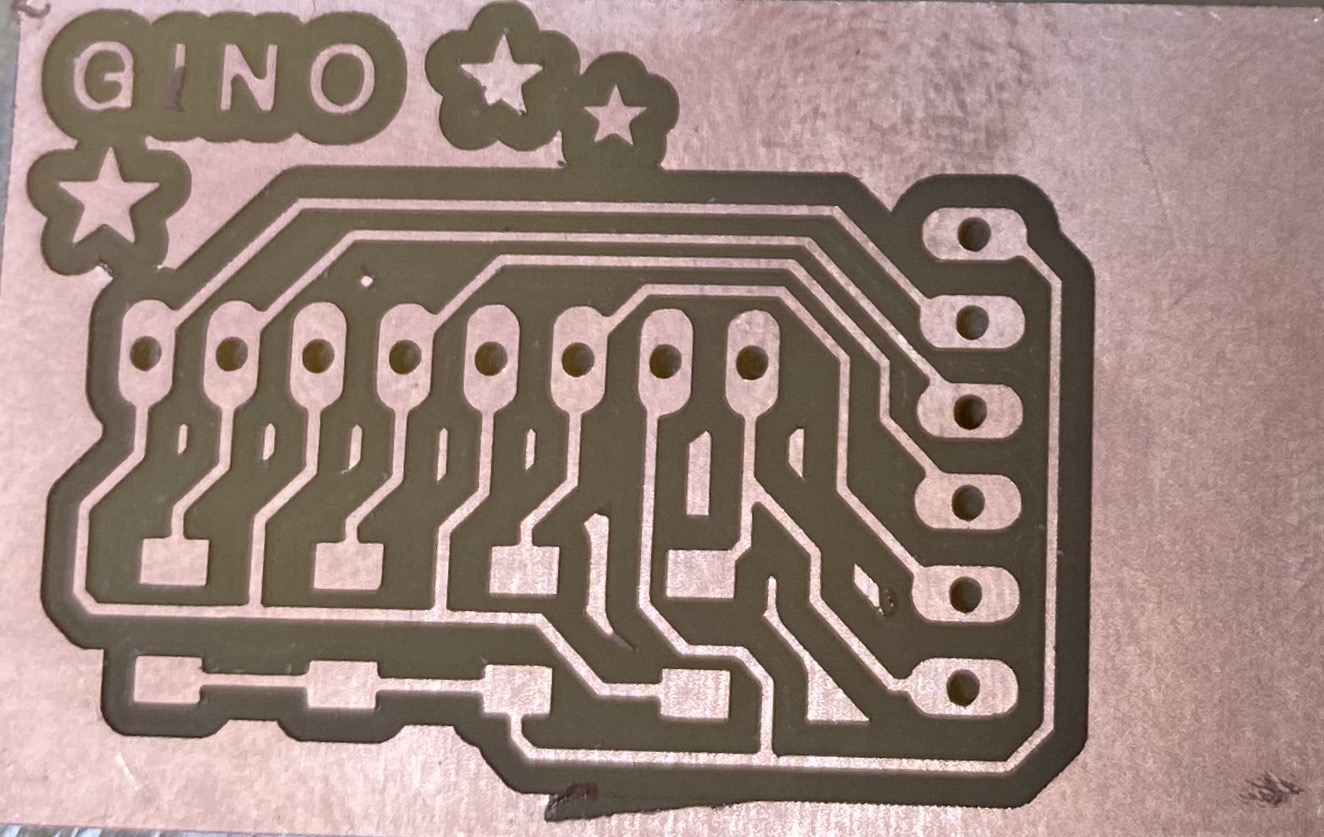
Then I make the milling trace for GINO board.

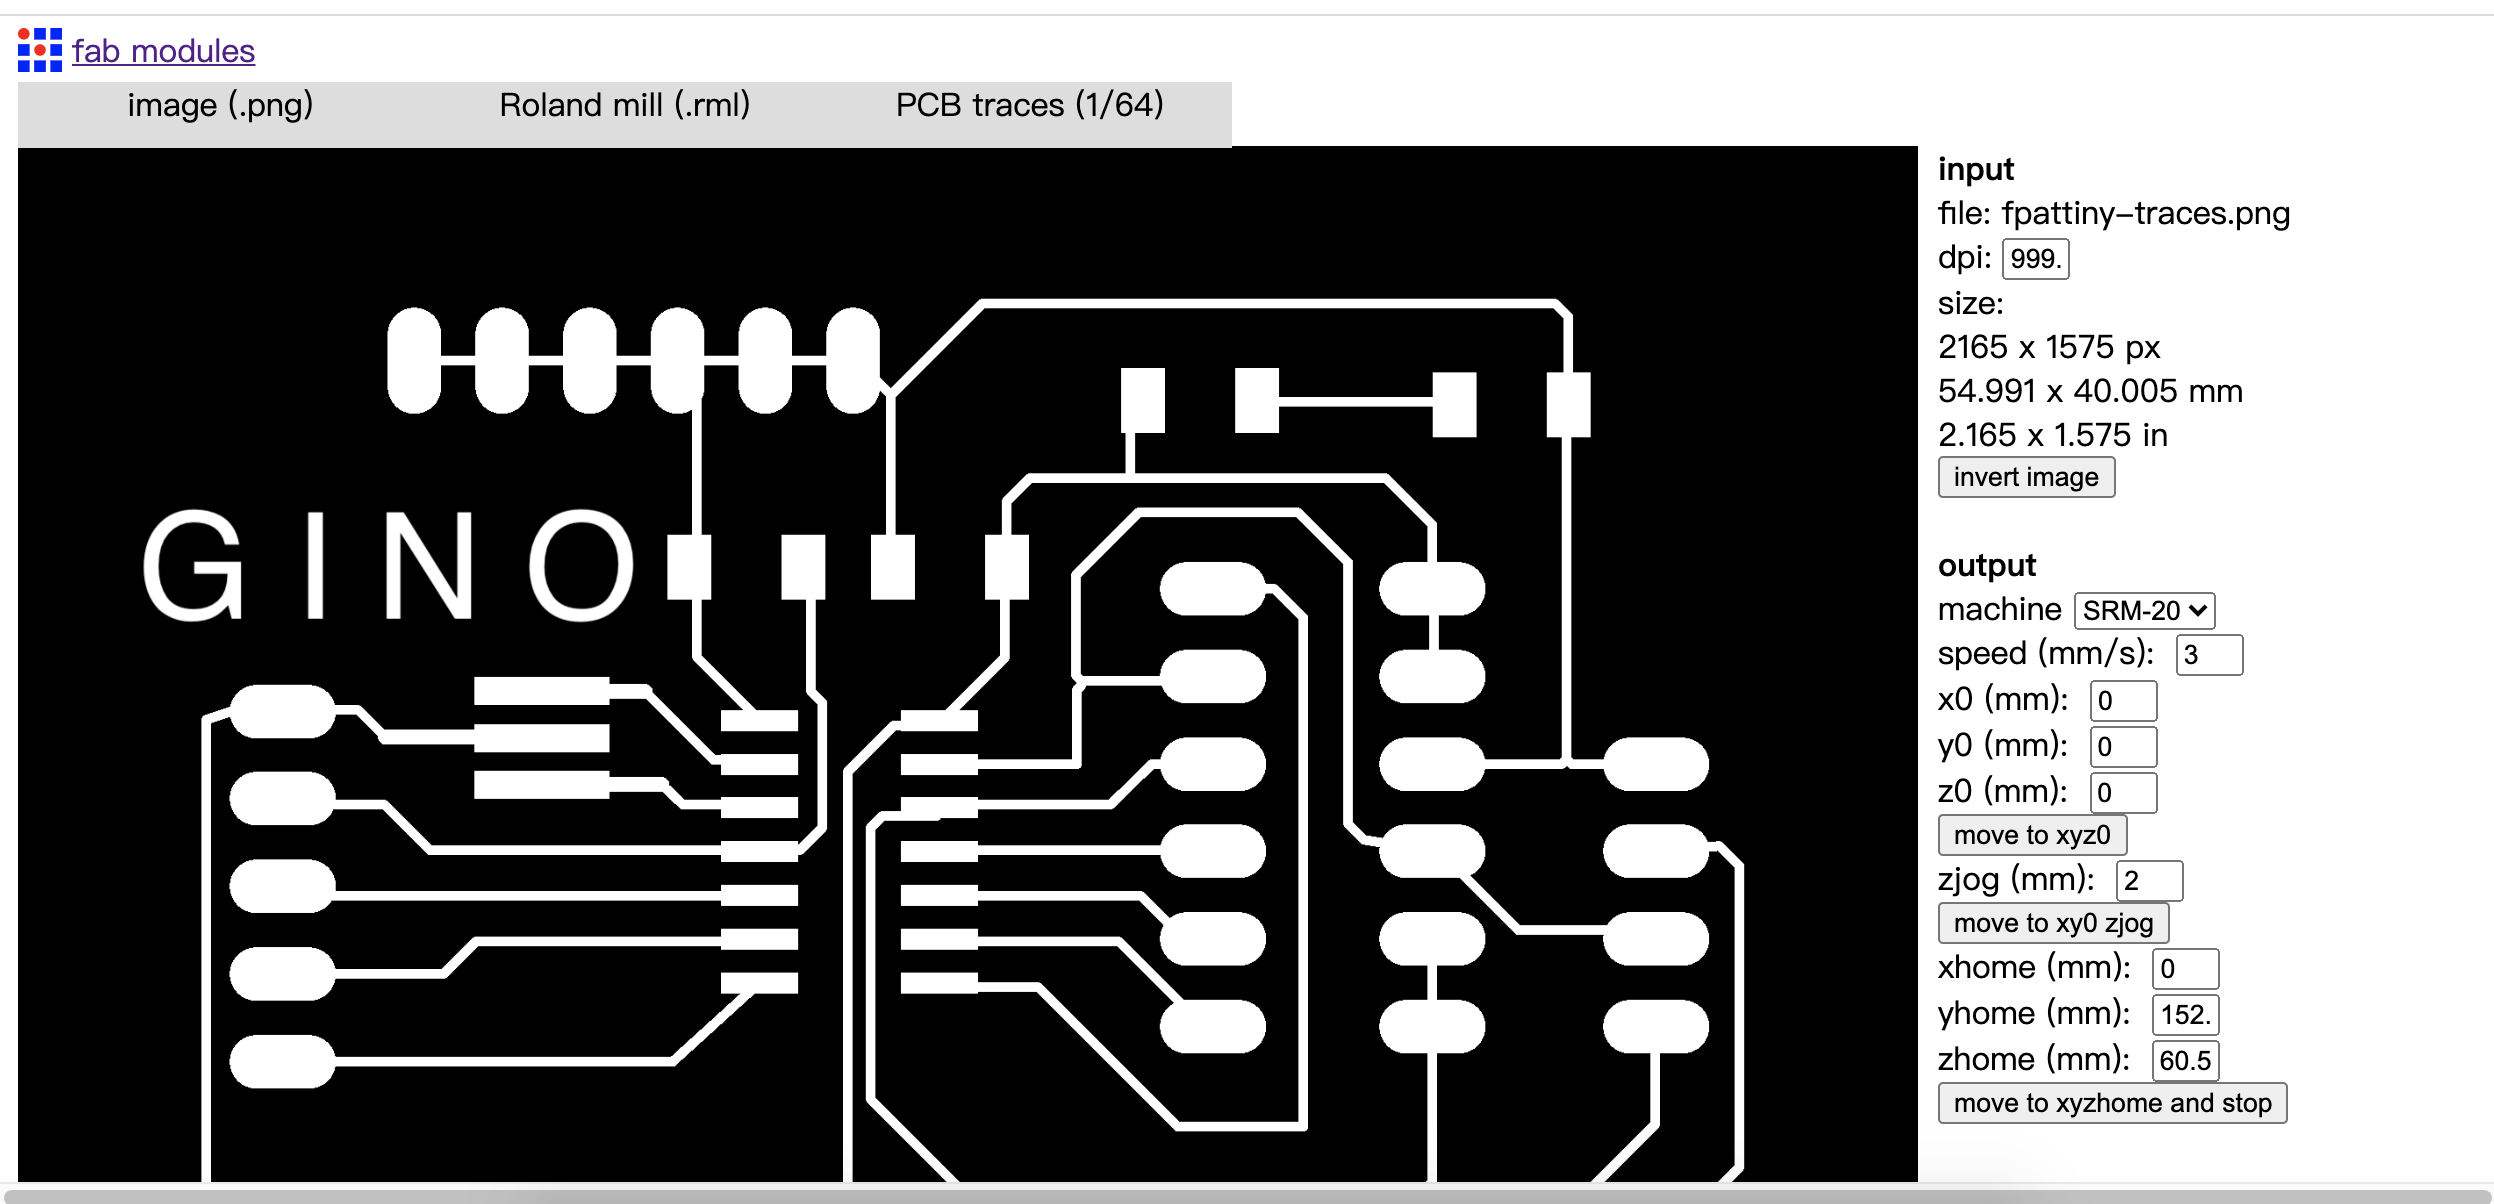
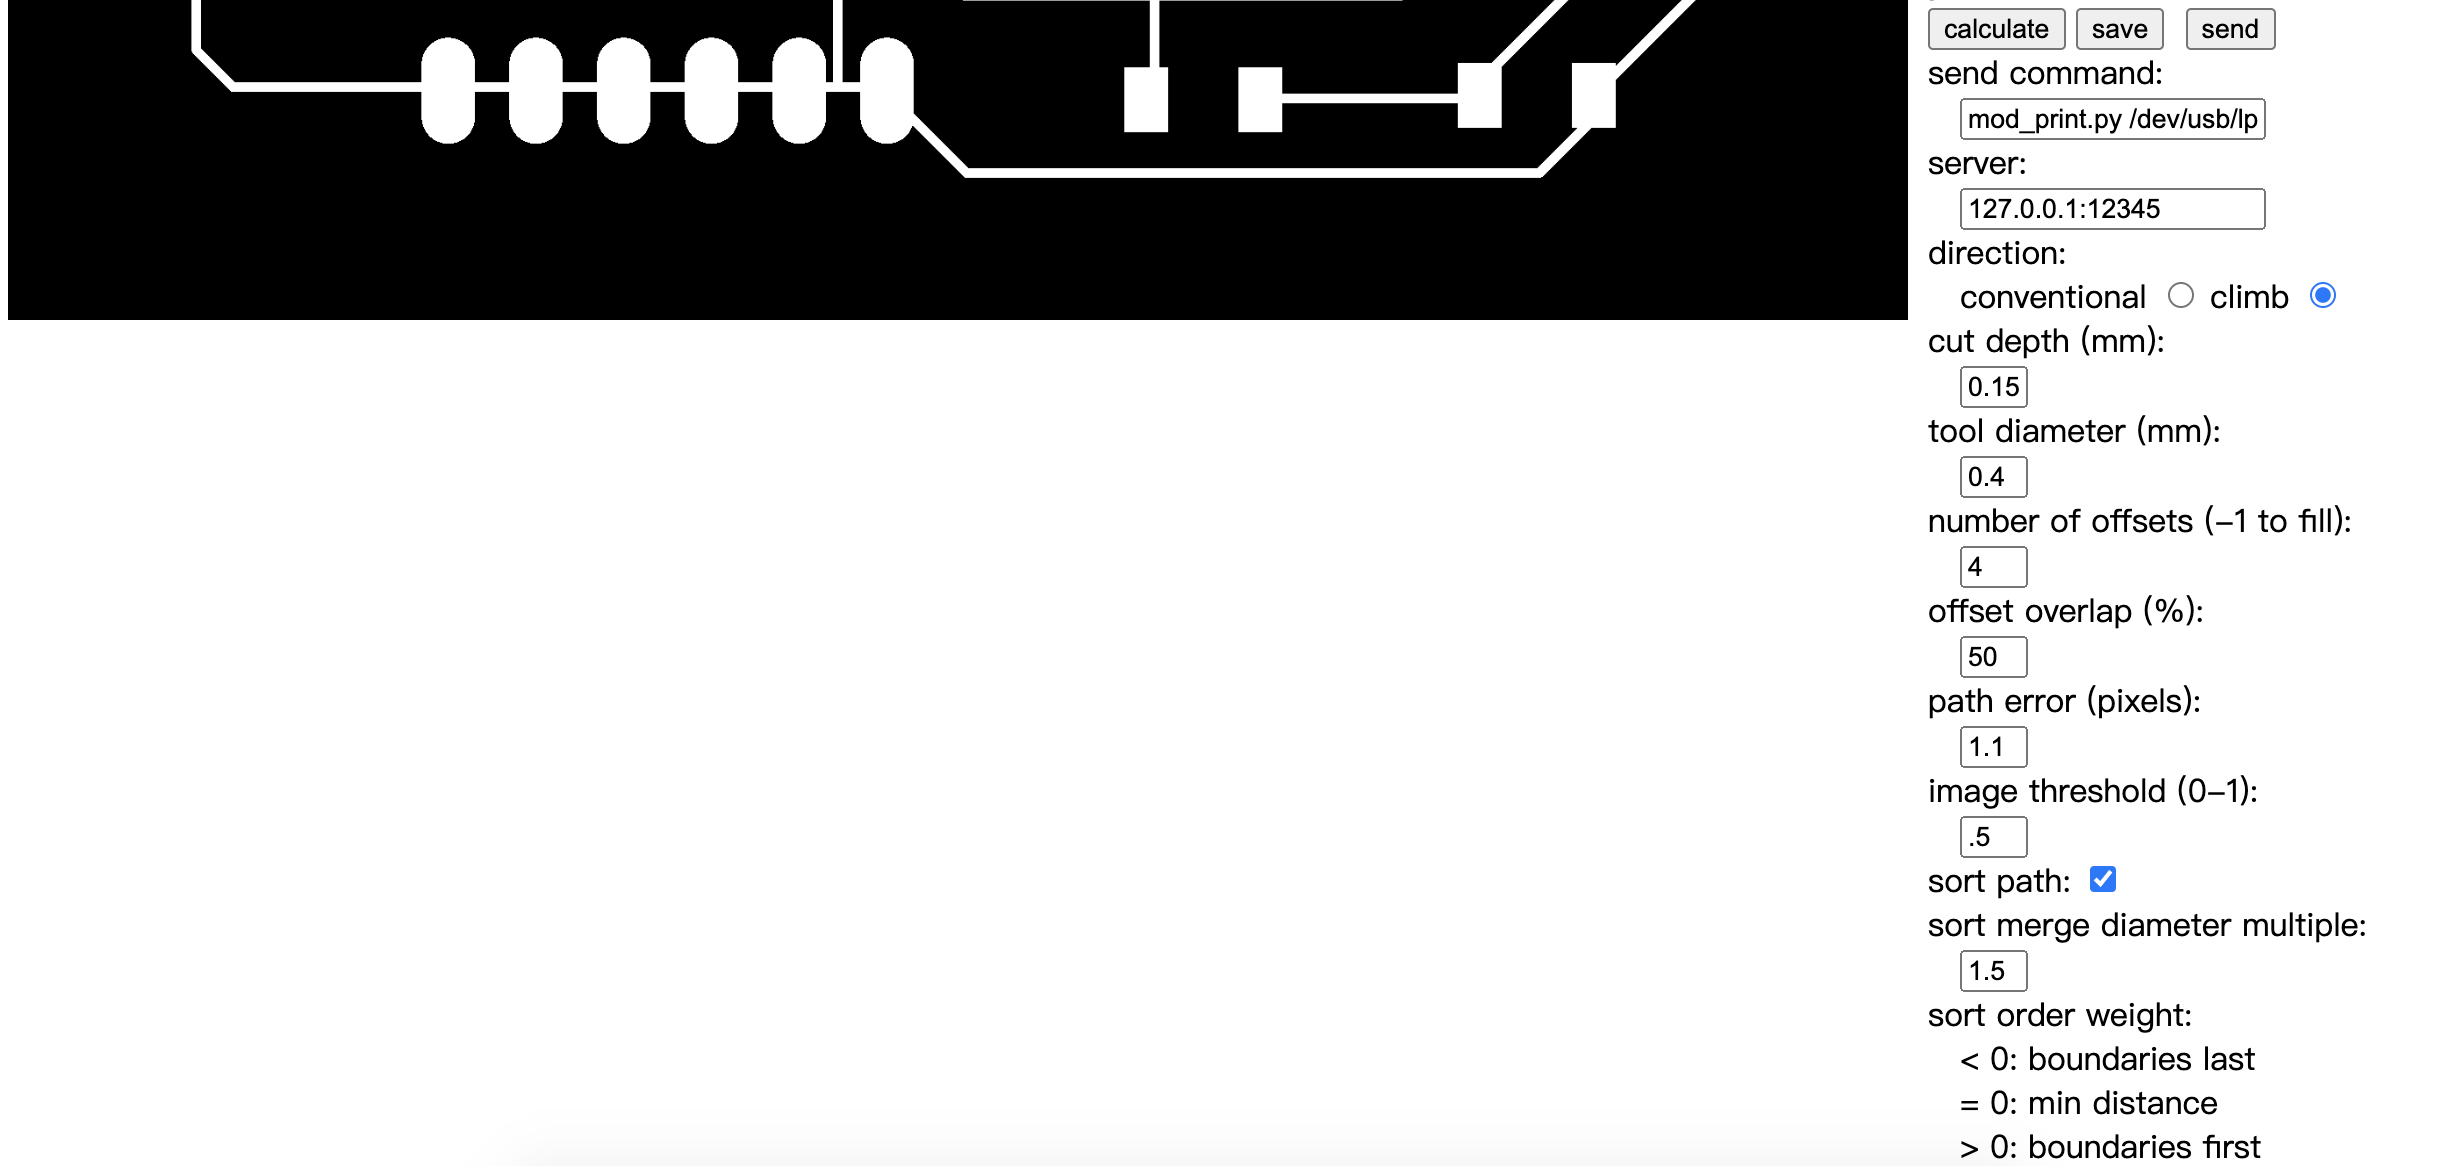
I use fab mudule to creat path for CNC. The setting is below.
I also make a board for force resistor and then milling it.
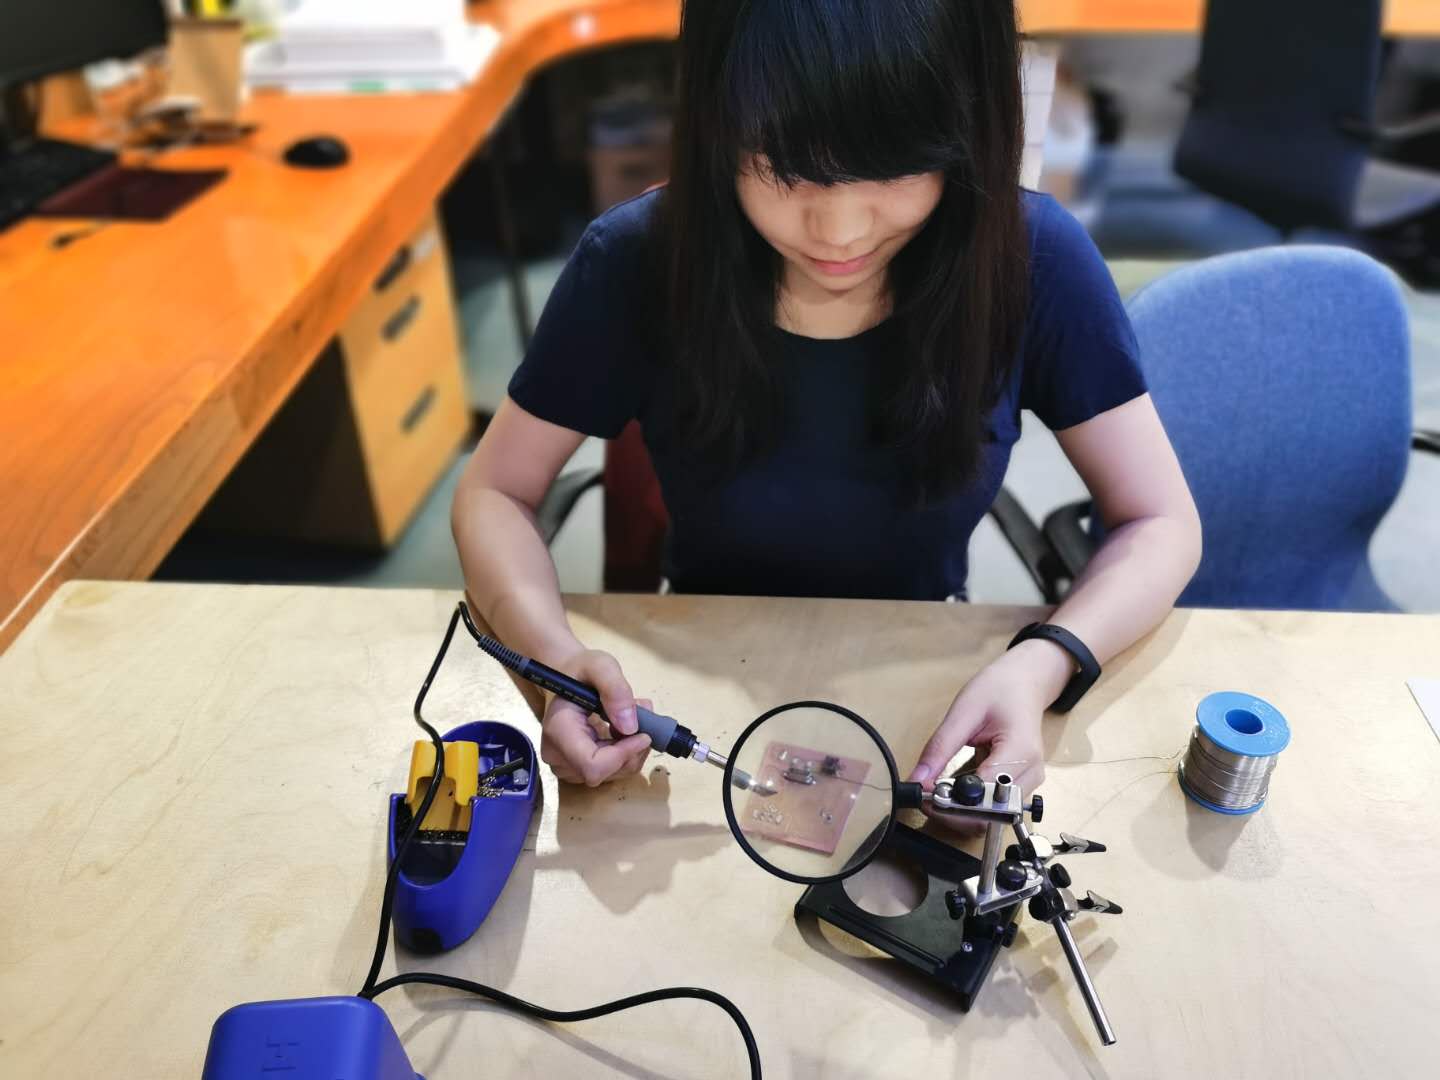


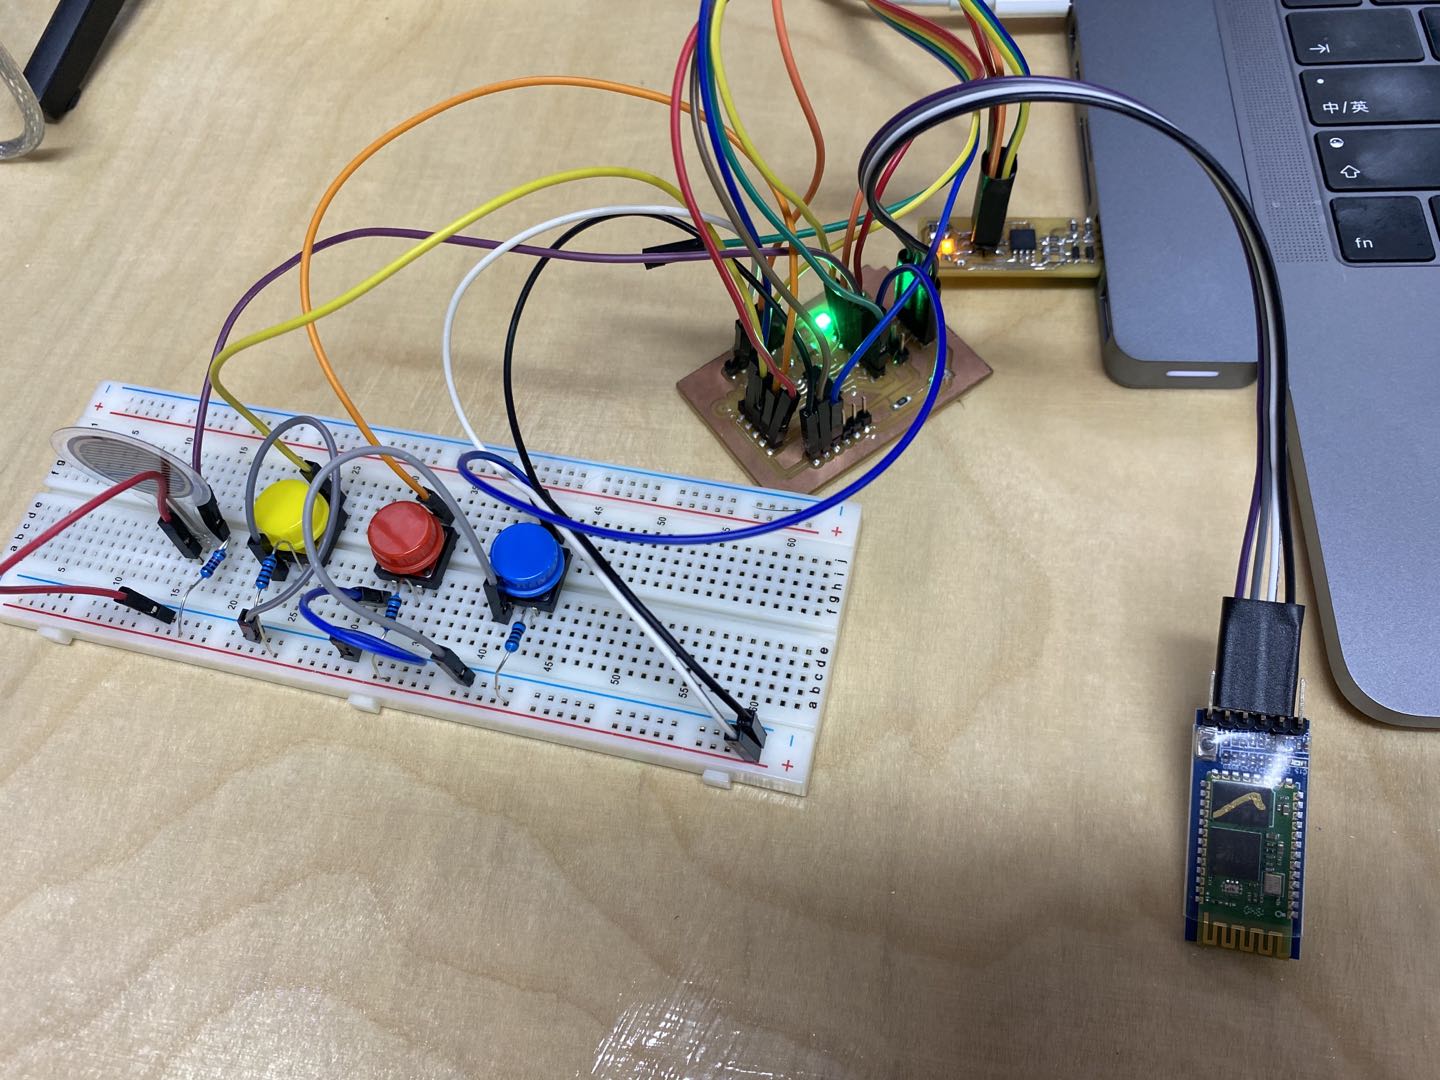
Final project board:
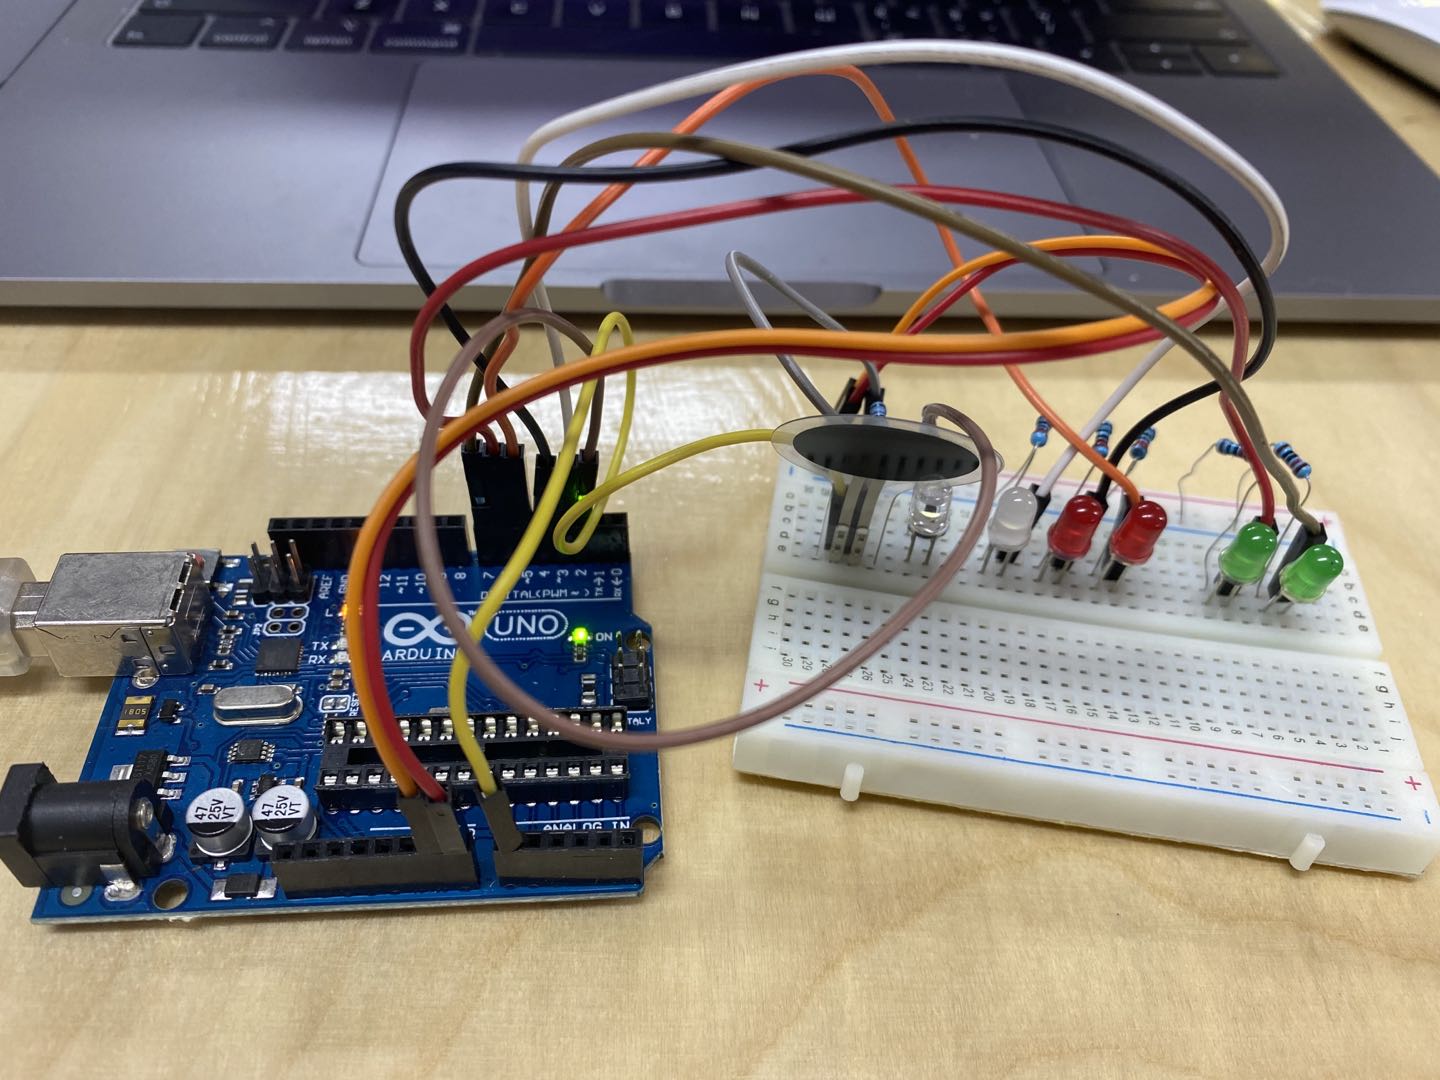
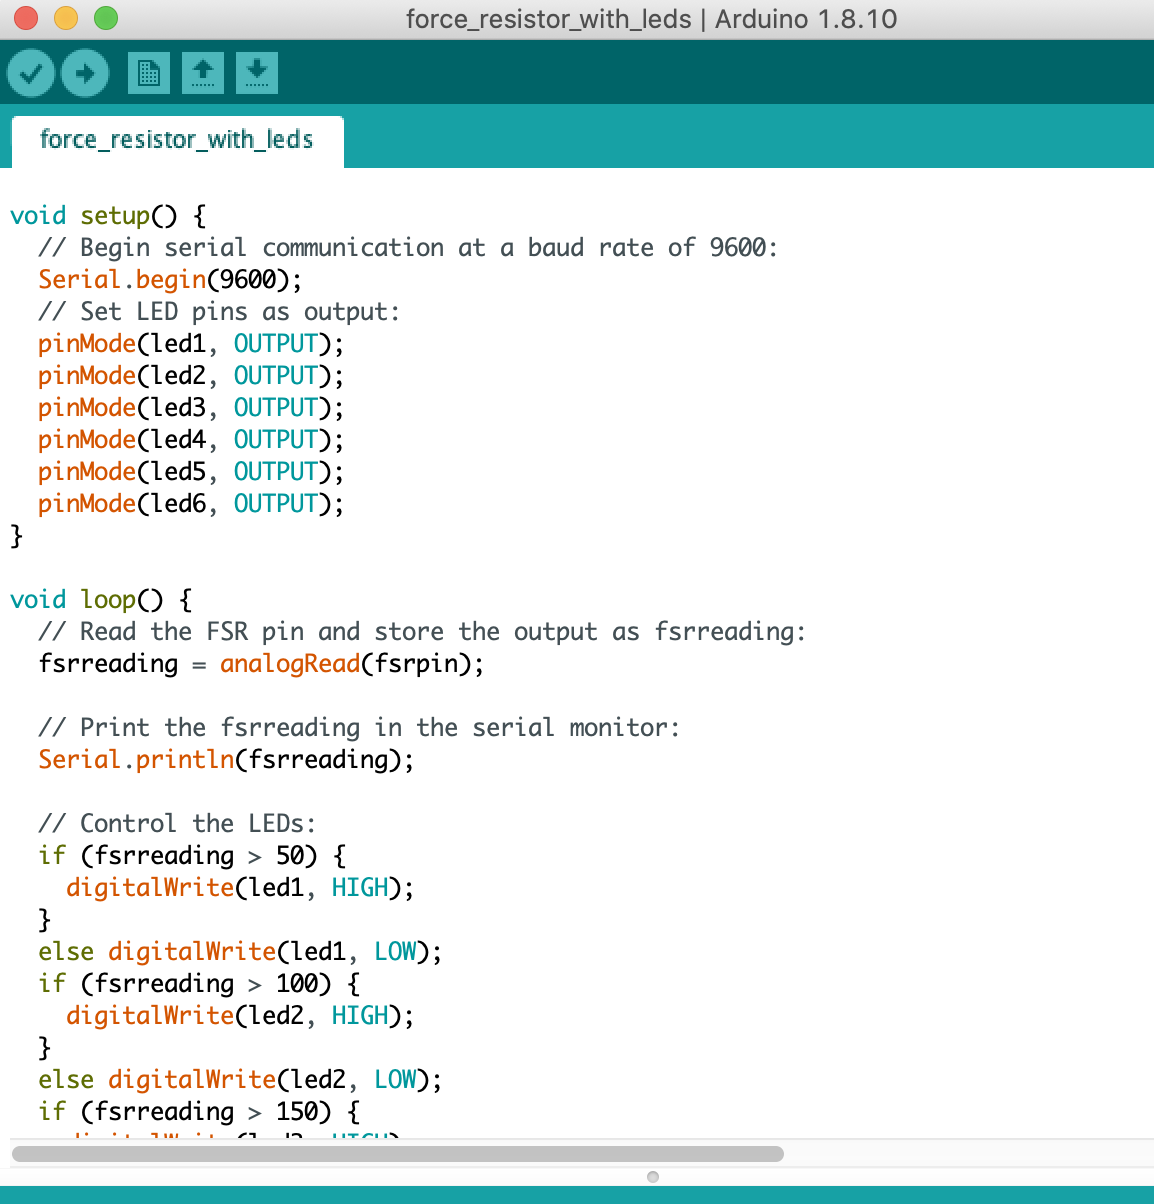
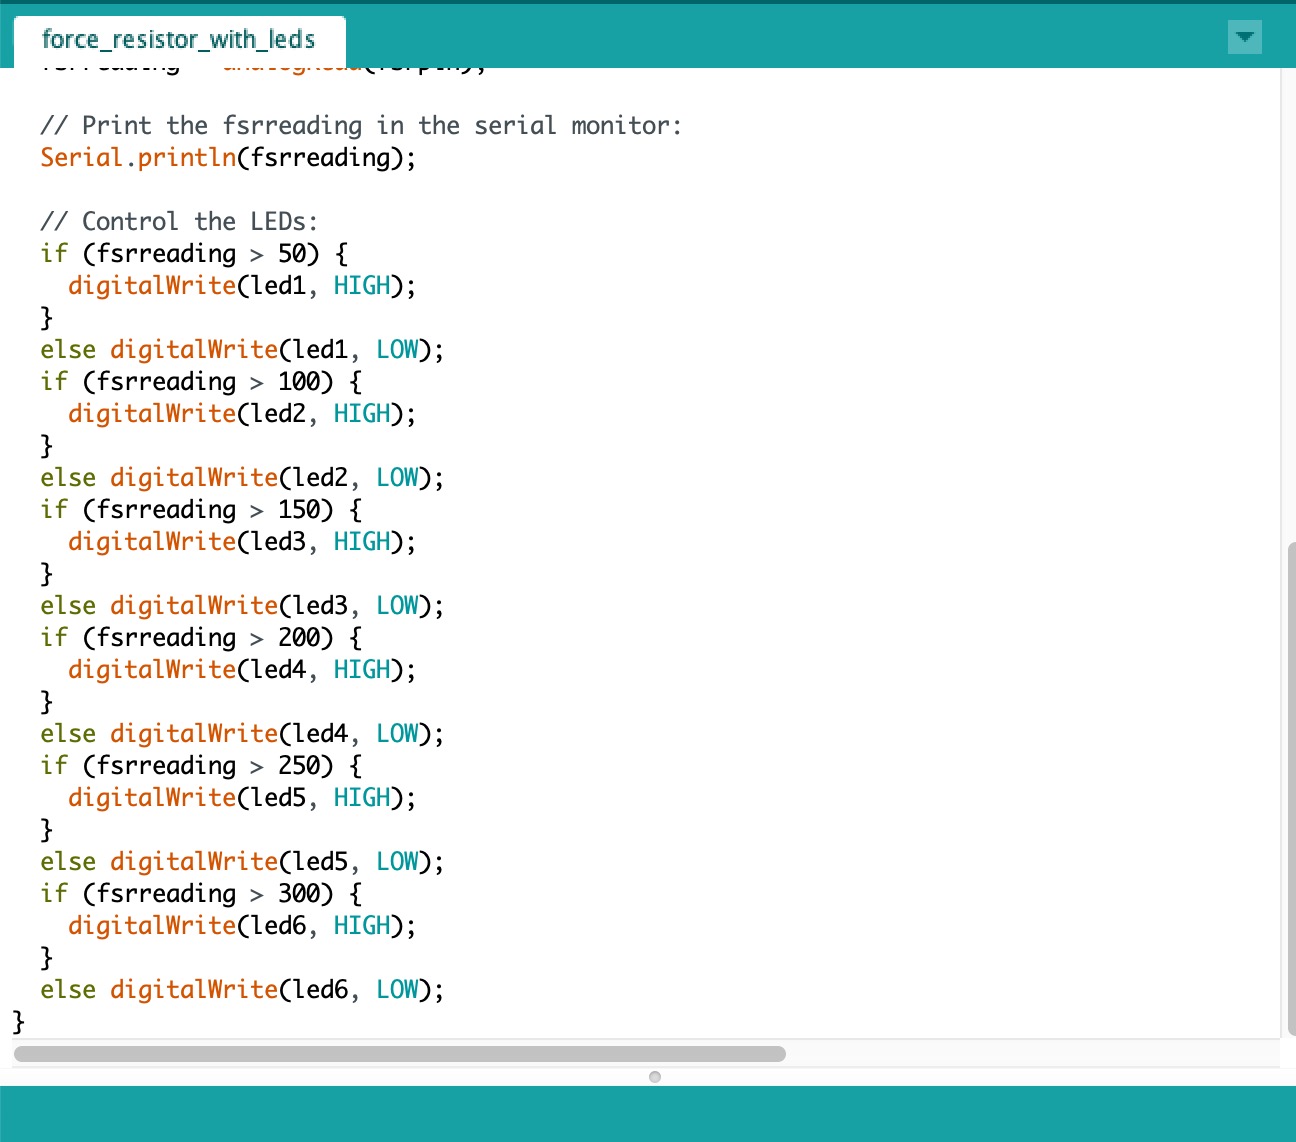
1 Try the force resitor with leds.
Code is below:
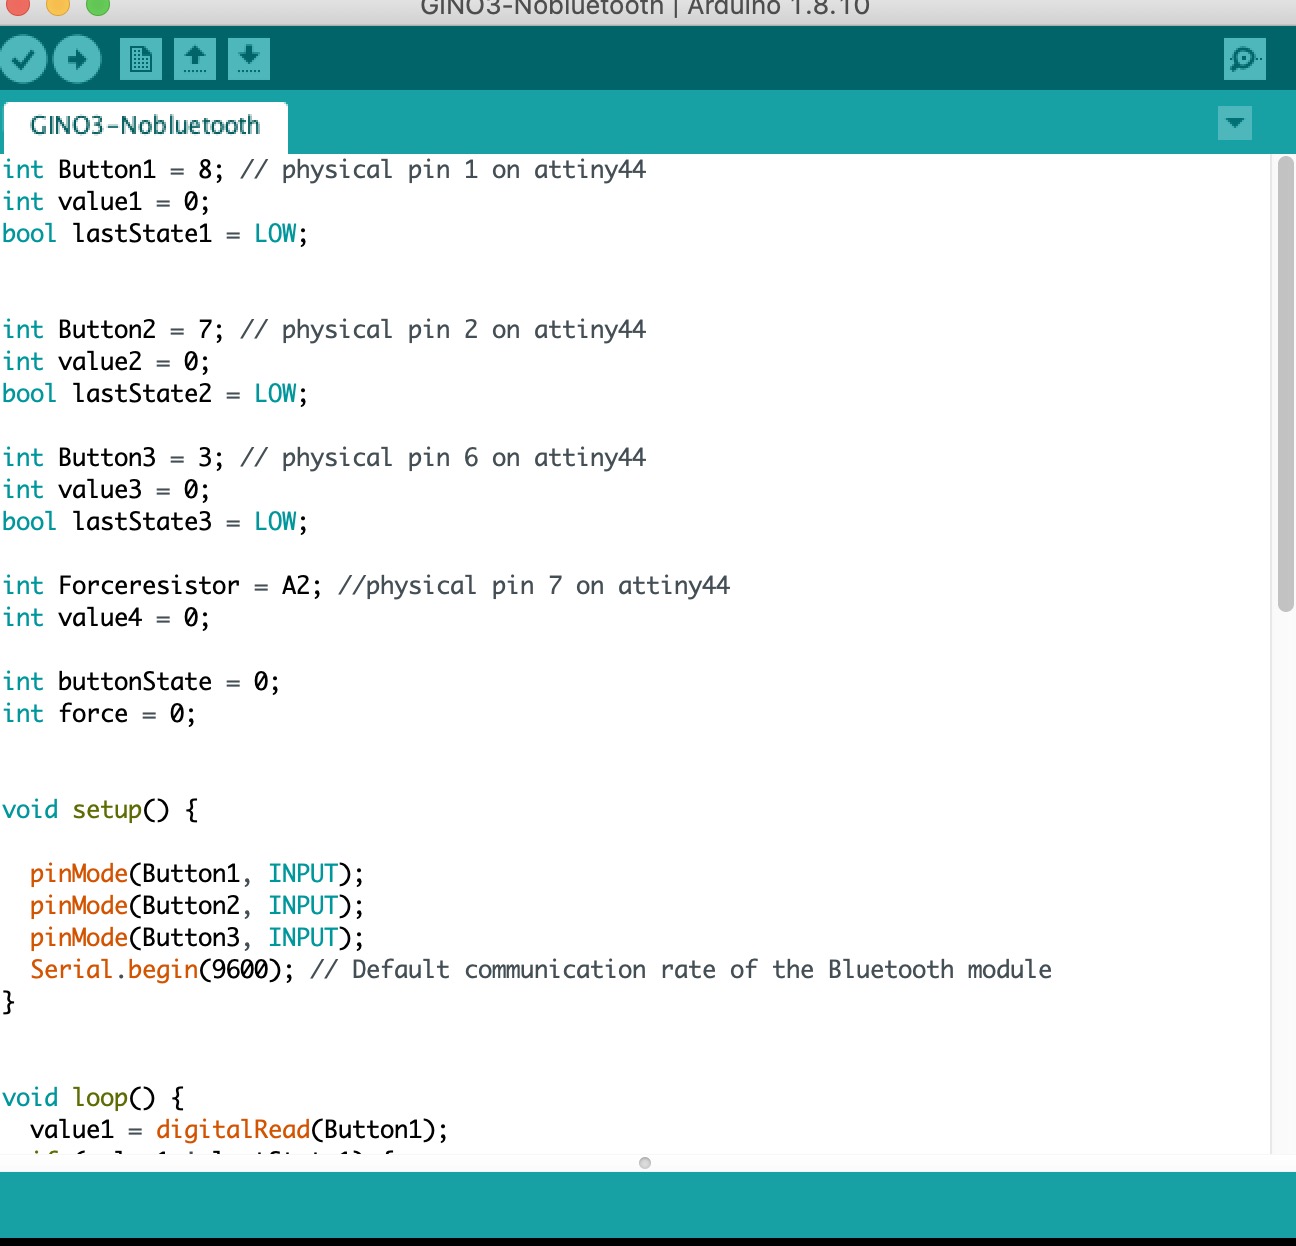
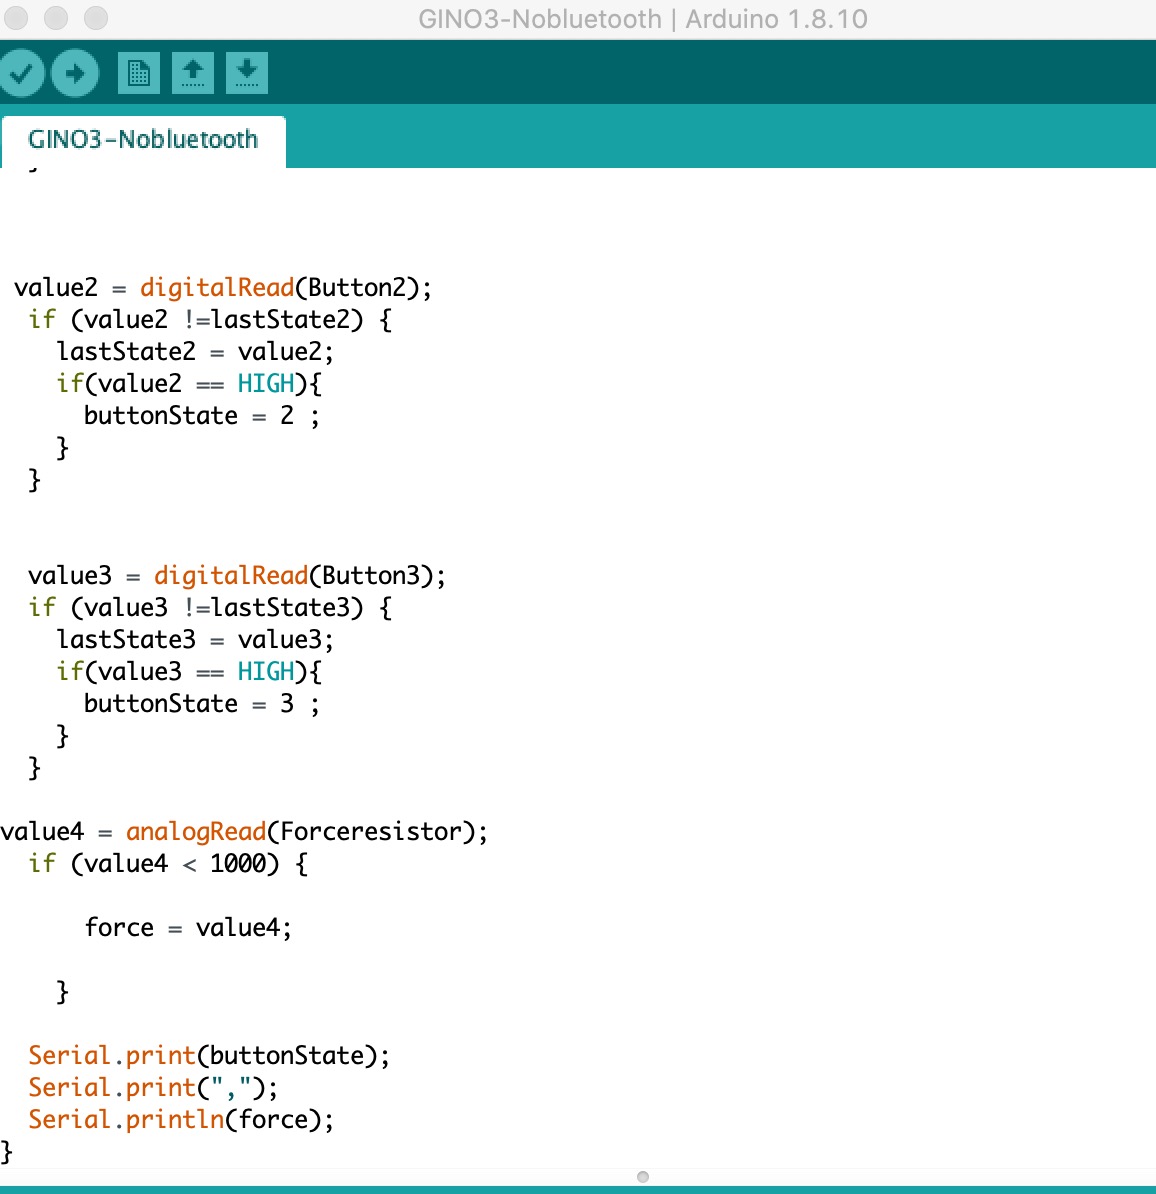
Try to use with buttons with force resistor. The code is below:

Test video:
Download Link:
- Download code code for this week.
- Download code Nano Radar
- Download code Final board