Interface and Application Programming
Week12
Naturally, I used my outcomes of weeks 09 (Input Devices) and 11 (Output Devices) as my basis for programming an interface. After receiving inputs in Processing and Python I opted for the latter - mainly because I heard various people describing it as "such a beatiful language" that I thought I need to learn more about it.
Getting started in Python demands first to download the Python Interpreter from the Python website. Since Python is a scritped language, this step is necessary for the computer to be able to understand the scripted code and convert it into machine code. Apart from that, coding also requires an Integrated Development Environment (IDE). There are numerous options to pick from; we were introduced to PyCharm, to be downloaded from the JetBrains website.
As indicated in my week11 page, the system consists of an Arduino that receives analog input from a capacitive moisture sensor and starts a DC motor (as proxy for a peristaltic pump) once the readings indicate dry conditions. While the wiring for the sensor was very straightforward, wiring the DC engine offered more options for desaster. It is operated via a MOSFET that permits current to flow from an external power source to the device while at the same time protecting the Arduino from the current. So far, the system works fine.
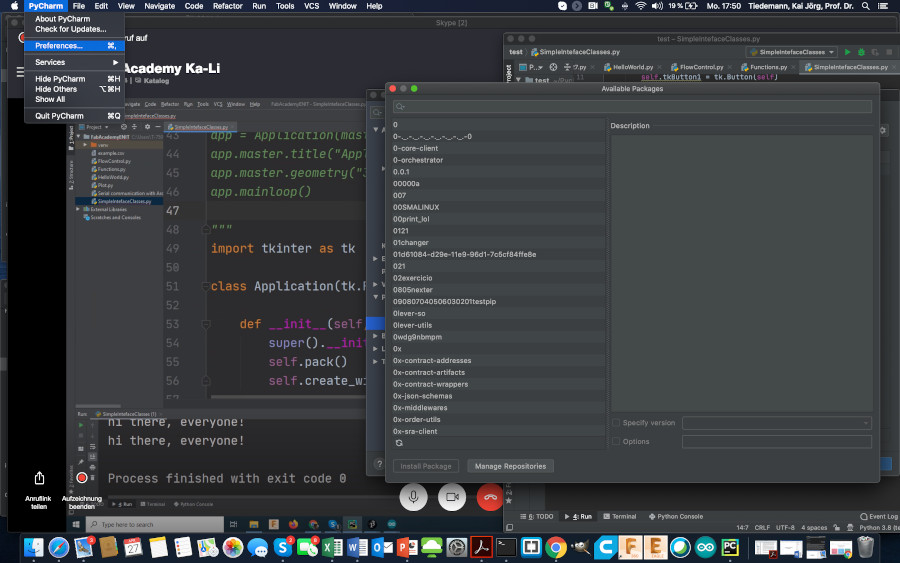
The interface I picked for this week's assignment is largely based on one of the sample codes regarding Serial Communication. To access this and other sample codes, the corresponding libraries must be downloaded and installed in the IDE. On MacOS there was a little difference to the PyCharm navigation on Windows computers: the path to the library manager goes via the PyCharm-tab, then Preferences (Fig.01). Opening the pop-down tab of the current project offers to choose Python Interpreter. Clicking on the + icon opens a list of probably ..thousands(?) of packages. Daniele suggested to download pyserial and matplotlib

Fig.01: Accessing the PyCharm library manager.
The code consists of four blocks:- the packages to be opened from my library
- the definition of the objects and functions I need to run the code
- the assembly instructions for my interface
- the while loop for perpetual repetition
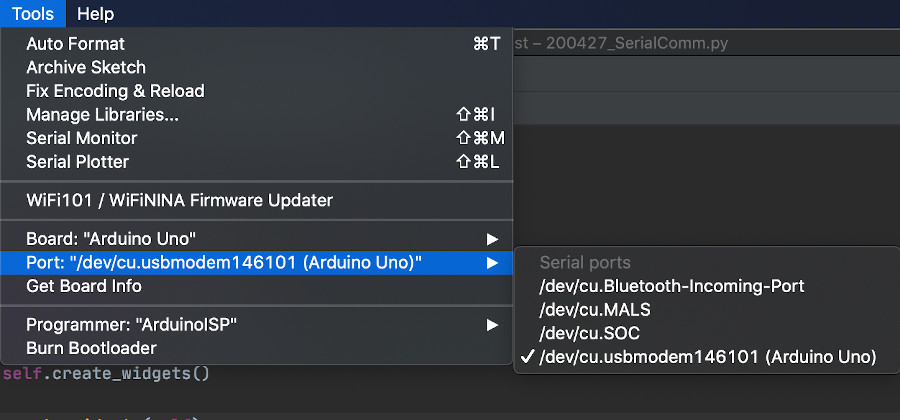
Trying to run it for the first time, I received various errors - most importantly the message that the USB-port could not be found. I looked it up in the Arduino IDE (Fig.02), changed the Python code, then tried again - and I had my little window on the screen, visualizing moisture by the length of the bar!

Fig.02: Detecting the port number for serial communication in Arduino IDE.
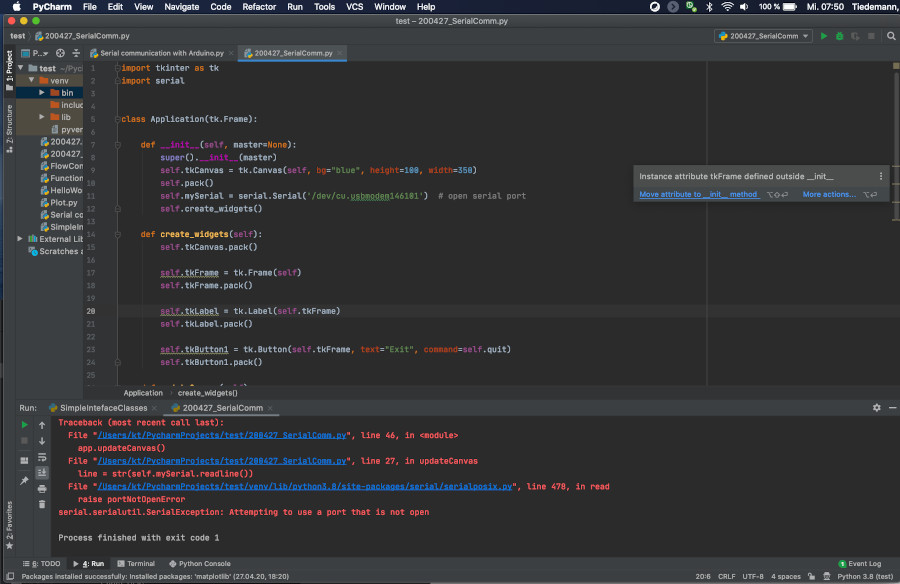
But even after running the interface, Python still indicated some minor errors:- after the
importblock, Python expected two blank lines instead of one self.tkCanvas = tk.Canvas(self, bg="blue", height=100, width=350)was moved to inside the__init__block- same with the the line
self.tkFrame = tk.Frame(self)(see Fig.03) - same with
self.tkLabel = tk.Label(self.tkFrame) - same with
self.tkButton1 = tk.Button(self.tkFrame, text="Exit", command=self.quit)

Fig.03: Debugging minor errors in PyCharm.
Vid.01: Running my first Python code.
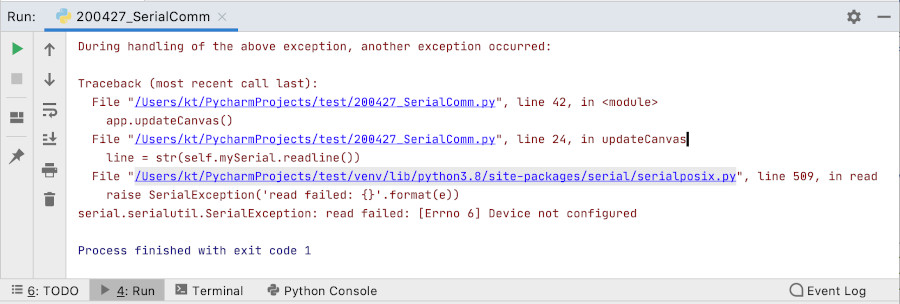
Upon exiting the program - no matter whether by clicking exit or the red button on the interface window - PyCharm shoots some more errors into the console (Fig.04):

Fig.04: Error report in PyCharm console.
Debugging all those errors properly will take more time than this week permits. I will have to postpone that step for the real thing once I started to bring the pieces together in my final project.
