-
Fab Academy 2020
-
Design. Make. create.
-
Shape the Future
The assignment for this week was to design a machine that includes mechanism +actuation+ automation, build the mechanical parts and operate it manually, and then for the machine assignment we had to actuate and automate our machine.
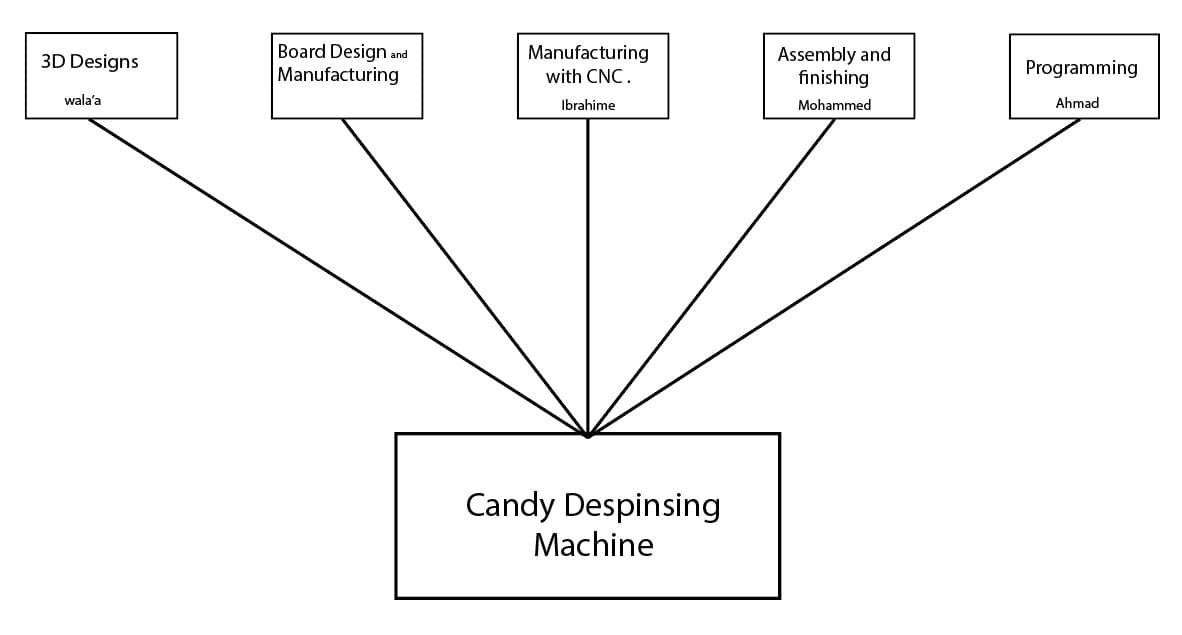
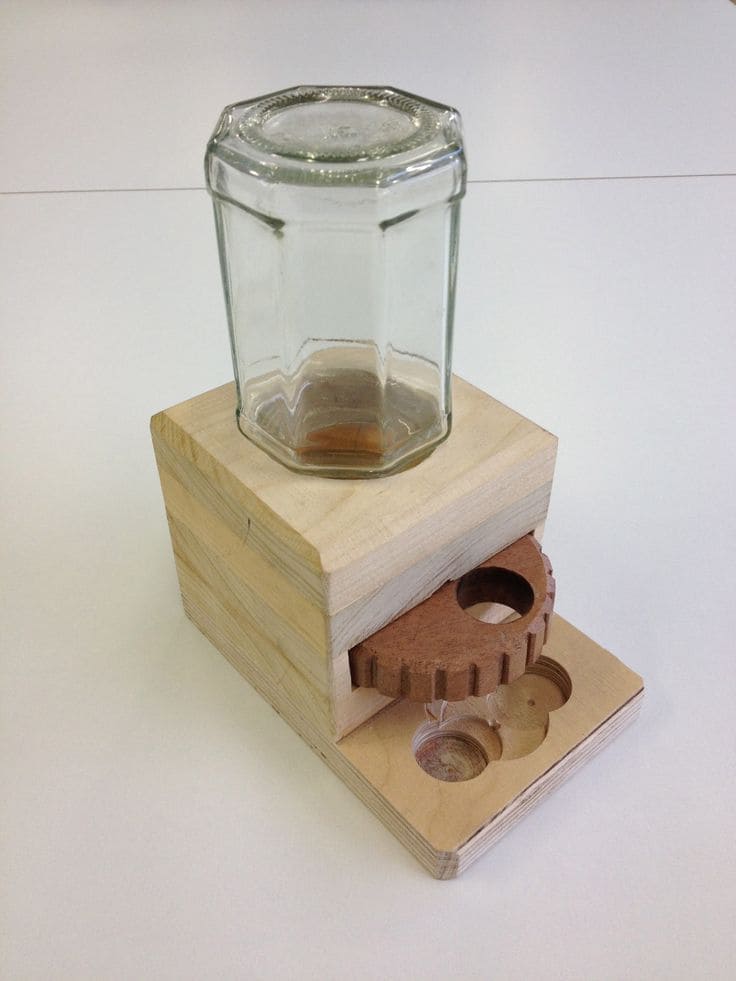
We decided to make a small candy dispensing machine, it contains a candy in a jar and when you touch the side panel it should extract one candy.
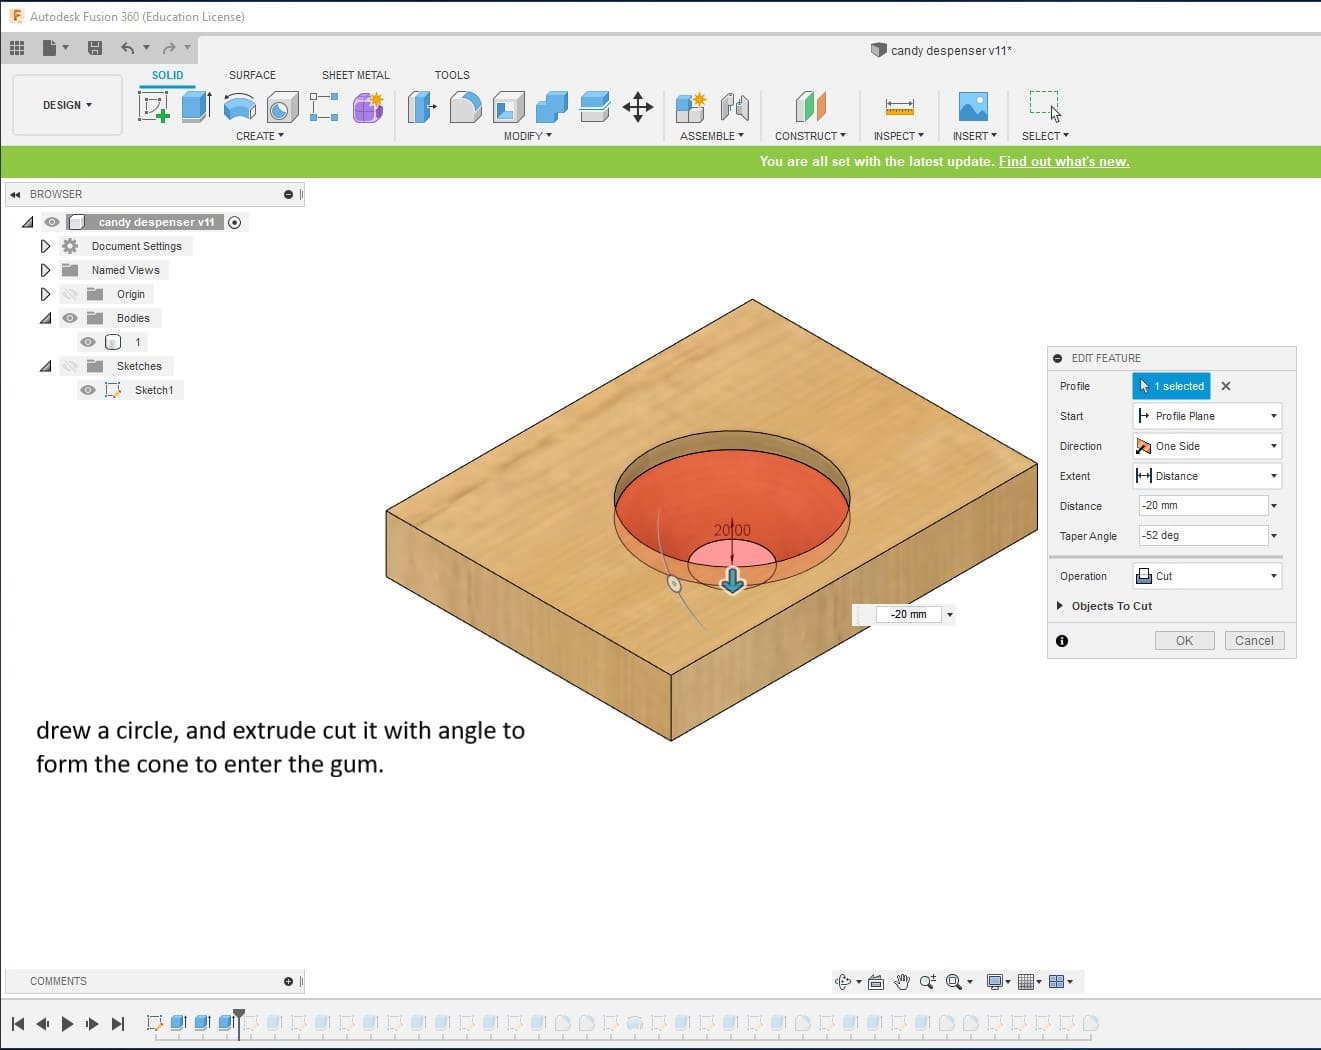
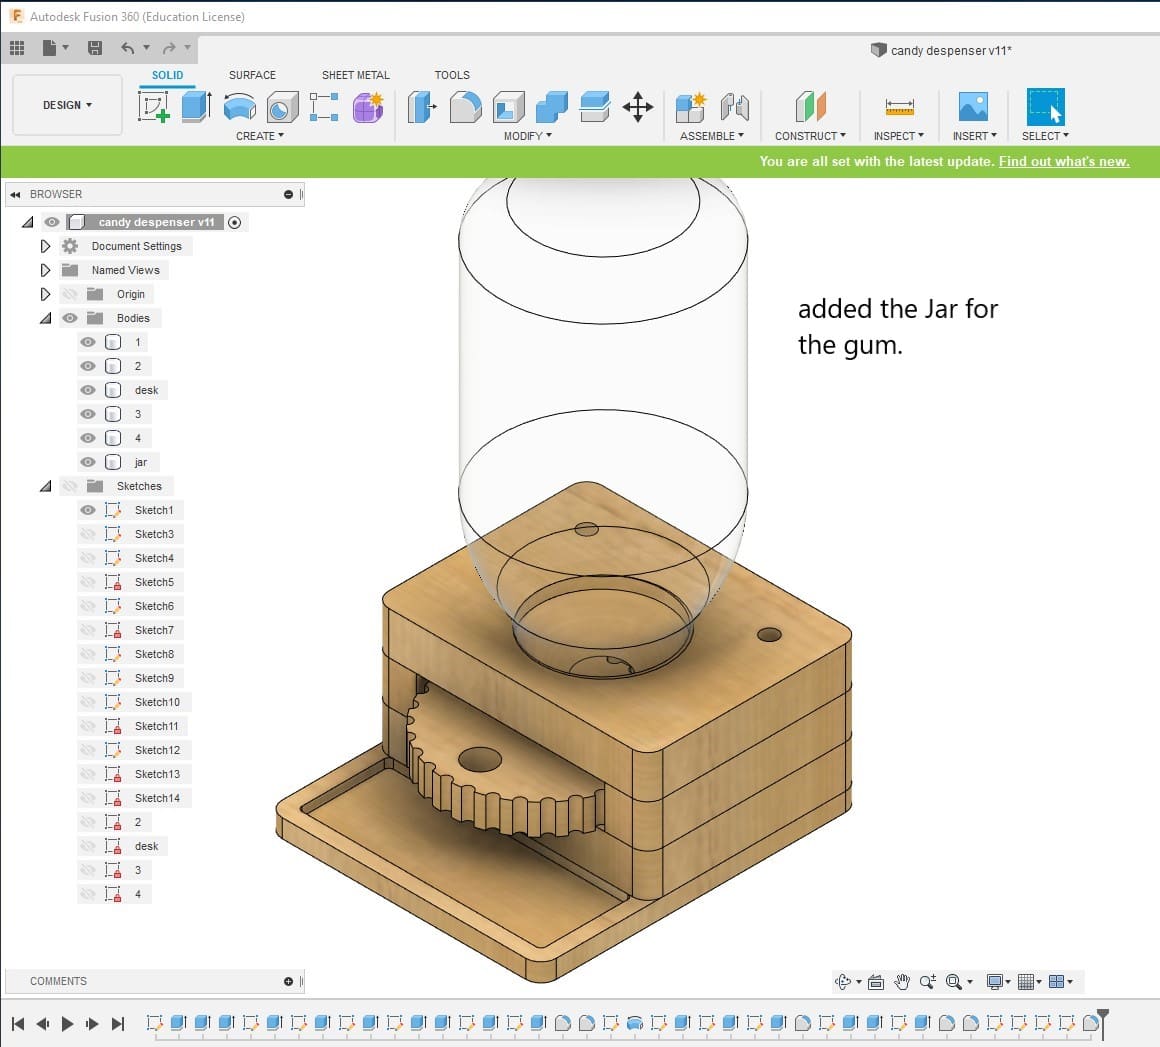
We started with the Fusion360 to design the machine, this was Walaa’s part, since we decided to make it using the wood shopbot CNC machine, we designed it as layers each layer with thickness of 28 mm as our stock was. We used a hard Swedish wood its thickness was 32 mm but after using the thickener to make it flat its width became 28mm.
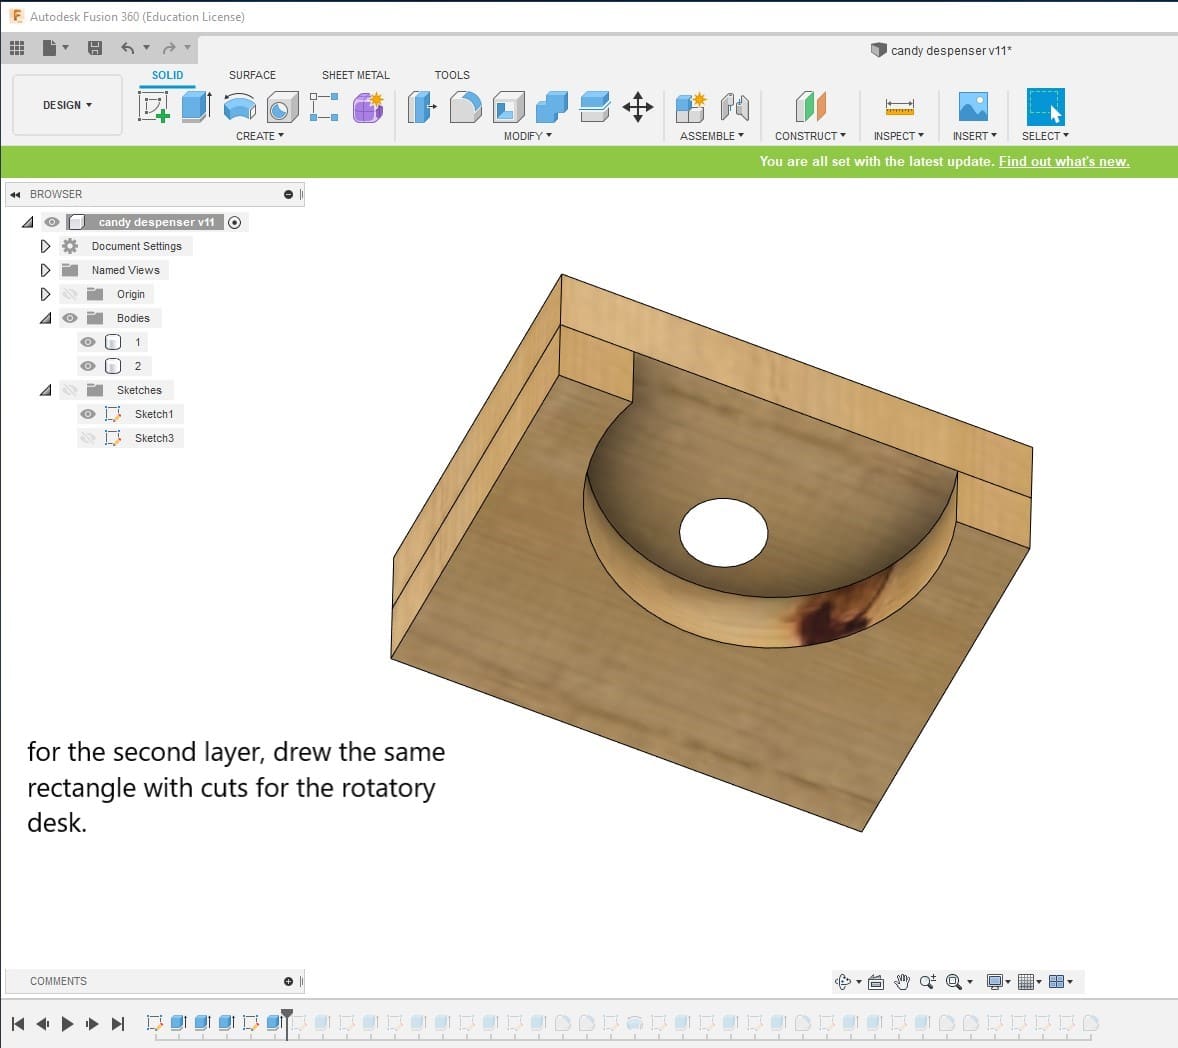
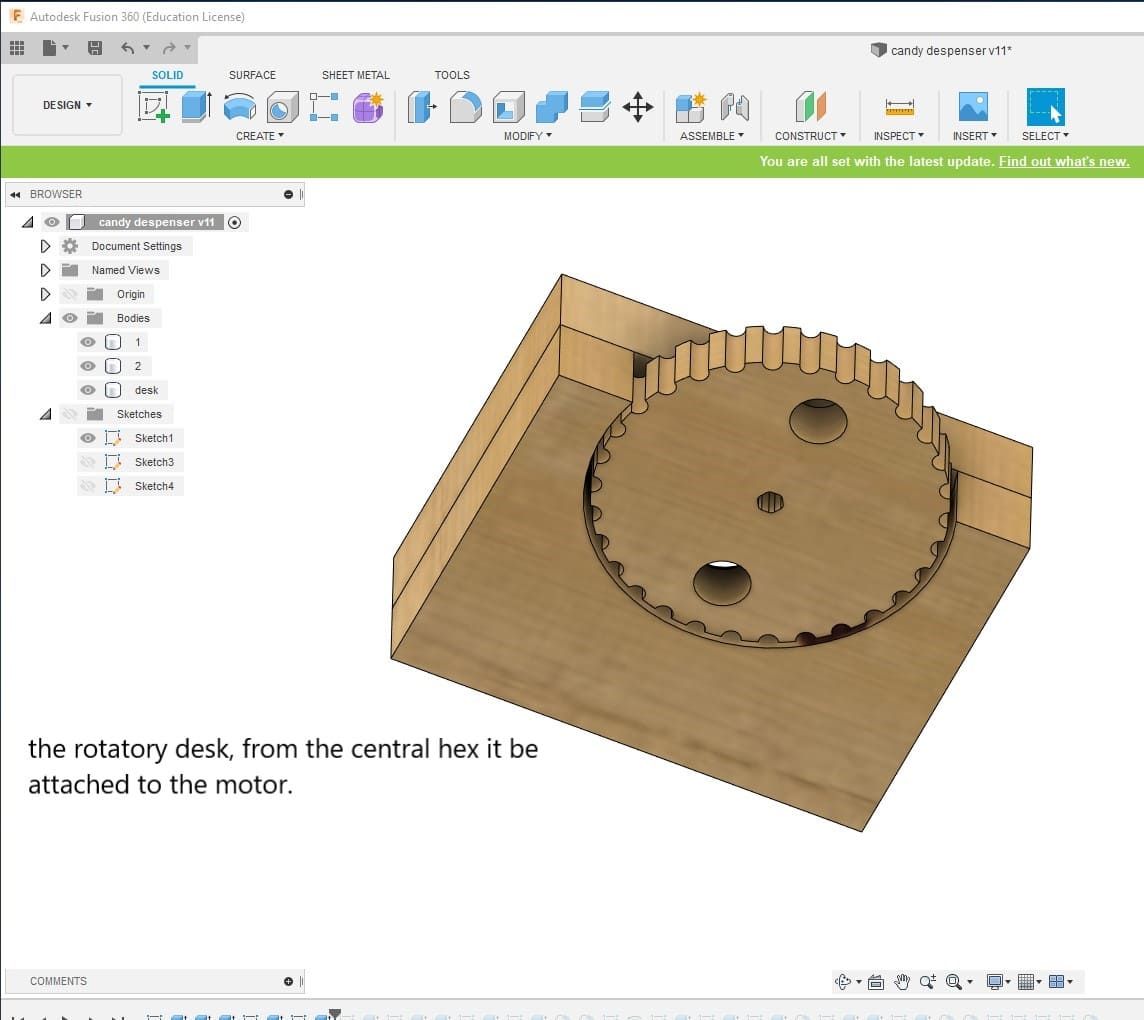
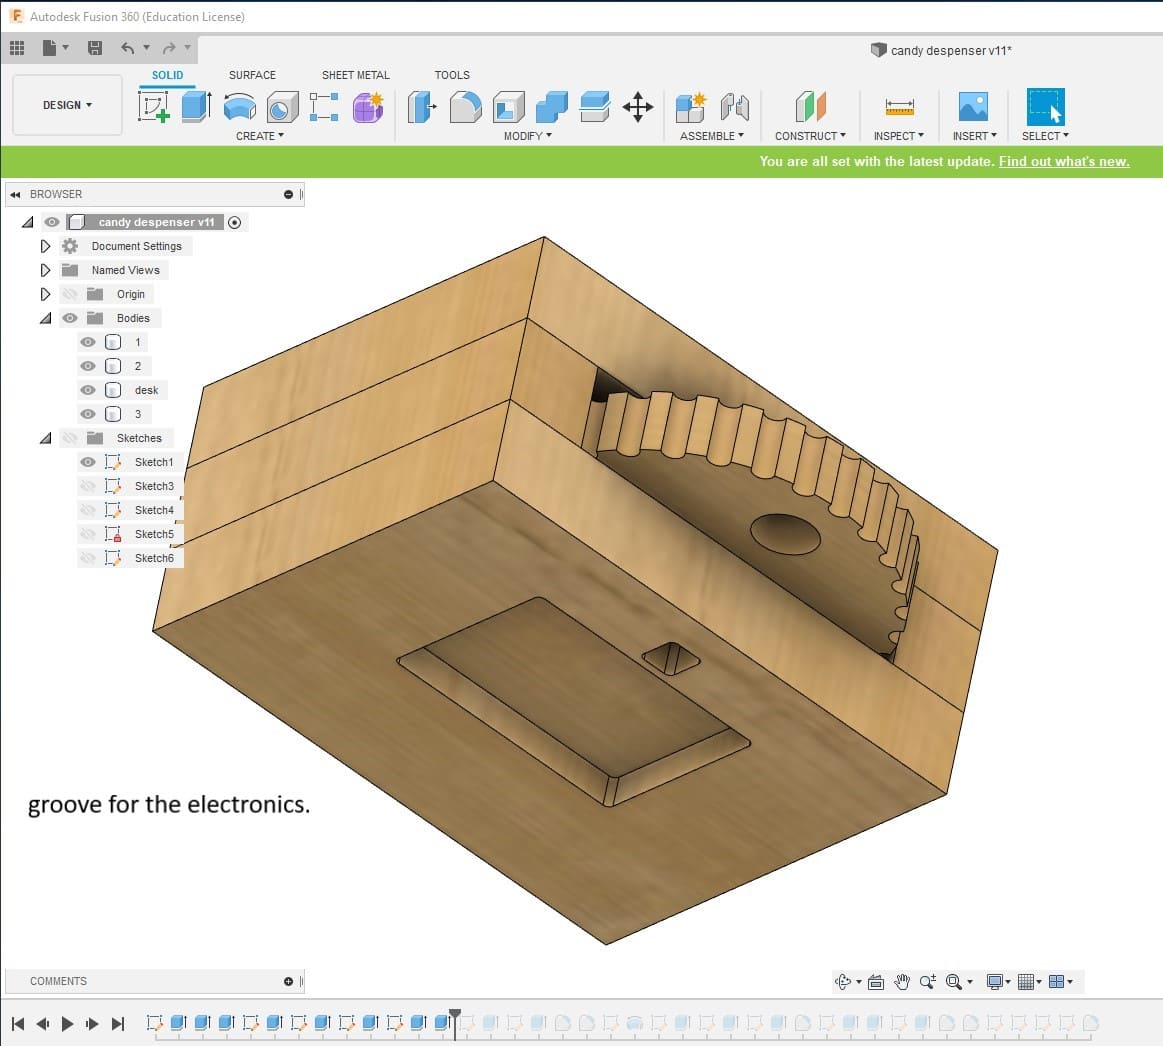
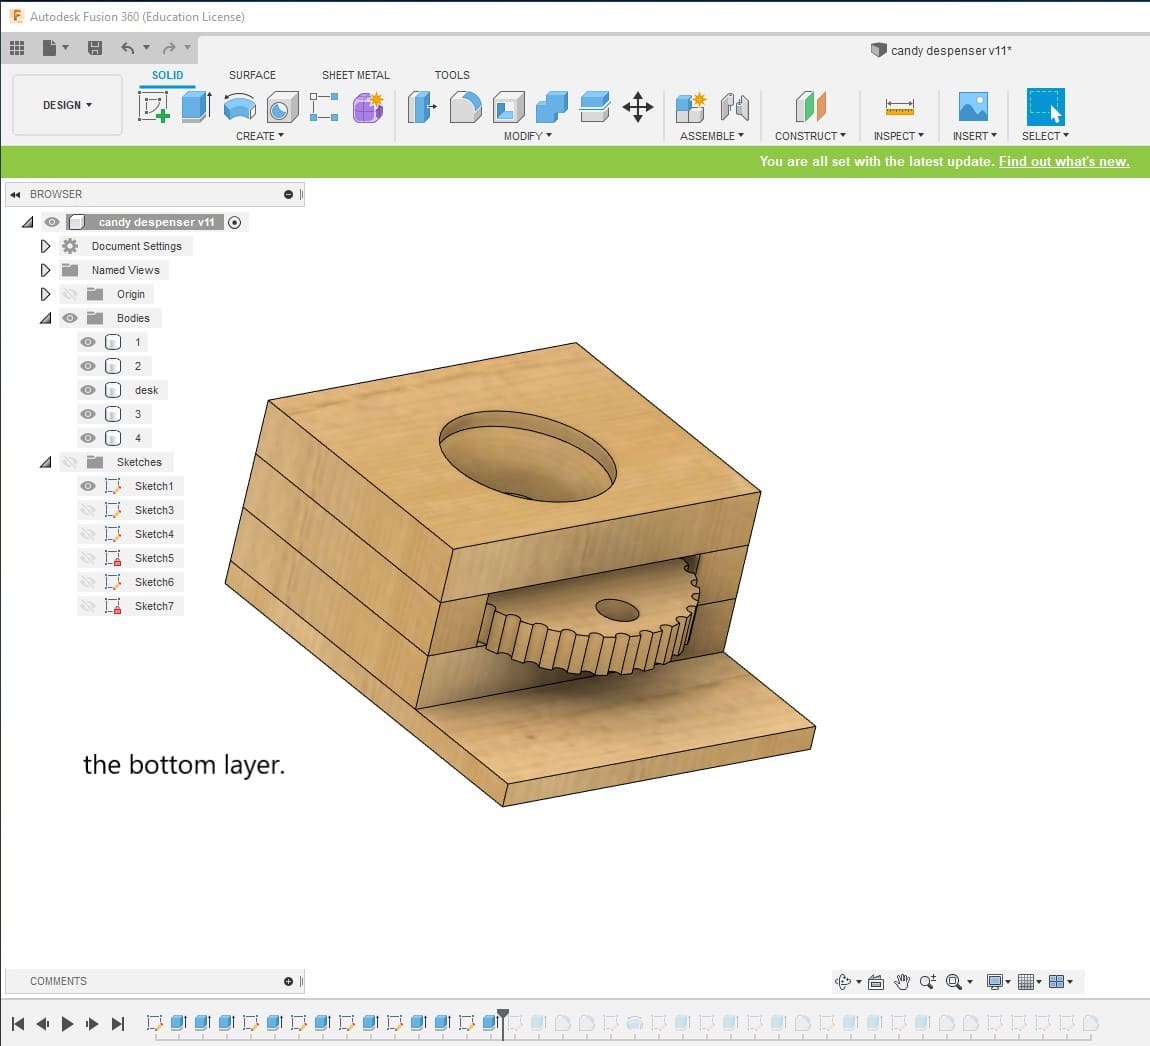
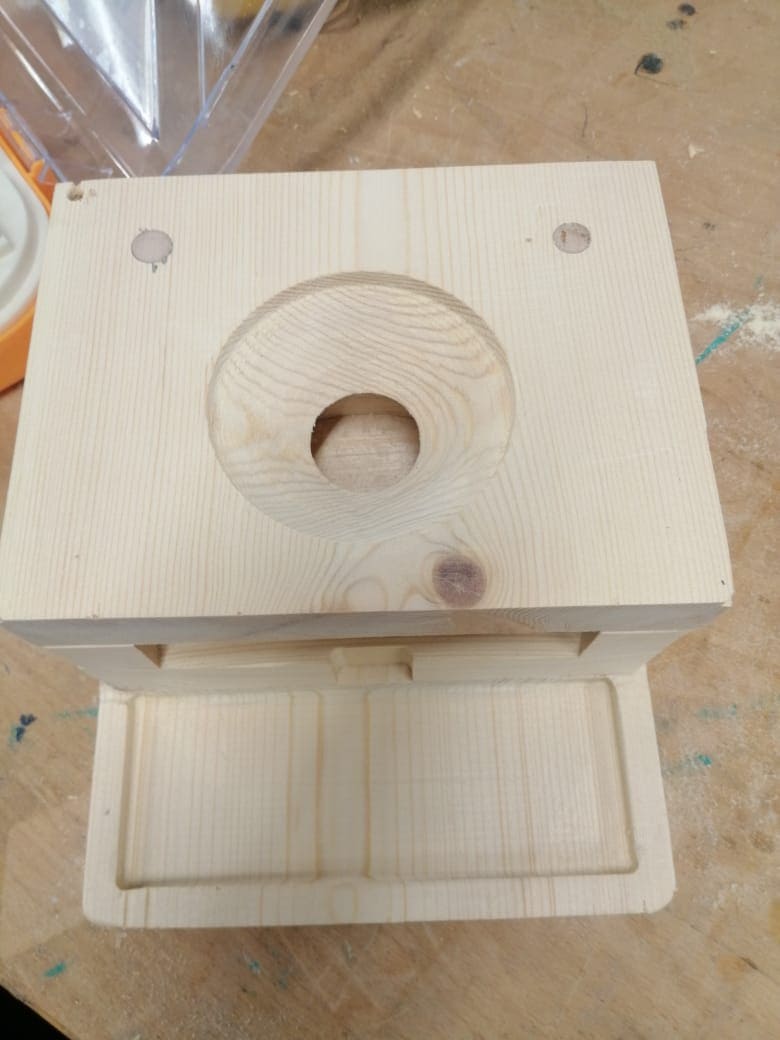
The most challenging part was designing the rotatory desk, since we are using a DC motor which its position or rotations cant be controlled by coding, we needed a limit switch. So, we added the limit switch under the desk and created a groove inside it from the bottom. You can see its concept in the below images. 10/11
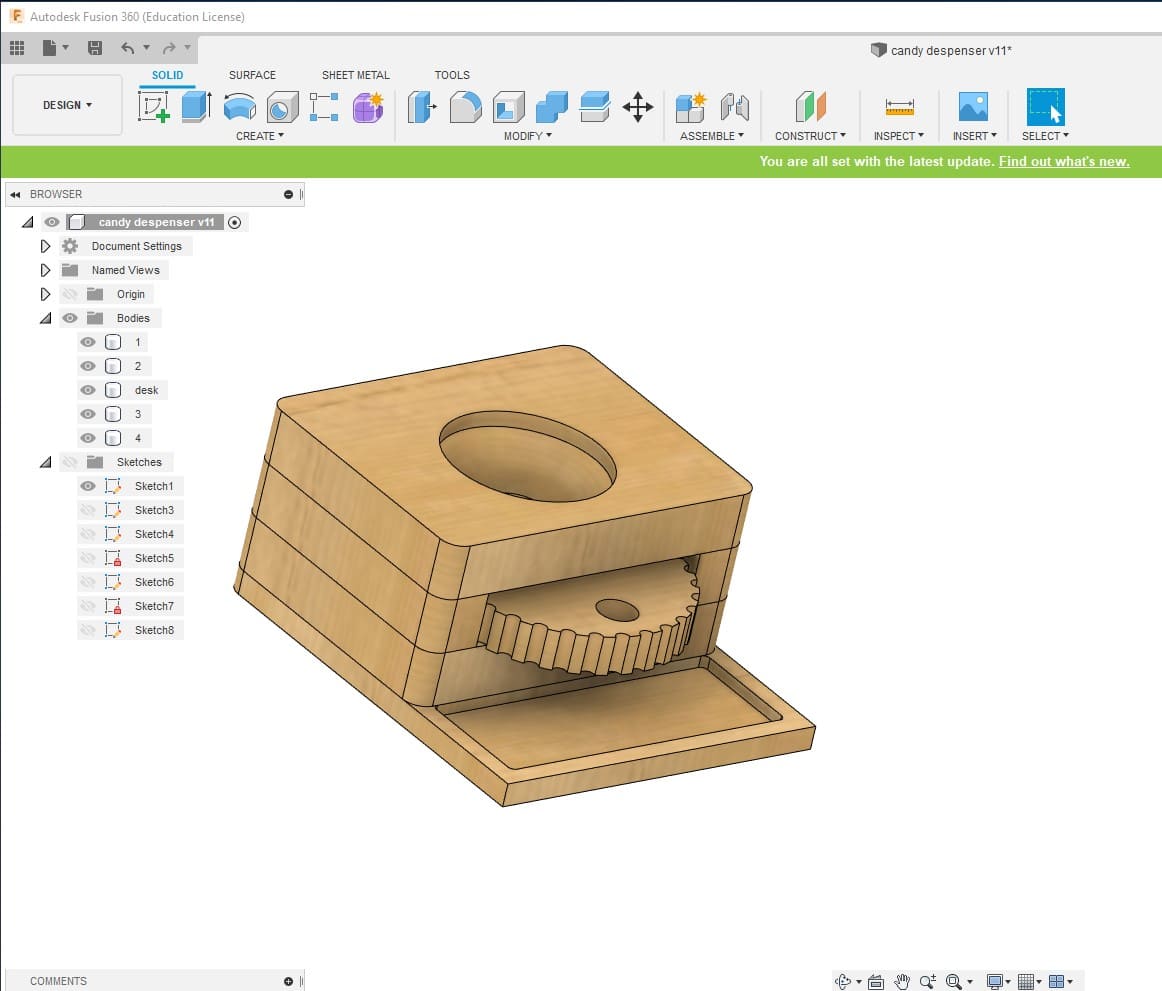
Below you can see all the design steps, all the parts made with one side milling required only, to make the manufacturing process easier.


The second part was the electronics design part, we needed to design a board to control the motor to move when the panel in the side being touched. but since Wala’a designed her Input /Output devices board to do the same job we used it as it is but with adding the limit switch to the FTDI pin header. Where the VCC and GND from the limit switch connected to the VCC and the GND to the FTDI, and the RX pin from the FTDI which initially was the PA0 pin attached to the control pin from the limit switch.
See below image of the board with the limit switch added.

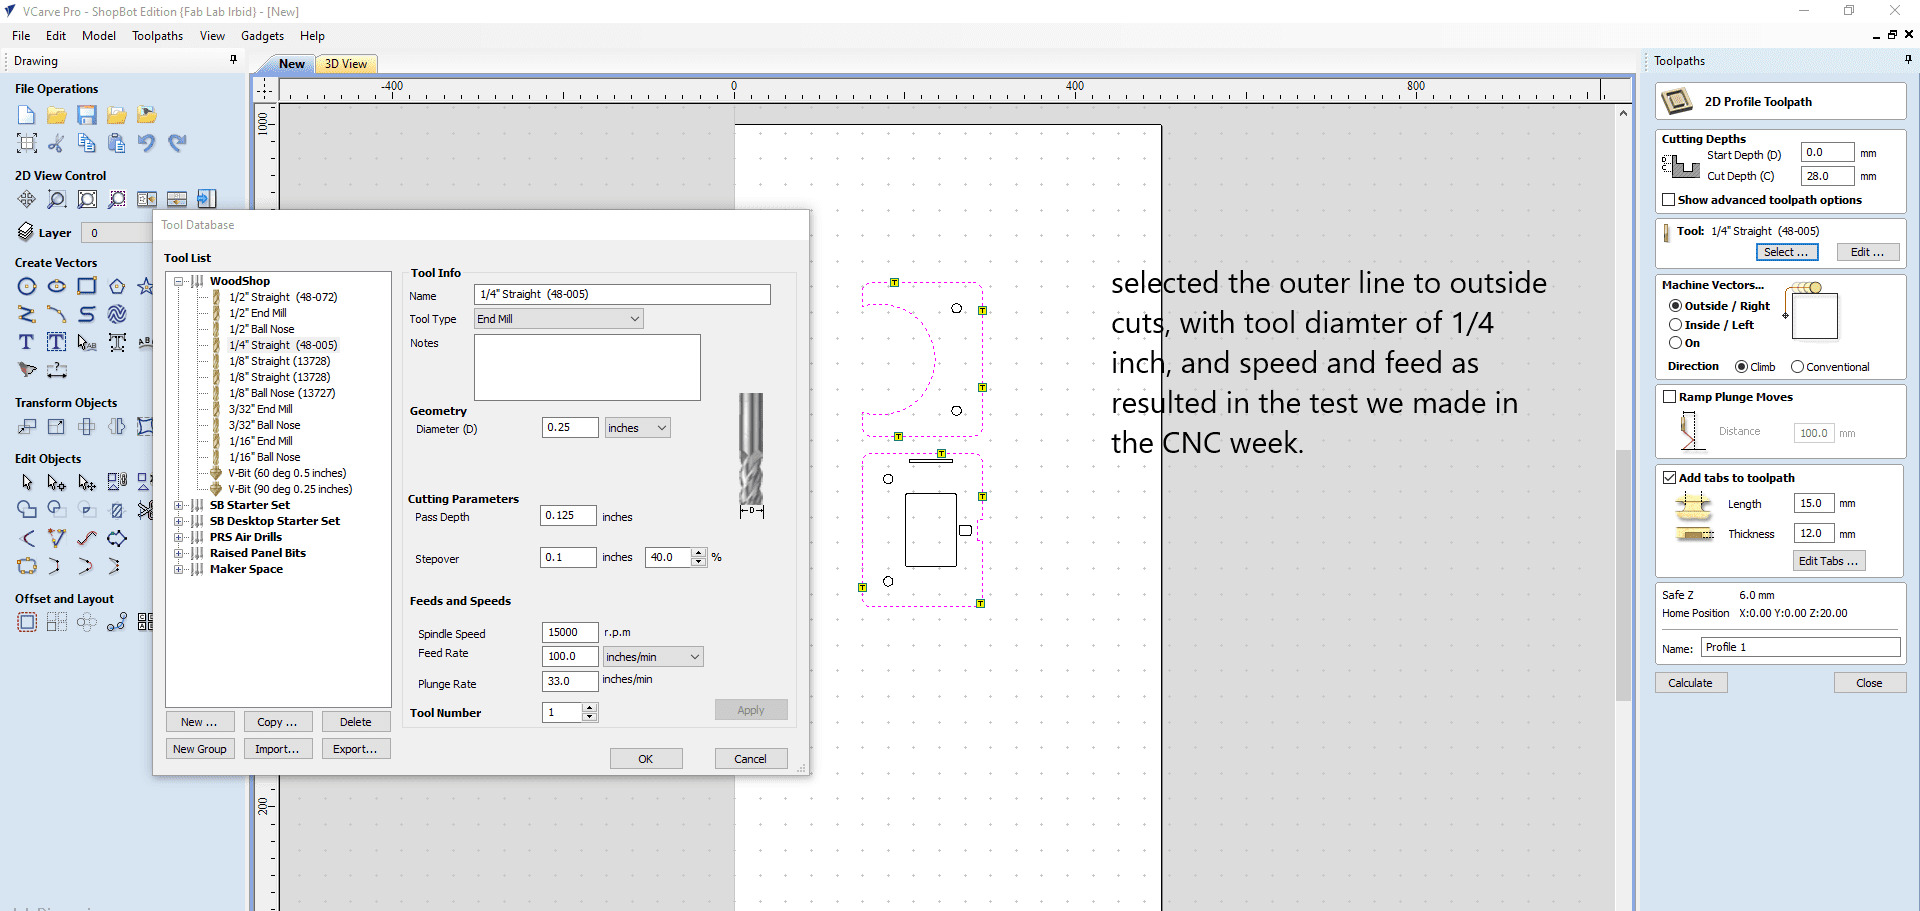
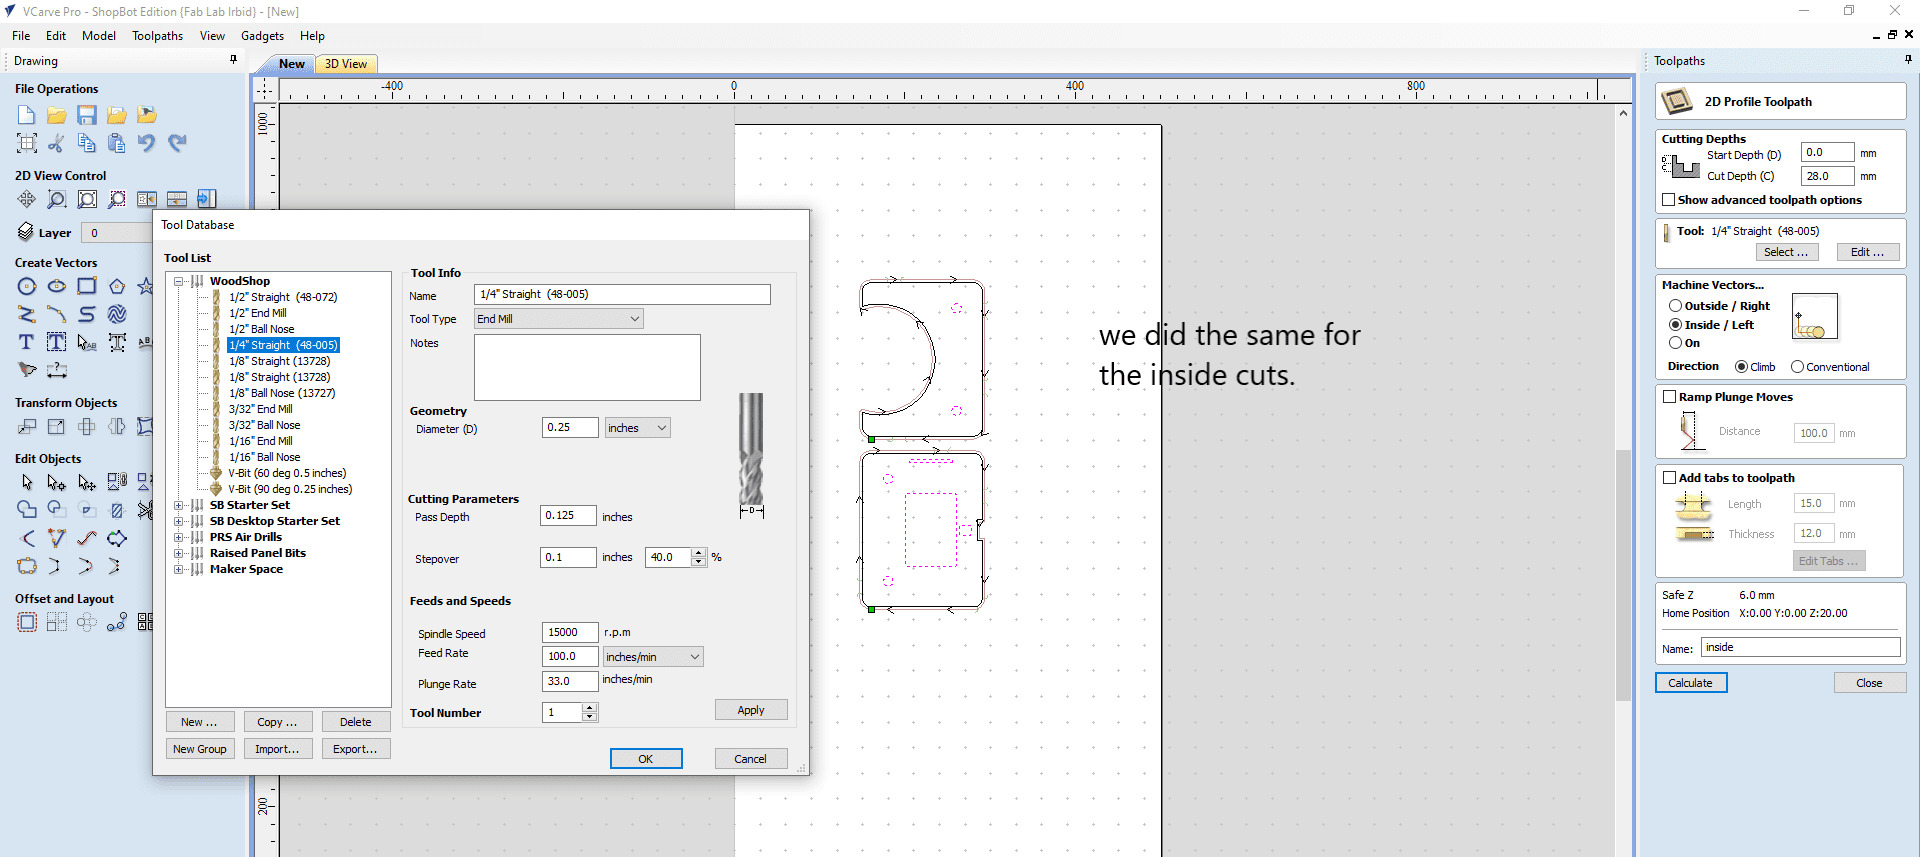
The third part was the manufacturing process with the CNC, as we mentioned before we wanted to make it with CNC. So, Ibrahim started with the fusion file and exported the second, third, and forth layers as DXF to cut them with the CNC.
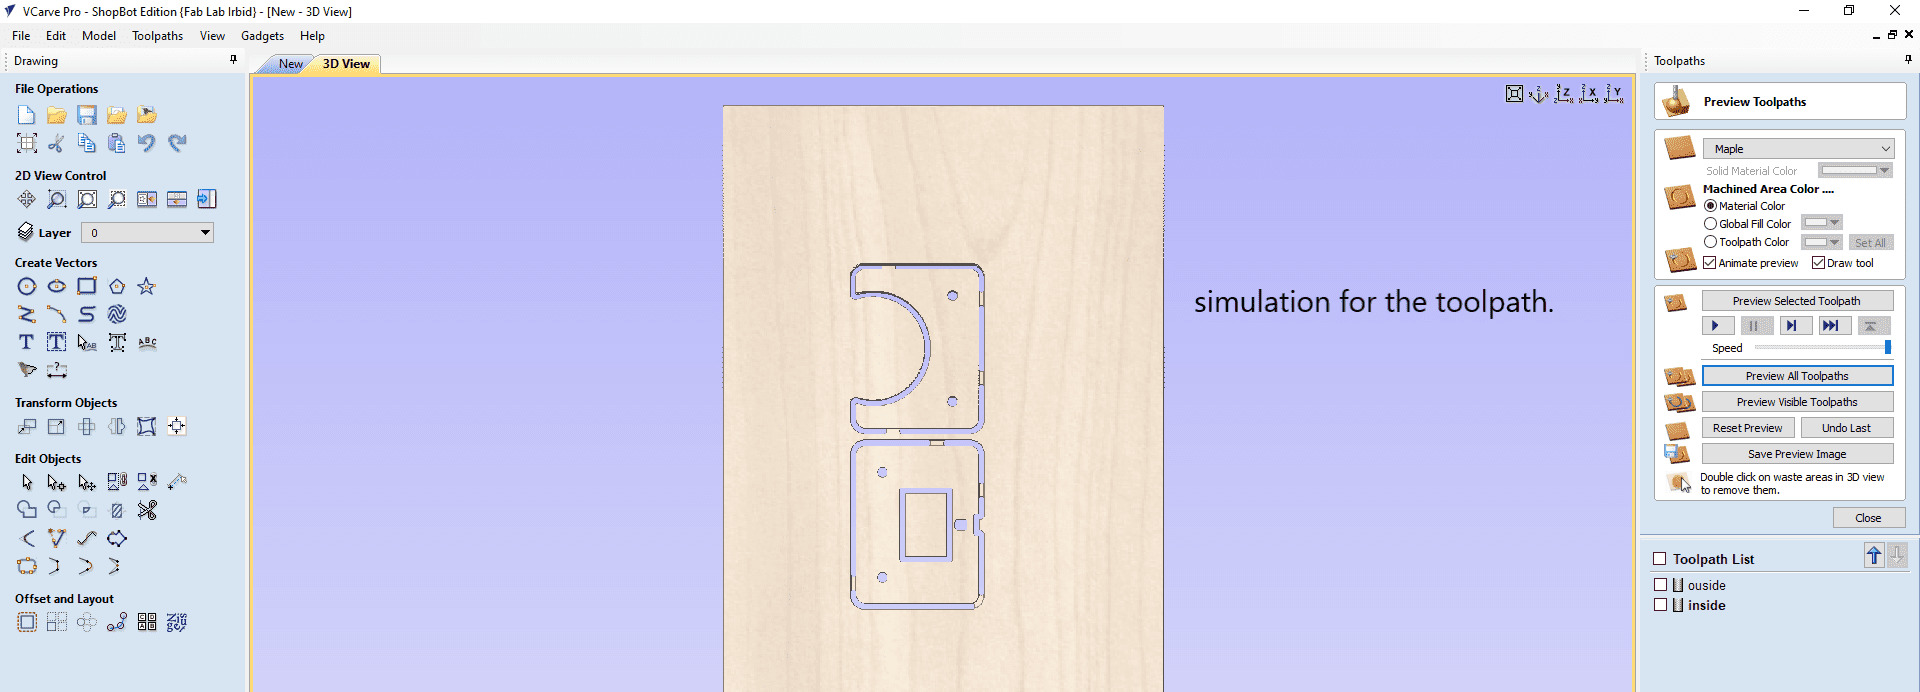
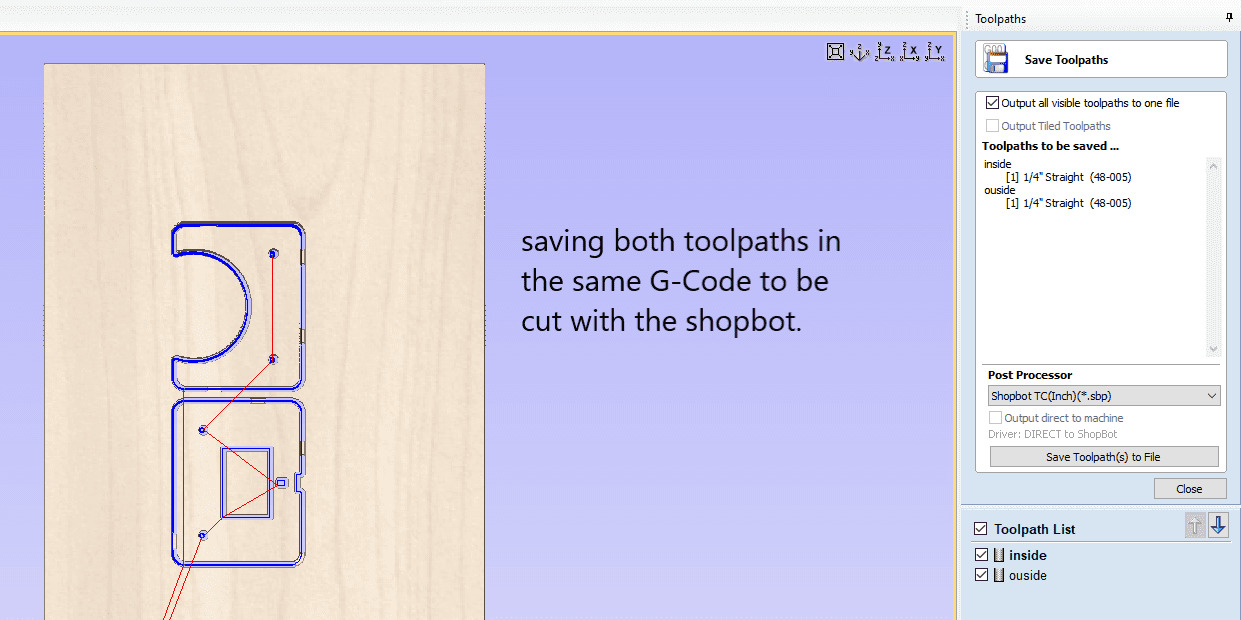
In V-carve, we stared importing the files and the created the toolpaths for the inner and outer cuts.See images below.
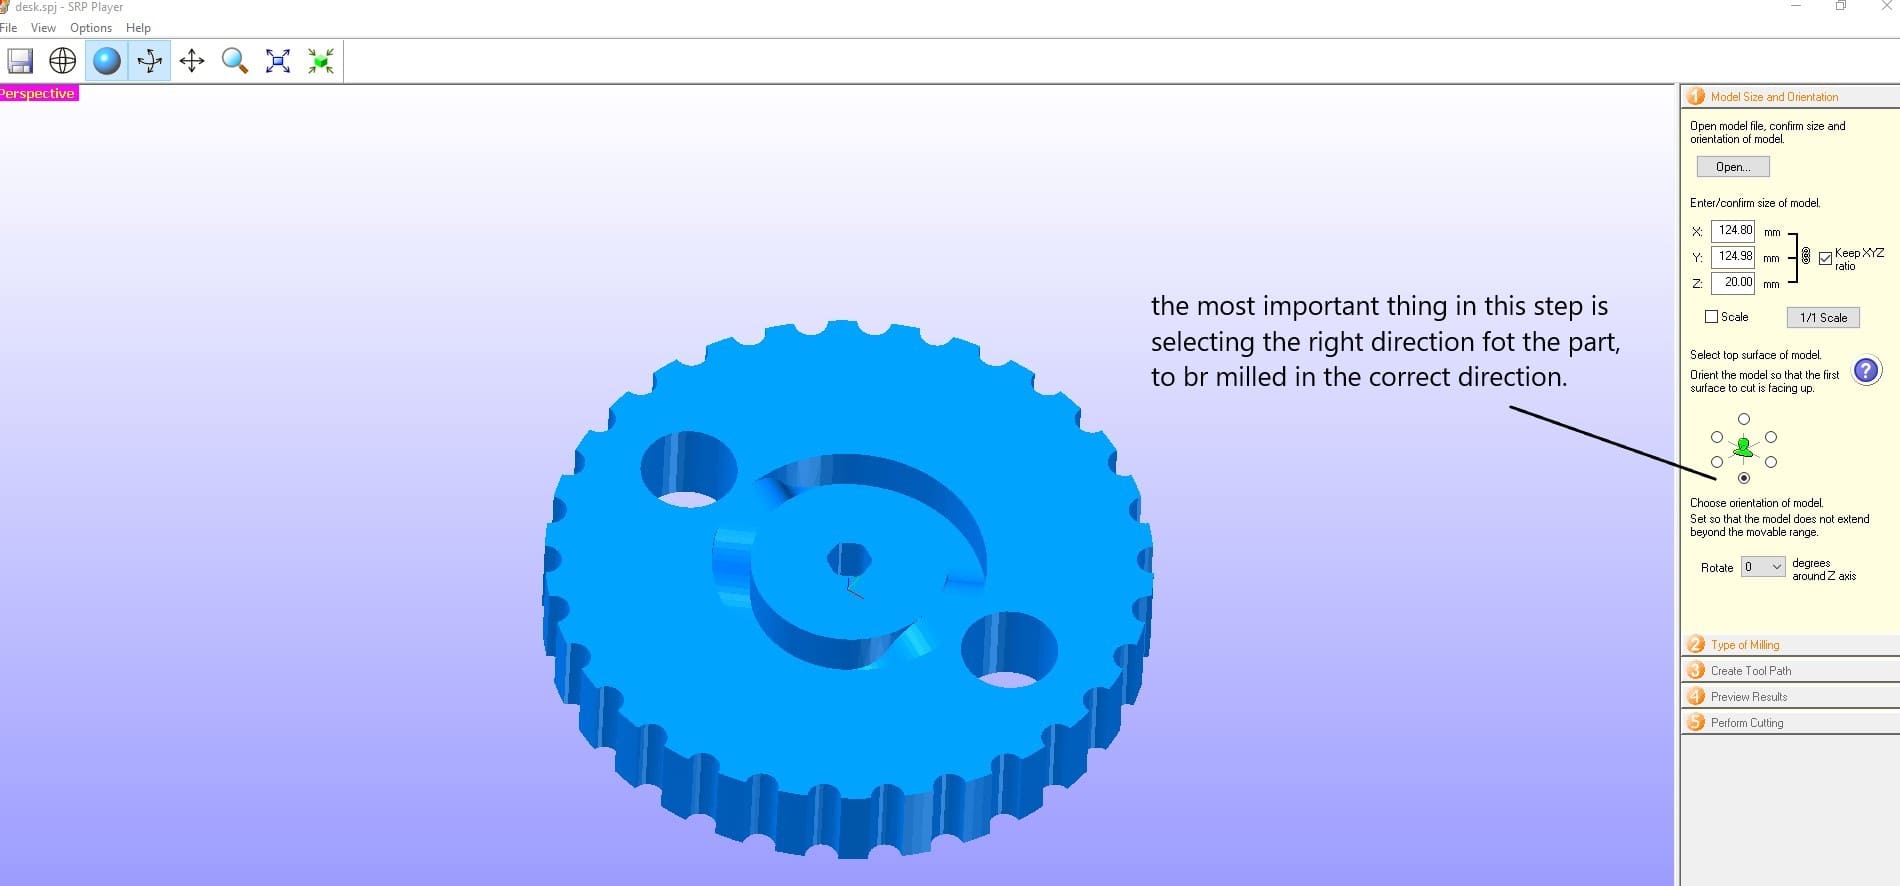
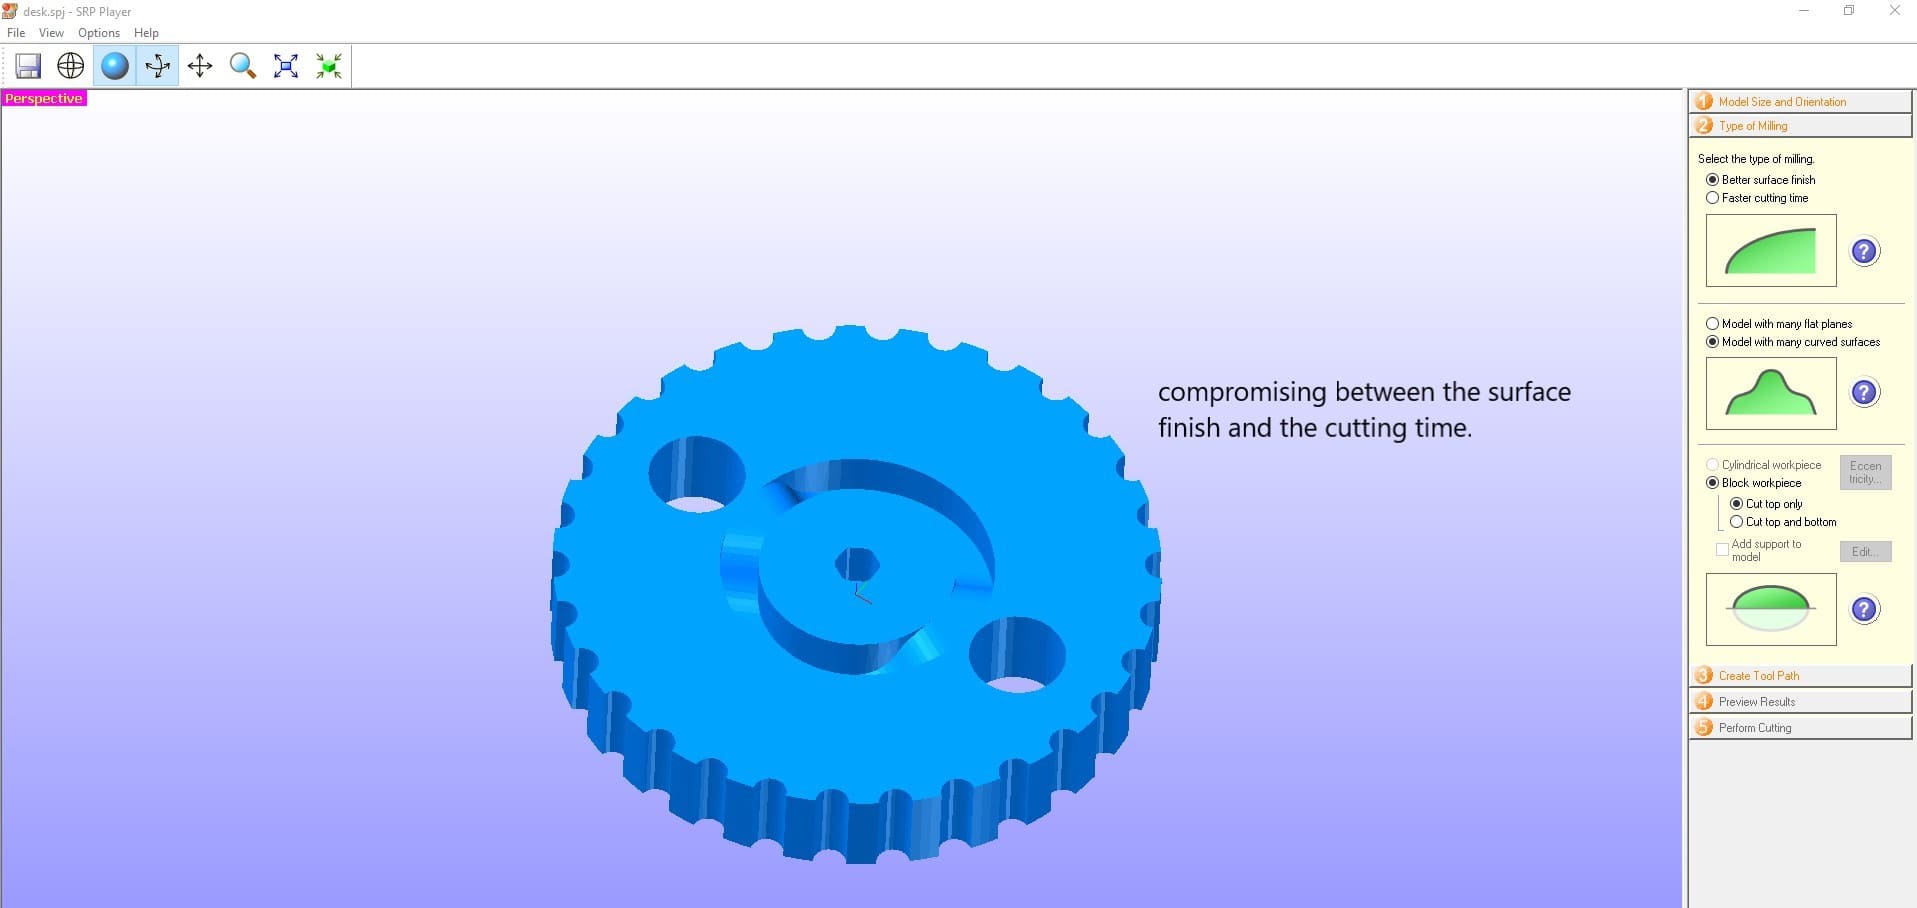
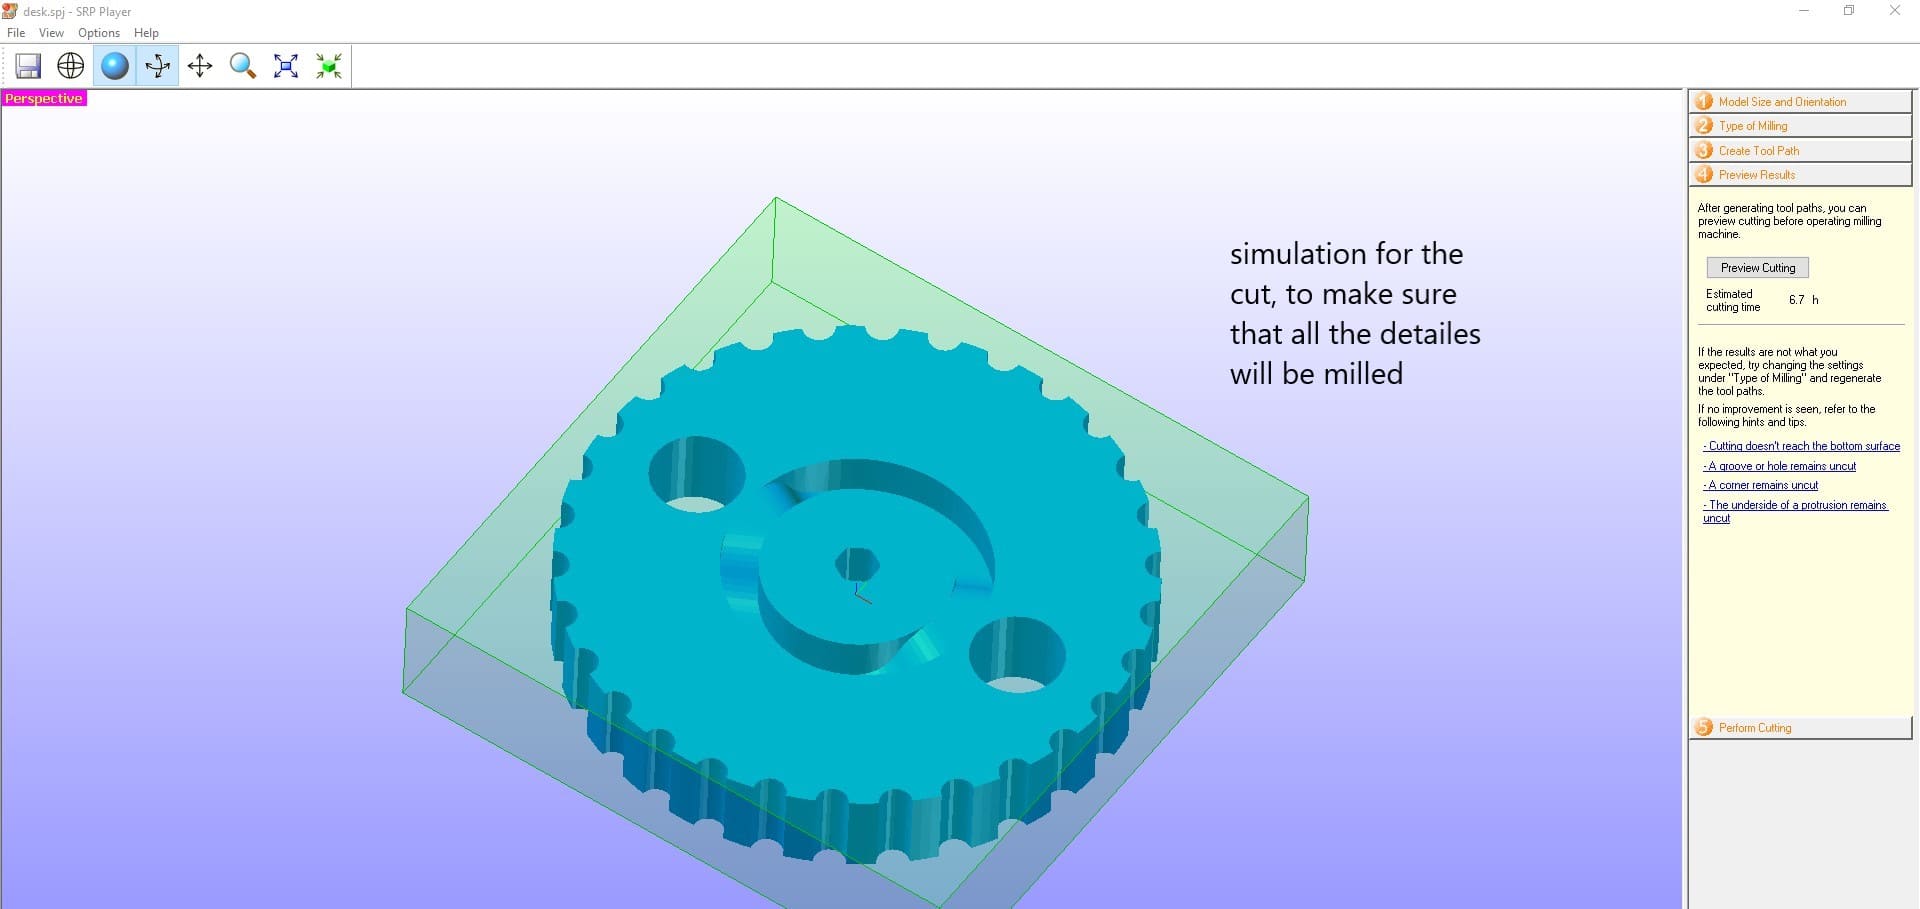
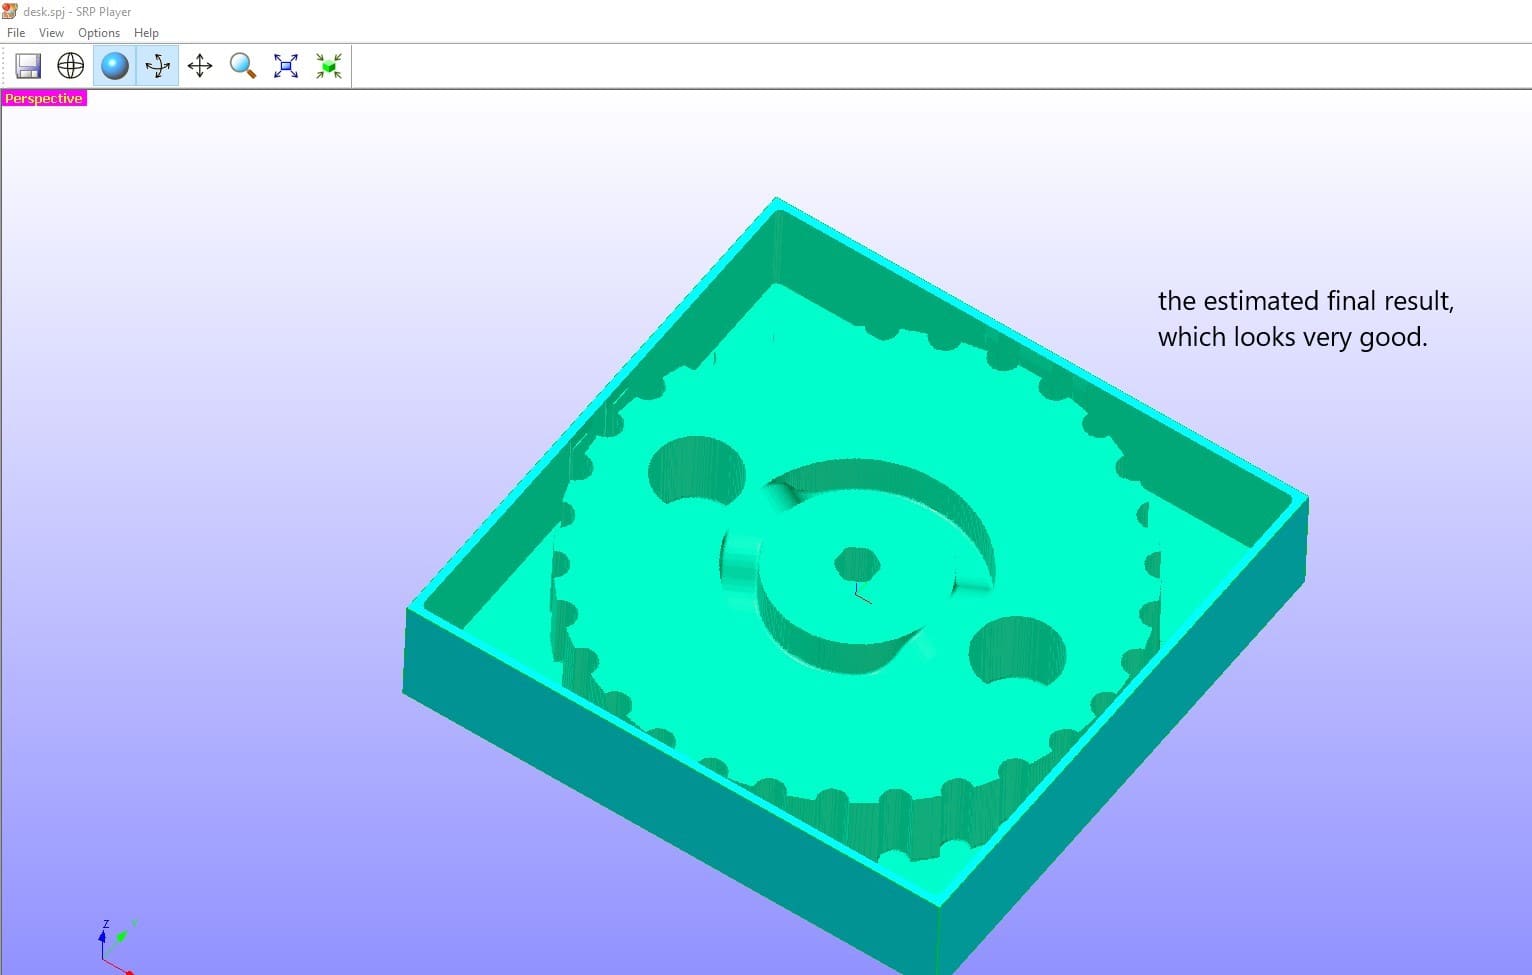
For the parts that needs 3D cuts, we used the Roland since it gives much better finish. With the SRP Player software, imported the STL file and started preparing it as in the following images.


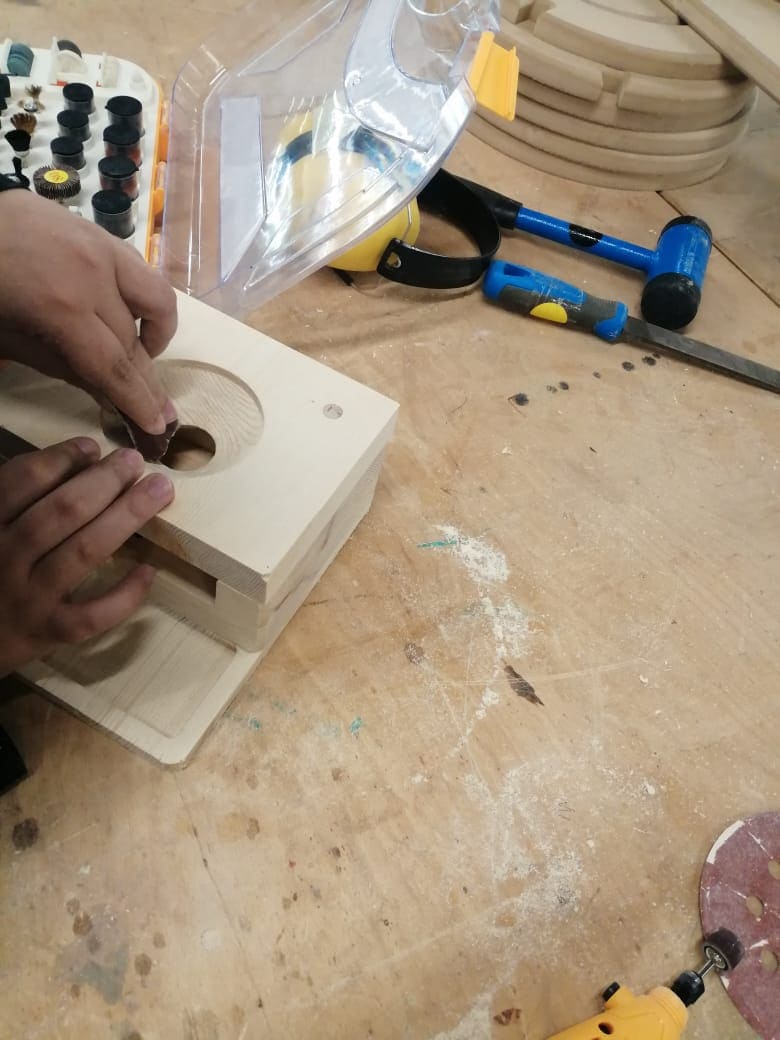
And after that we started assembling them, Mohammed and Ahmad together started sanding the parts and assembling them to make the full machine.
We used glue and dowels to fix all layers together, and sanded them to gather as one part to have a uniform look.
After this stage we had a small machine which can be operated manually, we used the power supply with 5 Volts to test the desks rotation. as the below video.
And tested it with sum ball gum to make sure that the concept is working.
Now for the serious part. We started with the same code that was uploaded to walaa’s board, rotating in one direction and when the wire touche it rotates to the other direction.
It was the most challenging part, since we wanted to control the machine with two inputs, the limit switch and the touch sensor.
So, at the beginning, the limit switch should be pressed (the desk in a position where one of the holes is in the front). And when the touch panel is touched (given order) it should start rotating (half revolution) to allow the gum fall into the hole and when it rotates it will fall to the dish.
To stop the motor at the position where the half revolution is done, we used the limit switch under the desk. So, it has to give a signal when it changes its state from being unpressed to pressed (from a position where the hole is not above the dish, to a position where the hole is above the dish to drop down the gum.
After a lot of testing and debugging, we were able to write a code that can do exactly what we needed. We used two variables to indicate the past position for the desk and the current position.
CODEAnd below you can see the video of the machine working, it’s really very good but of course needs some modifications as we will discuss in the below section.
As a first prototype, its functionality considered to be very good, but we faced some troubles.
The first problem was in the feed process of the Gum Balls into the machine through the feeding cone. From the video below, you can see that the Balls stuck inside the holes and stops the motor in some cases.
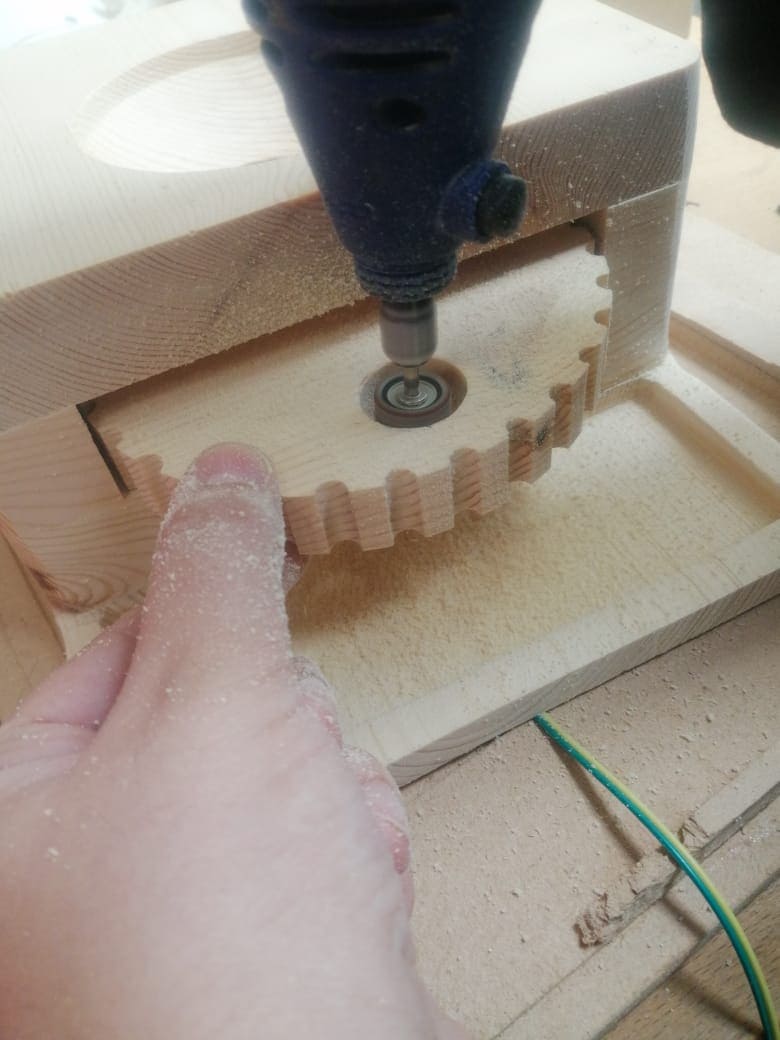
So, using the dremel I started increasing the diameter of the holes to be bigger than the balls, and increased the diameter of the cone itself.
The second problem we faced was the limit switch wires and fixing process, it’s place was little bit small and hard to be accessed; it made the positioning process hard. And we forgot to add holes to hide its wires.
The last problem was the torque of the motor; it stopes from any small force. This problem caused the motor to stop even from the limit switch roller, so we had to fix the limit switch position and added some lubricant to the groove to make the motion much easier.
So, if we had the chance to repeat this machine build, we would make its design much better assembly wise, it should be easier in assembly and disassembly. And we won’t use the same motor that we used, we need to use stronger one.