
Week 11 (Output Devices)
Week 11
The proper way to measure current is in series. To do this you have to connect the multimeter’s probes in the correct ports. In this case we are going to place the RED probe on the mA port to have more accuracy and because the components I’m measuring has a low power consumption. This doesn’t apply to motors. Black always goes in COM. Now to measure current you need to make sure you are measuring DC current on the multimeter and you have to interrupt the circuit and use the multimeter probes to close again the circuit.
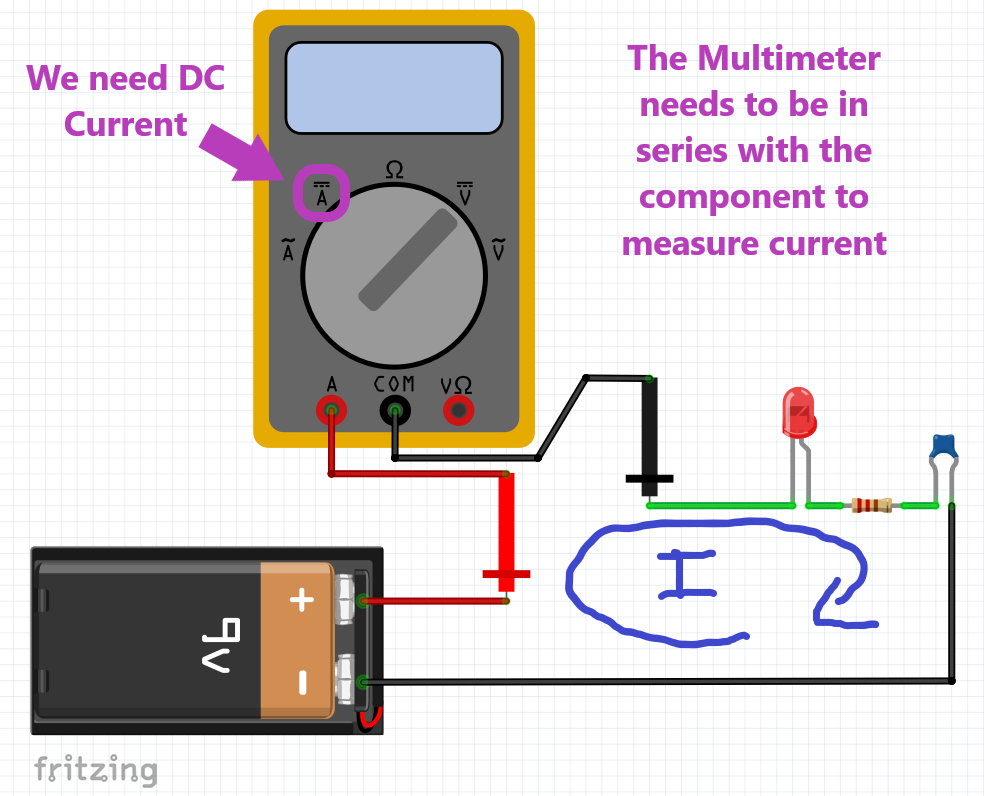
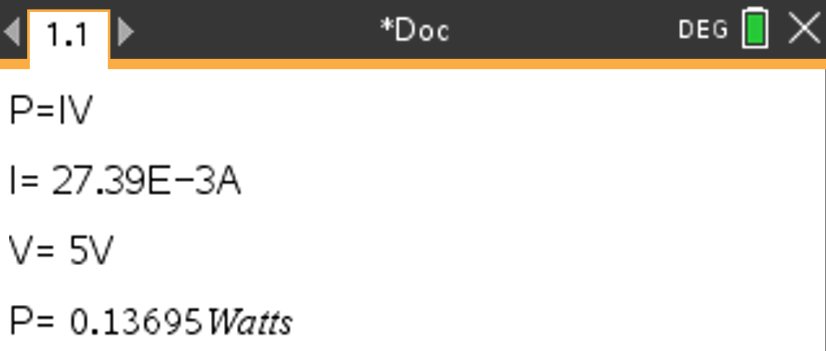
Remember that component that are in series share the same value of current. In this case we need current because we have a fixed voltage value. In this case its around 5V because that’s the output voltage of the FTDI cable I’m using.
Week 11
I’ll star with the LCD screen just in case the servo burns my board. Conveniently this screen works using I2C communication protocol. My PCB already has the pins for easy access with multiple input or output devices. In I2C communication protocol identifying the slaves that are connected to the BUS is crucial for proper operation. In the case of this LCD we use one of Neil's programs to identify the corresponding number.
            // hello.I2C.ino
            //
            // I2C hello-world scanner
            //
            // Neil Gershenfeld 12/8/19
            //
            // This work may be reproduced, modified, distributed,
            // performed, and displayed for any purpose, but must
            // acknowledge this project. Copyright is retained and
            // must be preserved. The work is provided as is; no
            // warranty is provided, and users accept all liability.
            //

            #include <Wire.h>

            void setup() {
               Serial.begin(115200);
               Wire.begin();
               }

            uint8_t address,count;

            void loop() {
               count = 0;
               Serial.println("start scan ...");
               for (address = 1; address < 127; address++) {
                  Wire.beginTransmission (address);
                  if (Wire.endTransmission () == 0) {
                     count += 1;
                     Serial.print("   found ");
                     Serial.print(address,DEC);
                     Serial.print(" (0x");
                     Serial.print(address,HEX);
                     Serial.println (")");
                     }
                  }
               if (count == 0)
                  Serial.println("   no devices found");
               delay(1000);
               }
Please read my documentation on week 9 (Input Devices) to have a better understanding on the I2C serial communication. Long story short we need to identify the slave address of the device to enable I2C.
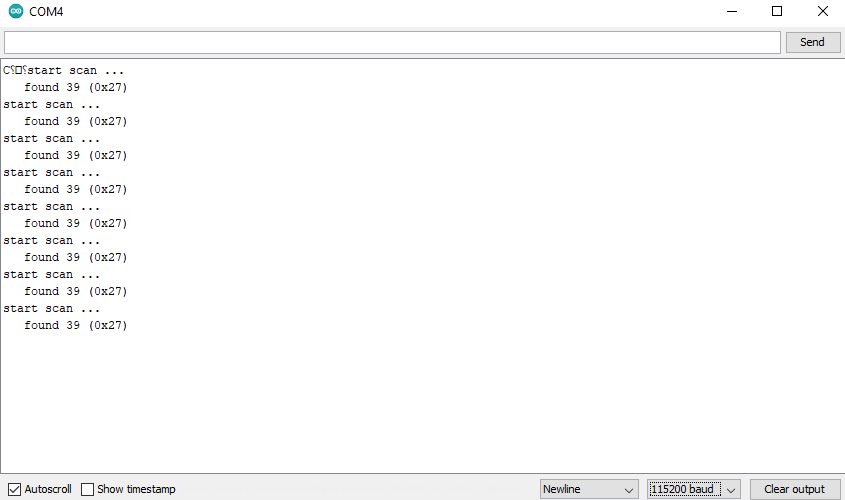
After opening the serial monitor the number the I need is 0x27.. After Finding this now I can execute Neil's 2nd code.
              //
              // hello.LCD.I2C.ino
              //
              // LCD I2C hello-world
              //
              // Neil Gershenfeld 12/8/19
              //
              // This work may be reproduced, modified, distributed,
              // performed, and displayed for any purpose, but must
              // acknowledge this project. Copyright is retained and
              // must be preserved. The work is provided as is; no
              // warranty is provided, and users accept all liability.
              //

              #include <LiquidCrystal_PCF8574.h>
              #include <Wire.h>

              LiquidCrystal_PCF8574 lcd(0x27); // set LCD address 0x27
              int count = 0;

              void setup() {
                 lcd.begin(16,2); // initialize 16x2 LCD
                 //lcd.begin(20,4); // initialize 20x4 LCD
                 lcd.setBacklight(255); // turn on backlight
                 lcd.home(); // go home
                 lcd.clear(); // clear display
                 lcd.print("Hello World!"); // print text
                 lcd.setCursor(0,1); // move cursor
                 lcd.print("Count: ");
                 }

              void loop() {
                 lcd.print(count);
                 lcd.setCursor(7,1);
                 count += 1;
                 }