Final project (draft)
When I decided to tell my boss about my plans to finish up the FabAcademy, I told her because there was a plan. Back when I was intern at the company, we already had the problem that will be described down below. I also wanted to work on it, and even started a prototype but there were more pressing matters that had to be done for my thesis. Therefore, this problem never got the attention that it needed.
The problem
During the past months I had the honour to observe several workshops about micro-controllers given by Ingegno. And there were a few things that caught my attention
First of all: out of children (and adults that are new to this) might be overwhelmed the moment they see a breadboard or microcontroller in front of them. Especially if they never
came into contact with a micro-controller before.
Second: a breadboard has a lot of small holes where you pin the jumperwires in. Even though the teacher in question was using pictures that were being enlagerd due to a projector,
some children still found it difficult to follow where the jumper wire needed to be added.
The Ingegno Makerspace feels that teaching microcomputers to children and adults can be quite demanding due to the small insert holes of the breadboards. To make this more easy and understandable they have asked to develop a giant breadboard with working components to explain the basis of physical computing to children and adults.
Next to that, Ingegno also uses their self developed LED up Kidz. As this is still one of the first versions, it is time to make the design a bit updated and review the project. In the end we’d like to combine the giant breadboard with the LED up Kidz.
What
A giant breadboard, including components that can be used to teach children about micro-controllers. The teacher gets a giant breadboard that can be used as a board, but also the children get a bigger than usual breadboard.
The second part of the assignment is to make giant components, that work. For now we keep it down to 3 components: a LED, resistor and push button.
The last part of the assignment is to adapt the LED up Kidz to the breadboard - or the other way around. The LED up Kidz is a workshop that we give to children aged 8 tot 14 to learn about SMD soldering, electronics production and programming.
Where
Most of the prototyping will take place in the Lab in Drongen. As Amy is connected to the FabAcademy, most of the electronics will be produced there.
How
During the development of the project, we’ll use several known prototyping techniques like 3D printing and laser cutting. But we’d also like to use some time to test out new things. For example textile and electronics, or DIY projects combined with high tech. For example. A lot of sites and companies are swearing with conductive ink or paint. But or, it arrives and doesn't work, or it dries out to fast. What if we combine making our own ink with hightech electronics like a breadboard made with it. Or combine our conductive paint with textiles.
Planning
The assignment will be prototyped during the FabAcademy 2019. This course runs from the middle of january until the end of june.
- 16th of january 2019: Start Academy
- 13 february: electronics production: Hello World
- 27 february: electronics design: LED up KidZ
- 13 march: embedded programming
- 3 april: input devices: LED up Kidz
- 10 aprl: output devices: LED up KidZ
- 17 april: interface and app programmming
- 24 april: networking and communications
- 1 may: mechanical design: Chocolate 3D printer
- 8 may: machine design: Chocolate 3D printer
- 22 may: application and implication
- deadline prototype: 12th of june 2019
- deadline: 19th of june 2019. Includes everything
Whishes and demands
Demands
- A Giant breadboard, size circa A0 format () x1
- Small, kids breadboards, size circa A4 format () x12
- Components that fit the boards, including: LED, resistor and possibly a pushbutton.
- Connections that fit the boards and are conductive
- Transportable
- Easy in setup as time before workshops is limited
- See through, so that the children can see how the connections run
- Connections to the LED up KidZ.
Whishes
- Fitting within really useful boxes/li>
- Previous tests showed us that 3D printed connections are not ideal for the connections between jumper wires and breadboard.
Deliverables
- A working prototype/product
- A slide (1920x1080px) with name, project name, fablab name, photo/render/sketch of project, brief discription, function = money shot
- A project page on the website of FabAcademy student. With info on project
- Made a BOM of the project
- Link all the pages that have to do with the final project to the main final project page
- Link presentation.png and presentation.mp4 to final project page
- Add all of the original designfiles in the archive.
- Add a licence (standard one for Ingegno)
- Acknowledged work done by others.
- Full documentation of the project including instructables if needed.
Sketches
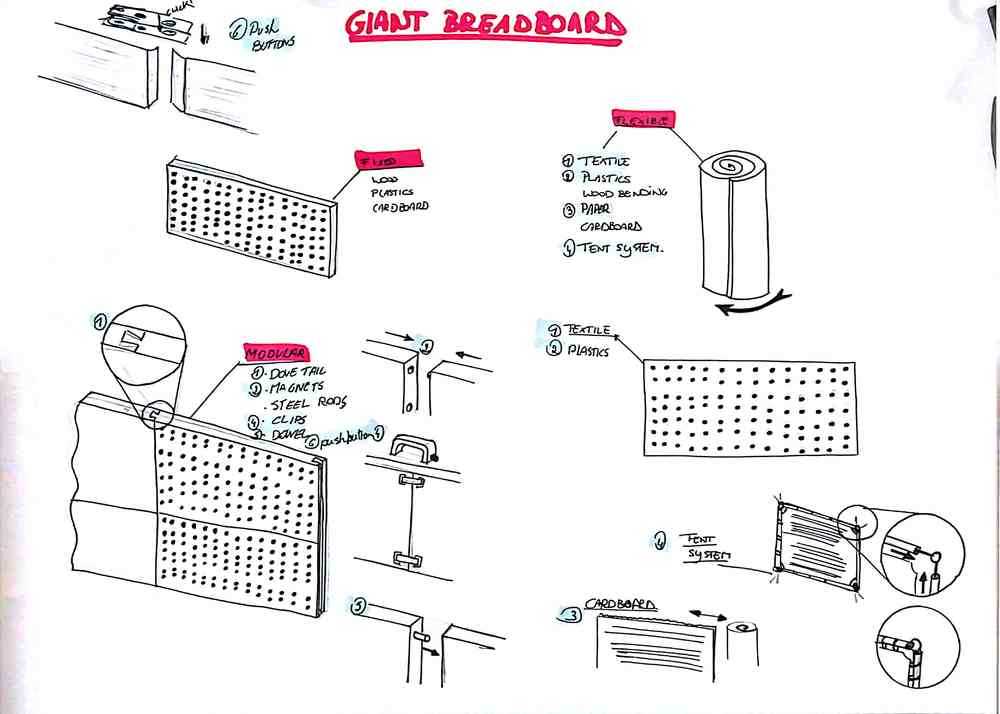 First sketch: possible ways for making the giant breadboard
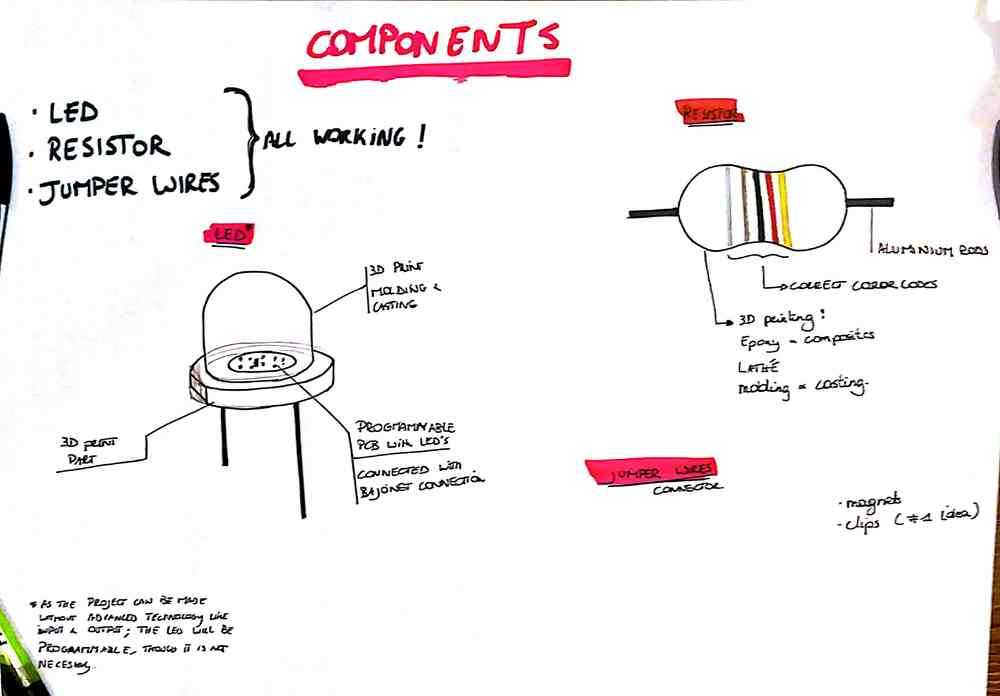 Second sketch: what components will I include?