Week 10 - Moulding and Casting.
Posted on April 27, 2019
For this week's assignment I made a food safe mould, to cast chocolate, sorbet, candy, jelly, caramel, or any liquid sweets. I wanted to create the official "FabChocolate", this chocolate would be used to give out as corporate gifts or to lab visitors. The Mould I created had the name of my local lab (Fab Lab UAE) on the front, but this can be modfied to any Fab Lab around the world, and on the back it had my name engraved, you can replace this with any other name or saying.
The program I used:
Fusion360 (3D Design)
This is my 3D Model of the FabChocolate Mould that I created using Fusion 360.
Alternatively you may download the file here.
This assignment can be broken down into five parts:
Making the 3D Model
Milling the Mould
Casting the Food Safe Silicone
Making the Chocolate
Casting the Chocolate
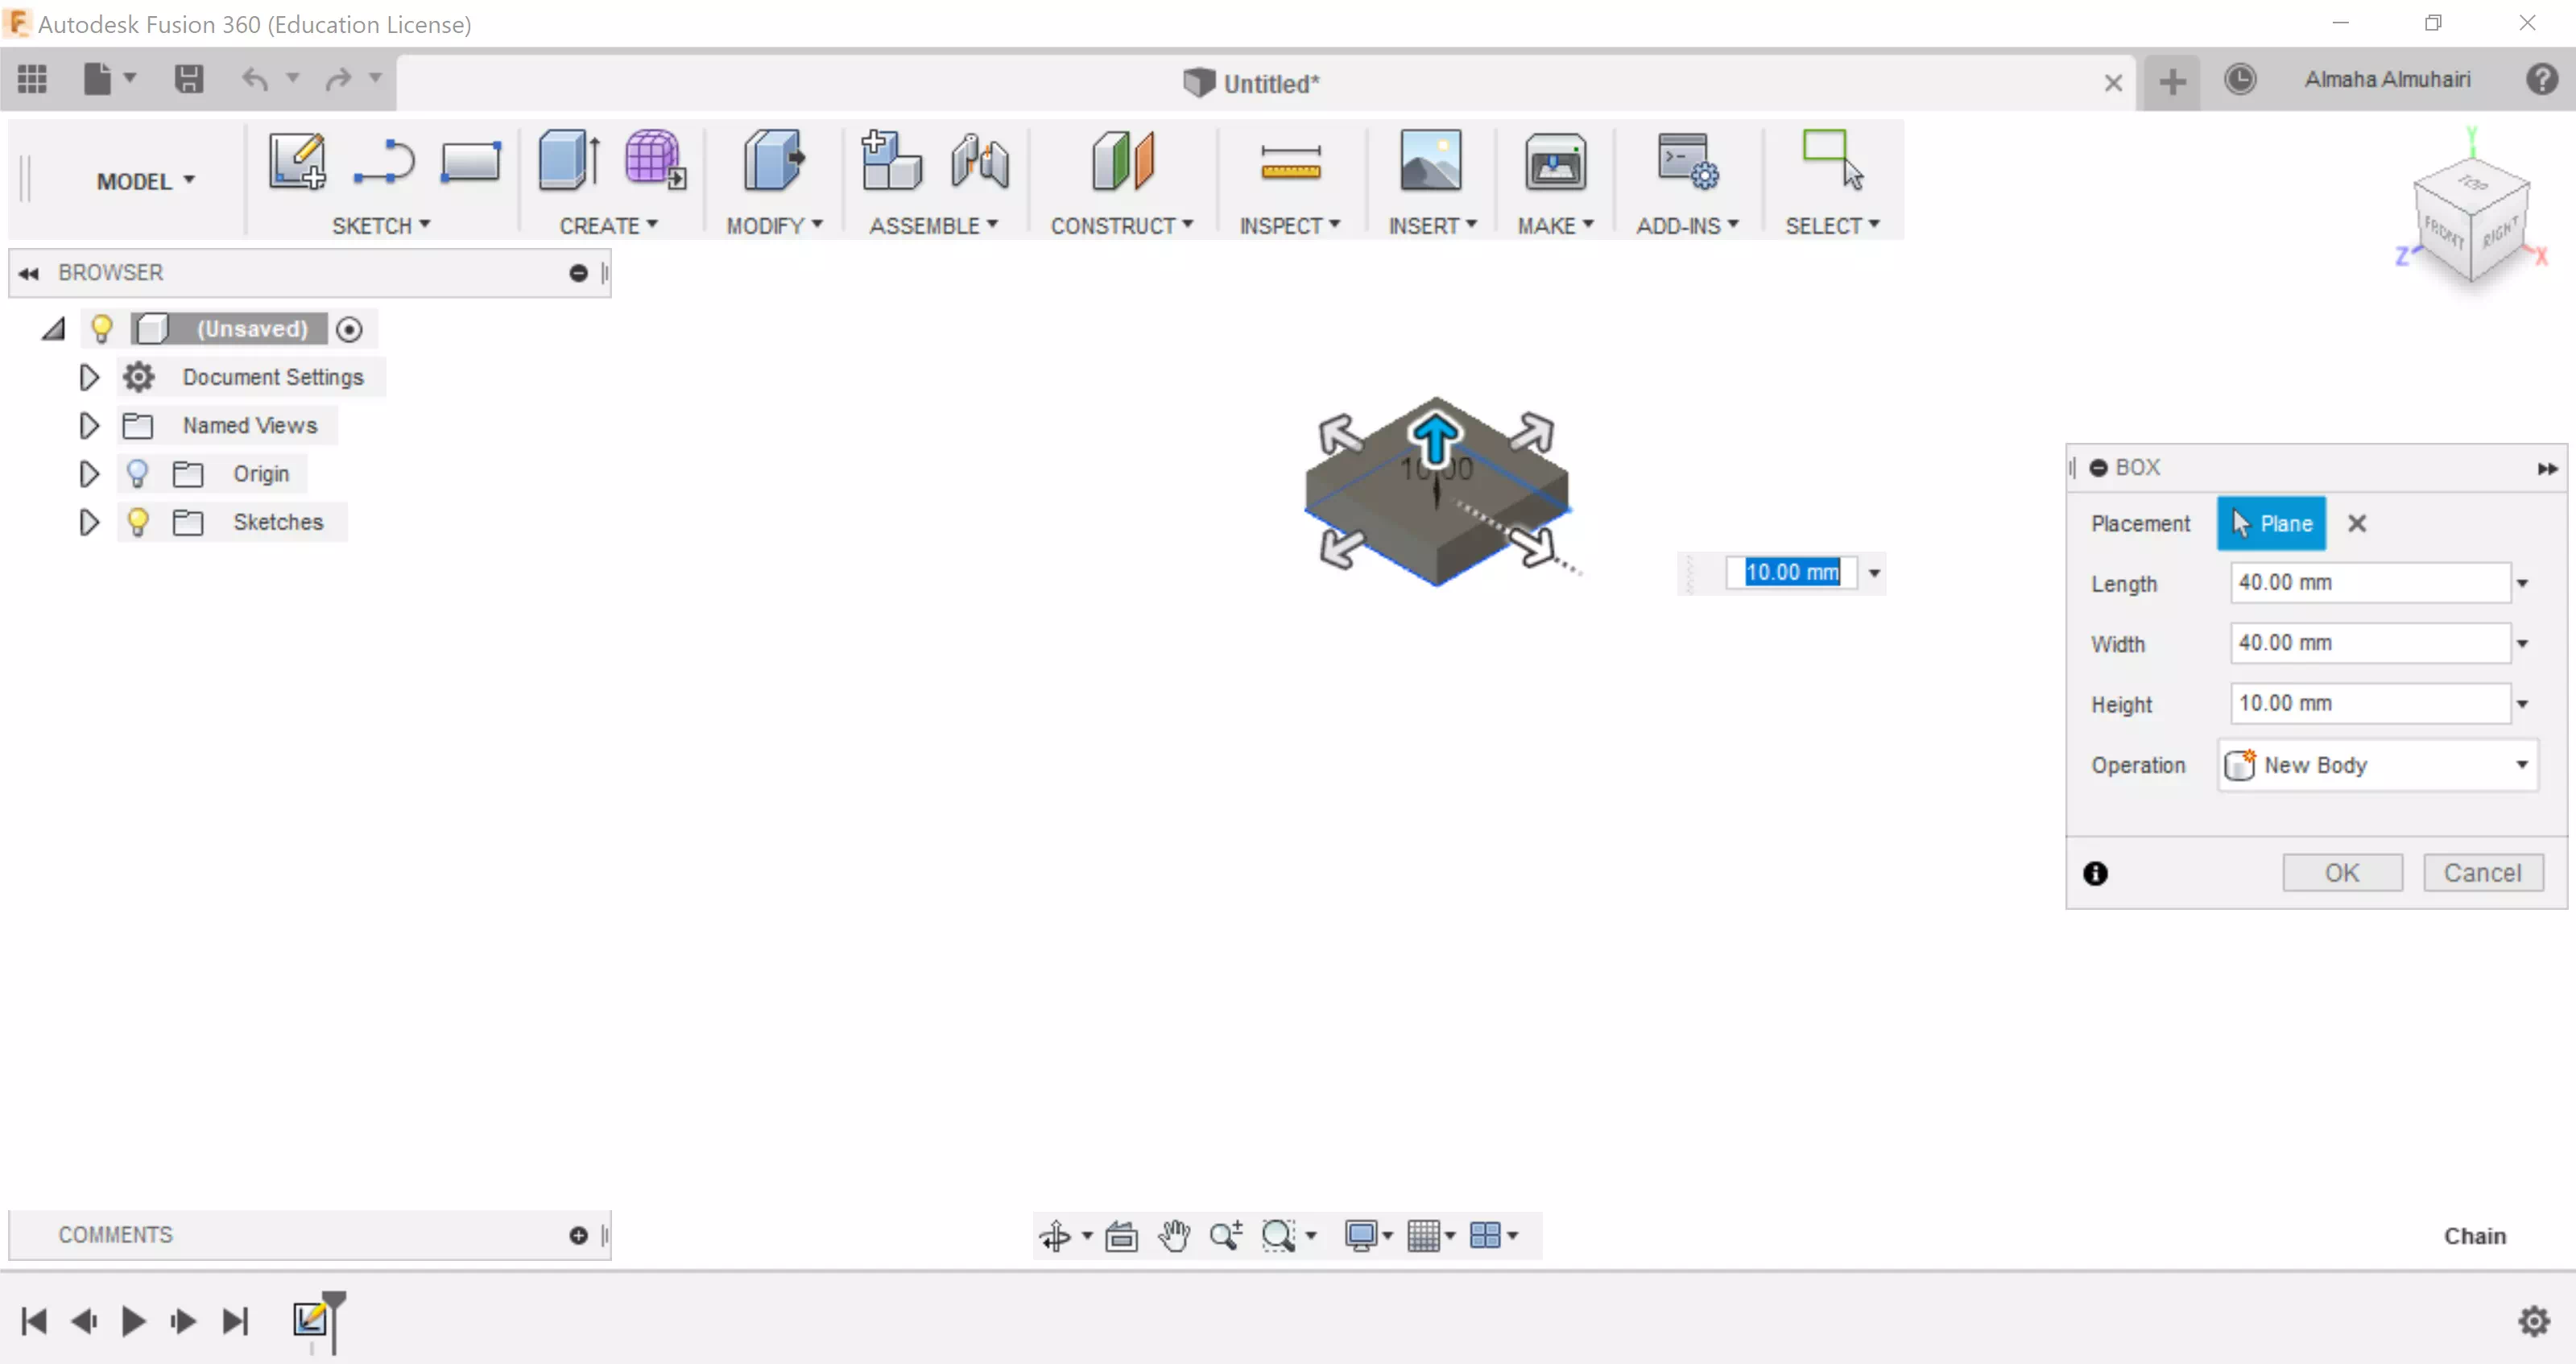
Start by creating a box. Use the create tab, My dimensions are 40mmL by 40mmW with a 10mm height.

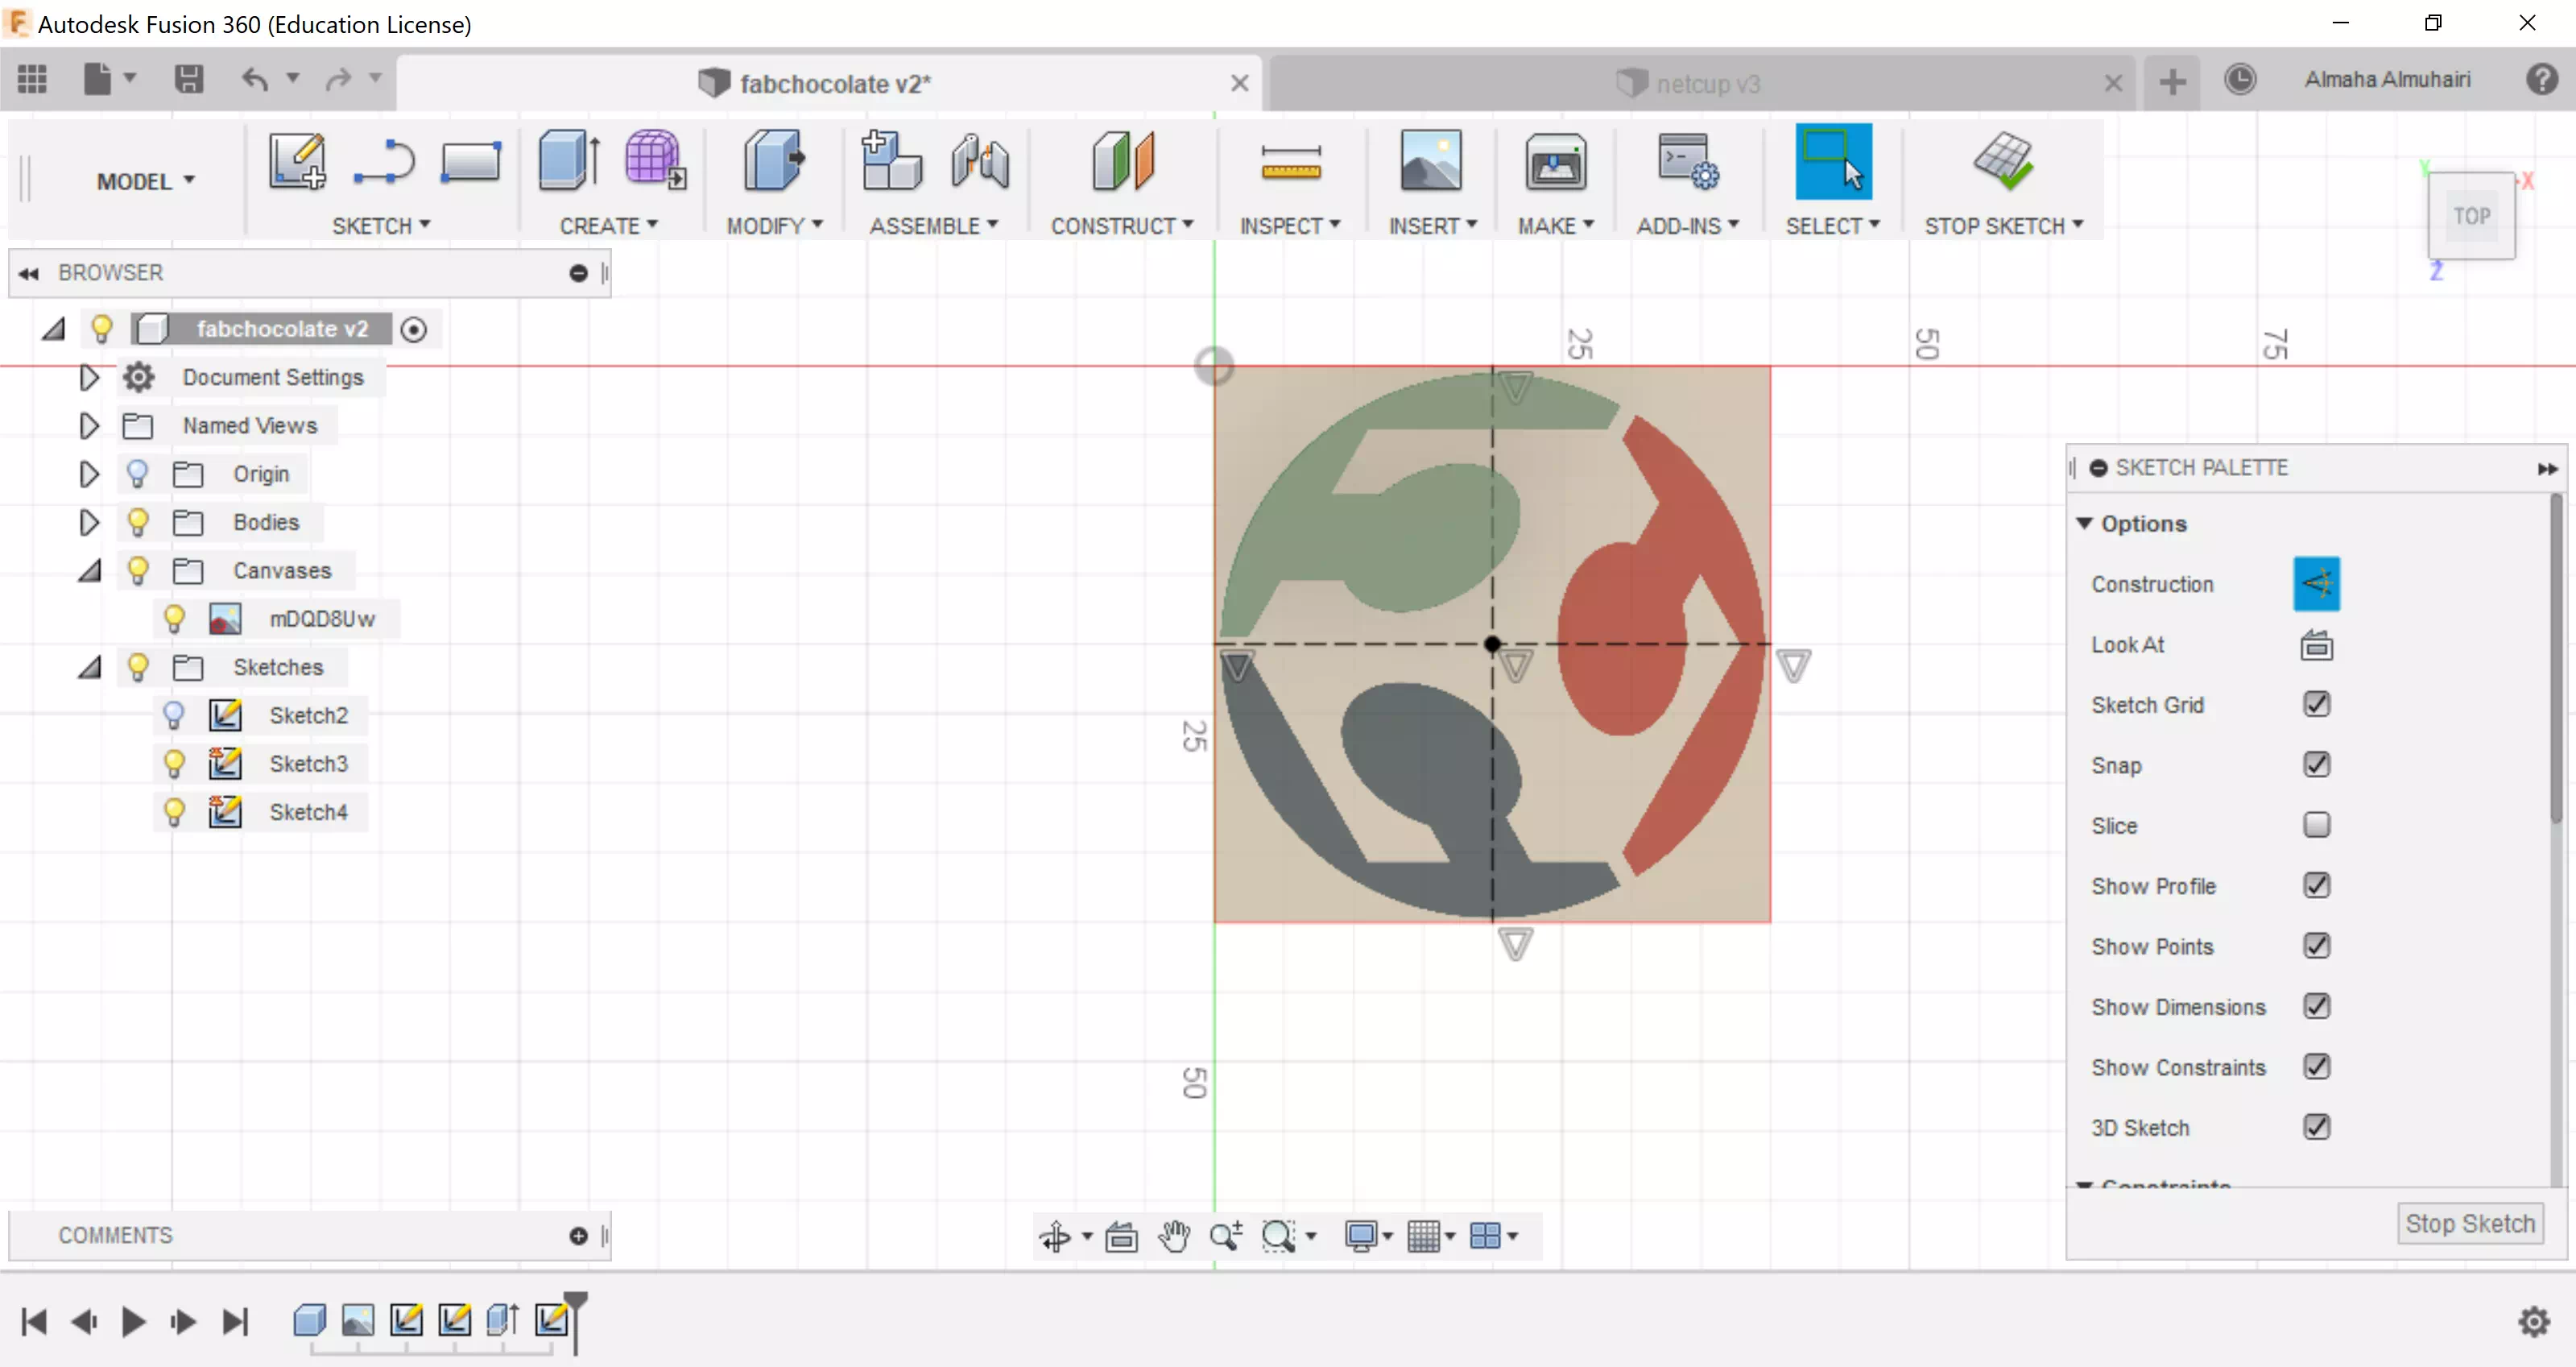
Attach the fablab logo image, In the Insert Tab using the attach canvas command, attach the canvas over the box created, by selecting the top face.
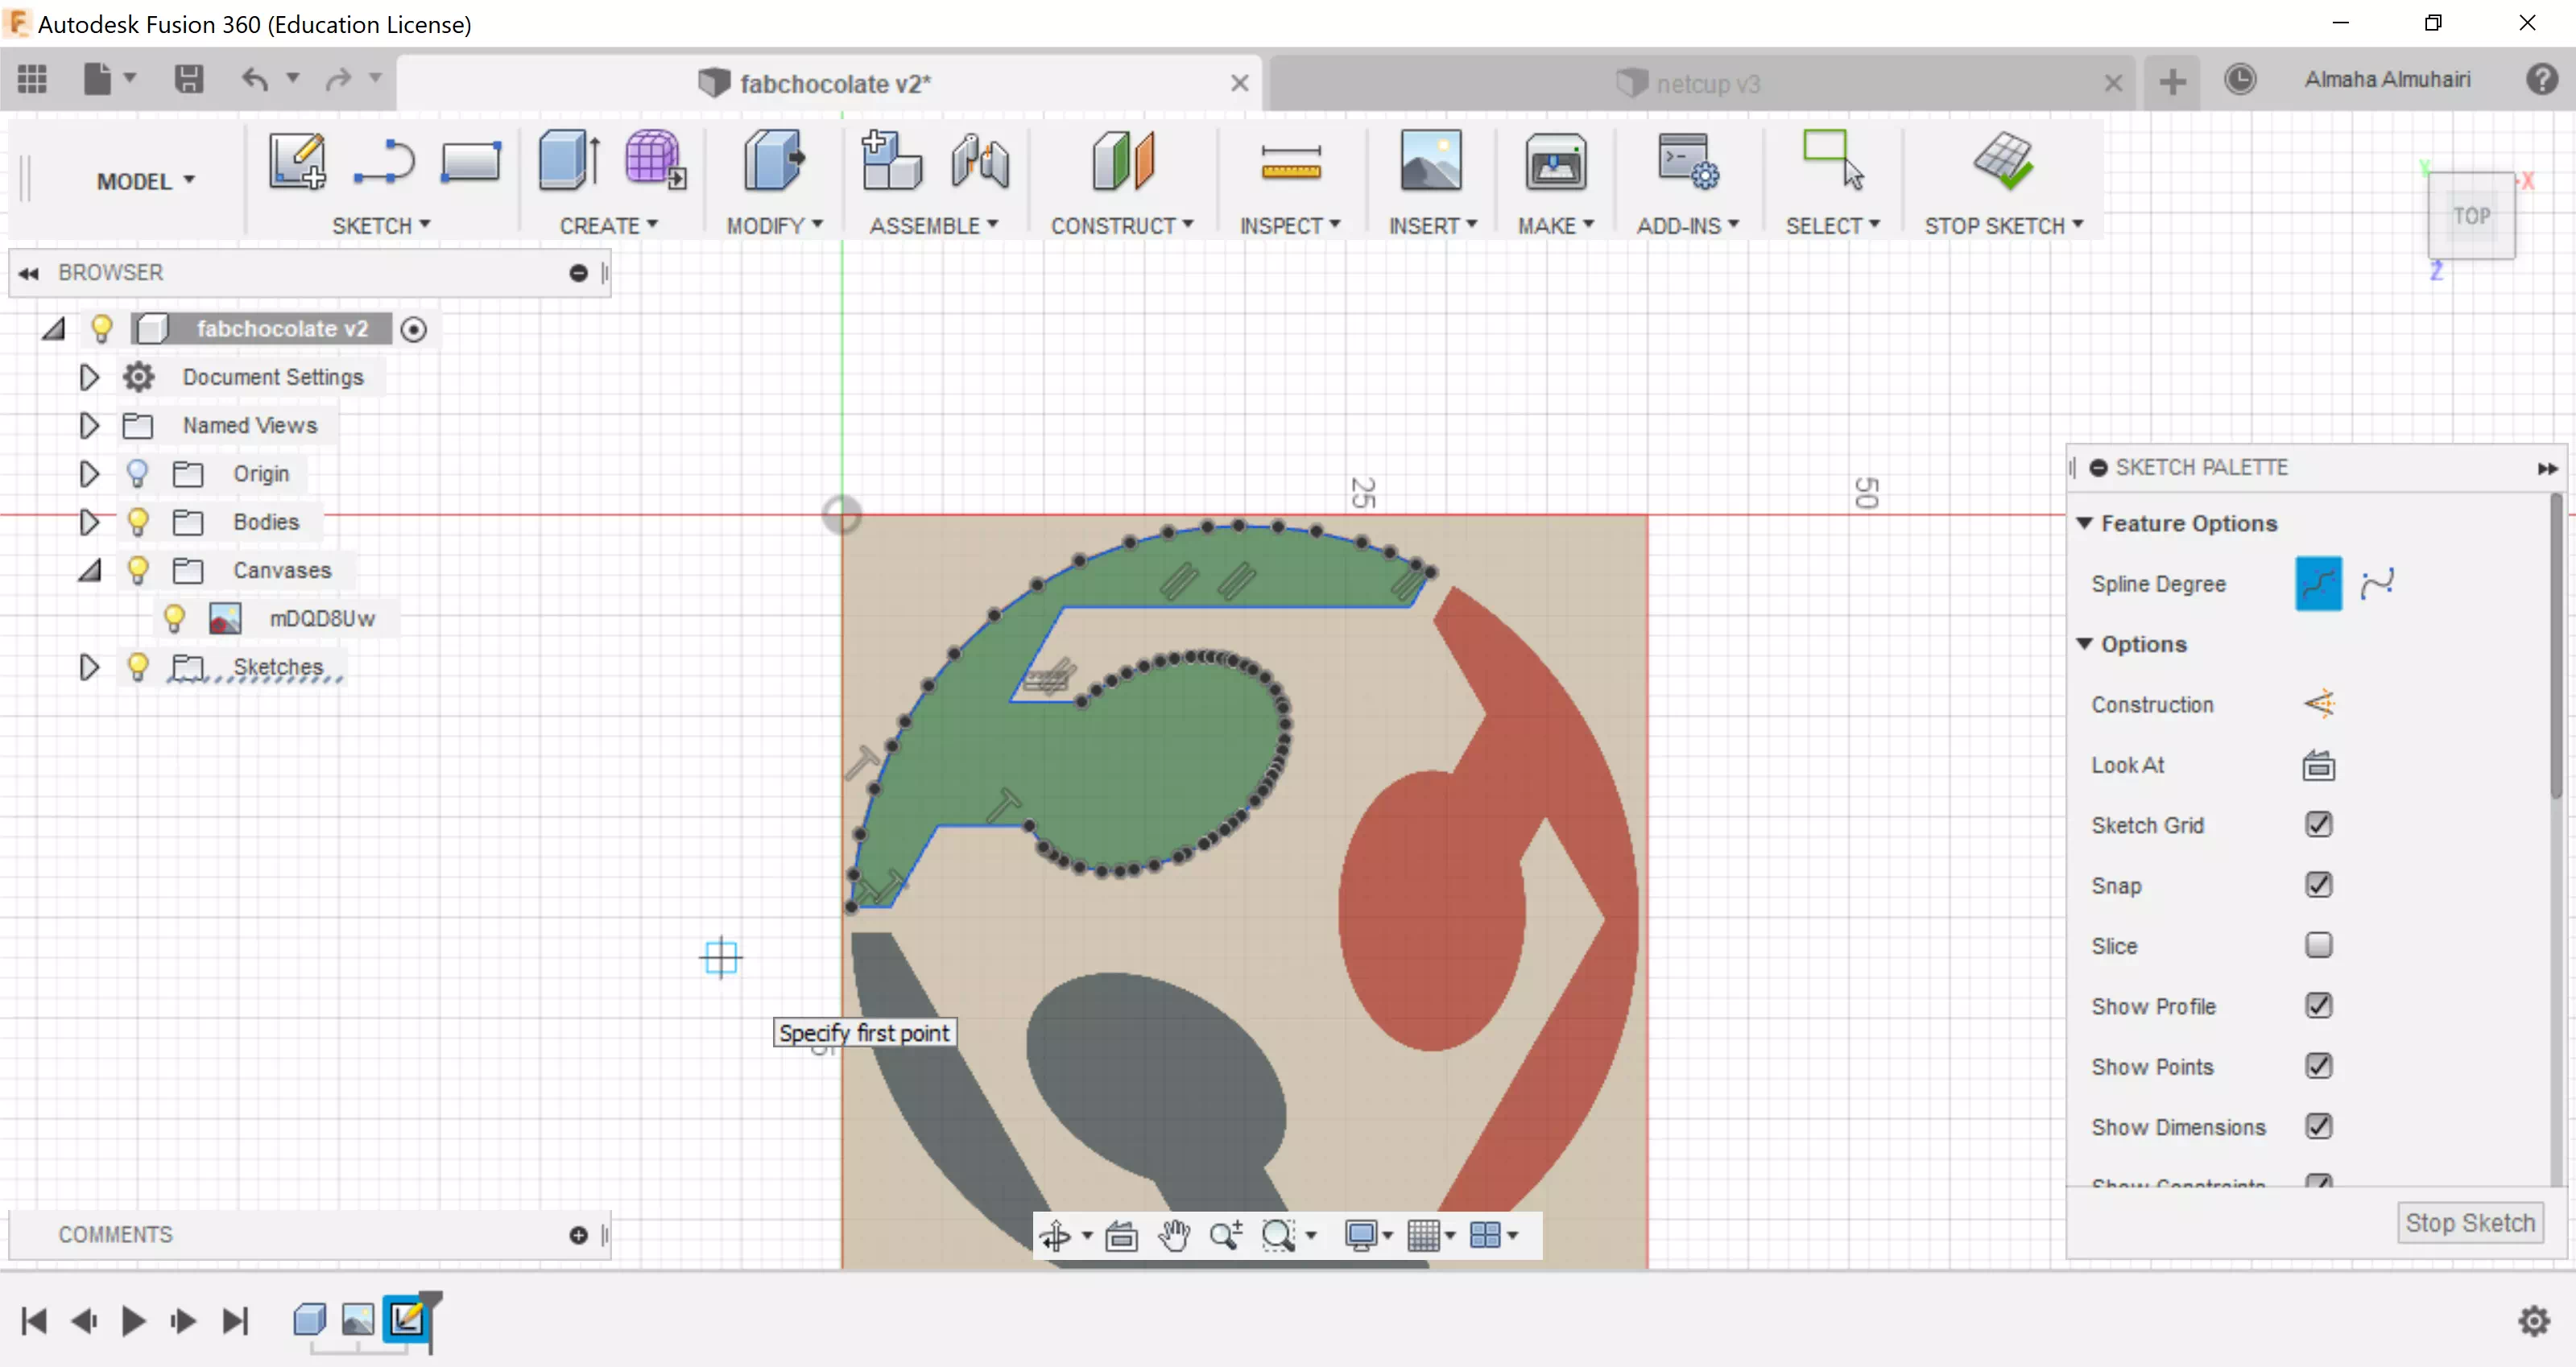
Using the sketch tools line and spline trace the image.
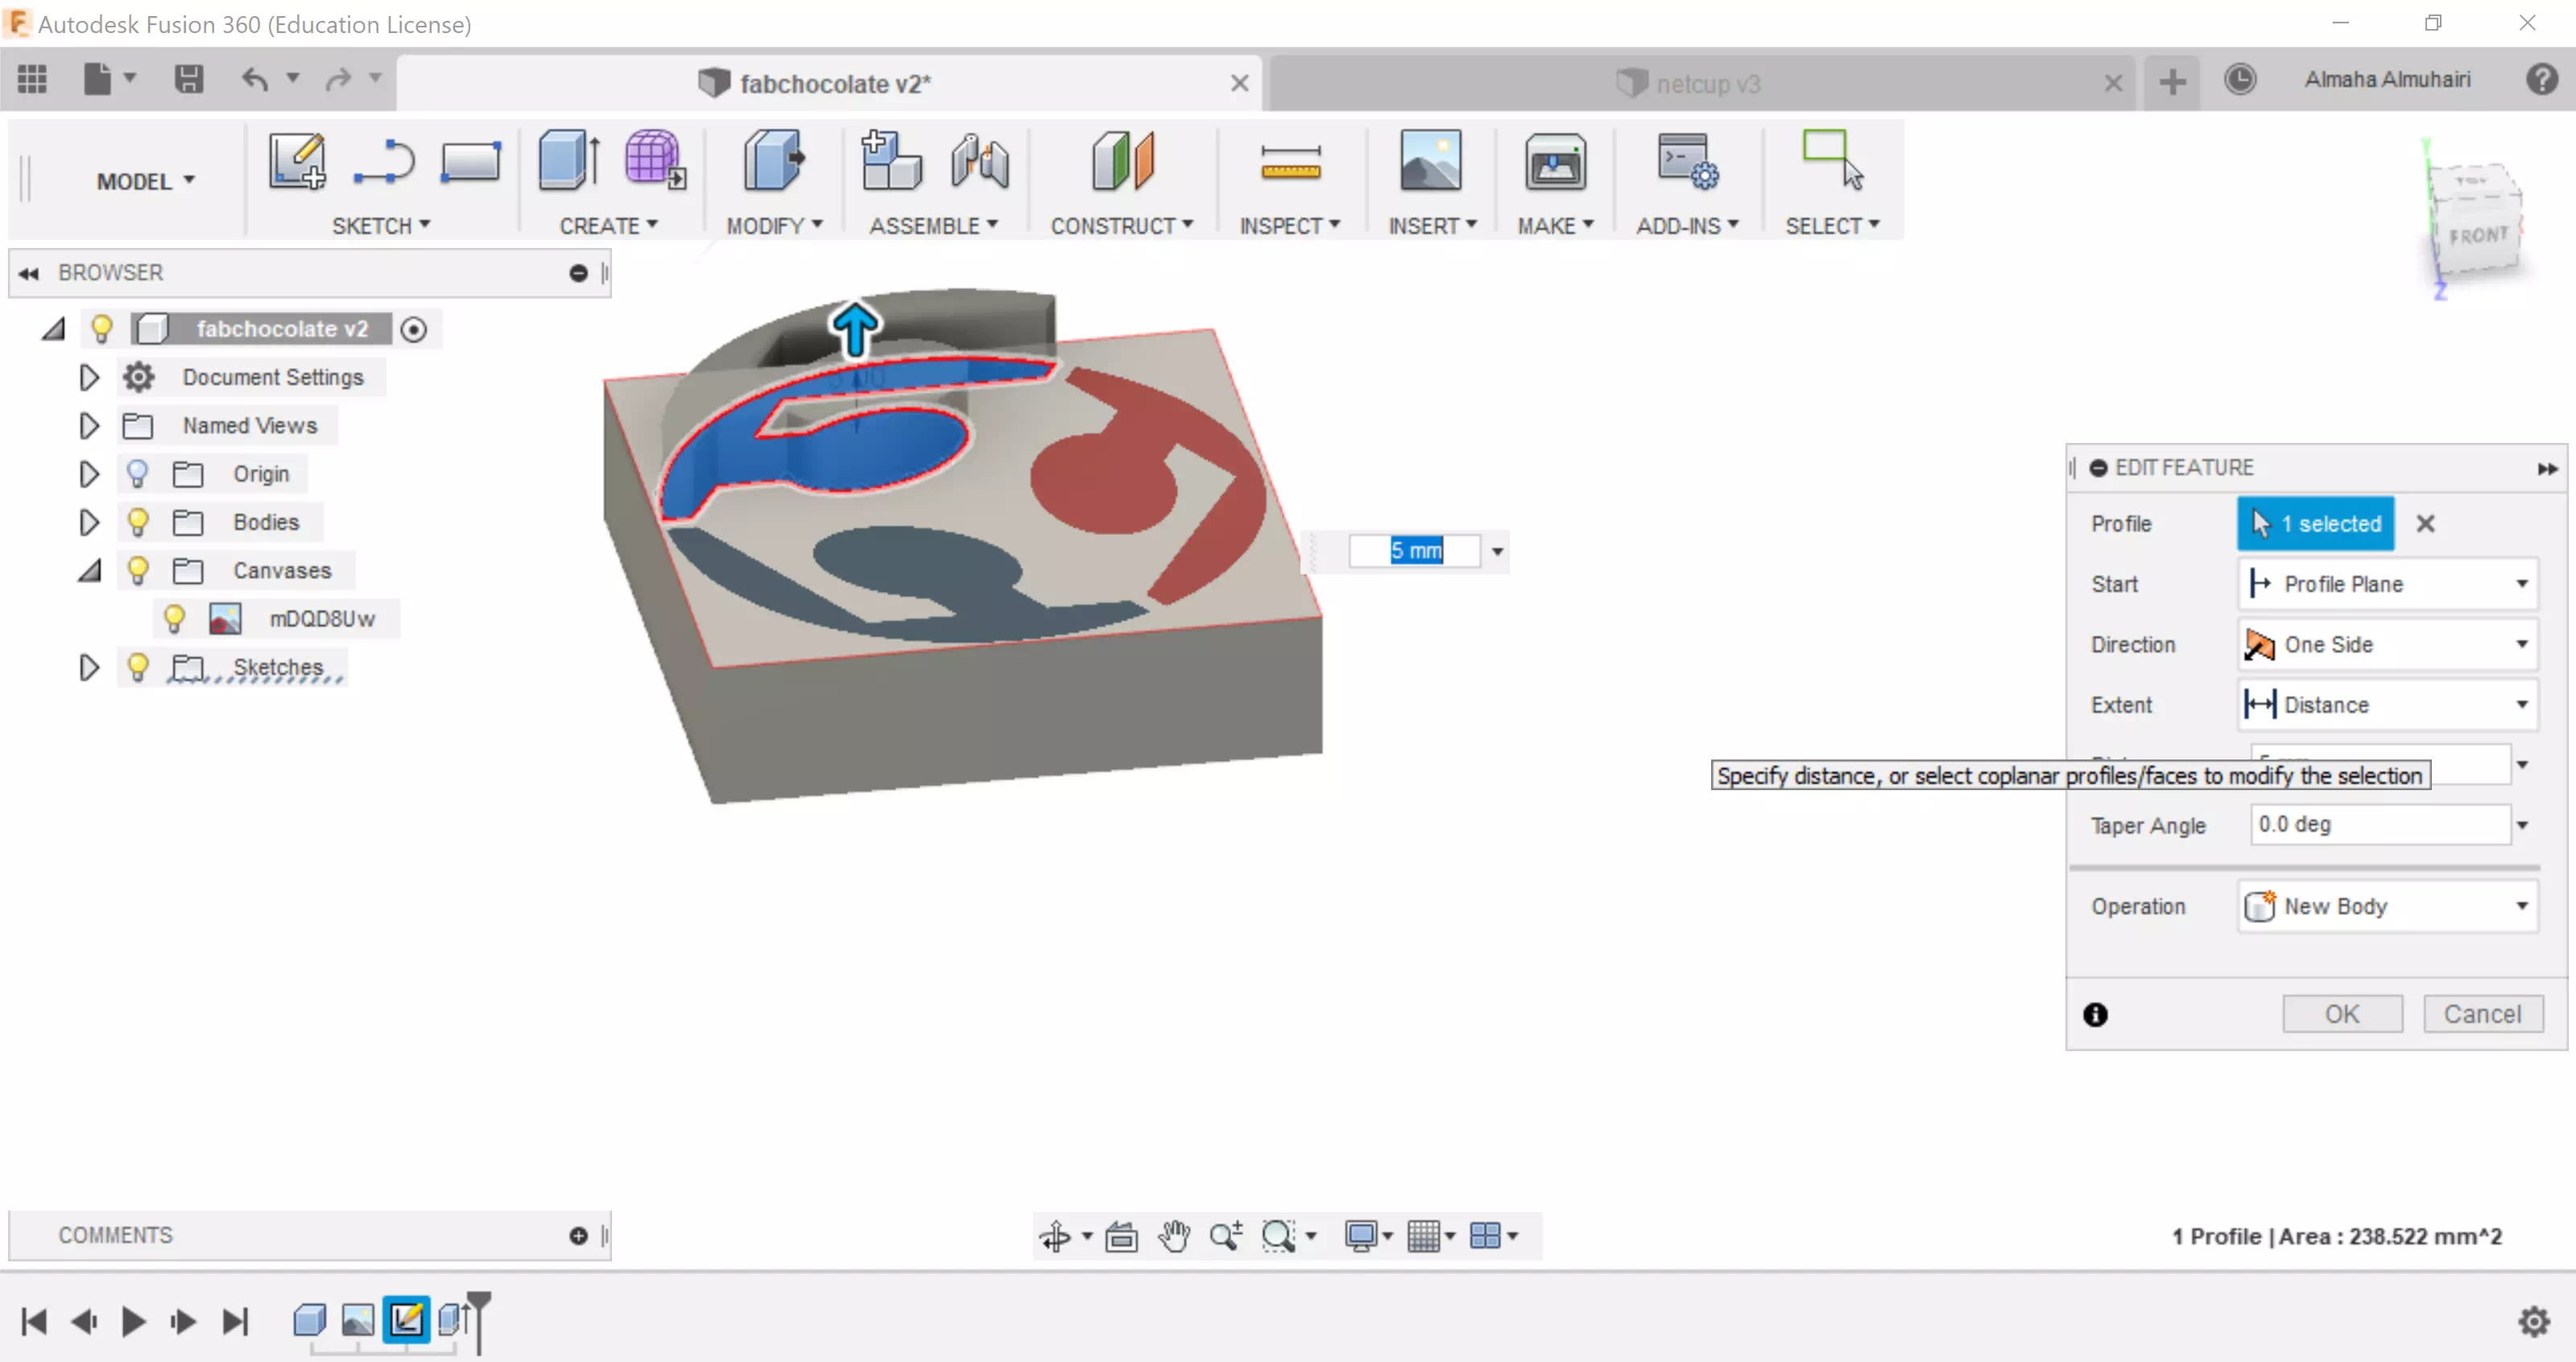
Extrude the sketch, in this case I extruded it by 5mm upwards.
Using the Sketch tool create two lines that meet at a center point into the middle of the cube.
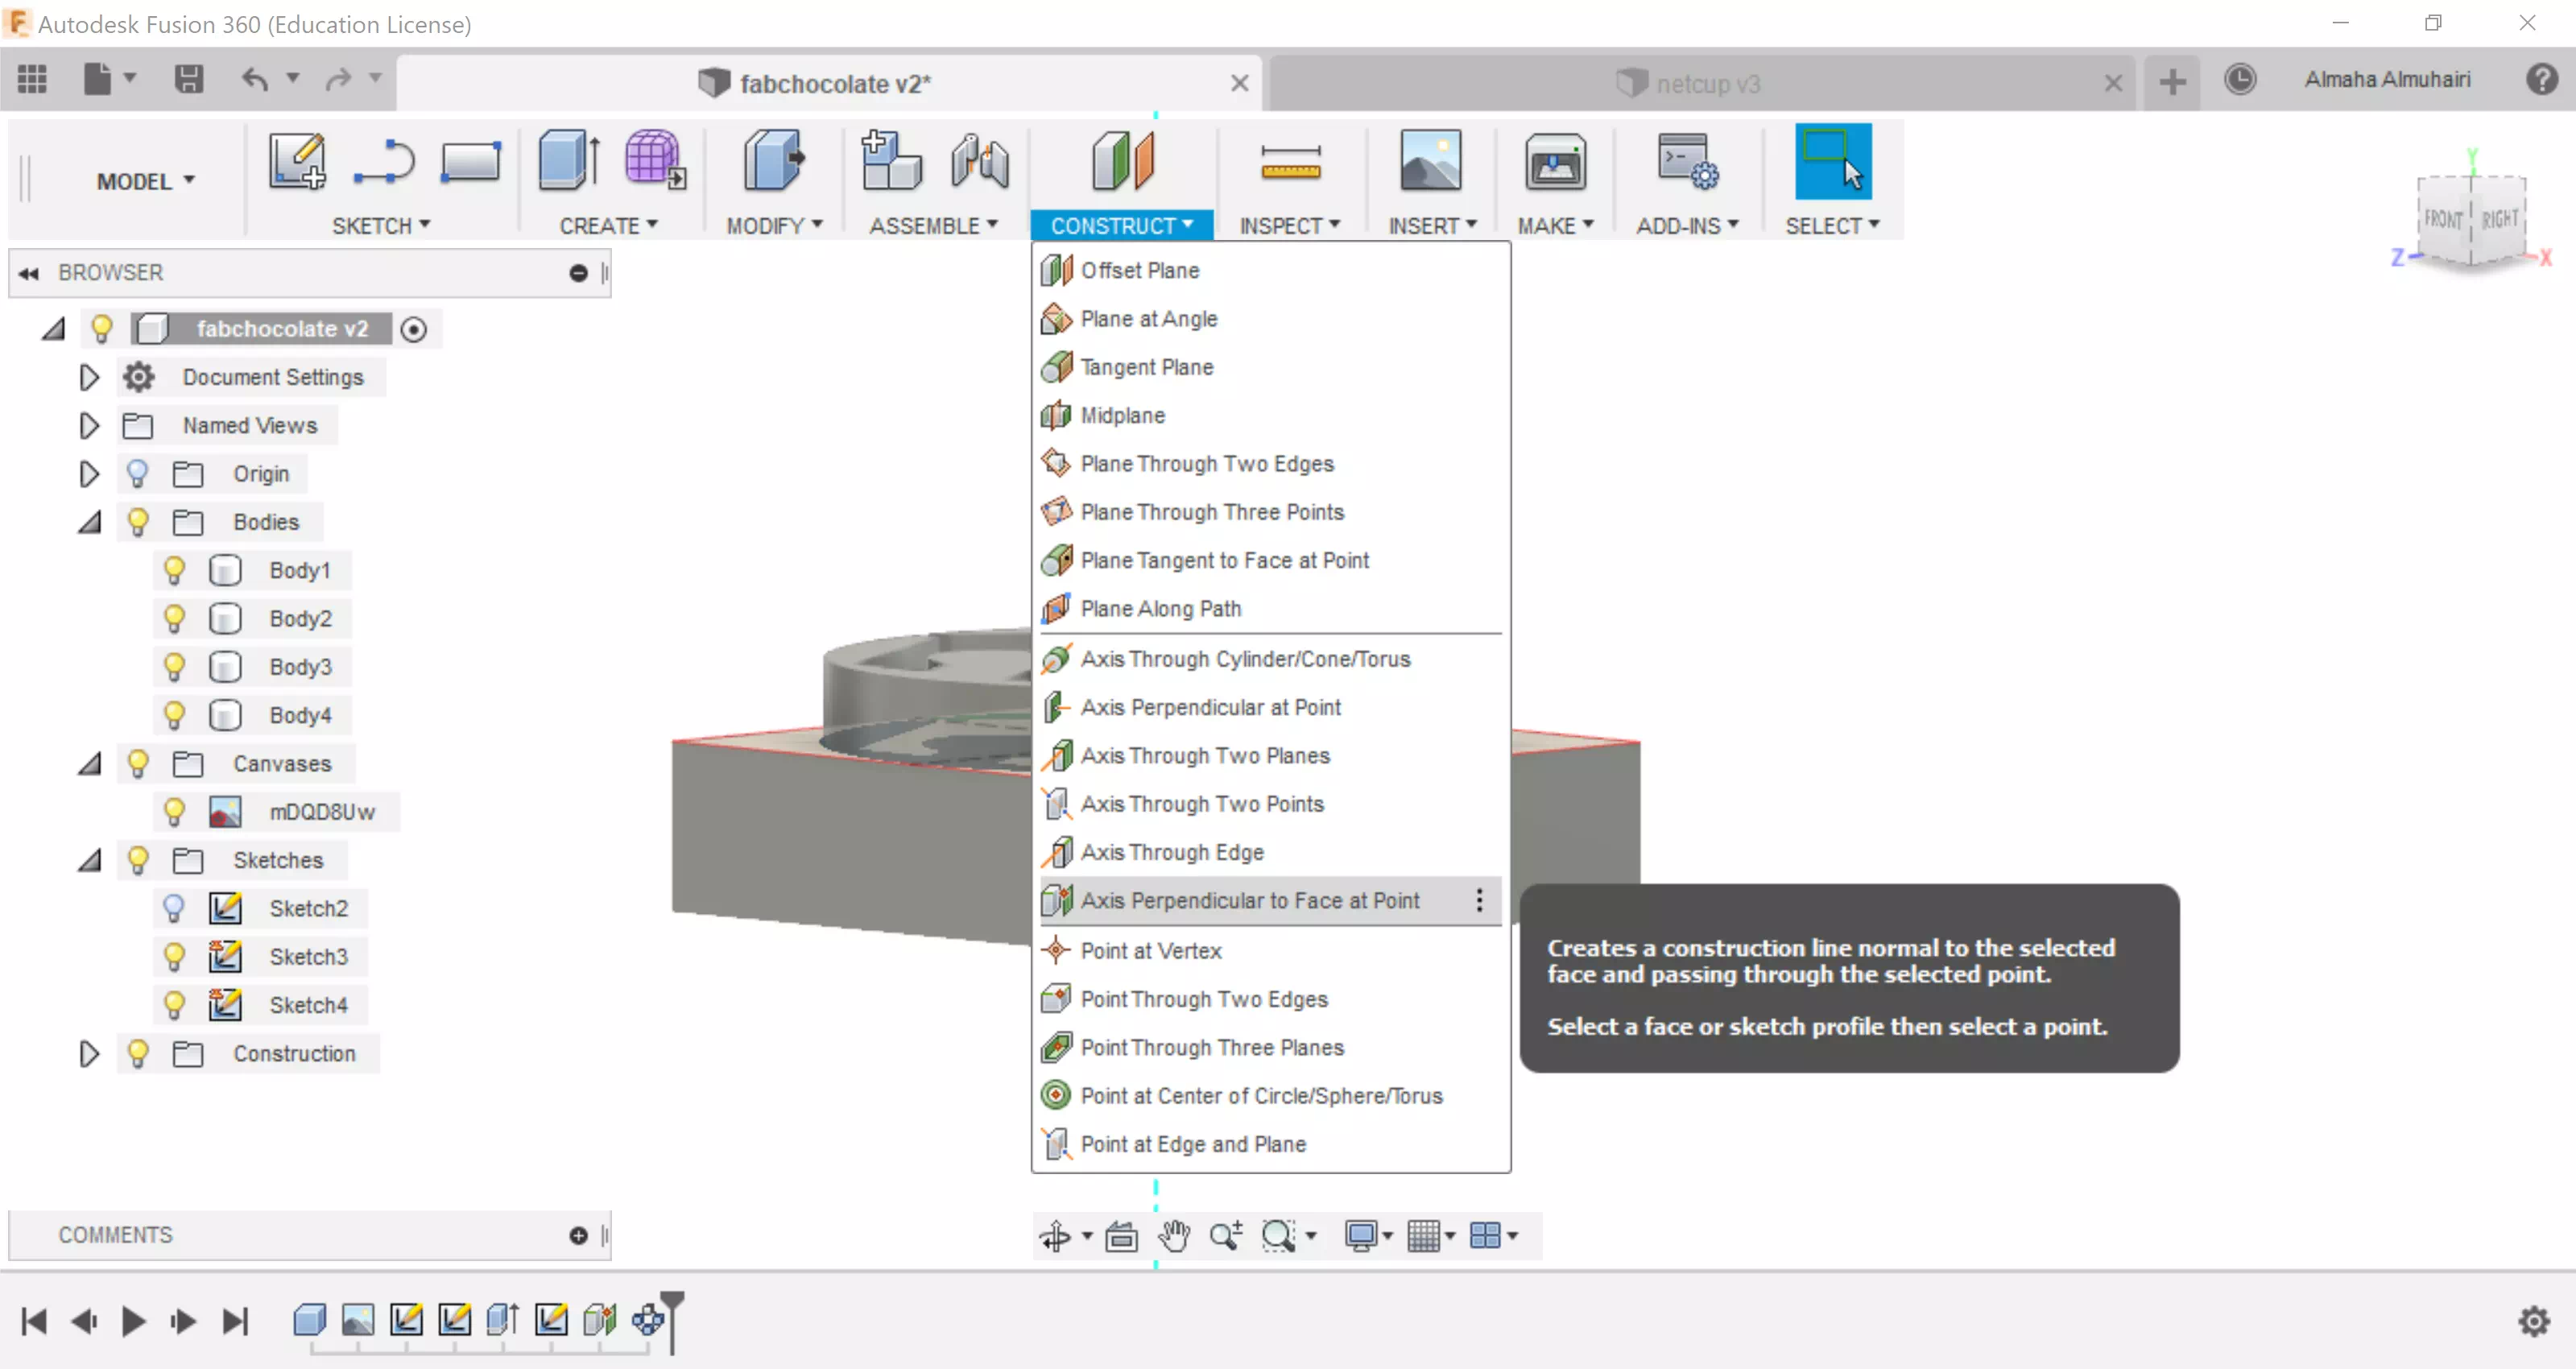
Make a construction, click on the Axis Perpendicular to Face at Point. Using the Axis Perpendicular to Face at Point tool click on the center point you made previously.
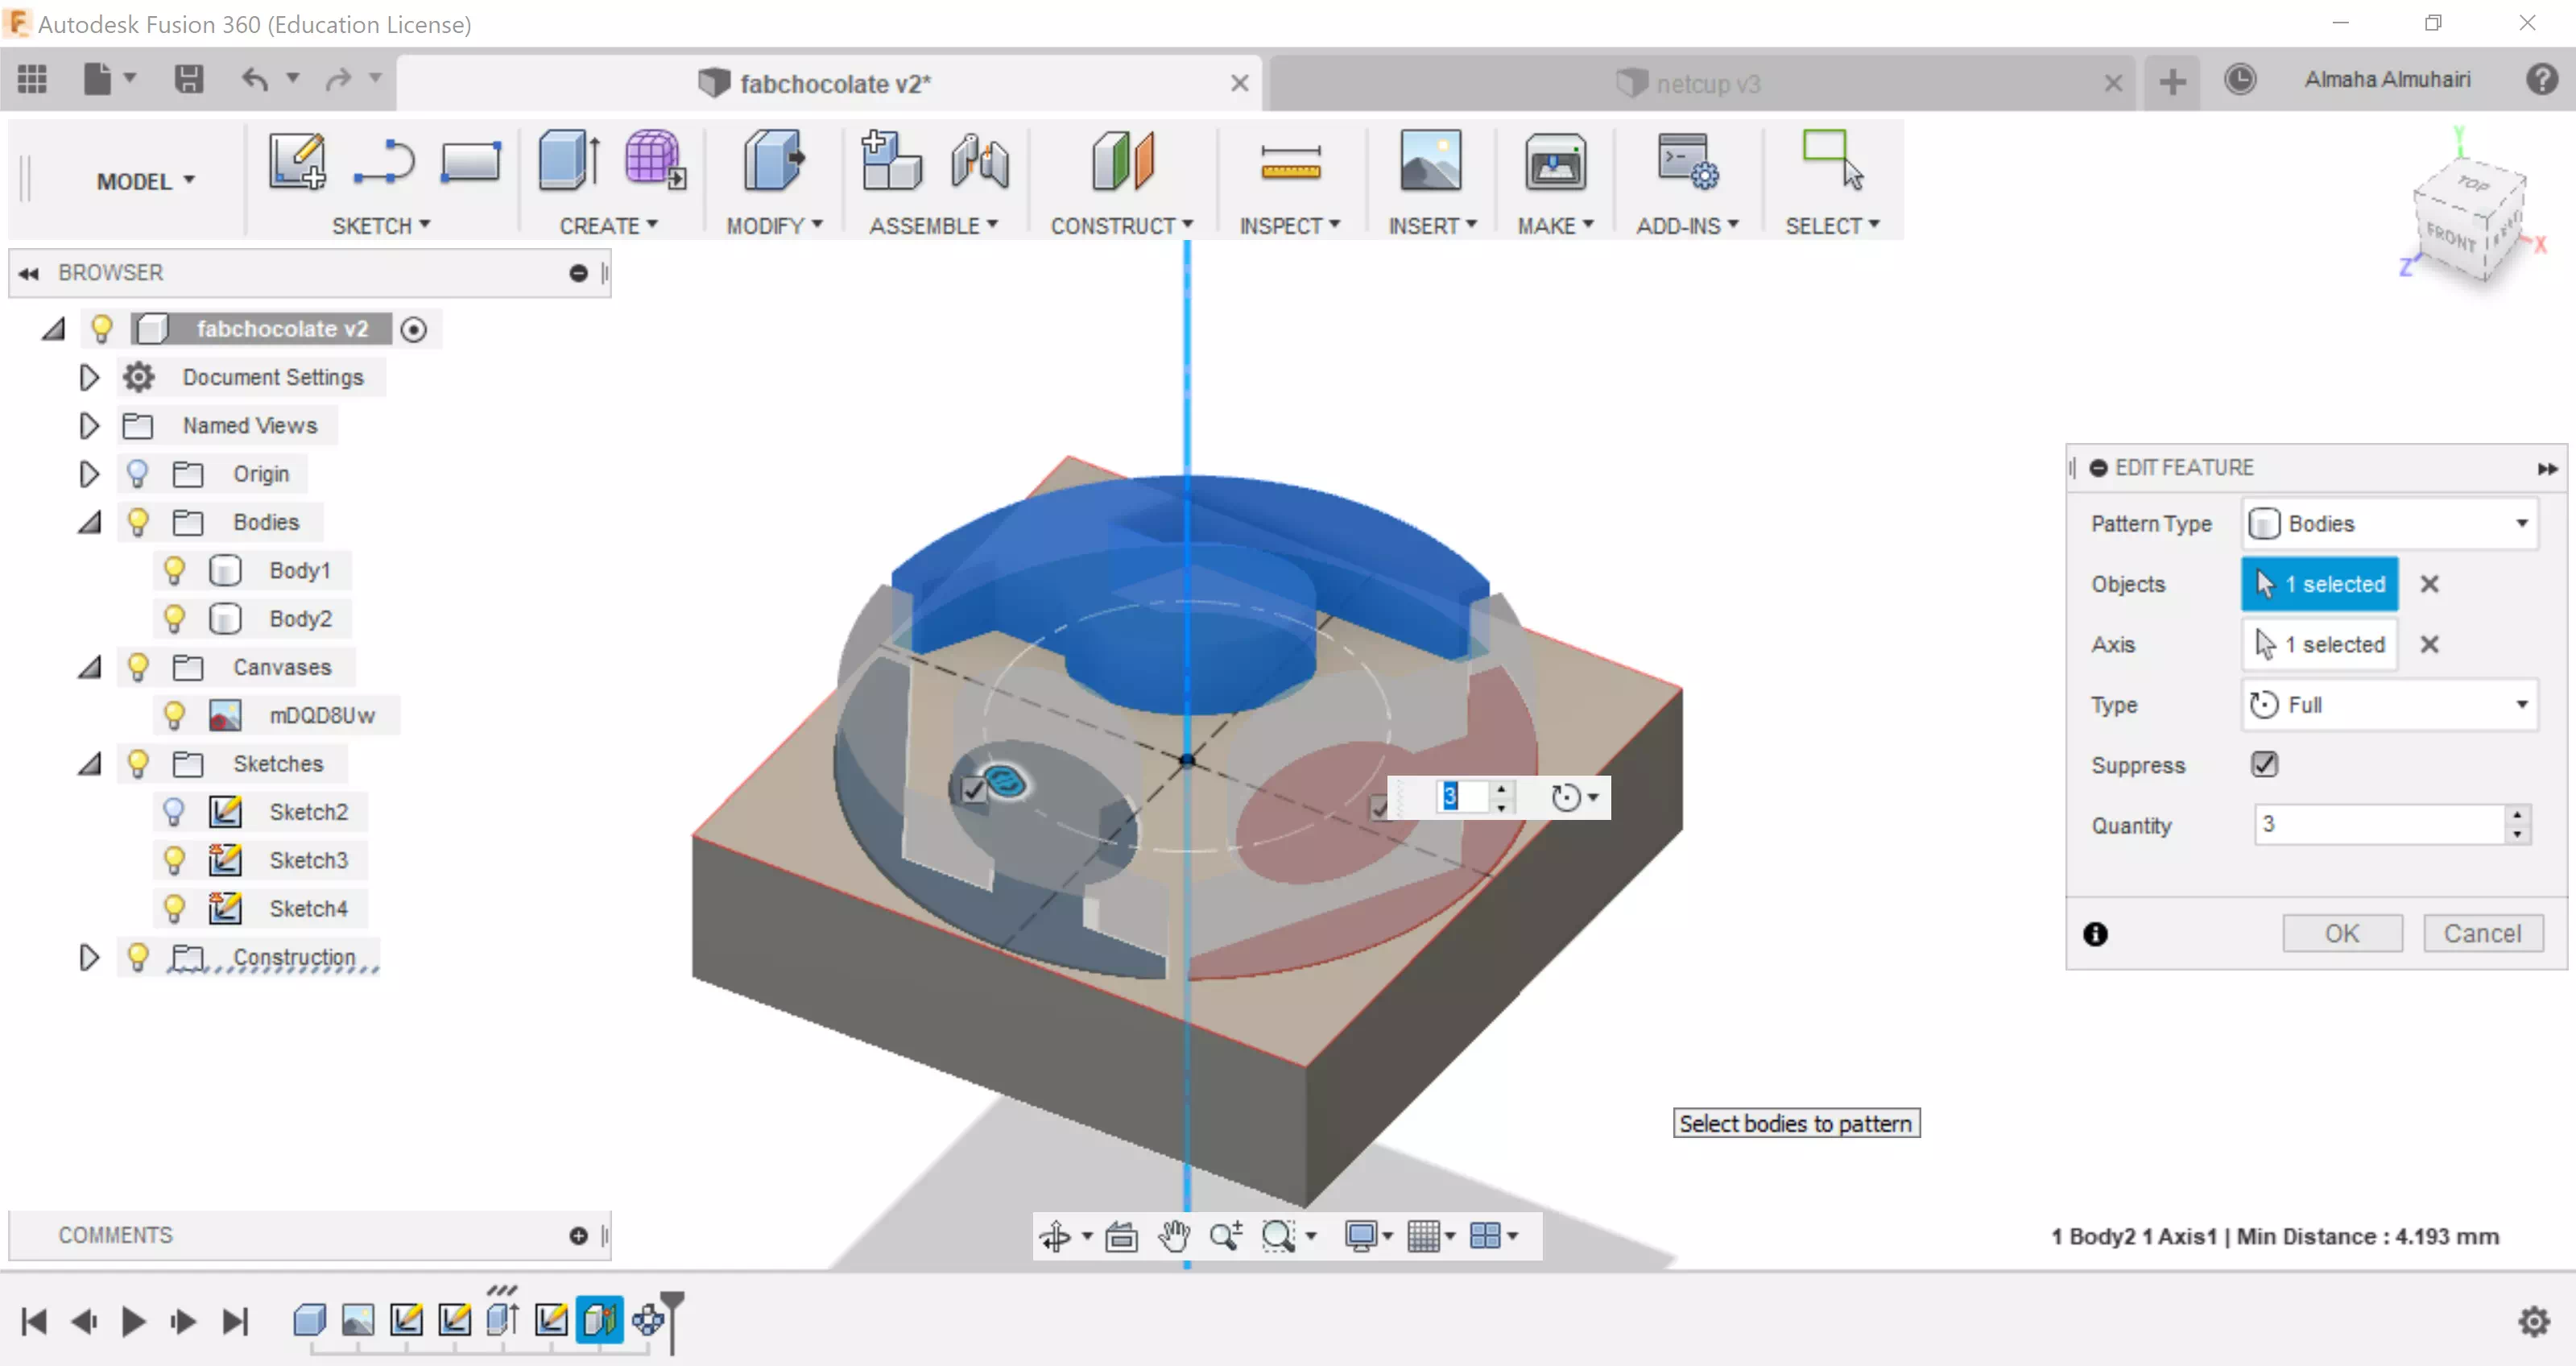
Using the circular pattern tool, select the extruded body and pattern it to follow the center point, the pattern should be repeated 3 times.
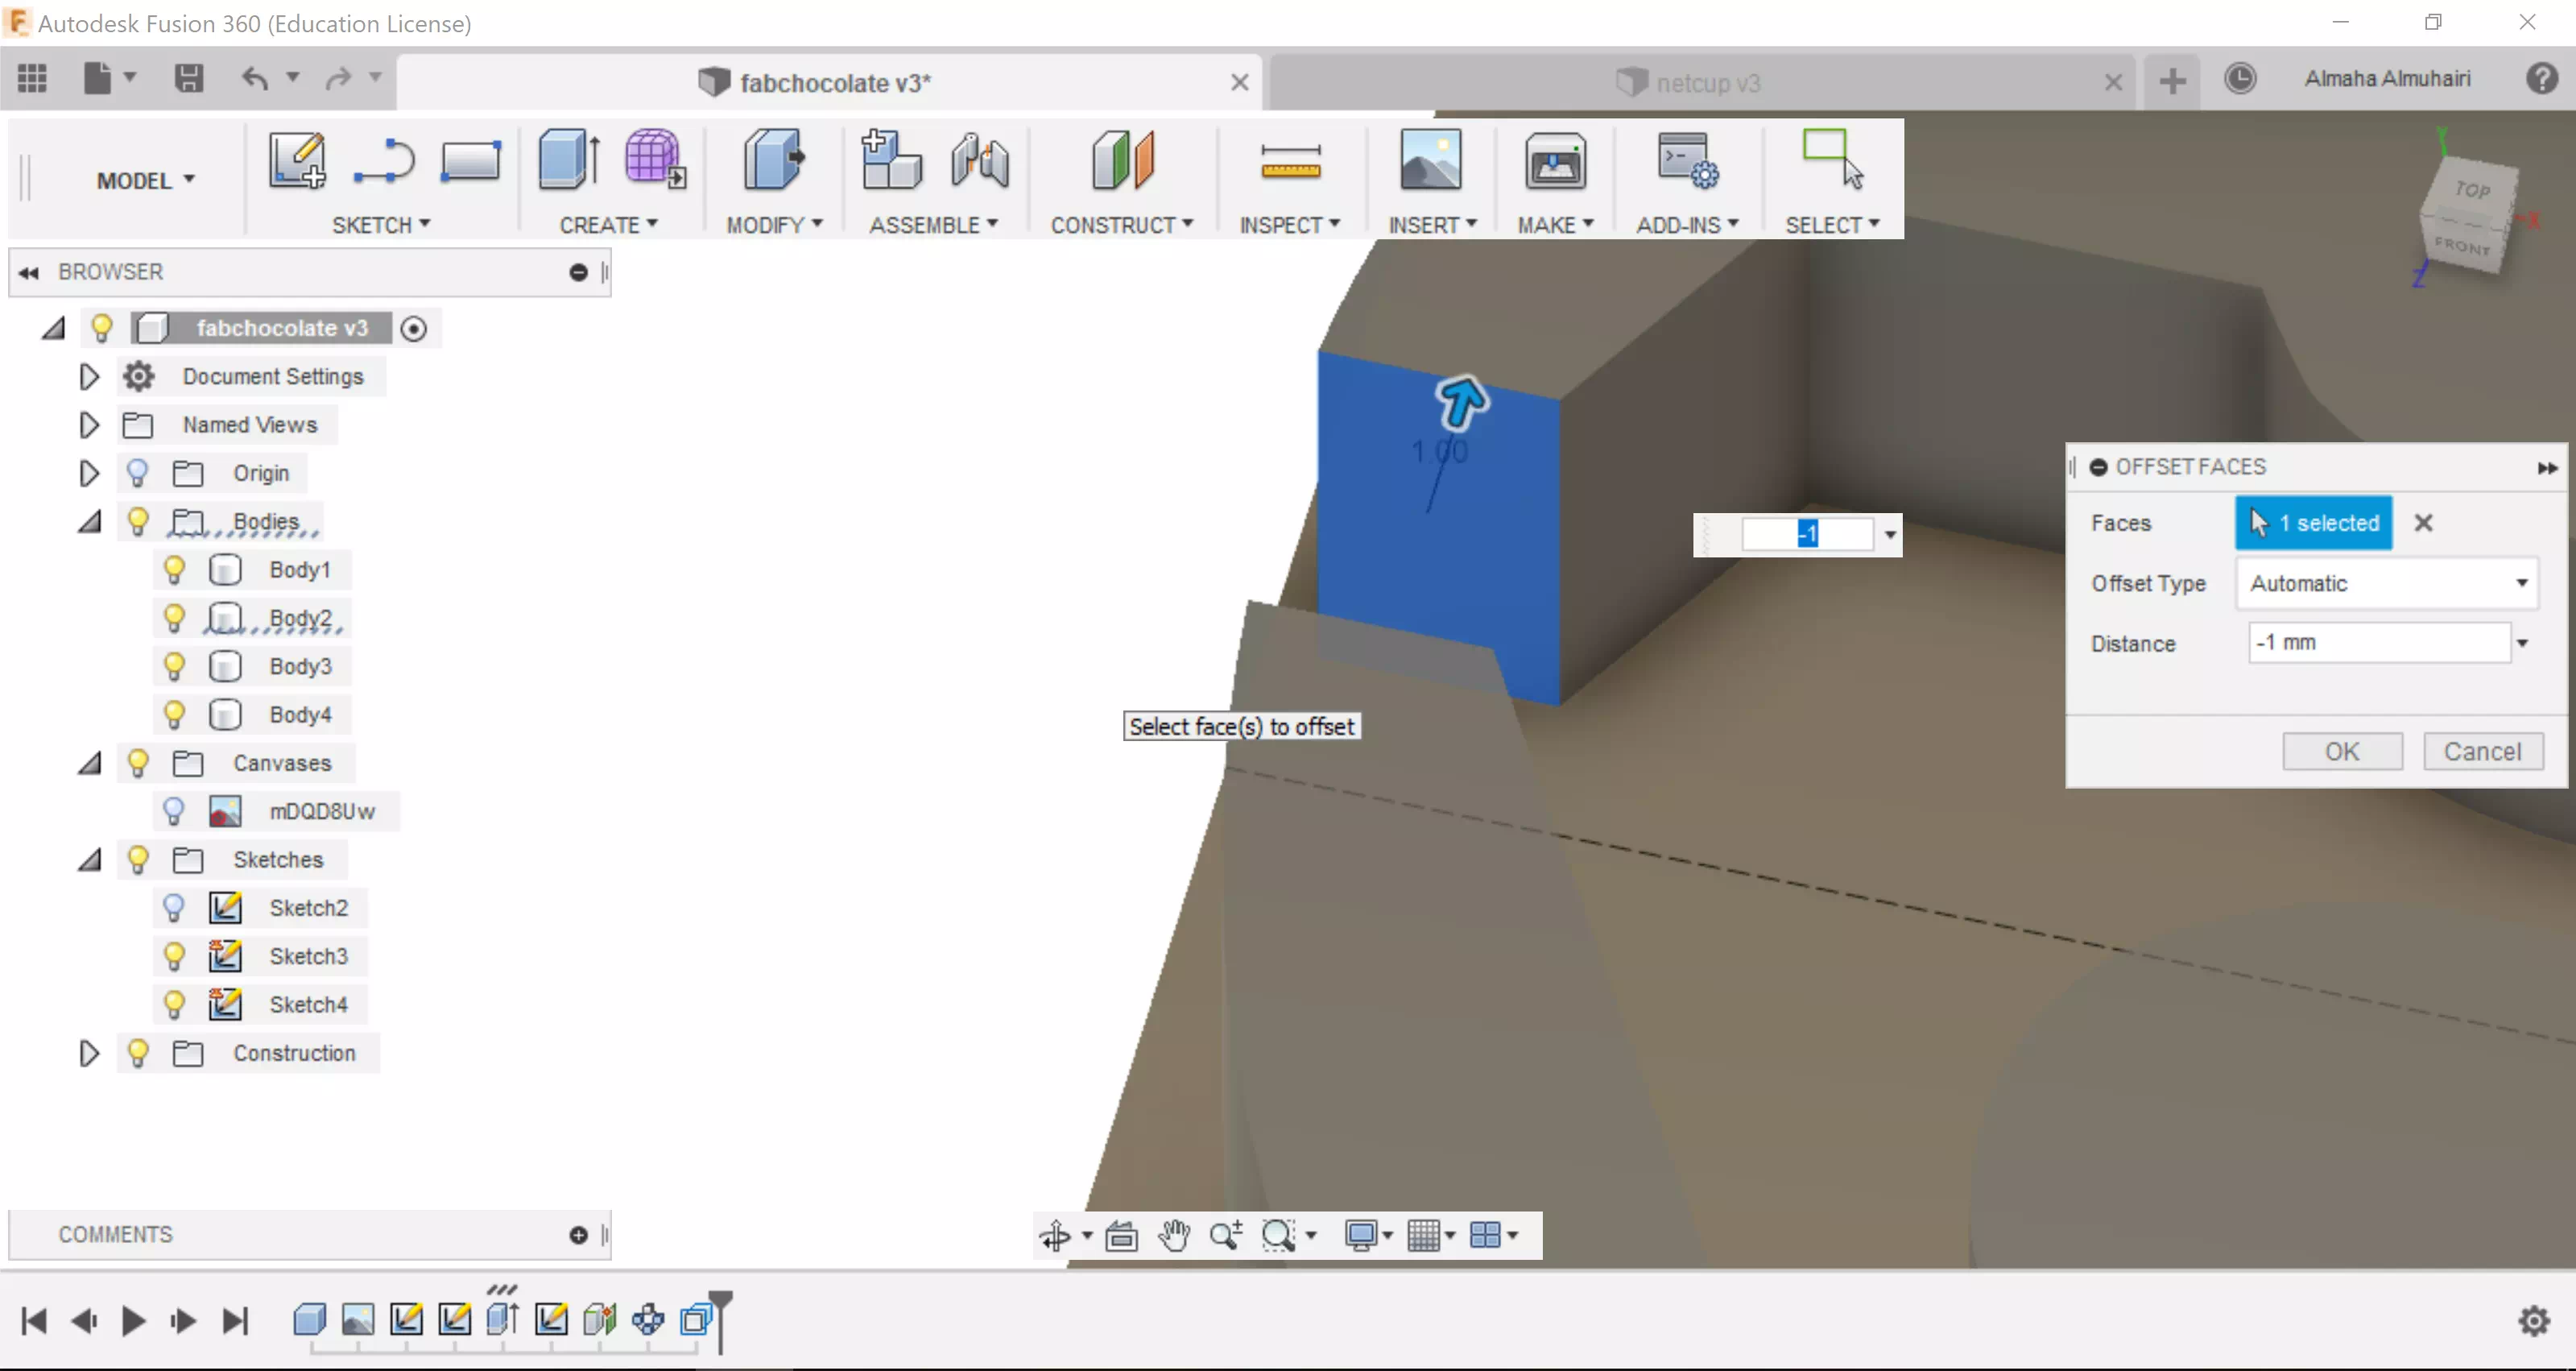
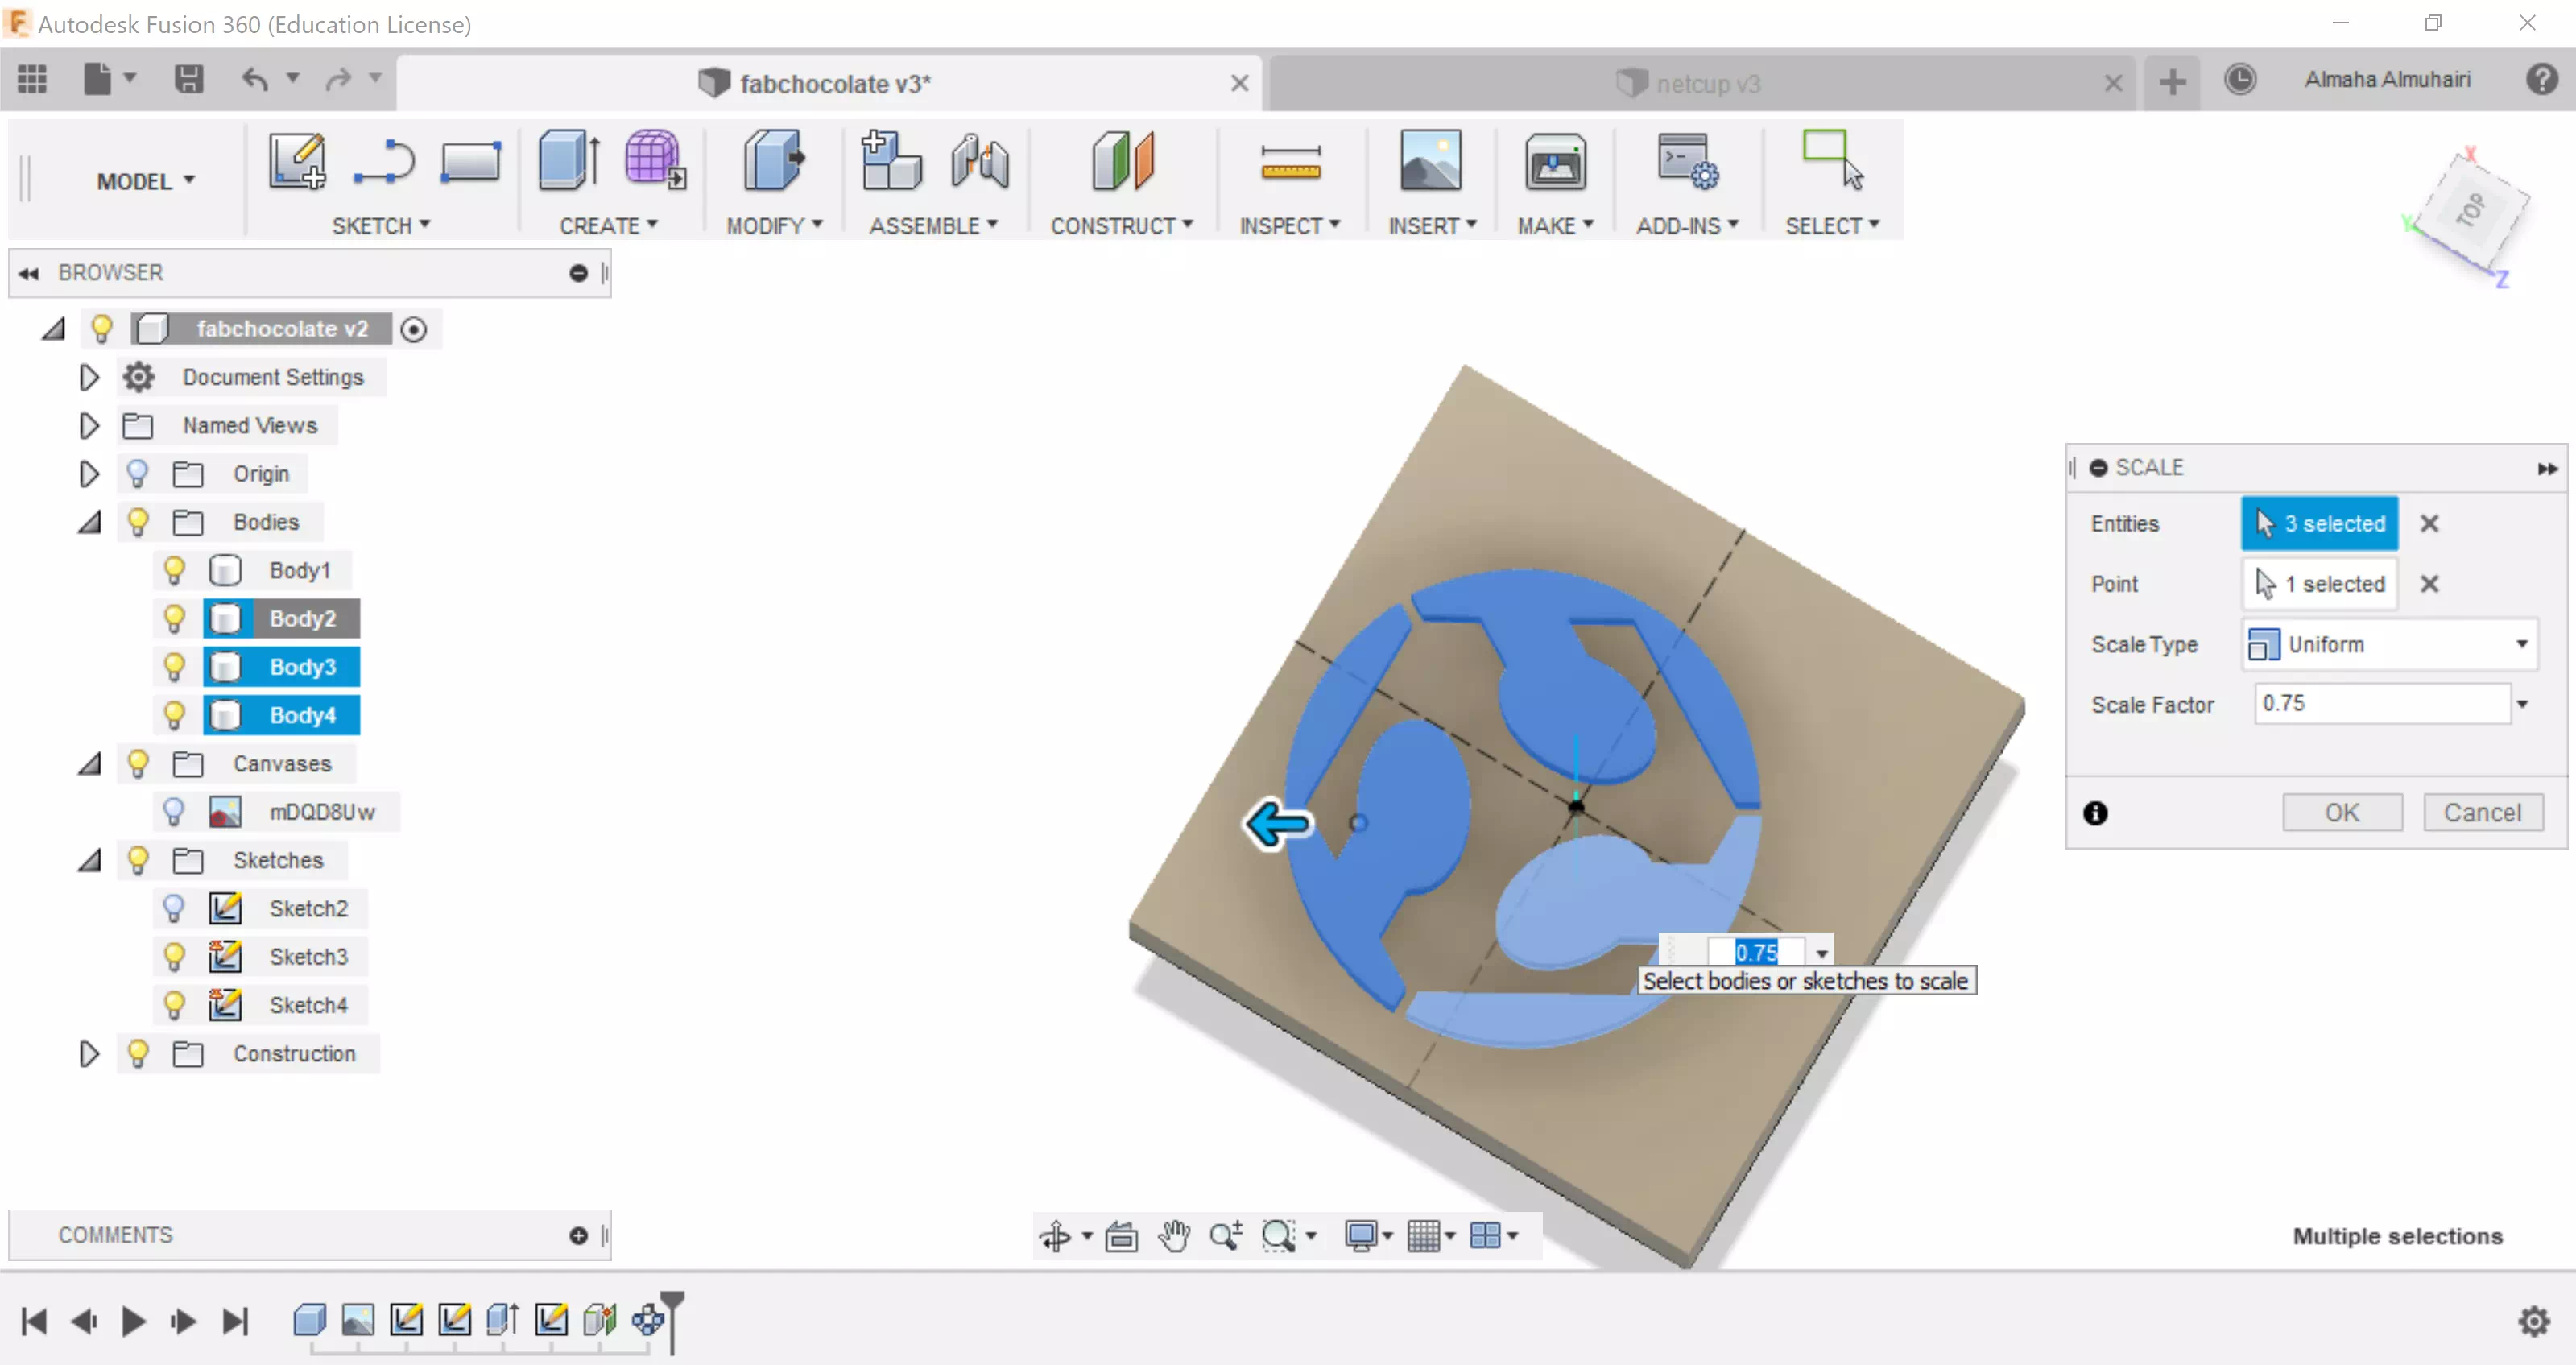
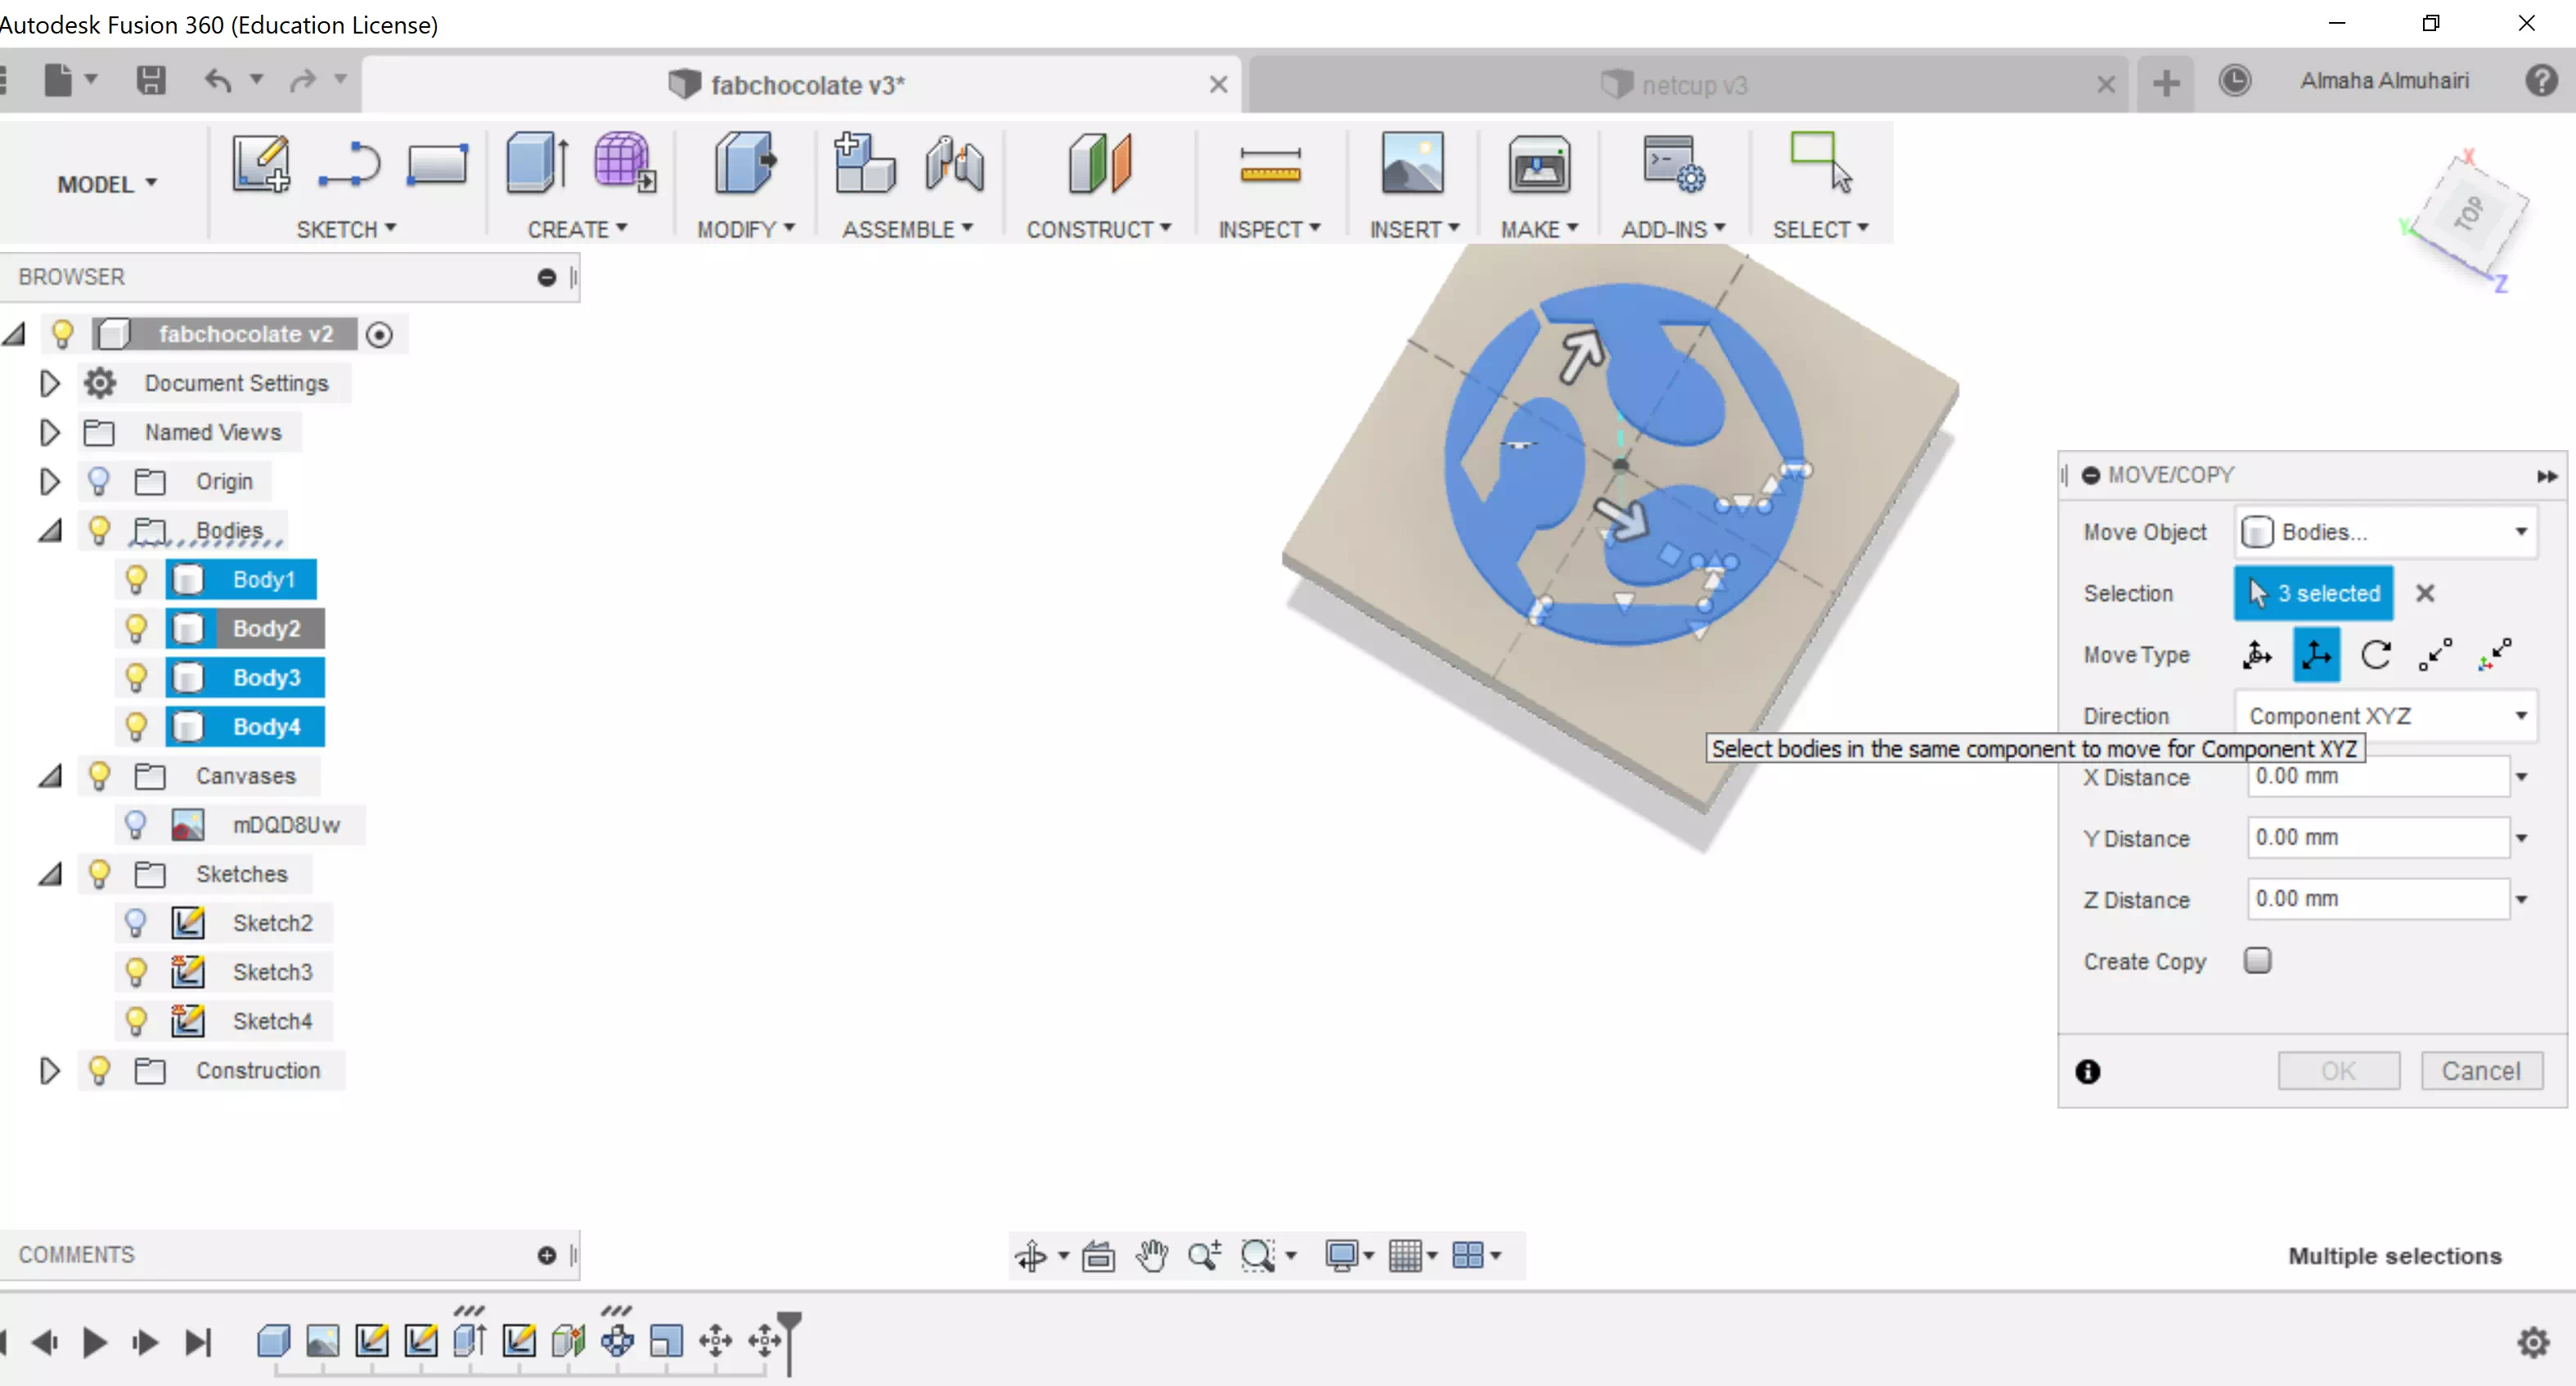
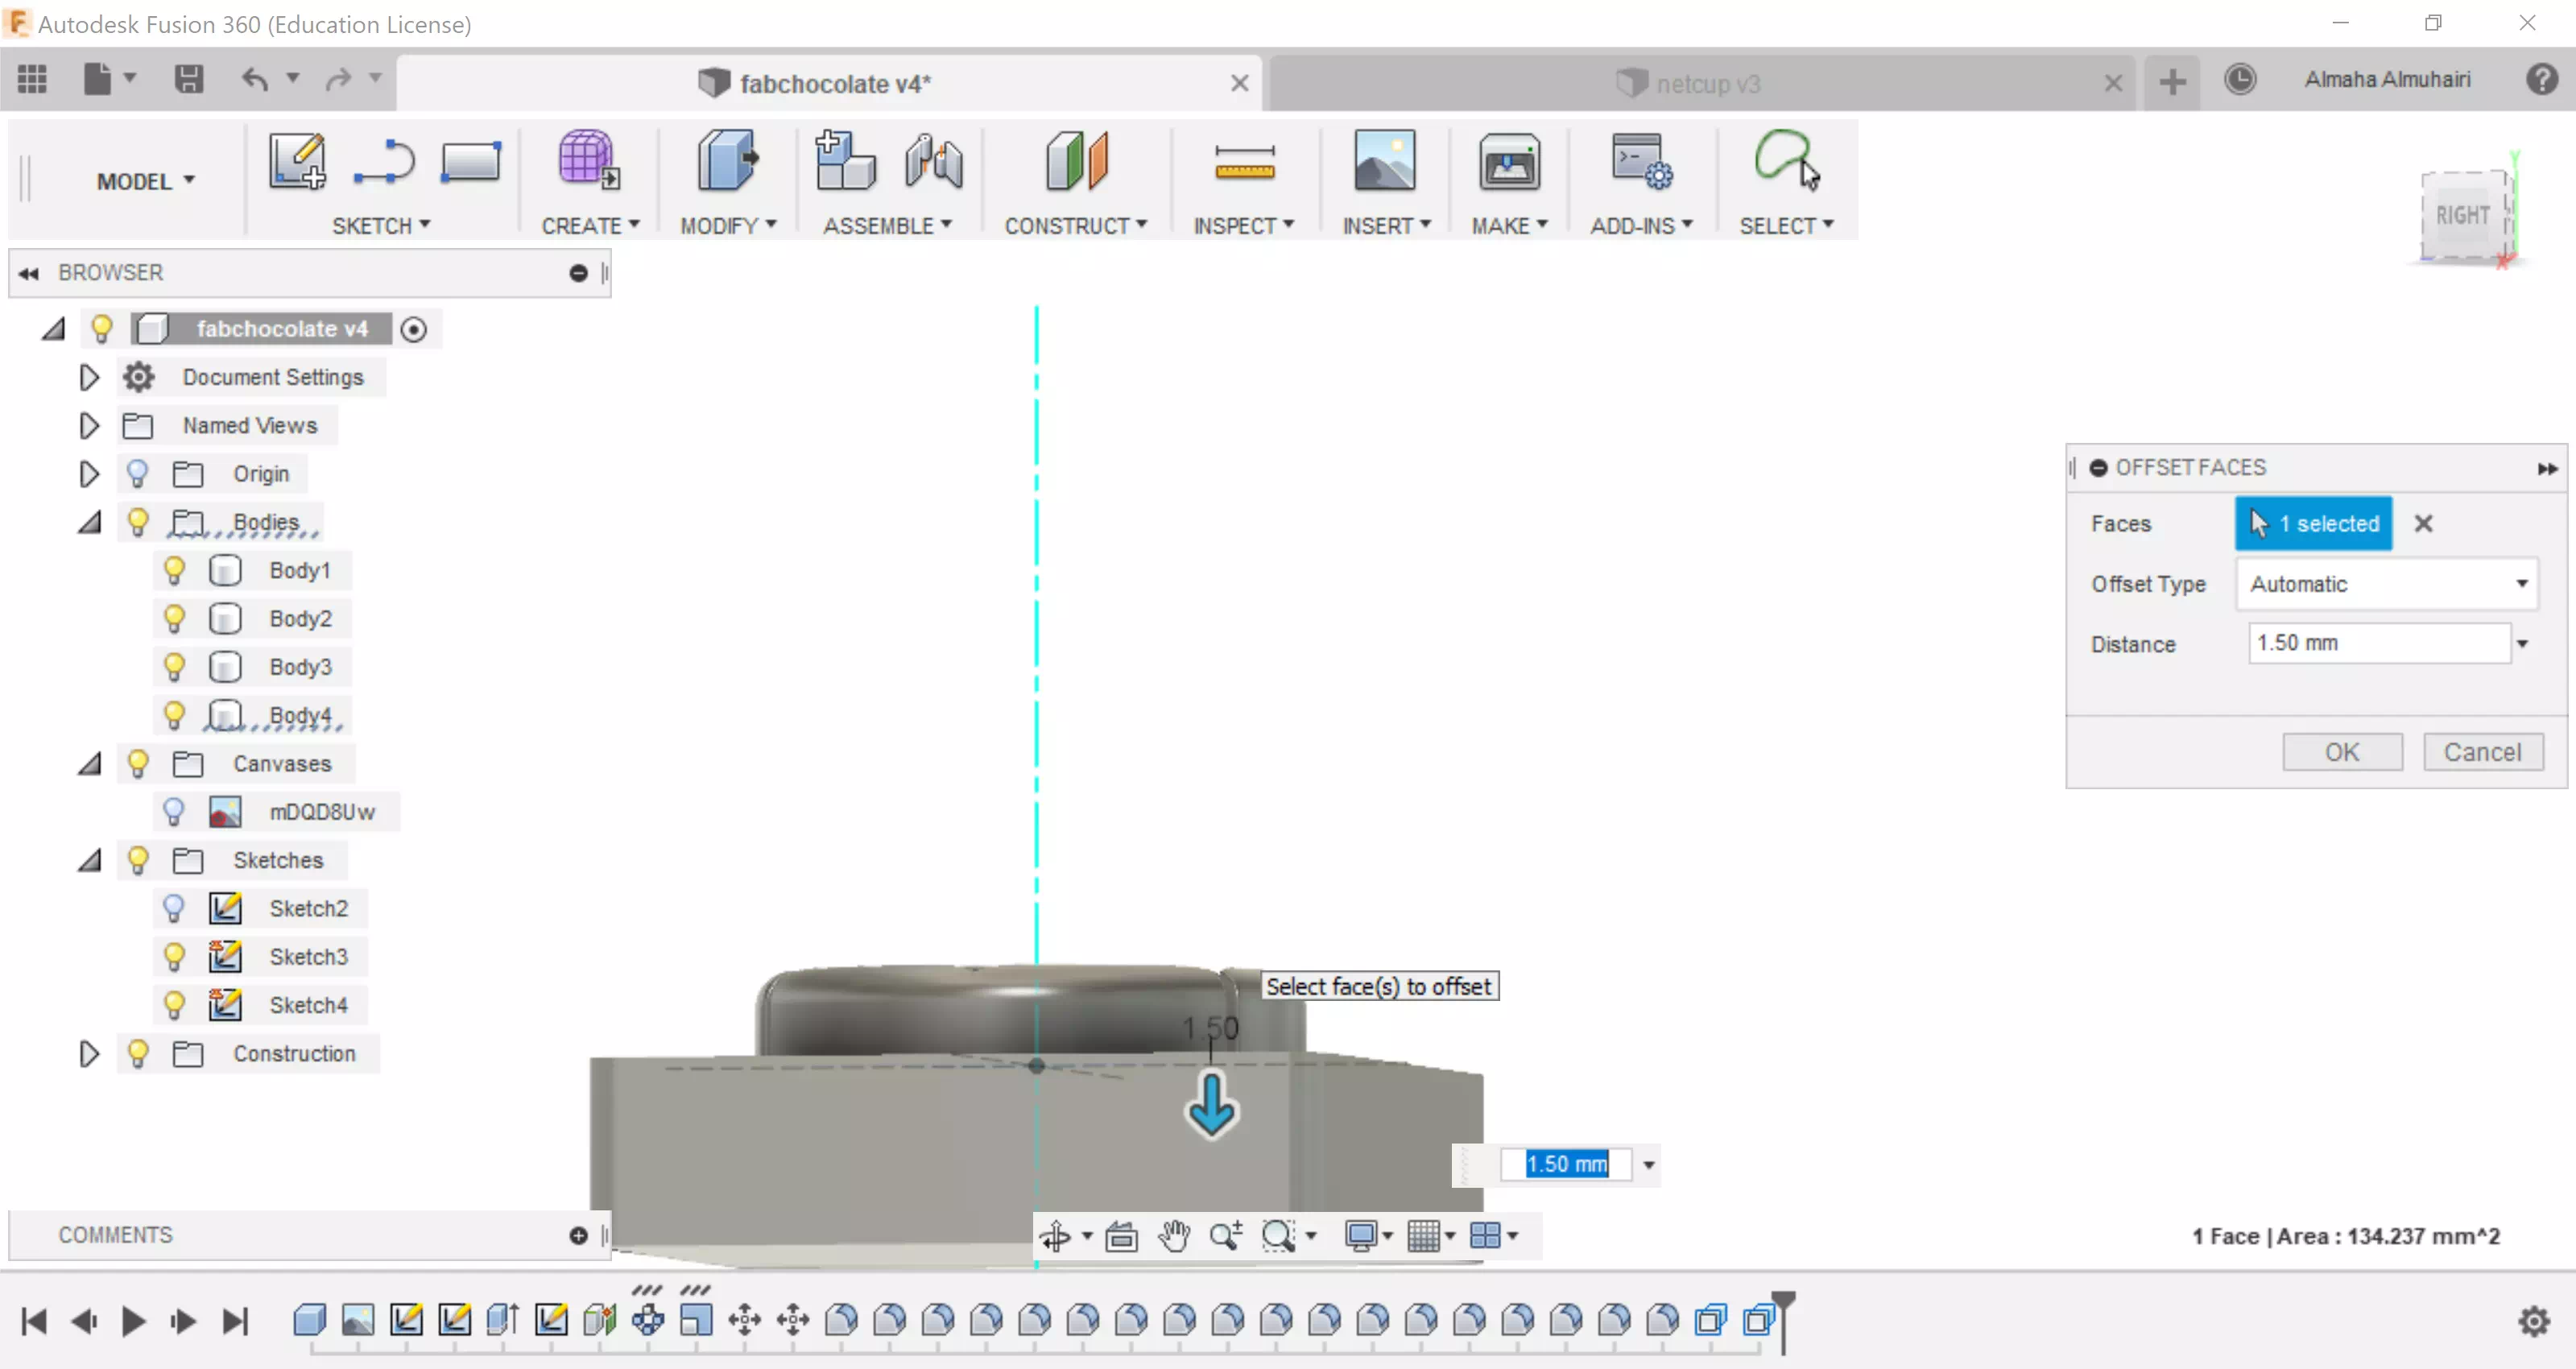
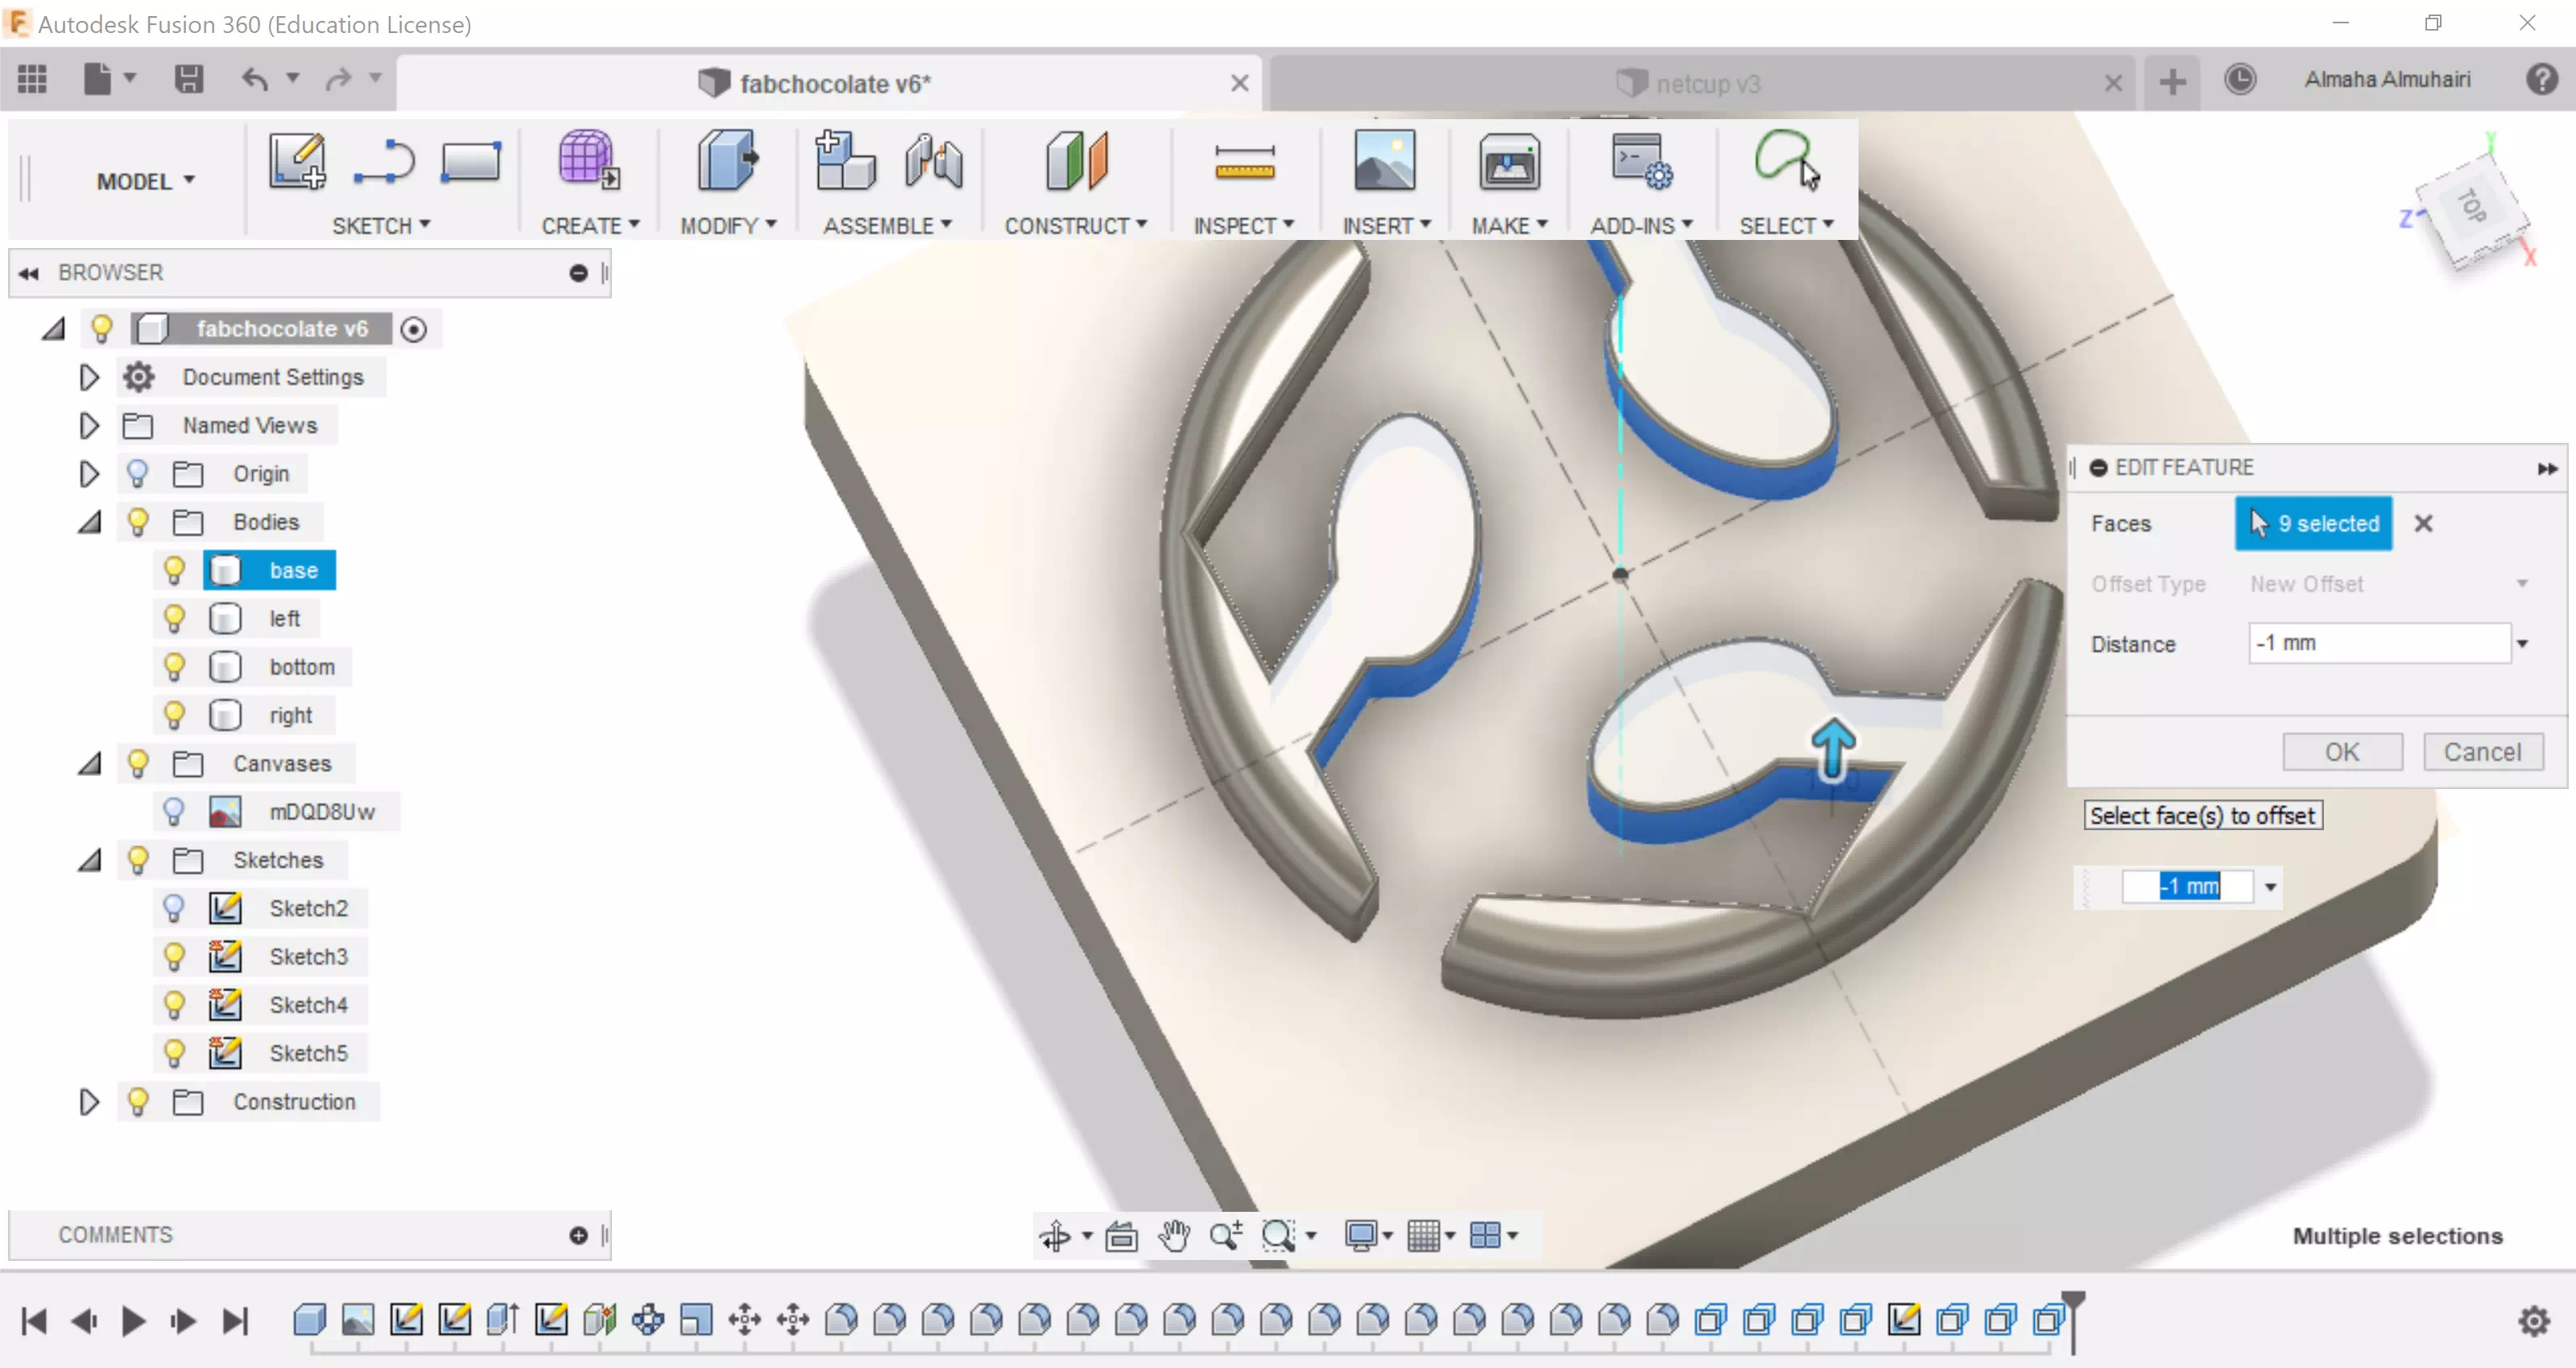
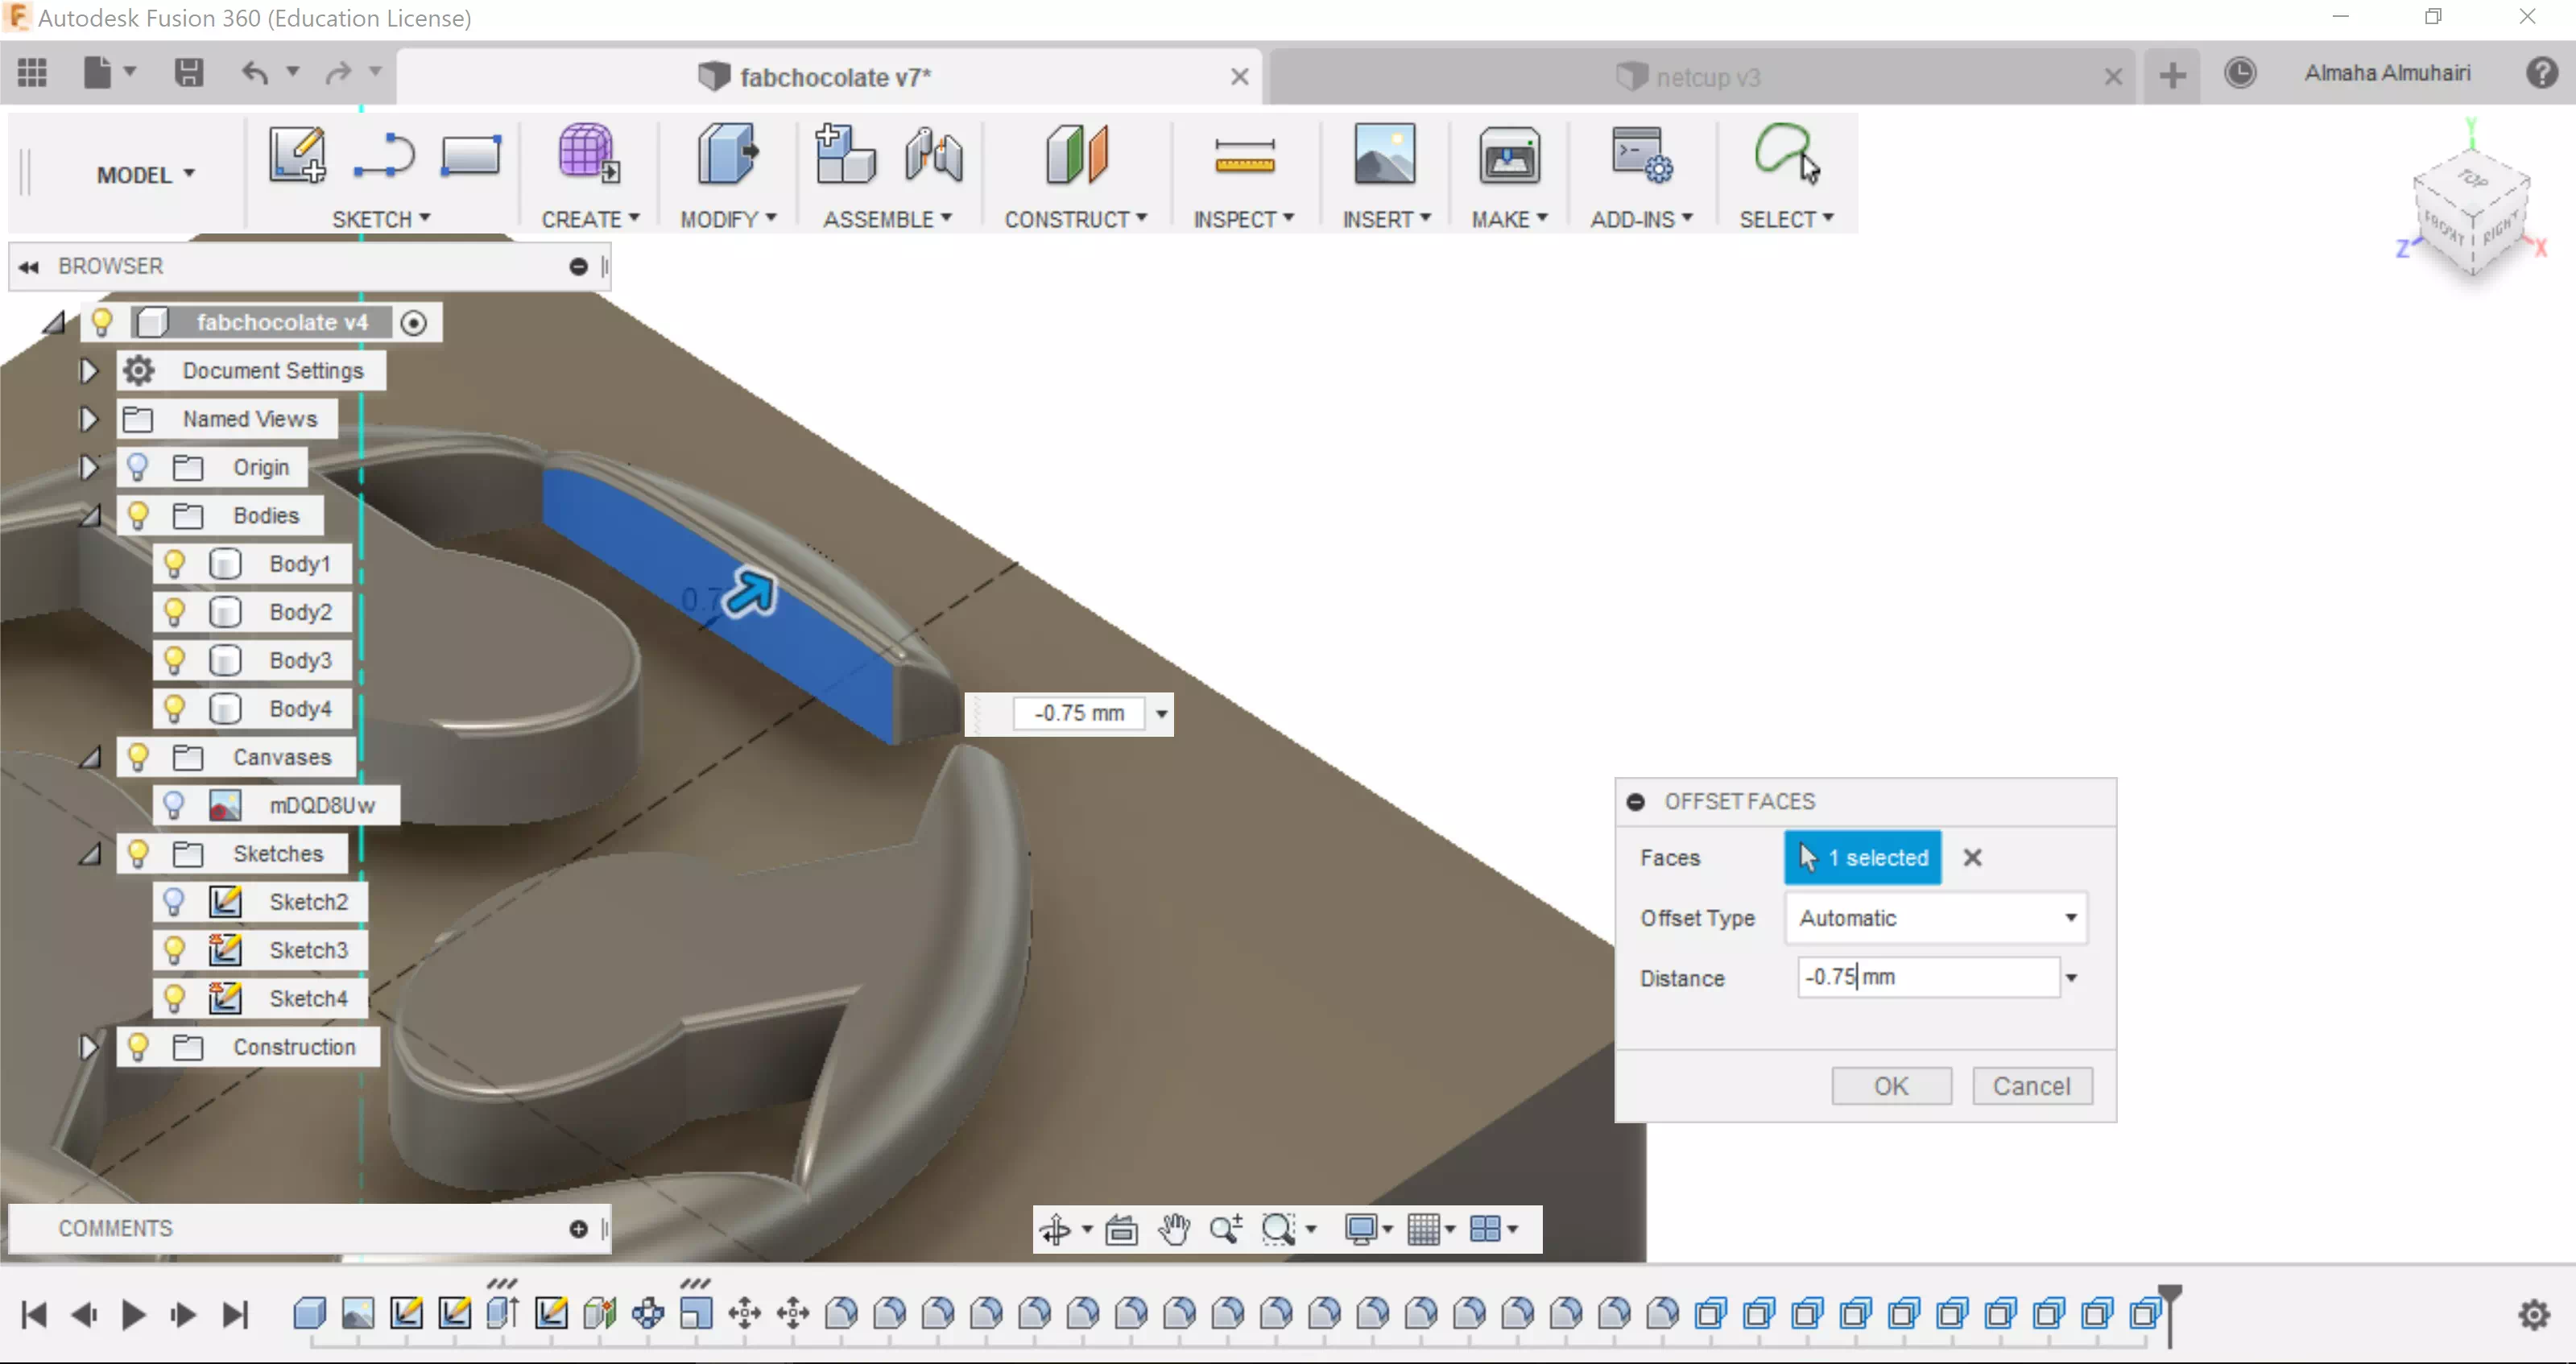
I made some adjustments to the bodies to fit the milling bit milling width, so that there will be enough space for the milling bit to go through the bodies. I moved the bodies, scaled them, and also using the Q command on my keyboard I was able to offset some faces in the design.
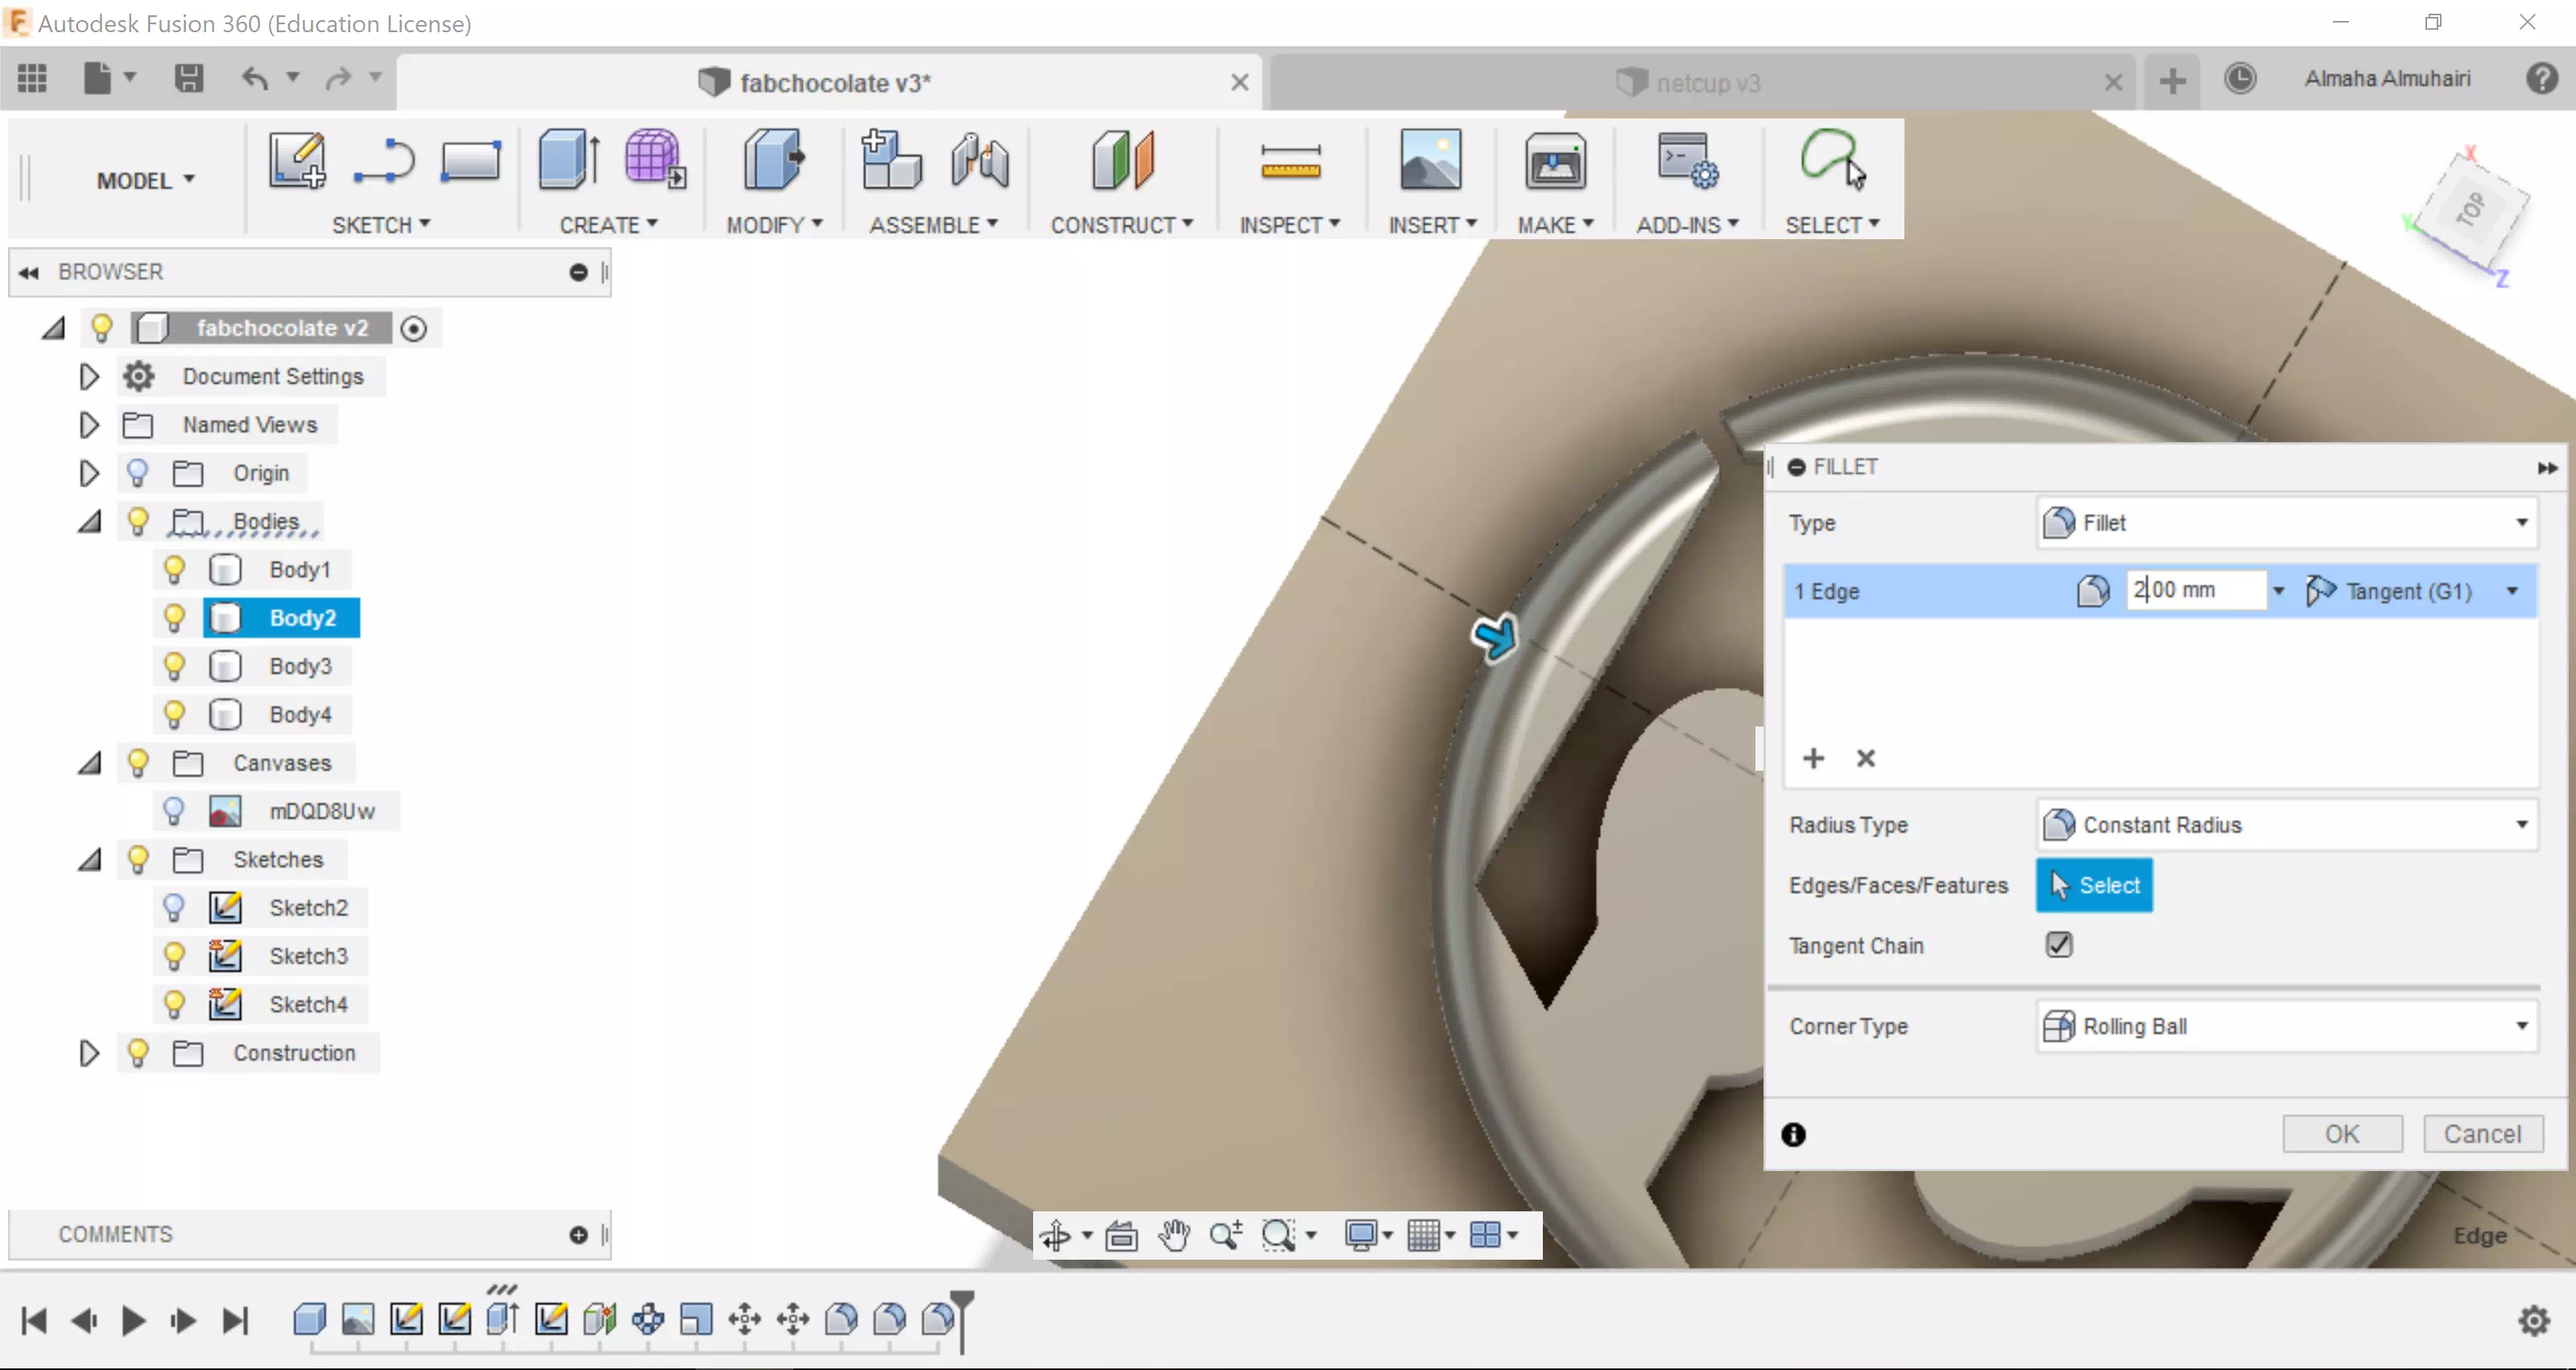
Create a fillet on the outter circle.
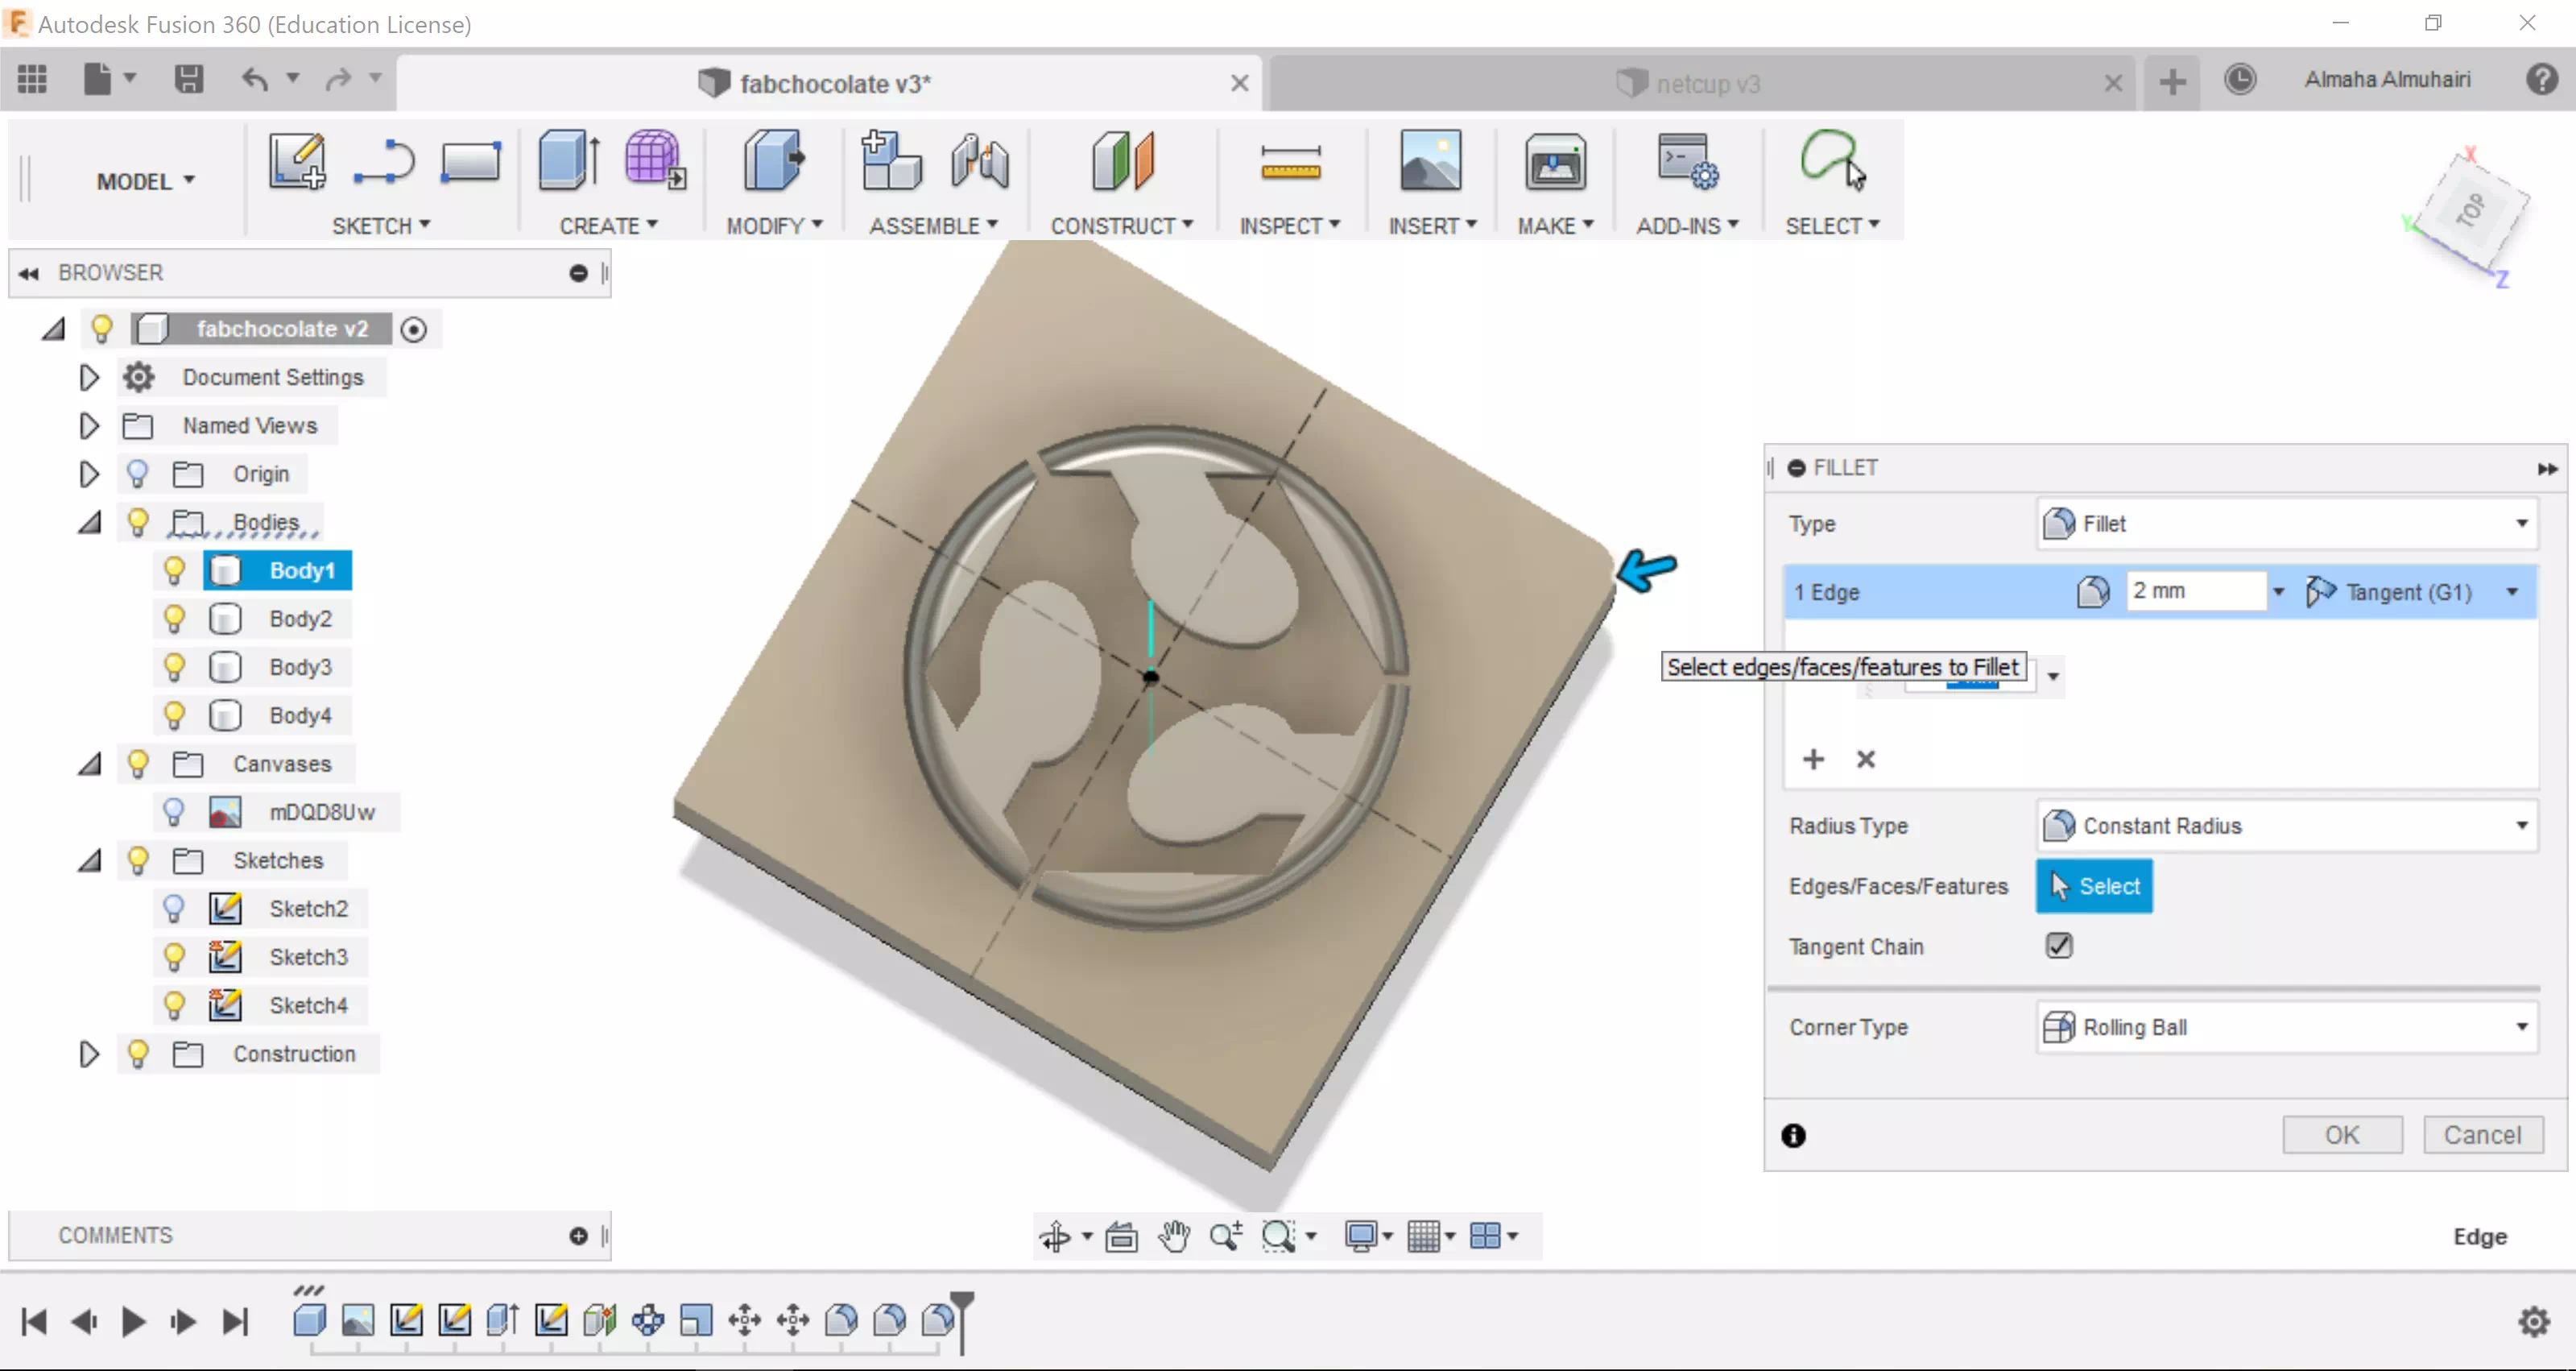
Create a fillet on the box/base body.
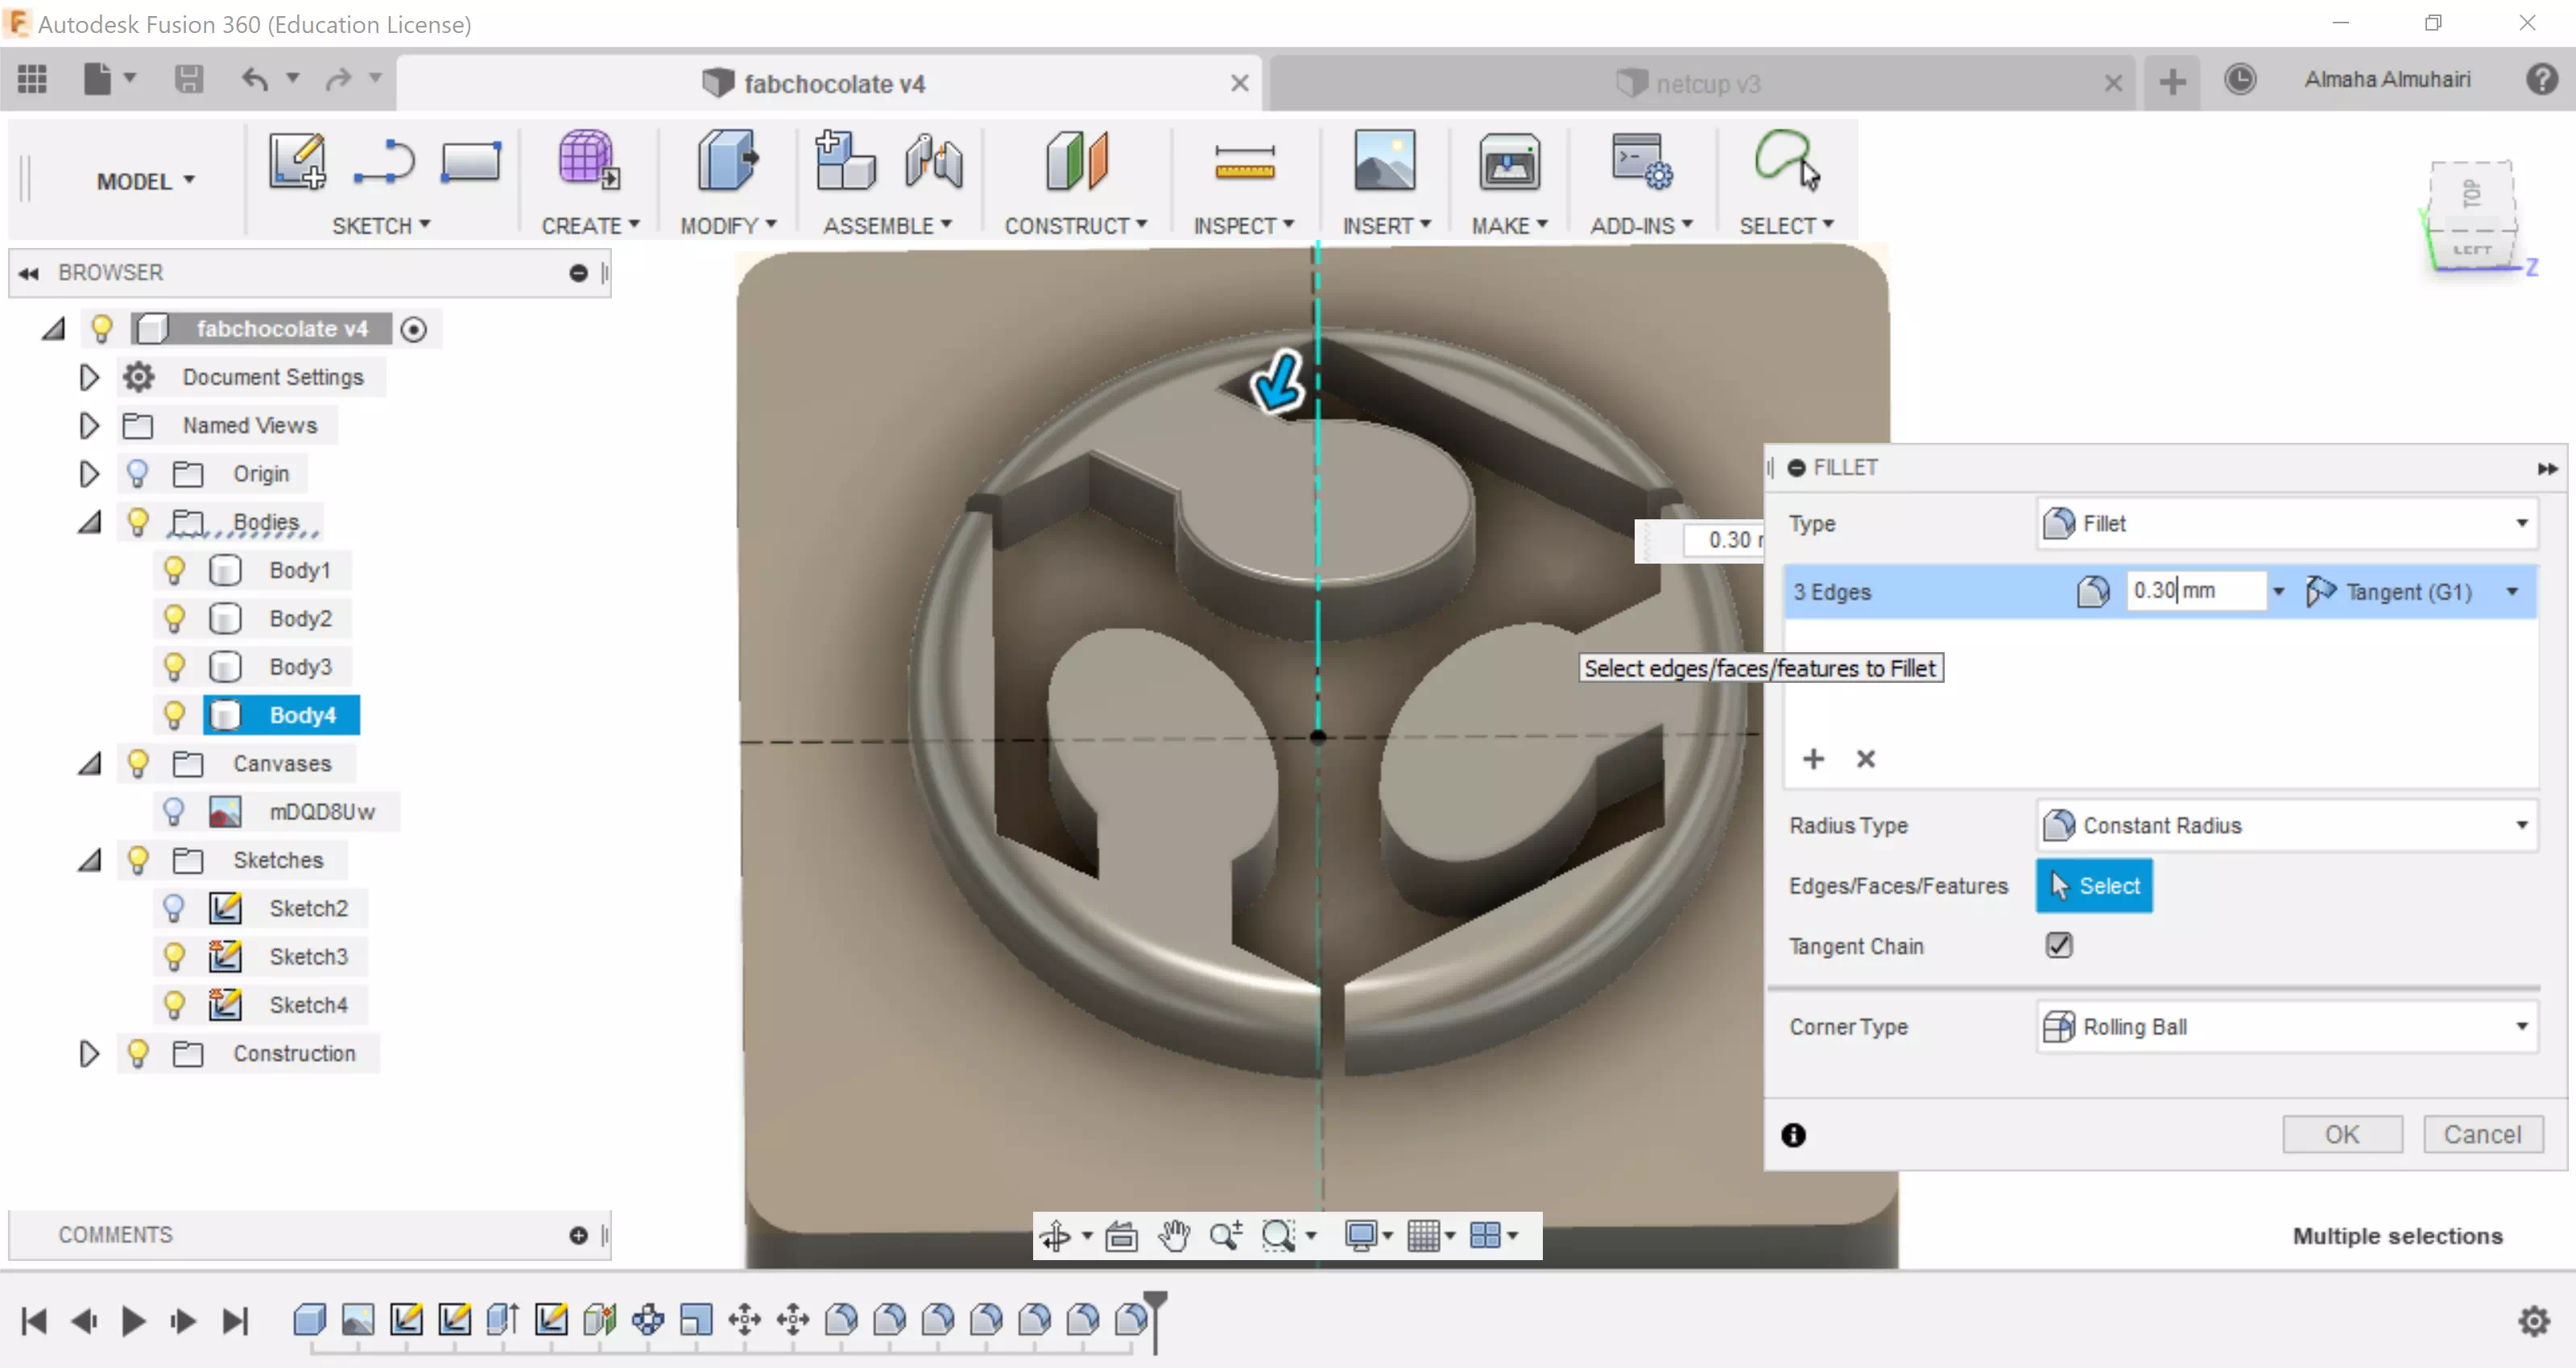
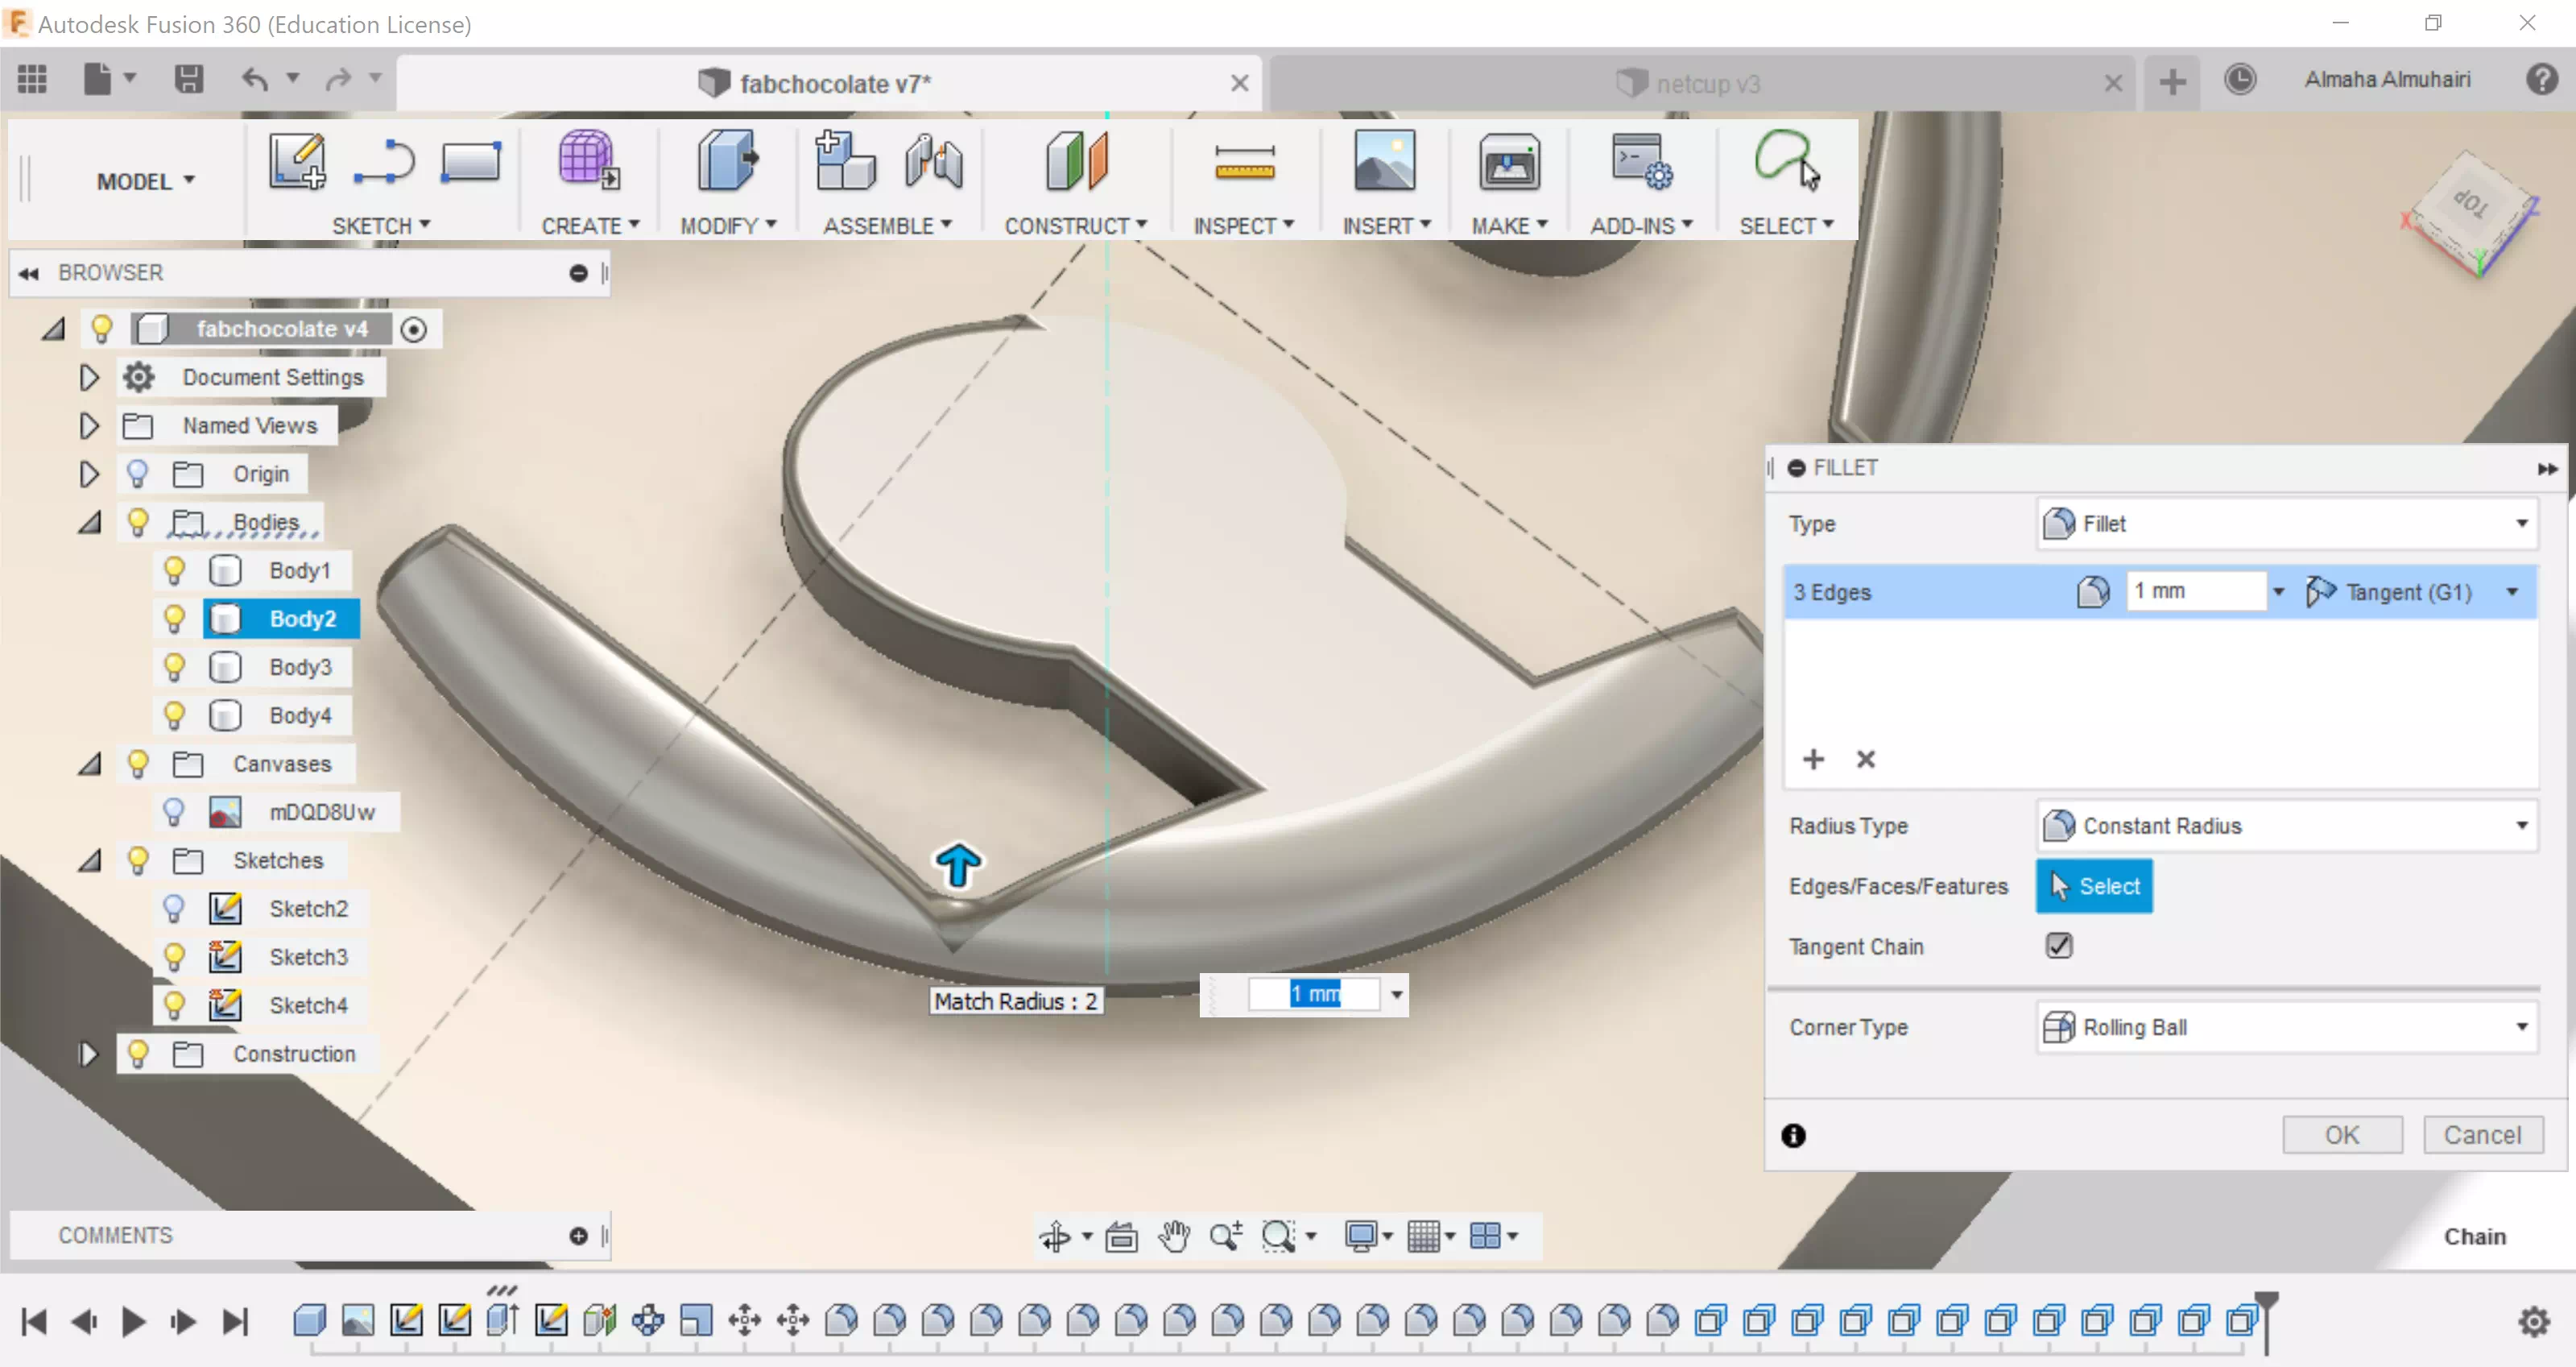
I made some adjustments to my bodies by filleting the harsh edges and offsetting some corners/edges to make the chocolate look rounder and smoother.
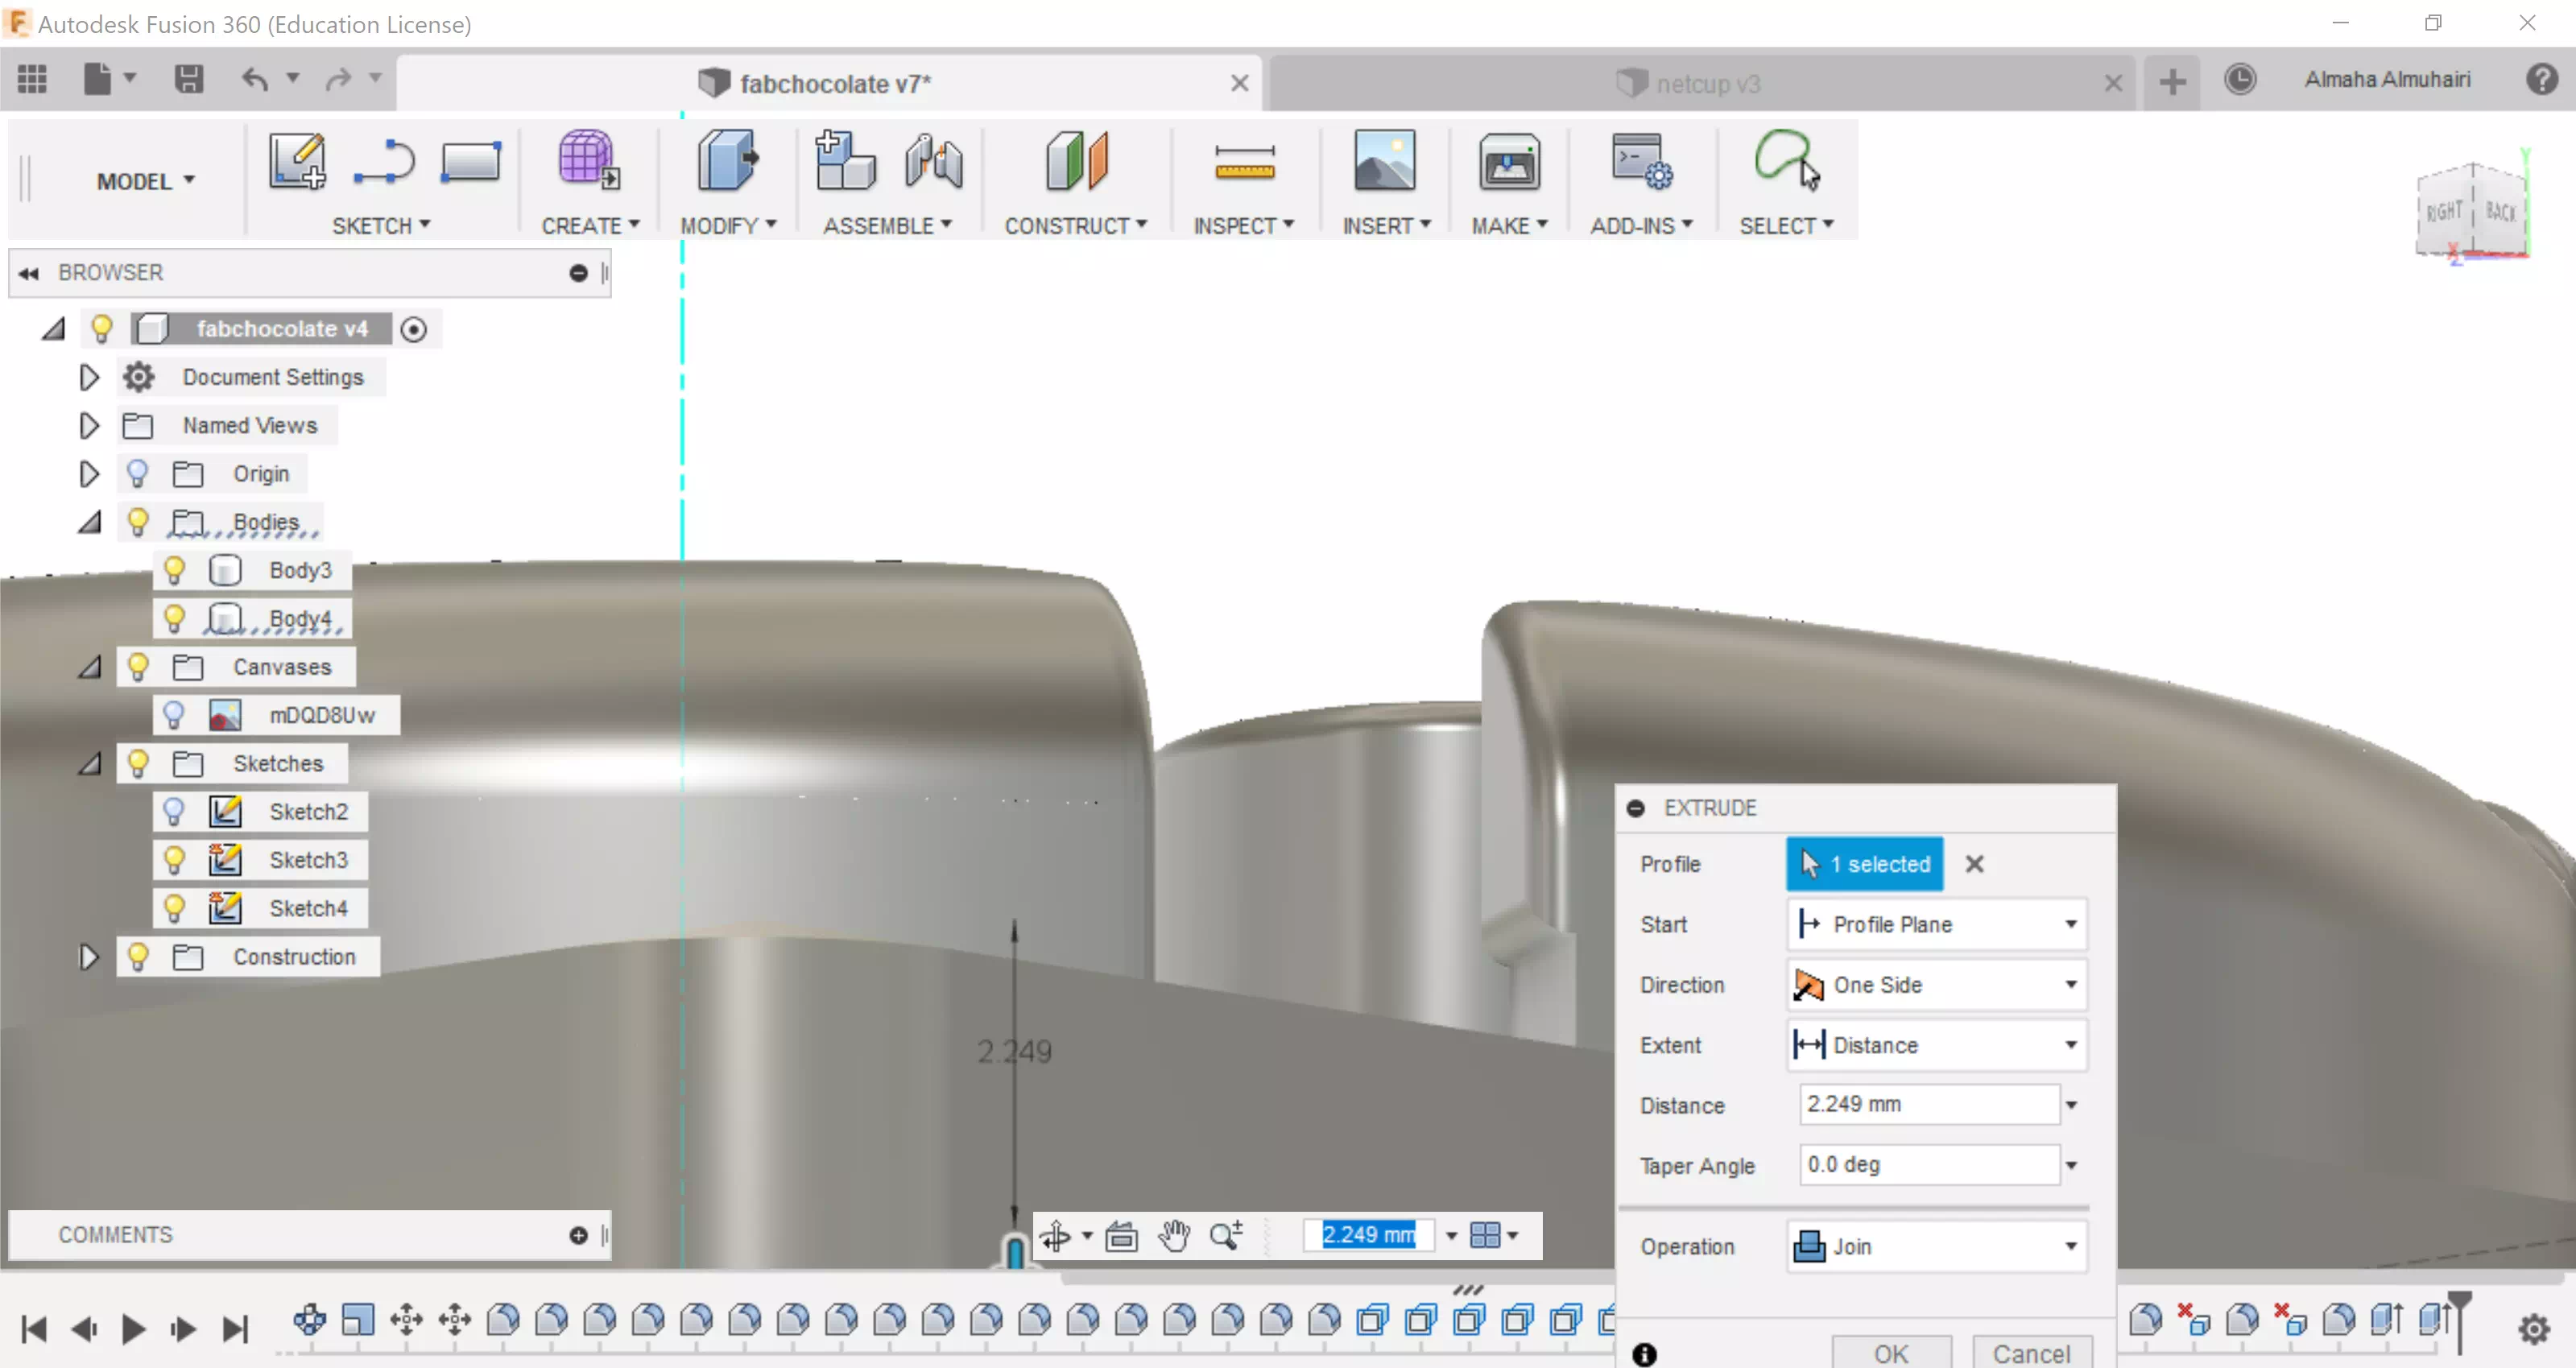
Using the Extrude tool join the base with the upper bodies.
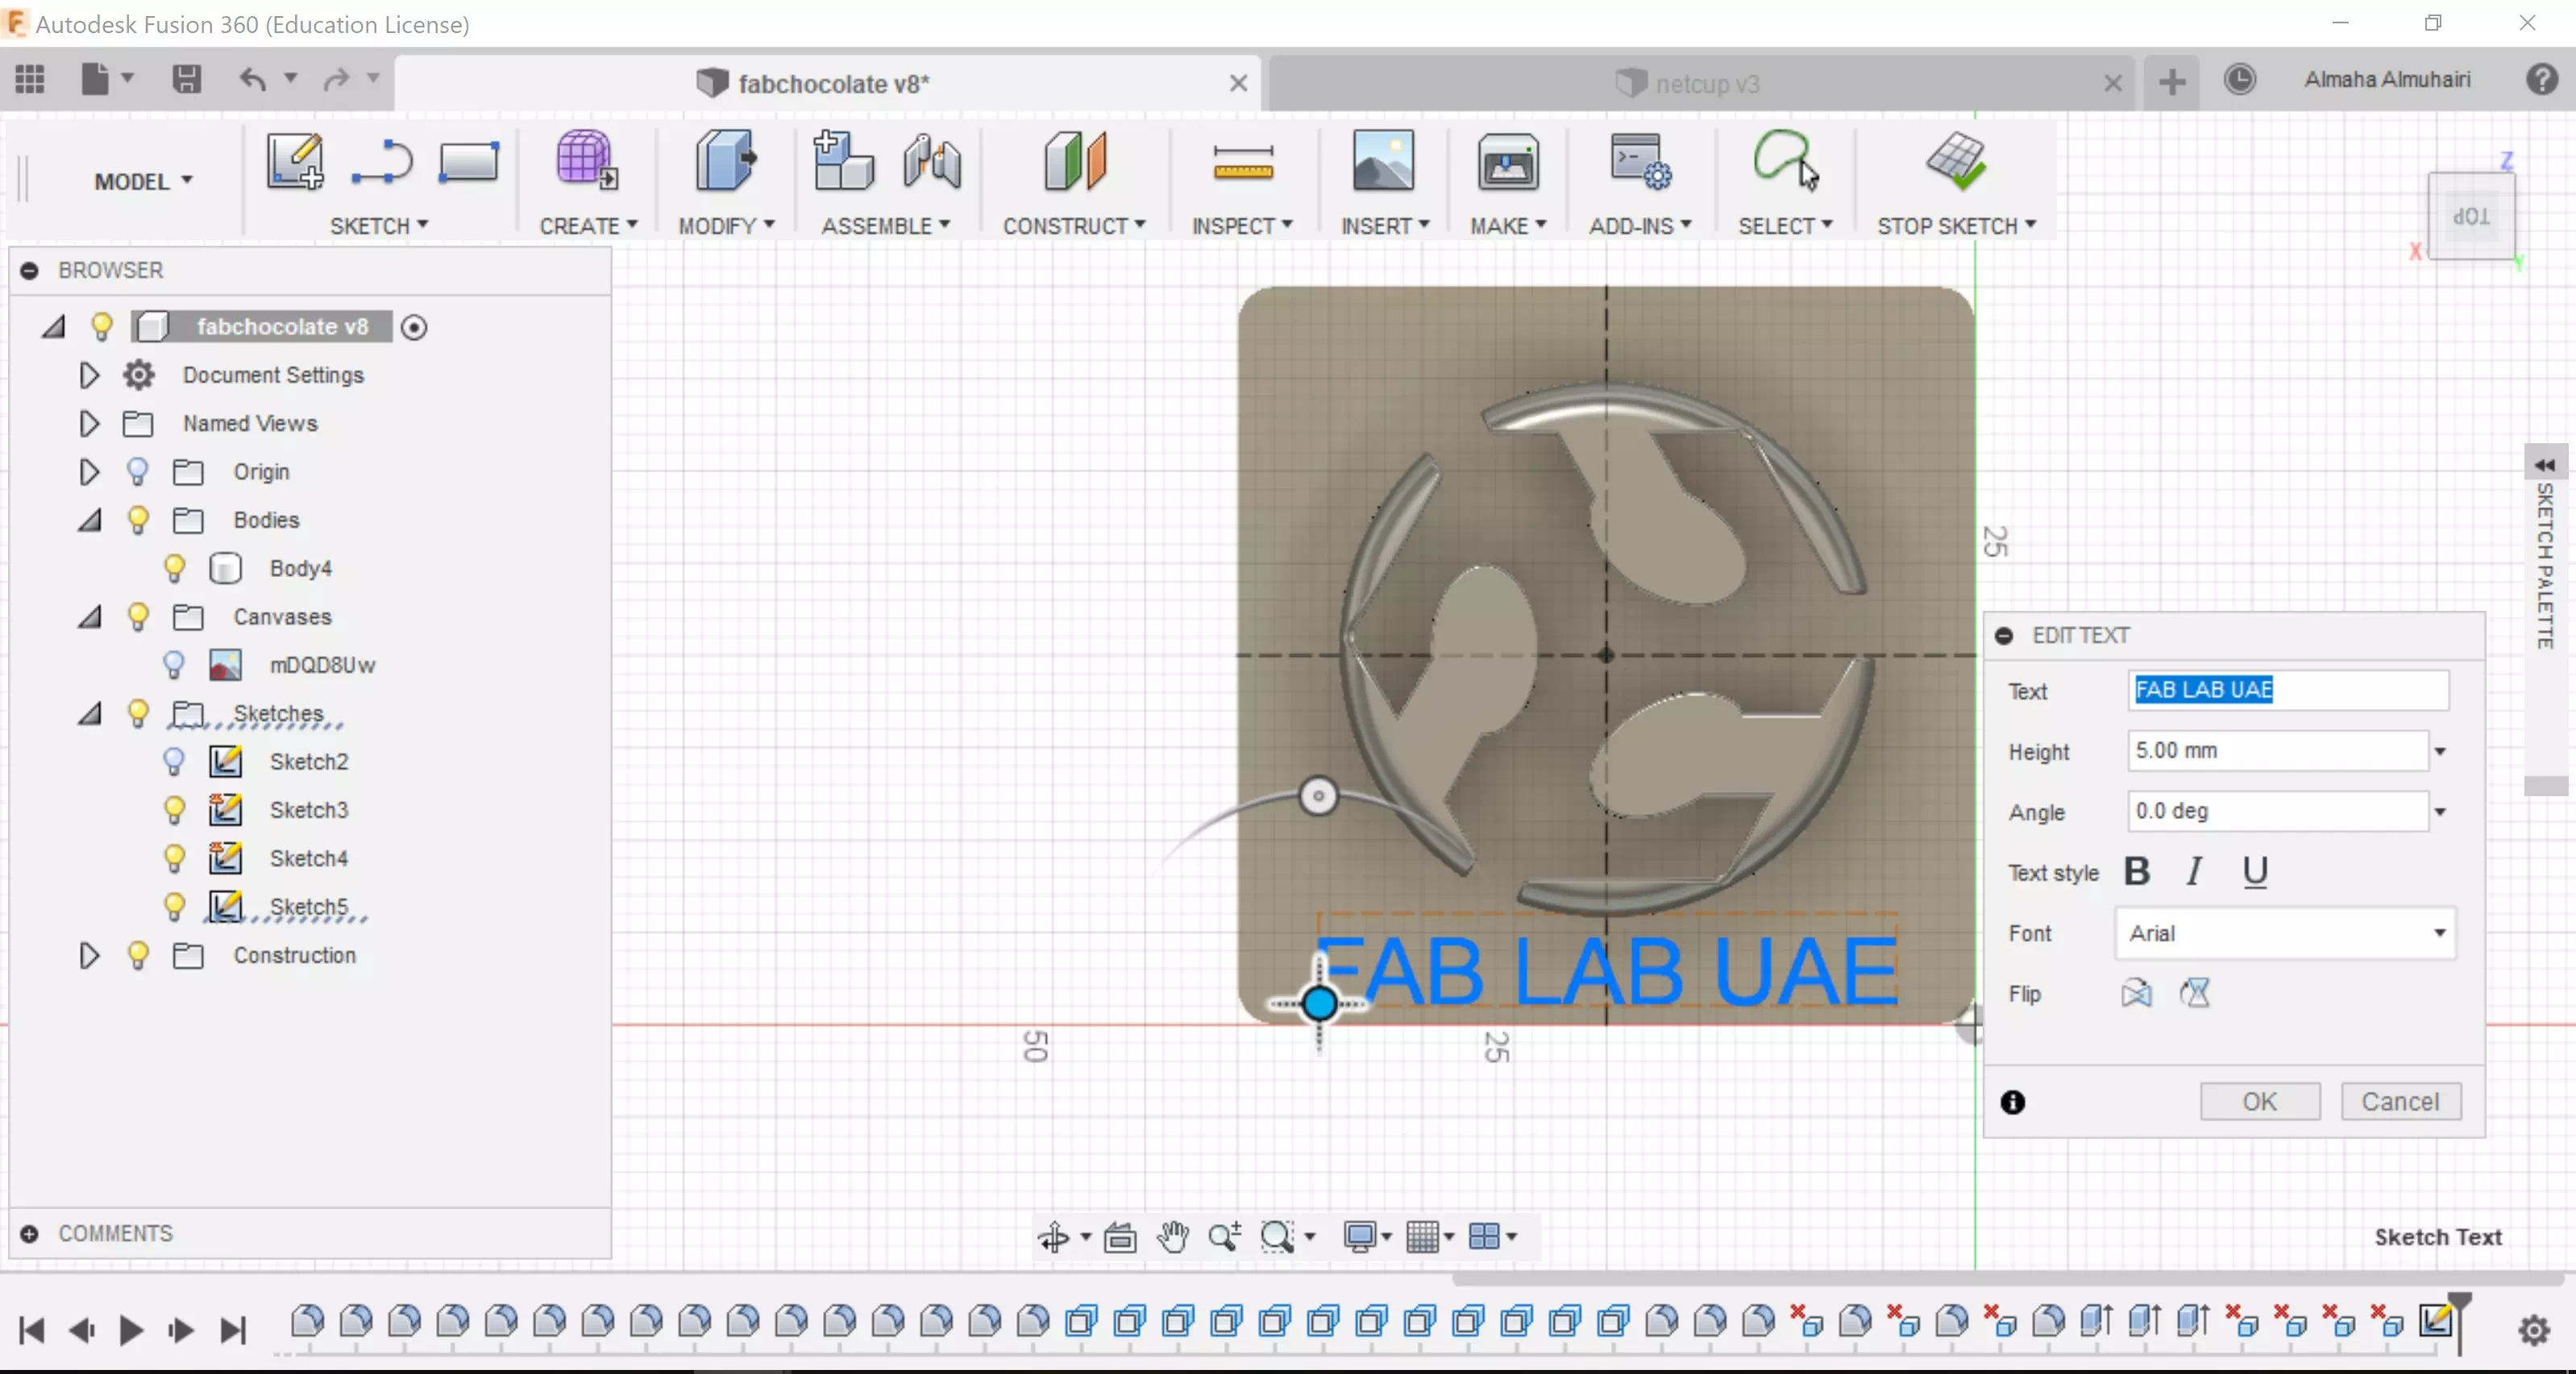
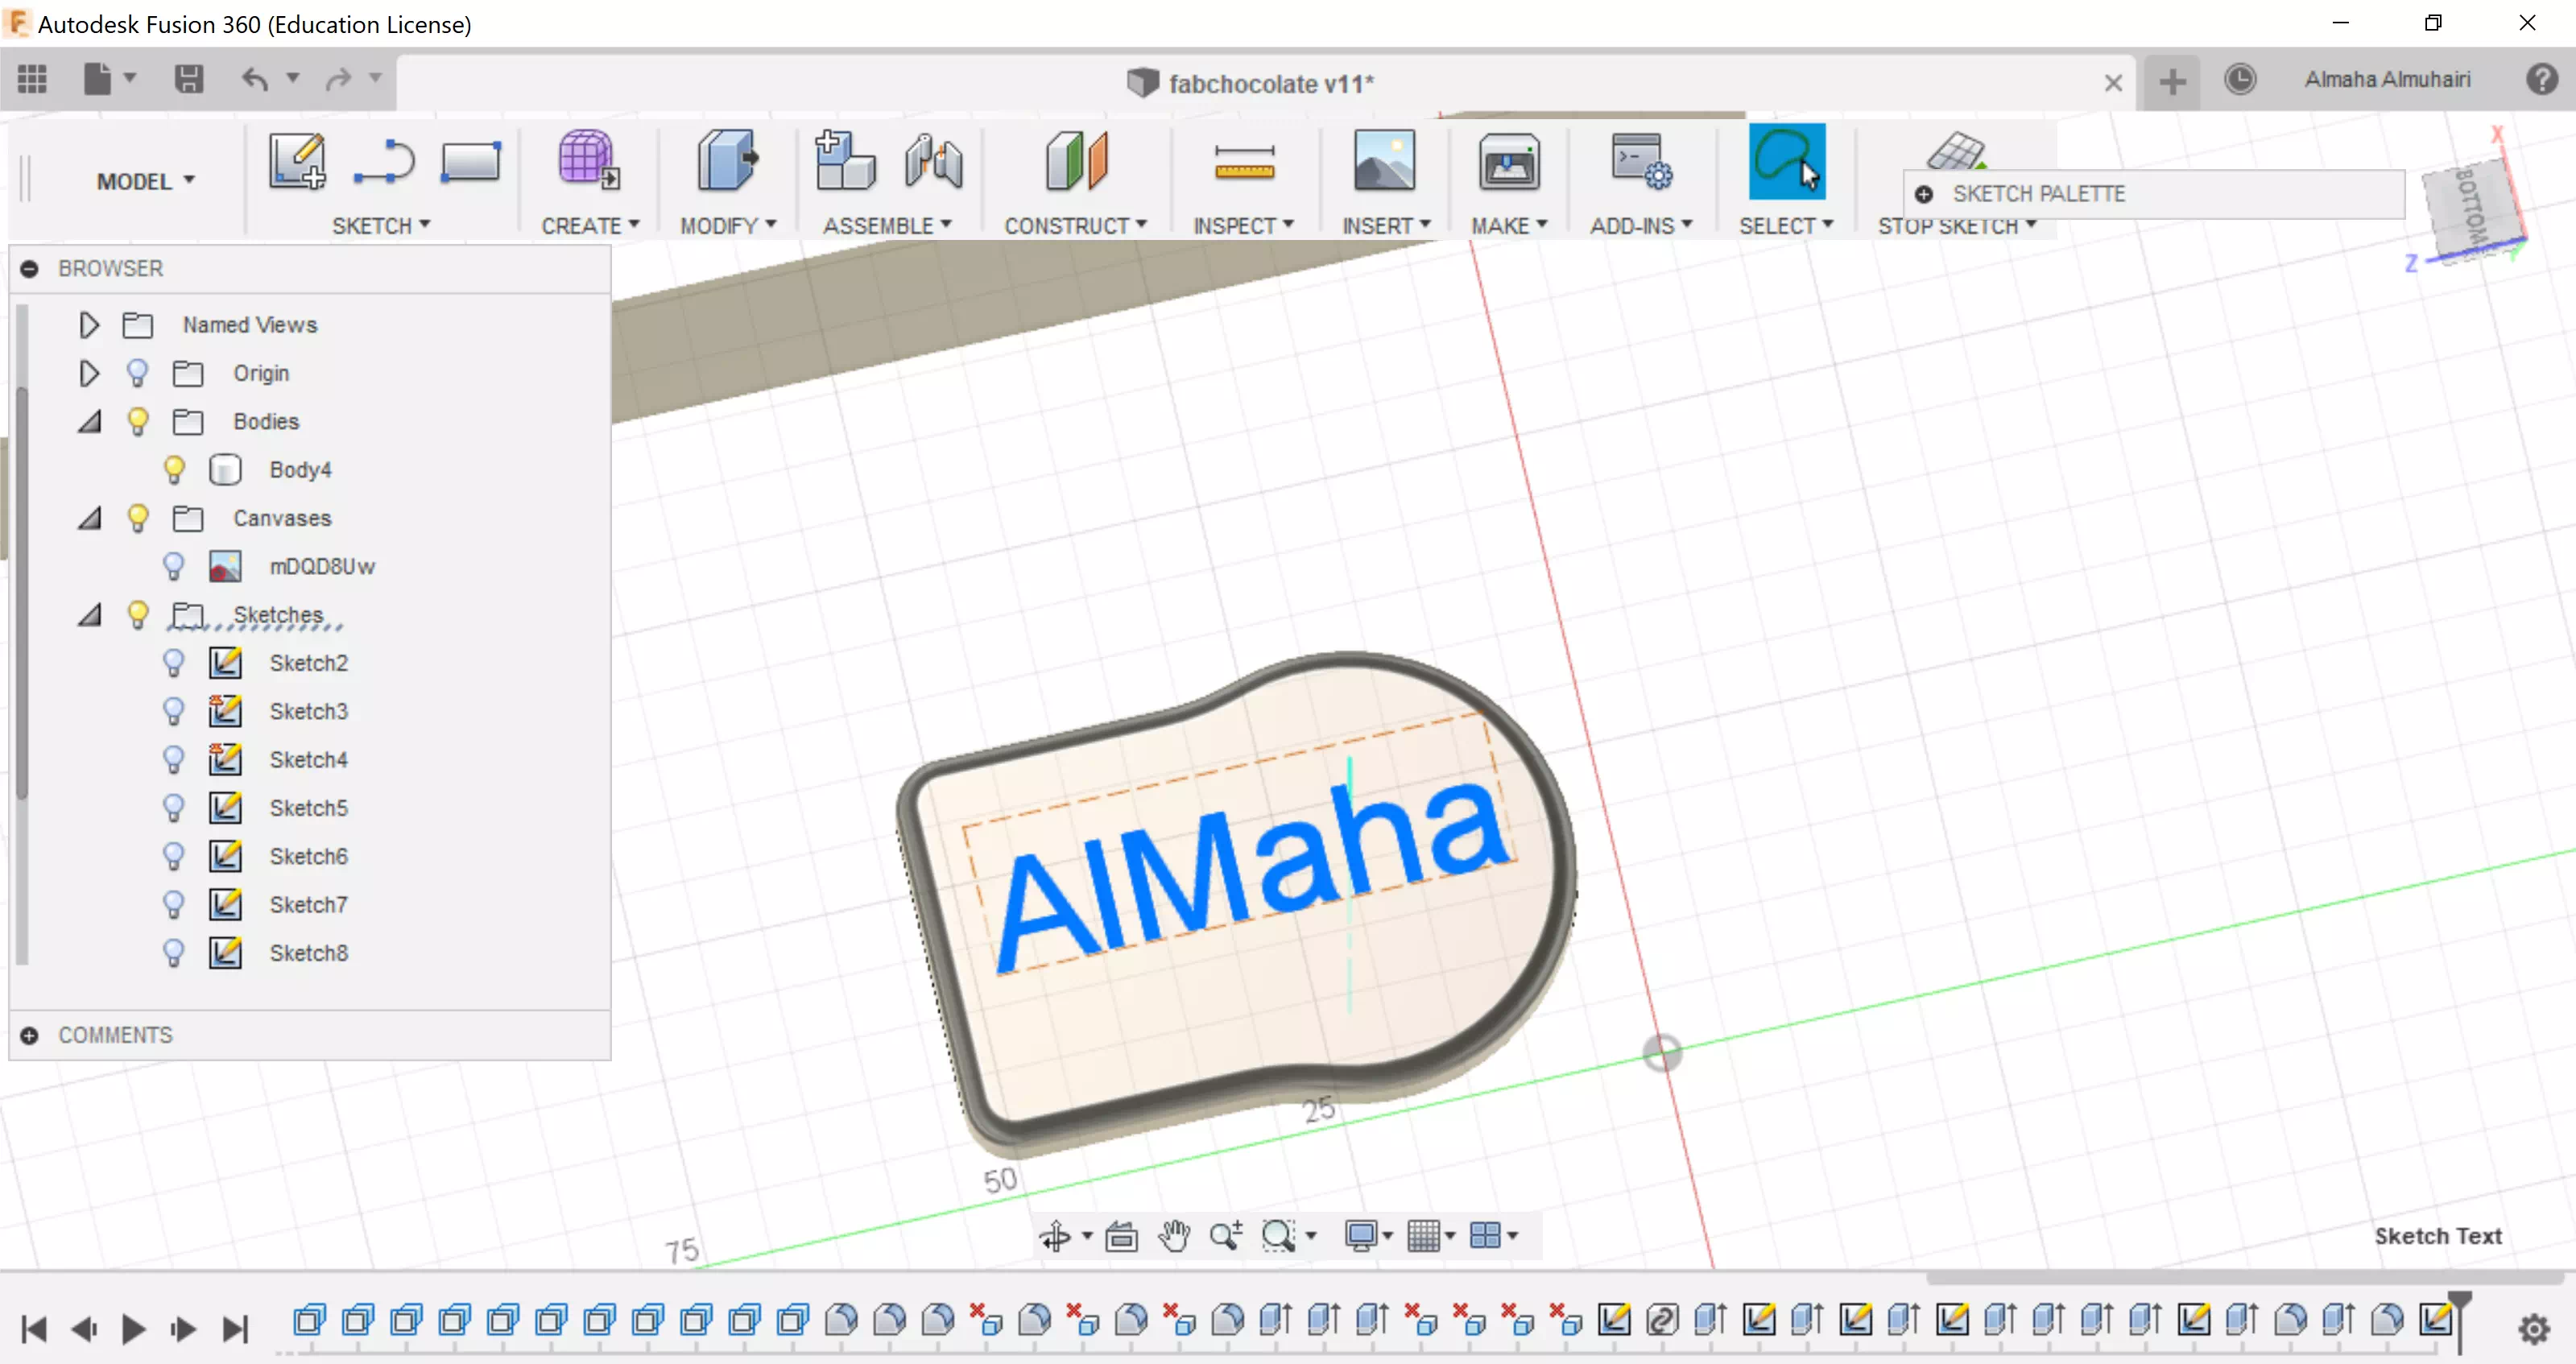
Add Text to the empty space, I also made my base bigger to make the text larger.
Edit the text settings and move it to a suitable space.
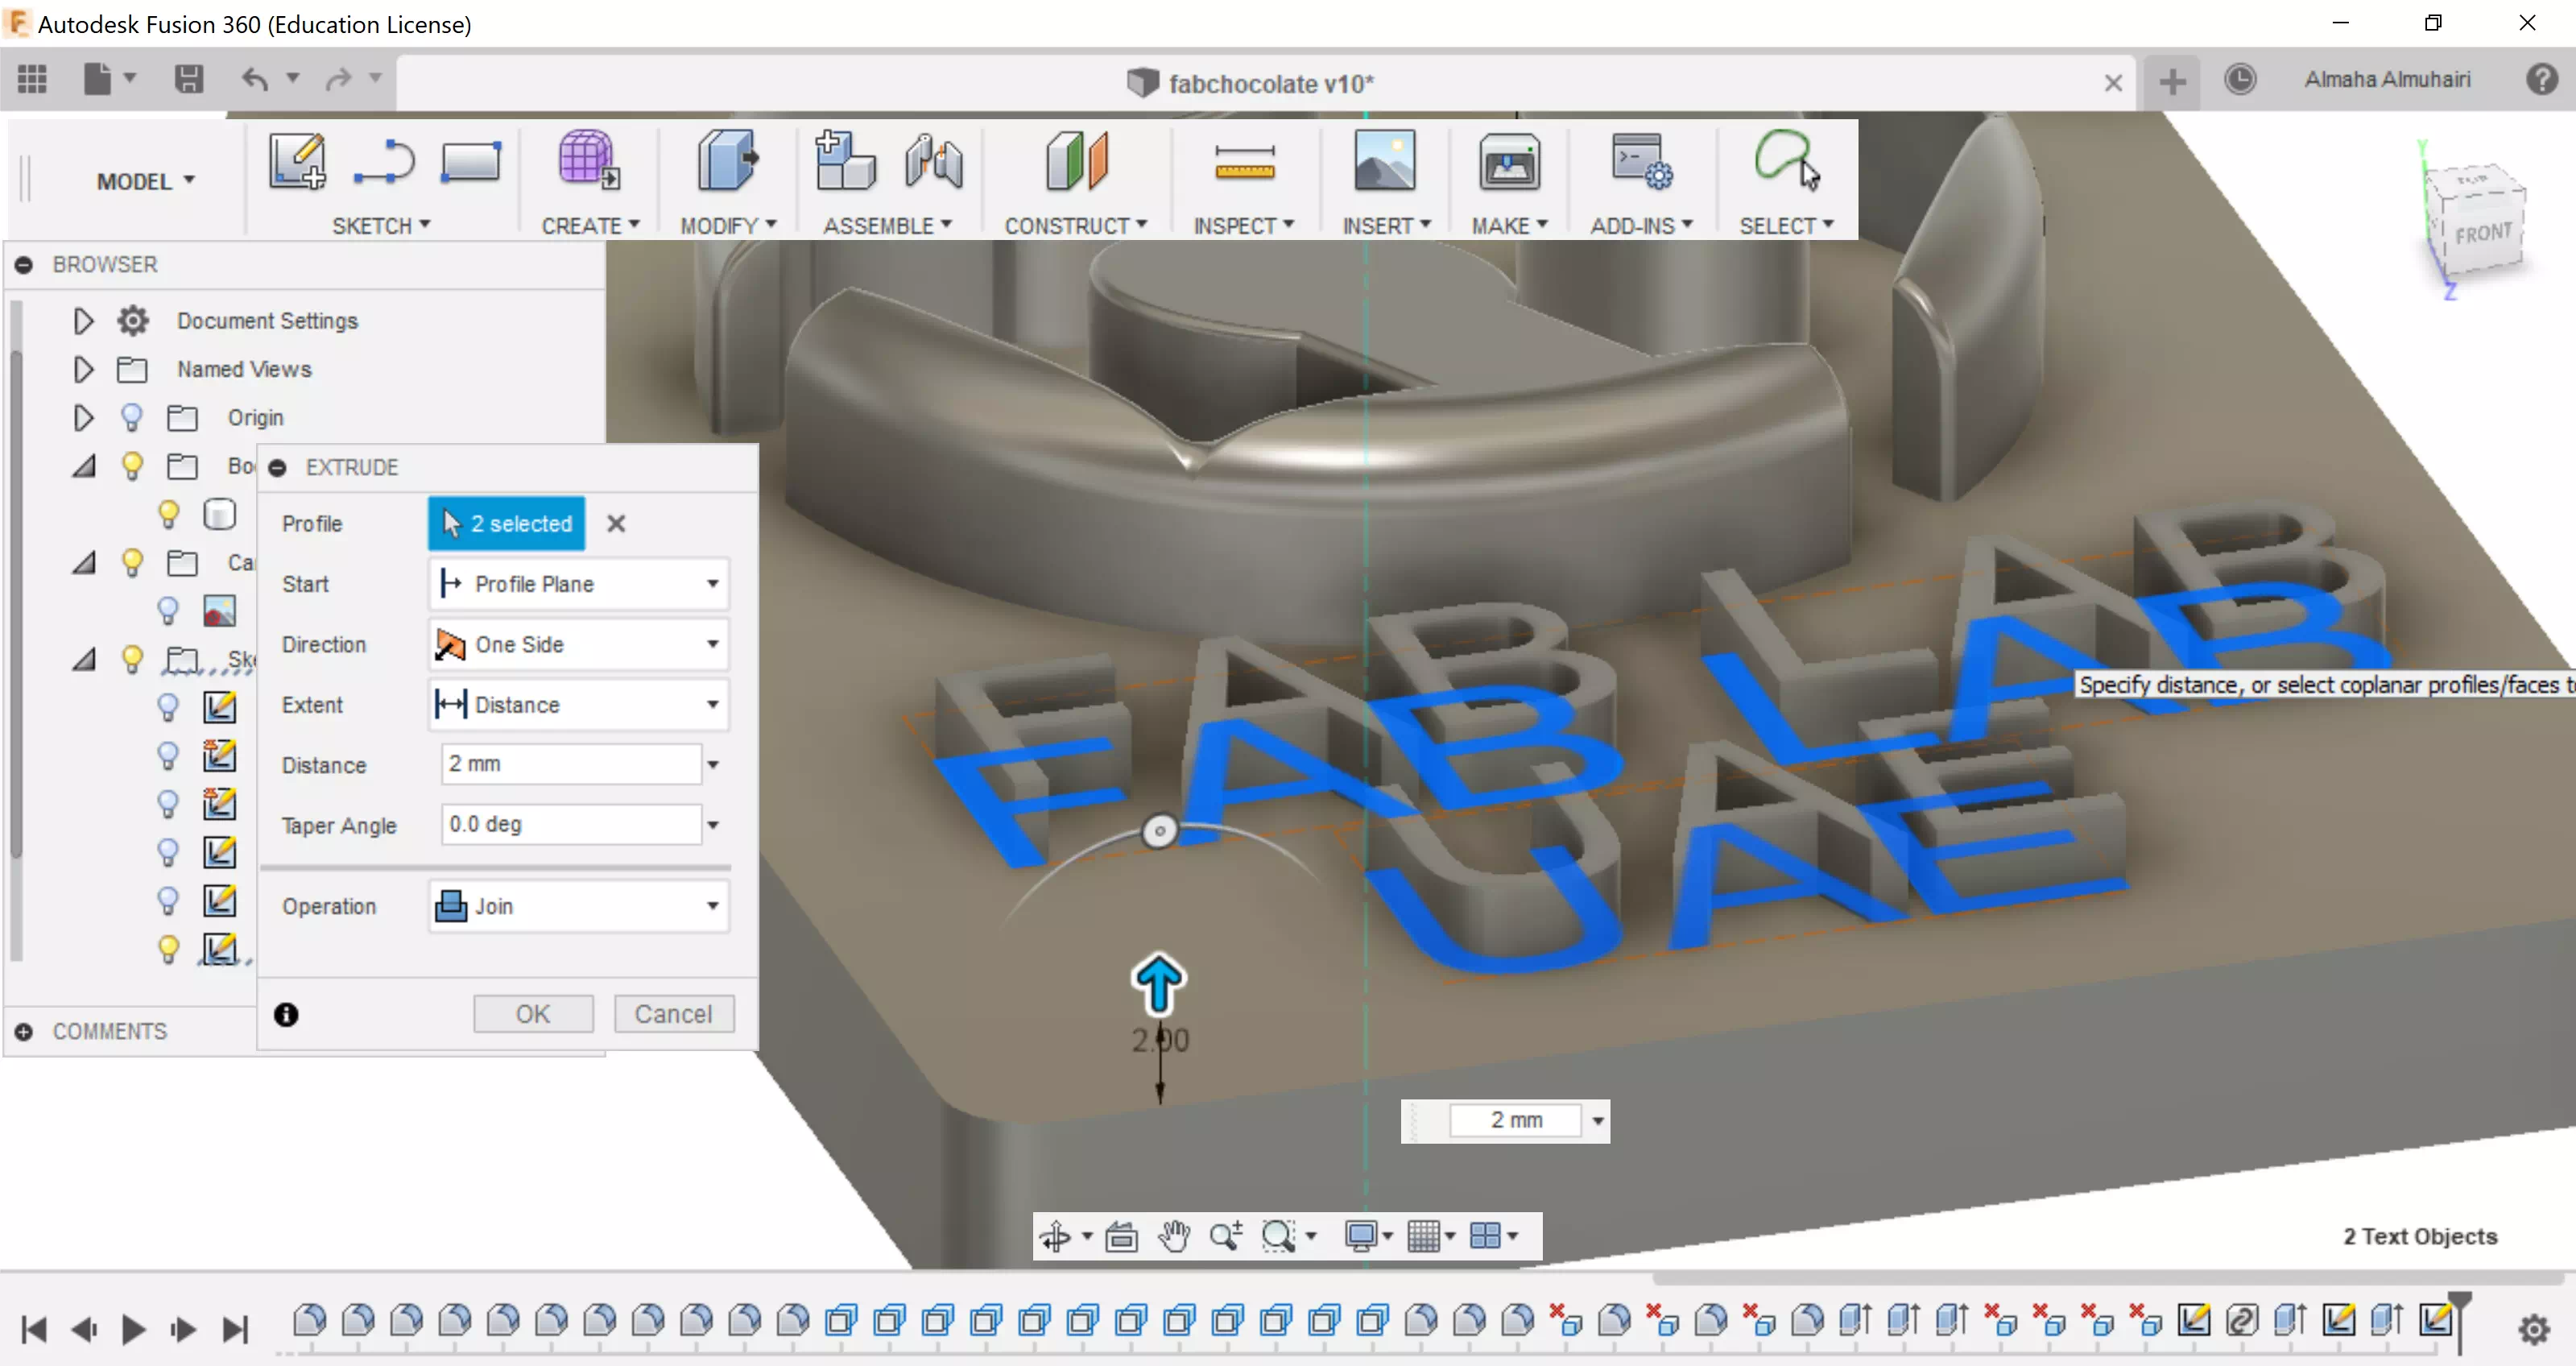
Extrude the text upwards.
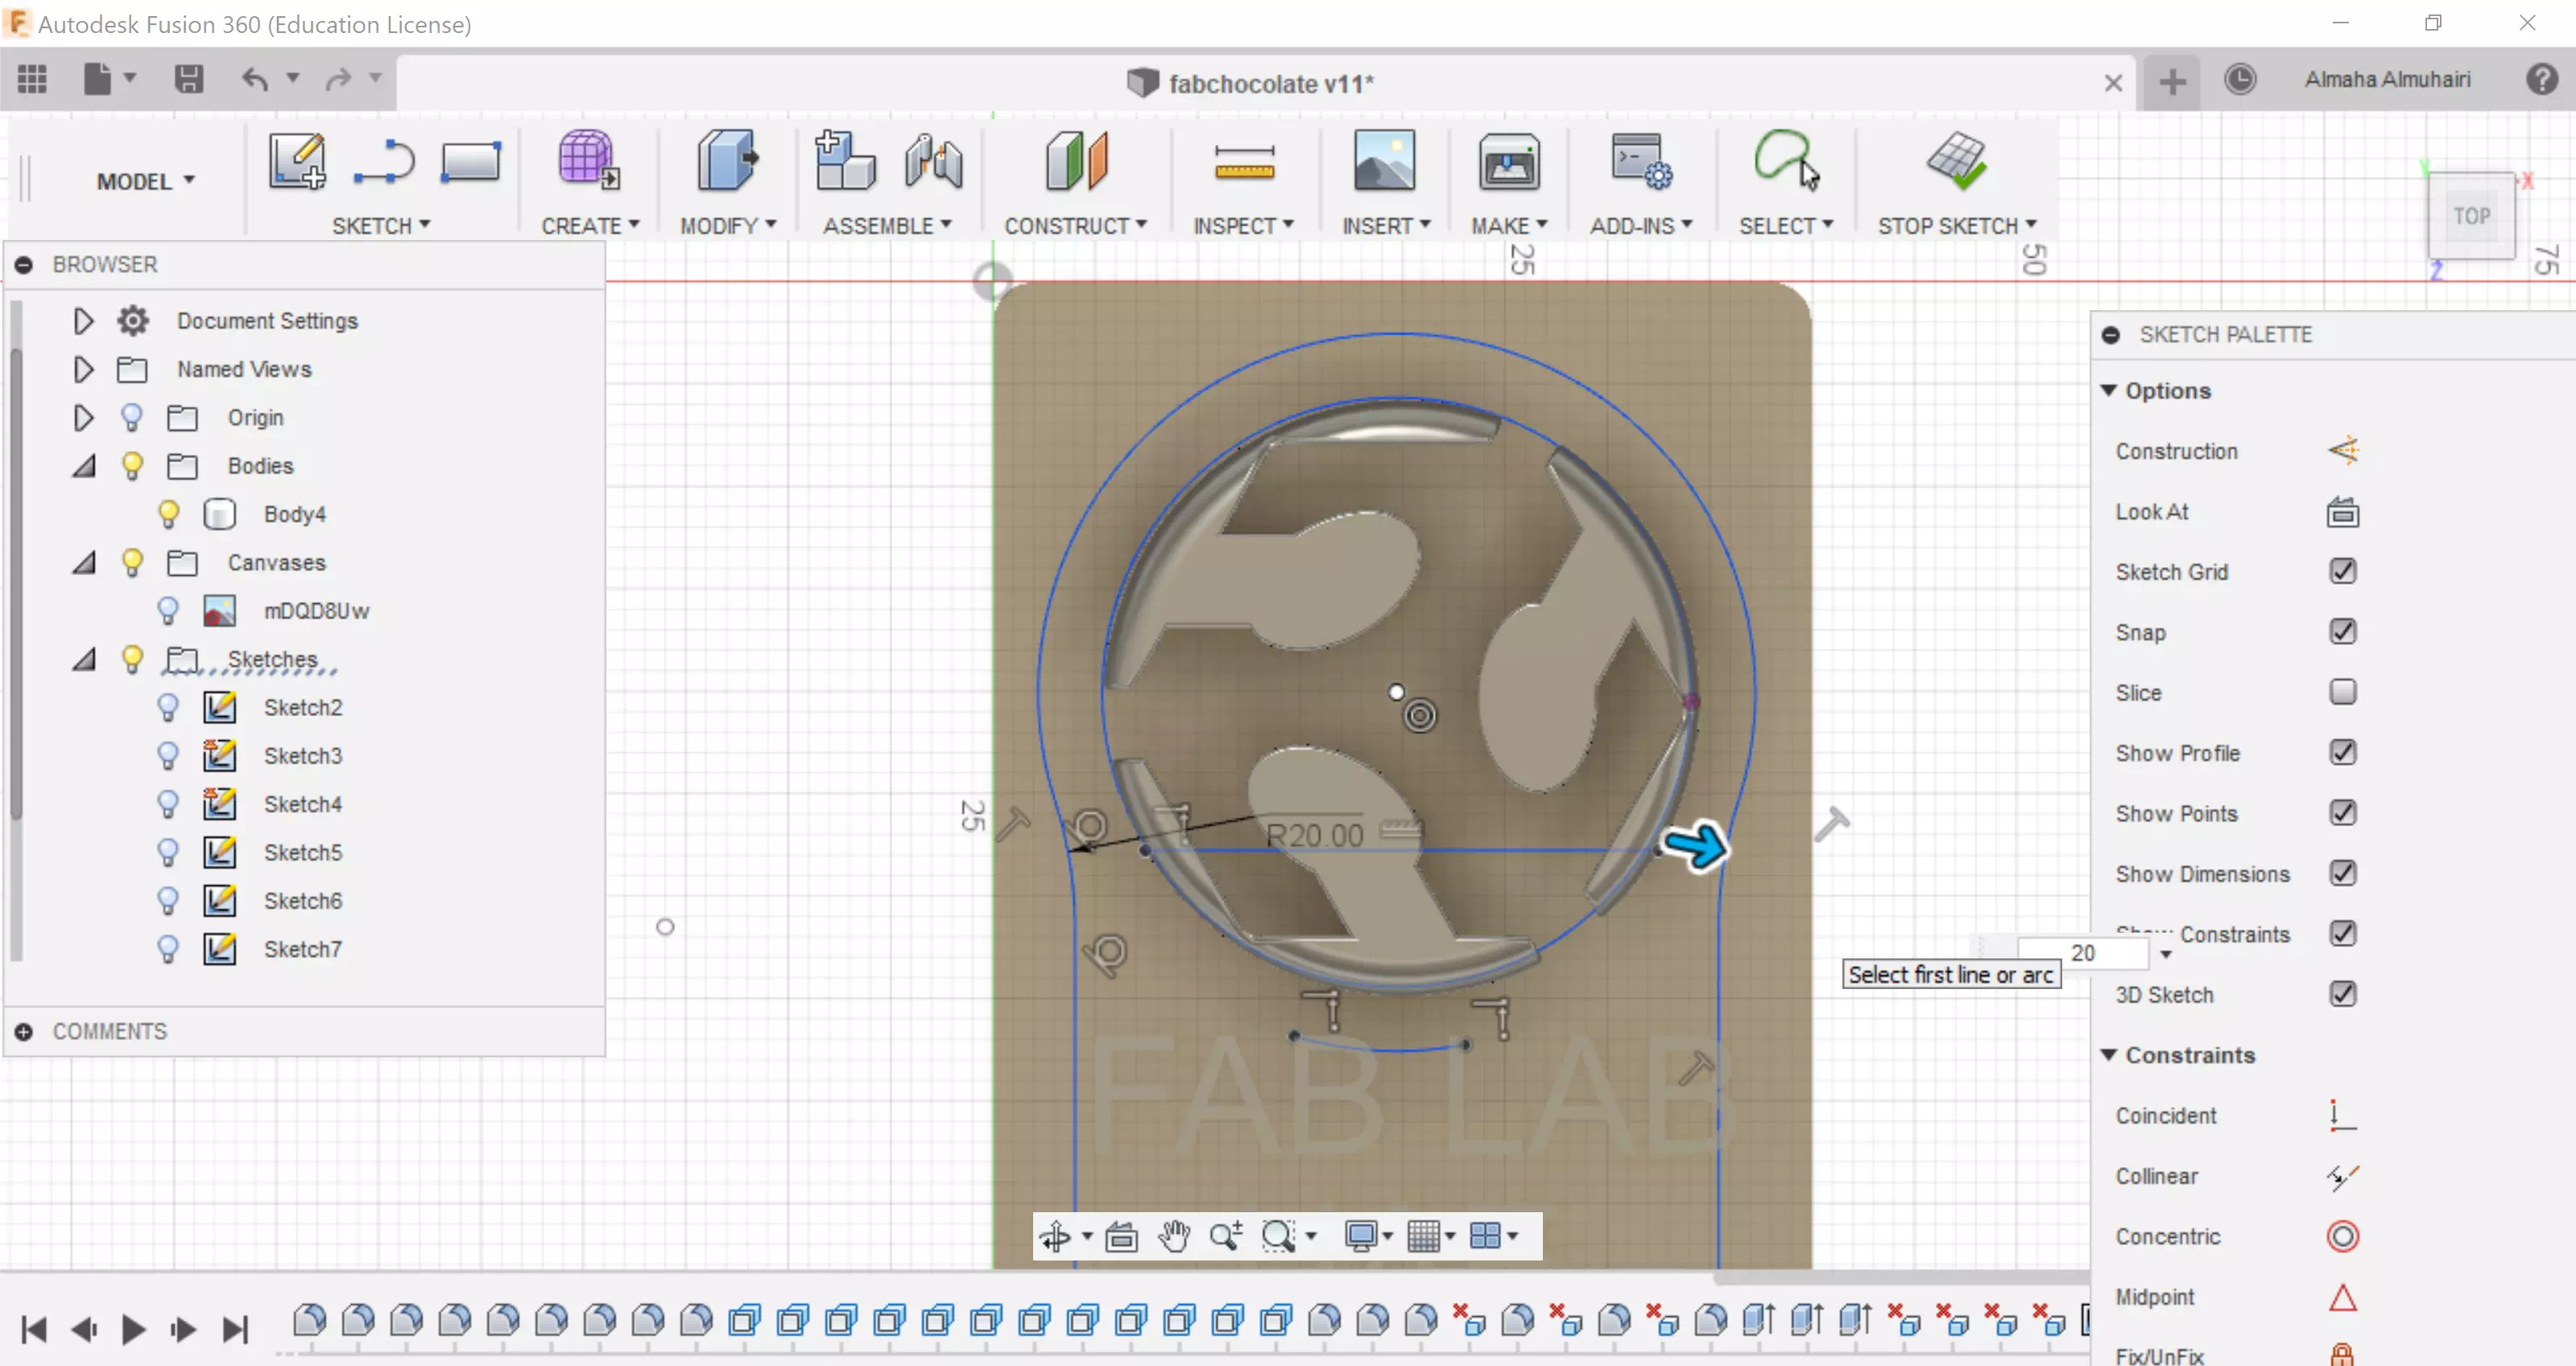
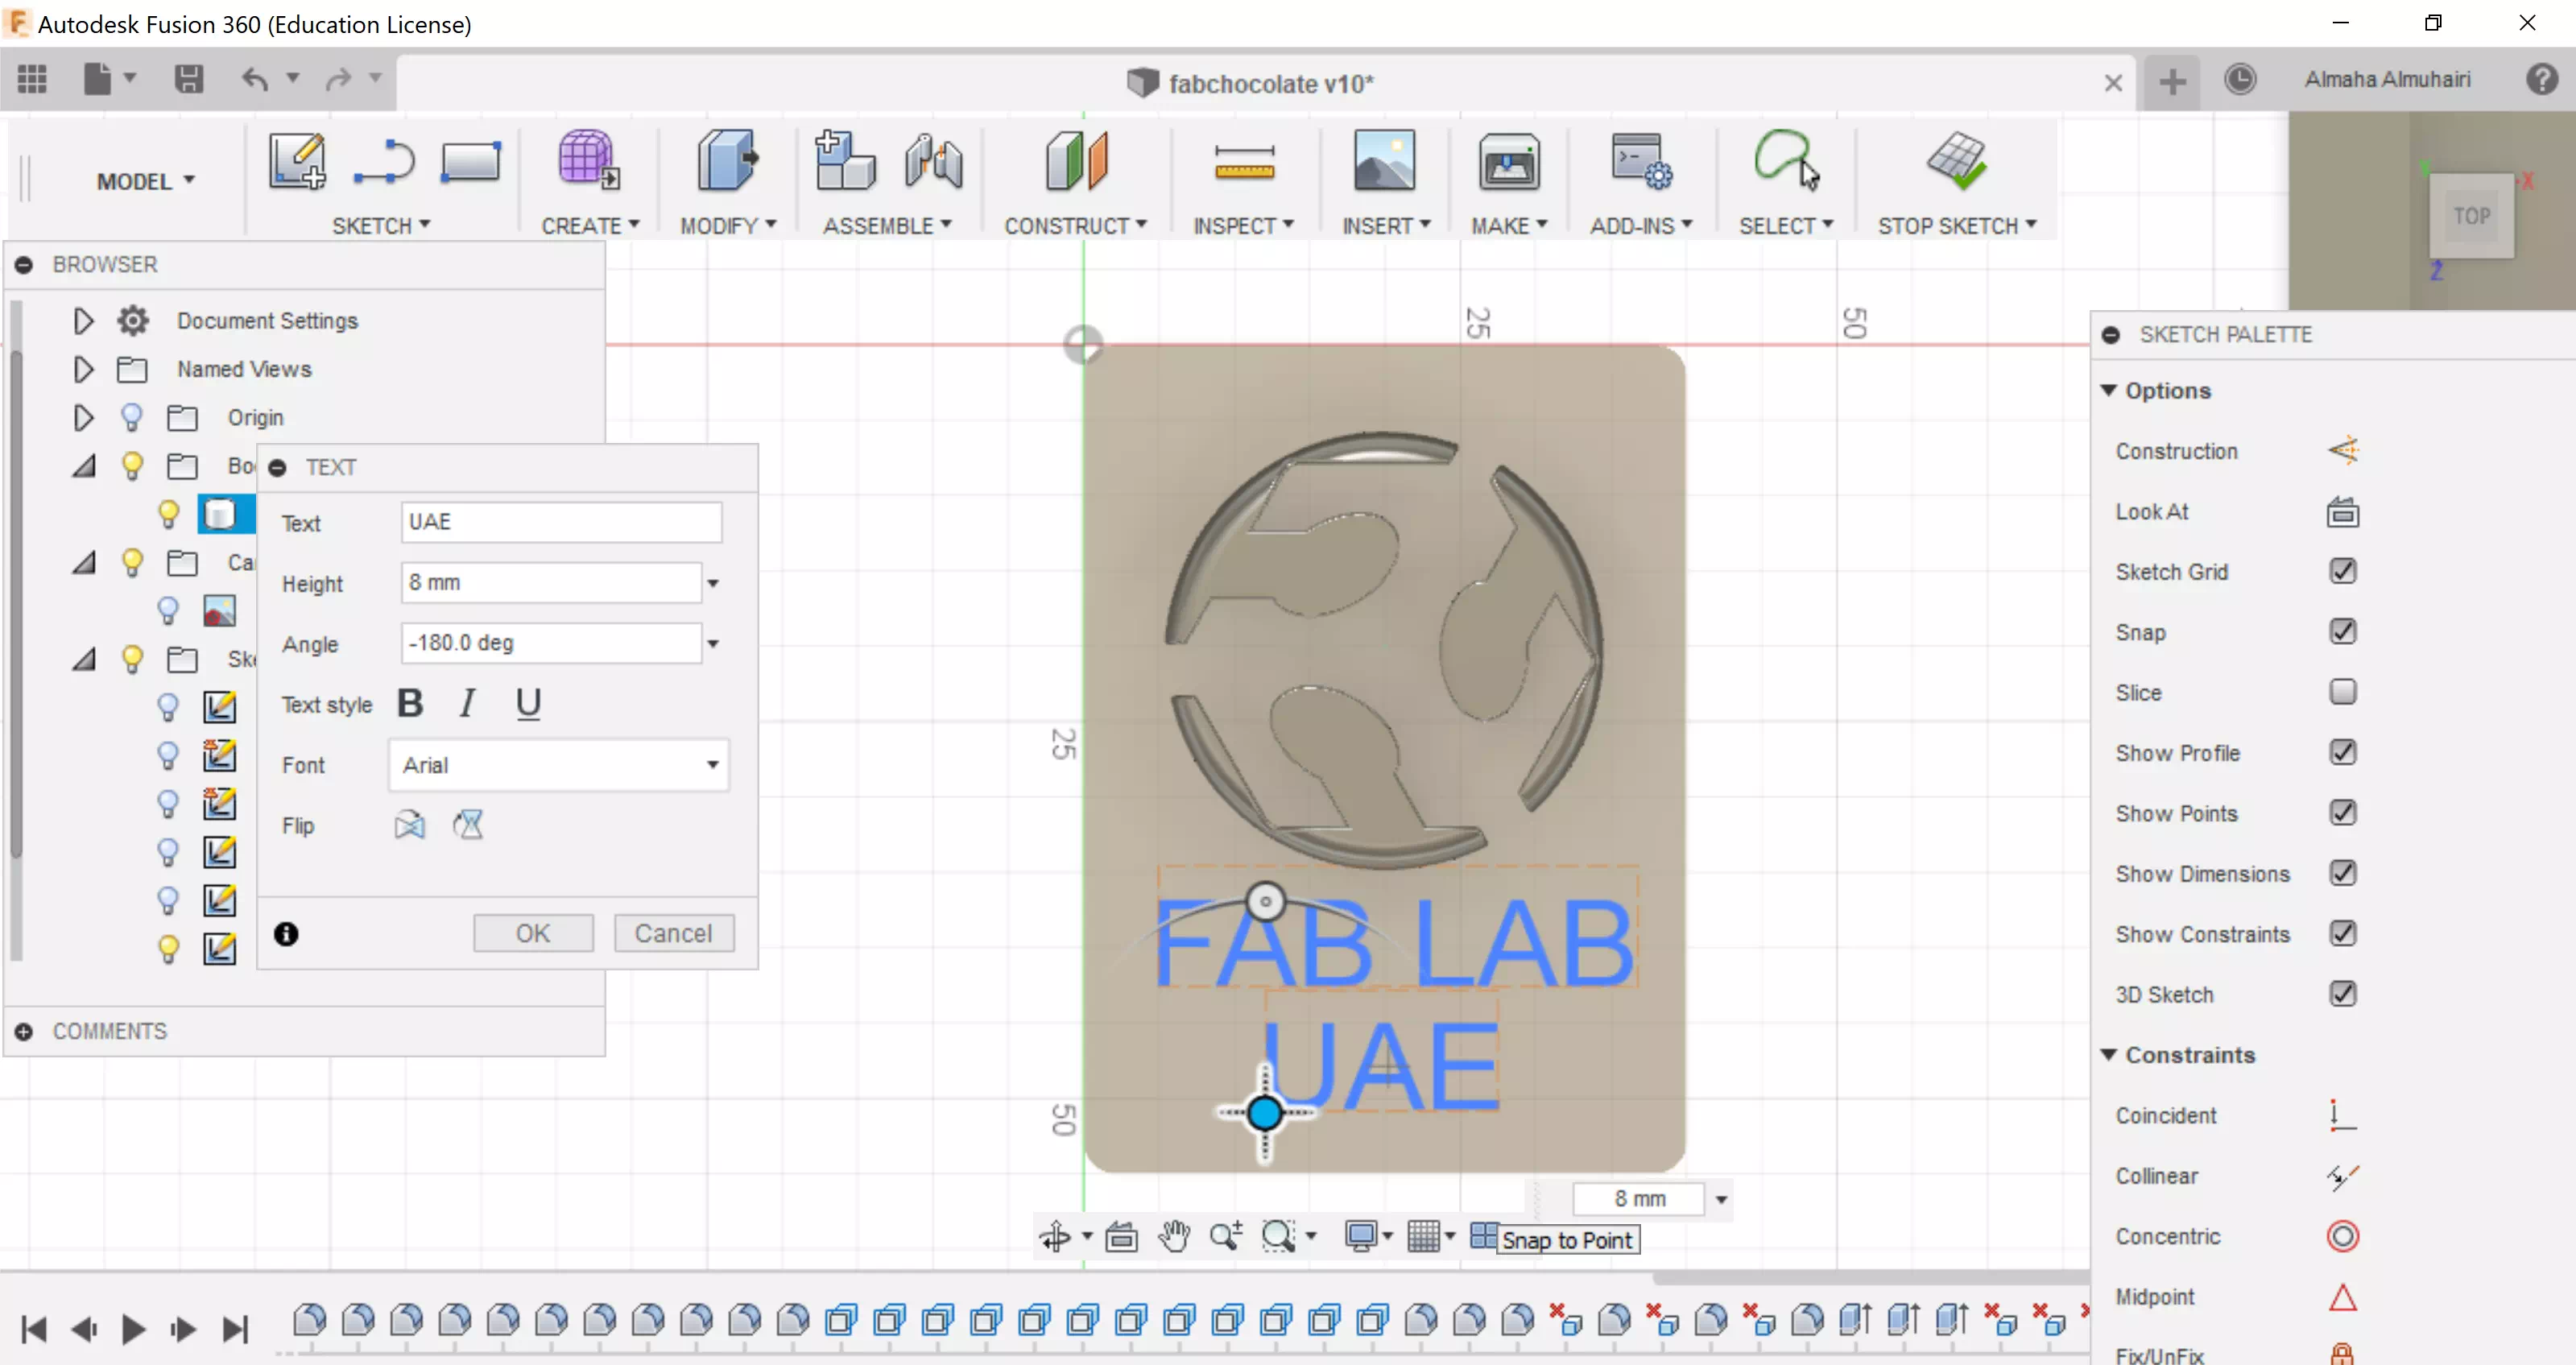
As you can see the words are big to that shape, so I decided to create a new sketch to fit all the words, using the lines and splines I created a new base on top of the existing base as a sketch.
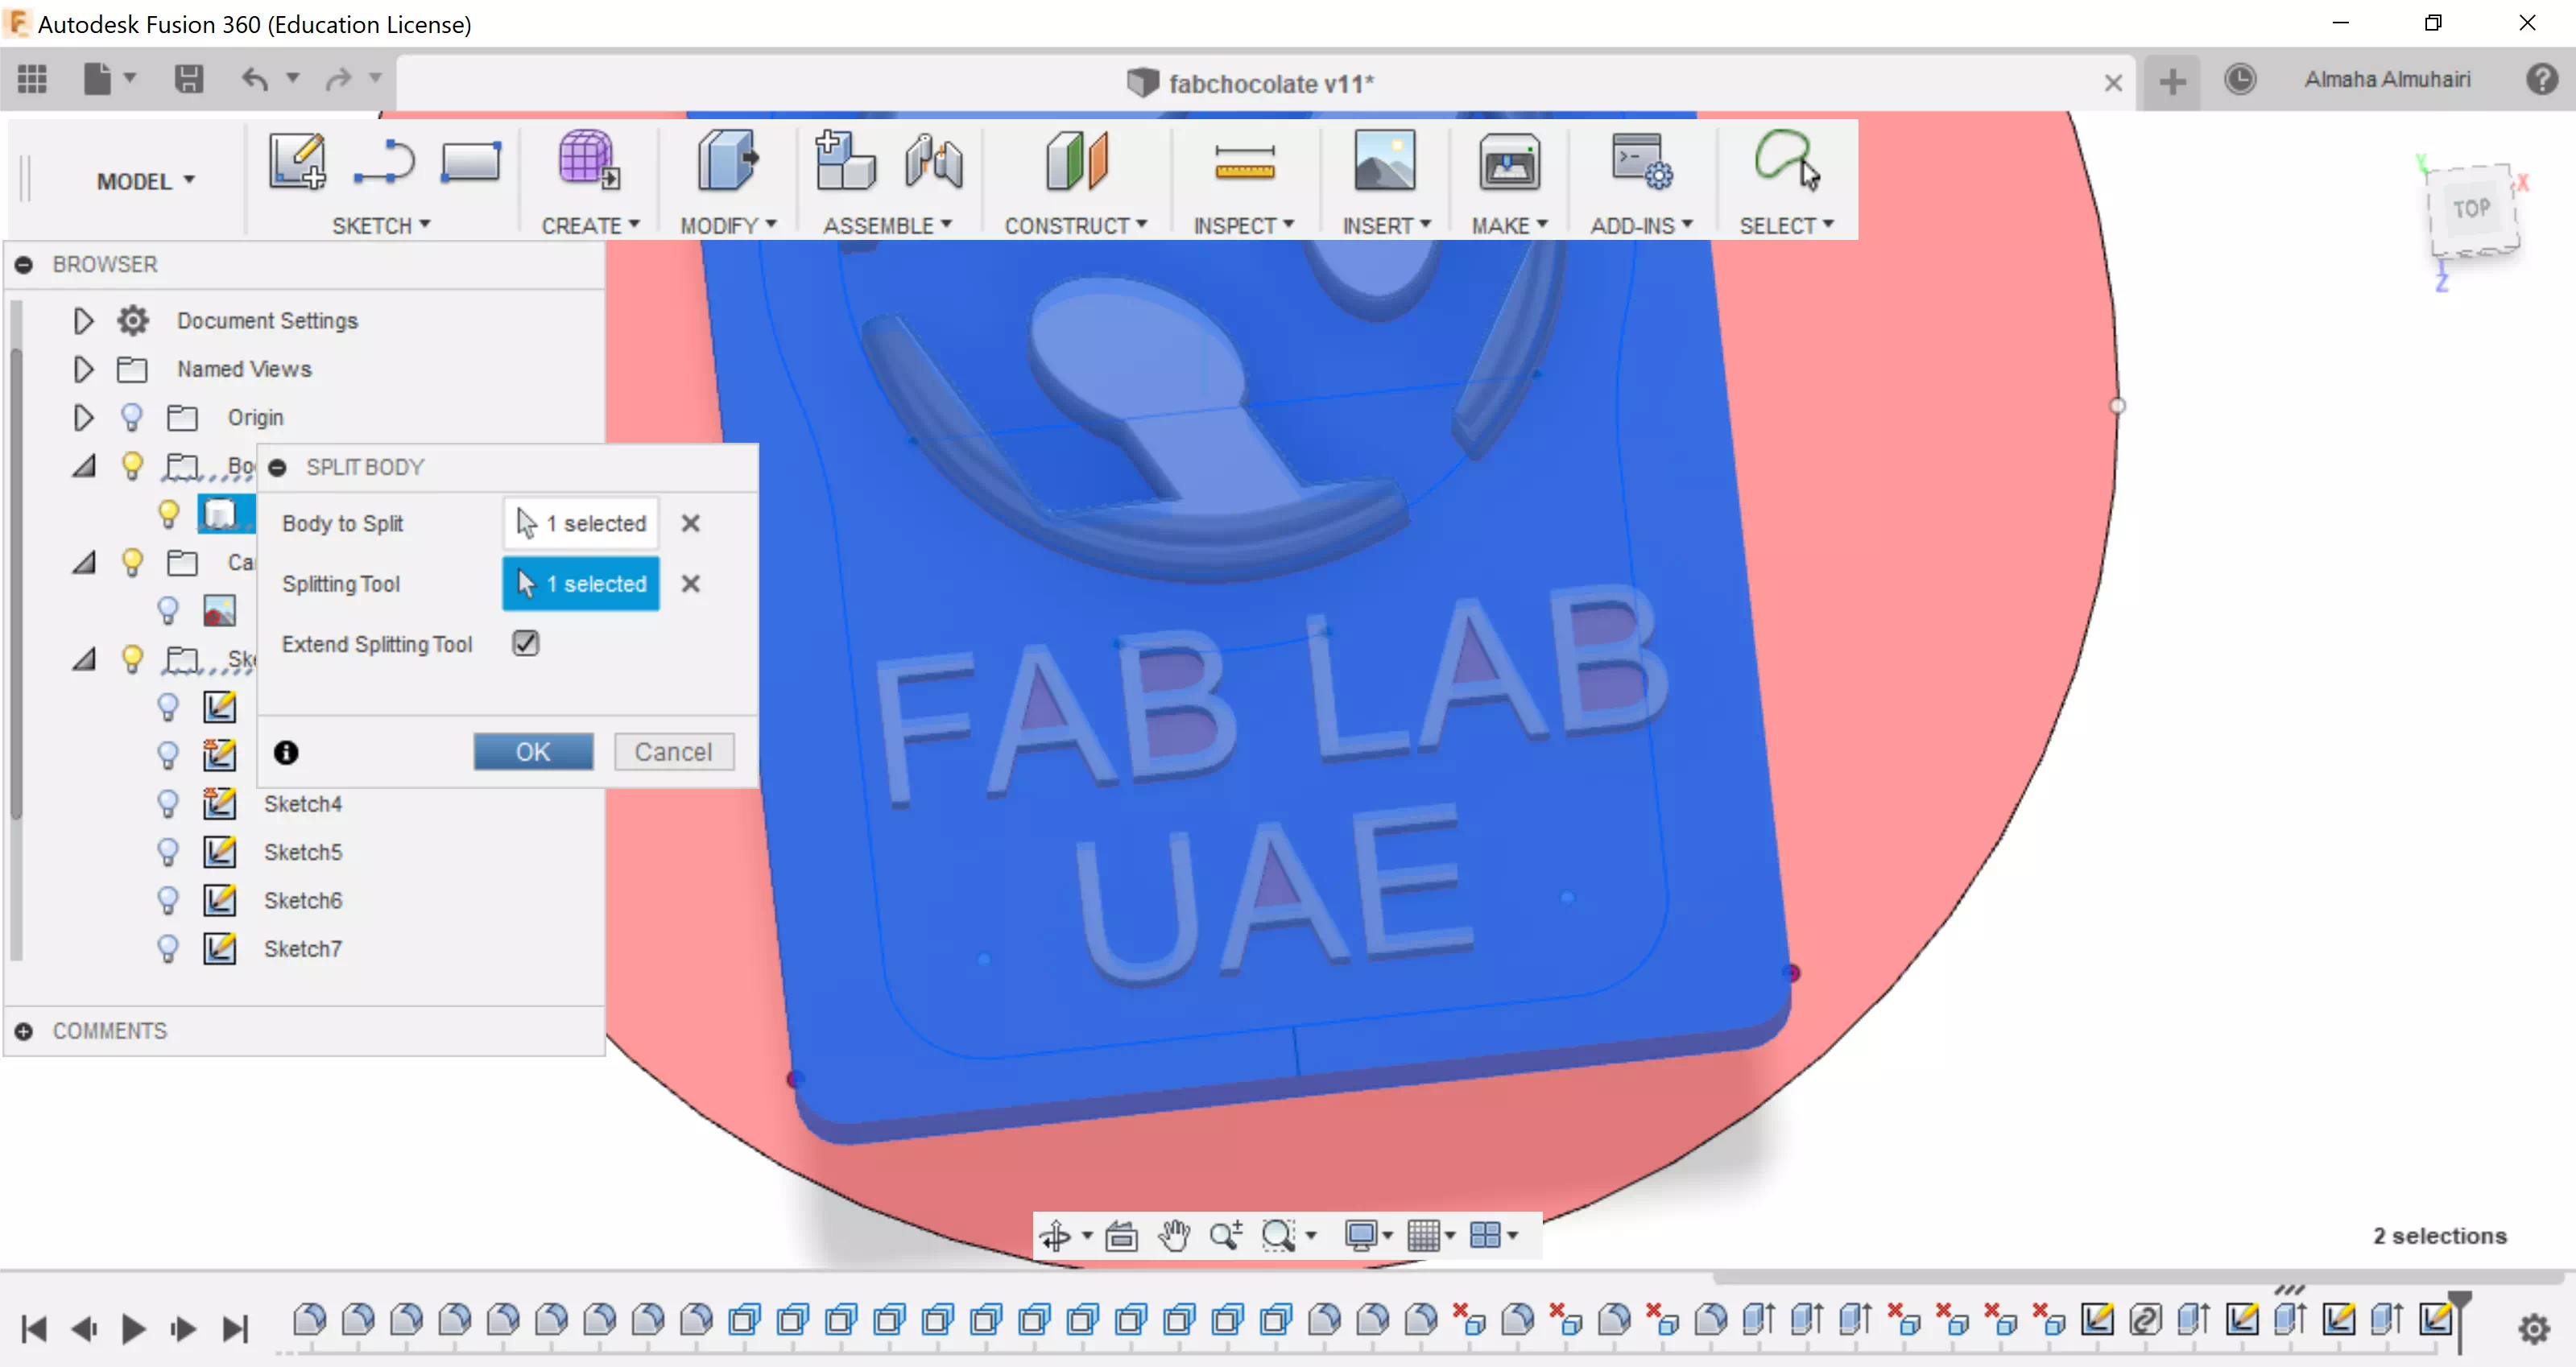
Using the split body tool split the top face.
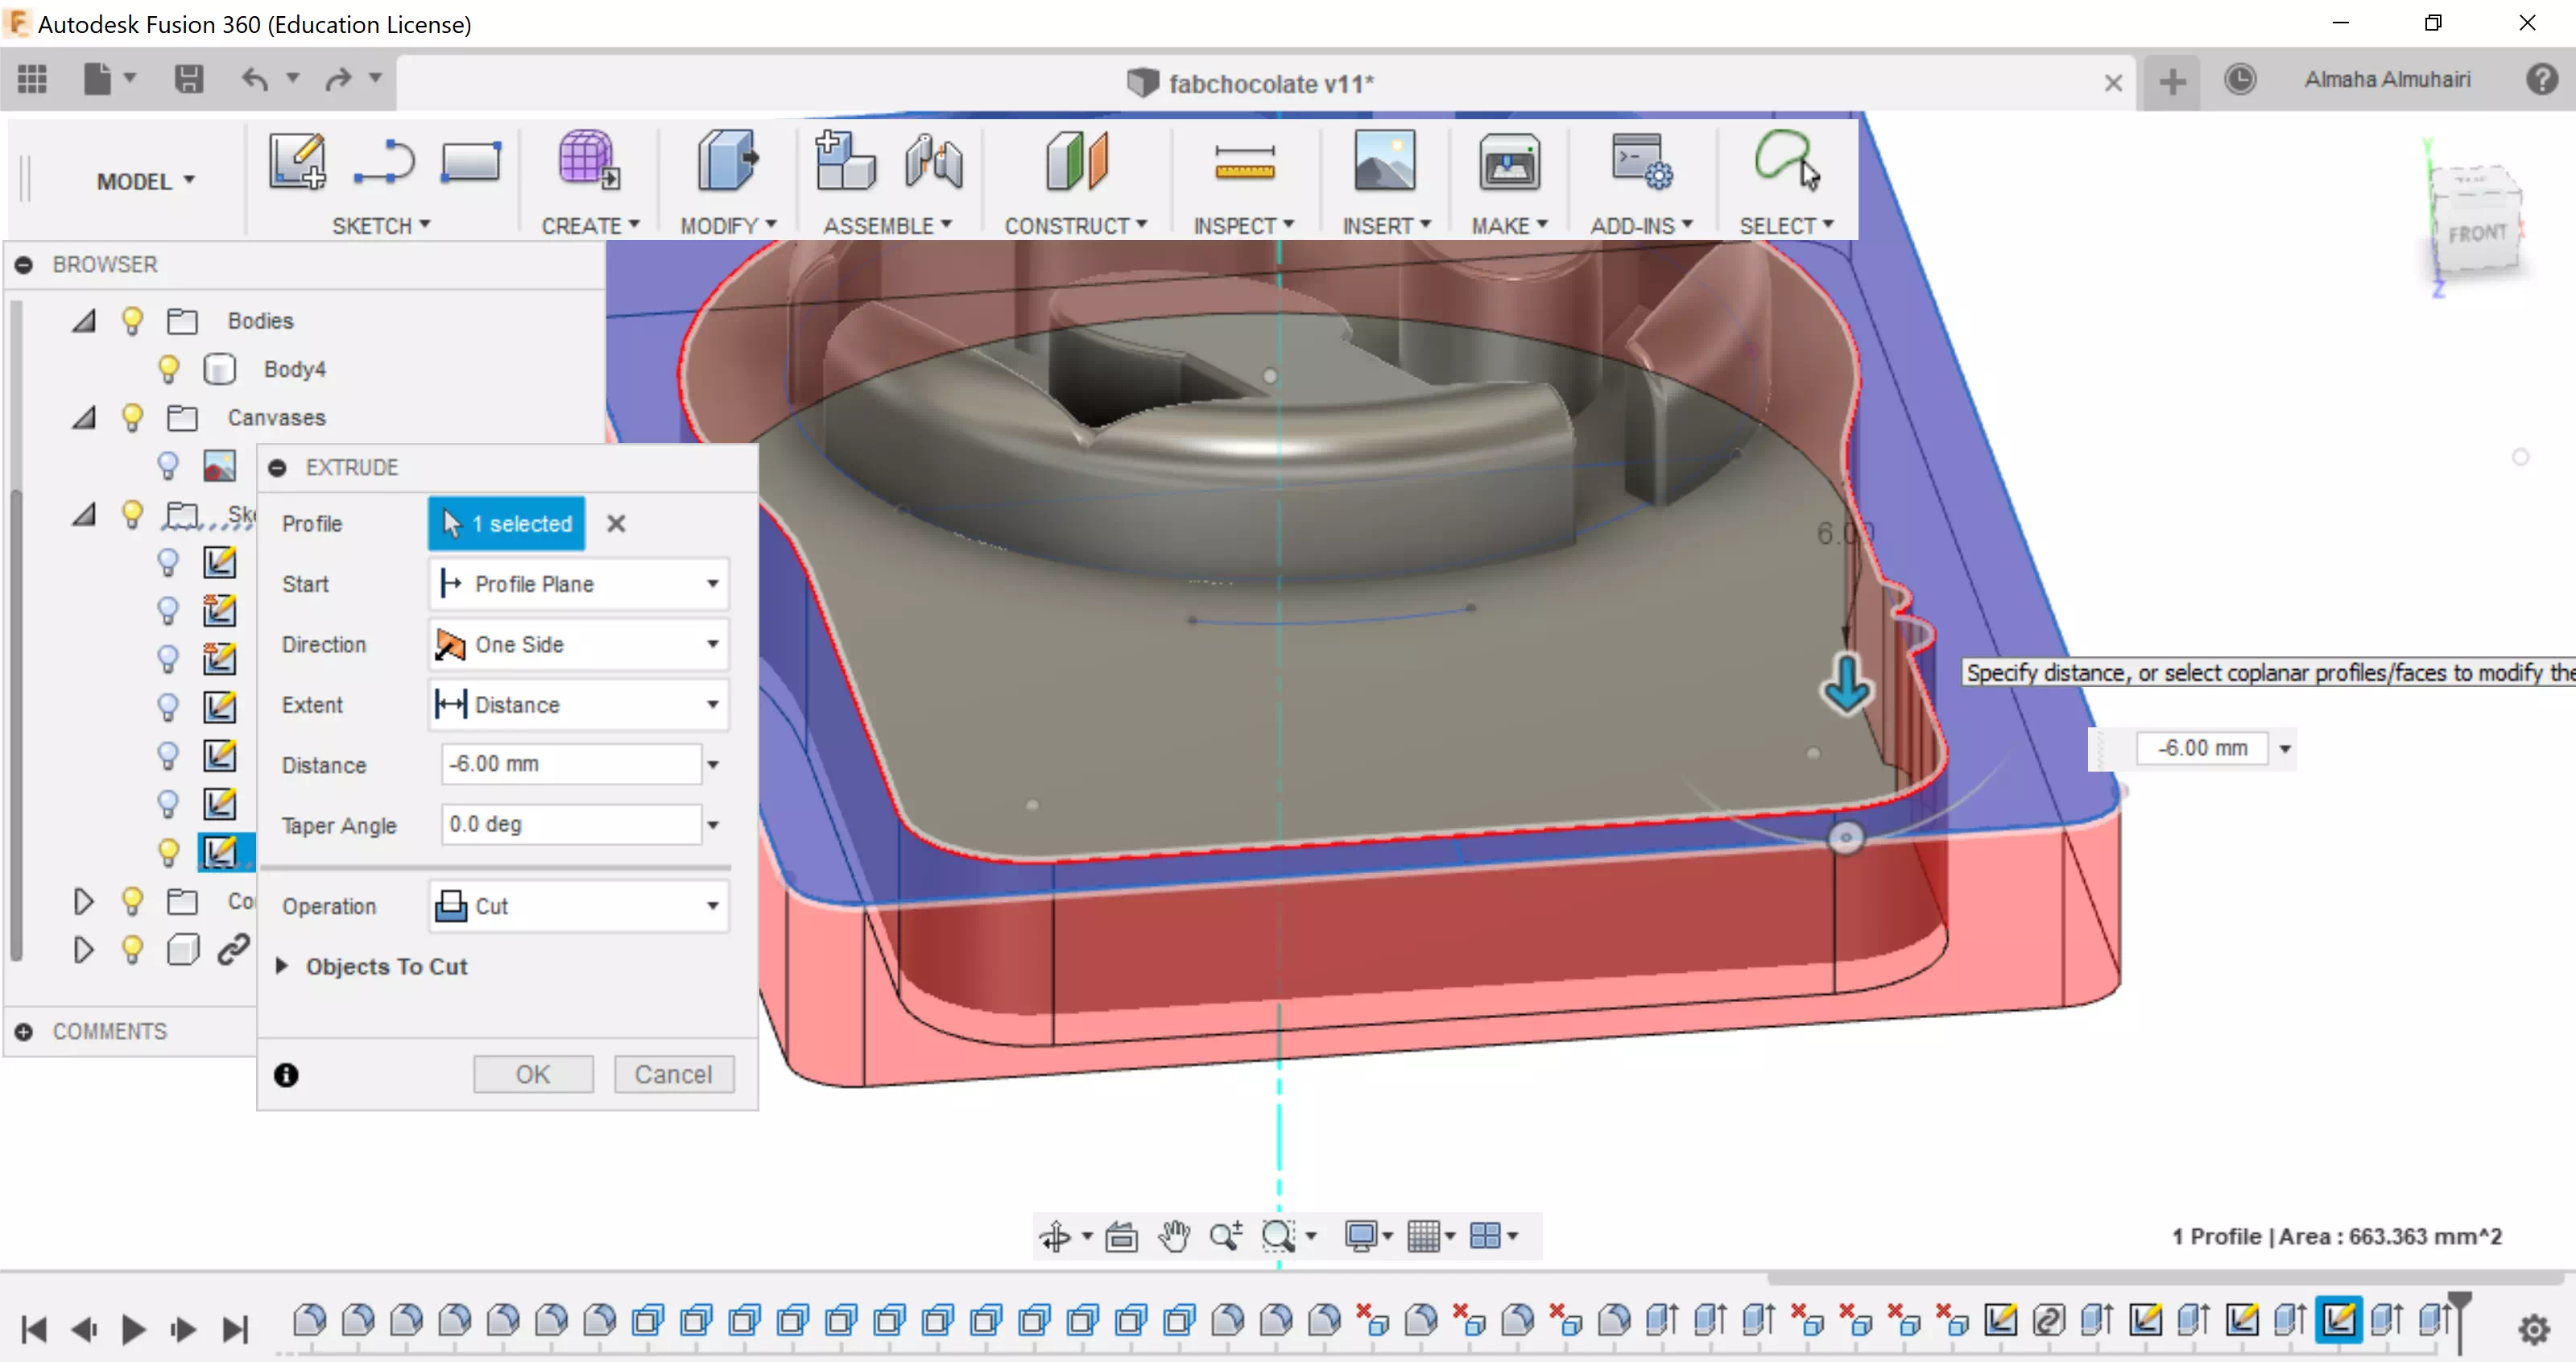
Extrude to cut from the new face.

Fillet the outter edge of the new base.
Add text to the underside of the the chocolate (I wrote my name).
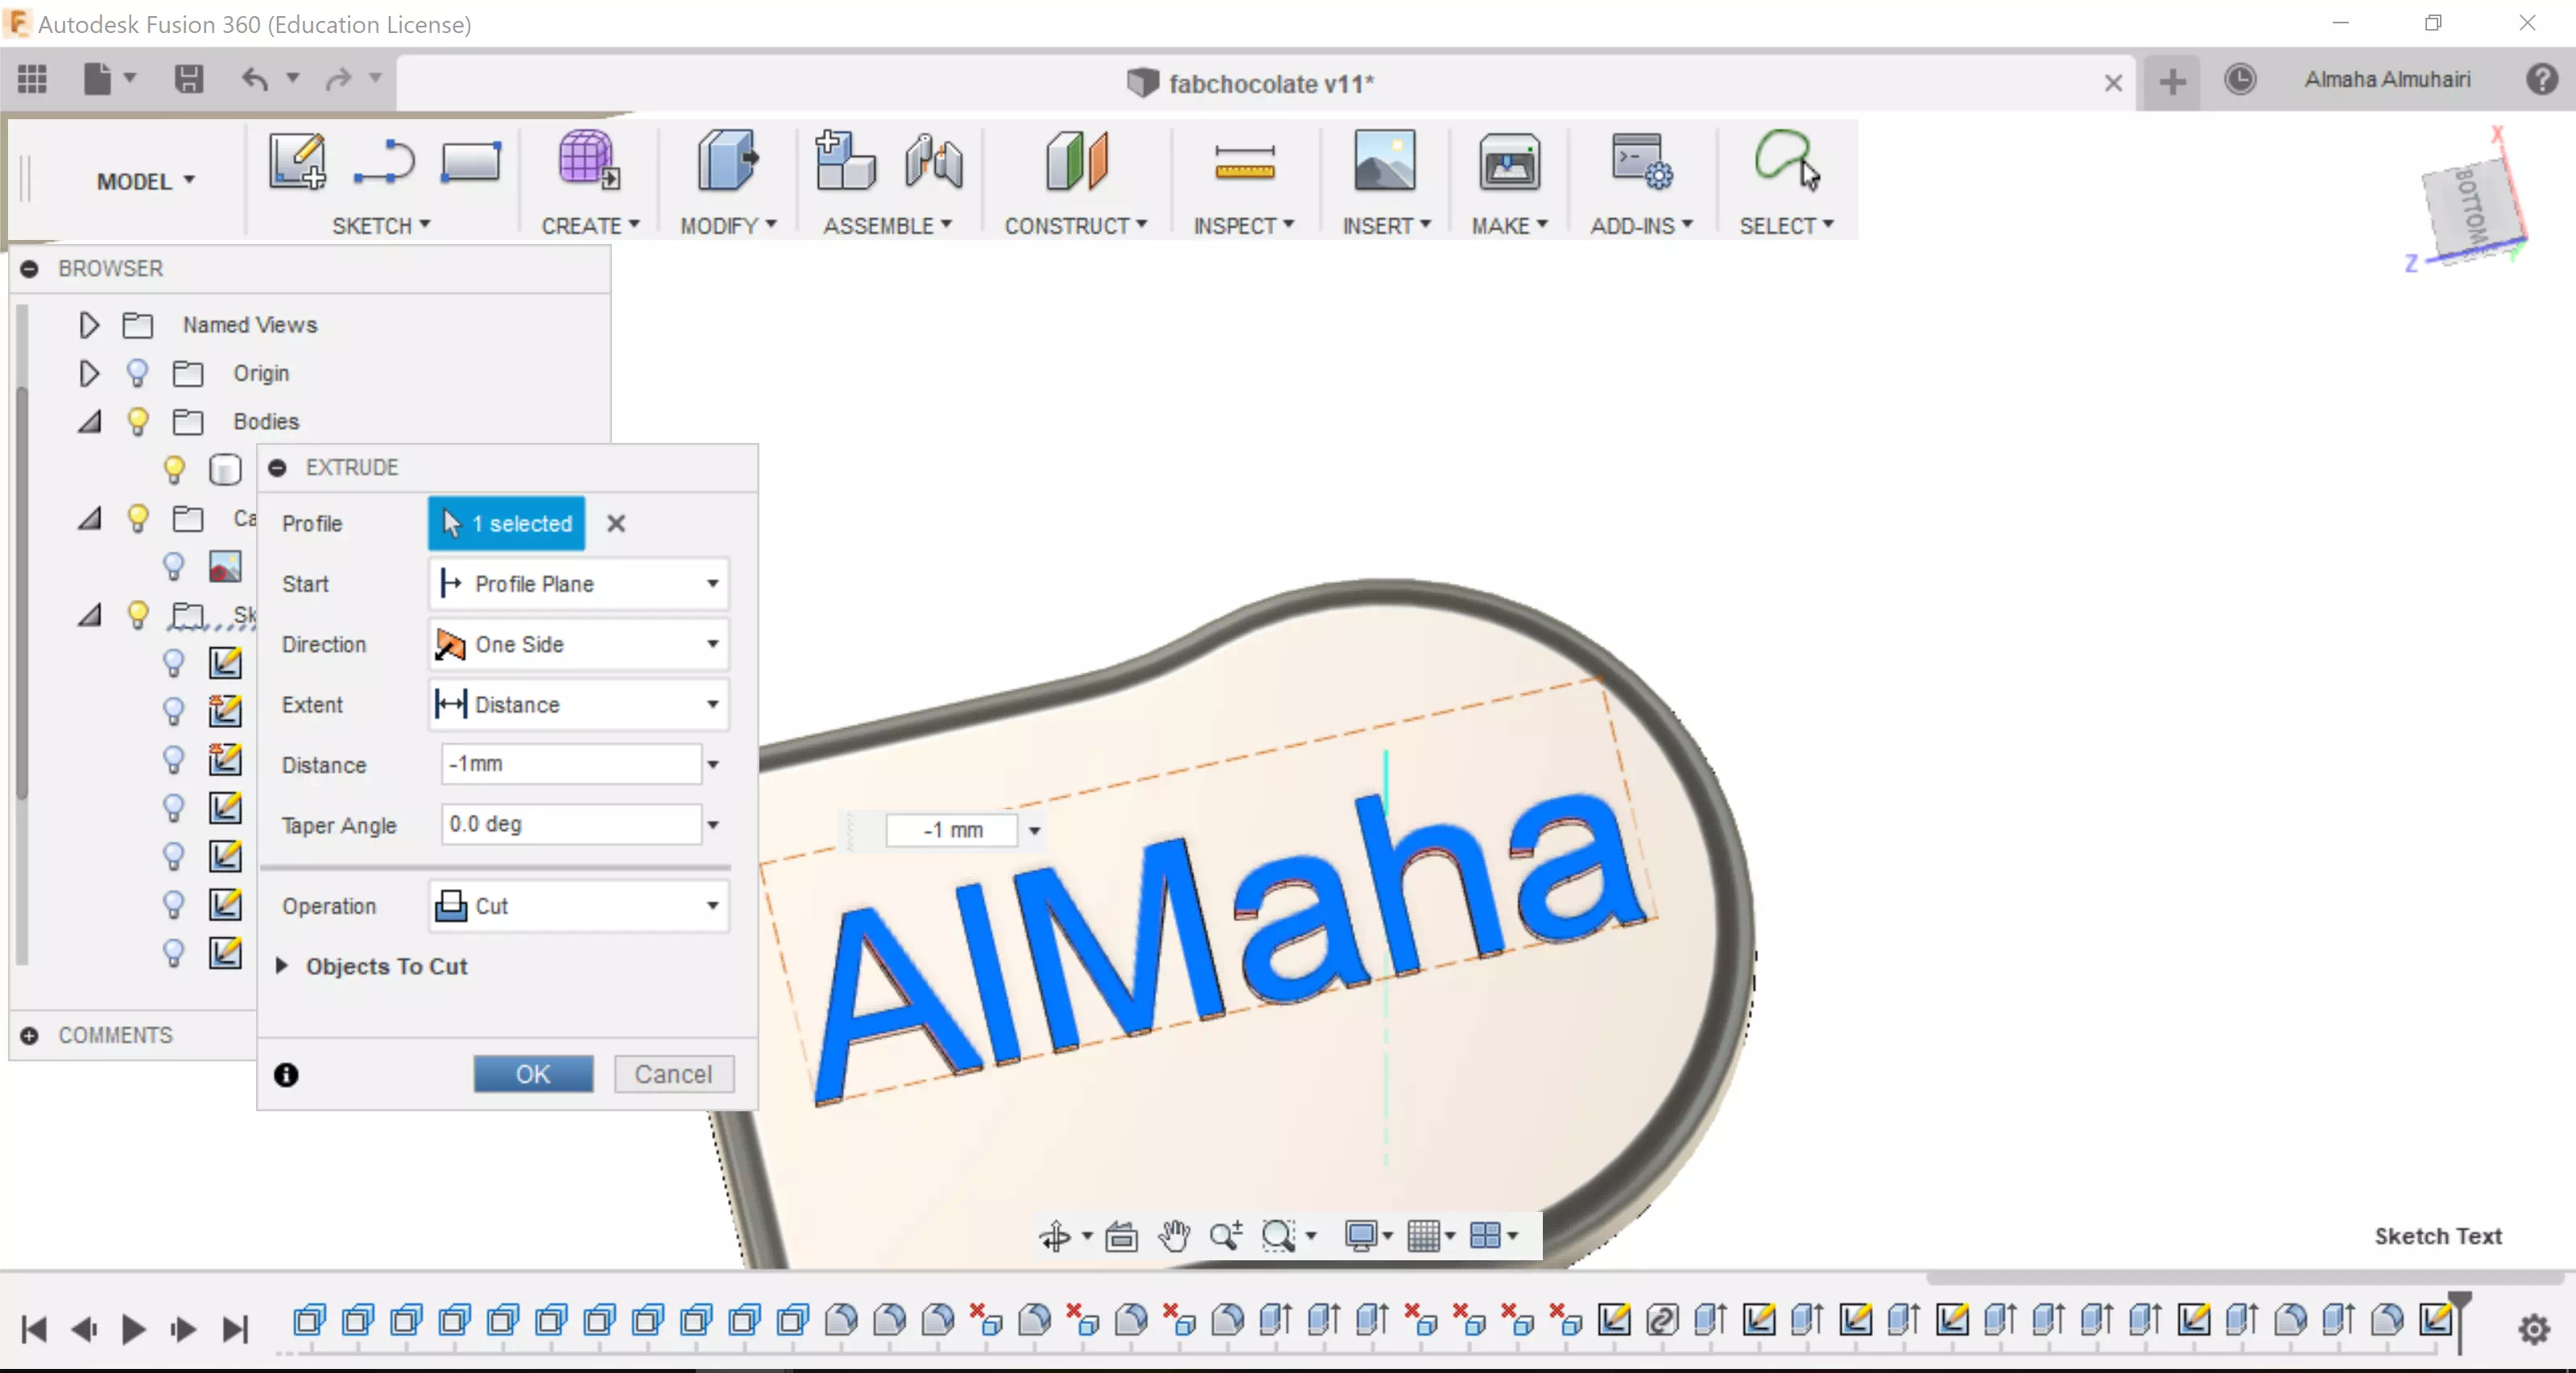
Extrude it to cut to the base.
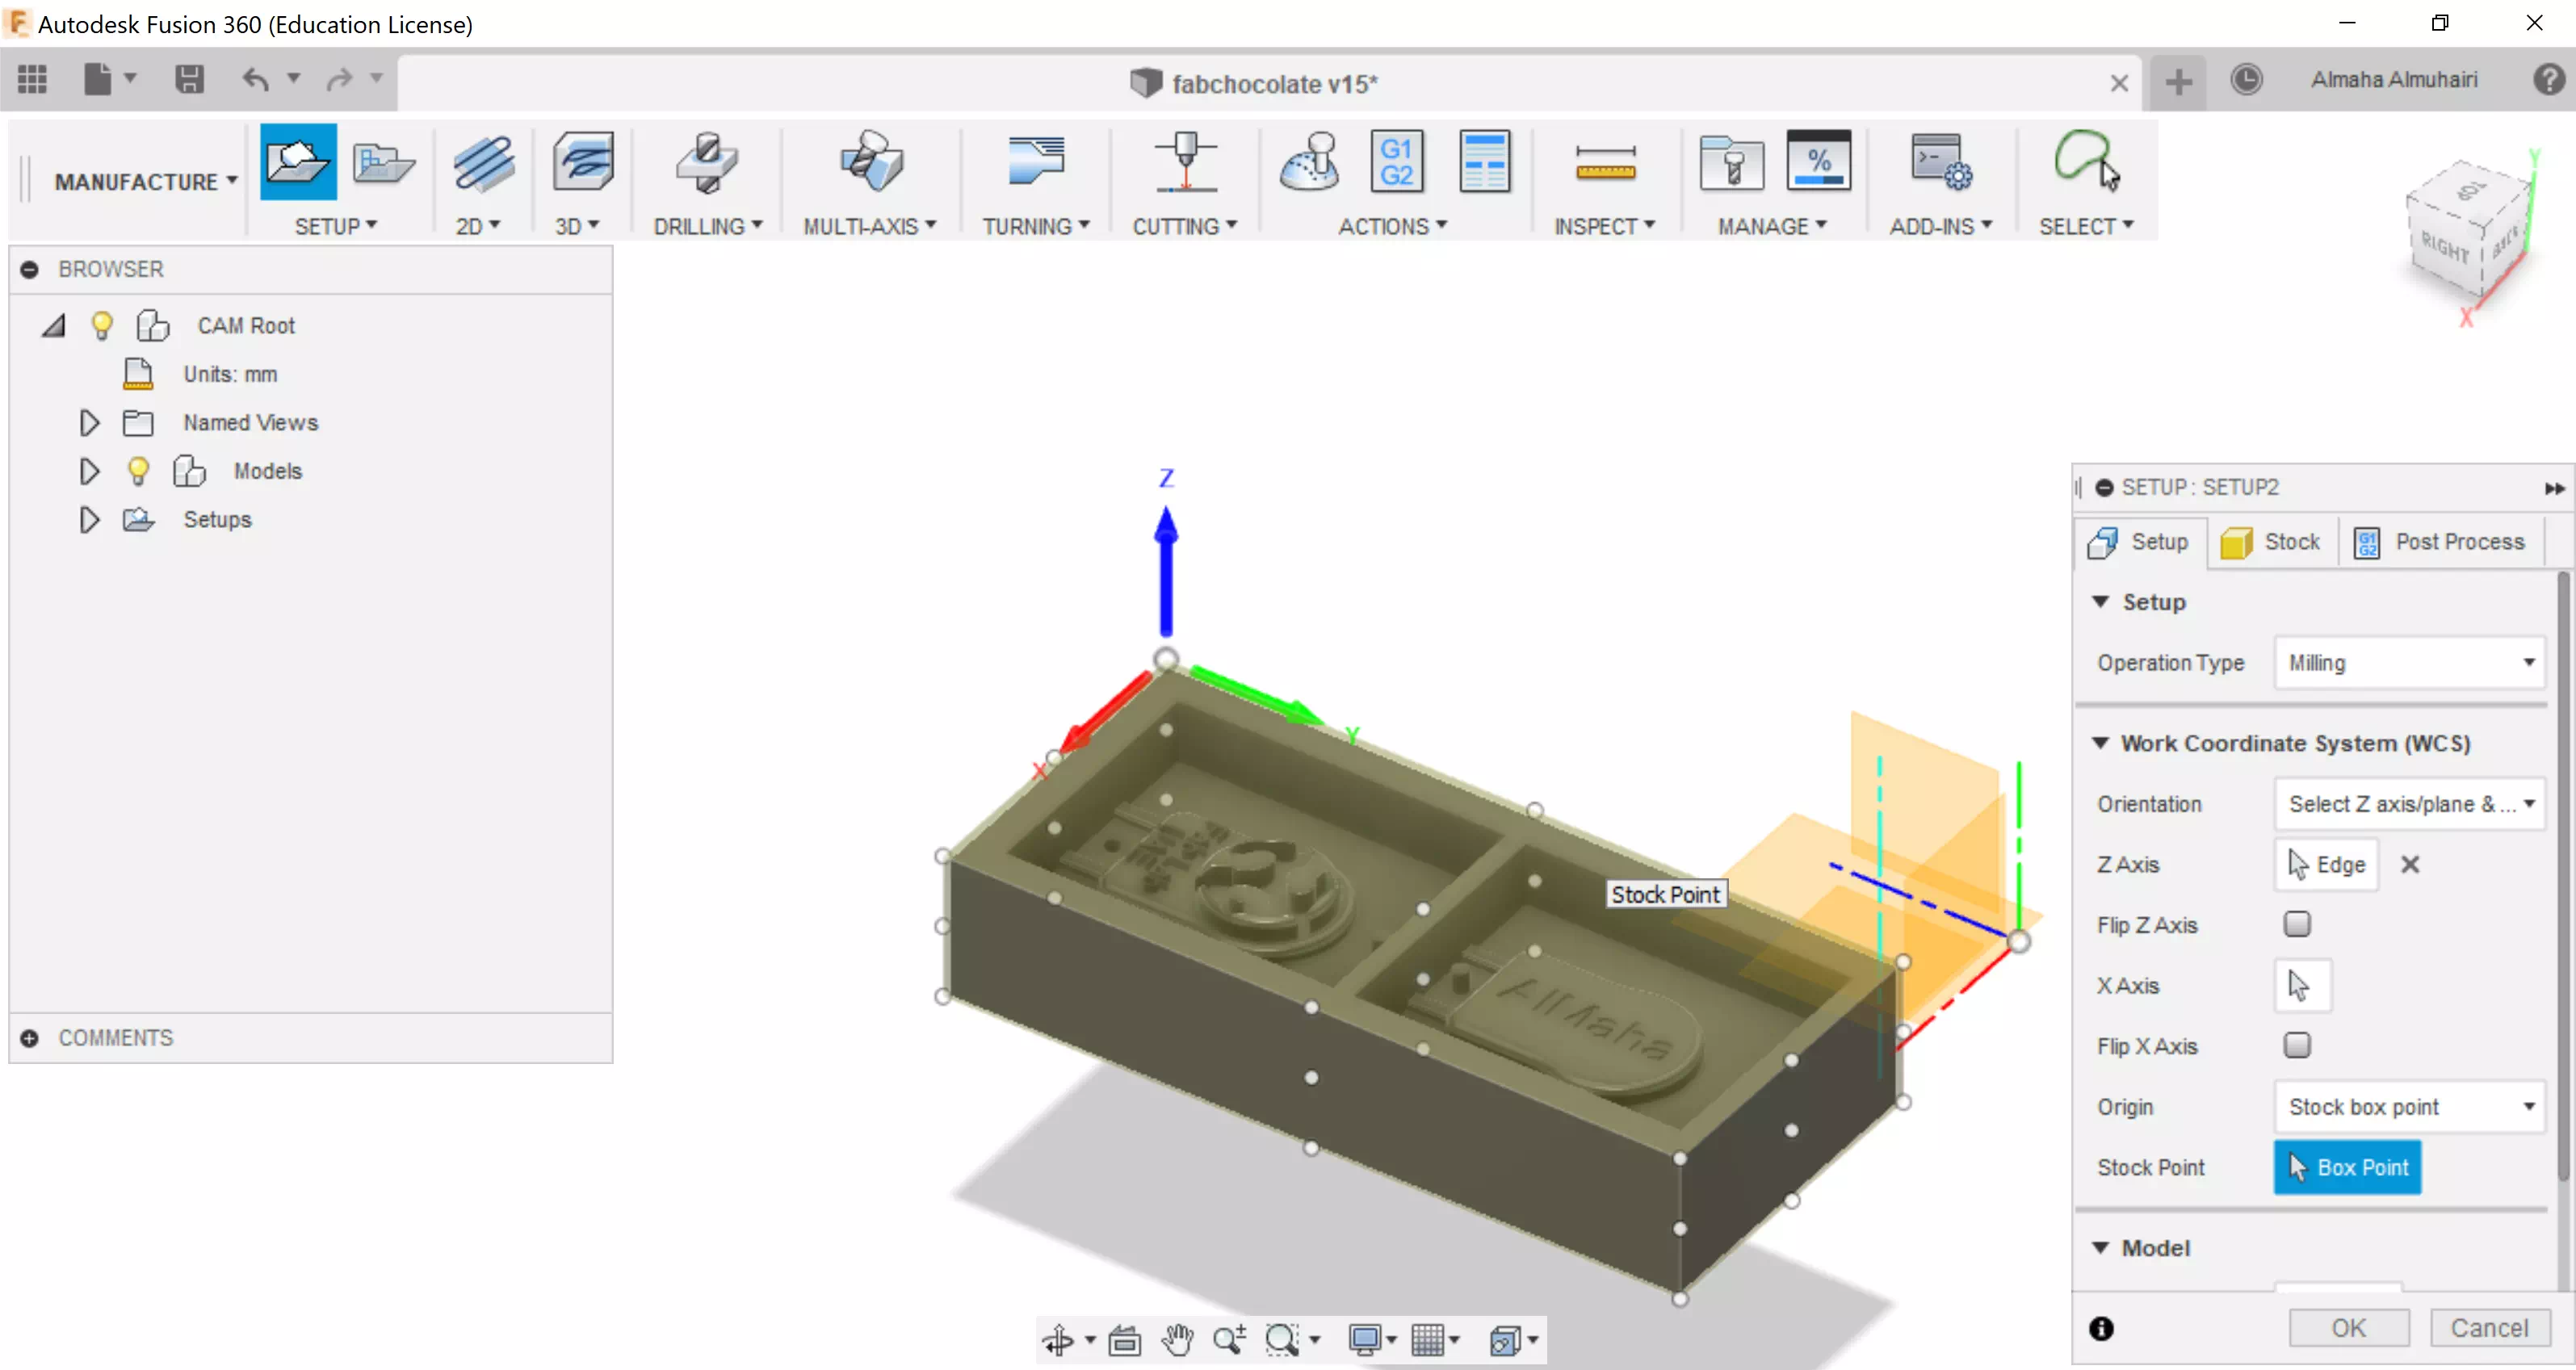
Import the test mould, In the Manufacture tab, set up the axis correctly so that the Z axis is on the top.
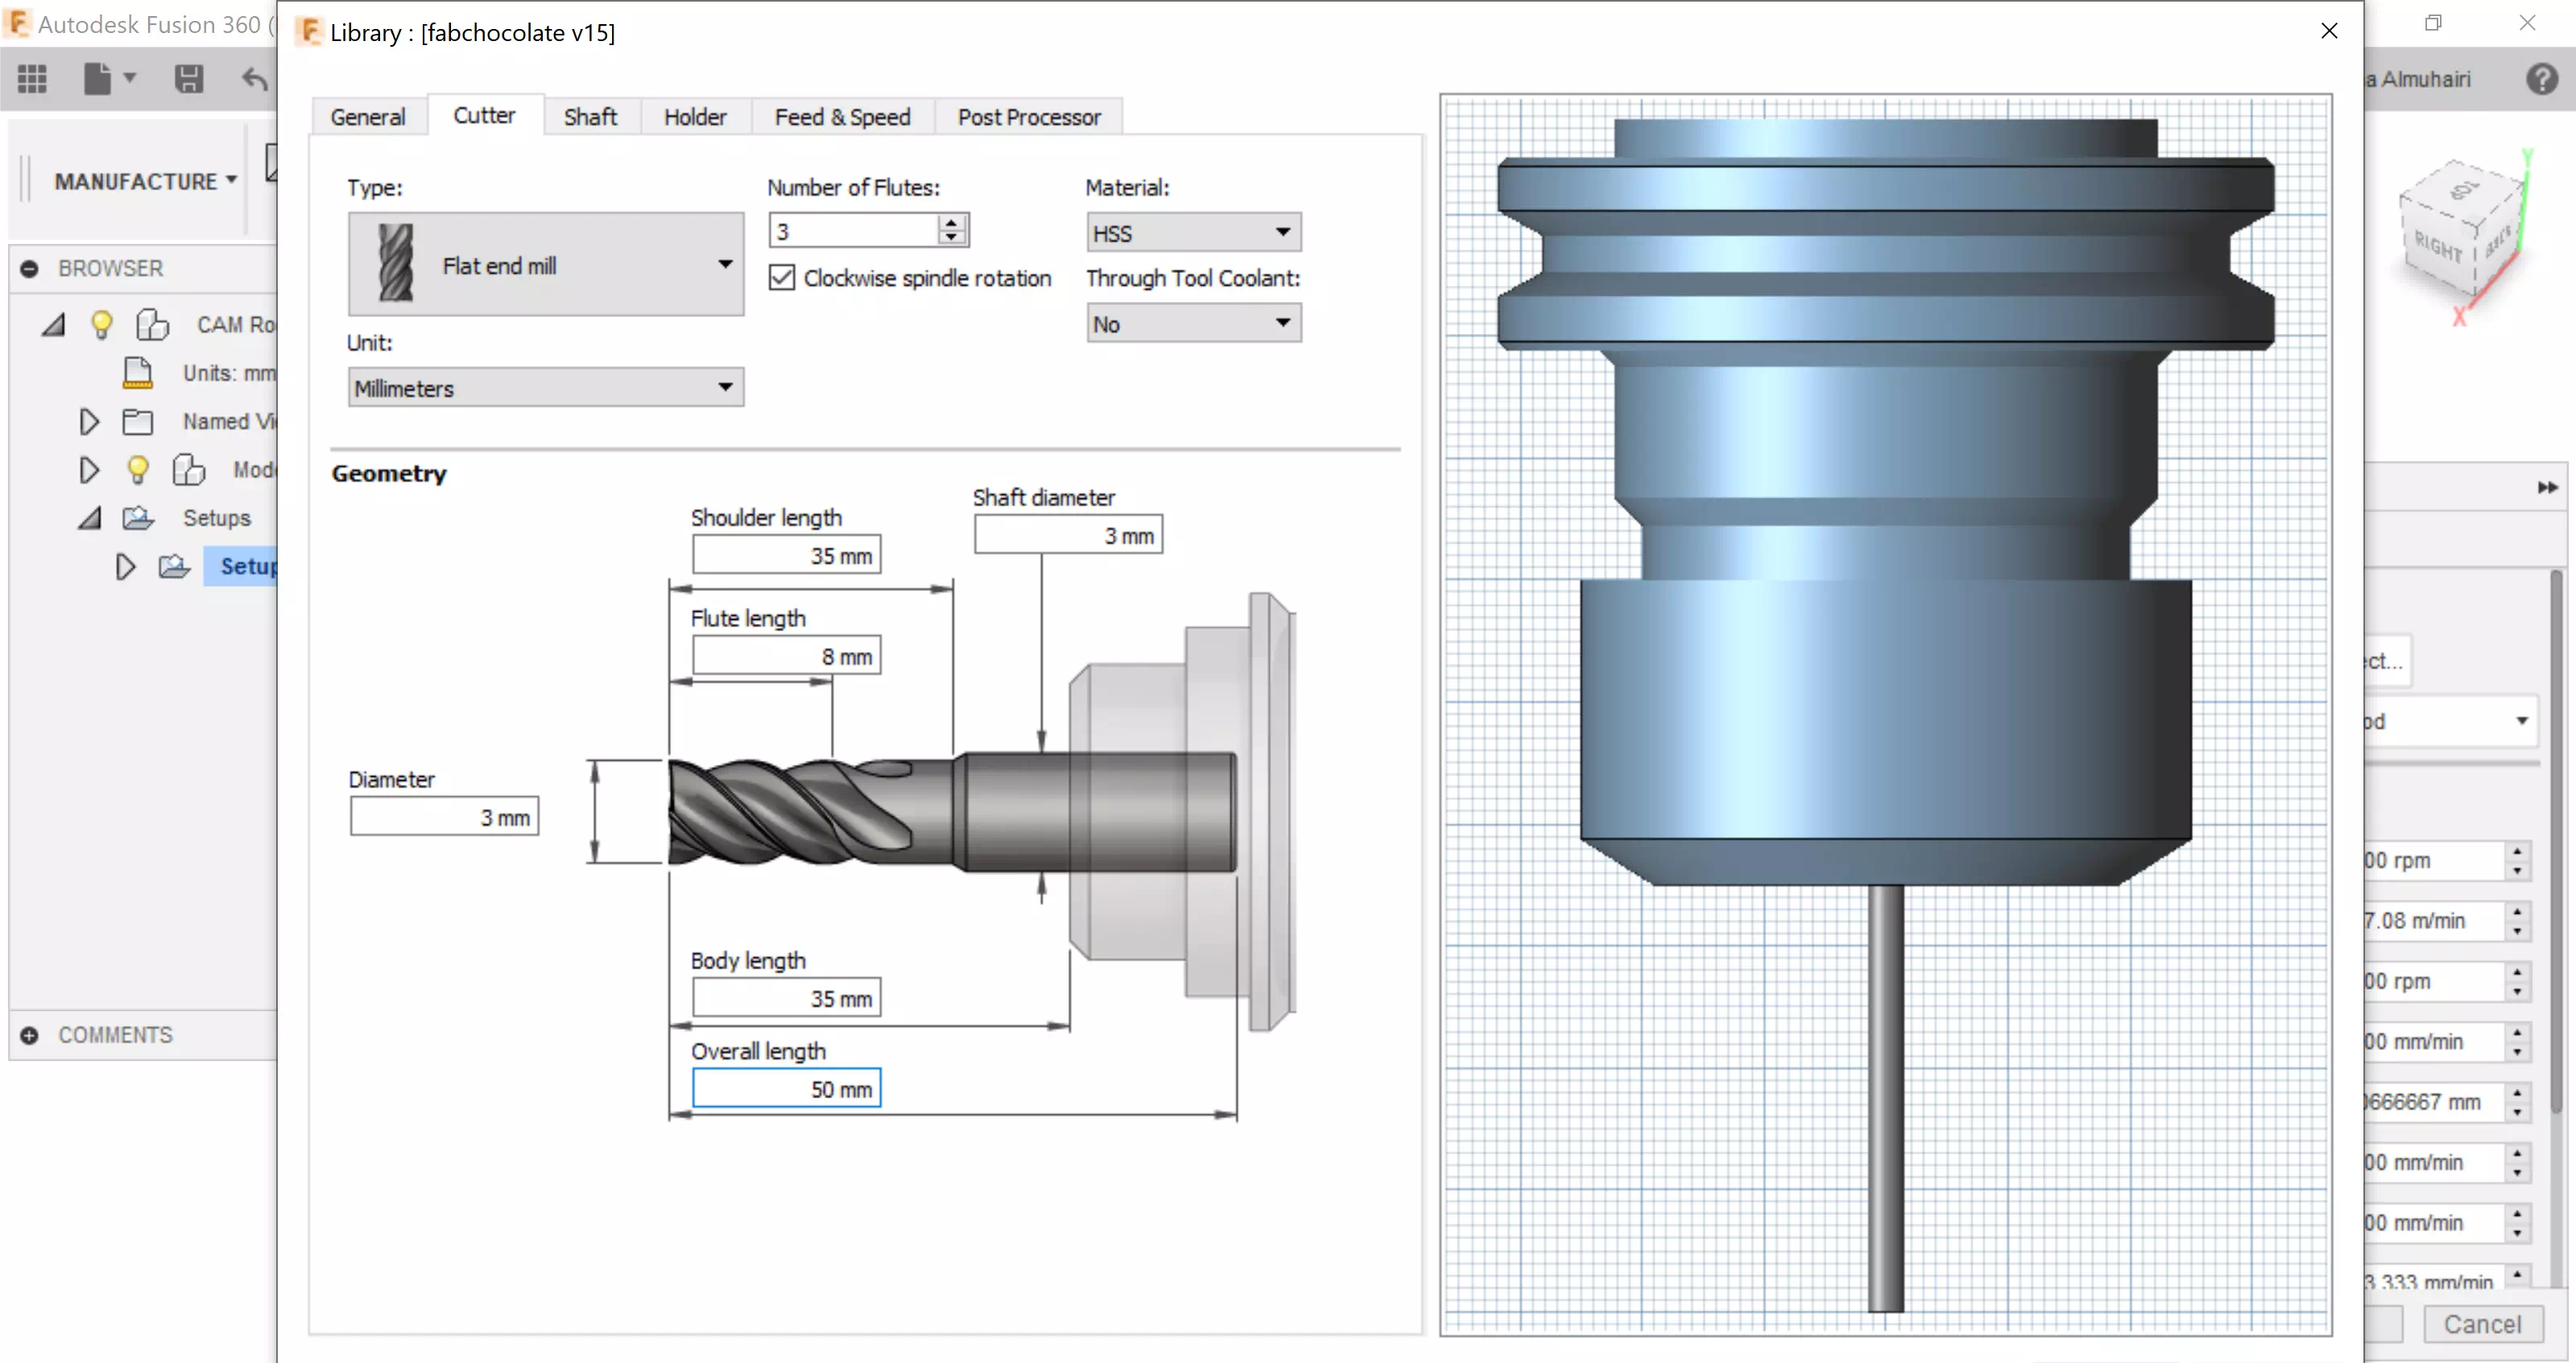
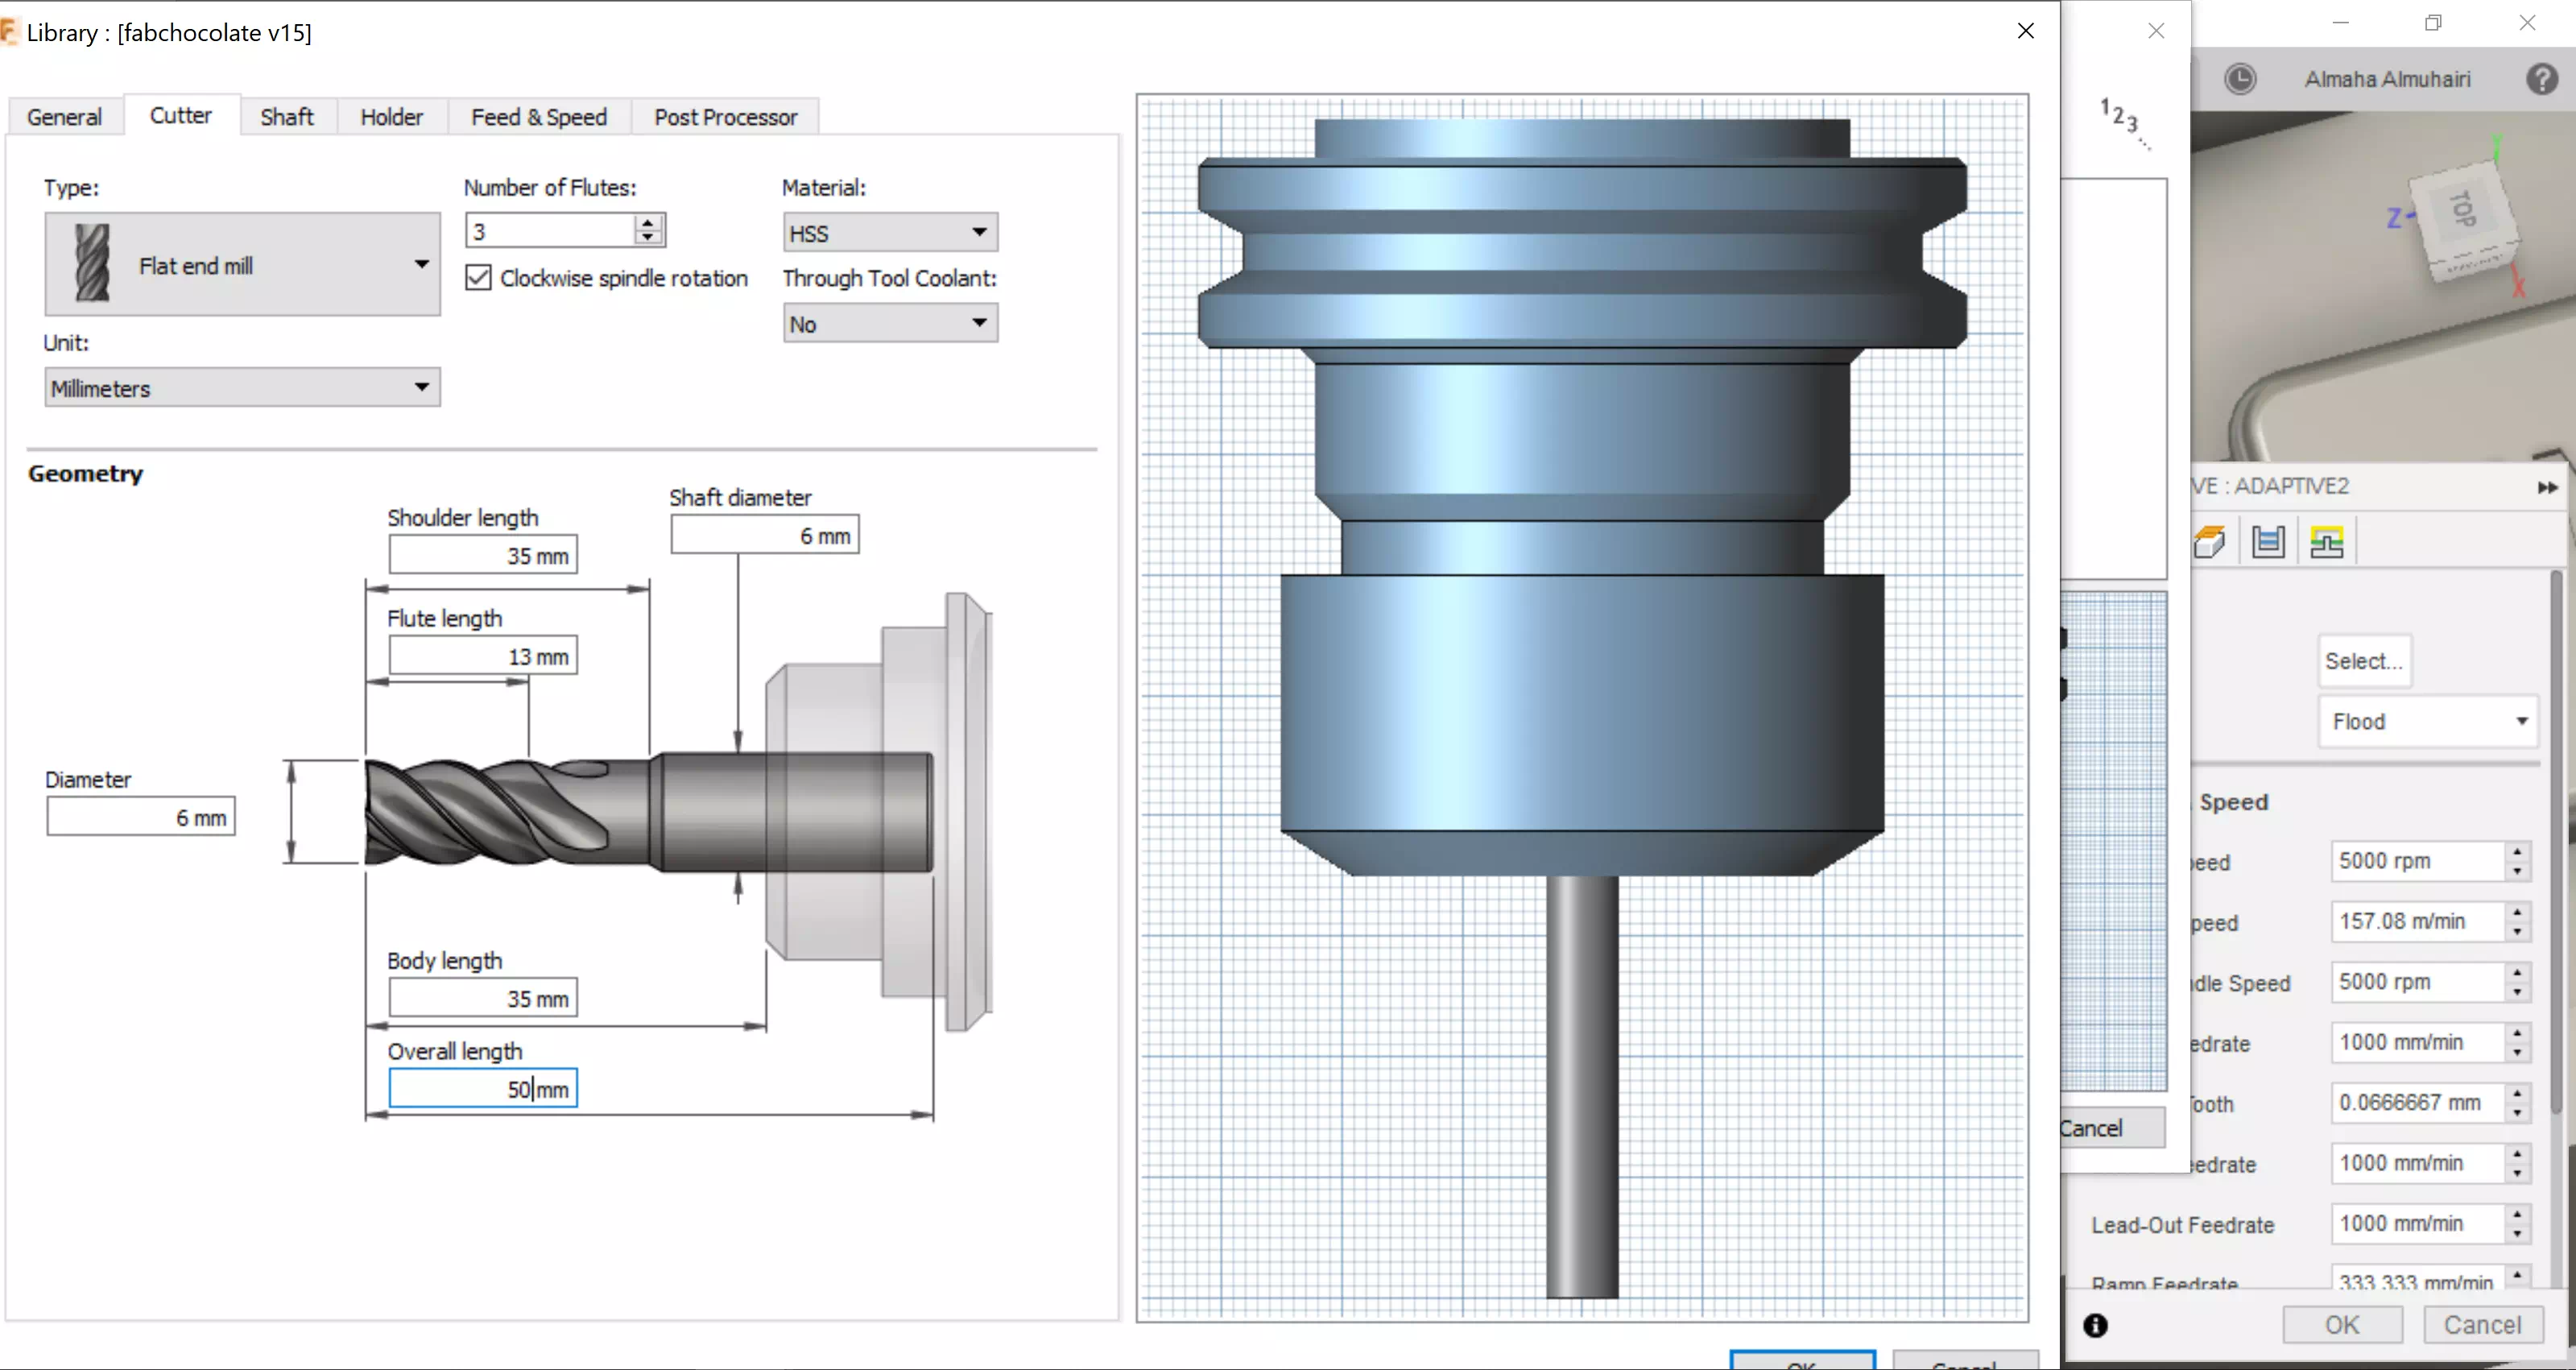
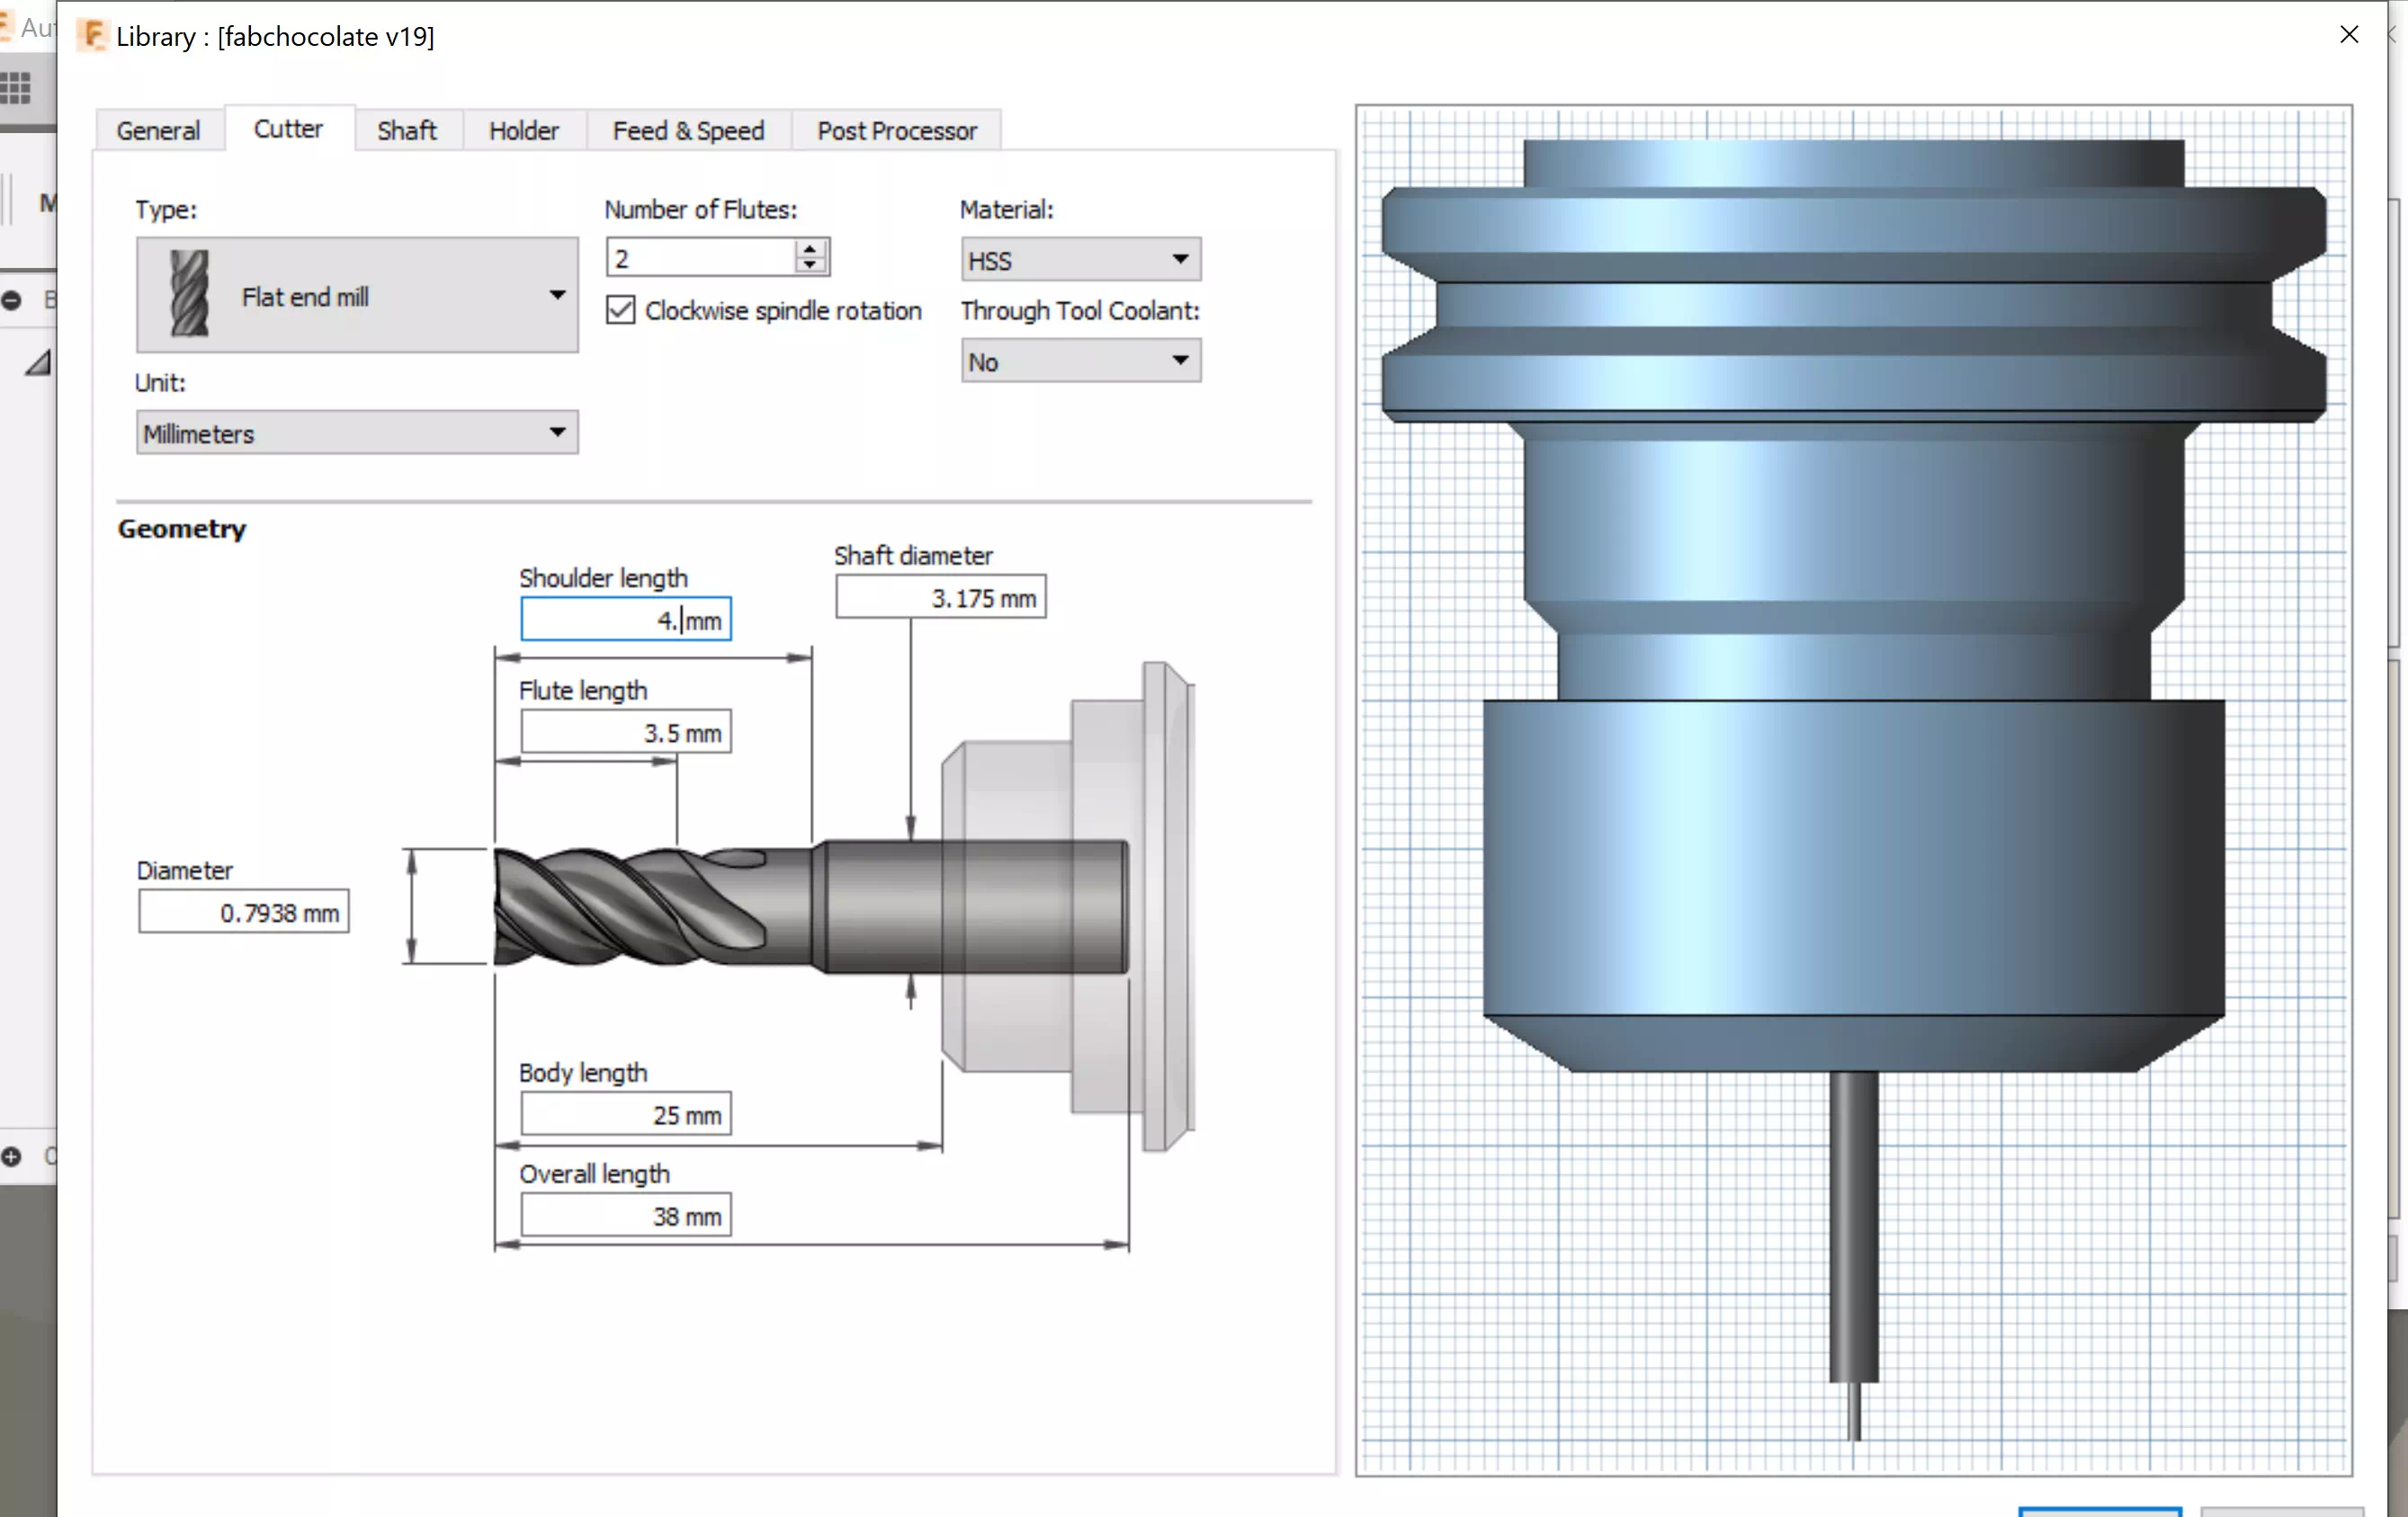
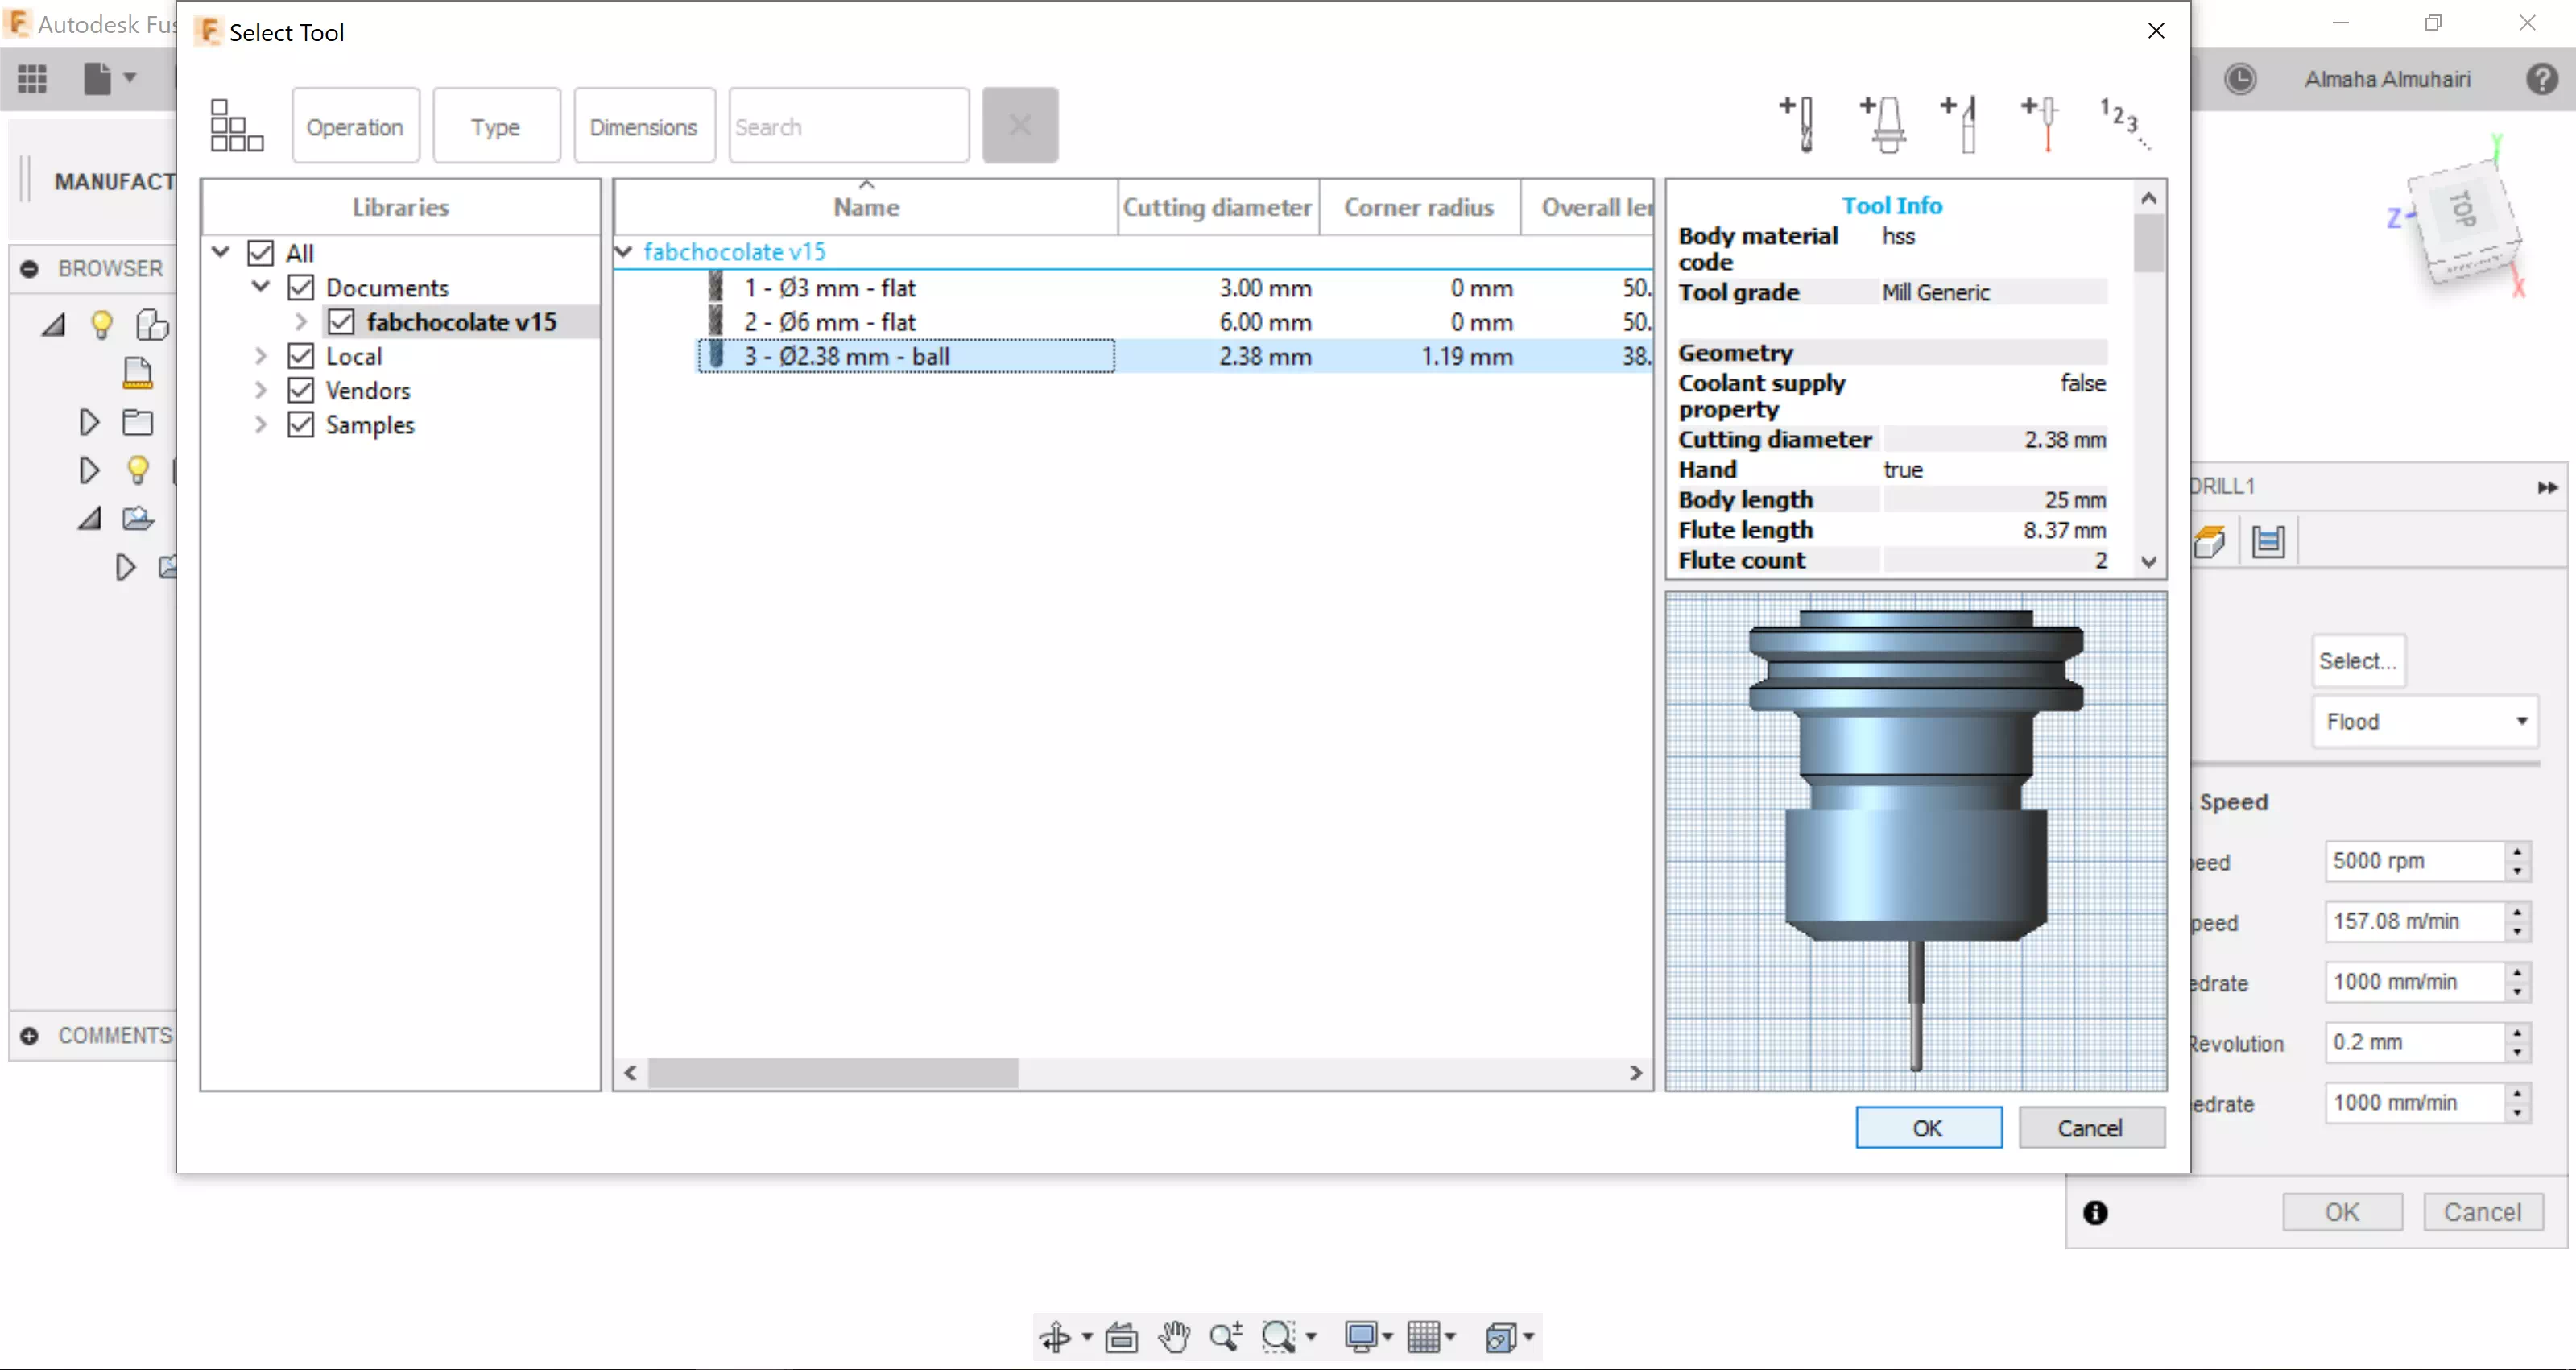
In the Manufacture tab, in set up, add your tools, these are the mill bits we will be using: 6mm: Removes most of the initial wax, 3mm: Contouring and detail making, and 2.38mm: for text milling.
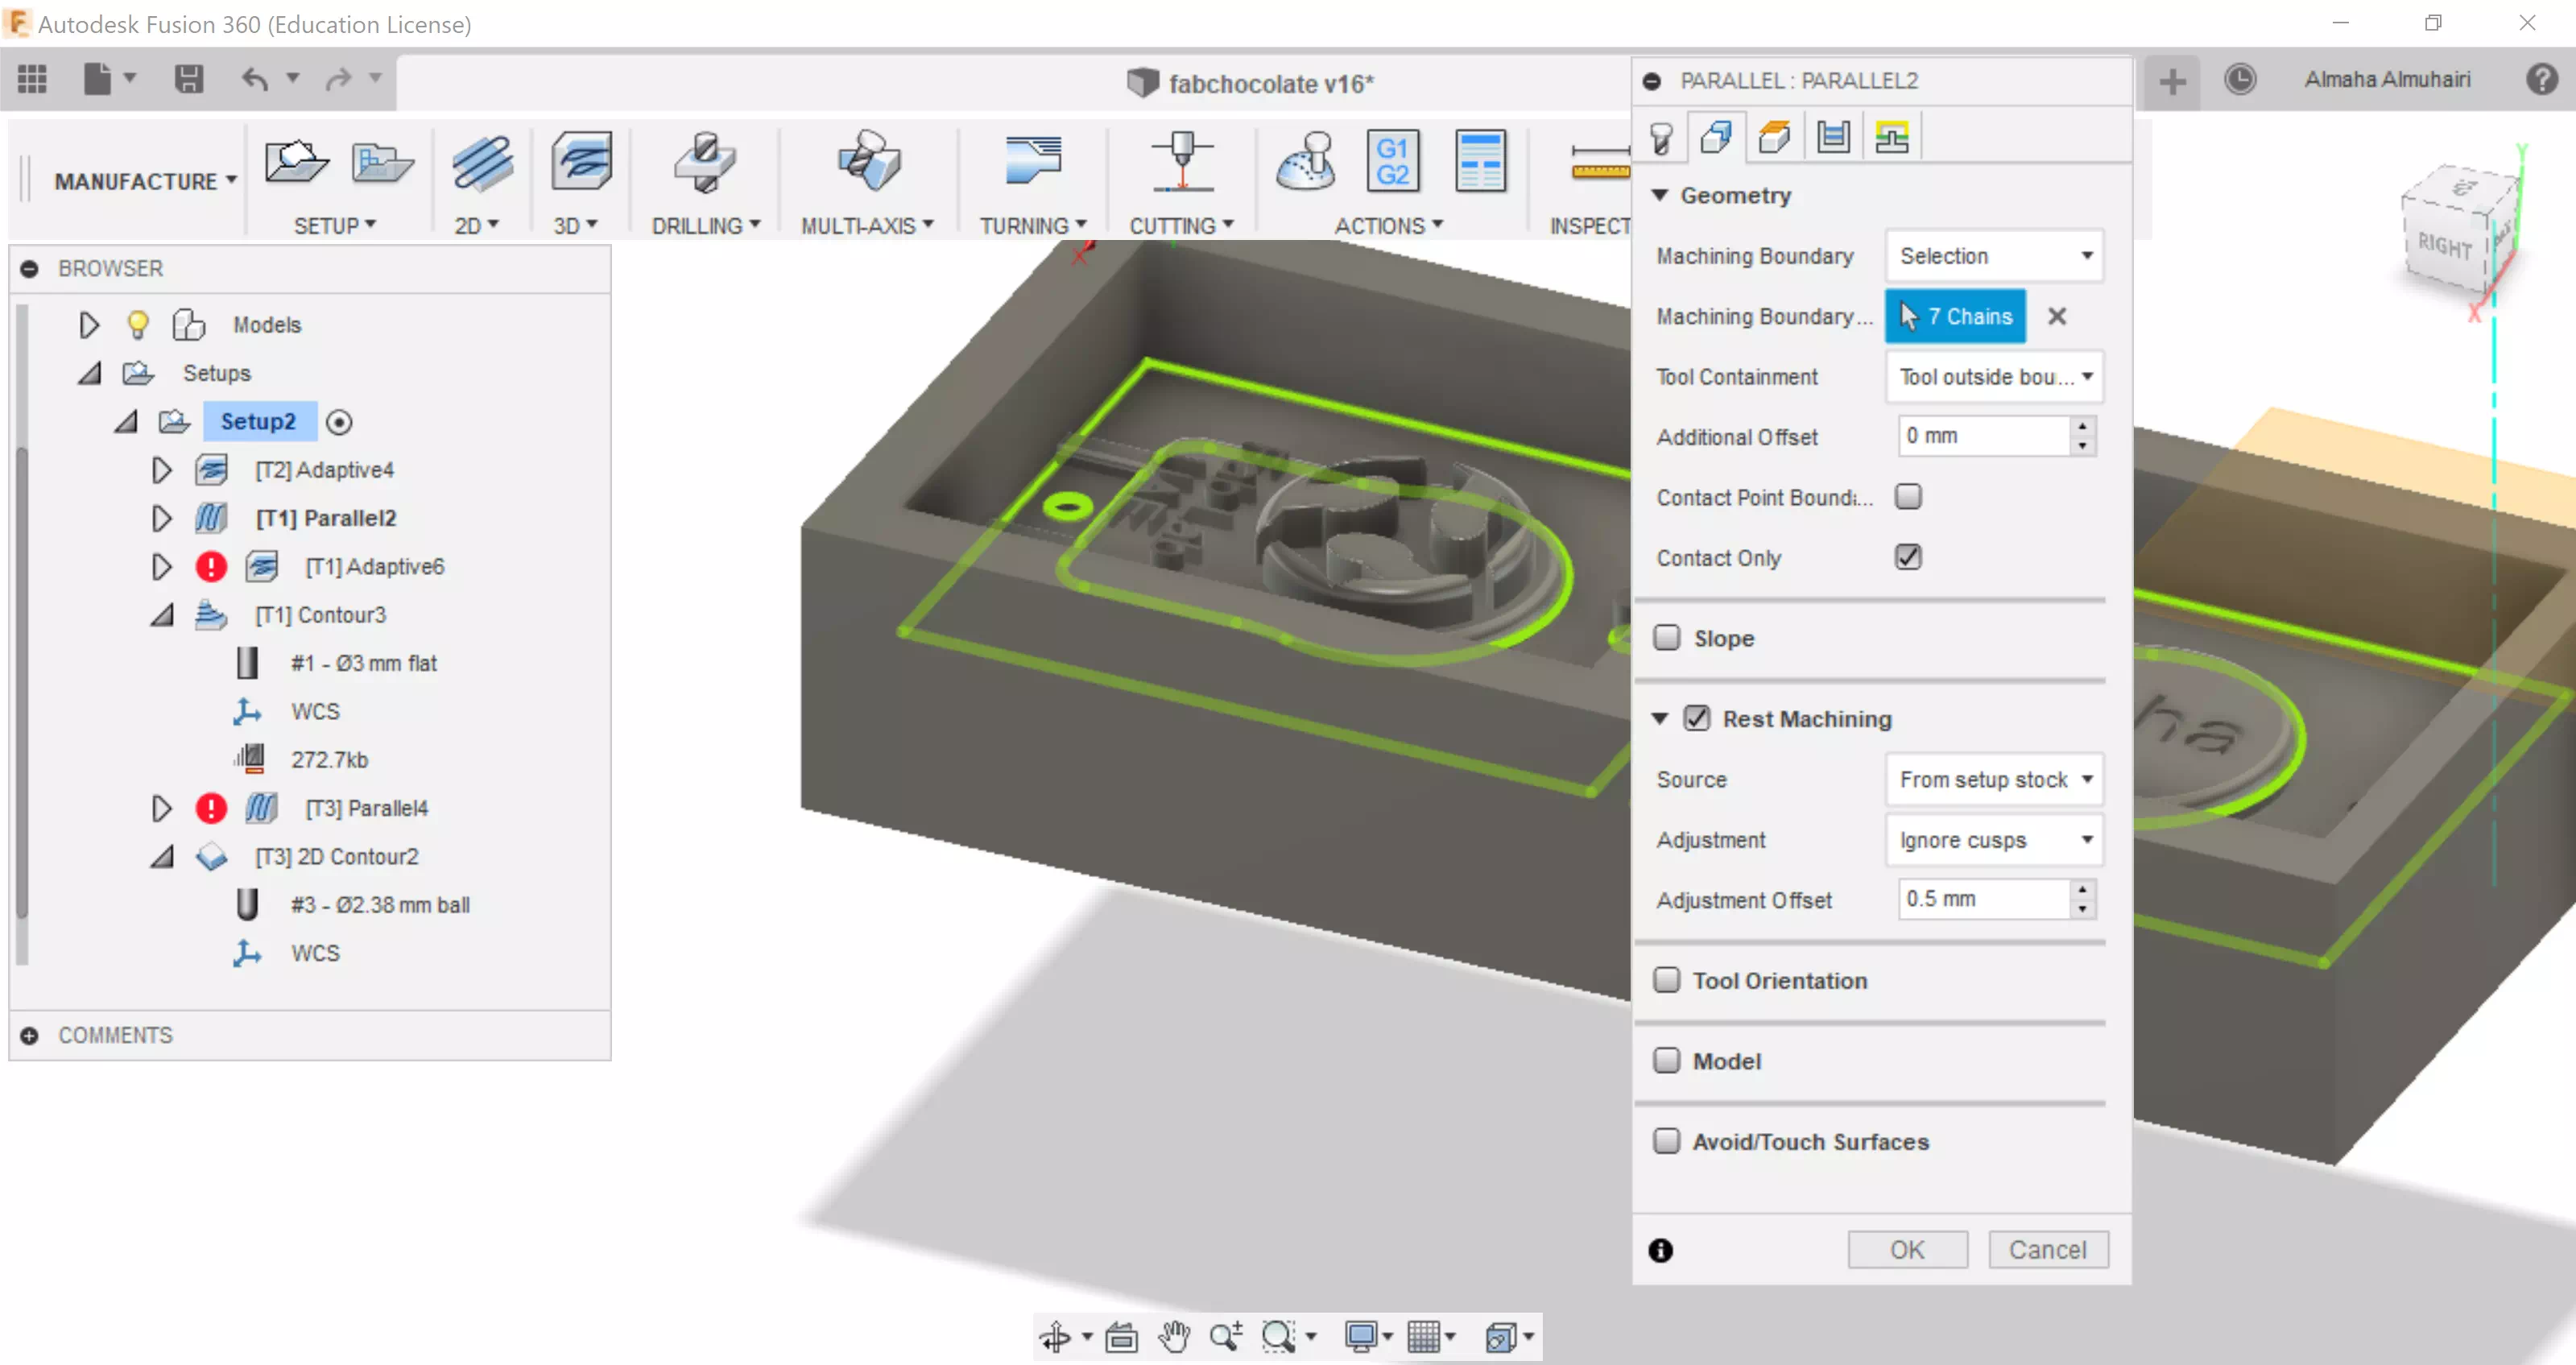
Set up the milling path this way and be sure to take your time in selecting the proper faces.

Calculate the milling path for each clearing step and make sure to remove the crashes before exporting the final milling files, here you can also see the estimated milling time for each path.
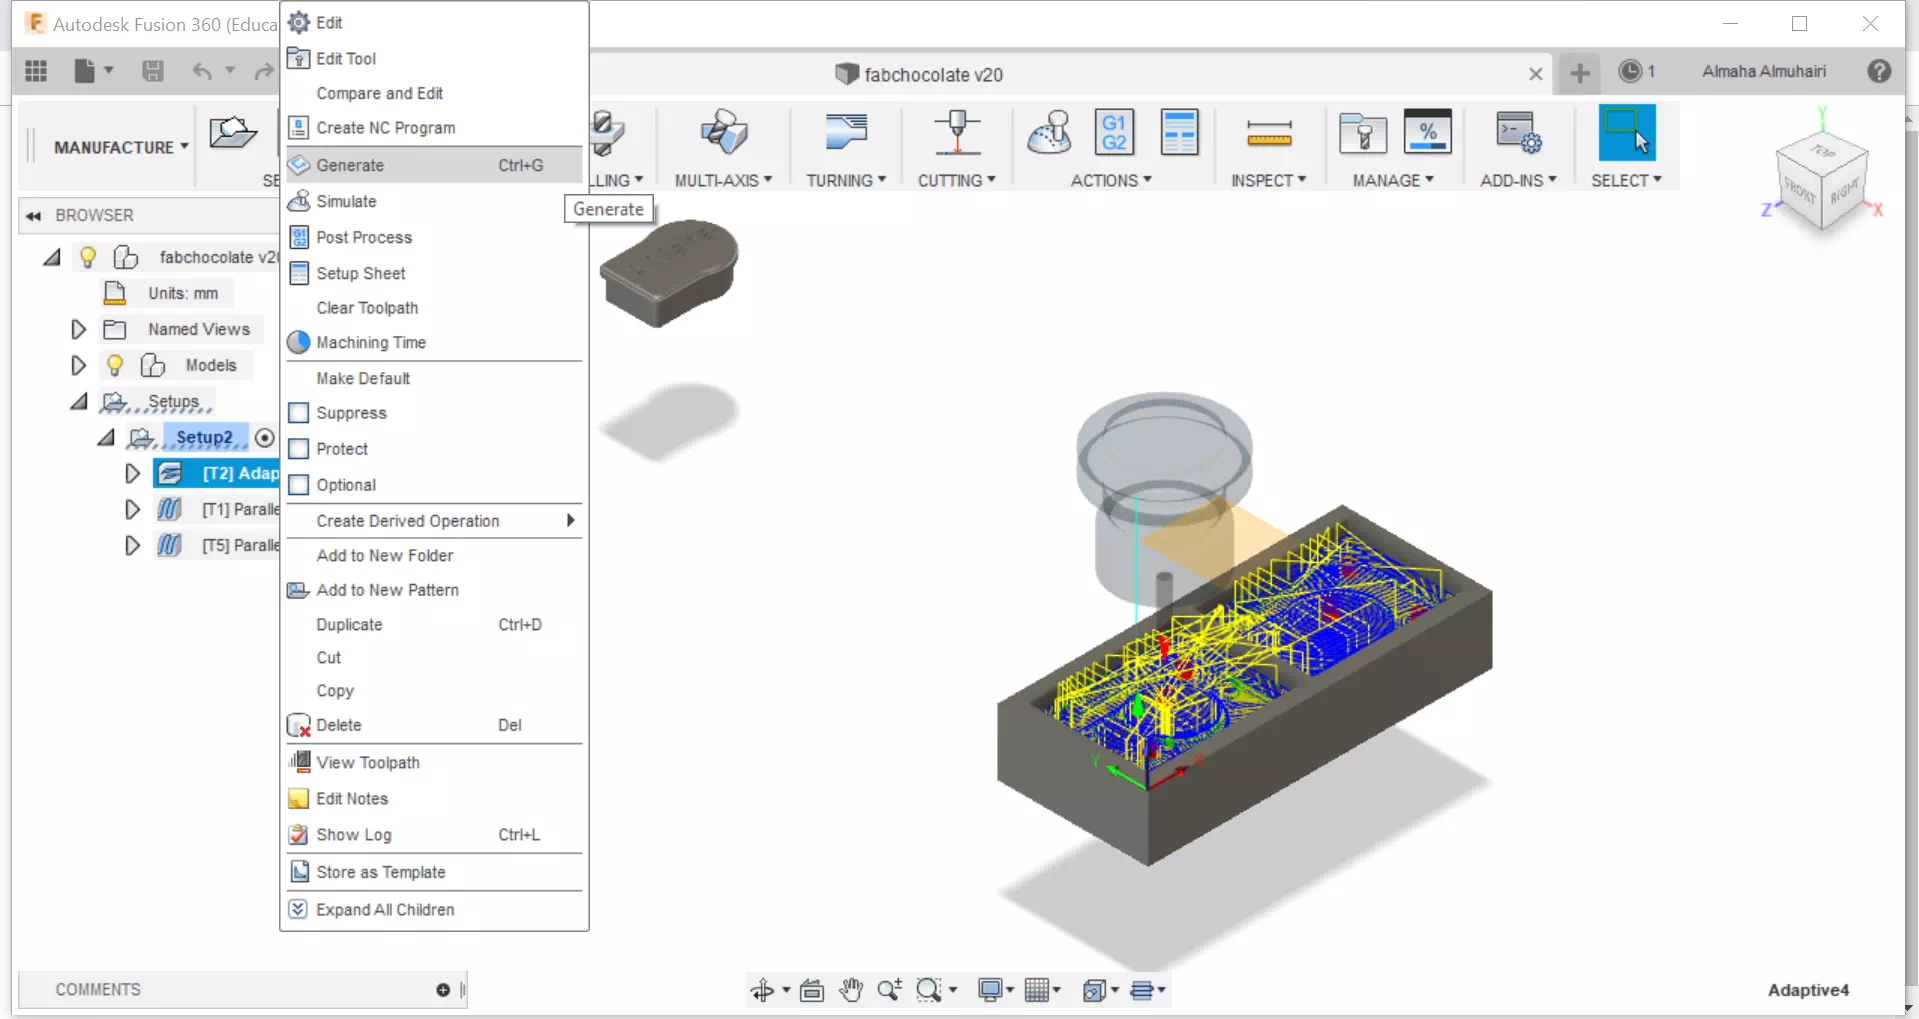
After making our tool path we must generate it, this will allow us to make files for our milling machines, right click on your selected tool path and click Generate.
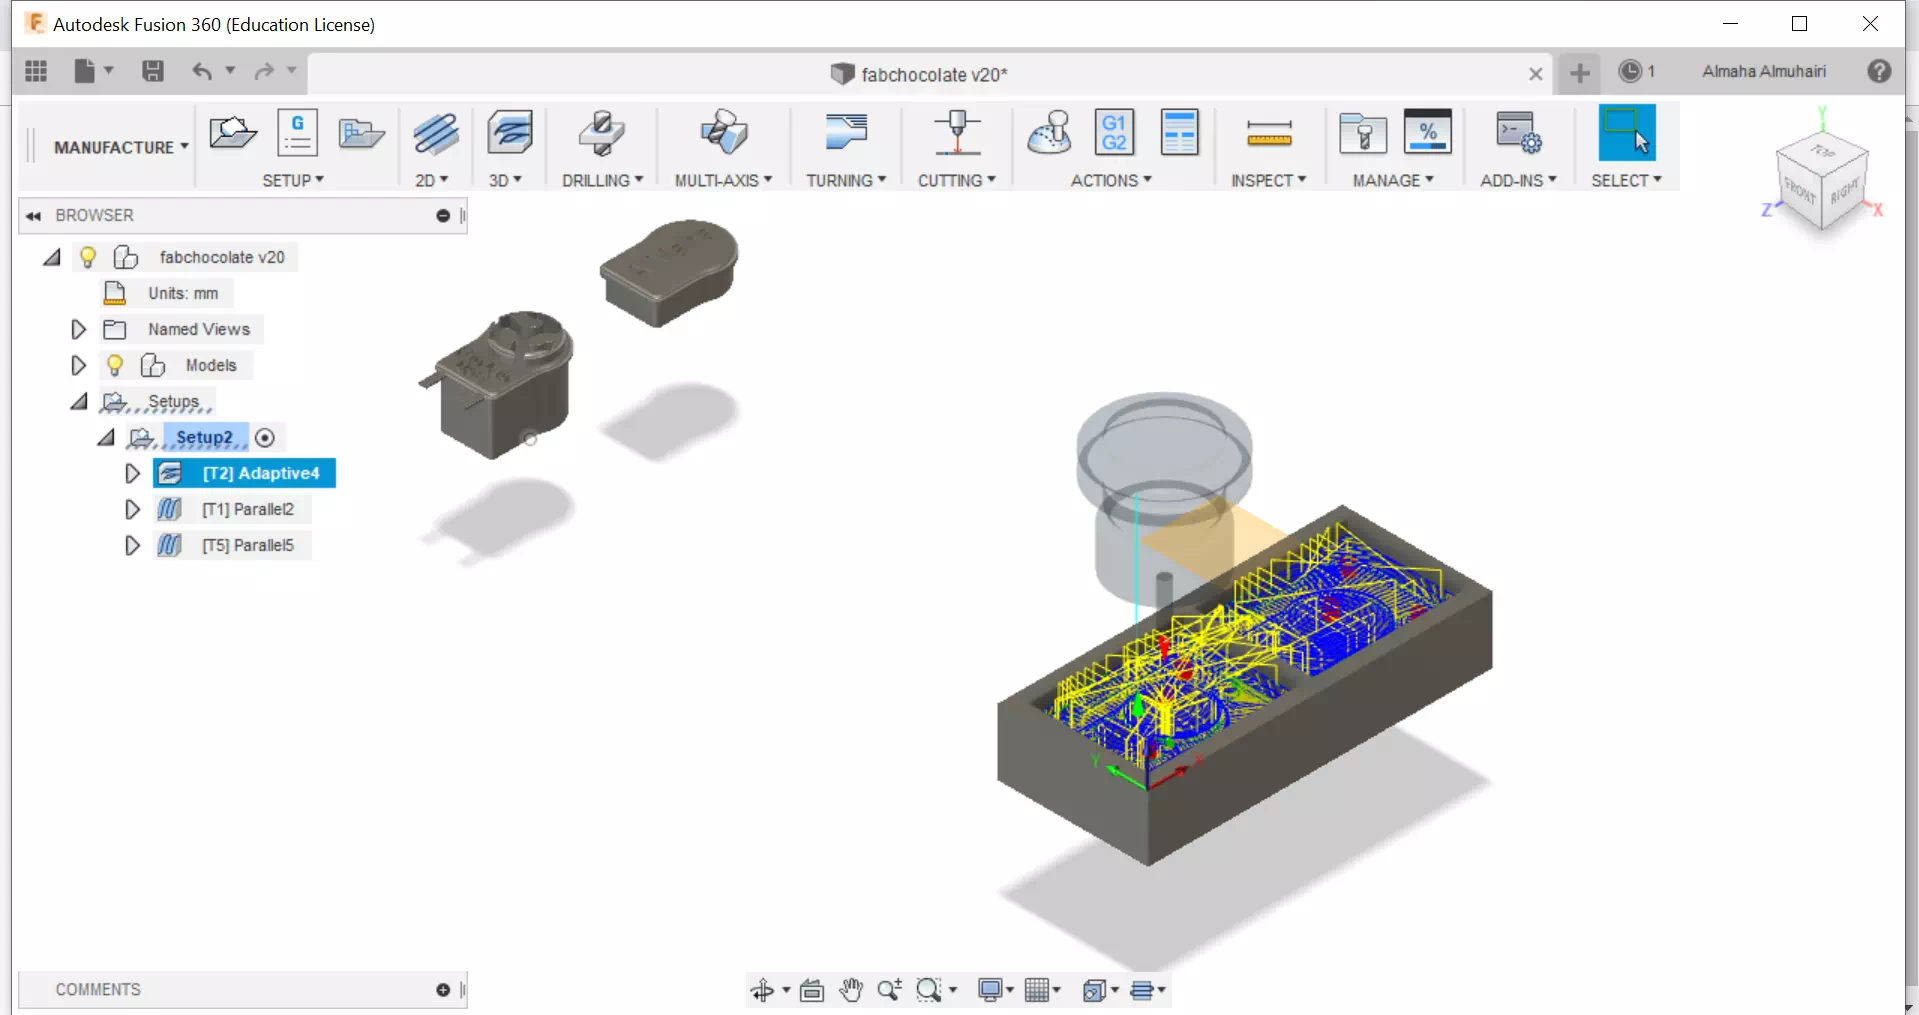
After generating it should look like this, during the generation you will see the generation process loading.

Right click on the same tool path you just generated and click post process.
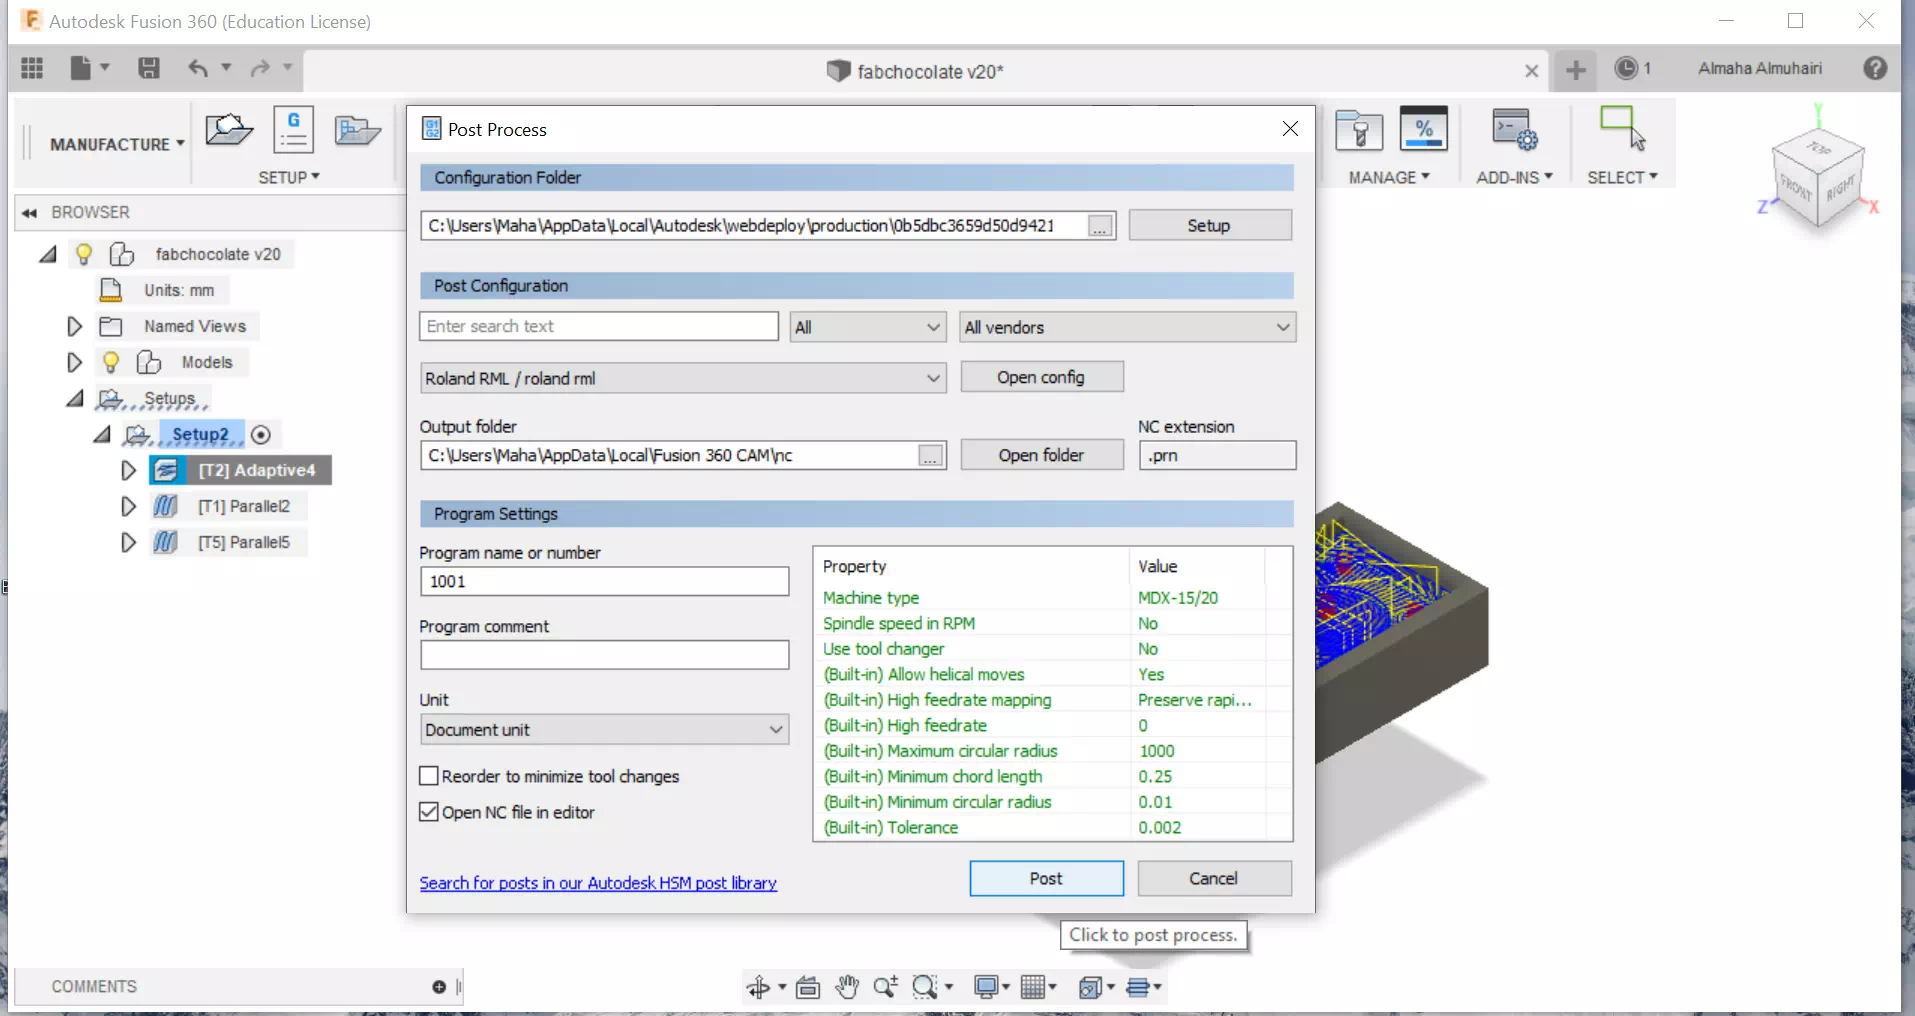
The post process should look like this, here you input your settings, in our case we just changed the milling machine type settings, we changed to MDX 15/20. Click Post.
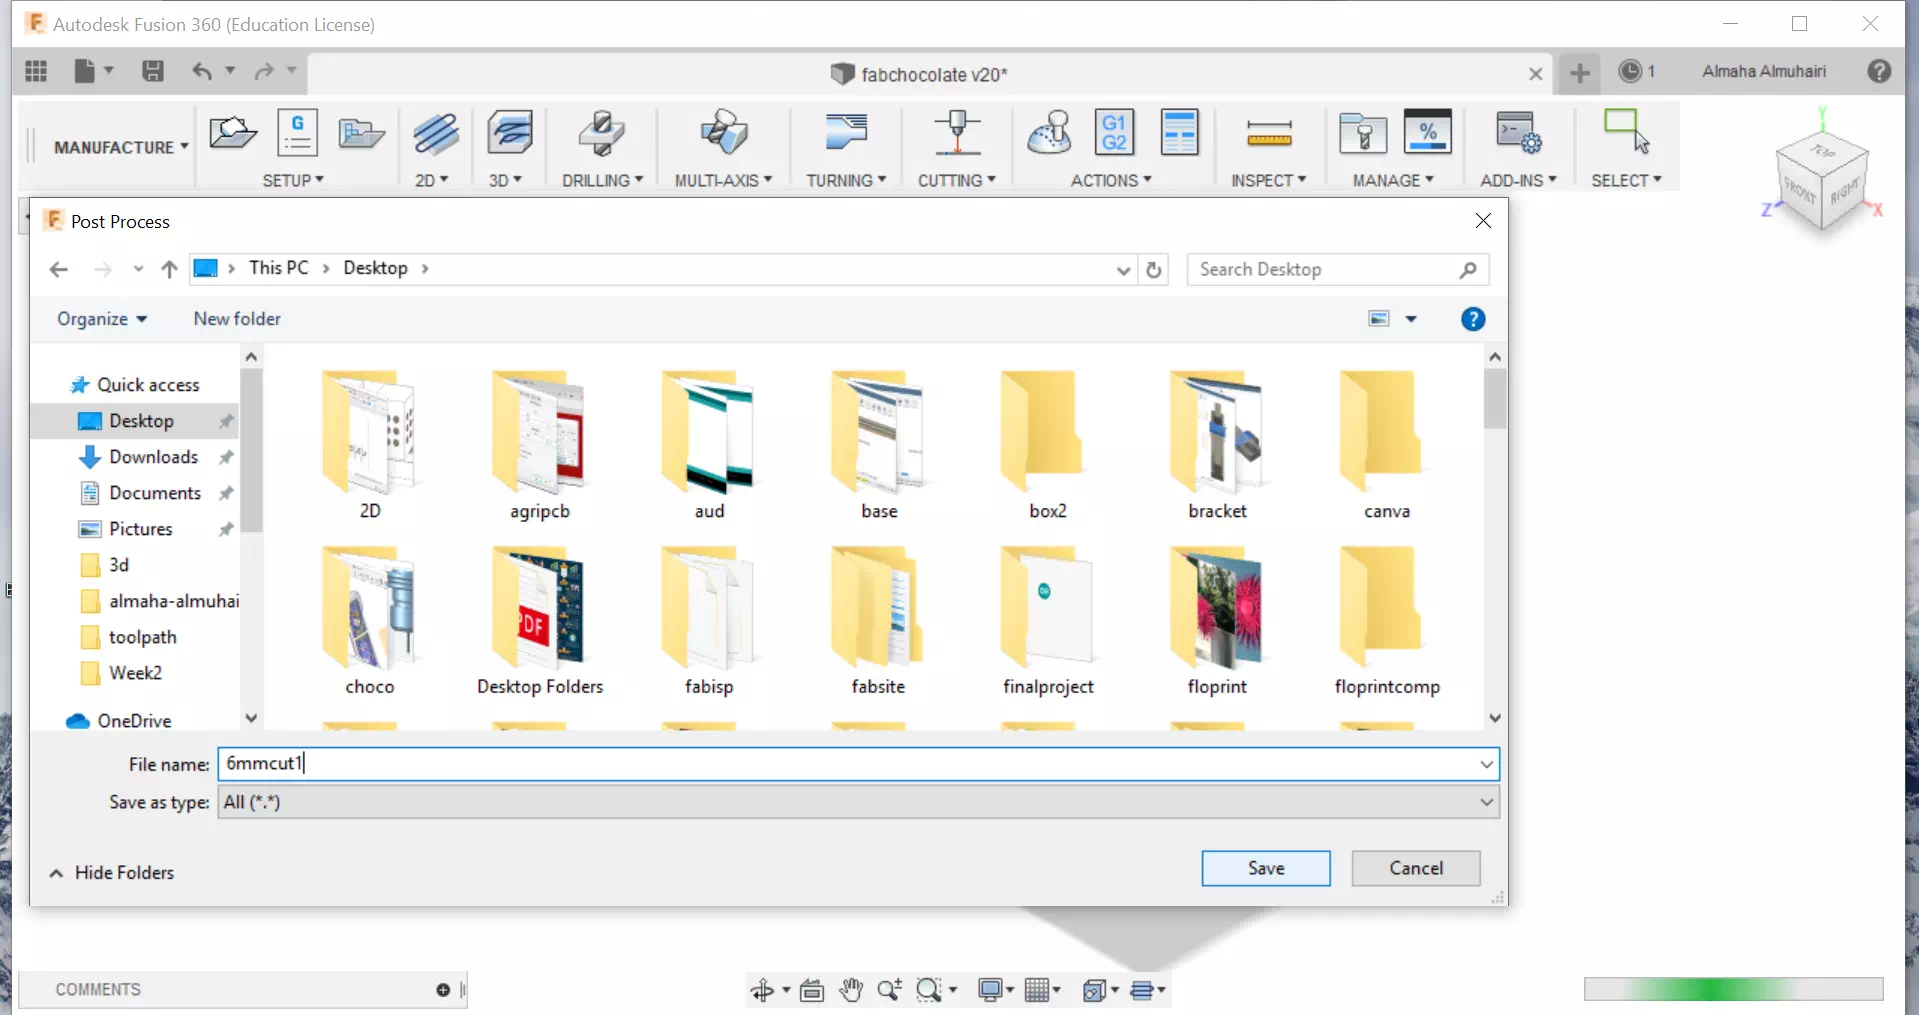
After clicking post, save the file somewhere in your desktop for easy access.(Tip: Save the file as the tool, you will be cutting with and the step.)

The file you saved can be opened in Brackets, then save it.
Your file should be saved as a CDR file.
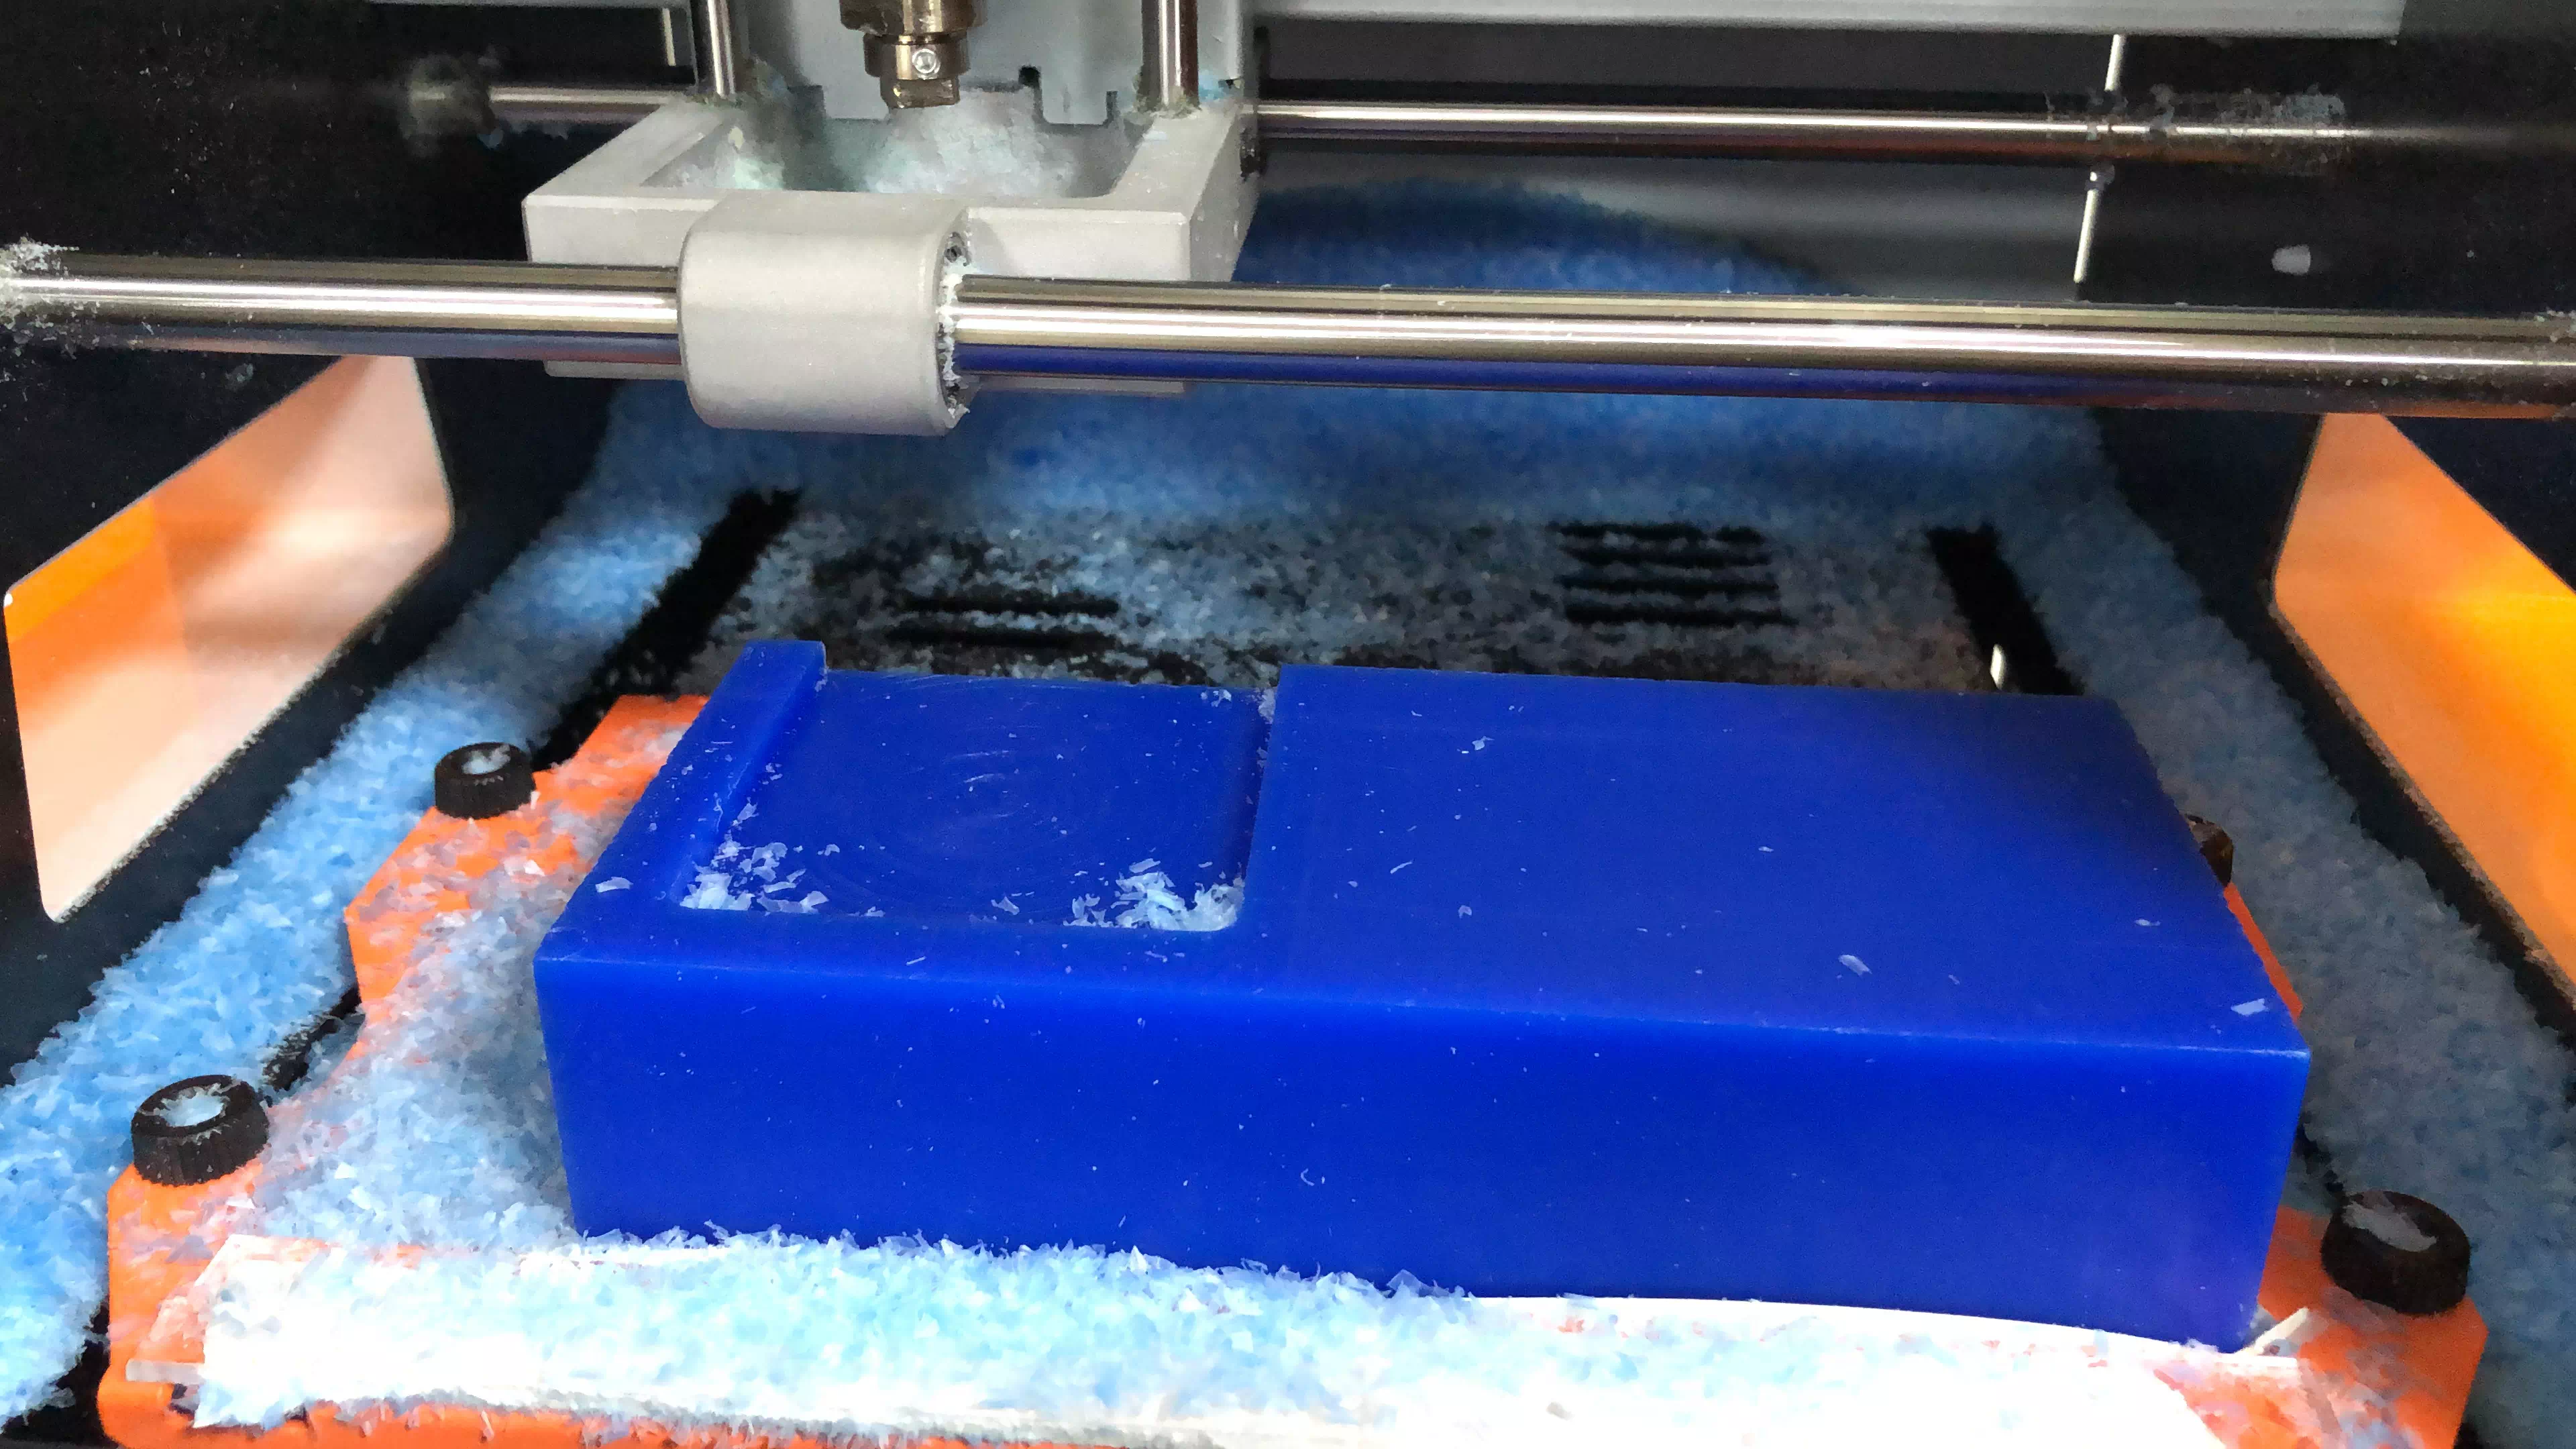
For all my milling I have manually set the speed to 50% in the milling software, this will increase the milling time but will decrease the rate of failure/crash, I made a mistake here by not setting the Z axis correctly when adding the template mould to design, The Z should always be on top.
.webp)
My second mistake is when I forgot to join the template mould body with my design body.
.webp)
My third mistake is when I selected the wrong body while milling, this was during the tool path selection process, so I had to redo the tool path to select the right bodies.
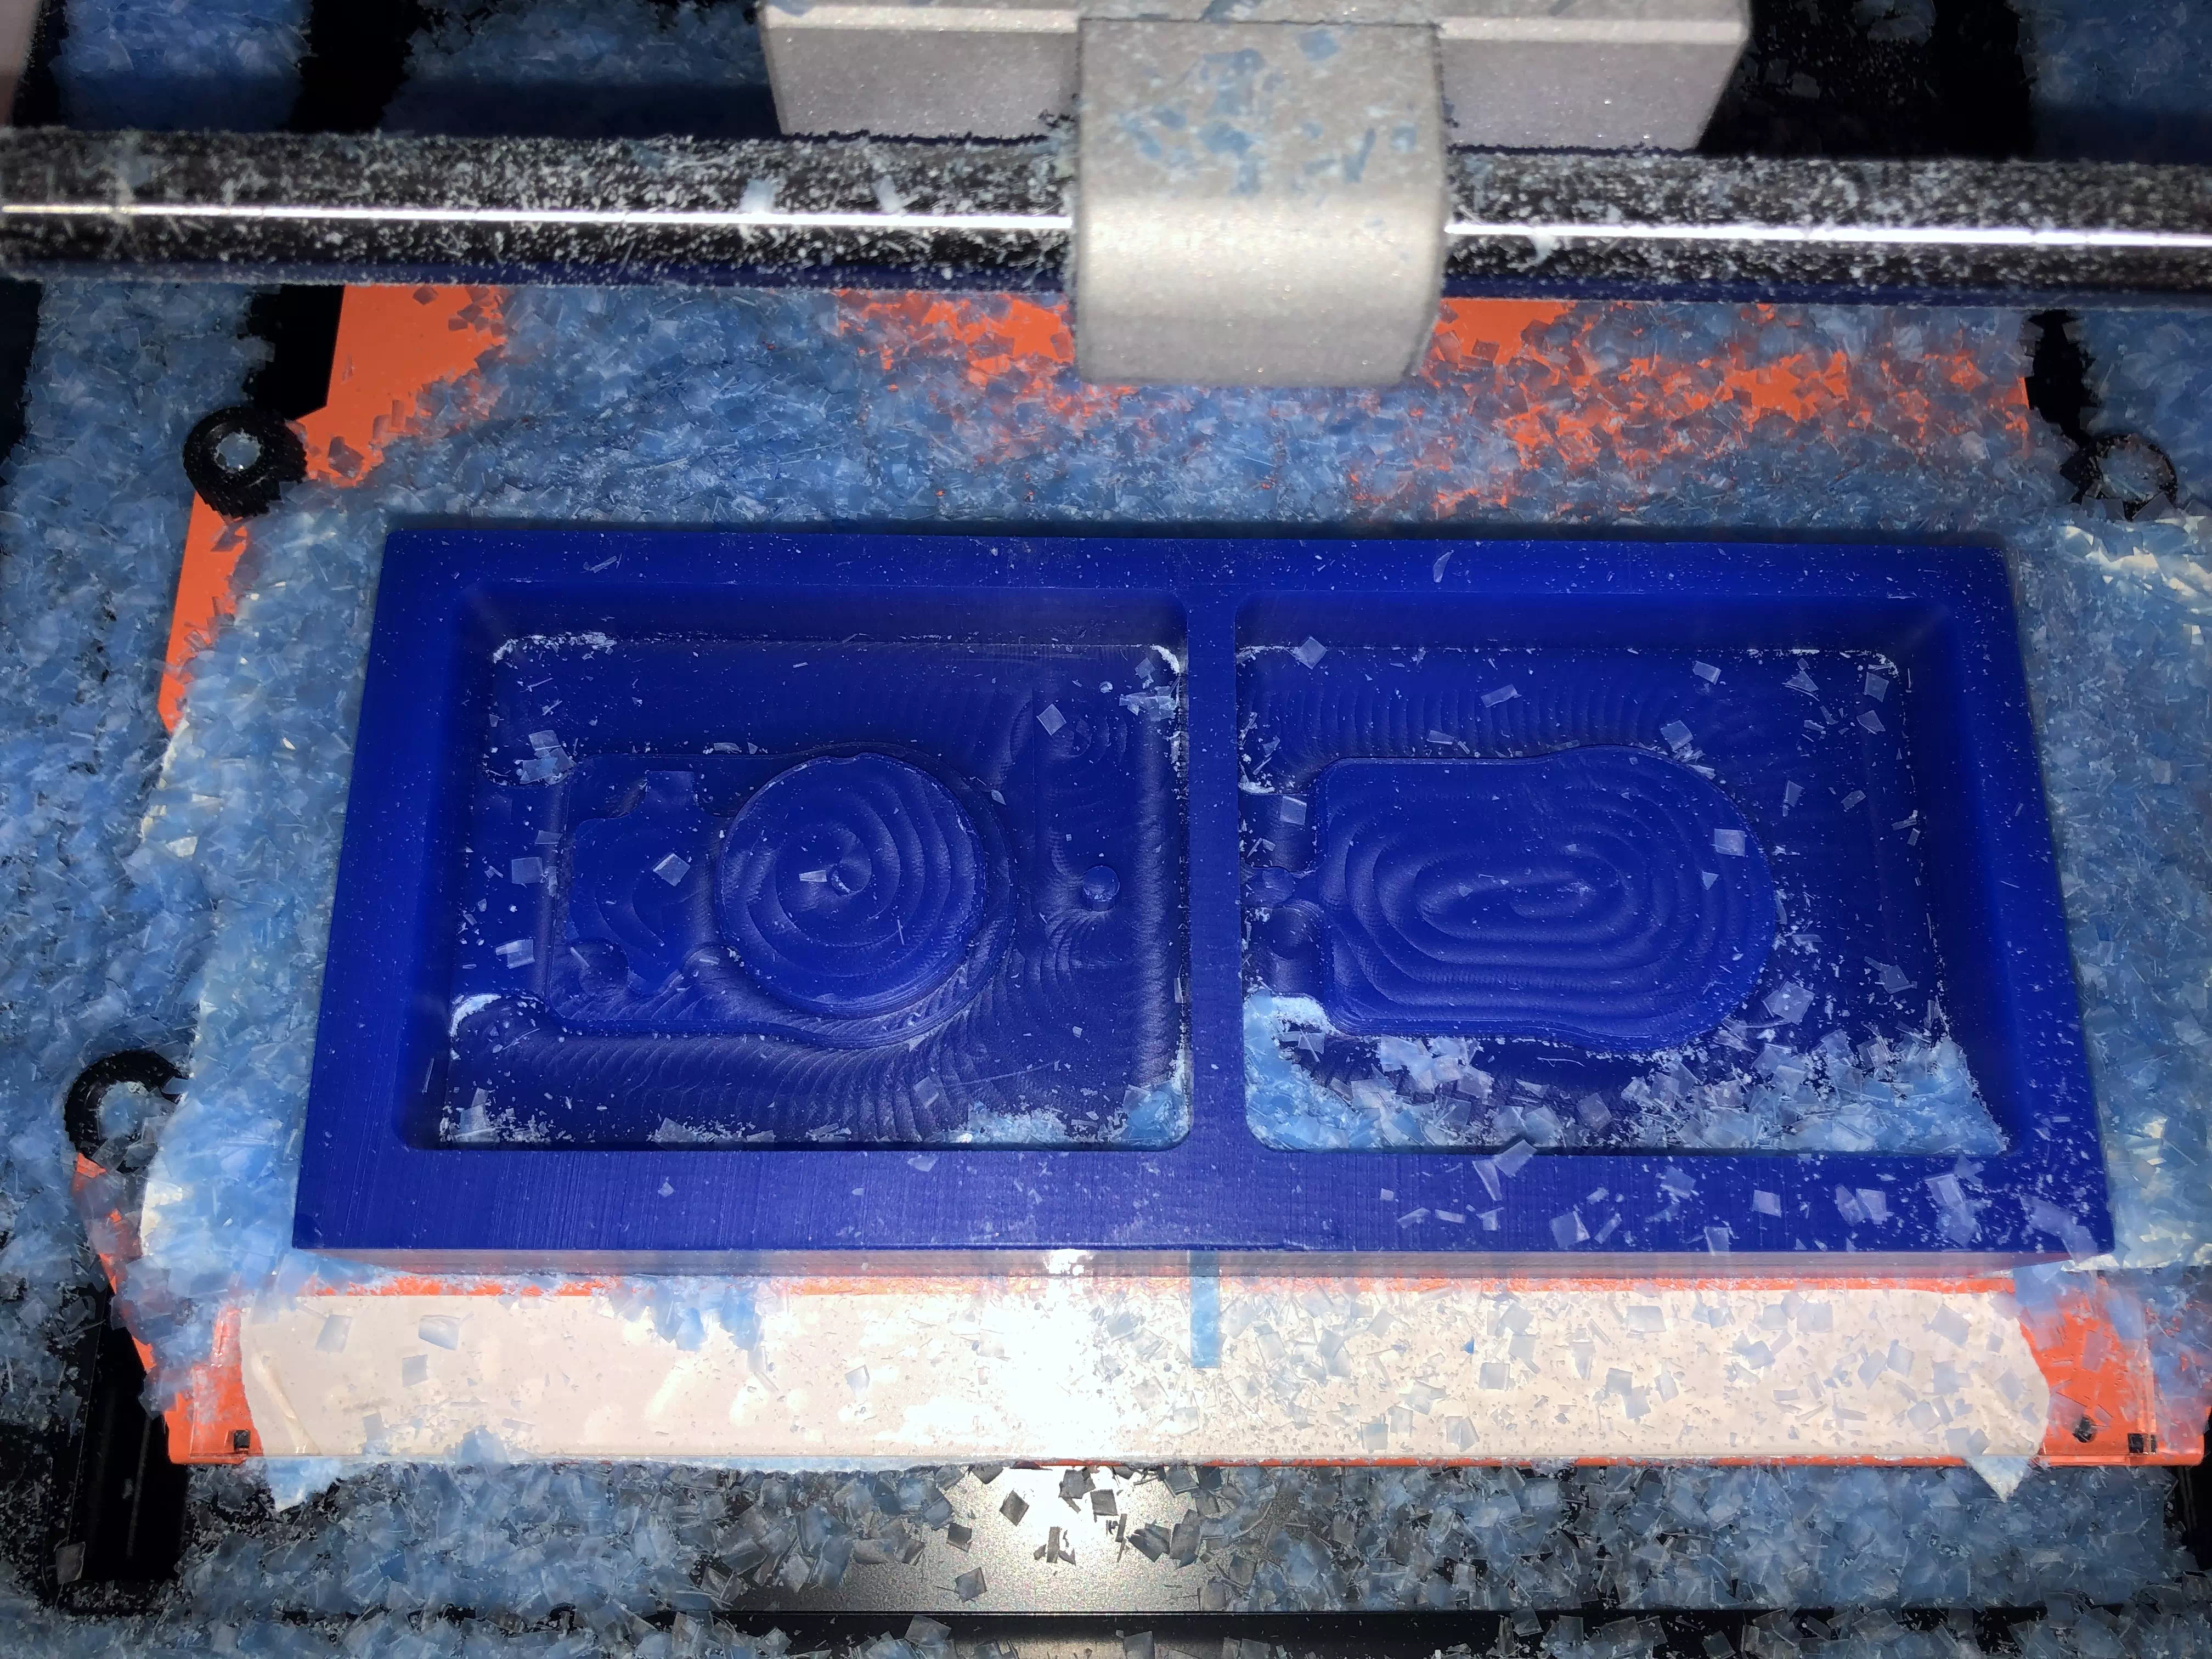
After all these mistakes, I finally milled it correctly!
The final mould.
Casting the Food Safe Silicone
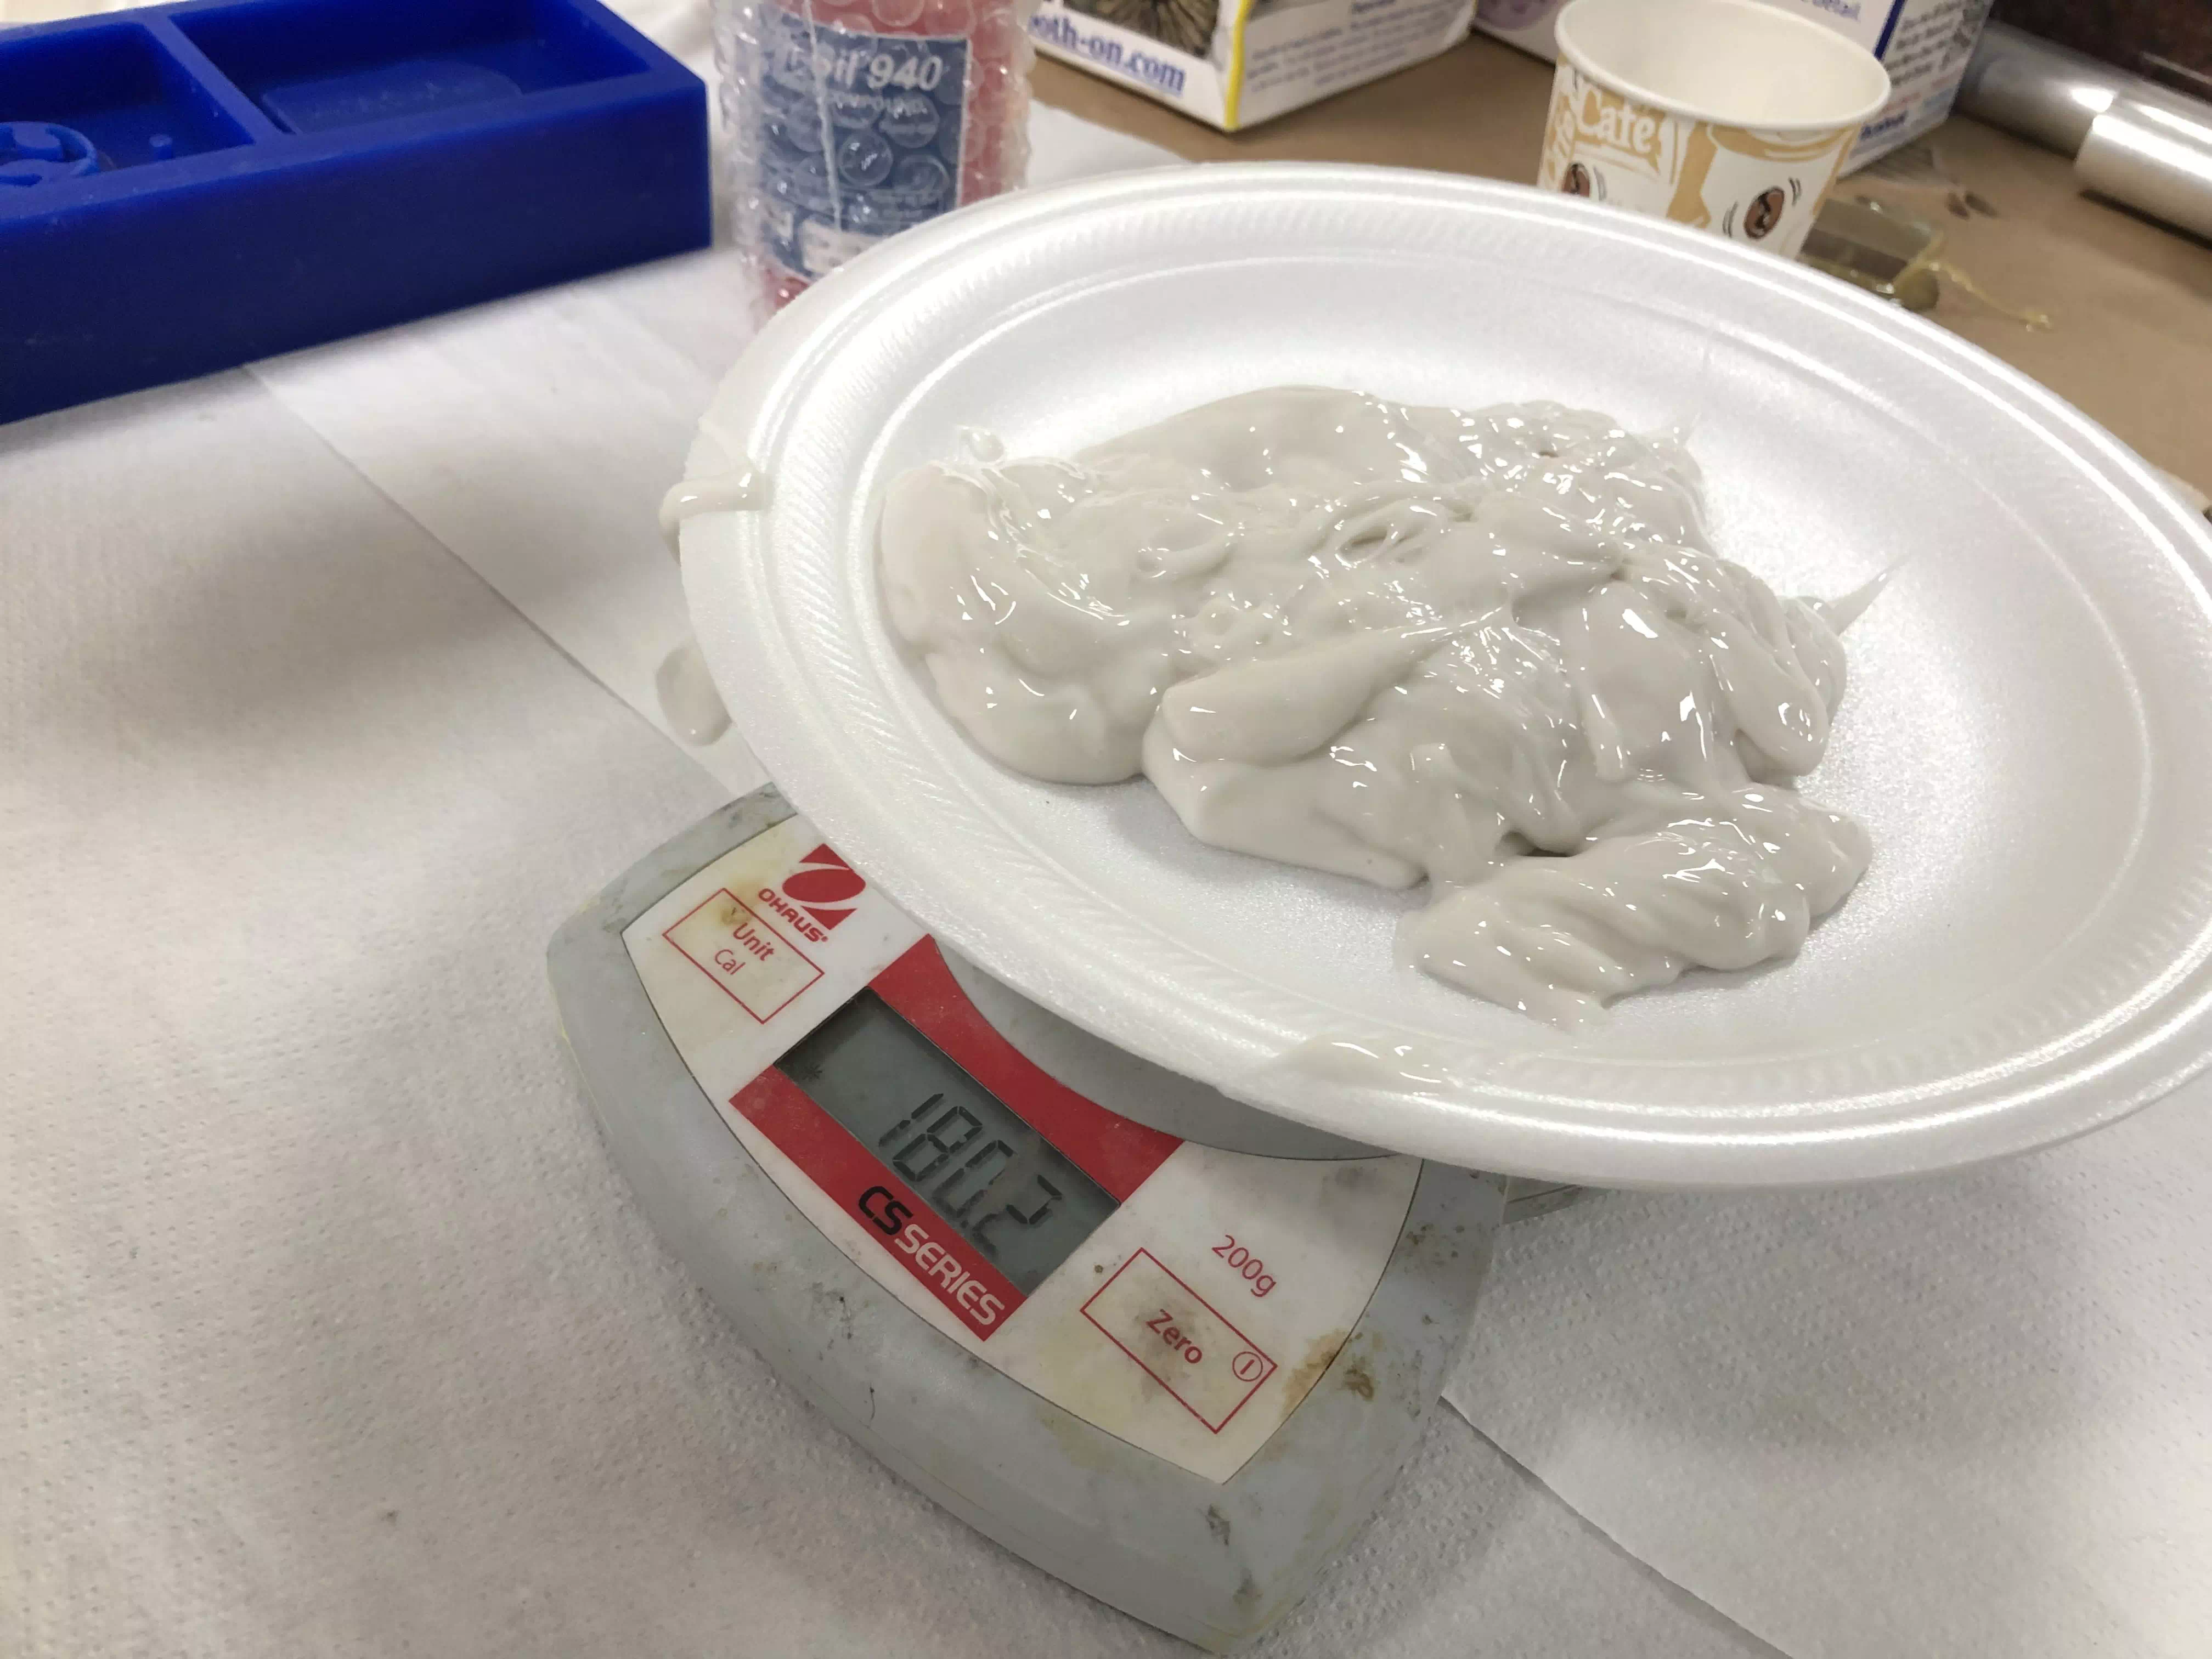
We will be using Smooth-Sil™ 940. The food grade silicone's data sheet is also available here. First We measured the amount needed in our mould by filling our mould with water then we weighed that amount of water by pouring that watering in a cup and using a scale to measure, we then matched that water Measurement by making the part A silicone the same weight.
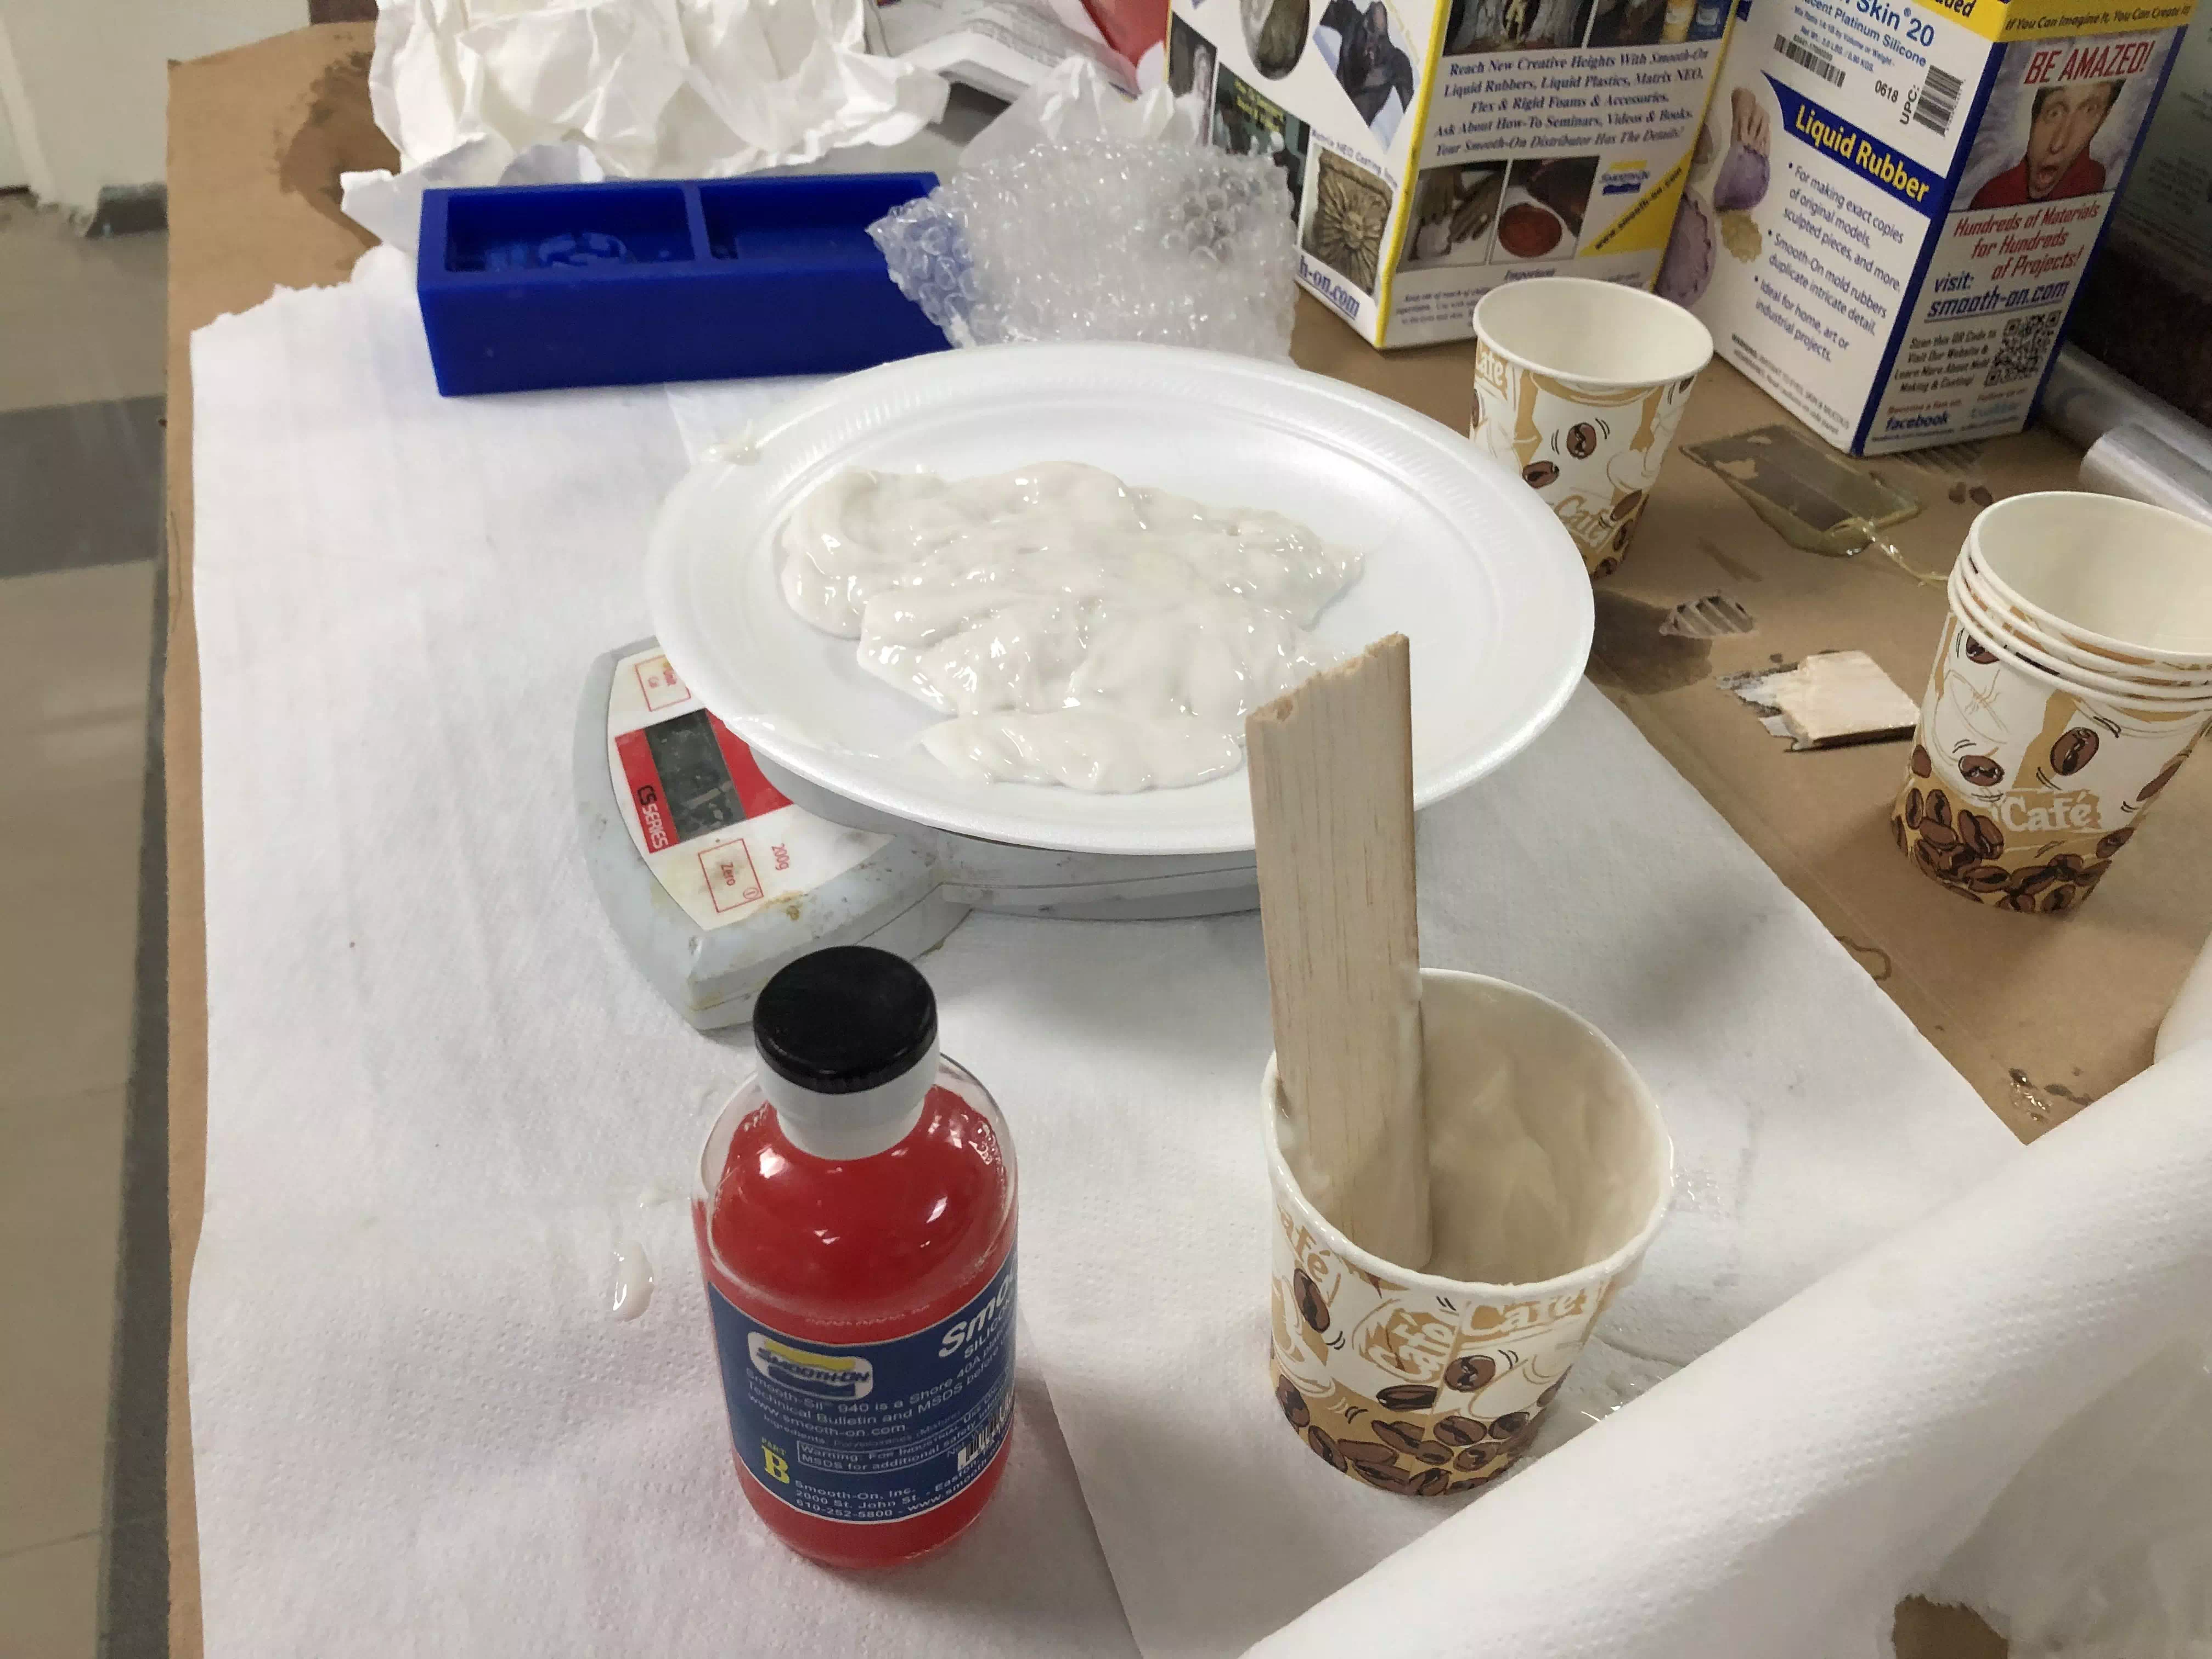
Make sure you have all your supplies near you and work space clear, wear gloves.
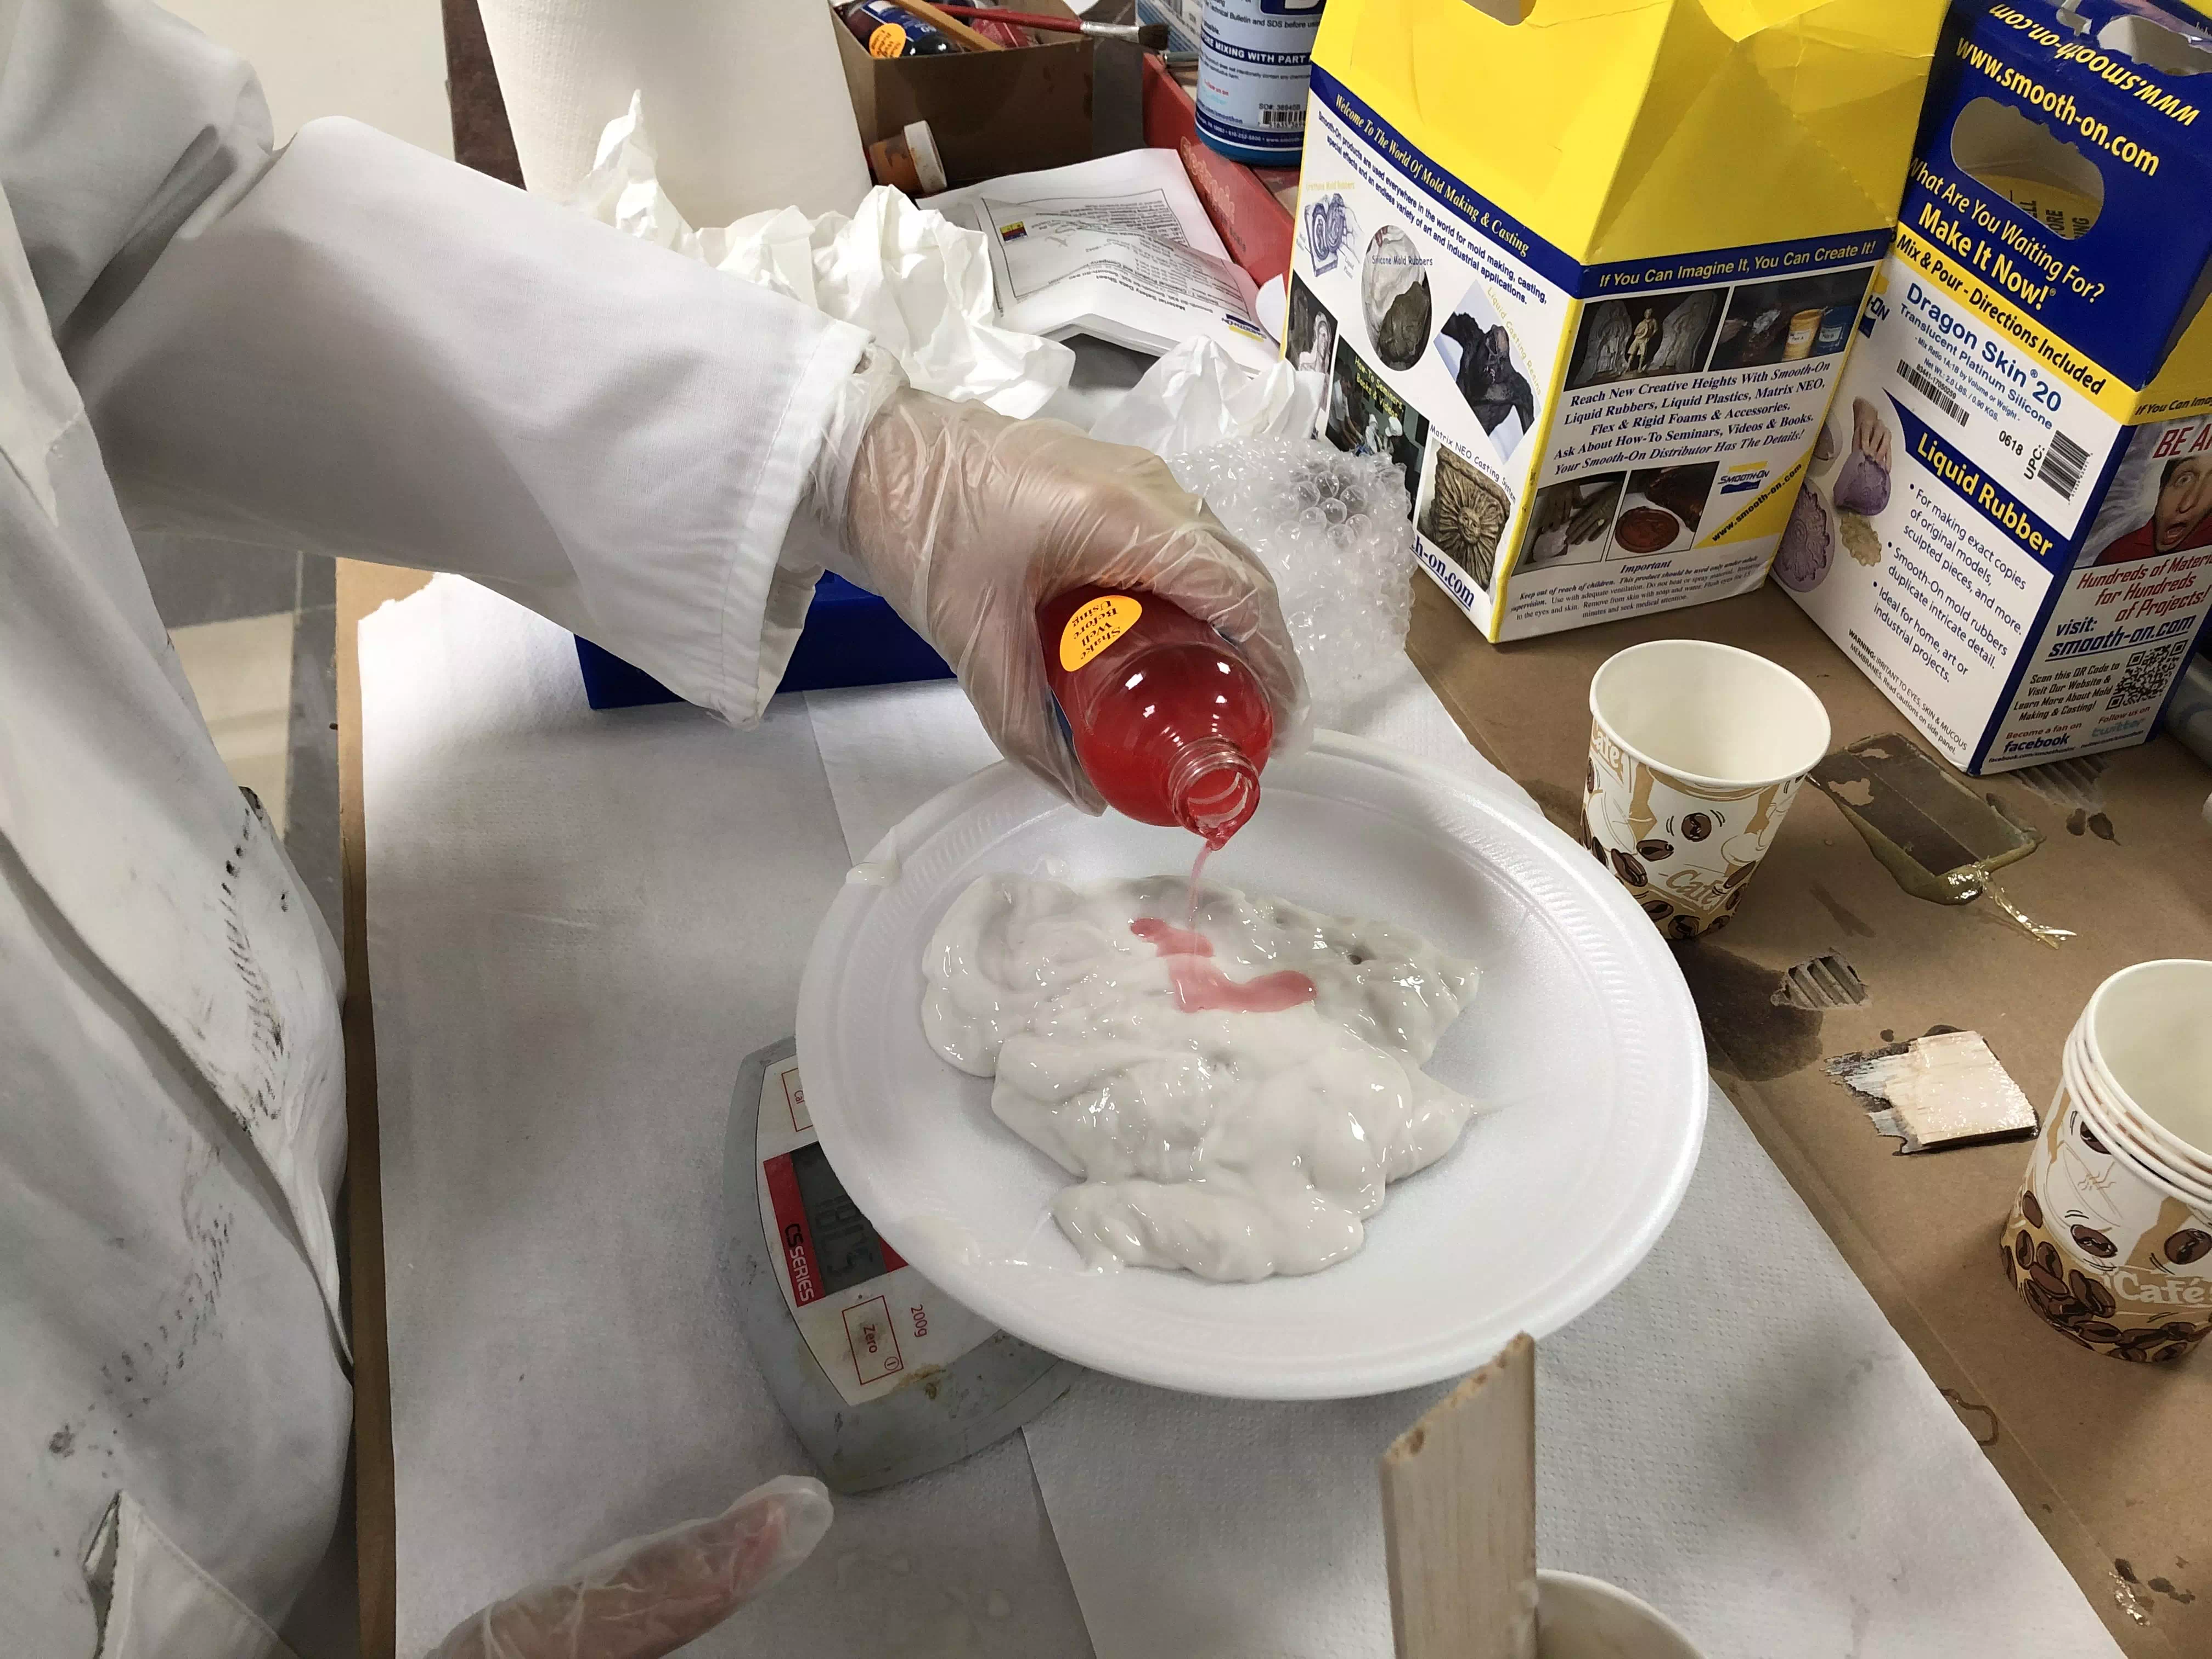
Add part B, here I added much more than the recommended since our silicone is old and was unused for so long. Normally it should be 100A:10B by weight, but I increased it by alot more like 100A:50B.
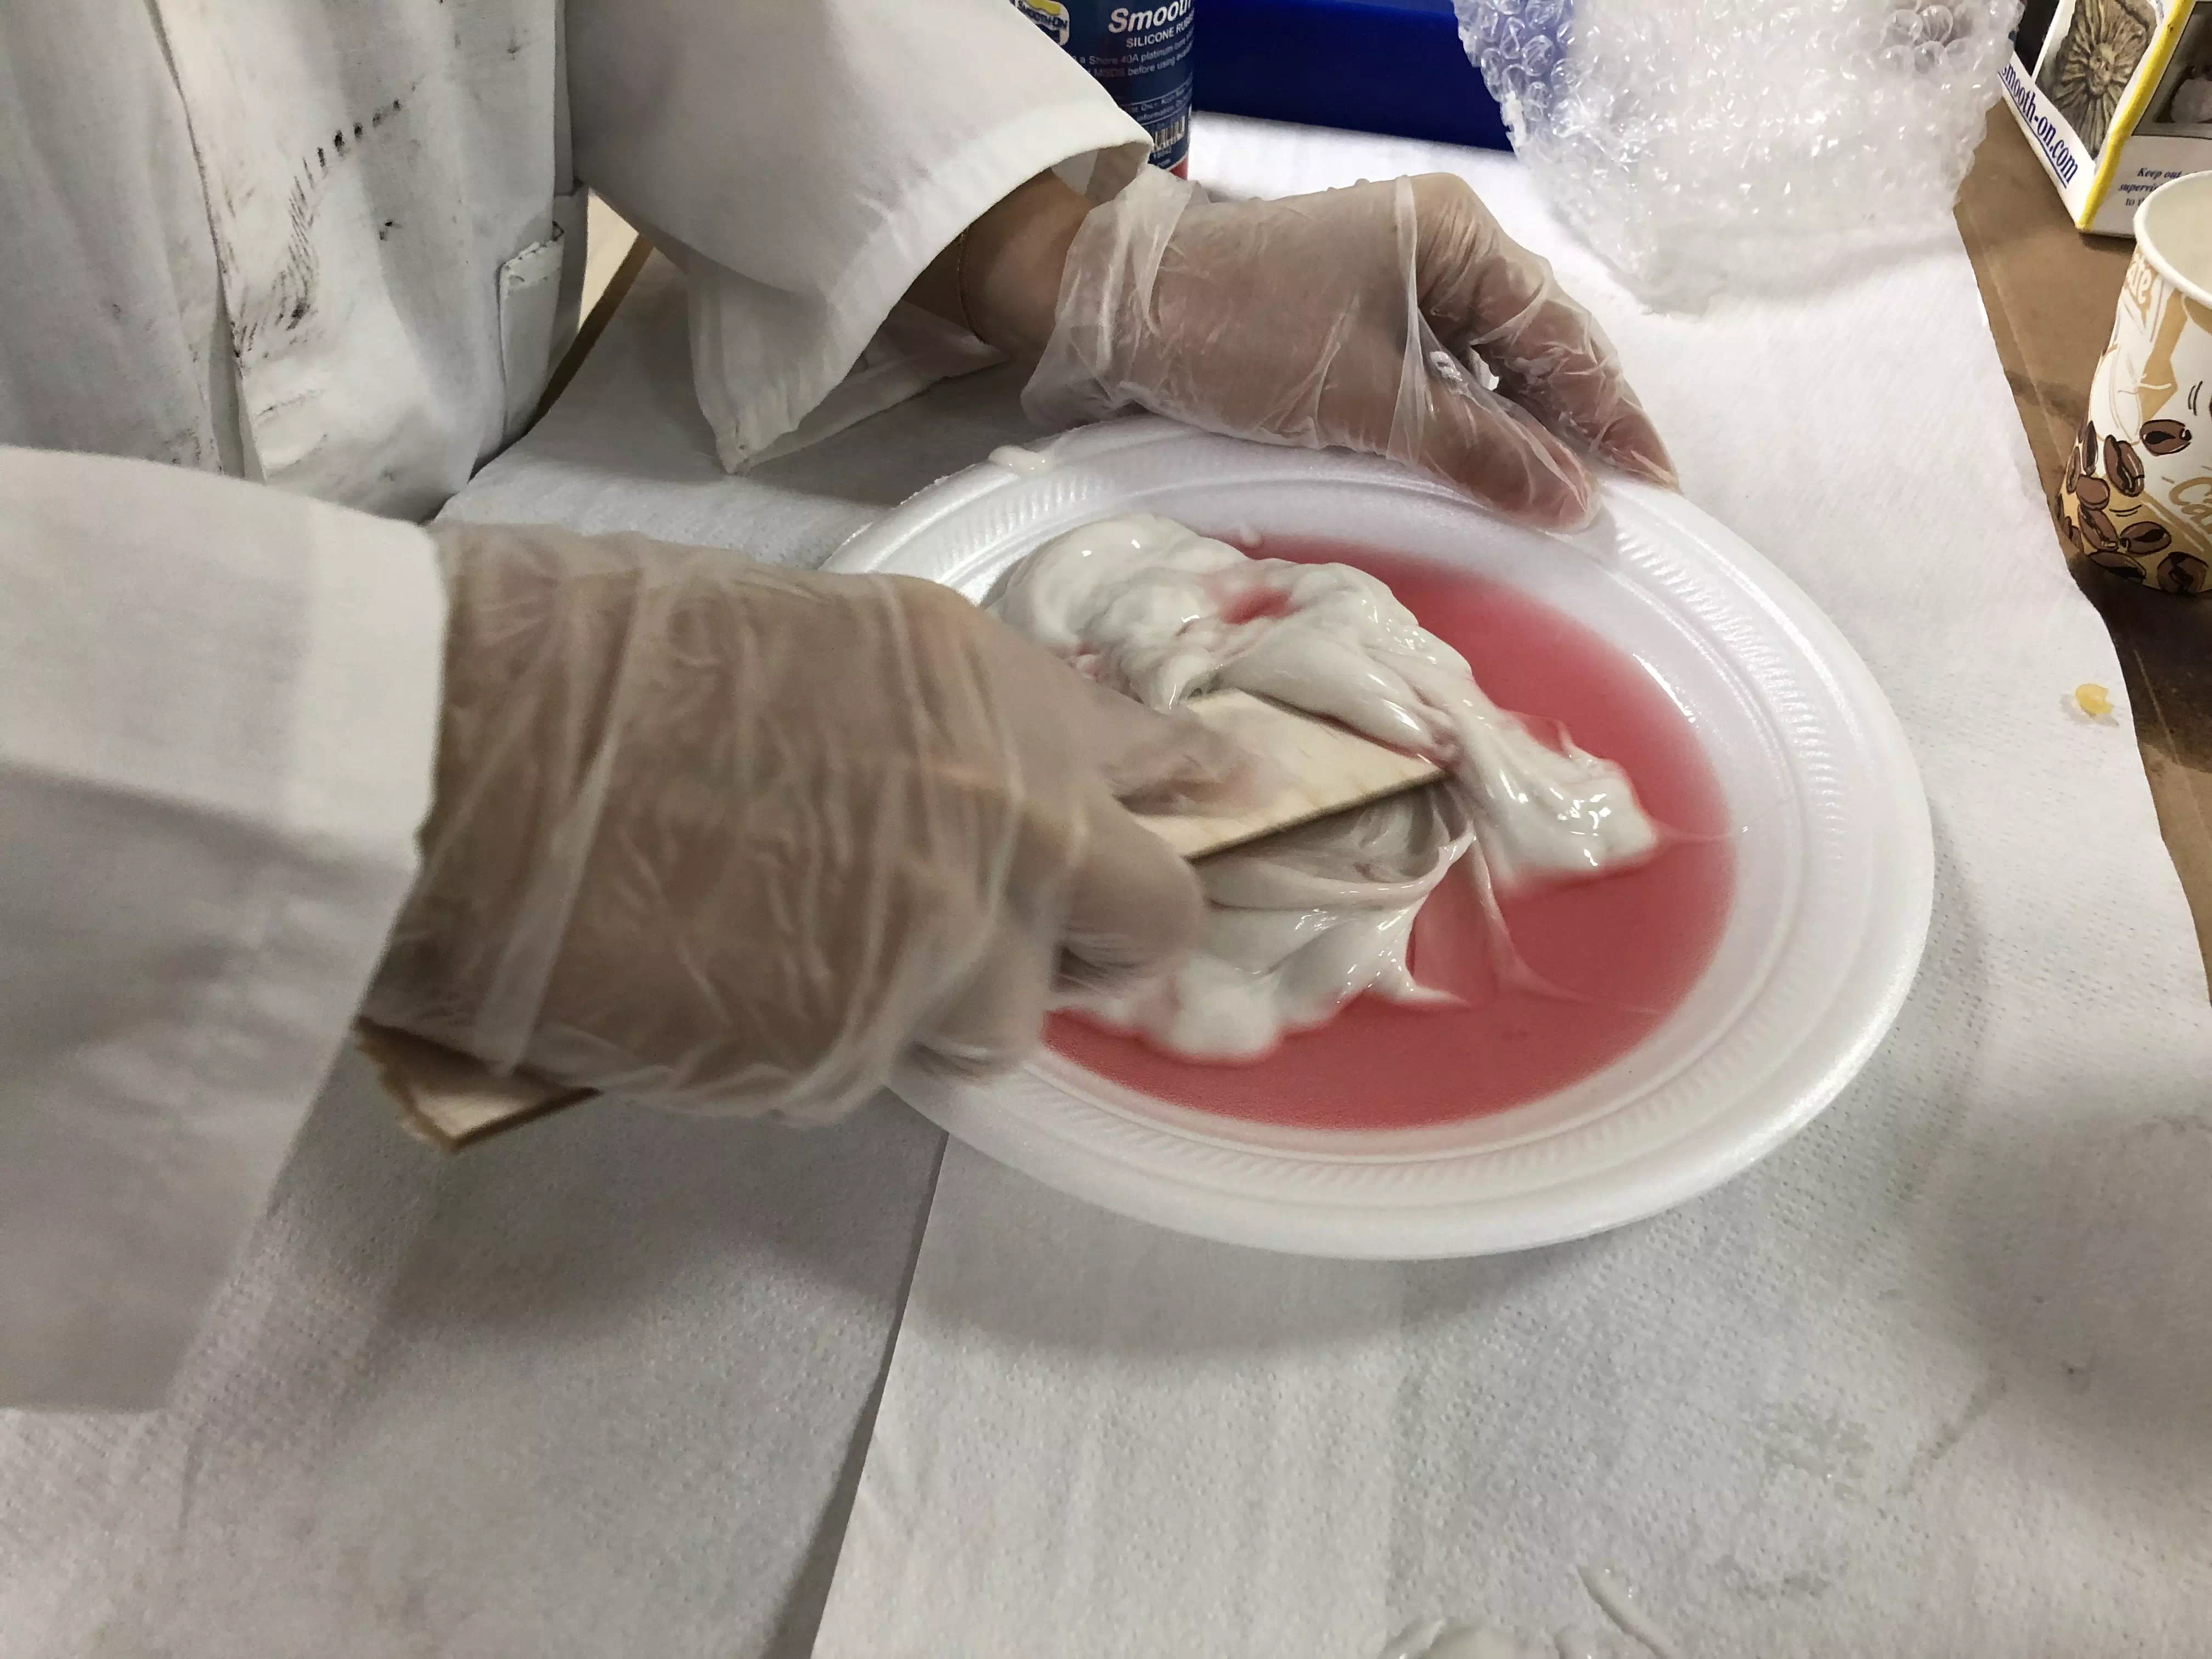
Keep mixing the for more than 3 minutes until the mixture turns pink and uniform.

Pour the silicone into the mould, it should be full like this.
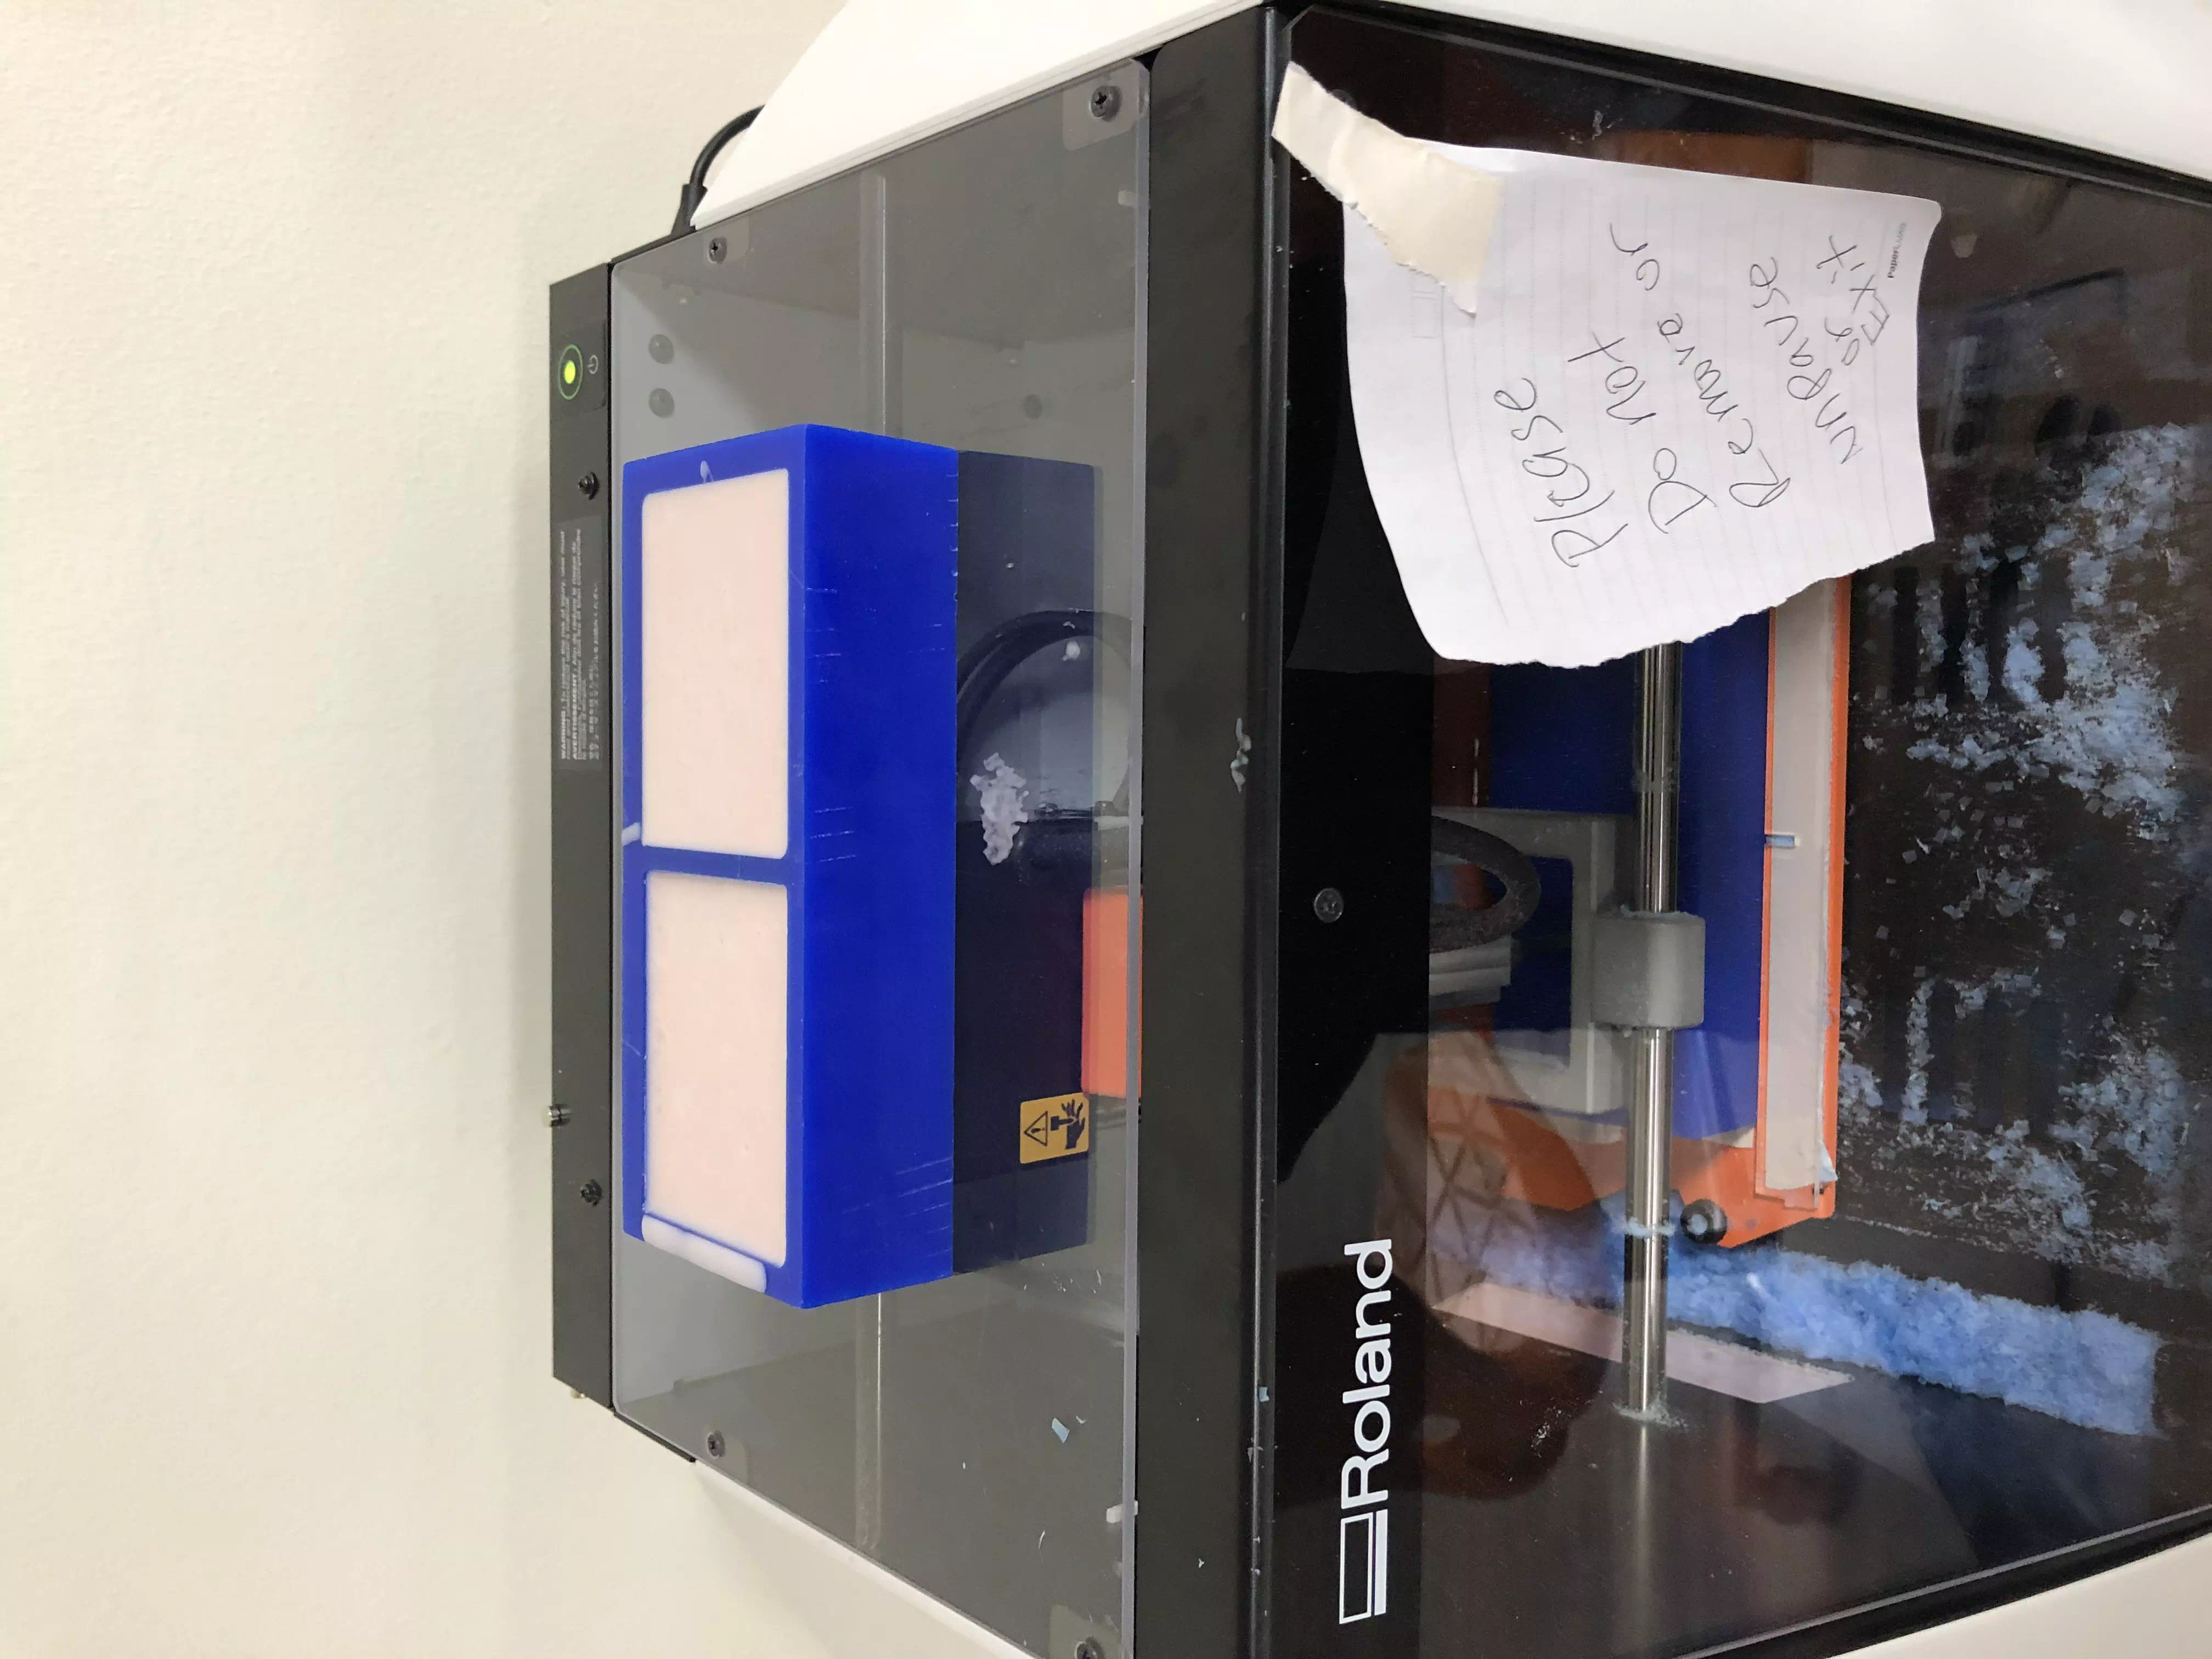
I then placed the mould on top of the machine and let it run on a random job so that the machine would vibrate and get rid of any air bubbles.
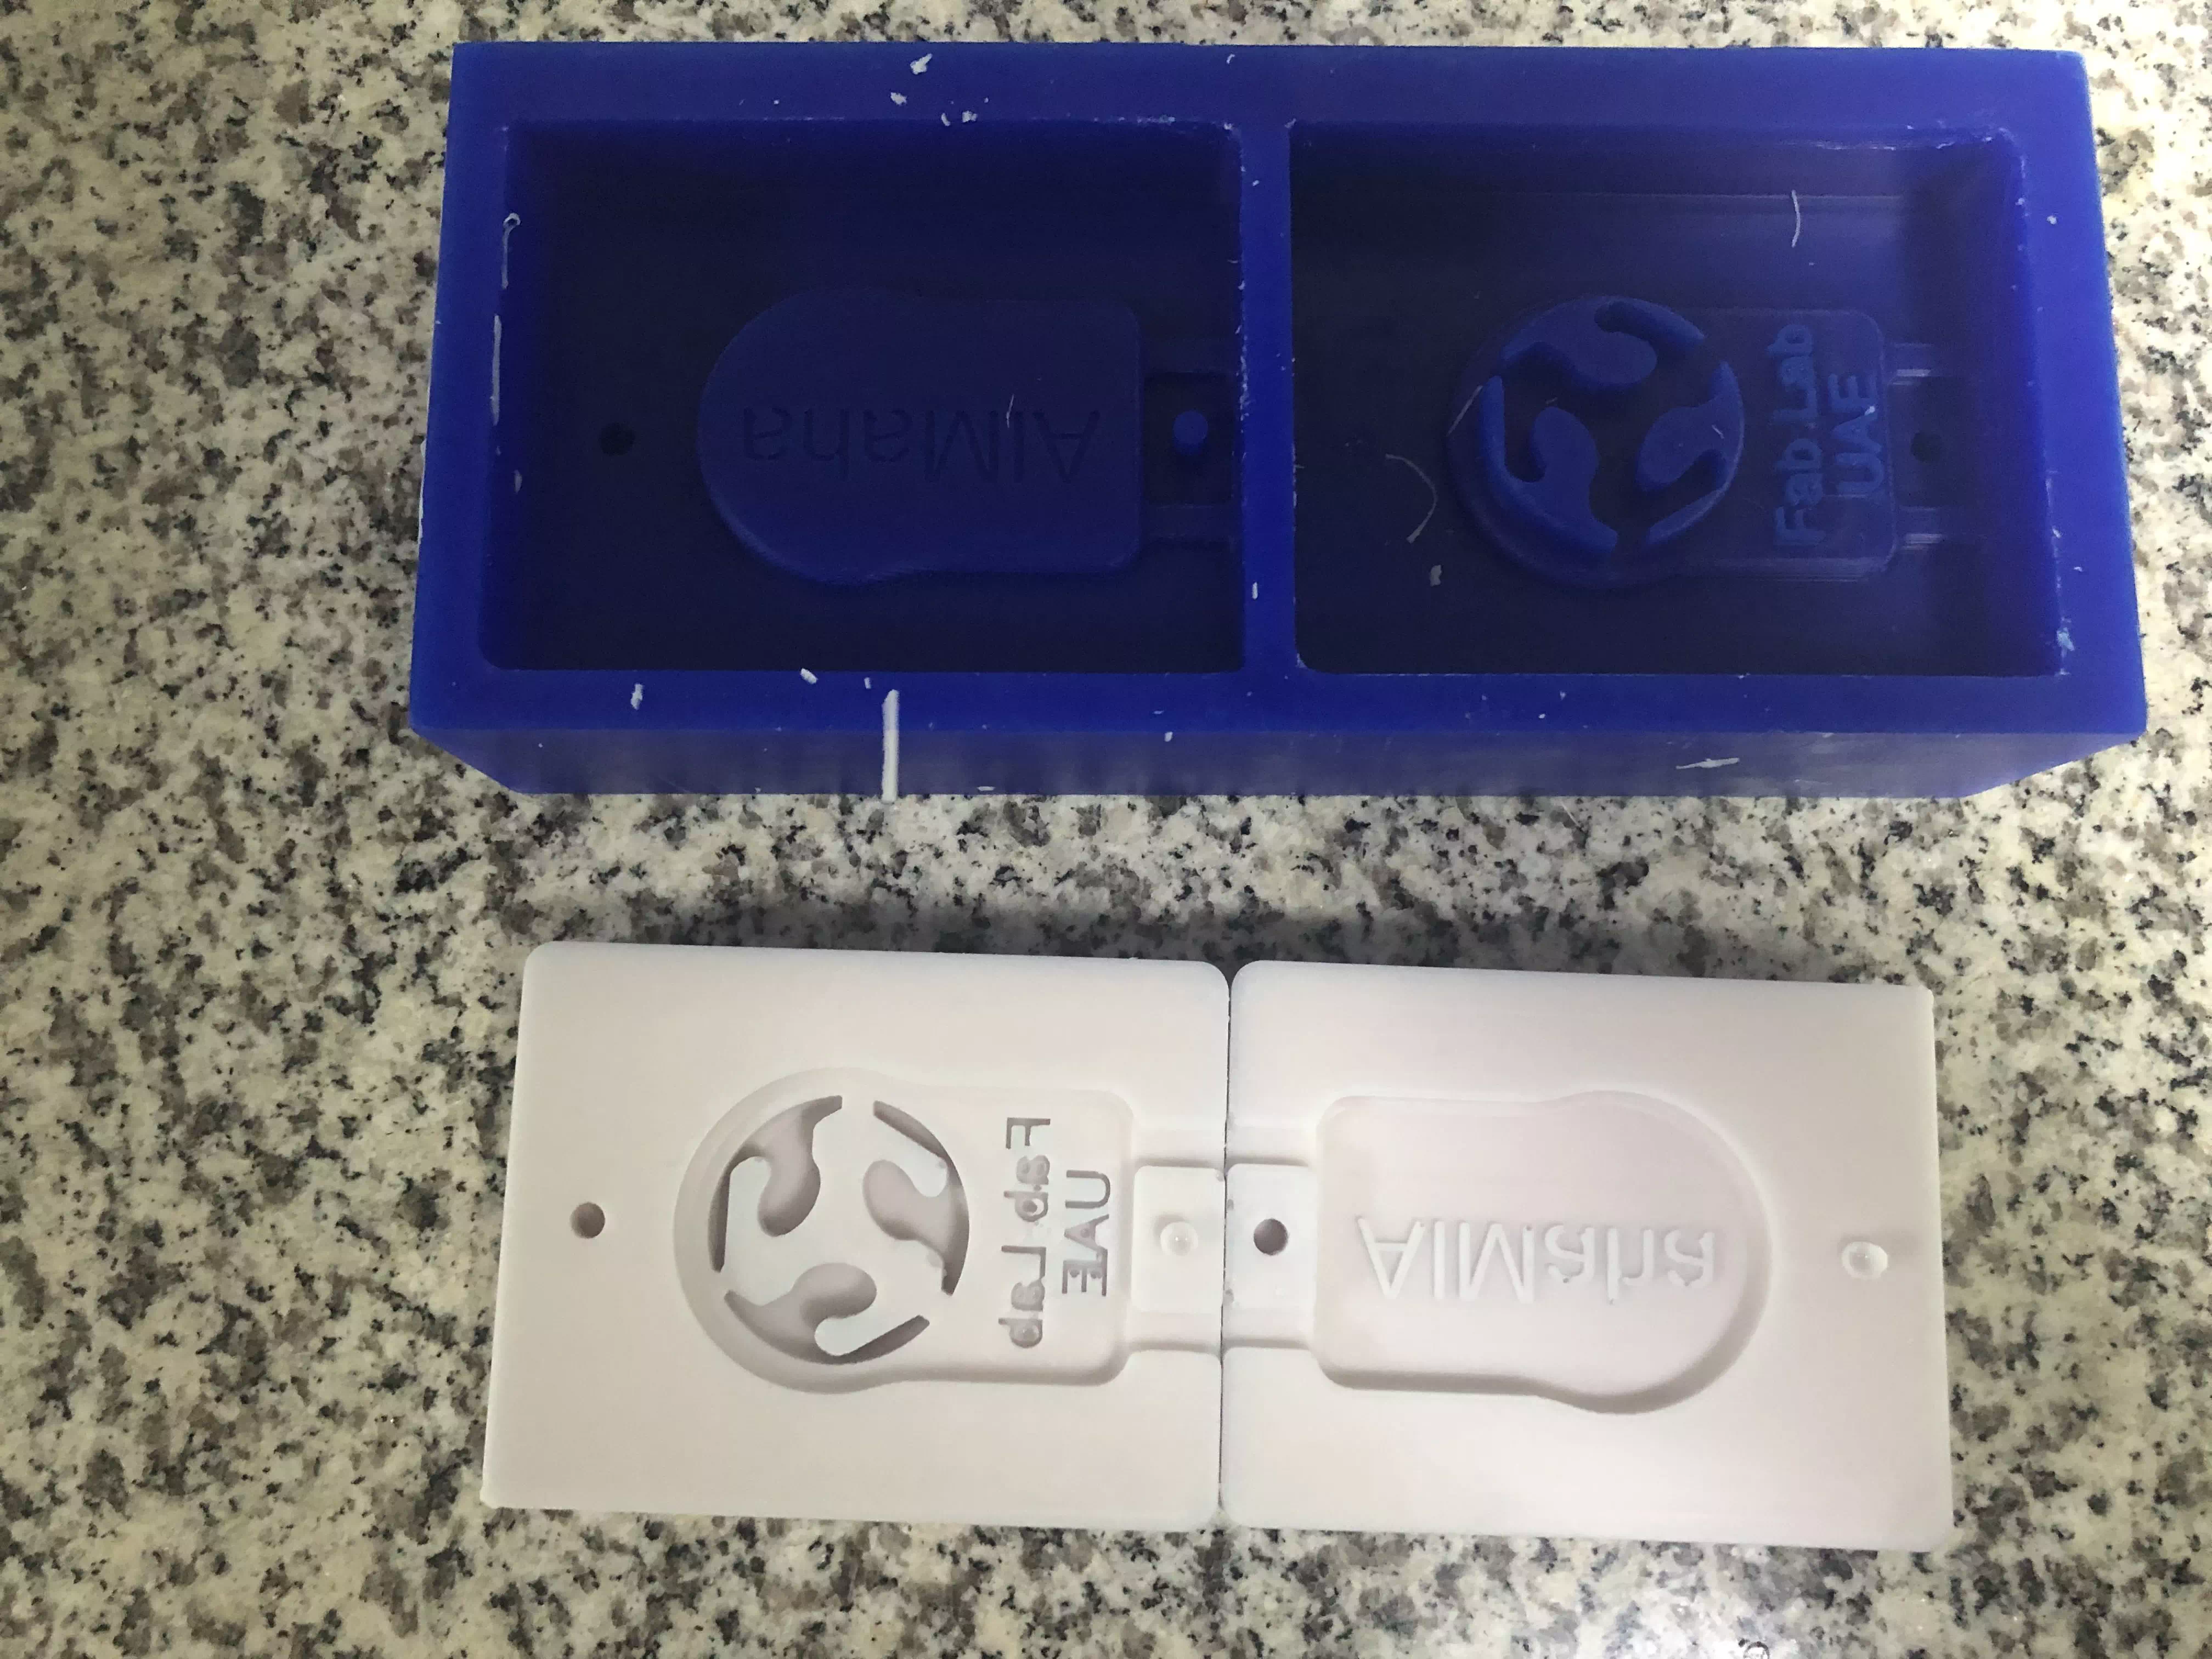
24 HOURS later, Carefully remove the mould from the cast, it should look like this, clean it with water to be ready for the next step.
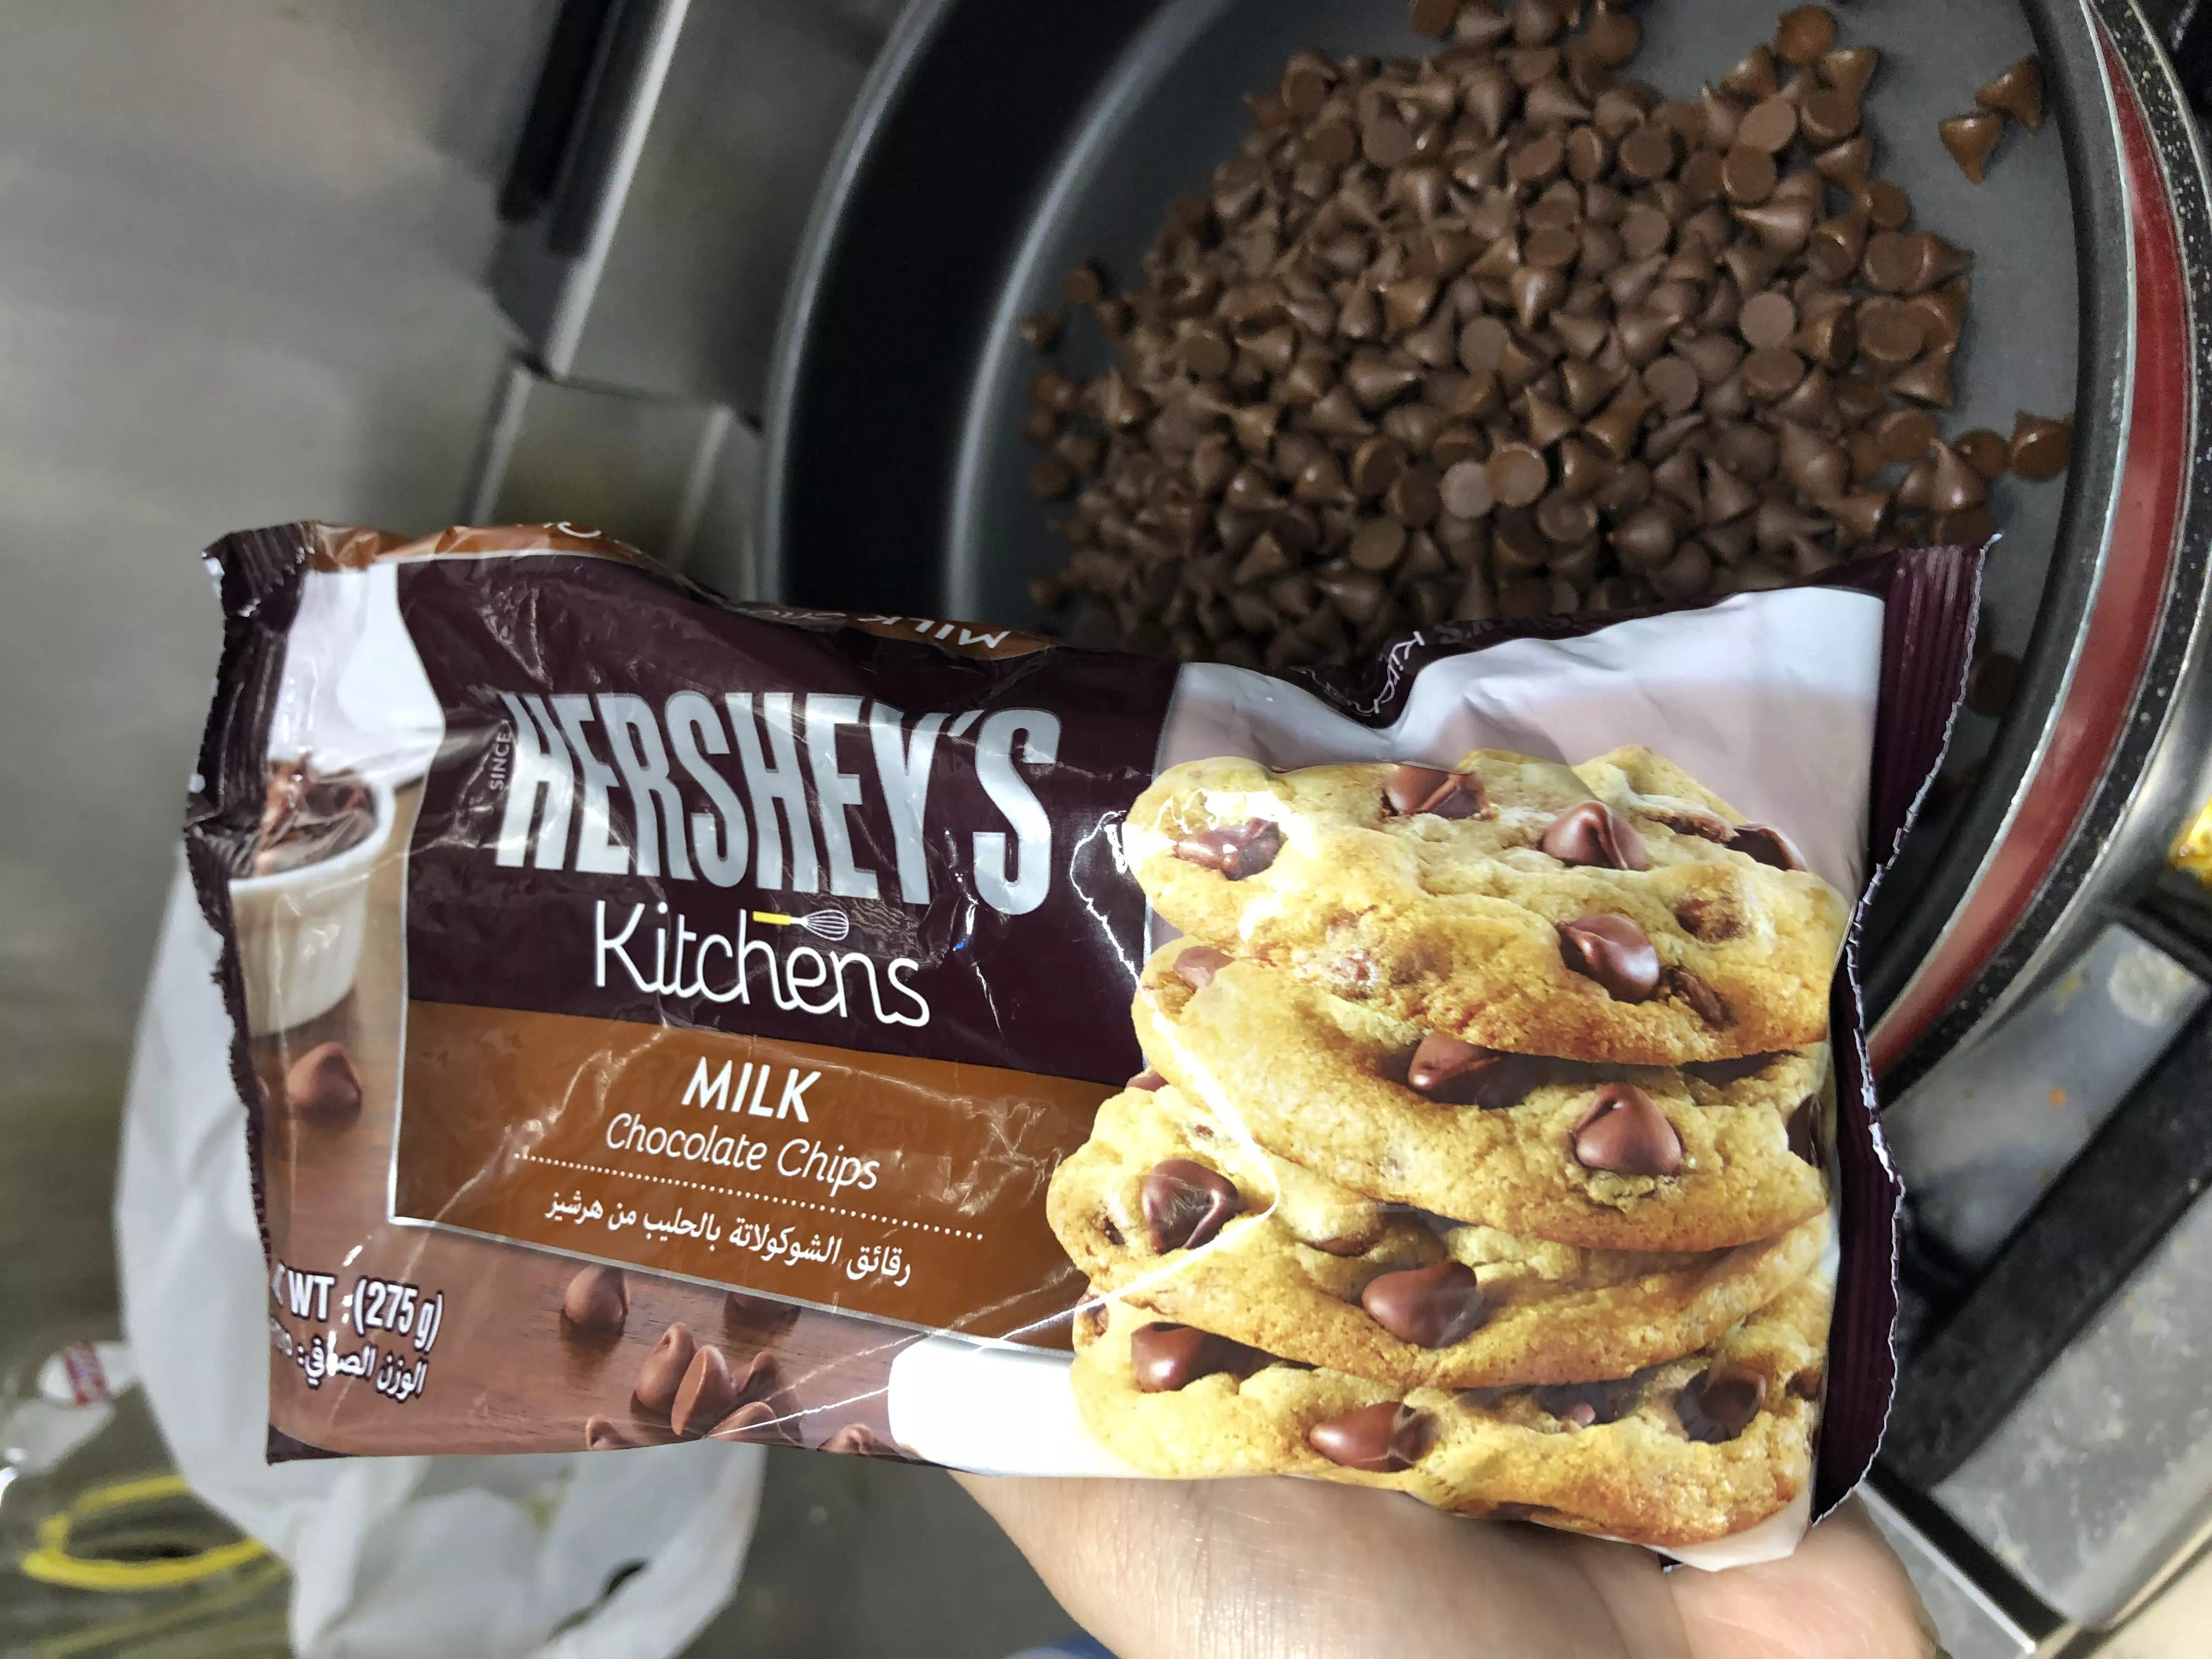
We will be using 2 bags of Hershey's kitchens chocolate chips, in the Double Boiler Method. this is where you basically have two pots, one boils hot water and the other sits on top to melt the chocolate using the heat of the boiling pot below. This is to avoid burning at high heat.
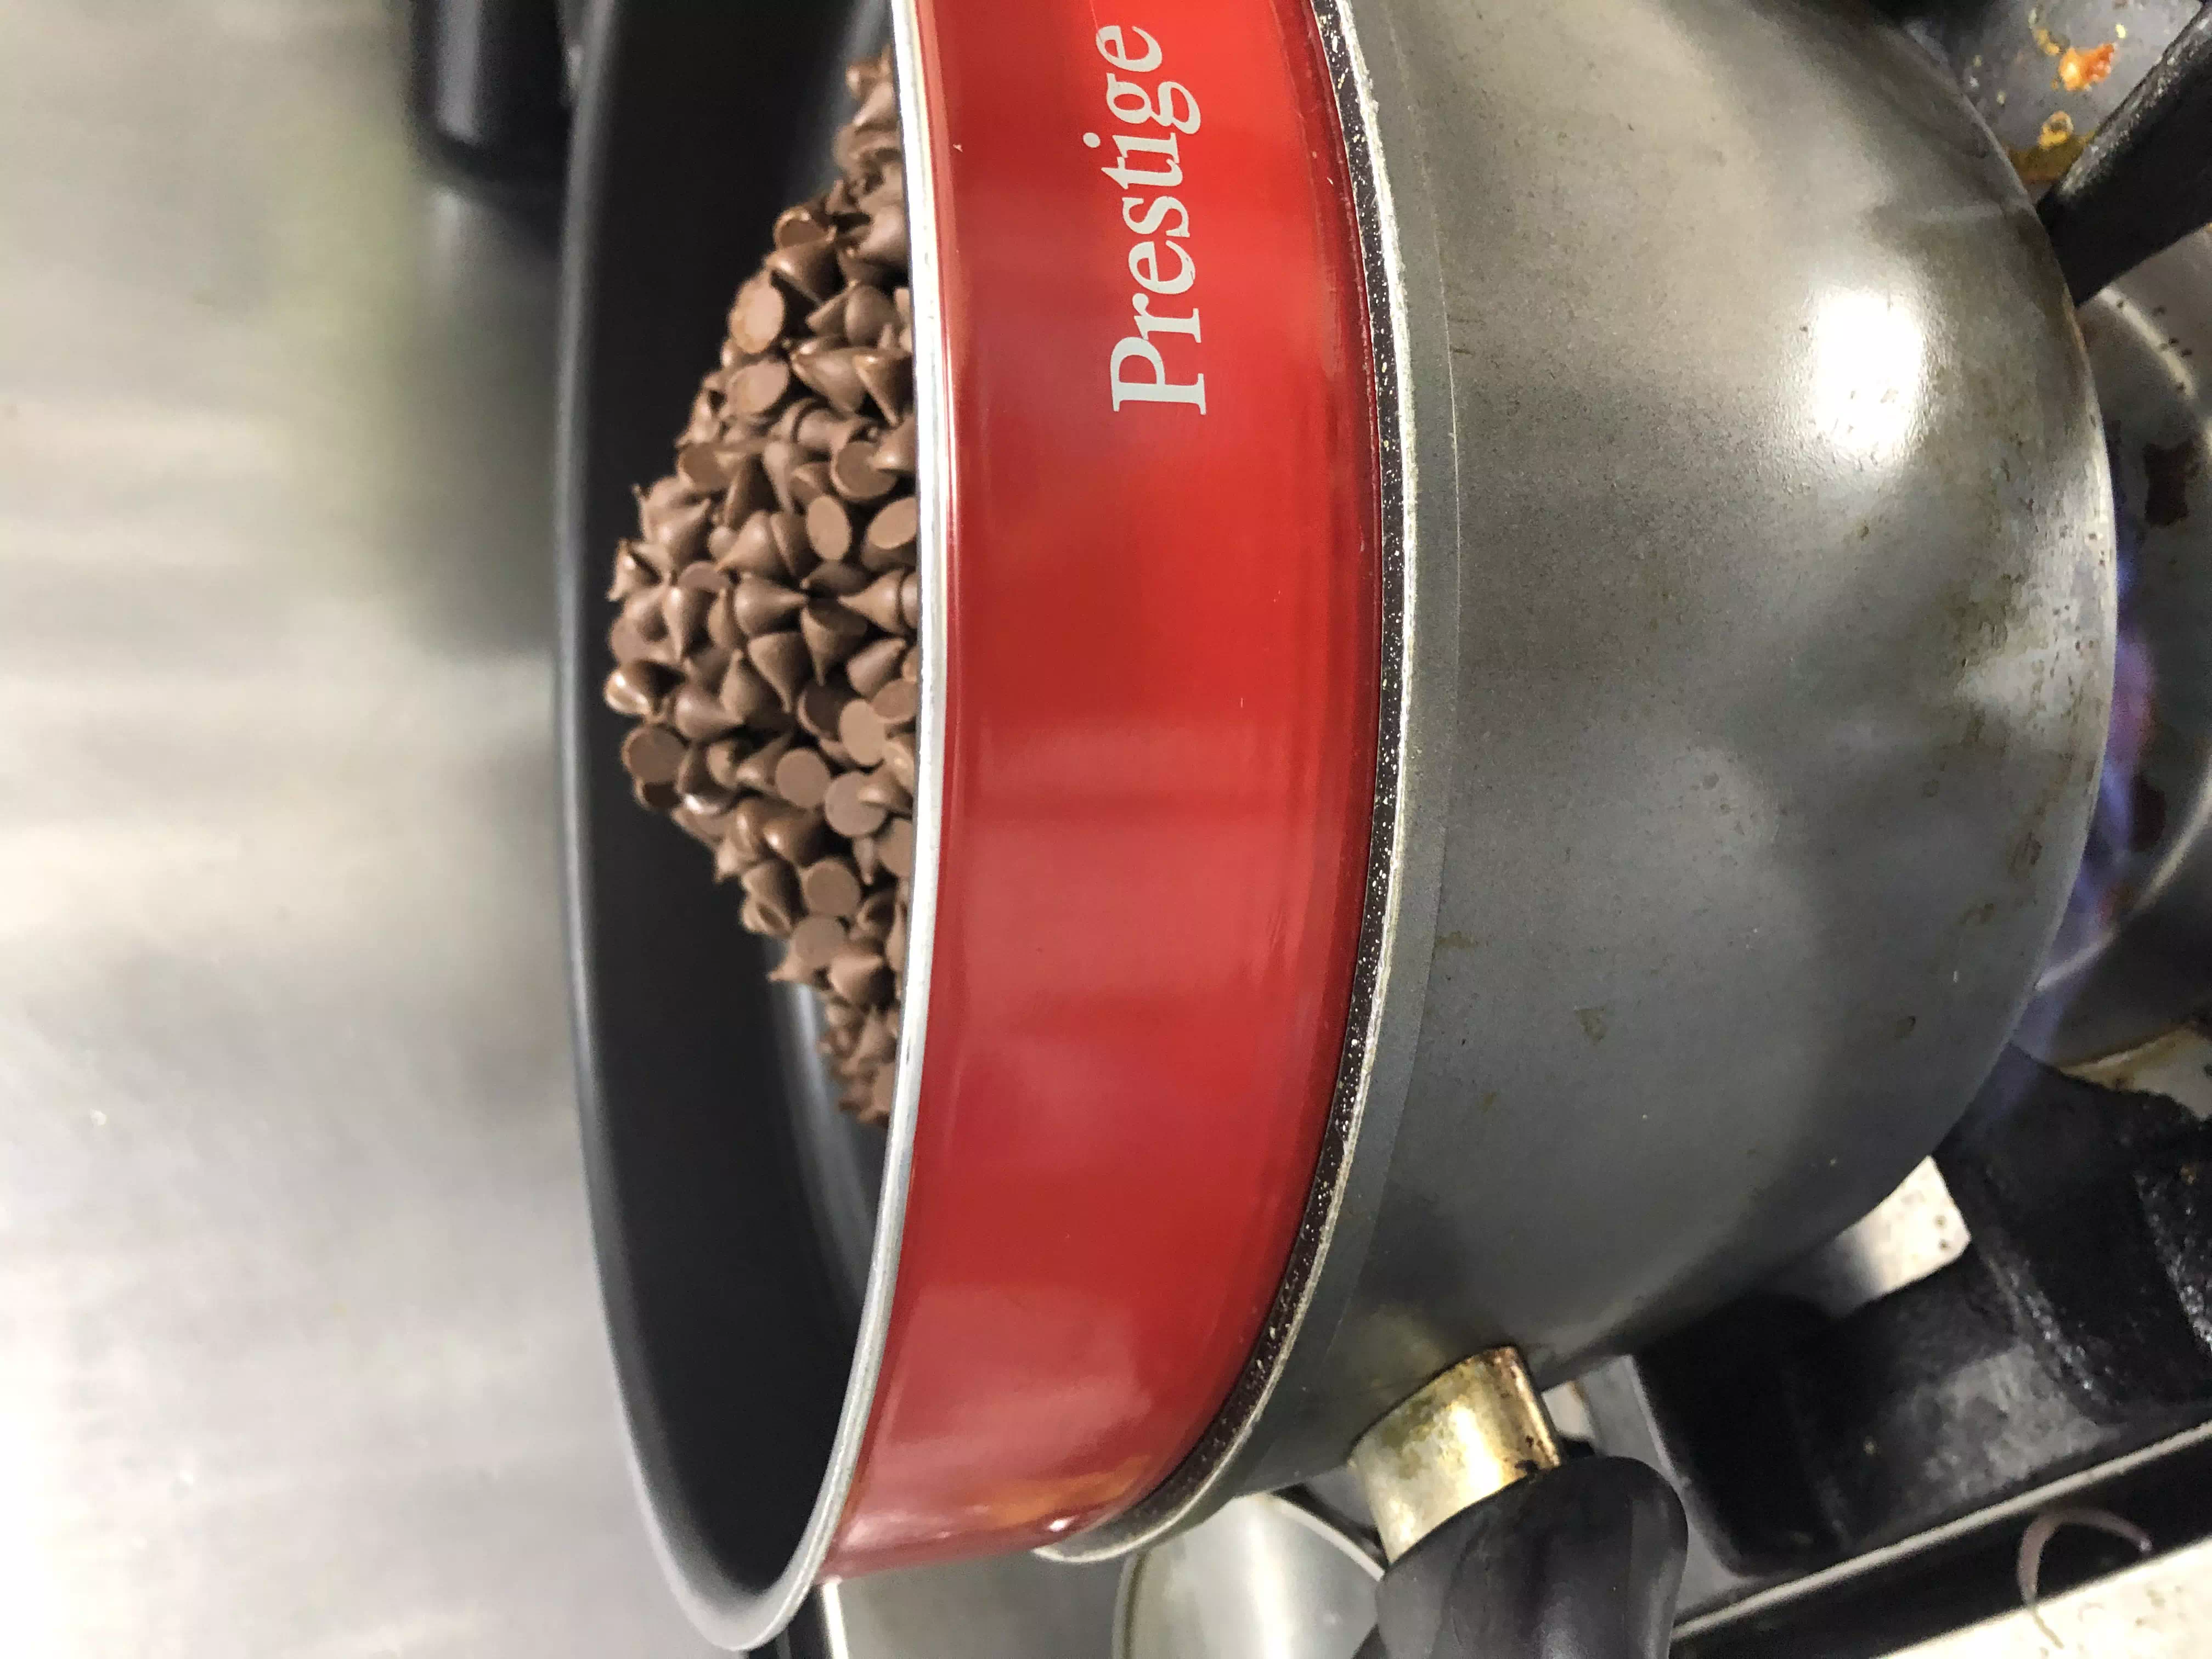
Add hot water to the bottom pot(grey pot), and to medium heat, then add all the 2 bags of chocolate to the top pot (red pot).
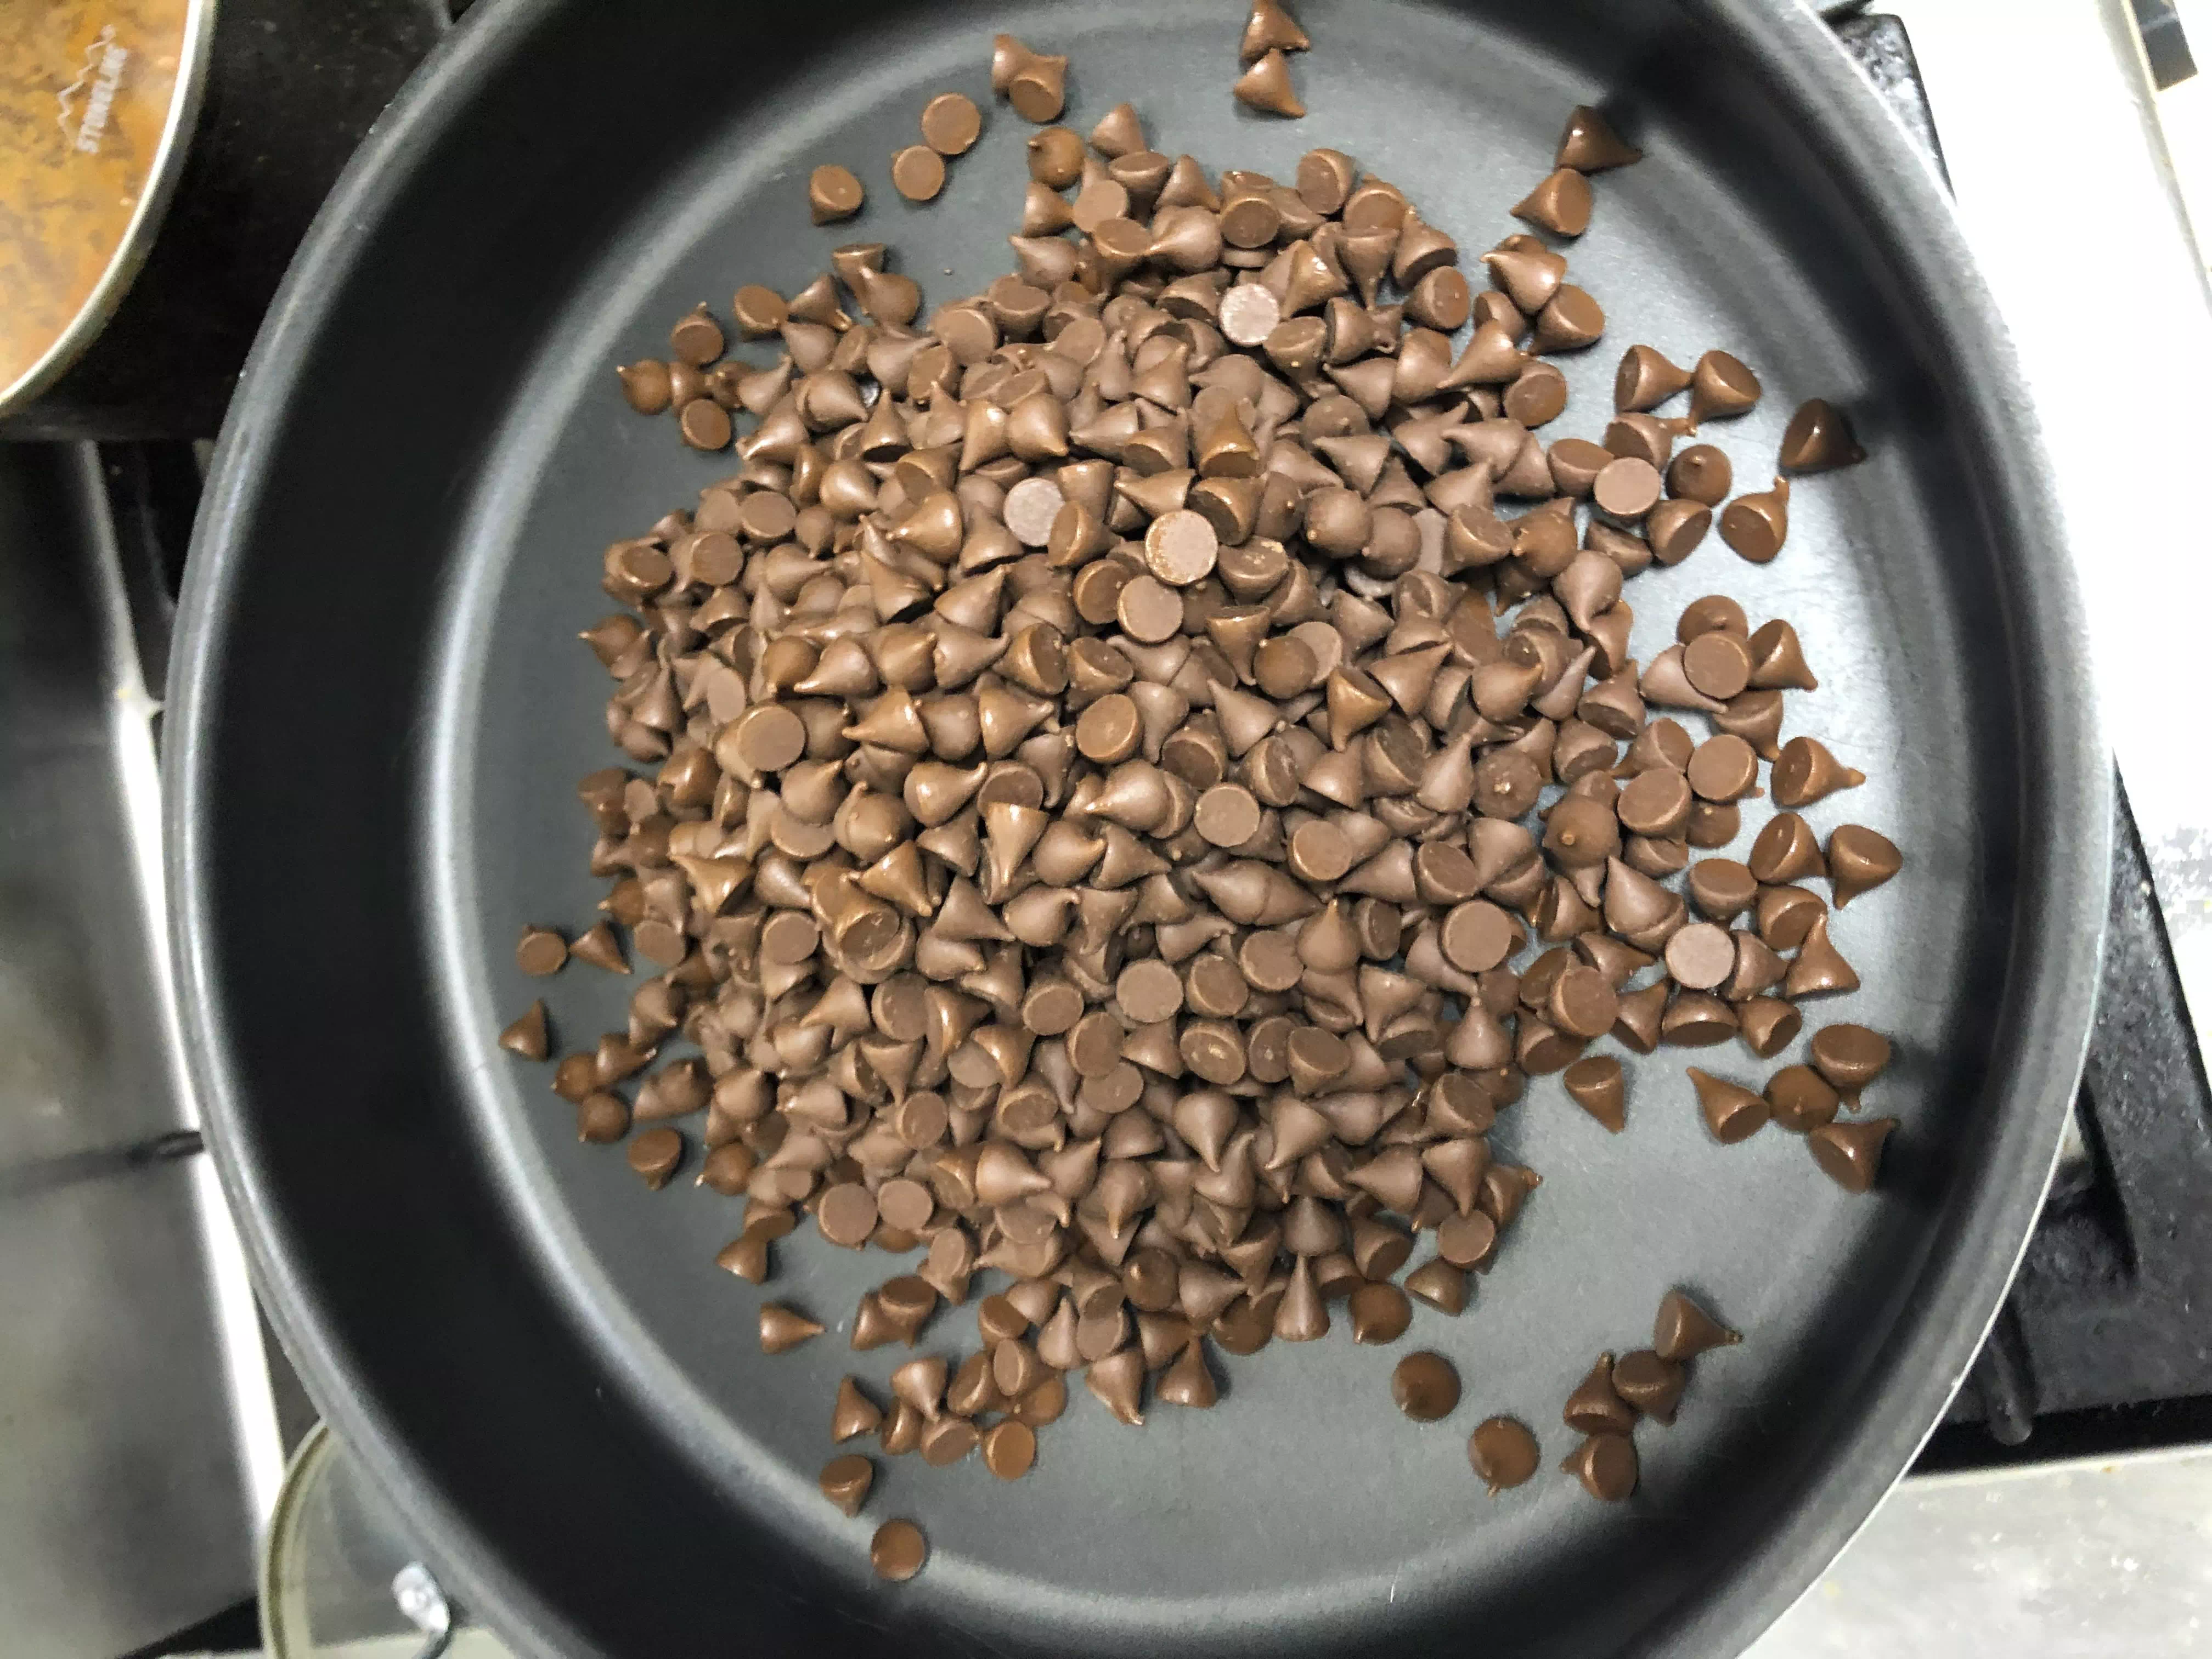
Your chocolate should look like this in the begining.
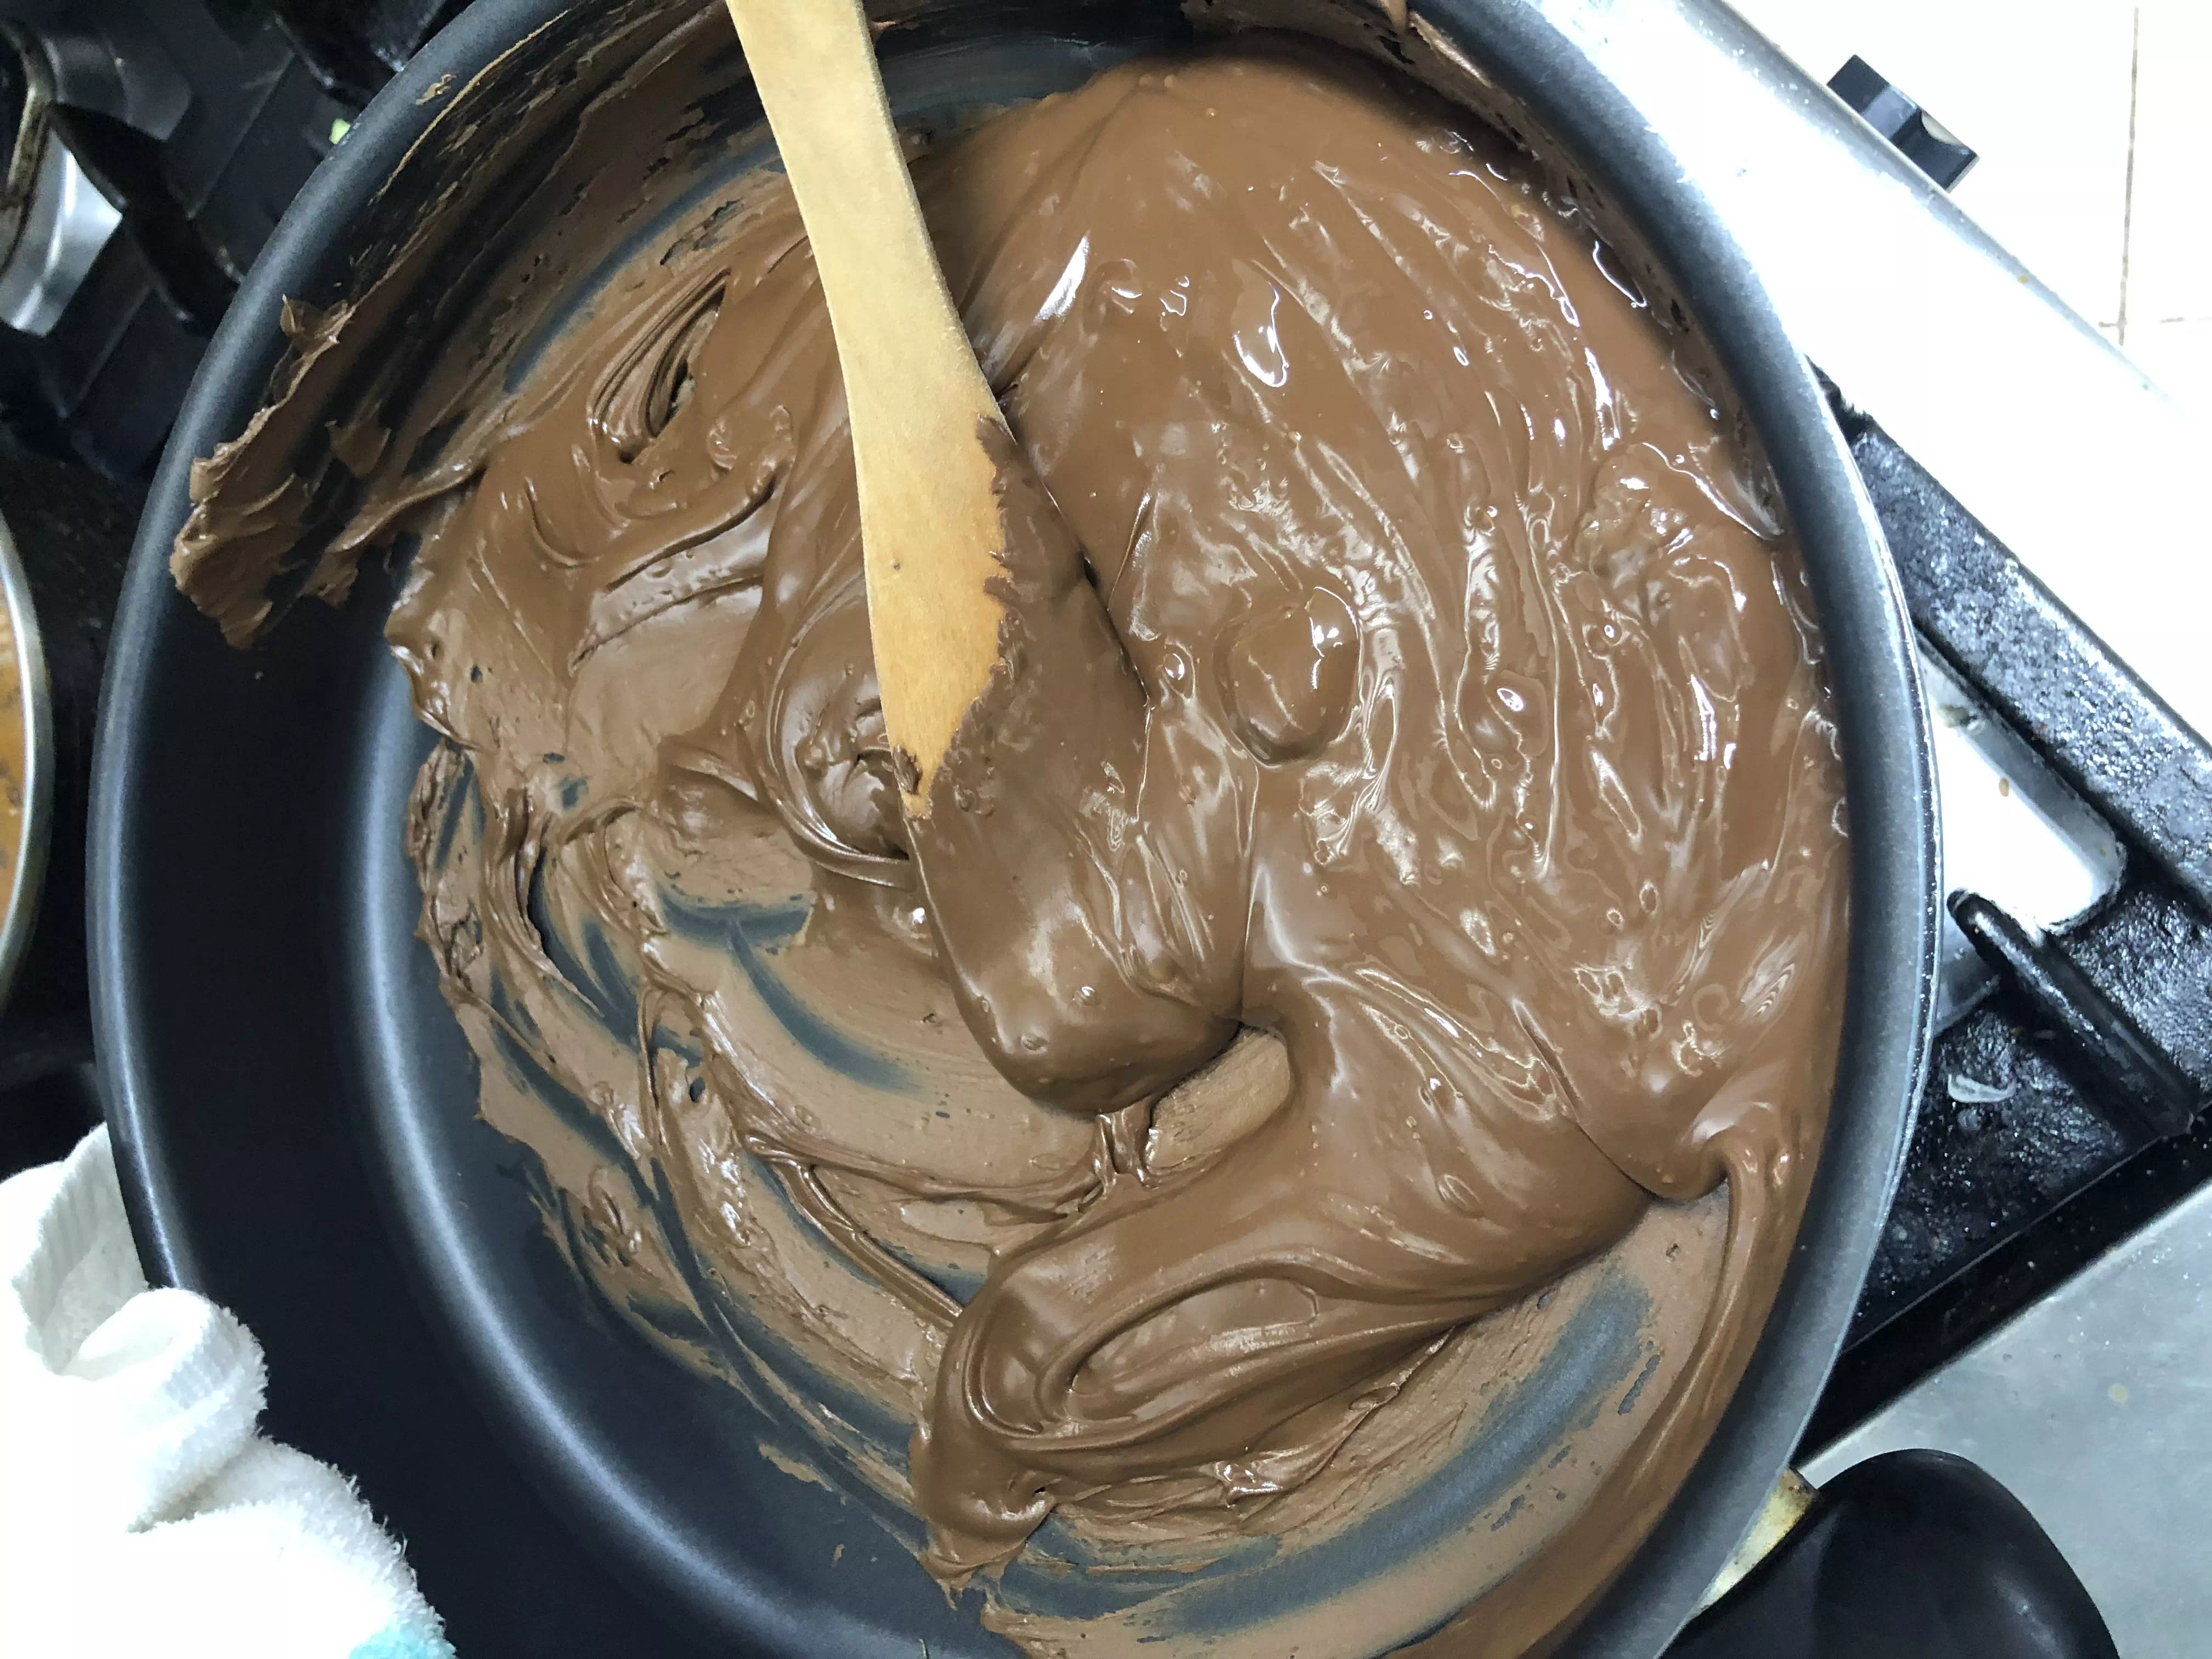
Overtime, as the pot heats up, keep stiring the chocolate till you get a smooth chocolate with no lumps.
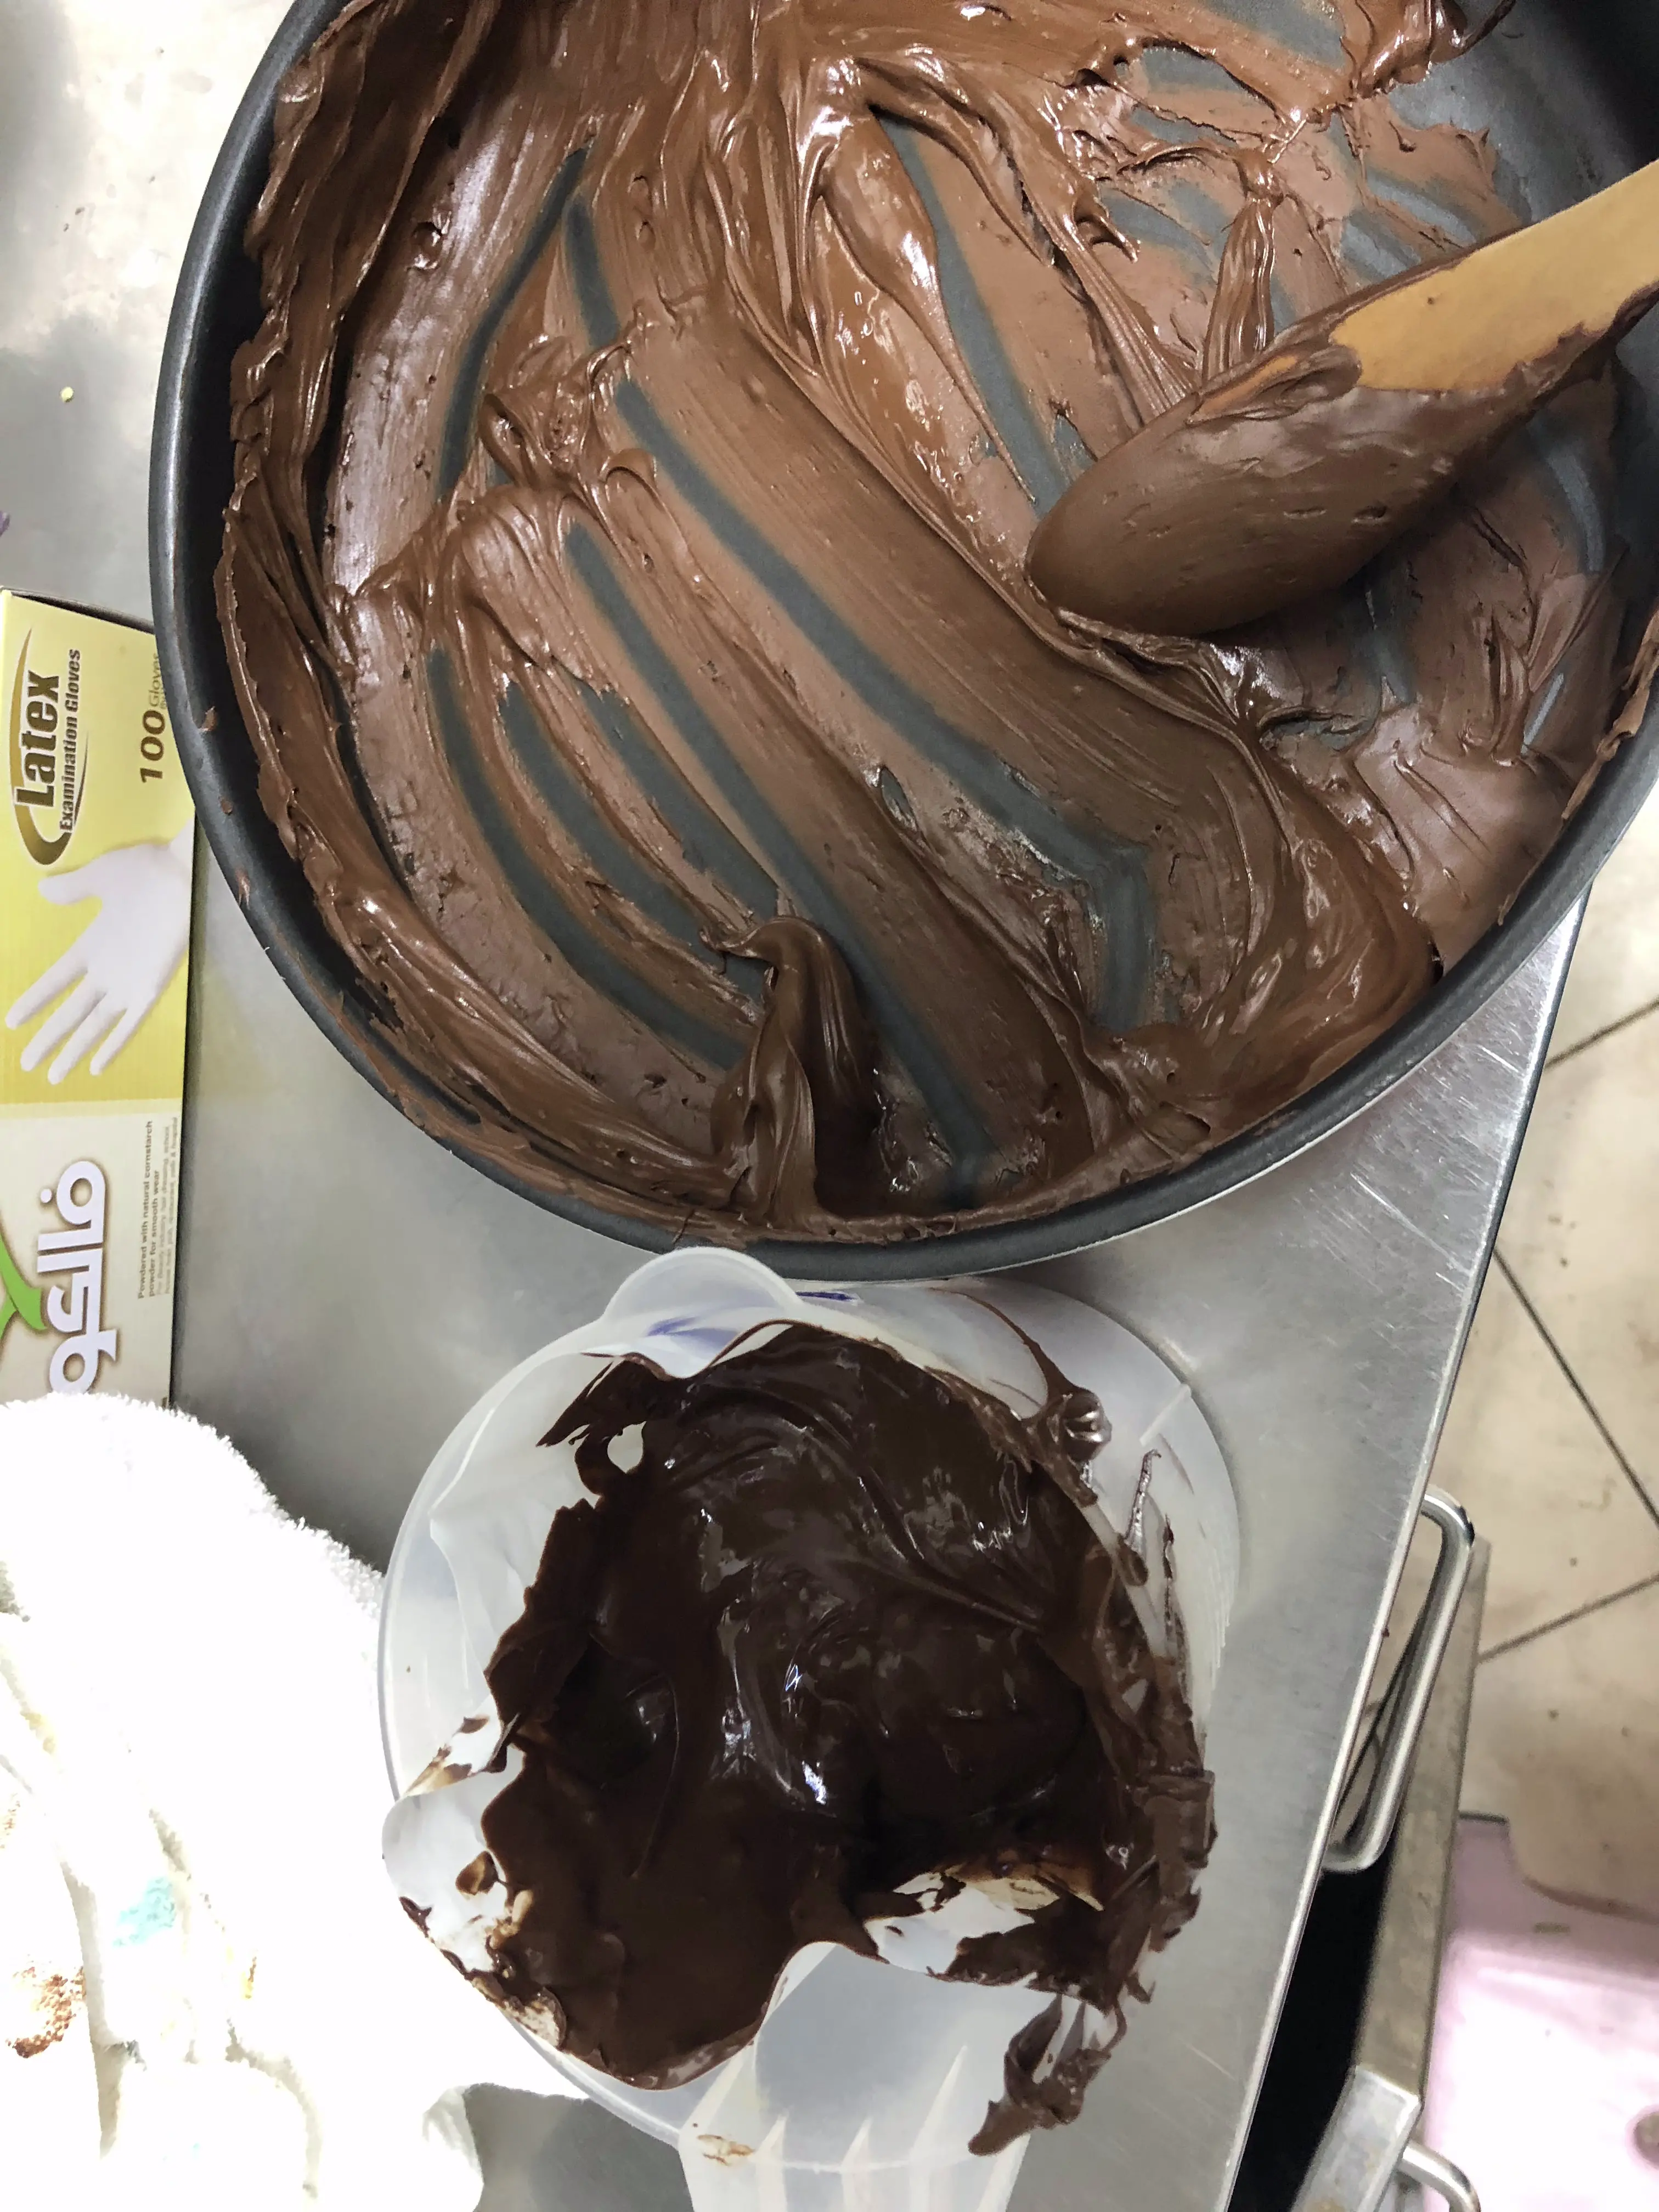
Move the chocolate to a piping bag or if you don't have a piping bag use a zip lock bag with the end cut off.
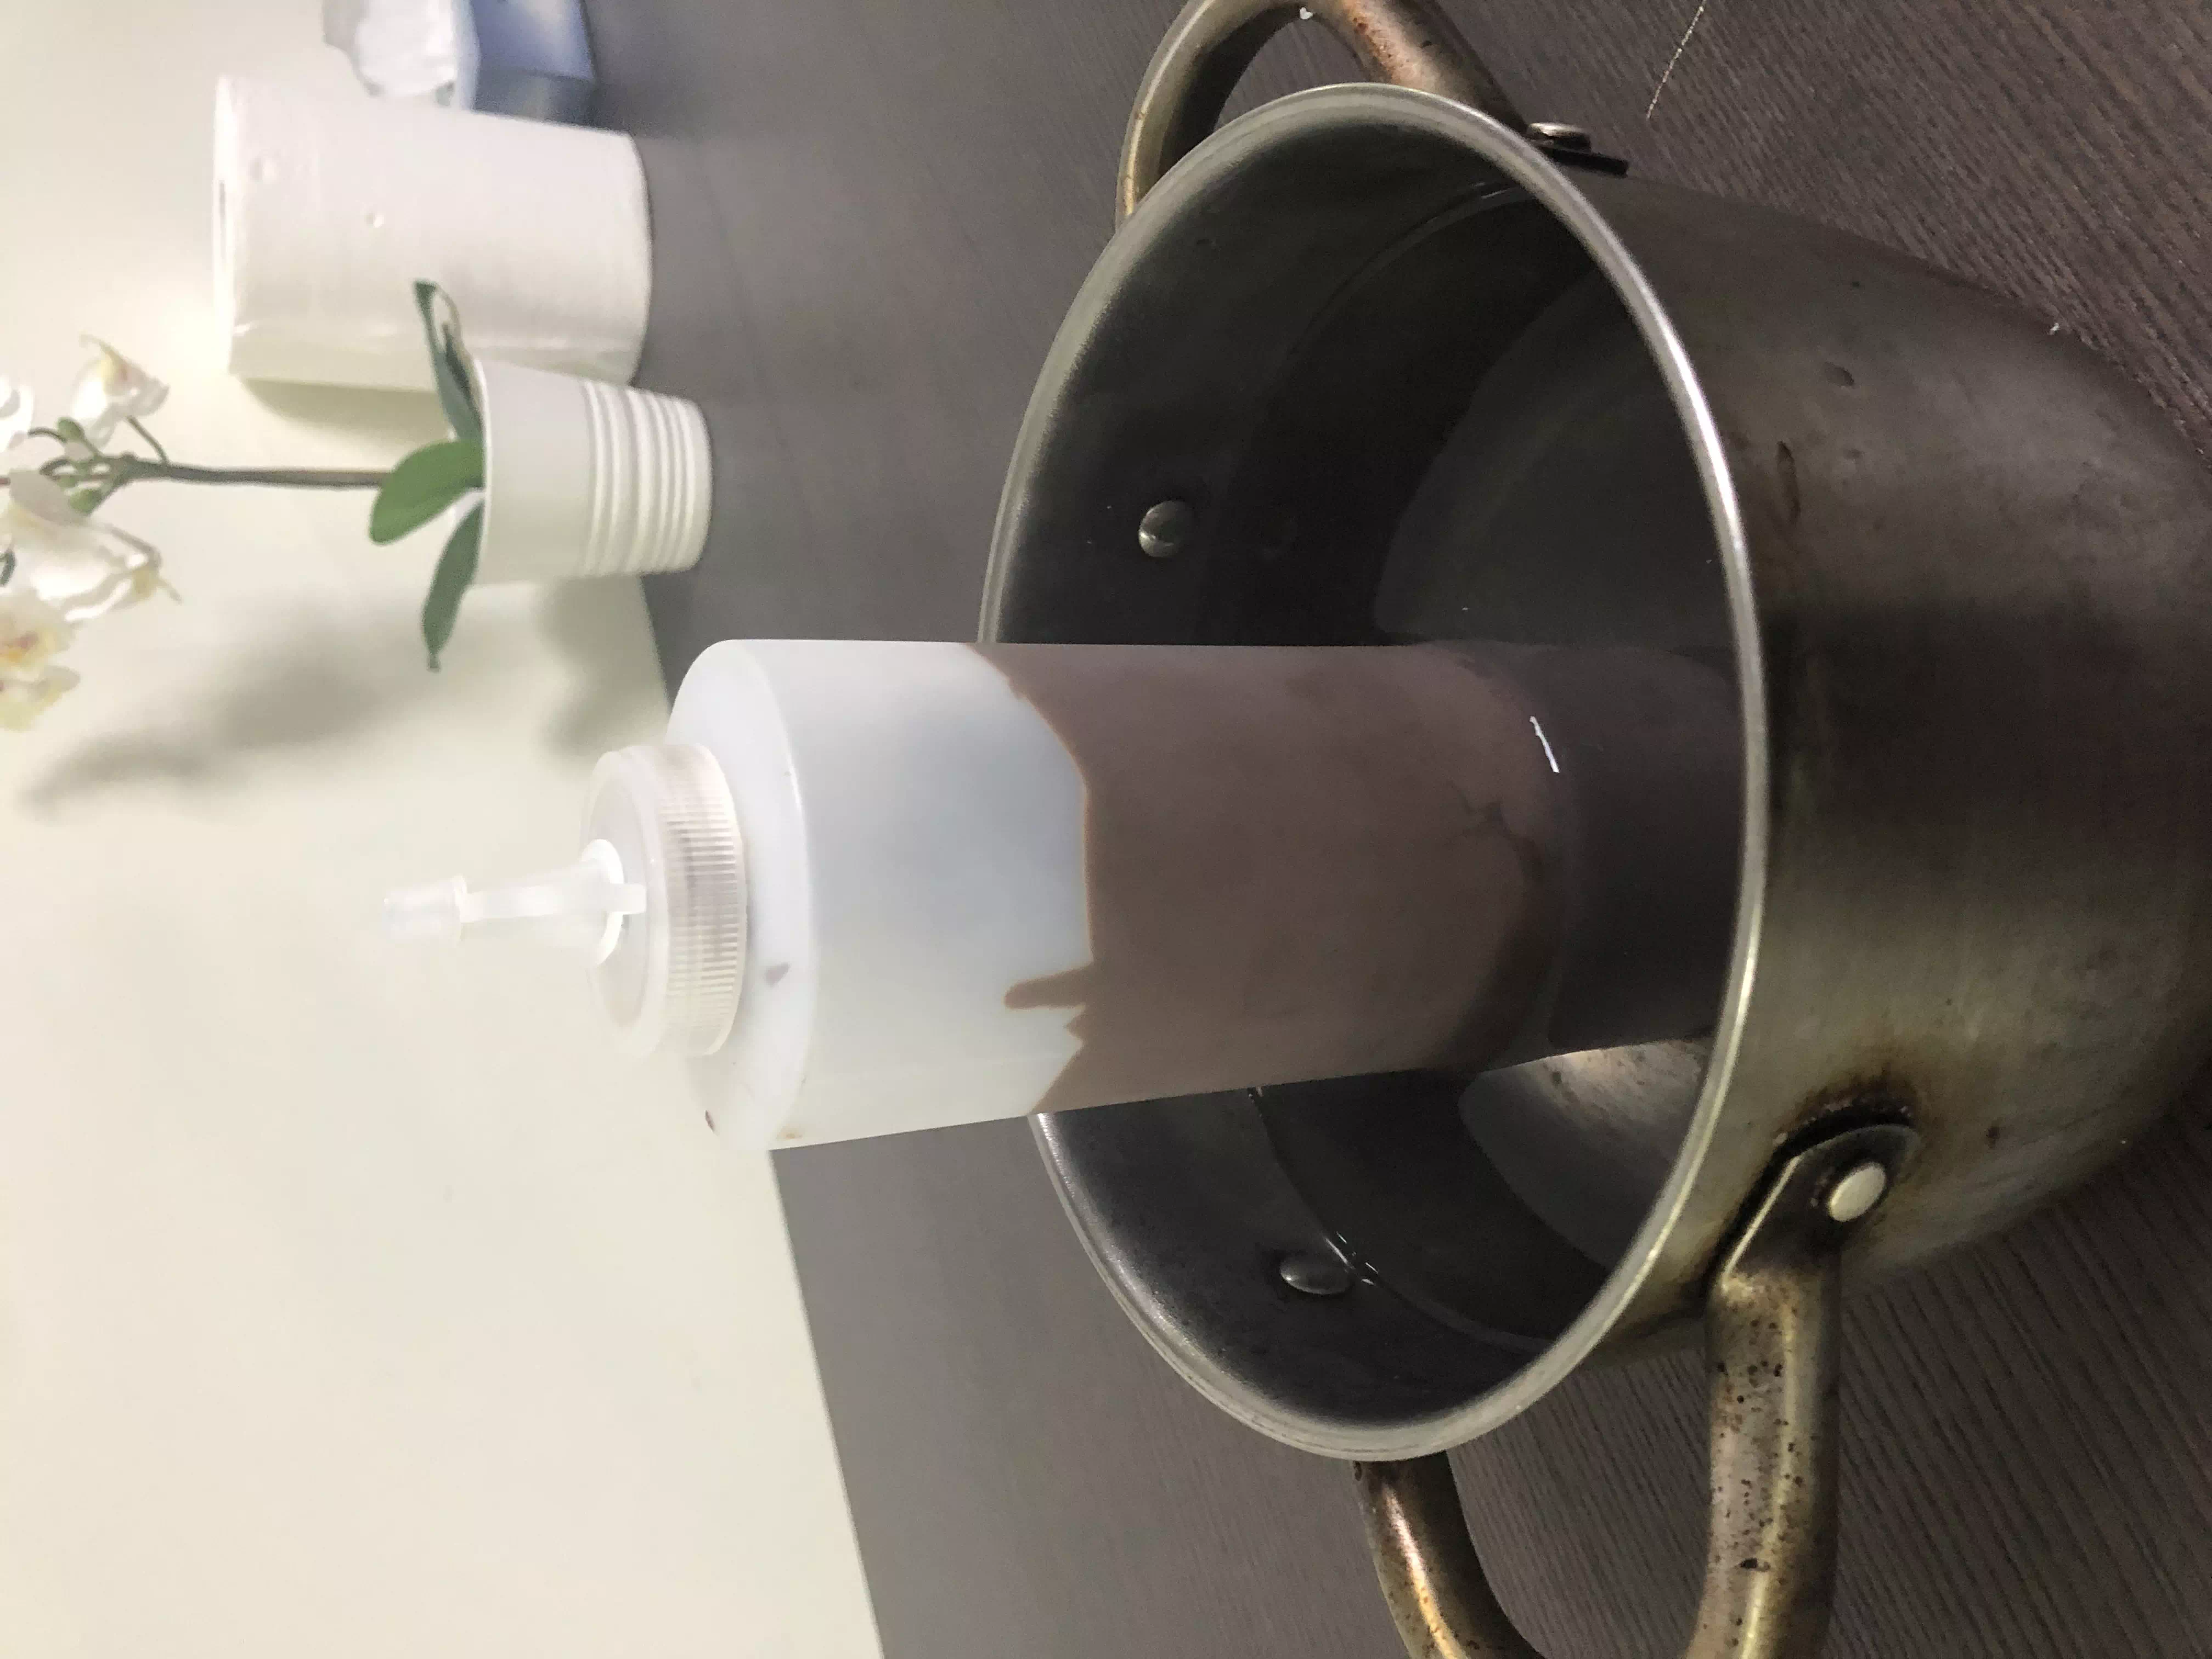
Using a pot of HOT water heat up the chocolate again, Try to get it as hot as possible so that the chocolate can flow as easliy as possible.
Start filling the syringes with the casting chocolate.
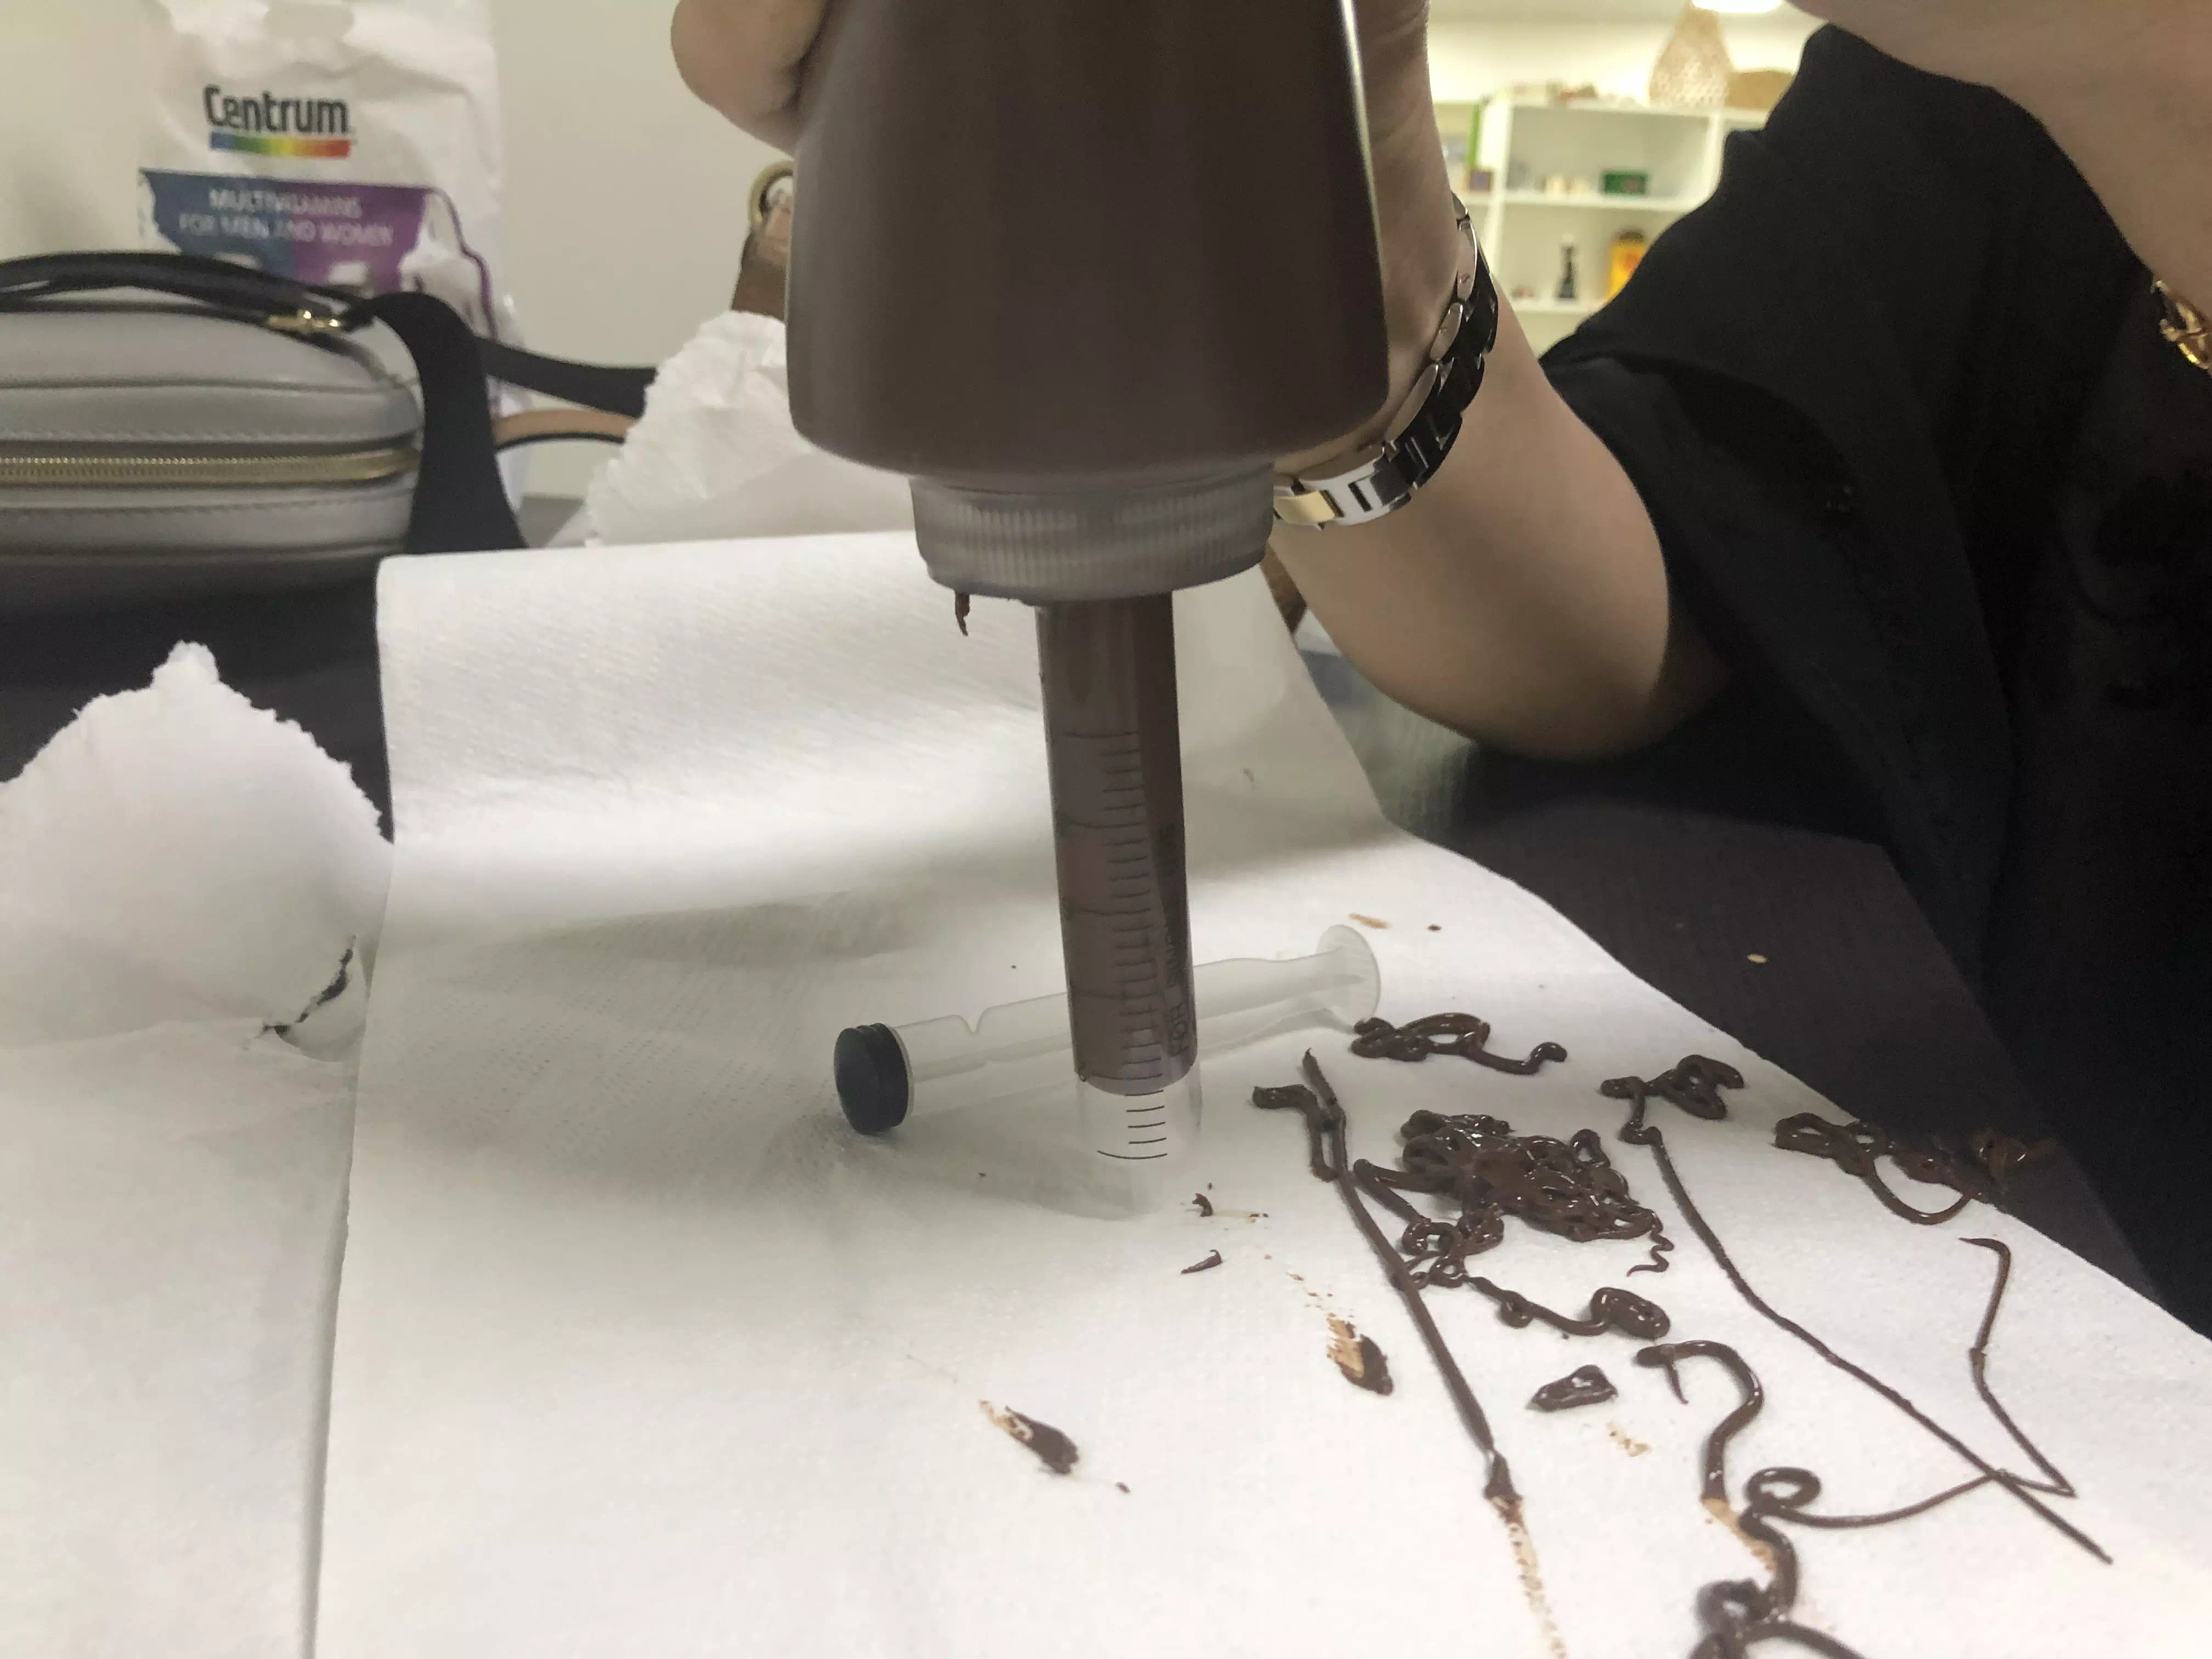
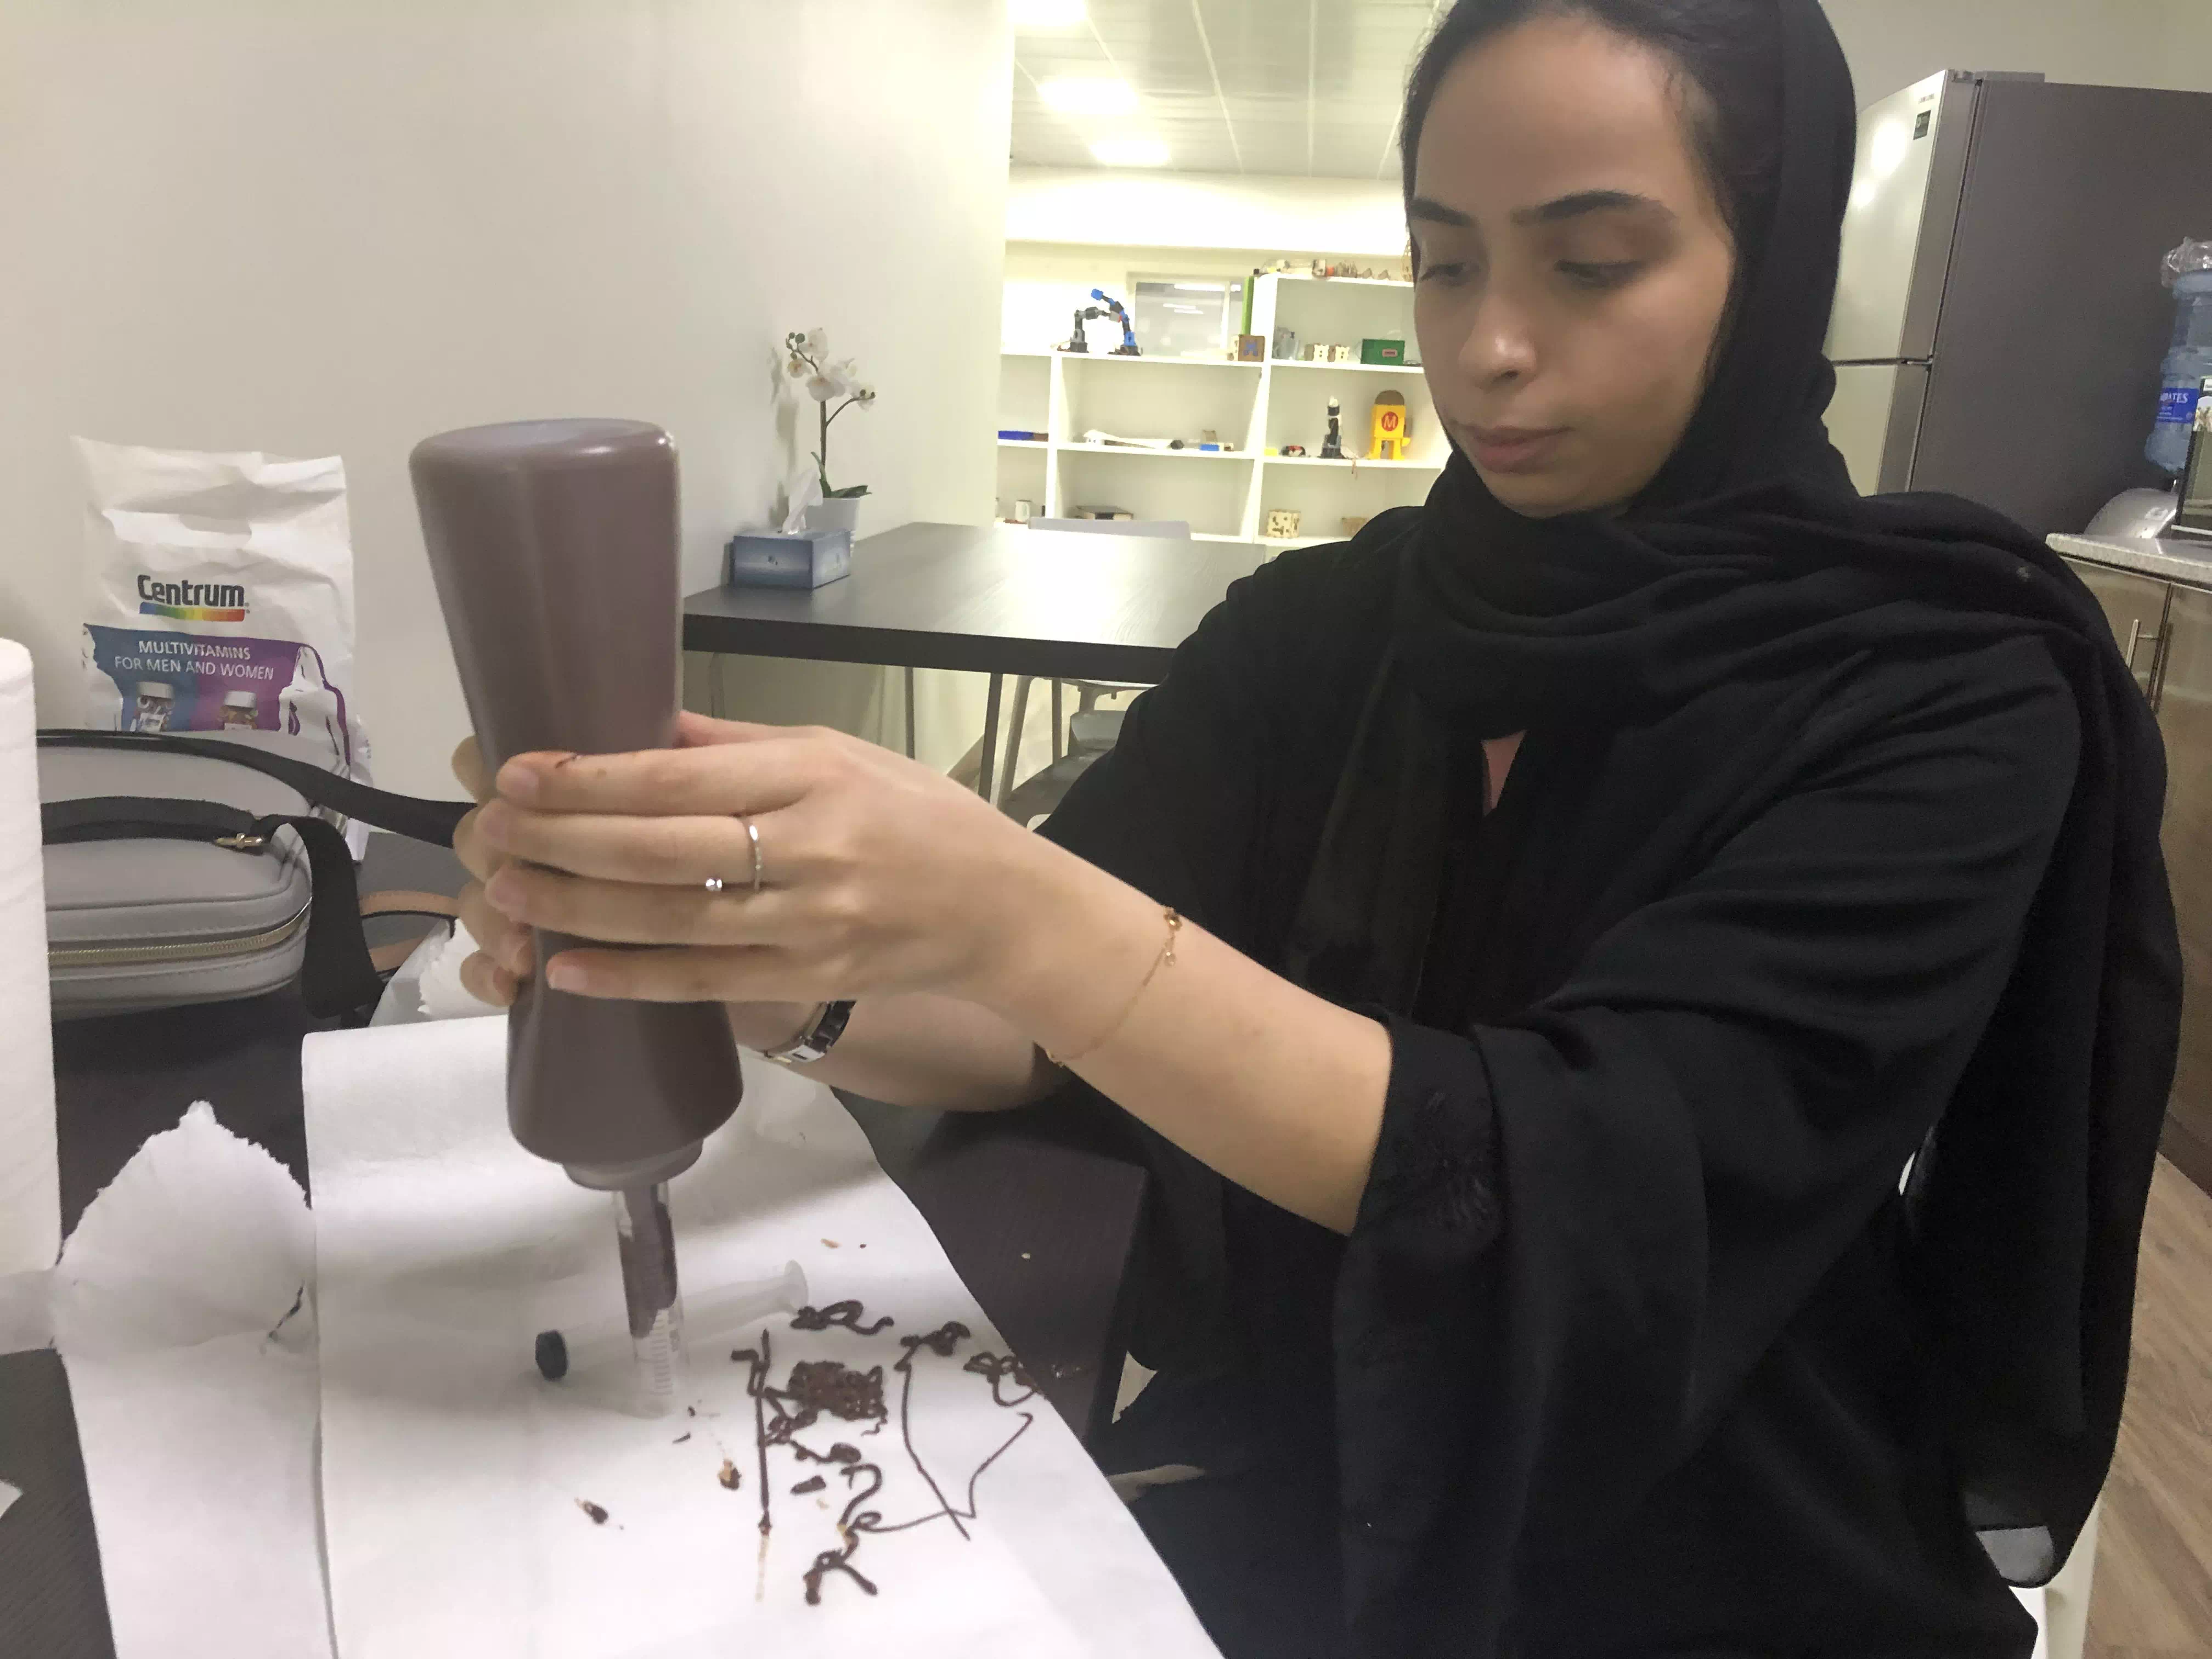
Push the chocolate into the syringe as hard as you can, and use the plunge to avoid air bubbles.
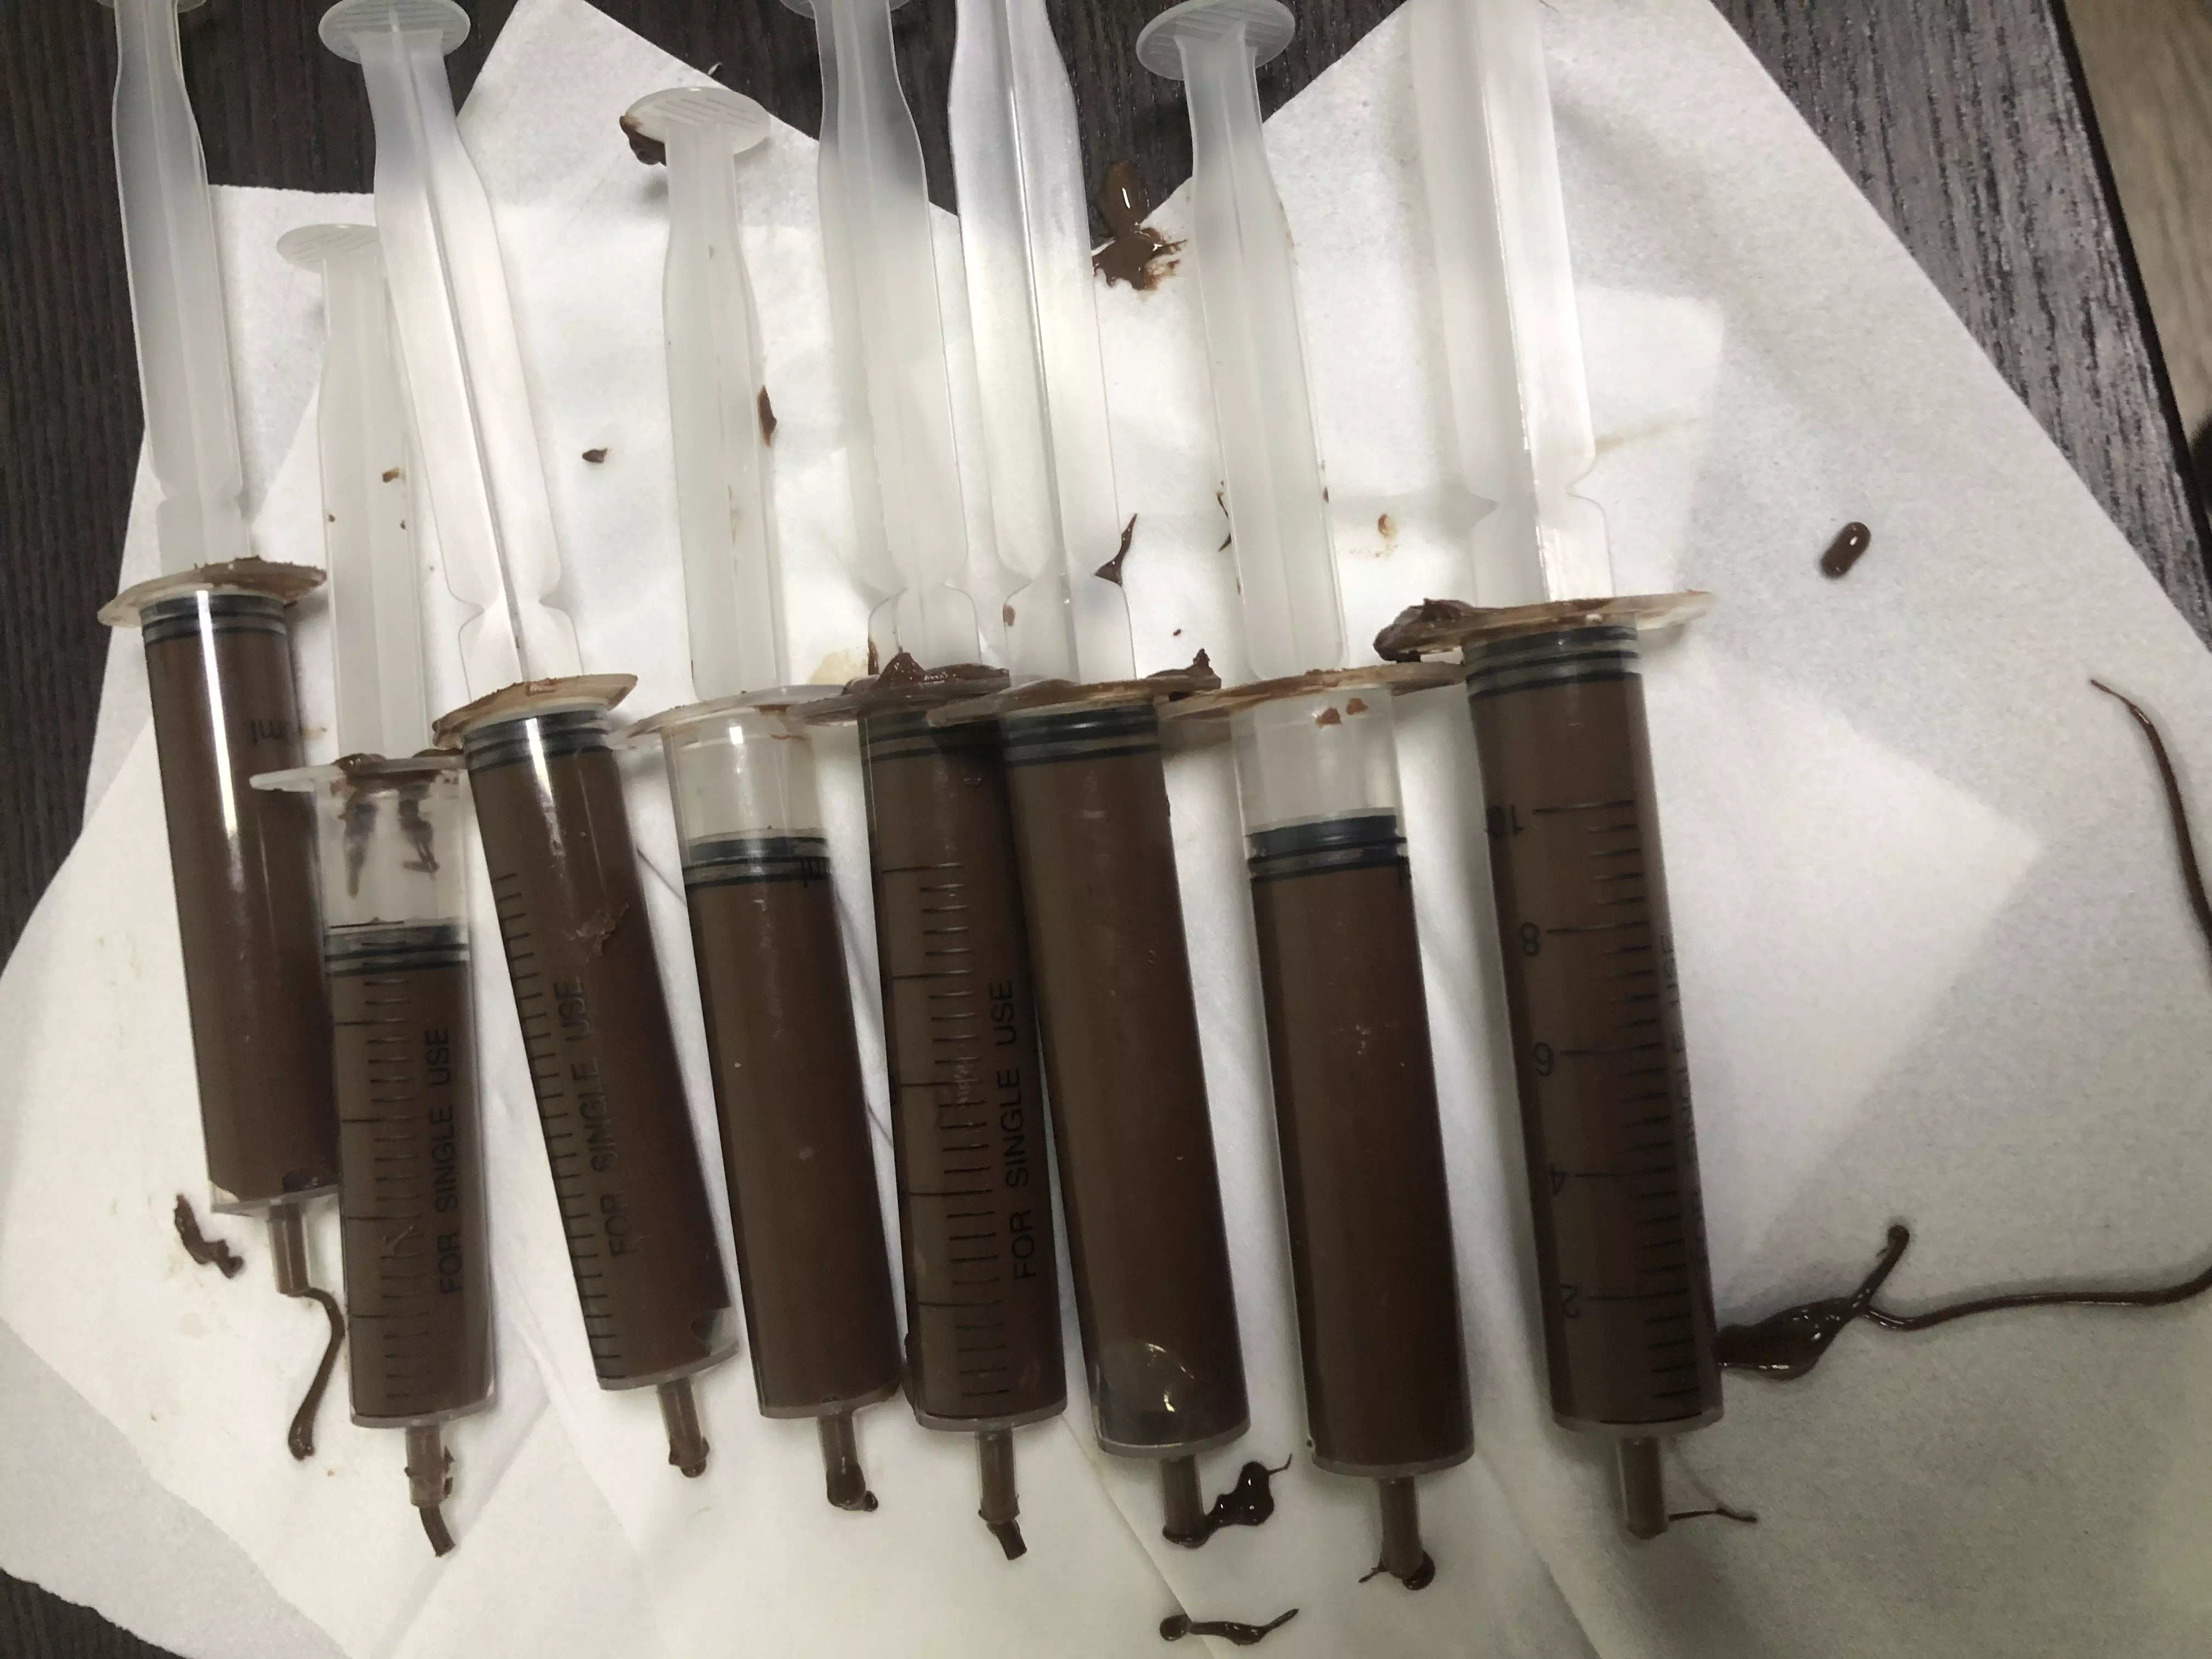
After filling all these syringes I realized my entire mould only required 2 syringes.
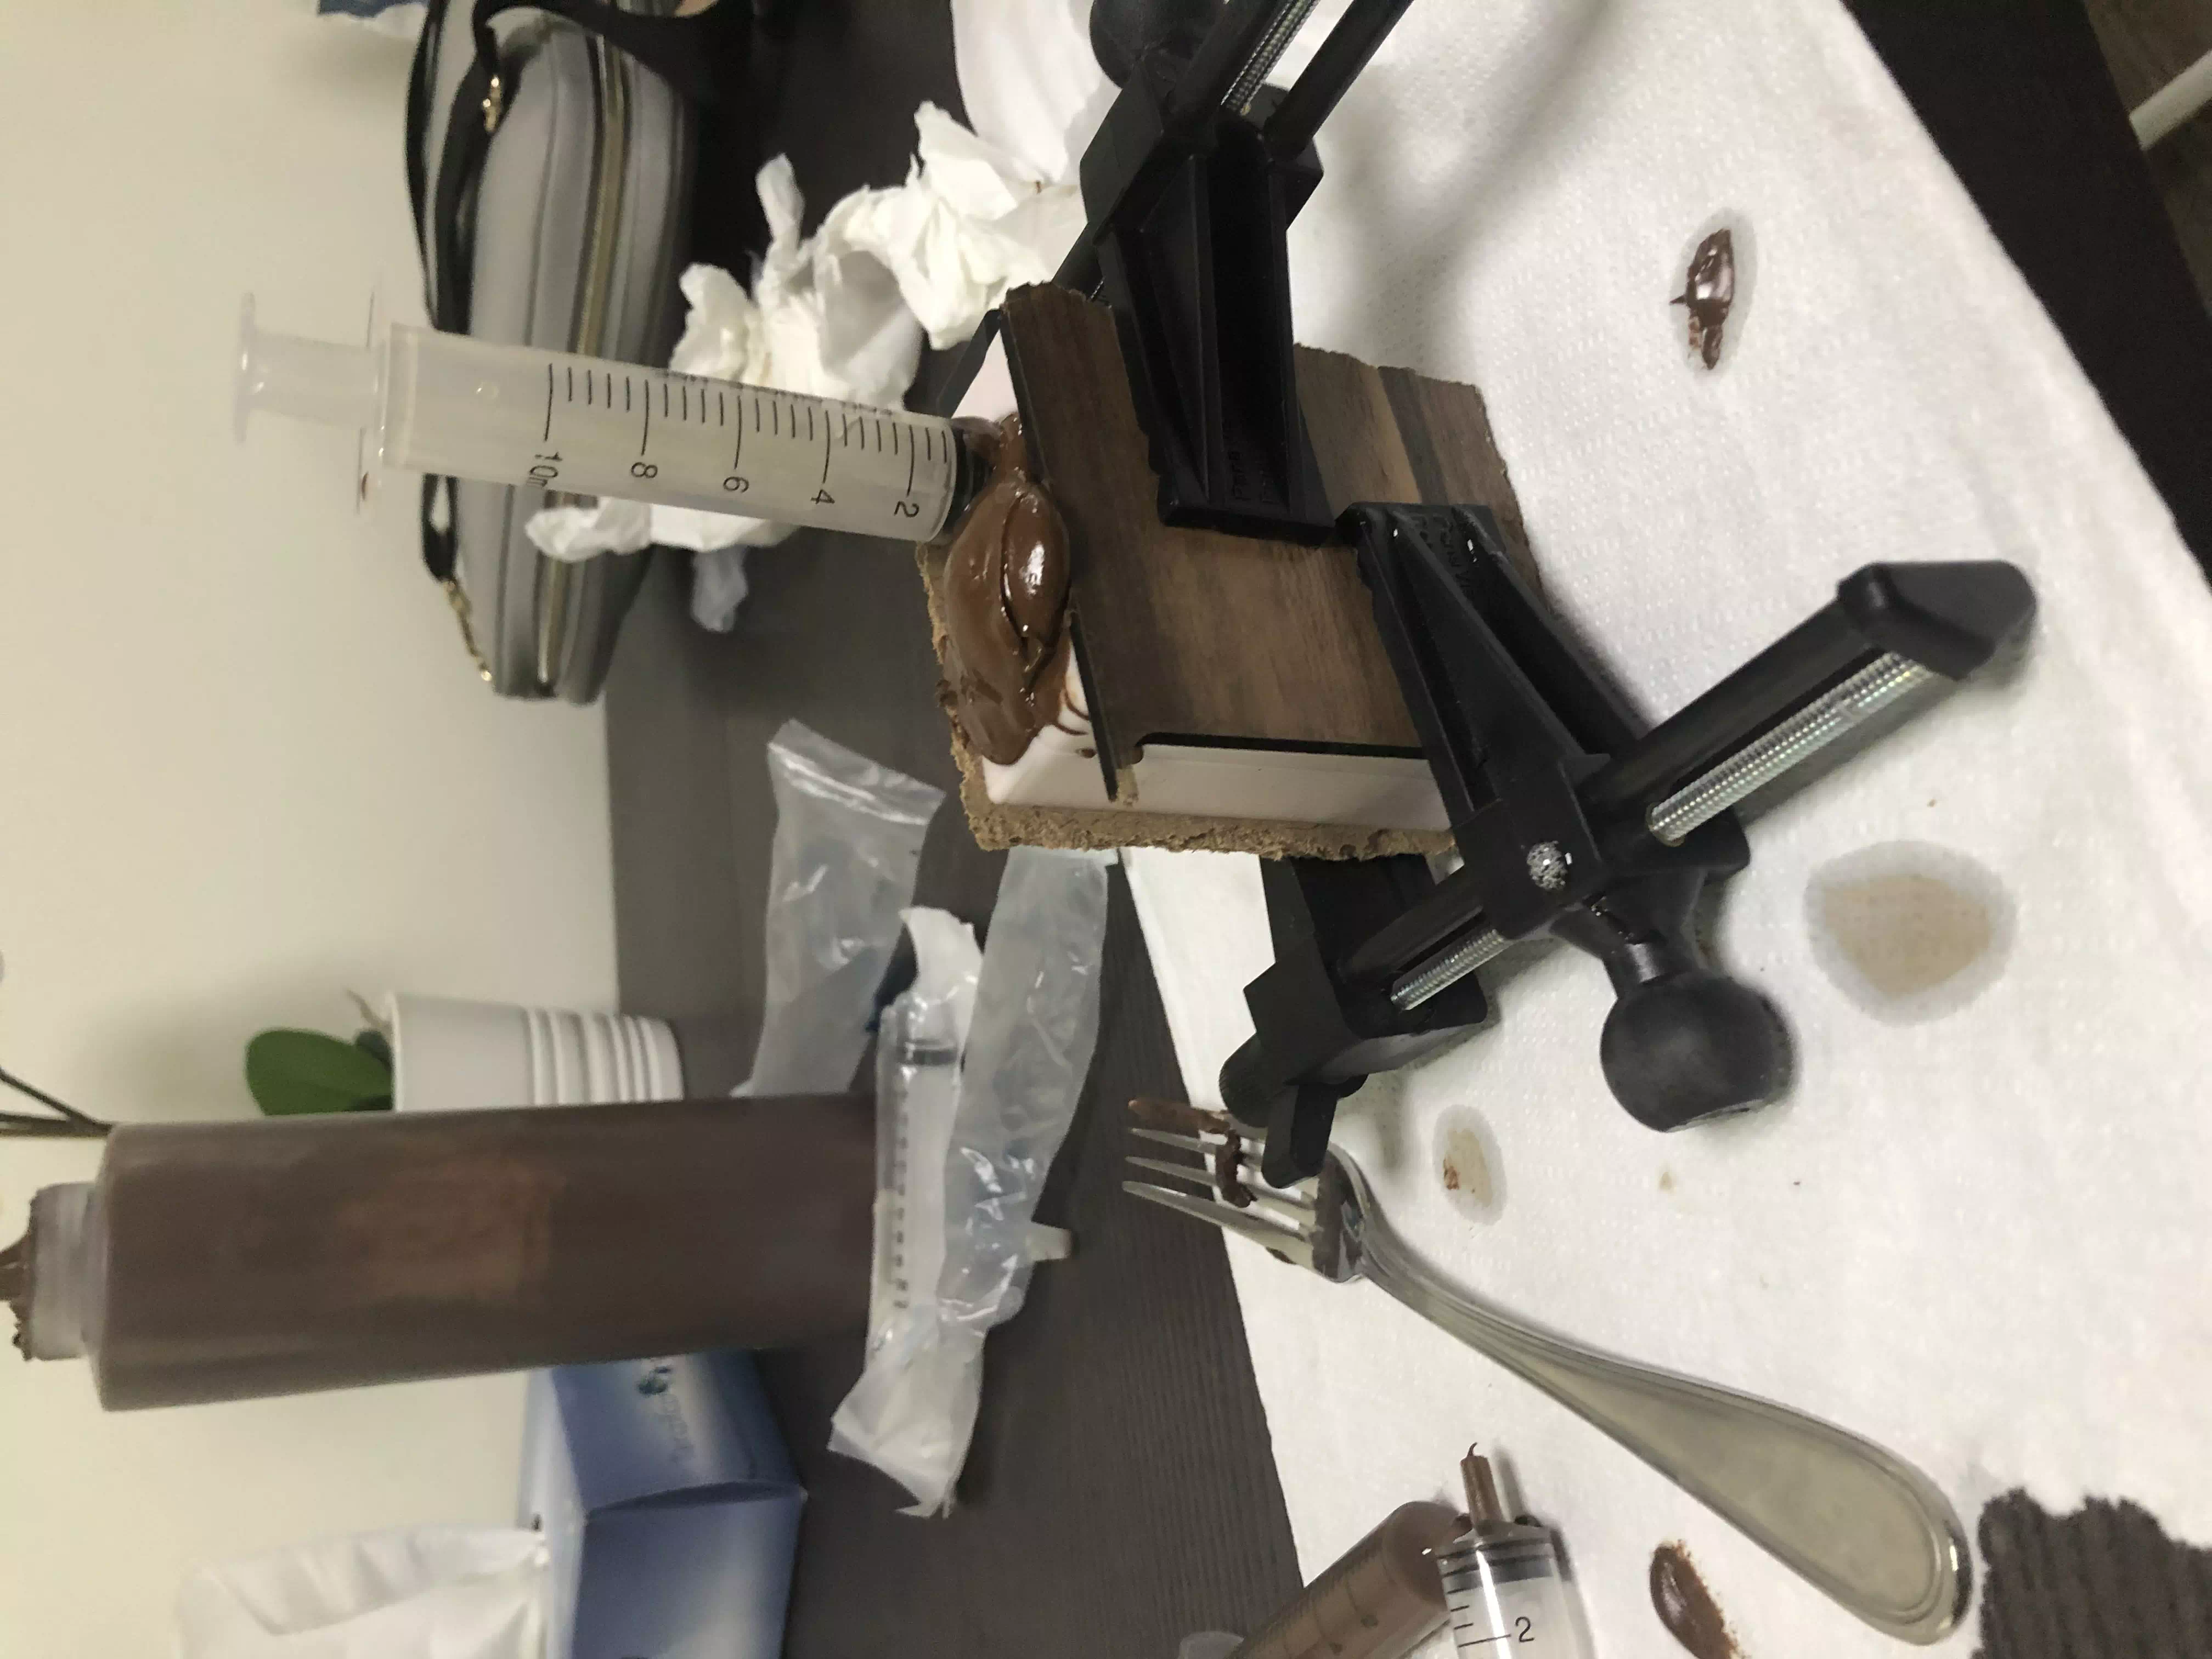
Using clamps and some scrap wood I clamped down my mould to each side as my mould was not aligned after breaking the aligning bit in the curing phase. Slowly I squeezed on the syringe. It took approx. 5 mins per side.
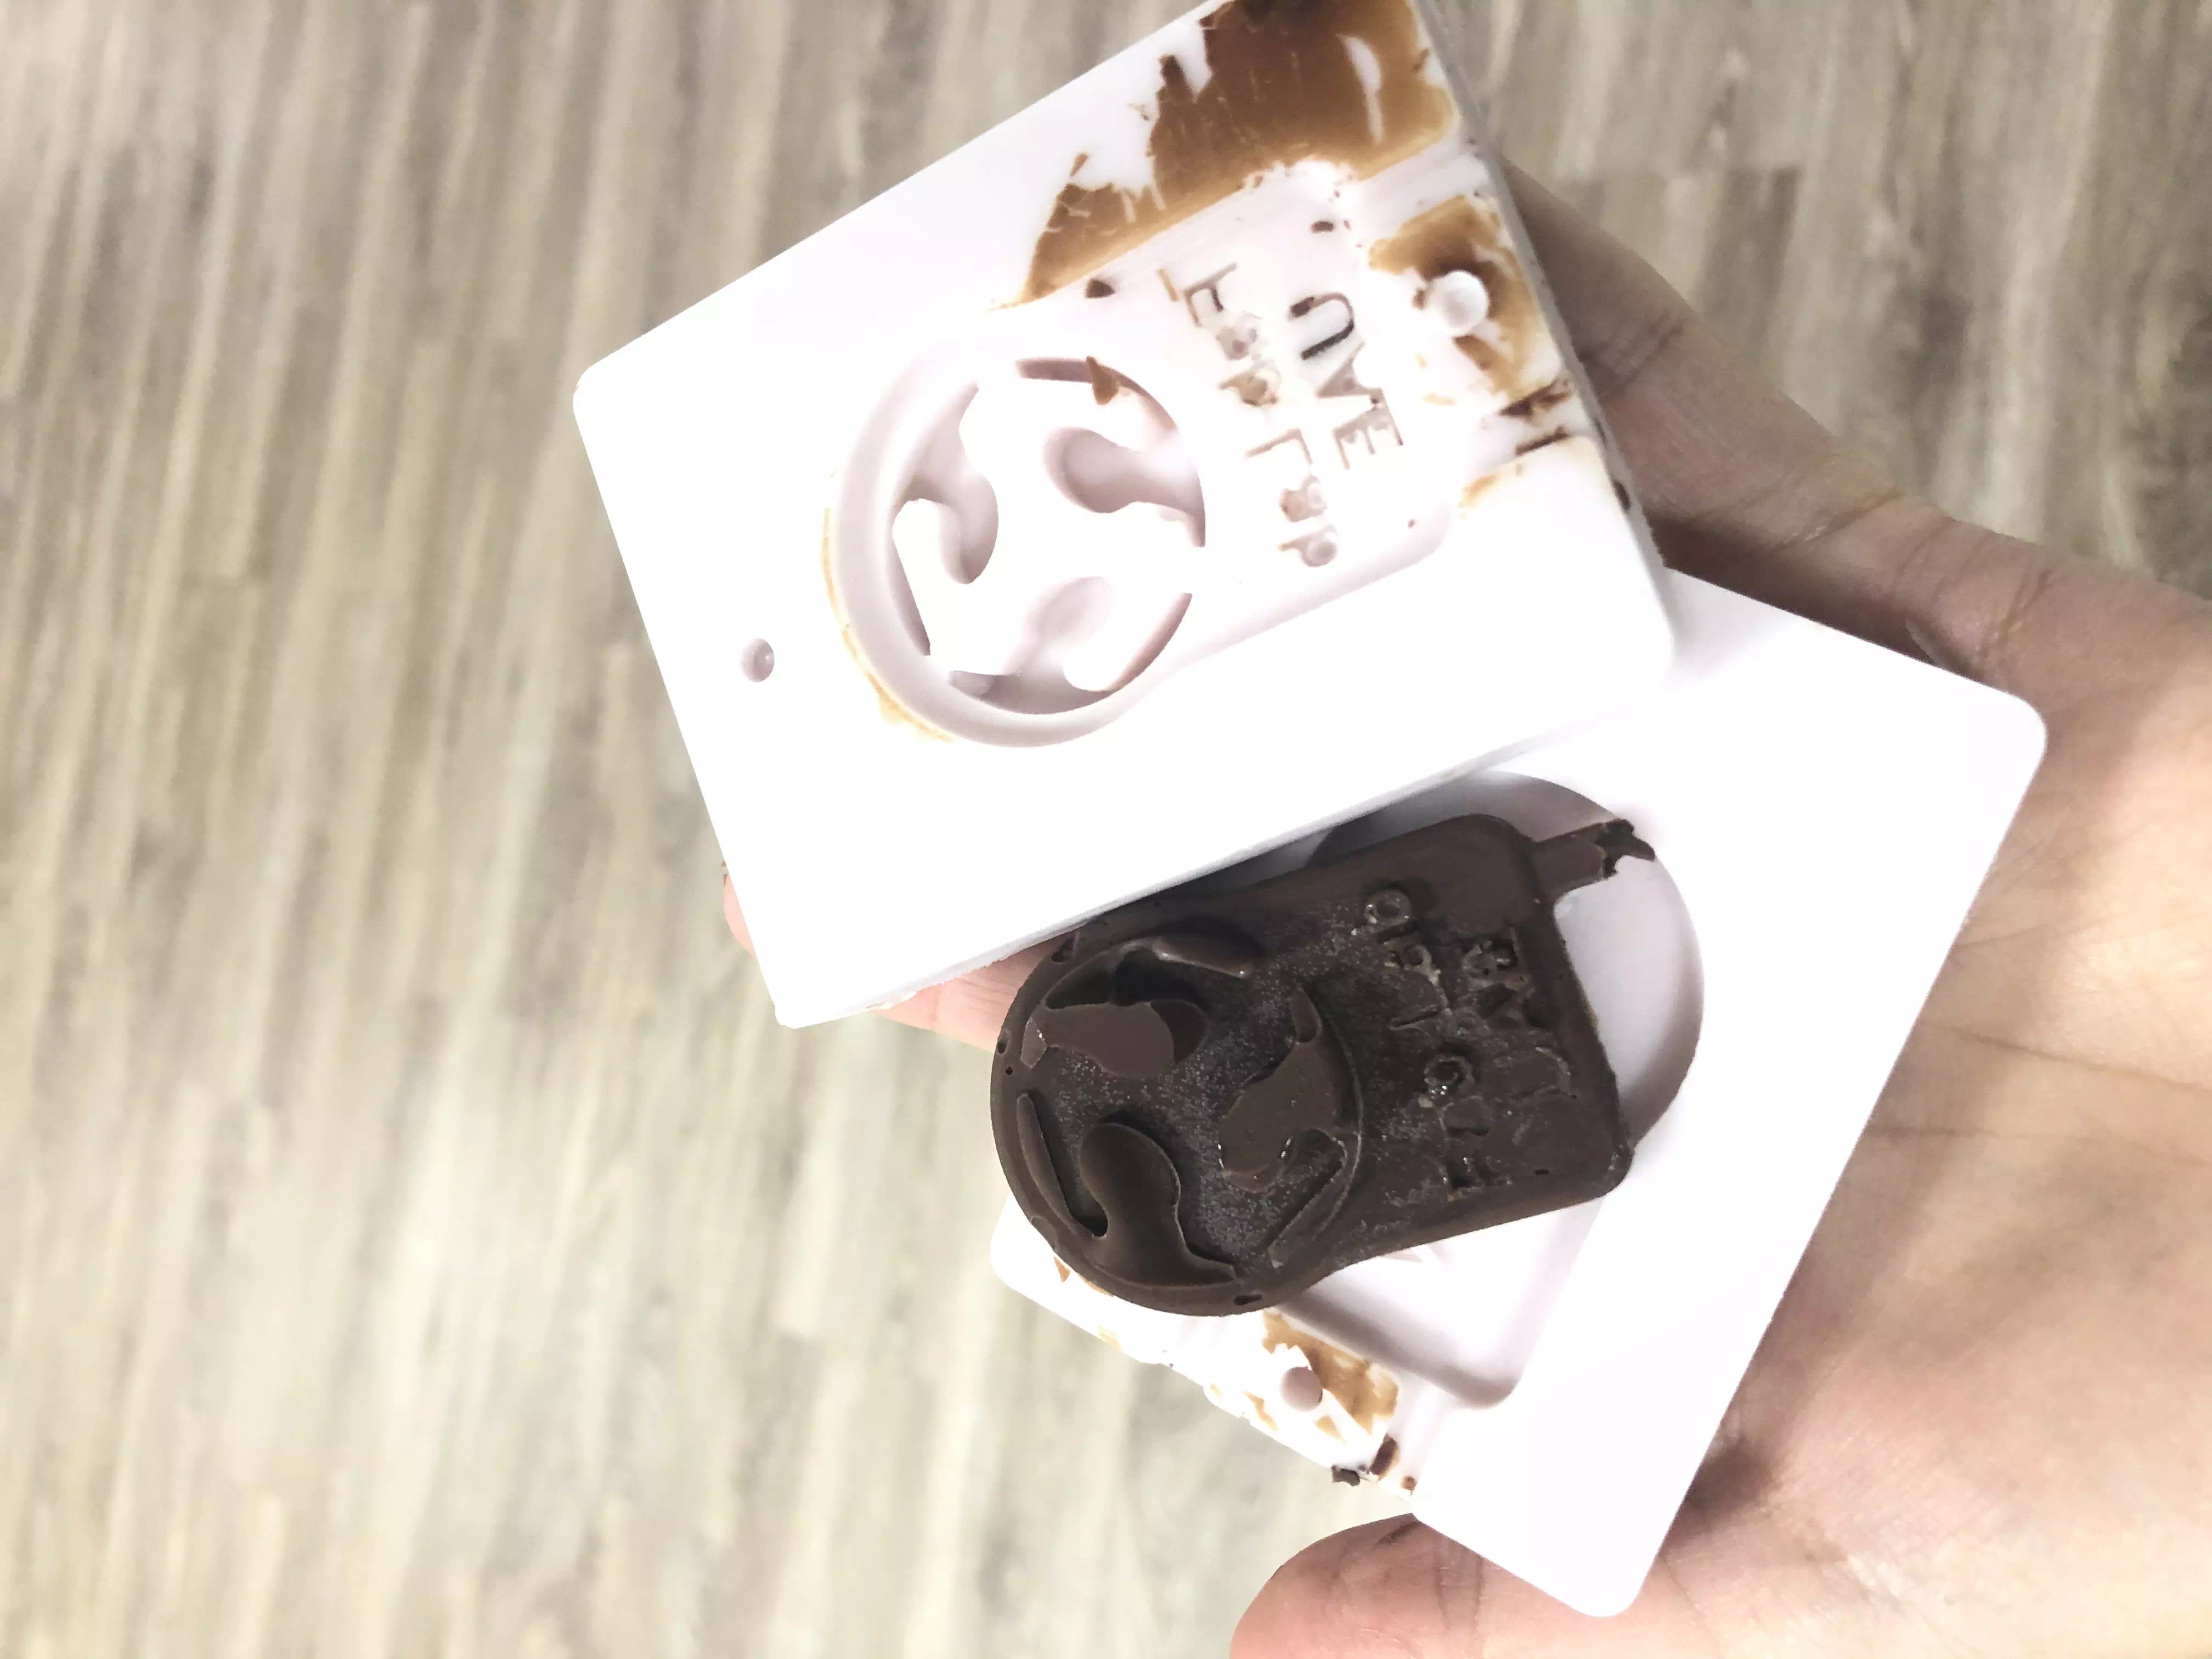
I then put the mould in the freezer for around 4 hours. It hardened well bt started to melt very quickly.
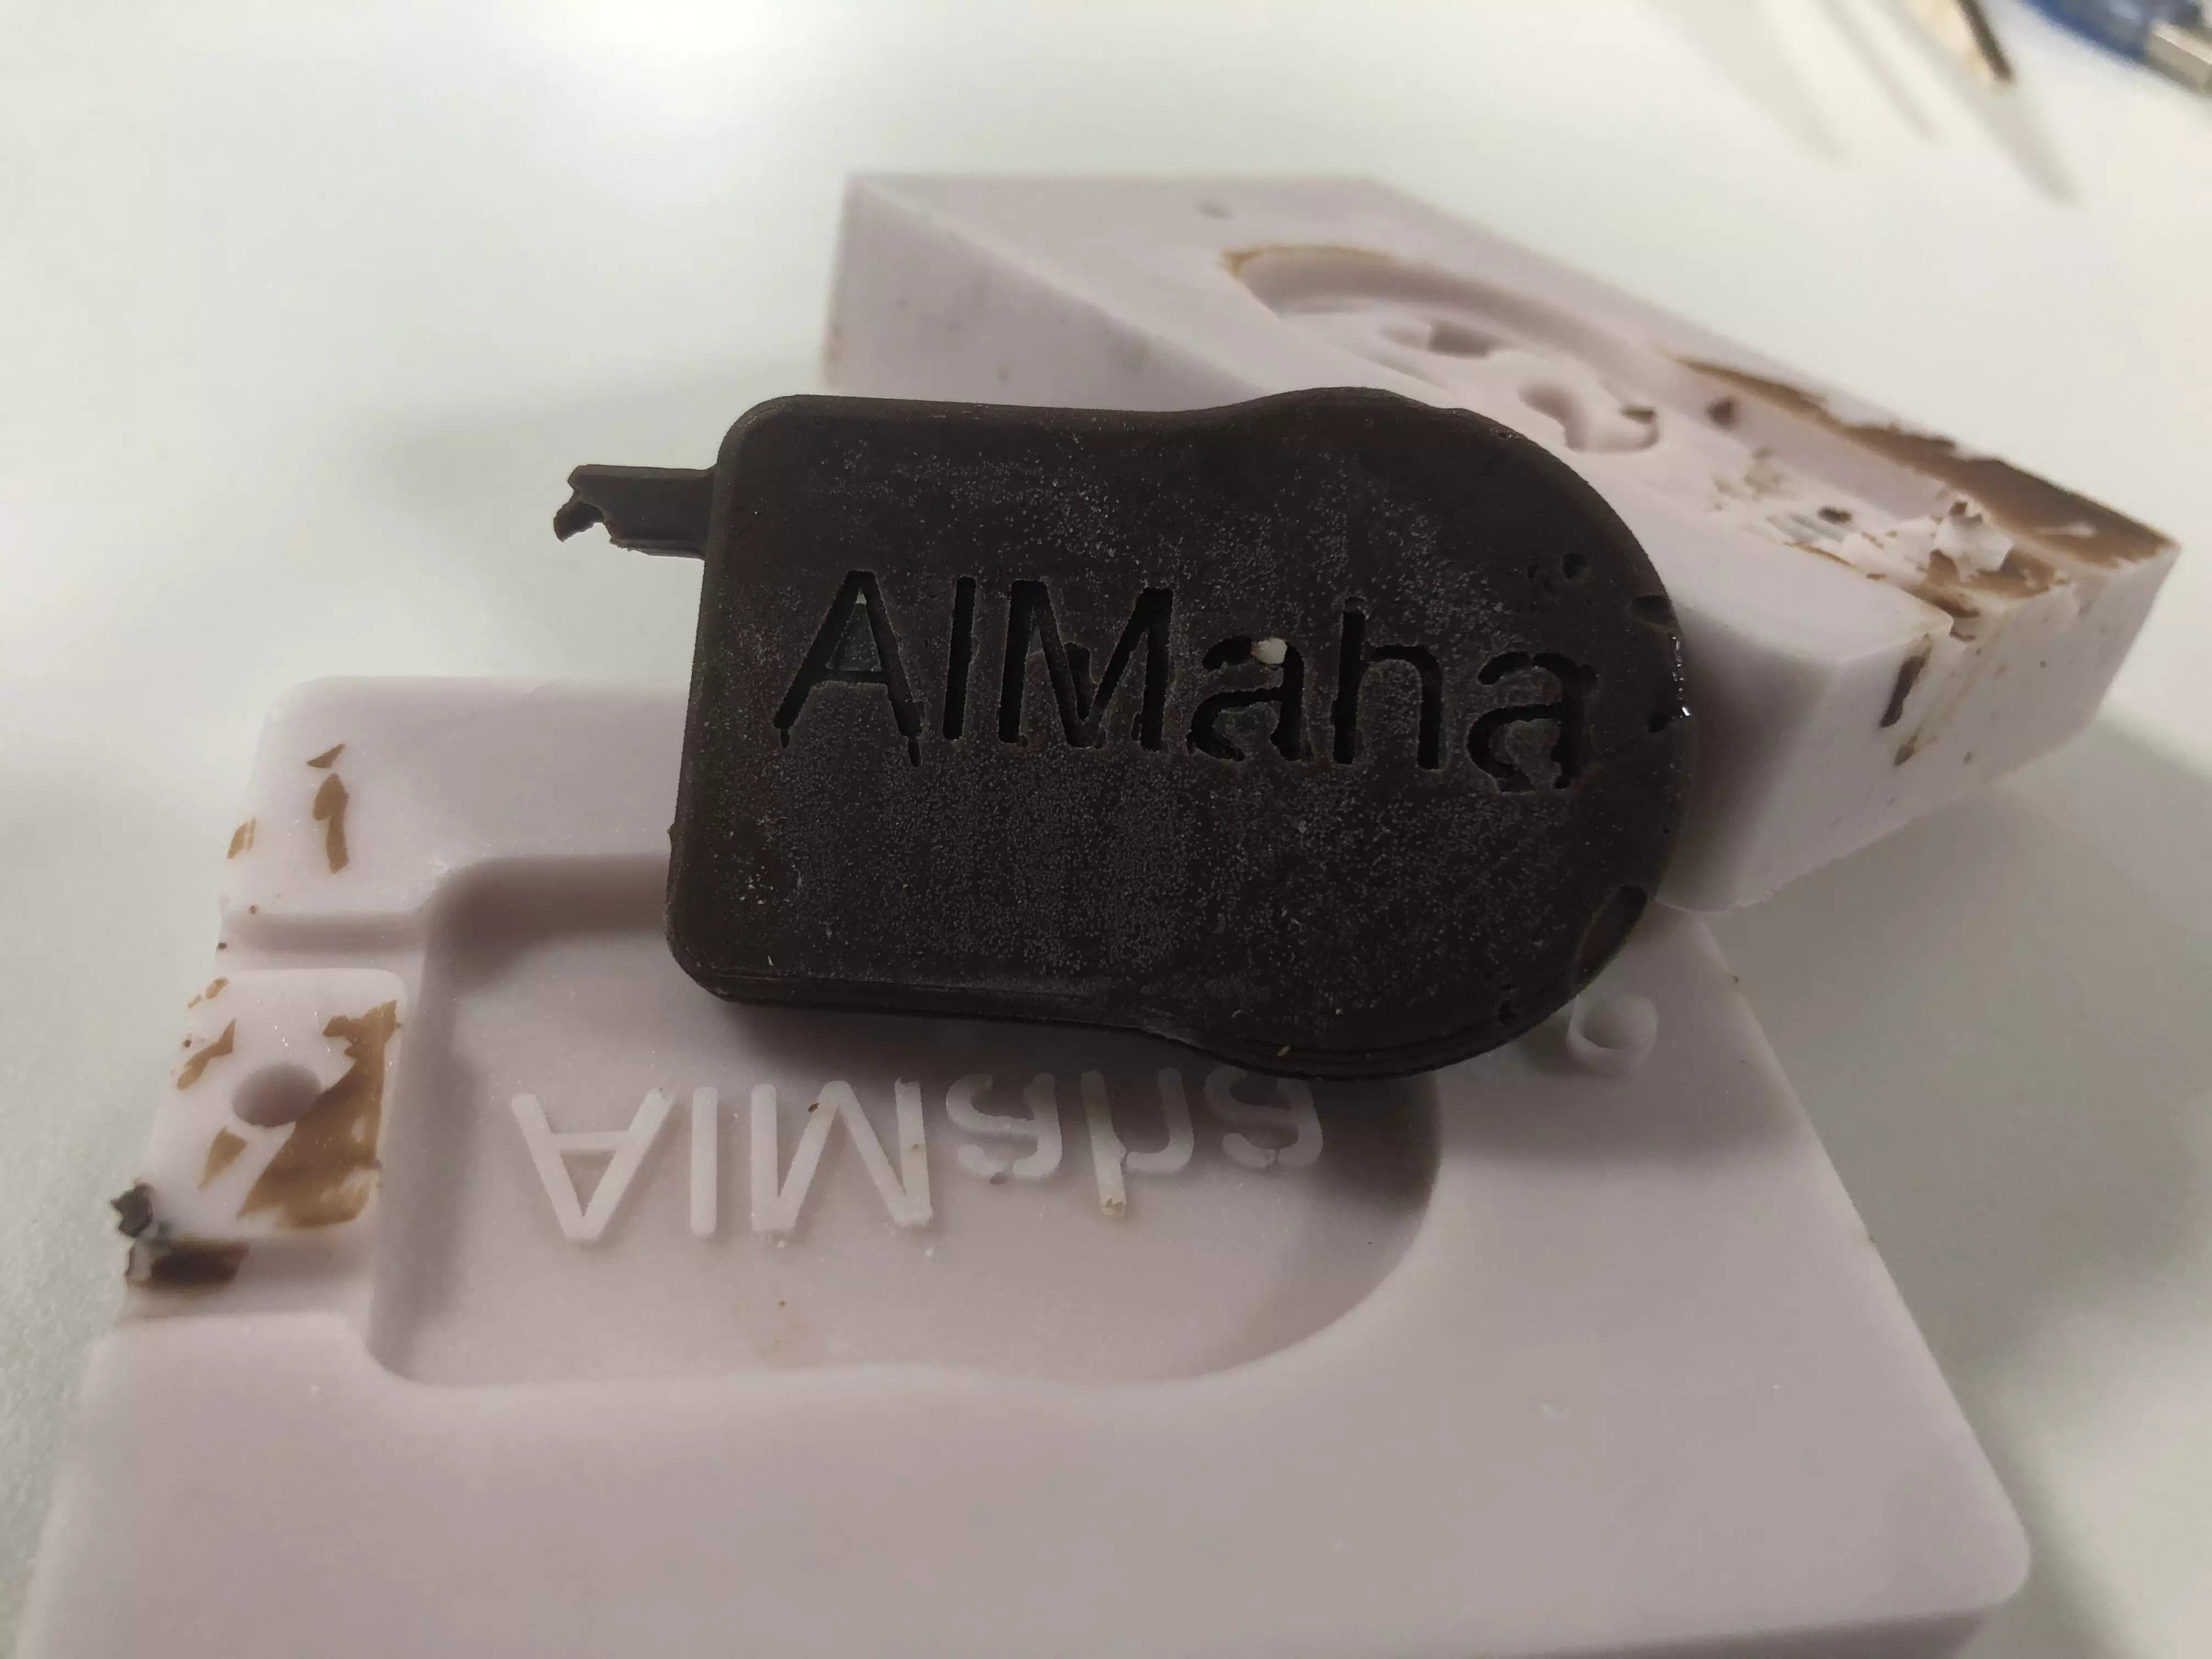
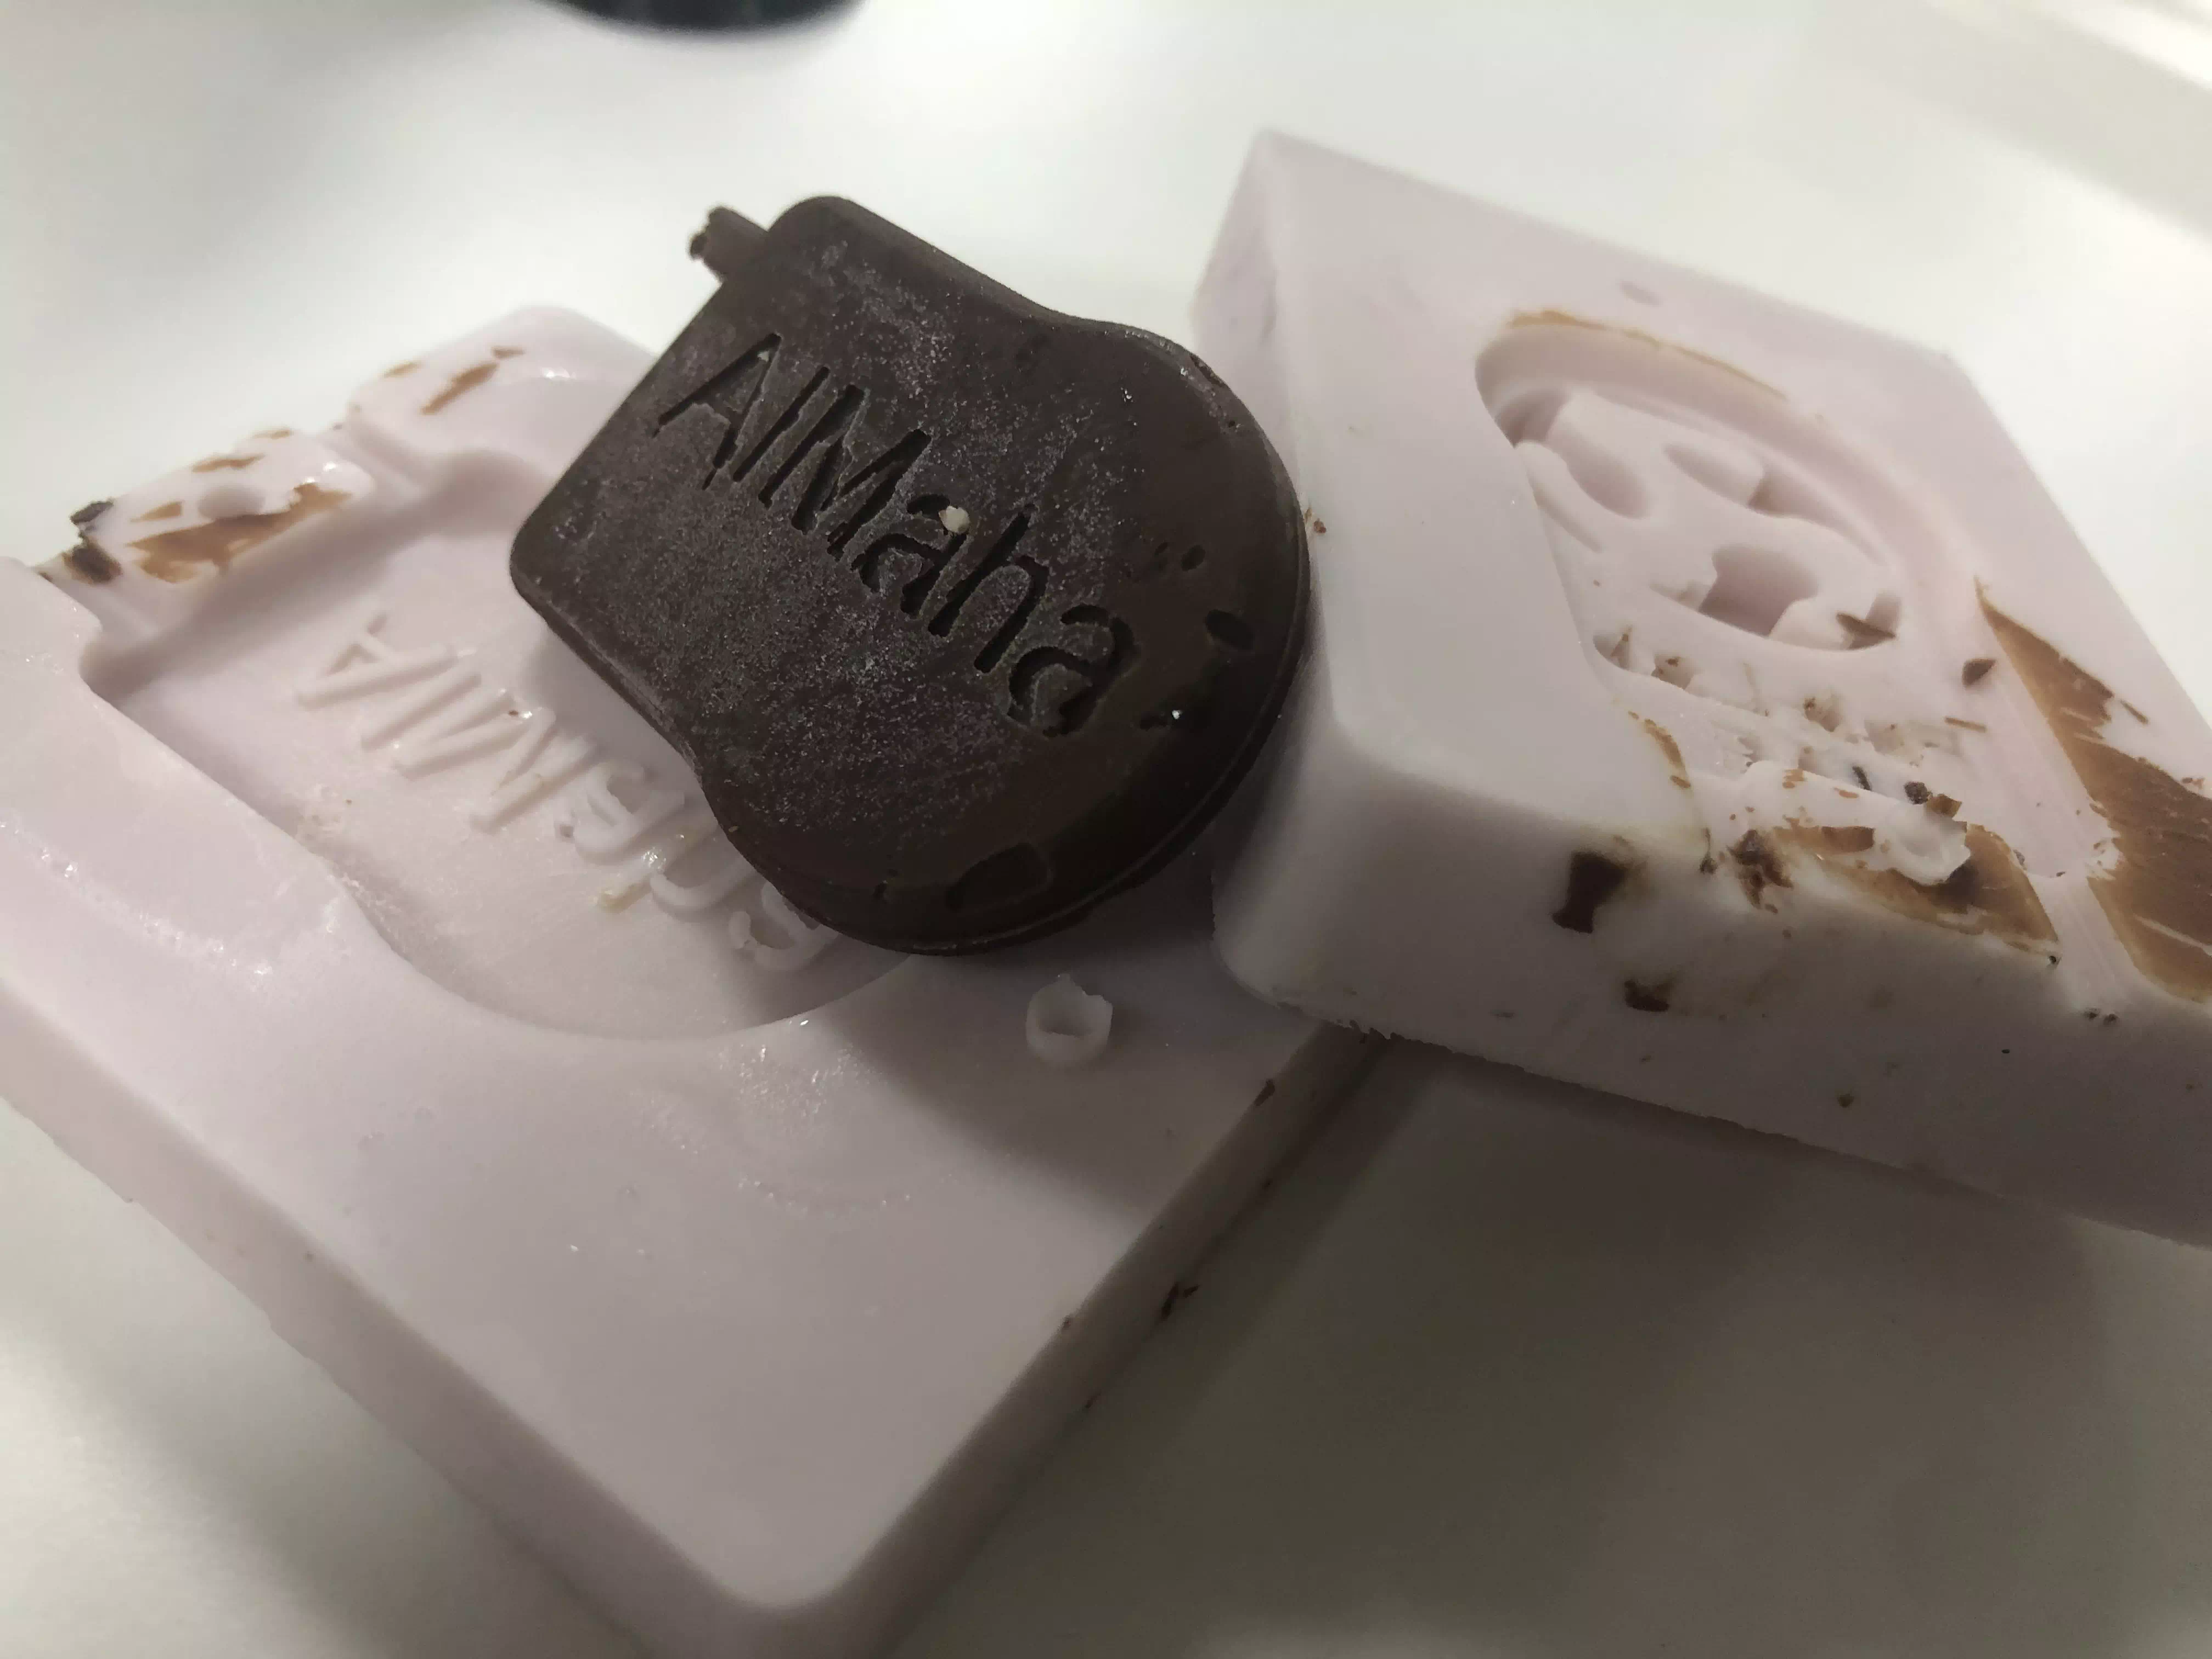
As you can see it picked up alot of the details but some of the text was broken and the cast was very fragile and the word details would crumble if manhandled while washing.
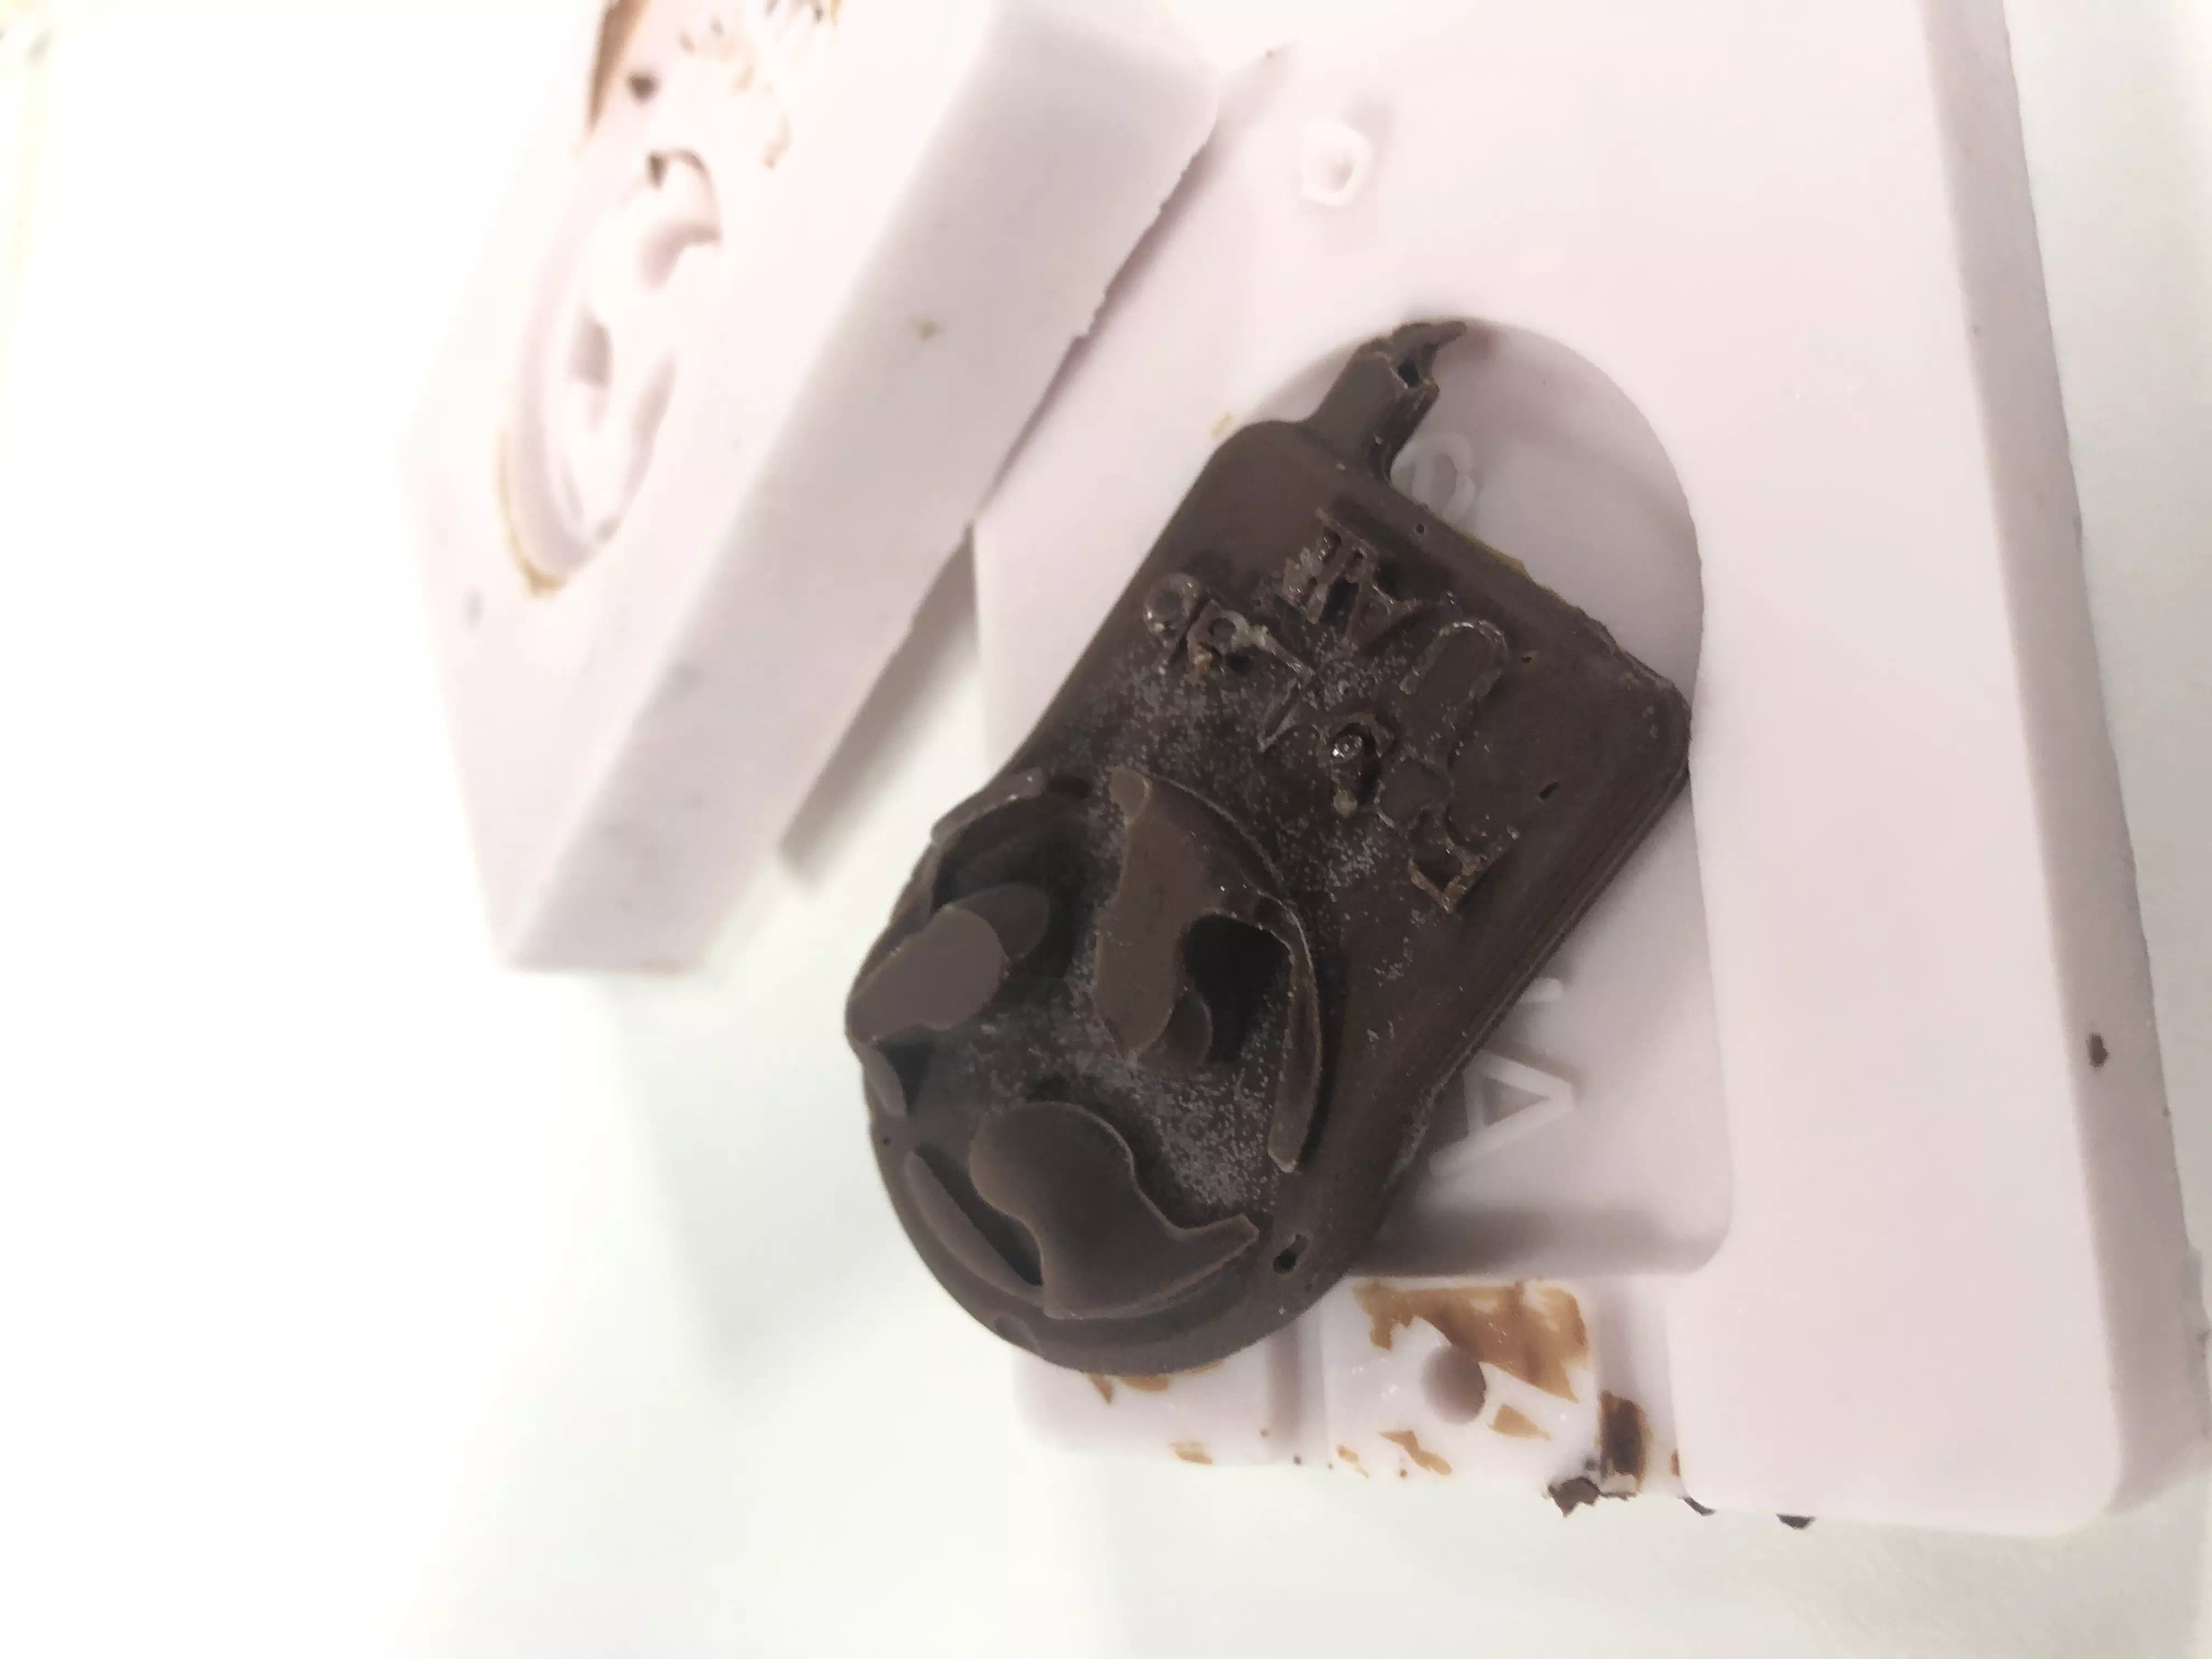
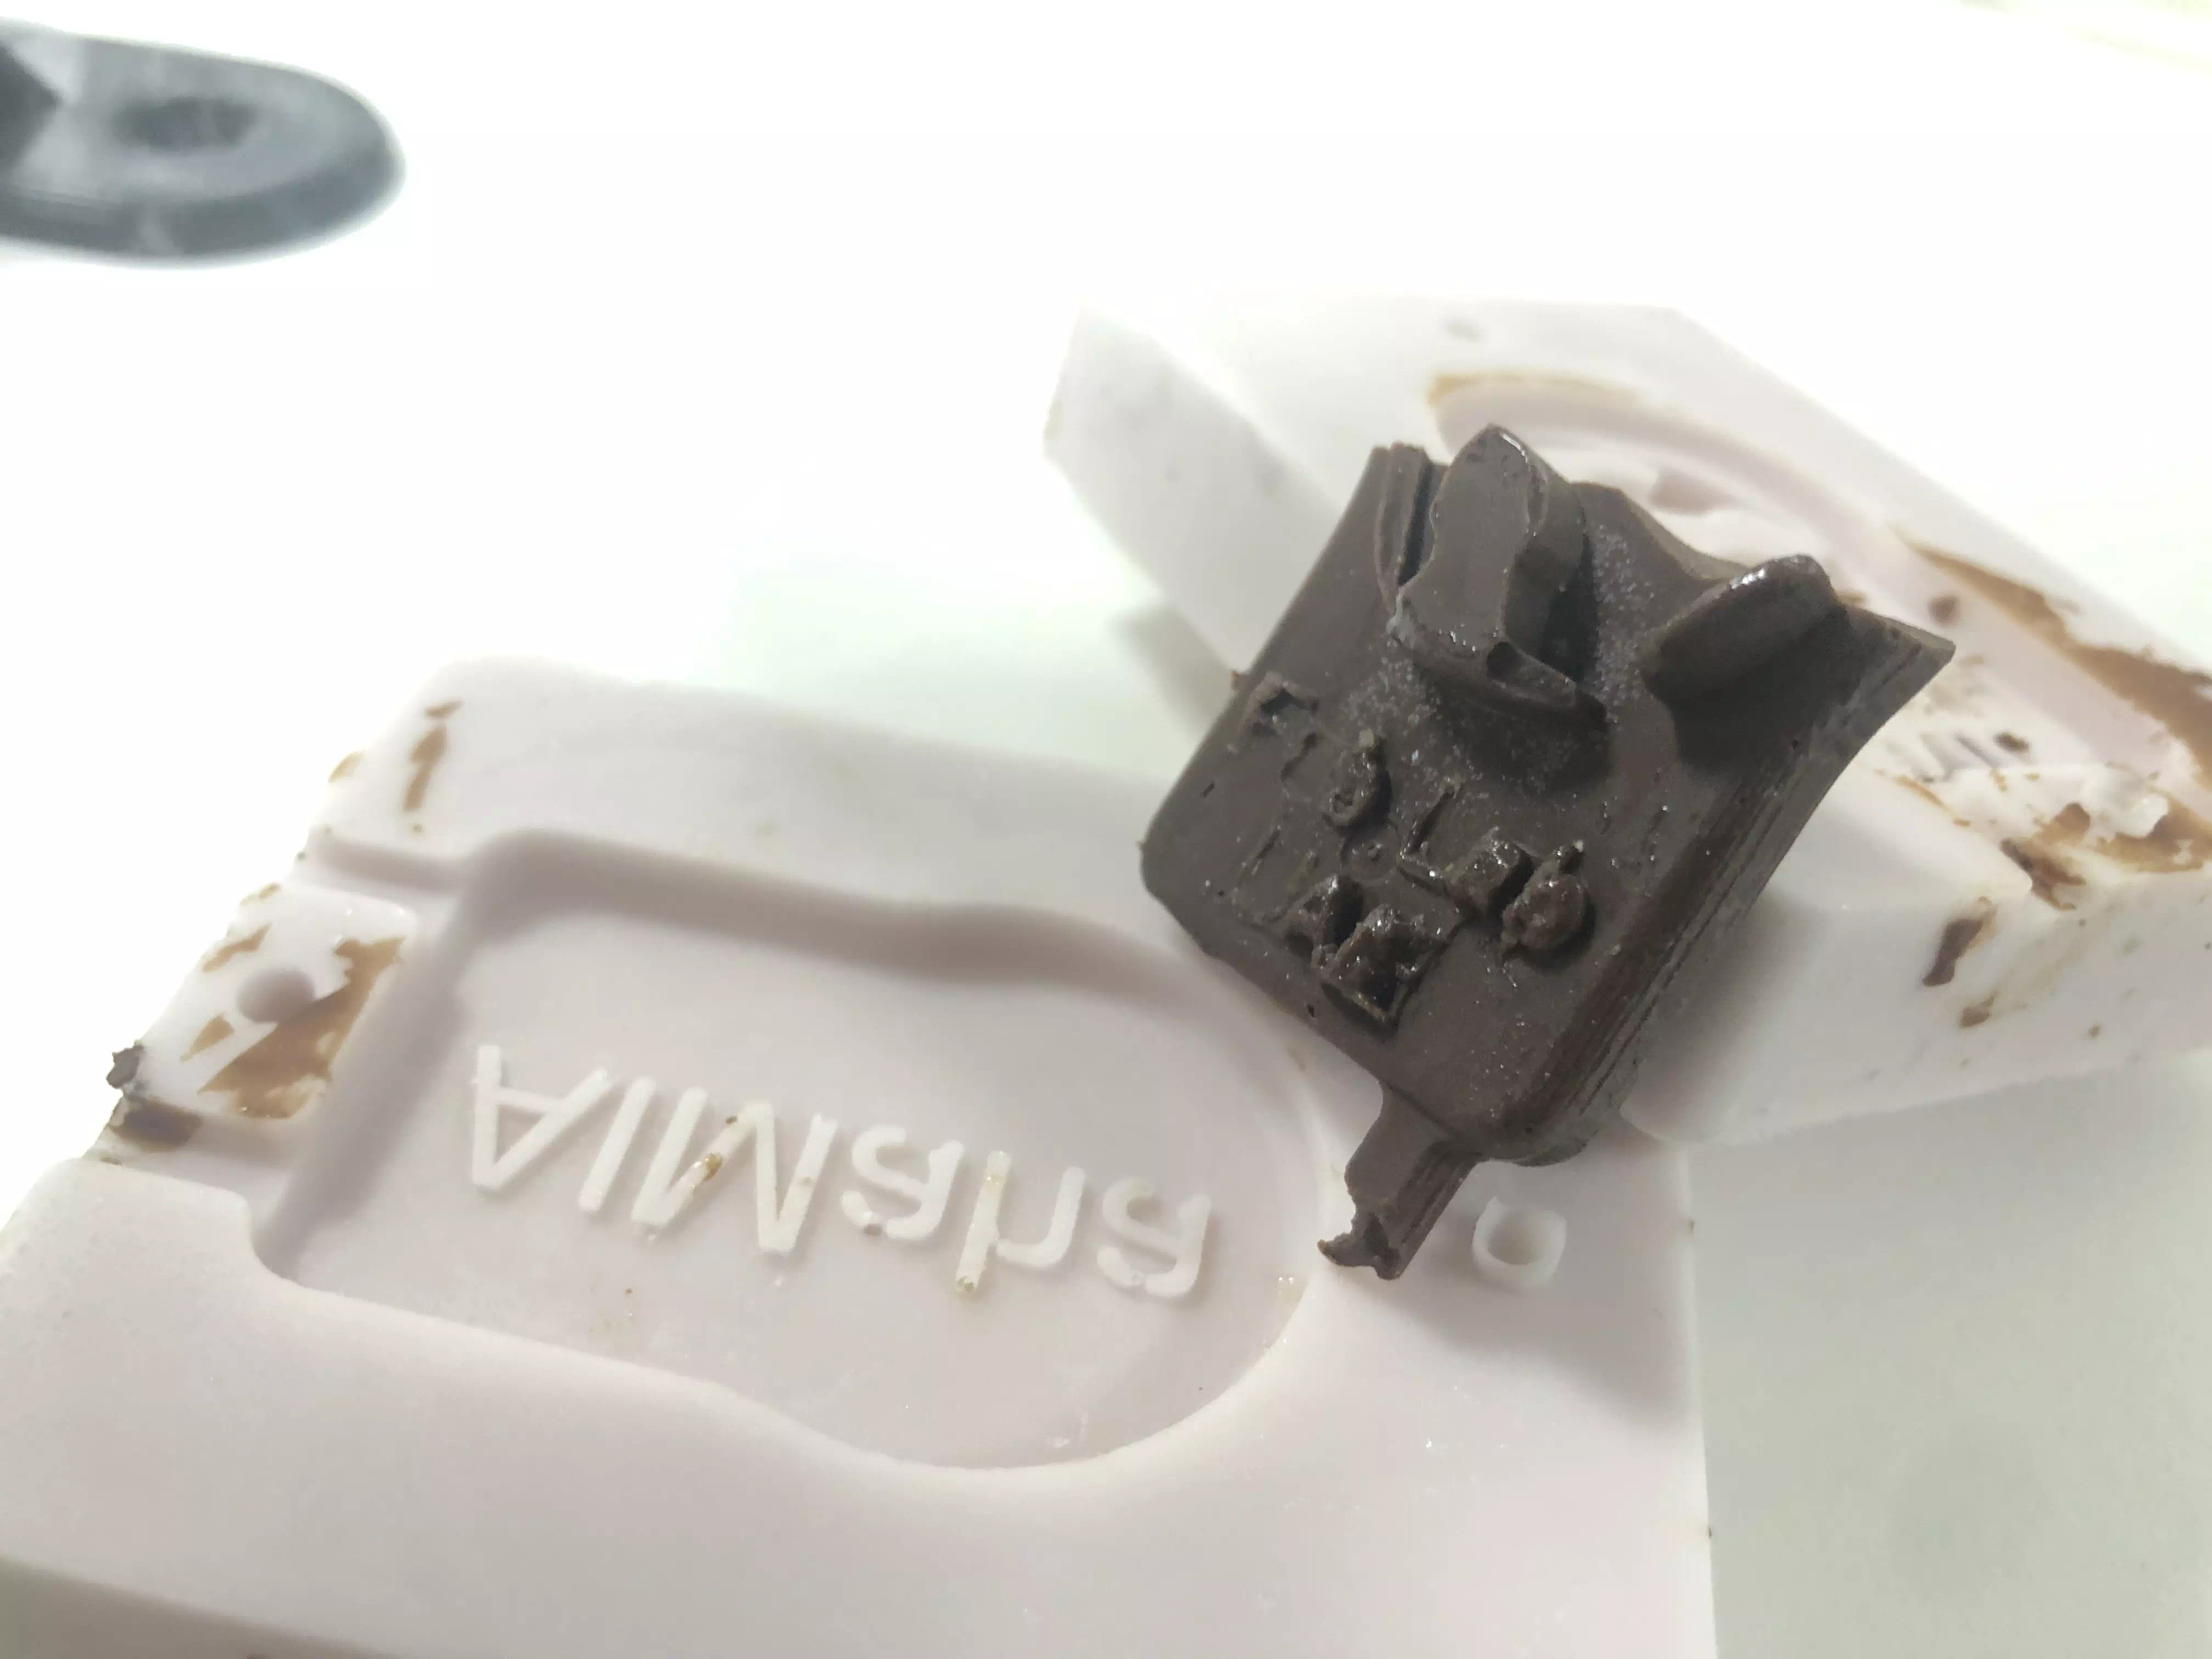
The back of the mould also picked up the text nicely but also picked up some of the cast and broke it a bit.
Next time I will freeze the chocolate for less time or temper the chocolate to avoid the frozen part.
After all this work the chocolate tasted GREAT! just like a giant Hershey kiss!