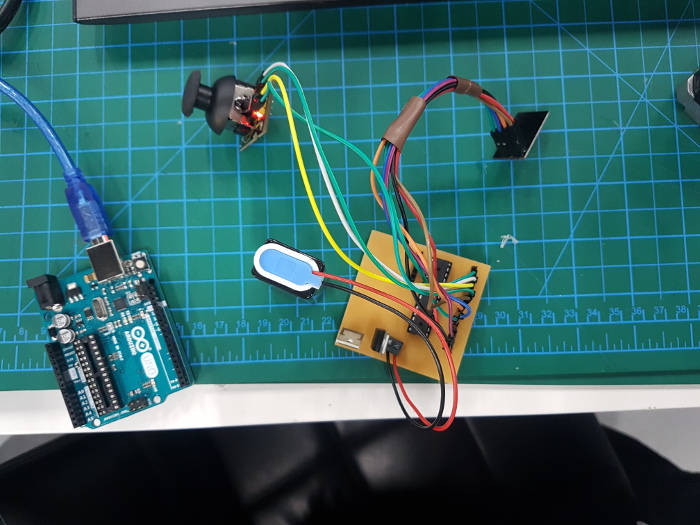
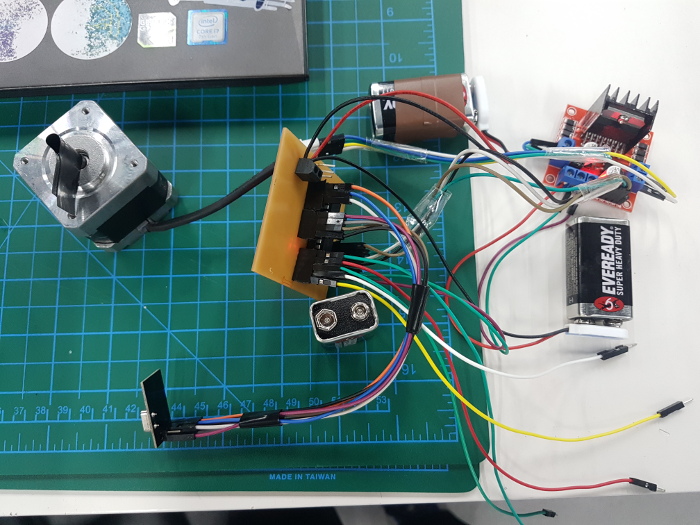
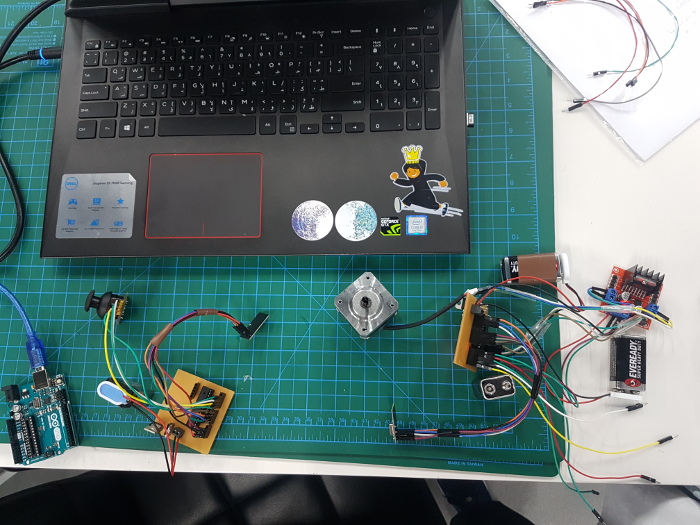
Concept
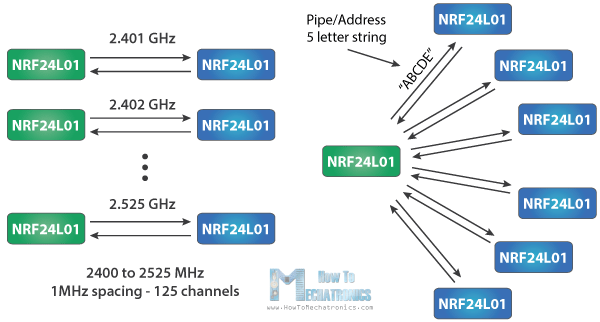
To establish two boards wireless communication I decided to use the NRF24L01 module. The NRF24L01 module is a single chip radio transceiver for the world wide 2.4 - 2.5 GHz ISM band. The transceiver consists of a fully integrated frequency synthesizer, a power amplifier, a crystal oscillator, a demodulator, modulator and Enhanced ShockBurst protocol engine. If used in open space and with lower baud rate its range can reach up to 100 meters.
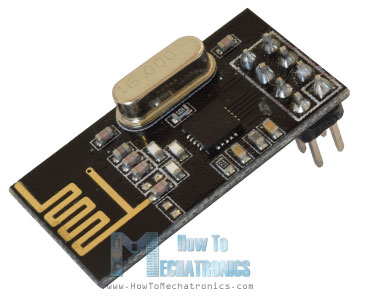
The module can use 125 different channels which gives a possibility to have a network of 125 independently working modems in one place. Each channel can have up to 6 addresses, or each unit can communicate with up to 6 other units at the same time. You can read this article to understand more about the module.
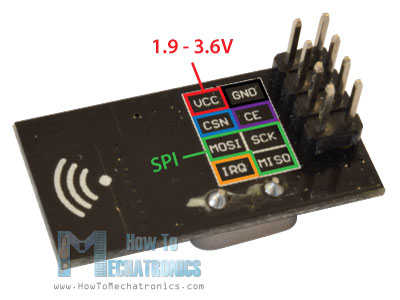
Three of these pins are for the SPI communication and they need to be connected to the SPI pins of the Arduino commercial board or the microcontroller that going to be fabricated. Therefore it is important to refer to the datasheet of the microcontroller ship to know where is the SPI pins exactly. The pins CSN and CE can be connected to any digital pin of the Arduino comercial board or the microcontroller and they are used for setting the module in standby or active mode, as well as for switching between transmit or command mode. The last pin is an interrupt pin which doesn’t have to be used.
The power consumption of this module is just around 12mA during transmission, which is even lower than a single LED. The operating voltage of the module is from 1.9 to 3.6V. Therefore a voltage regulator should be added to convert voltage from 5V to 3.3 V.
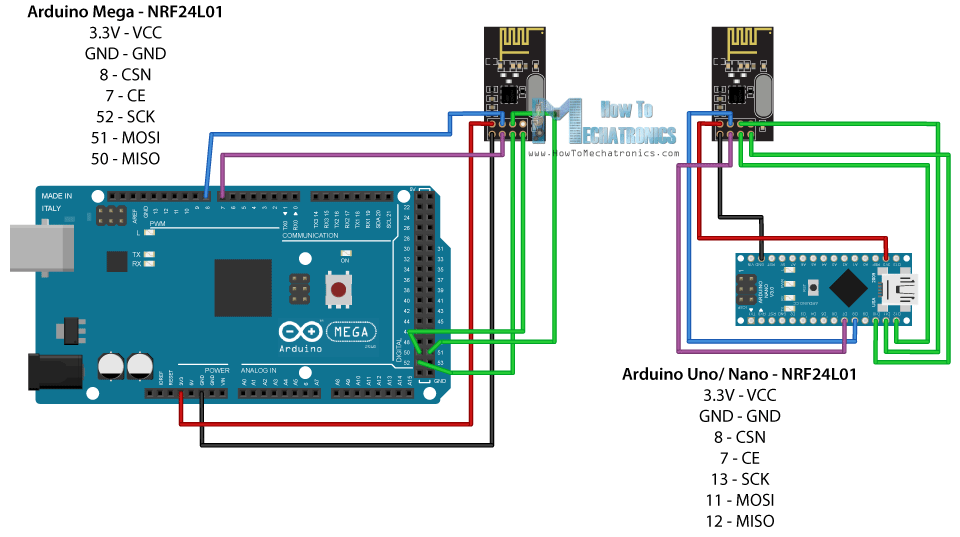
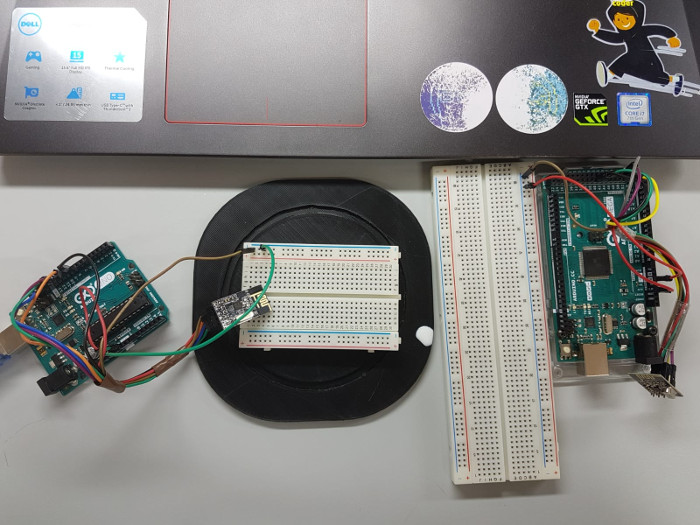
I tried to test the module by sending Hello World using two comercial arduino board. I followed the below schematic, however I used arduino UNO and arduino MEGA. The SPI pins for arduino UNO is pin (13, 12, and 11) for SCK, MISO, and MOSI respectively. However the SPI pins for arduino MEGA is pin (52, 50, 51) for SCK, MISO, and MOSI respectively.
* The Transmitter Code is the following.
/*
* Arduino Wireless Communication Tutorial
*     Example 1 - Transmitter Code
*
* by Dejan Nedelkovski, www.HowToMechatronics.com
*
* Library: TMRh20/RF24, https://github.com/tmrh20/RF24/
*/
#include <SPI.h<
#include <nRF24L01.h<
#include <RF24.h<
RF24 radio(9, 8); // CE, CSN
const byte address[6] = "00001";
void setup() {
  radio.begin();
  radio.openWritingPipe(address);
  radio.setPALevel(RF24_PA_MIN);
  radio.stopListening();
}
void loop() {
  const char text[] = "Hello World";
  radio.write(&text, sizeof(text));
  delay(1000);
}
* The Reciever Code is the following.
/*
* Arduino Wireless Communication Tutorial
*     Example 1 - Transmitter Code
*
* by Dejan Nedelkovski, www.HowToMechatronics.com
*
* Library: TMRh20/RF24, https://github.com/tmrh20/RF24/
*/
#include <SPI.h<
#include <nRF24L01.h<
#include <RF24.h<
RF24 radio(38, 70); // CE, CSN
const byte address[6] = "00001";
void setup() {
  Serial.begin(9600);
  radio.begin();
  radio.openReadingPipe(0, address);
  radio.setPALevel(RF24_PA_MIN);
  radio.startListening();
}
void loop() {
  if (radio.available()) {
    char text[32] = "";
    radio.read(&text, sizeof(text));
    Serial.println(text);
  }
}
The results of the circuit is the following.
Now after I tested the mechanism it is important for me to test my entire system together. I am going to connect my Joystick module to one commercial arduino with NRF24L01, and my stepper motor to another arduino with NRF24L01, and see wether the wireless connection will work or not.
* The transmitter code "with joystick" is the following.
#include <SPI.h<
#include <nRF24L01.h<
#include <RF24.h<
RF24 radio(13, 12);  // CE, CSN

//address through which two modules communicate.
const byte address[6] = "00001";

void setup()
{


  radio.begin();

  //set the address
  radio.openWritingPipe(address);

  //Set module as transmitter
  radio.stopListening();
}


void loop()
{
  //Send message to receiver

  // Get joystick position on A1
  int position  = analogRead(1);
  radio.write(&position, sizeof(position));


  delay(1000);
}
* The reciever code "with stepper Motor" is the following.
/*
* Arduino Wireless Communication Tutorial
*       Example 1 - Receiver Code
*
* by Dejan Nedelkovski, www.HowToMechatronics.com
*
* Library: TMRh20/RF24, https://github.com/tmrh20/RF24/
*/

#include <SPI.h>
#include <nRF24L01.h>
#include <RF24.h>

#include <Stepper.h<
//create an RF24 object
RF24 radio(9, 8);  // CE, CSN

const int PPR = 200;

// Motor 1 in pins 13-10
Stepper motor1(PPR, 13,11,12,10);
//address through which two modules communicate.
const byte address[6] = "00001";

void setup()
{
  while (!Serial);
  Serial.begin(9600);


    motor1.setSpeed(60);


  radio.begin();

  //set the address
  radio.openReadingPipe(0, address);

  //Set module as receiver
  radio.startListening();
}

void loop()
{
  //Read the data if available in buffer
  if (radio.available())
  {
    int position = analogRead(1);
    radio.read(&position, sizeof(position));
     if (position > 562 ) {
    Serial.println("clockwise");
    motor1.step(PPR);
  }

  if (position > 462) {
    Serial.println("counterclockwise");
    motor1.step(-PPR);

  }

  if (position = 0) {
    Serial.println("Nothing");
    motor1.step(0);

  }
  }
}
The final result:
