Vinyl Cutter
Using Silhouette Studio, I dragged and dropped my current company logos into the program.

The trace tool was then used to extract the outline from the logos.

Due to the parameters not set correctly, part of the trace was missing.

Using trial and error, I was able to figure out how to perfectly extract the full trace. I positioned them so the Alurays was the largest due to ‘Lighting Technology’ being written in very small.

For cutting, I used the red paper and stuck it onto the cutting board.

Aligning the arrows of the machine, I positioned the board and noticed some areas were not perfectly covering but guessed it would be within my design.

As the machine starting cutting, I noticed it would slowly skew to one side, lifting part of the paper off of the board as it touches the edge.

Everything turned out perfect except the very end with Retro’s logo, since that’s when the paper was lifting off the board.

The ‘a’ in Alurays was also totally messed up as it was left till the very end.

I enjoyed using the Vinyl cutter quite a lot, and realized it’s extremely easy to use, as long as you set up the cutting board properly.
Laser Cutter
I enjoy sailing quite a bit whenever I get the chance to do it, and so I could resist building one. To laser cut, I went back to my favorite program, SolidWorks, and started sketching a sailboat from a top view.

Using the spline tool, I curved the sides.

I then added 20mm slots, 4mm deep. I tried using the pattern tool to replicate them but that didn’t work due to the spline.

To add height to the boat, I sketched a rectangle to cover the circumference of the boat. For the slots to connect, the rectangle also needed equal and opposite slots.

Since the rectangle was a straight line, I was able to use the linear pattern tool to easily finish off the slots. Not all the slots were equidistant, so the pattern was only used for the sides.

Moving to the cutter. I imported the files and started cutting right away. As I didn’t really think about the order, everything turned out wrong. The outline of the boat was cut before the slots, causing the slots to be skewed.

The rectangle slots were cut as closed boxes, also resulting in a slot-less design. A big fail!

Going back to the software, I fixed the order to avoid conflicts.

Still didn’t get a perfect result due to parts of the boat tilting during the cut. I think this is because the board wasn’t secured properly onto the platform.

Finally, I assembled the pieces and they surprisingly stuck together quite nicely, without assistance or glue.

Group Assignment
Before using the laser cutter, we carried out a group assignment to test out the power and speed.
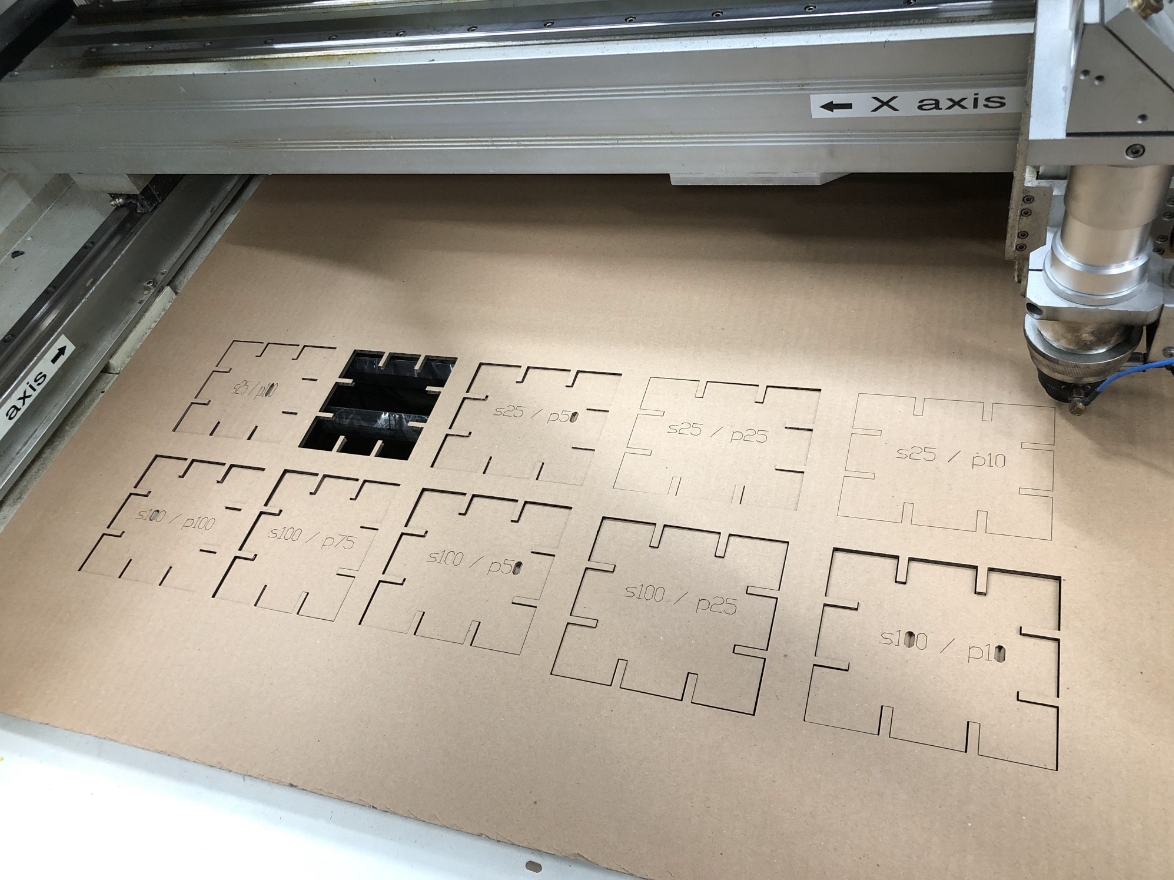
The results weren’t too informative, as we didn’t notice consistent differences, however, we better understood the tolerances of the machine, which helped us with our designs.
