_stage 4
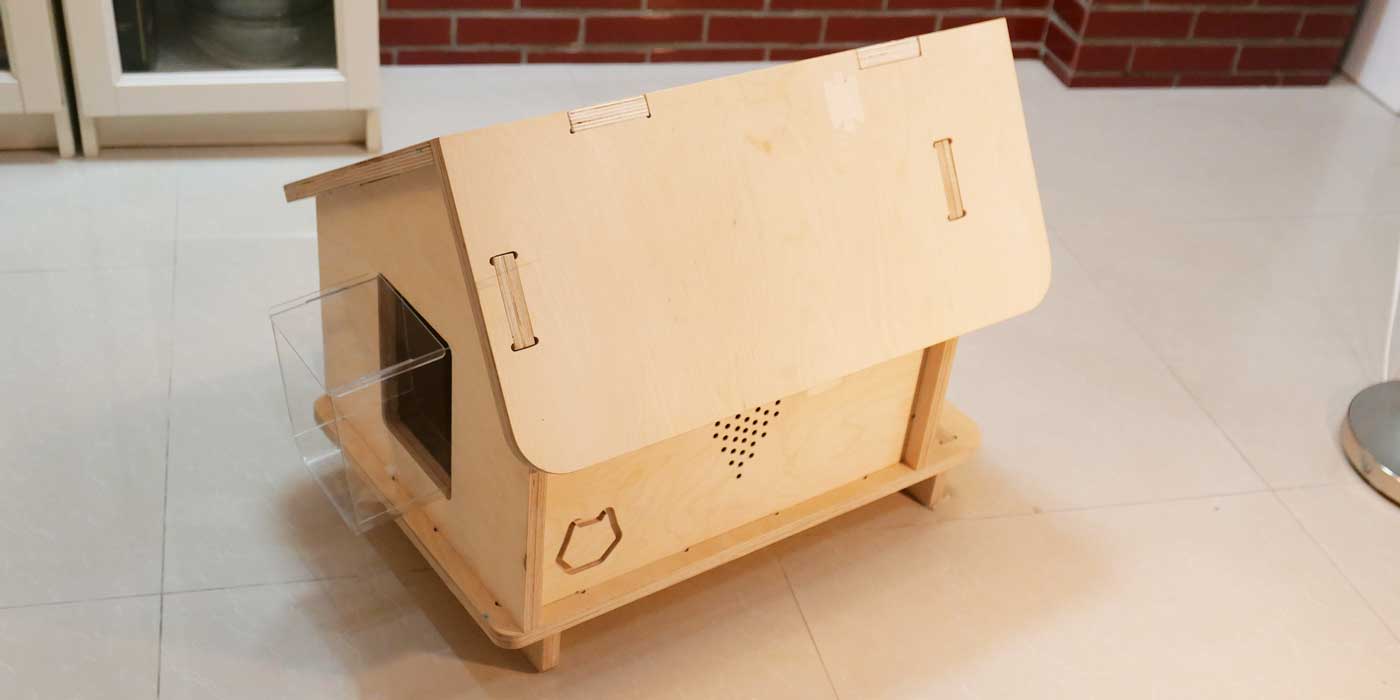
Structure
HOUSE STRUCTURE
This section is all about the prototype of the physical structure of the house.
Integrating the skills we need for the final project I am planning to use subtractive and additive
manufacturing for the design of the house. I will CNC the outter shell of the house and I plan to 3D
print the flap door that keeps the sensors and the brain of the structure.
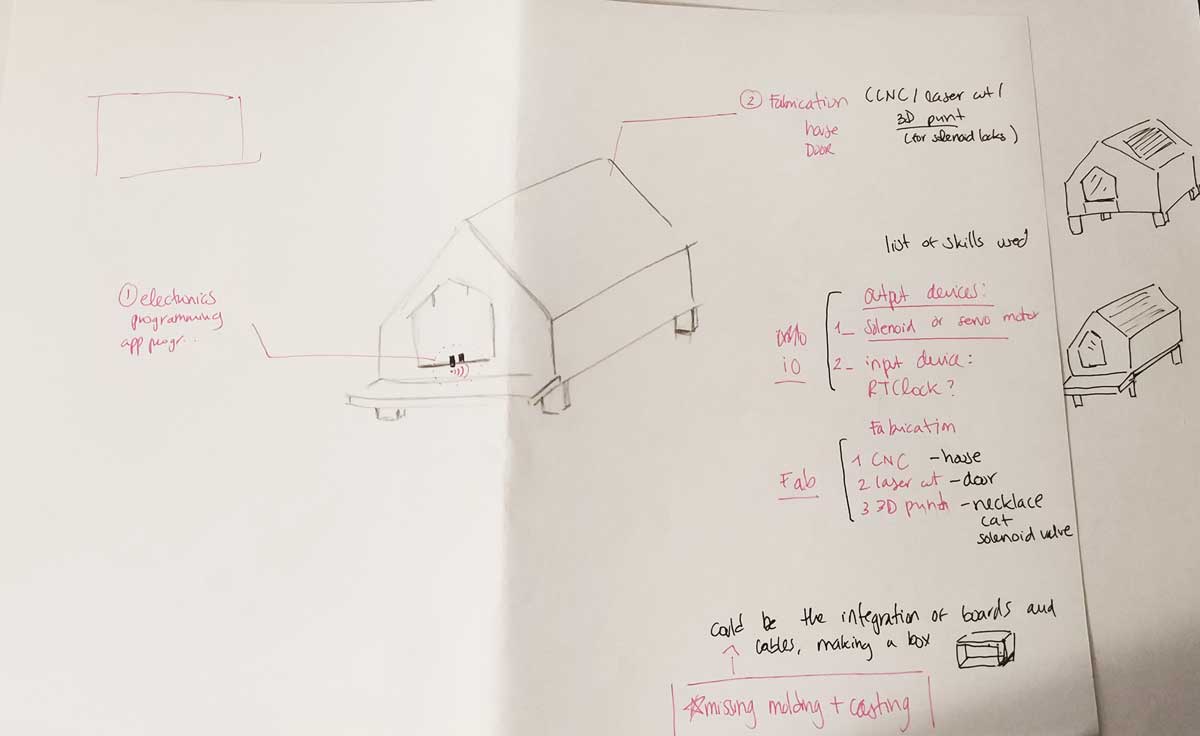
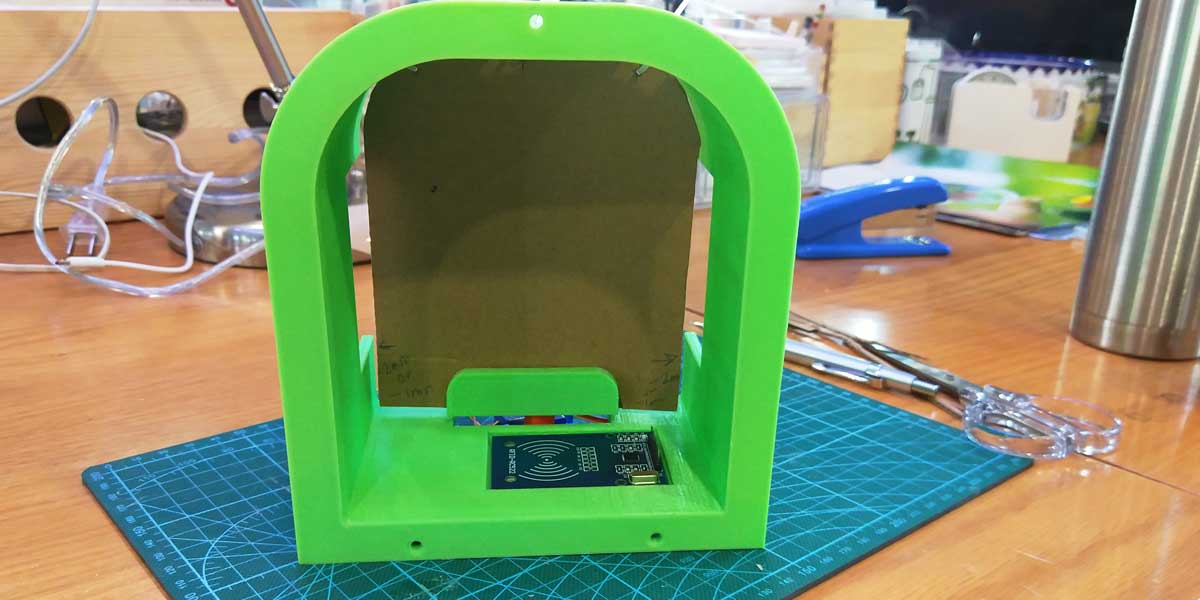
The idea of the structure of the house is that on one side we have the exit where I will place the RFD
tag reader and all the other sensors. Then on the other side it will have an opening to connect it
through a tube (I still need to think what works best) to the window of our house so she can leave and
come home.
This not only allows her to access but it also works as a shelter for her, to chill out of protect from
the weather changes.
WHO HAS DONE WHAT BEFOREHAND?
I previously did a research of flap doors systems that allow pets to go out/in and the research is inside
the stage
1 folder of my documentation for the final project. But, as I am adding an
extra feature which is the shelter-house I began by doing a research of similar existing products.
There are a number of houses that have been built for pets, mostly to put outdoors so that animals have
a shelter where to sleep or pass the day. Also there are a lot of indoor houses for cats and dogs that
serve sometimes as a decoration or sometimes they are functional and serve for other things like a cat
litter-house.
So the idea of creating a shelter is nothing new, I am just trying to twist the idea and connect it to
our house through a smart opening system.
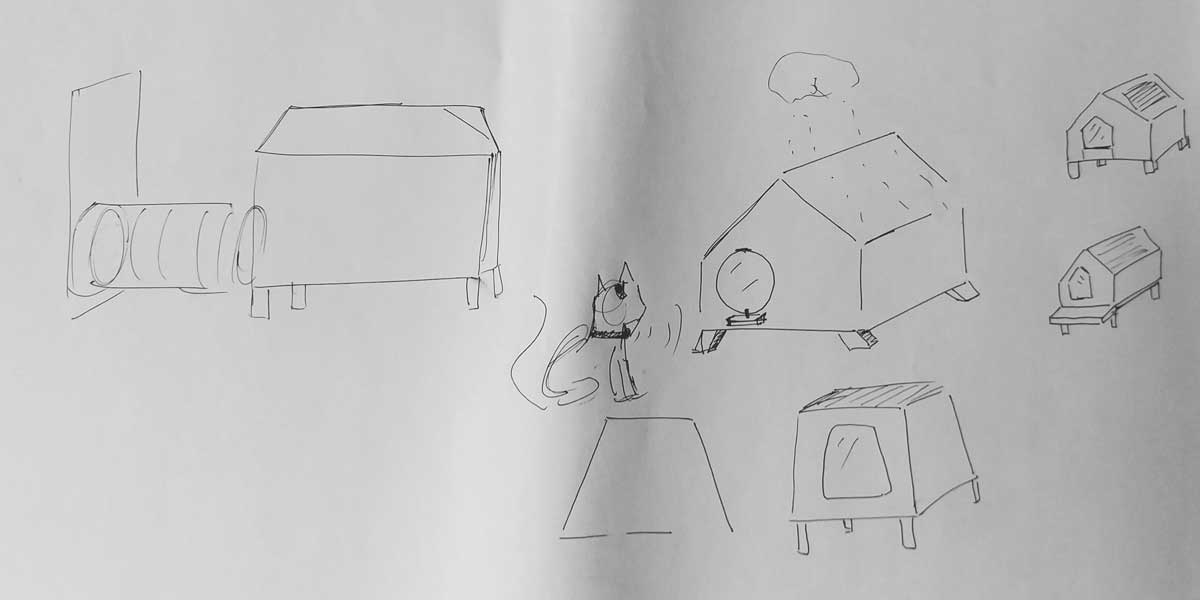
During my reserach I found a lot of cool designs, some helped me to get inspired on how to build the structure, some others gave me ideas for the funcionality. Some of my reserach include houses for children or for other uses:
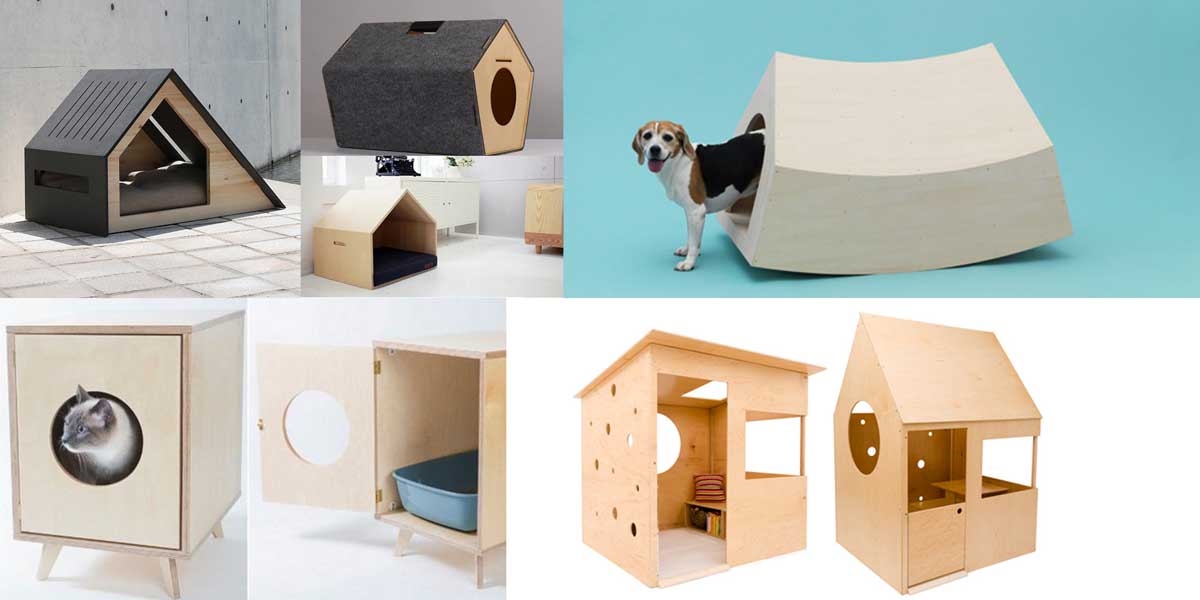
Information about the the brands, see clockwise order from top to bottom:
1_
BAD MARLON
2_
HOLIN
3_
MPUP
4_
ARCHITECTURE FOR DOGS, this
is
one of my main inspirations, is a project made by Kenya Hara where he asked designers and architects to
design an architectural dogs-house.
5_
ISUTA
6_Modern Playhouse
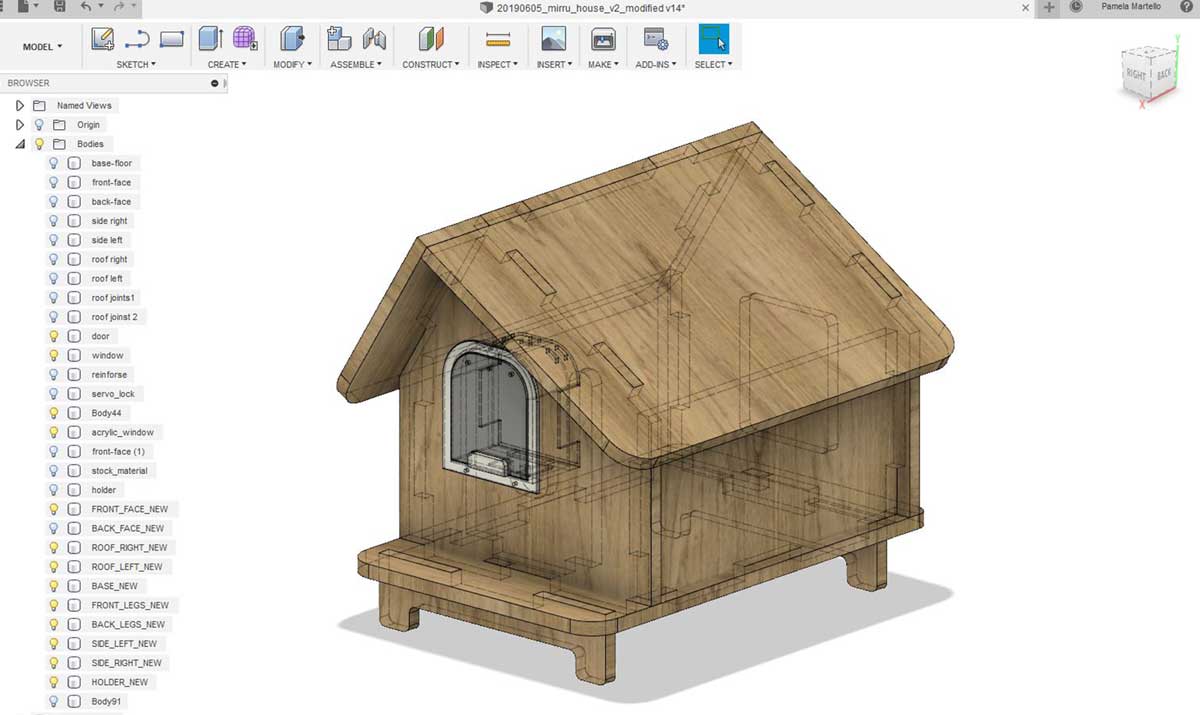
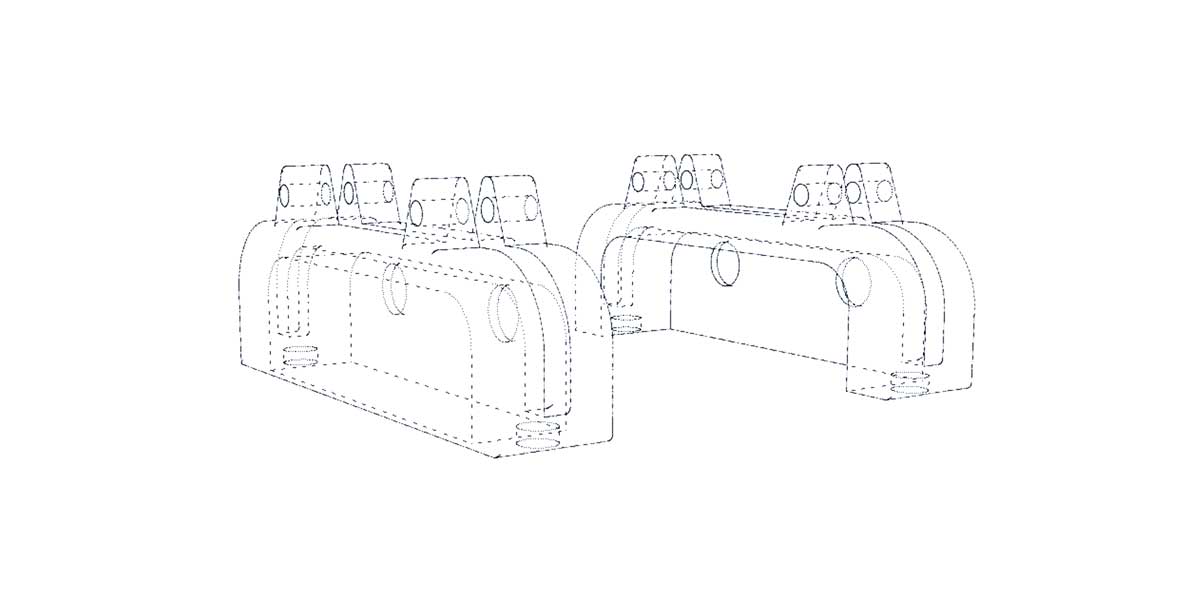
3D MODEL
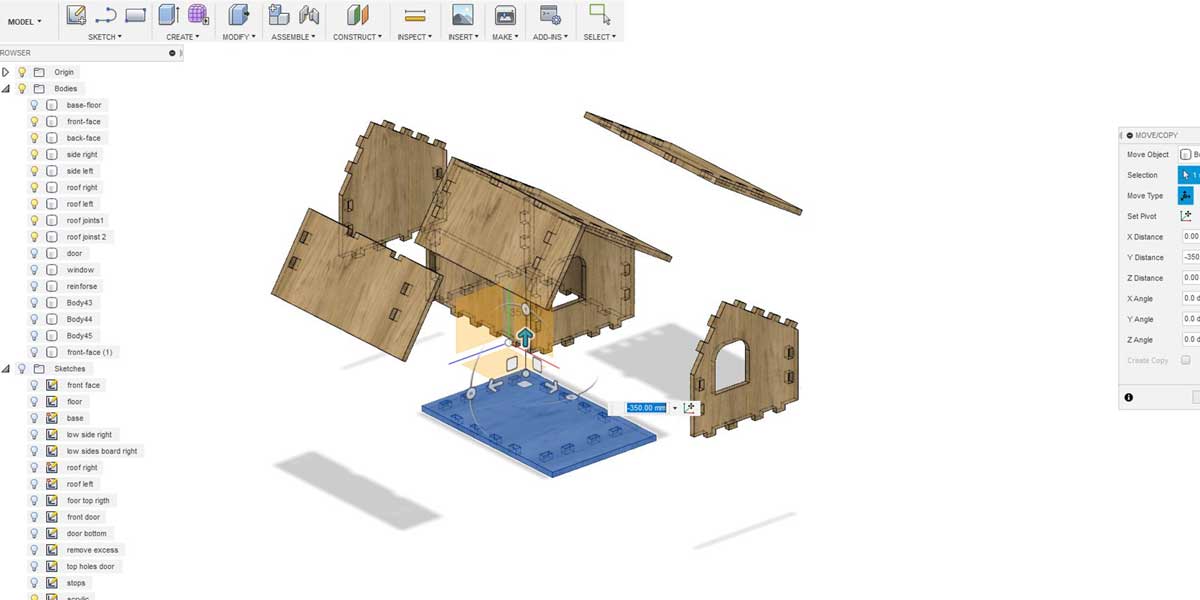
Although this have been intense days I really wanted to use more Fusion 360, so before getting into the
3D model I took several tutorials from youtube to learn better how to use the software and how to use
the parametric function.
I want to keep simple the structure and functional, the main things I kept in mind while designing
where;
1_ The house should have gable roof, as it will be outdoors and it rains a lot in Shanghai water should
run down from the surface.
2_As I will use plywood for the model, the house should be a bit raised from the floor to avoid humidity
and damaging the base of the house.
3_Front and back easy access.
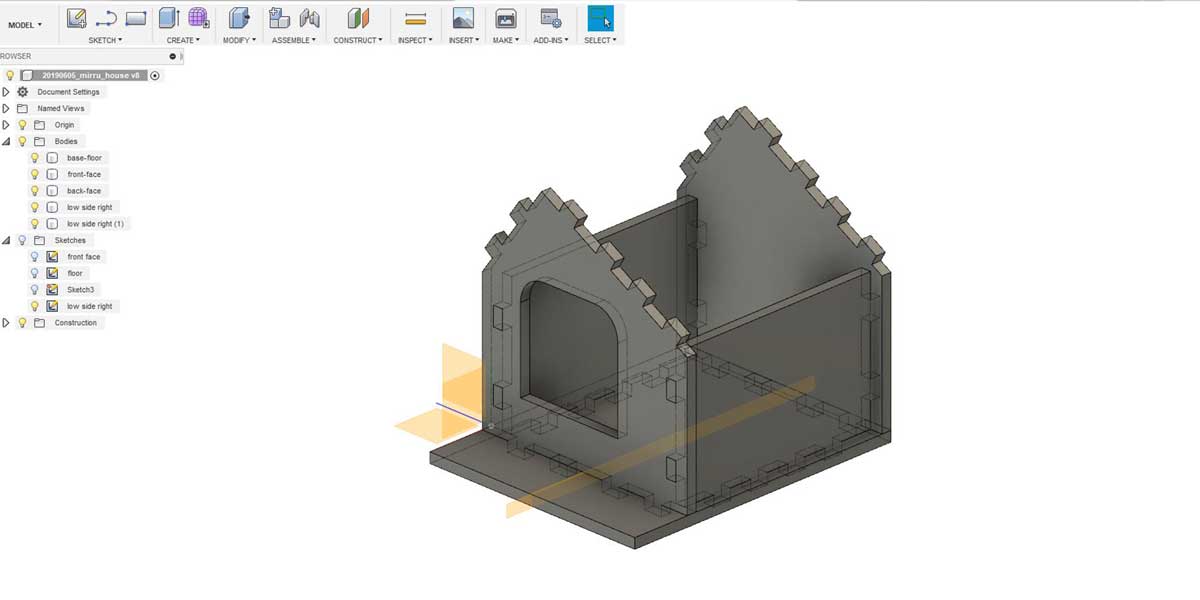
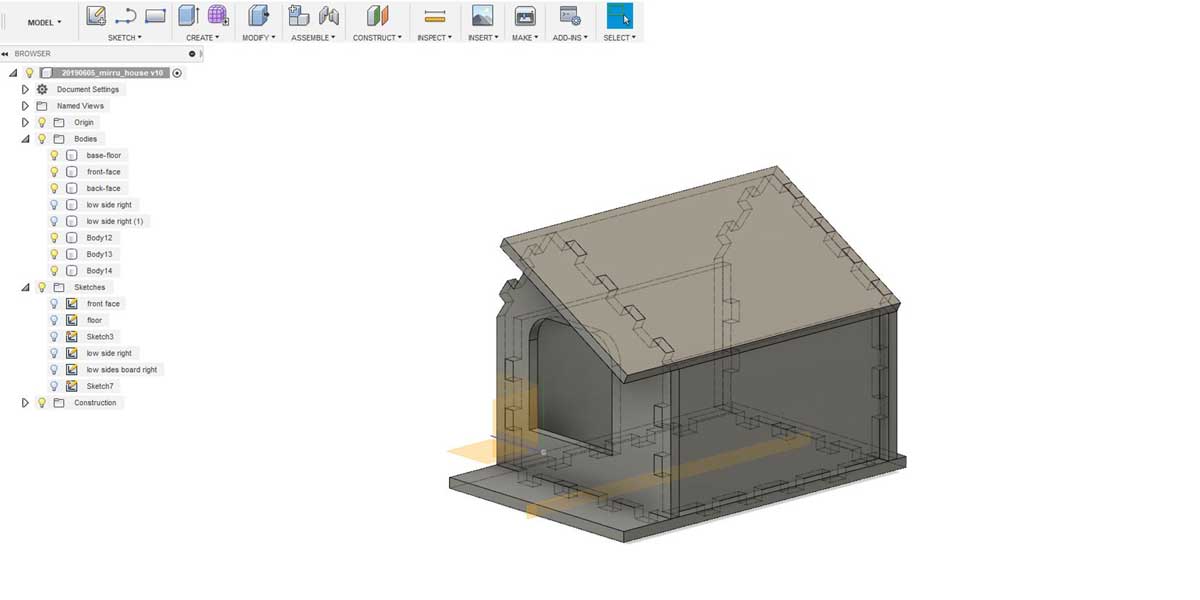
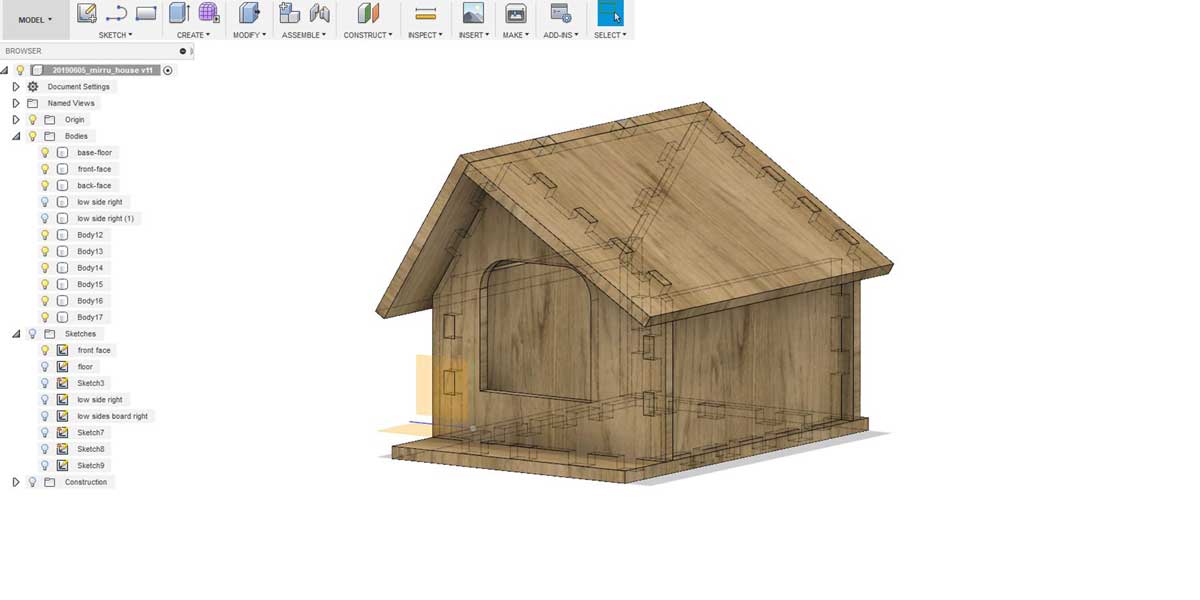
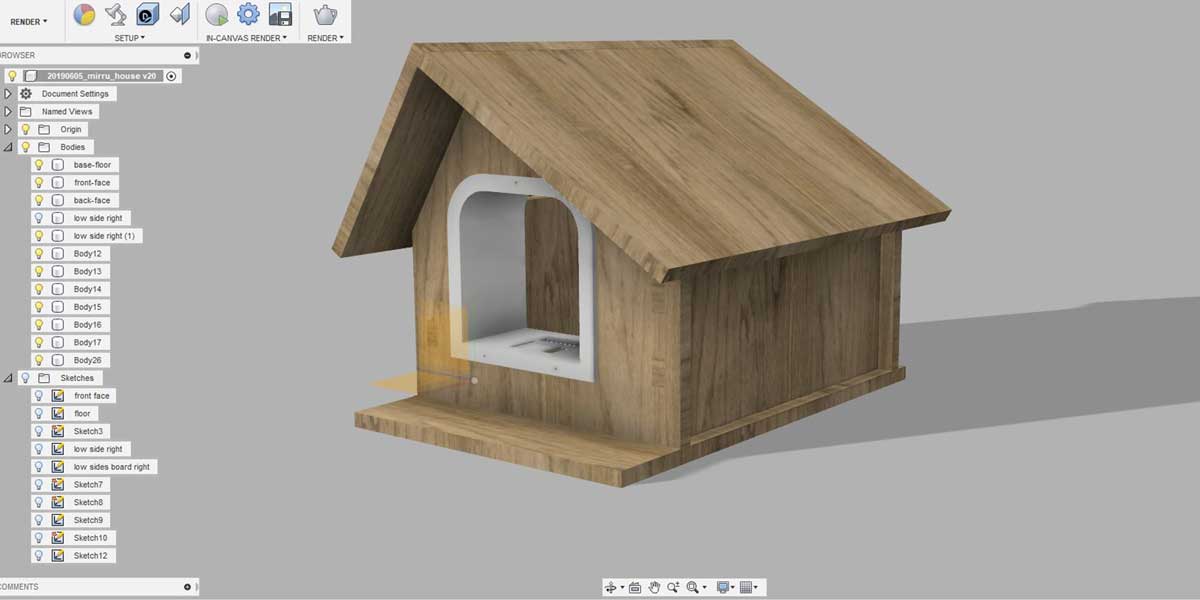
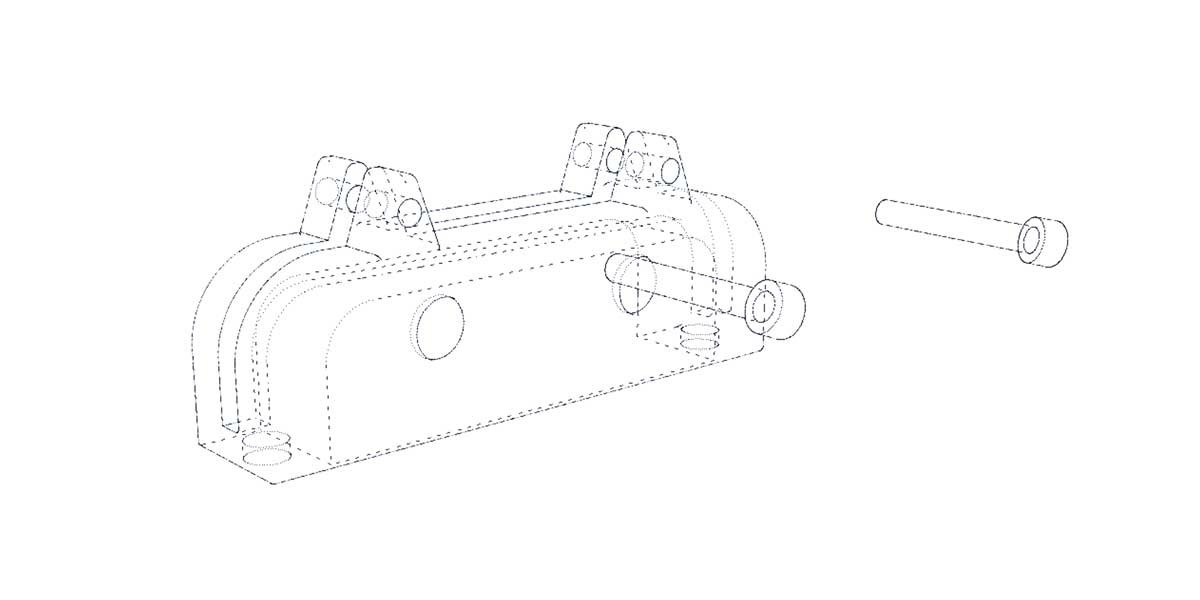
Here is the modelling process of the structure:
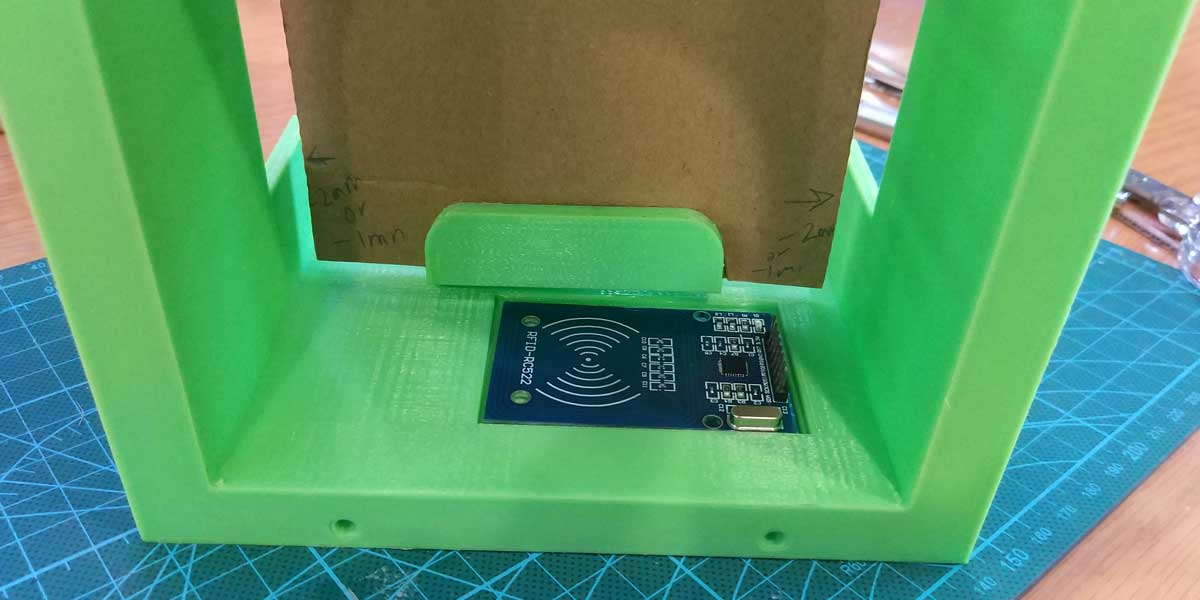
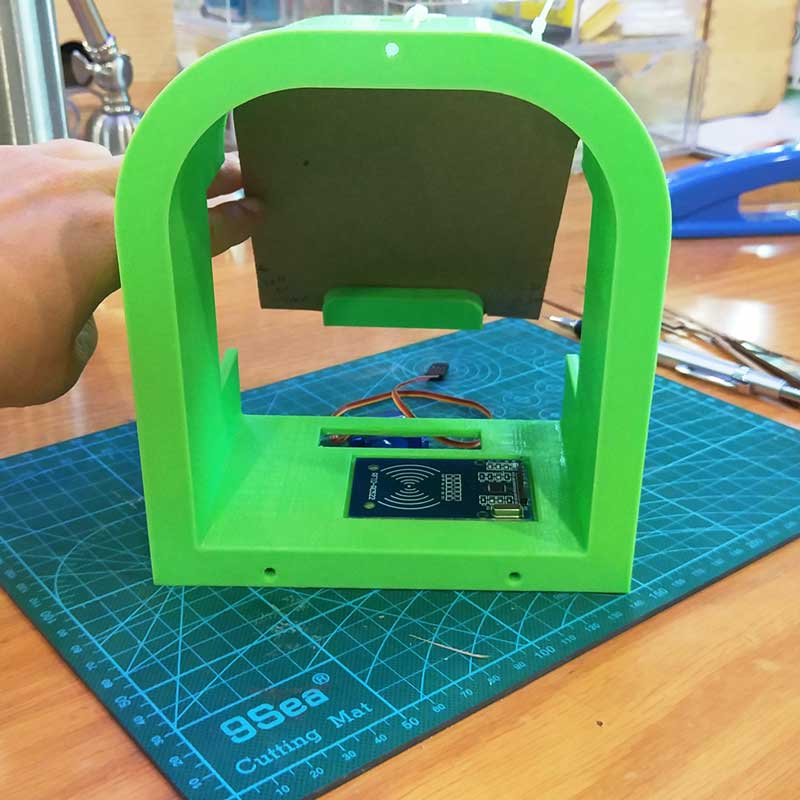
The last image shows the flap system. As the RFID reader I am using has a short range lecture distance (3-4cm), I thought of adapting the flap so that my cat gets really near the reader and unlocks the servo. It is like a small tunnel that will force my cat to go in and get very close to the RFID reader that will be placed on the surface of the tunnel.
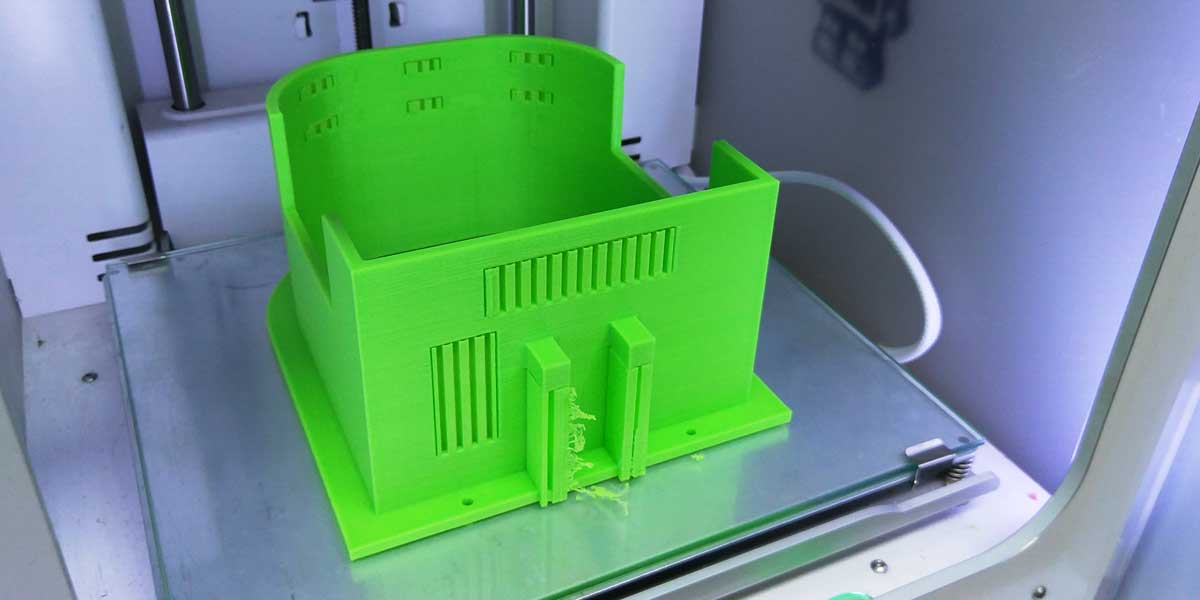
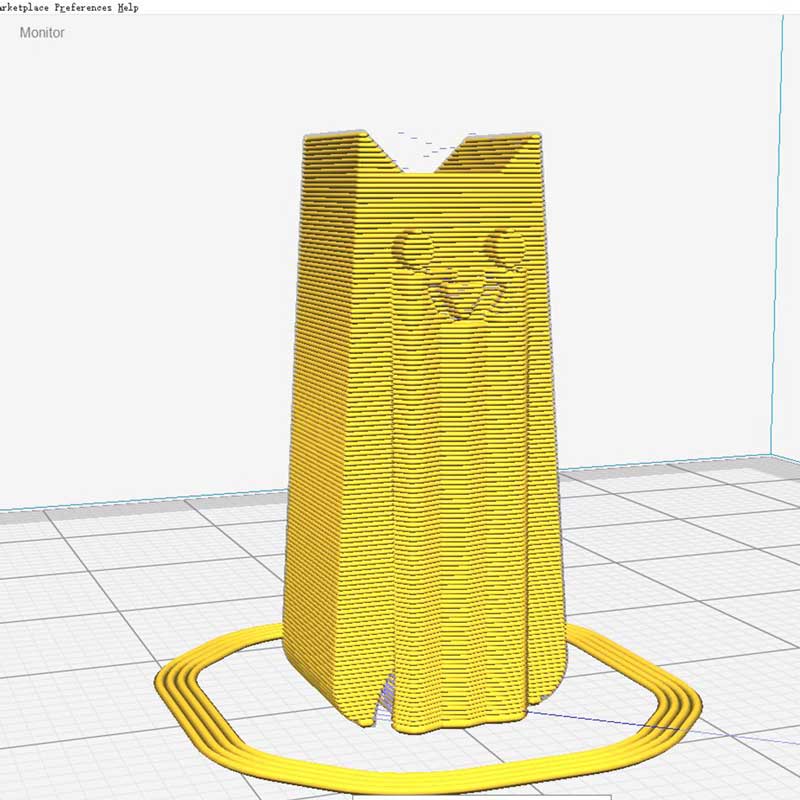
I thought of 3D printing this model, and when I opened it on CURA I saw the time it would take to print
so I decided to make it even smaller otherwise it would take long long time to print. I even removed
some parts of the walls to decrease the material and printing time, I mamanged to reduce the print to
9.5hrs-10hrs, which I left overnight printing.
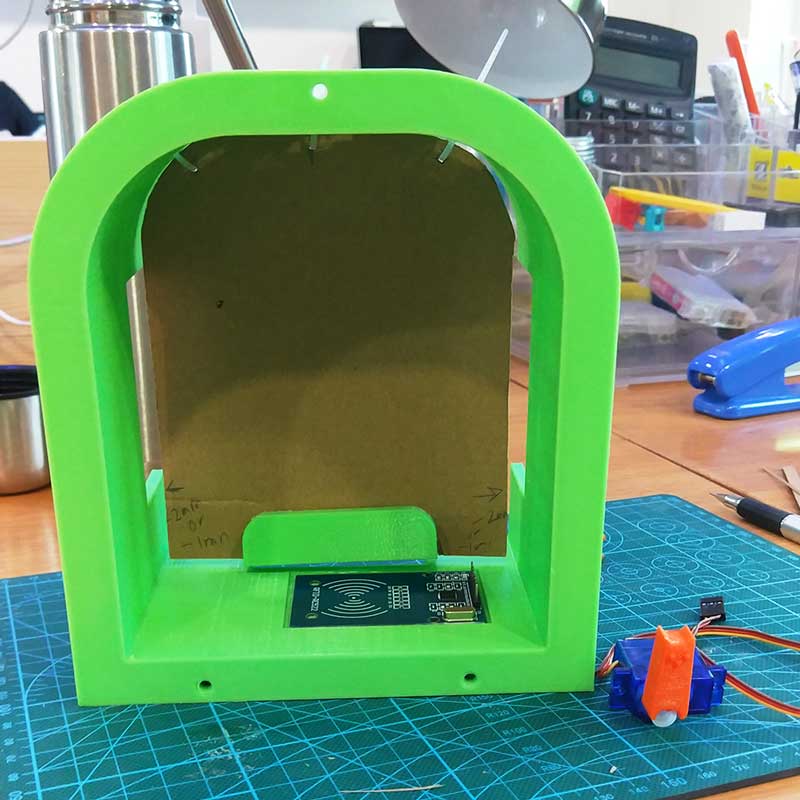
The result came out pretty well. It's a small flap but seems to work, I still need to test it with all
the components.
Good thing my cat is quite small and thin, this is not a flap for fat cats =P )
My instructor gave me a nice input for the locking of the servo, so i developed further the idea and this is the system to lock the the servo.
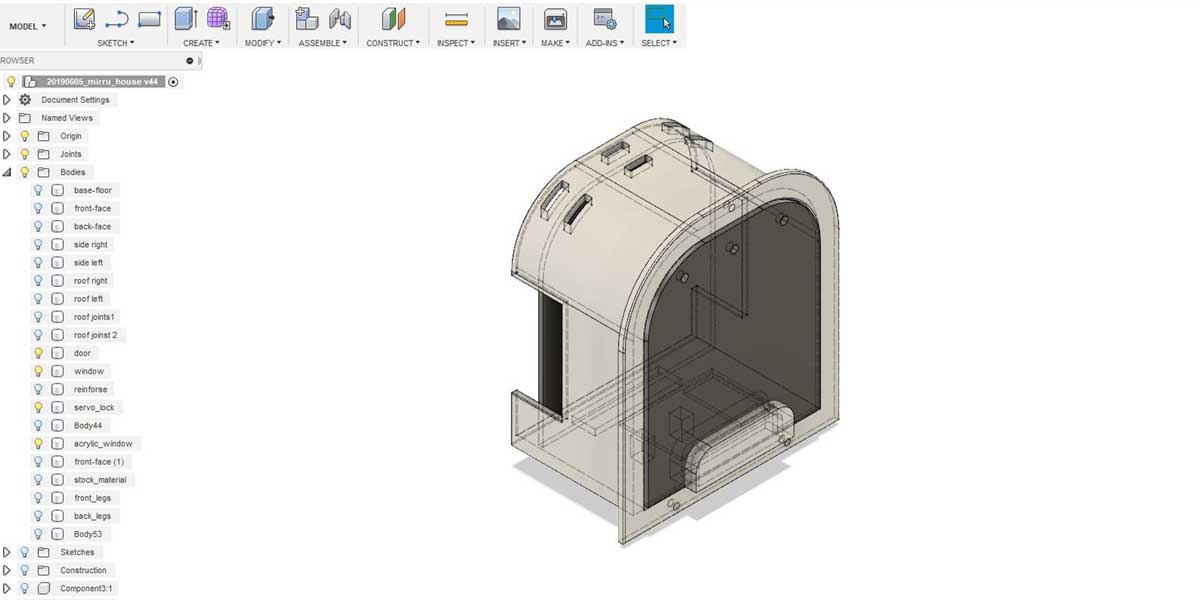
But there was a small issue... as the tunnel has a round shape on top the acrylic flap can't open all the way in or out... so I had to cut a bit more the original shape of the window in order for it to open all the way in and out.
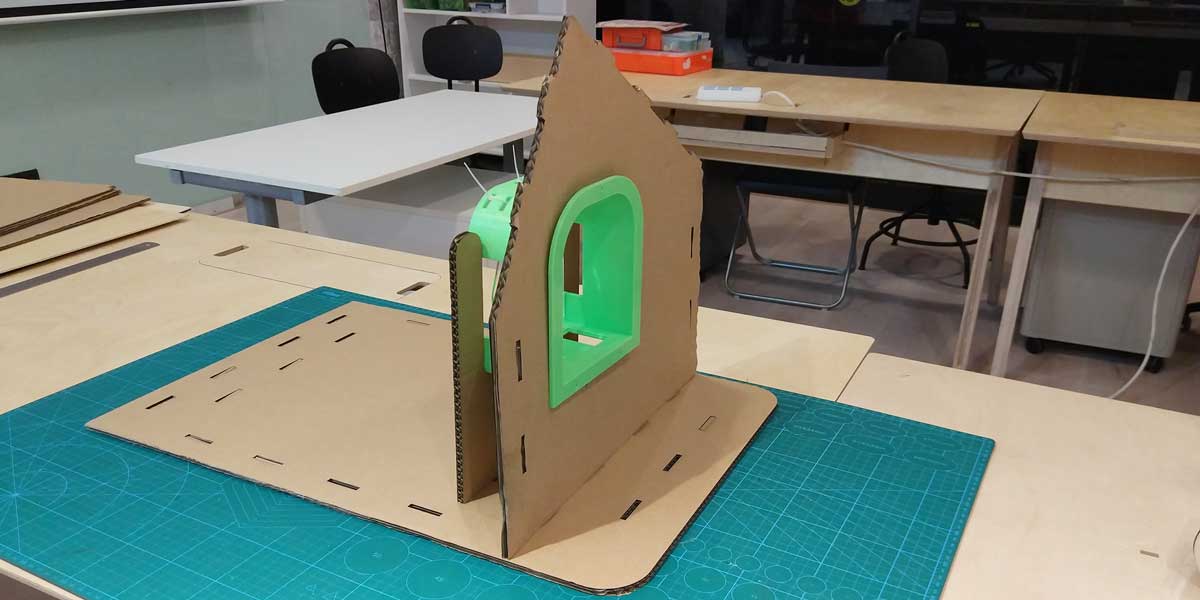
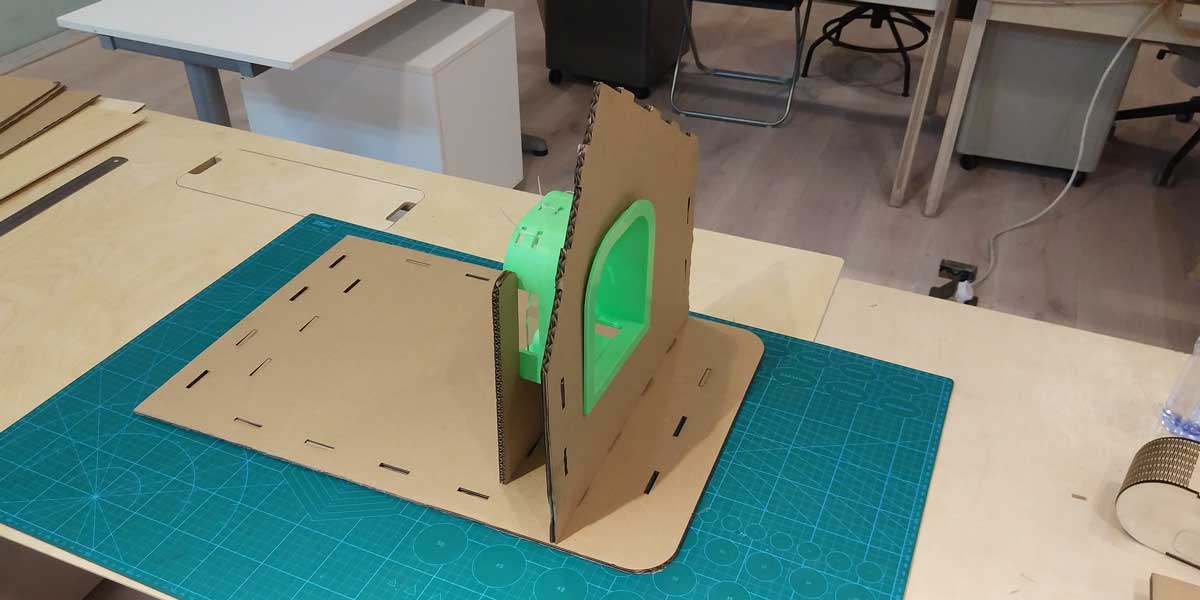
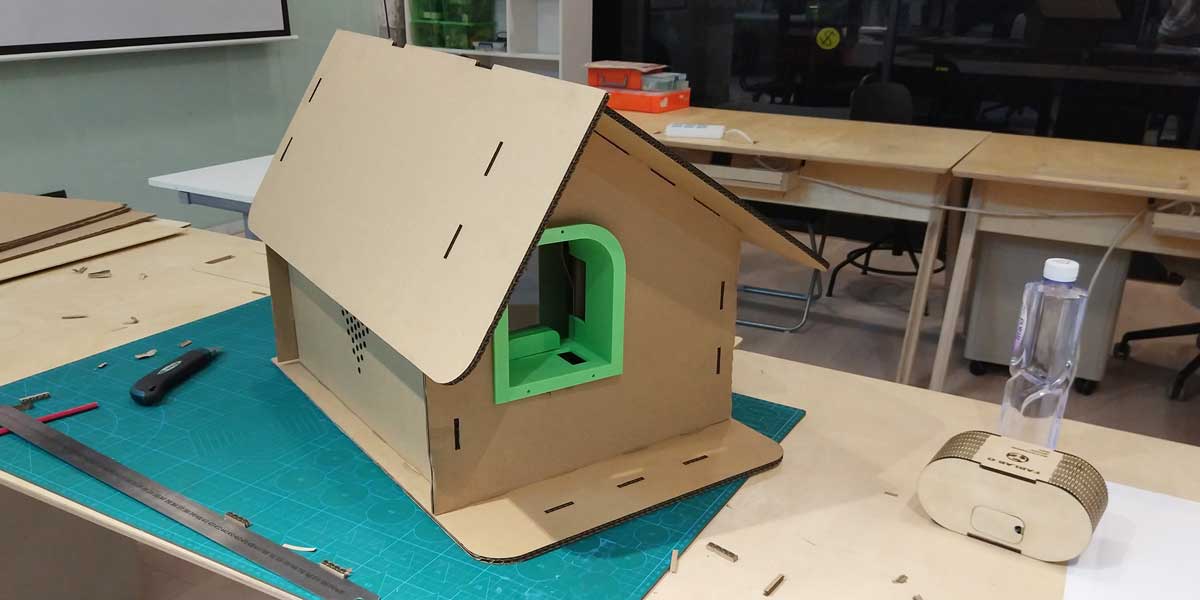
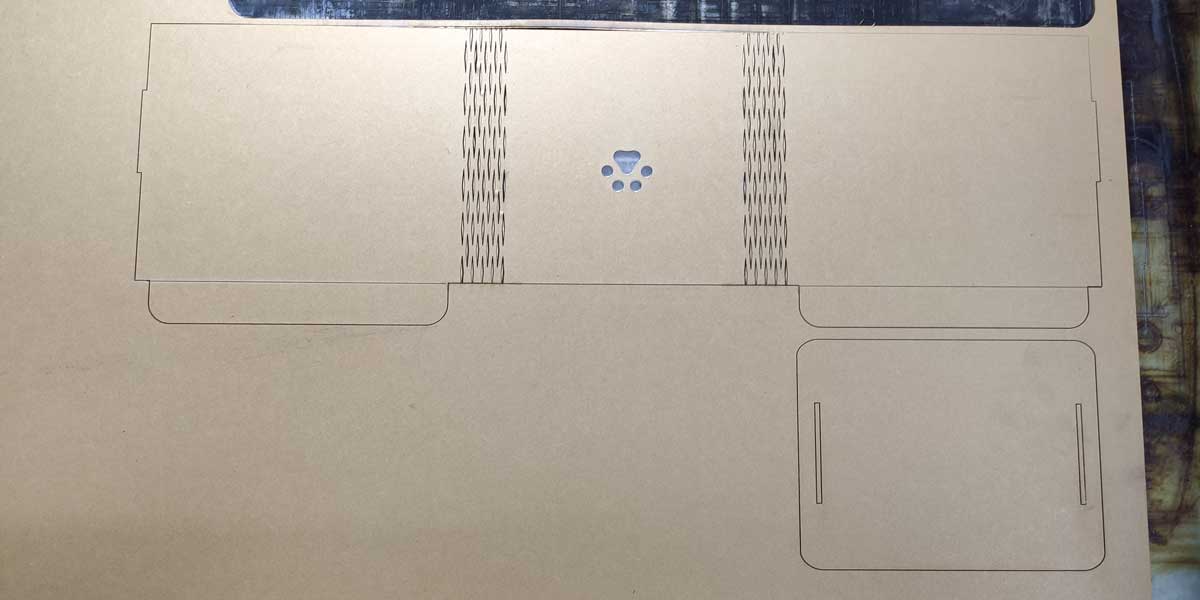
I then proceed to laser cut in 5mm thick cardboard a scaled model of the structure to see how it worked:
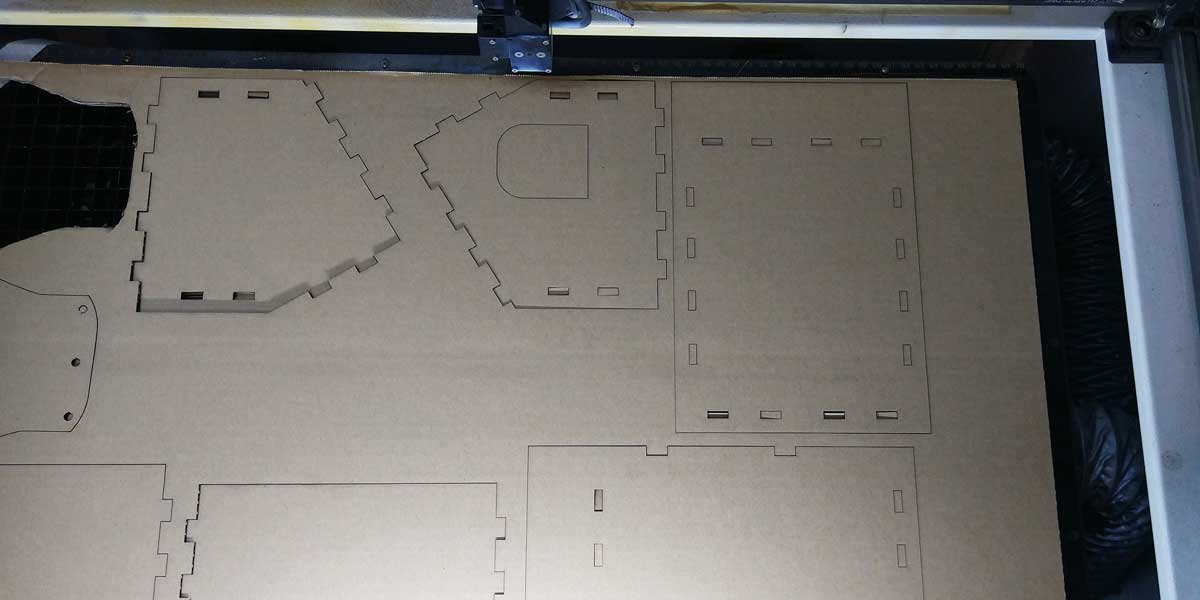
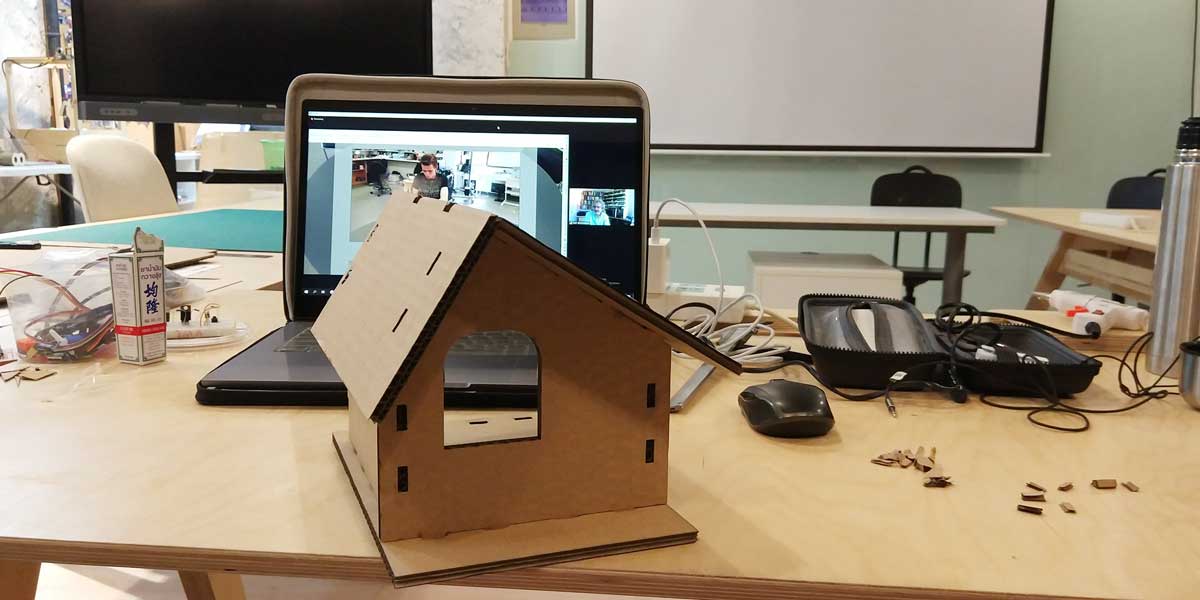
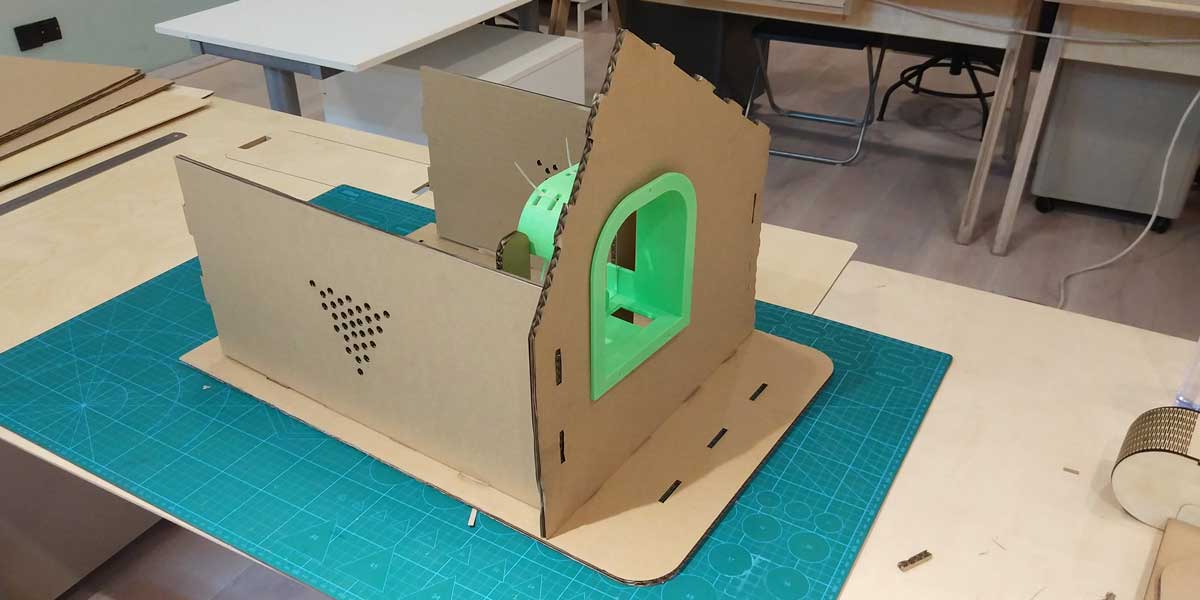
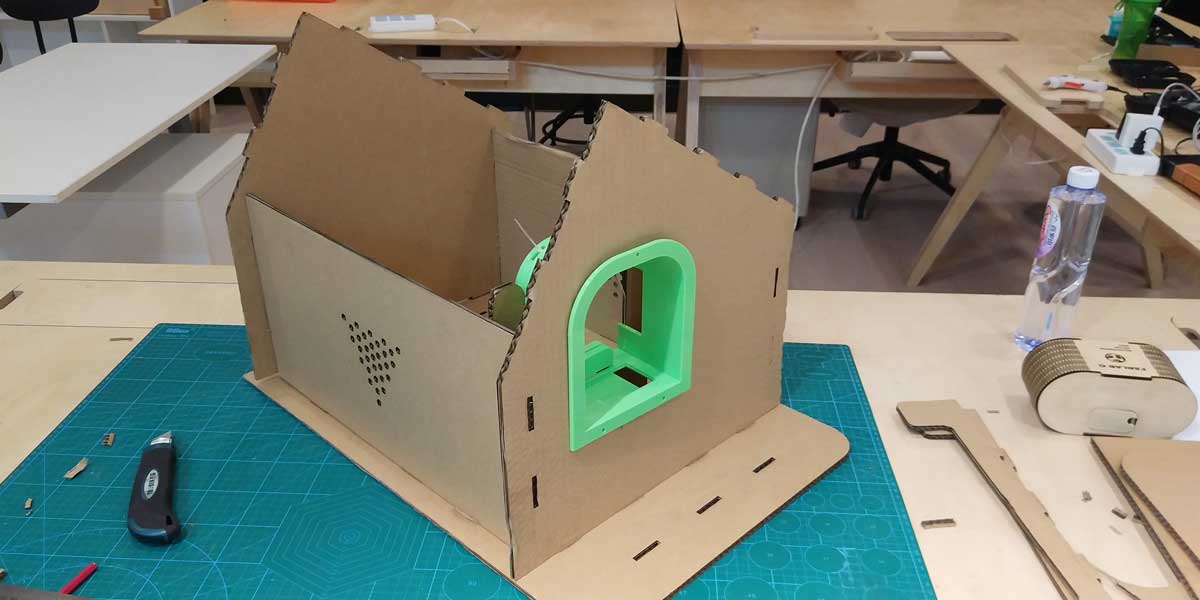
Then another test scale 1:1 with cardboard, I need the 1:1 model to see how the tunnel seats and fits, this helped me a lot because I had to change several things on my model of the structure and I need to redesign some parts of the flap tunnel where I planned to attach the servo motor.
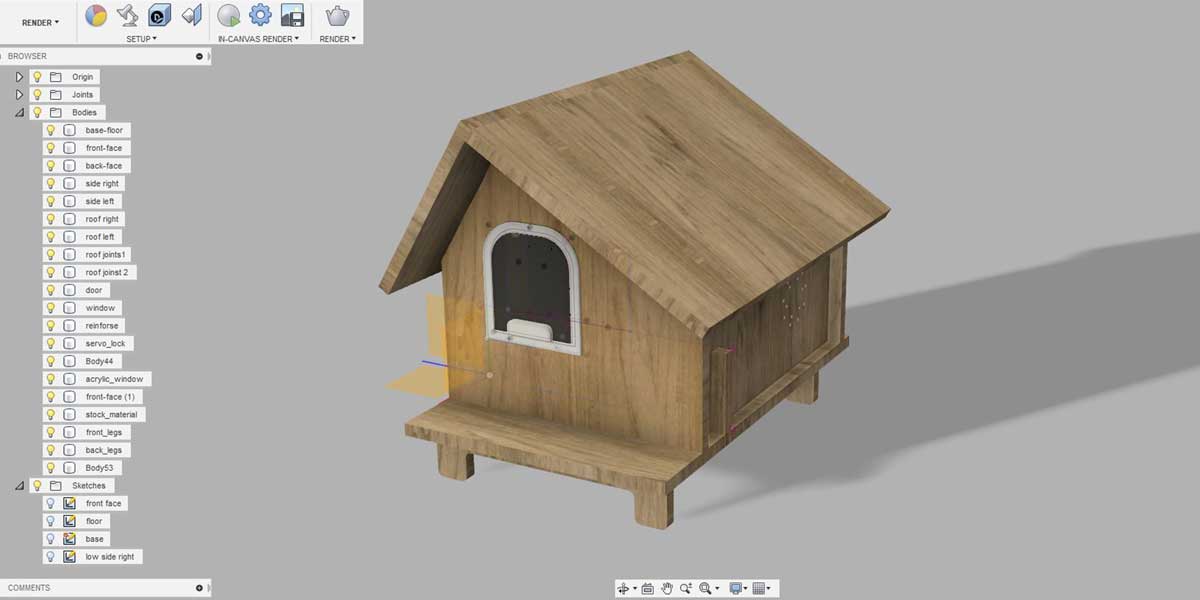
After doing several cardboard prototypes I did some modifications to the structure. I rounded the roofs, the base, added some lateral holes to let the air and light pass through and I added front and back legs.
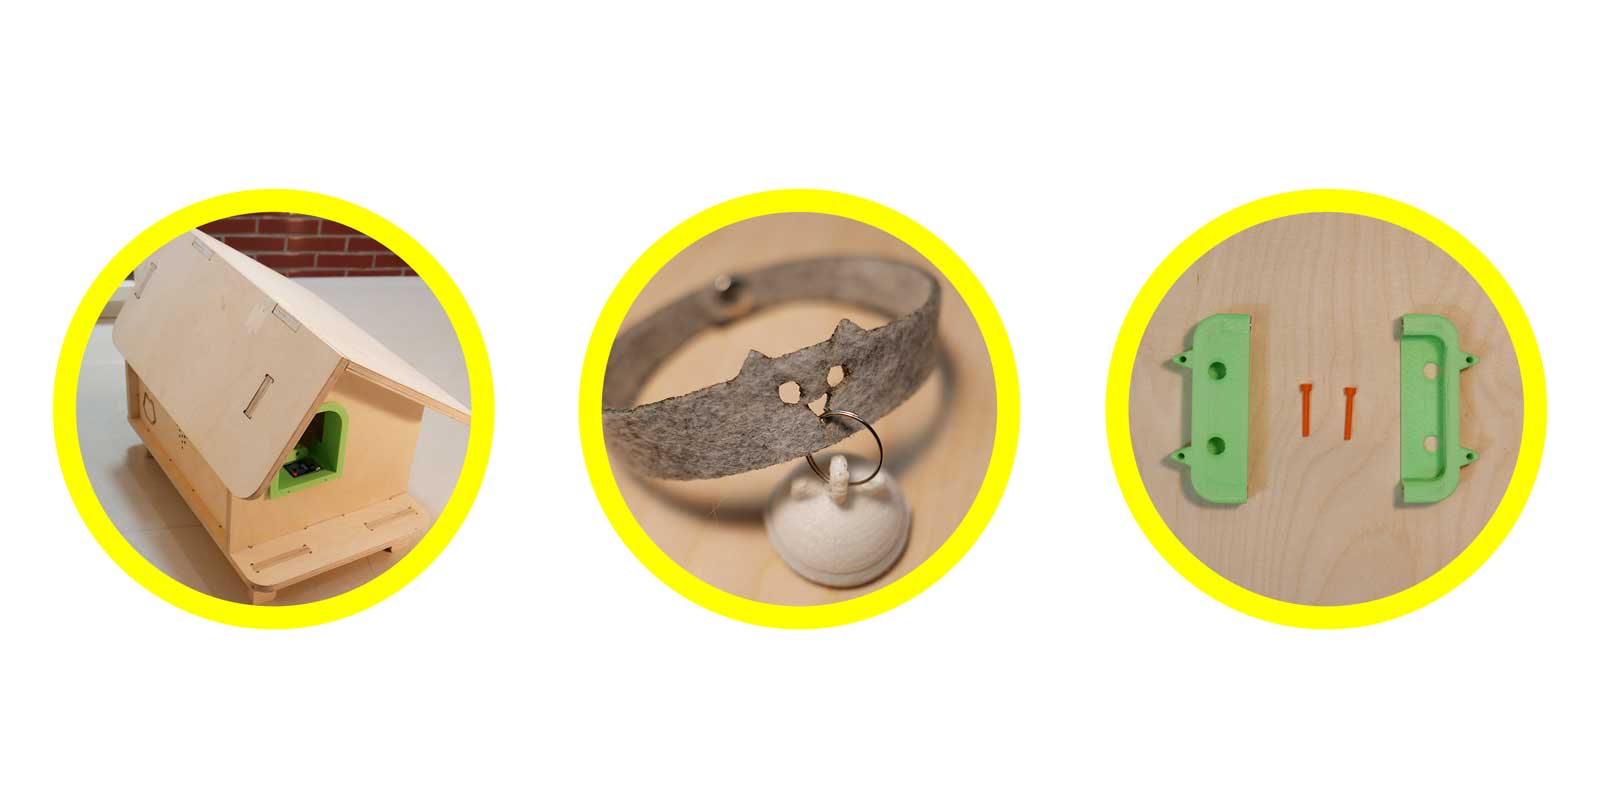
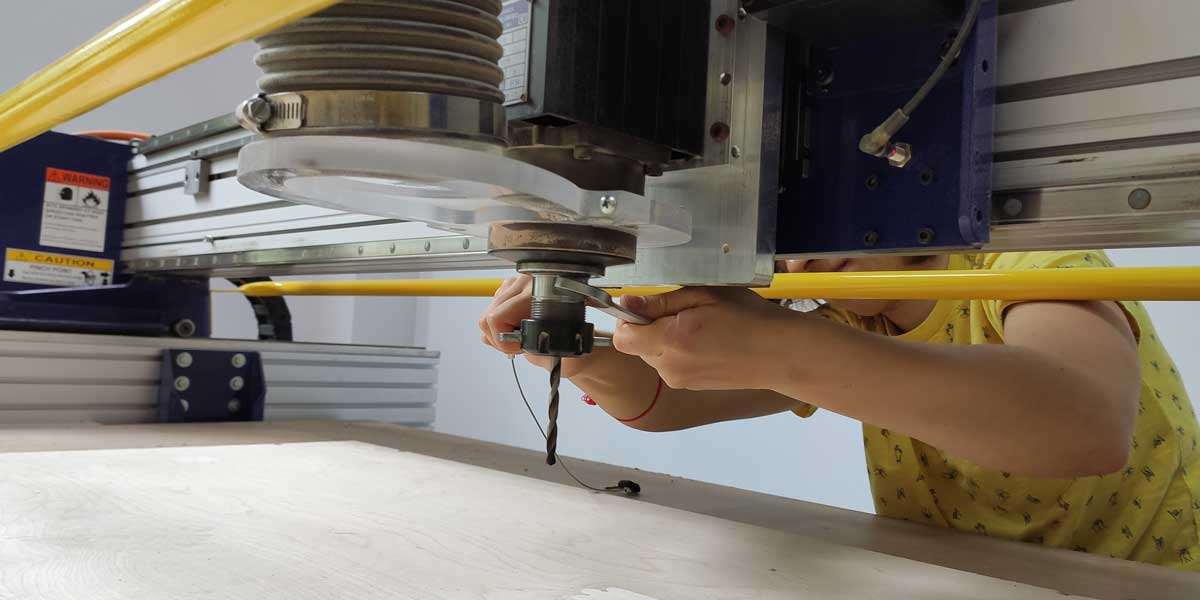
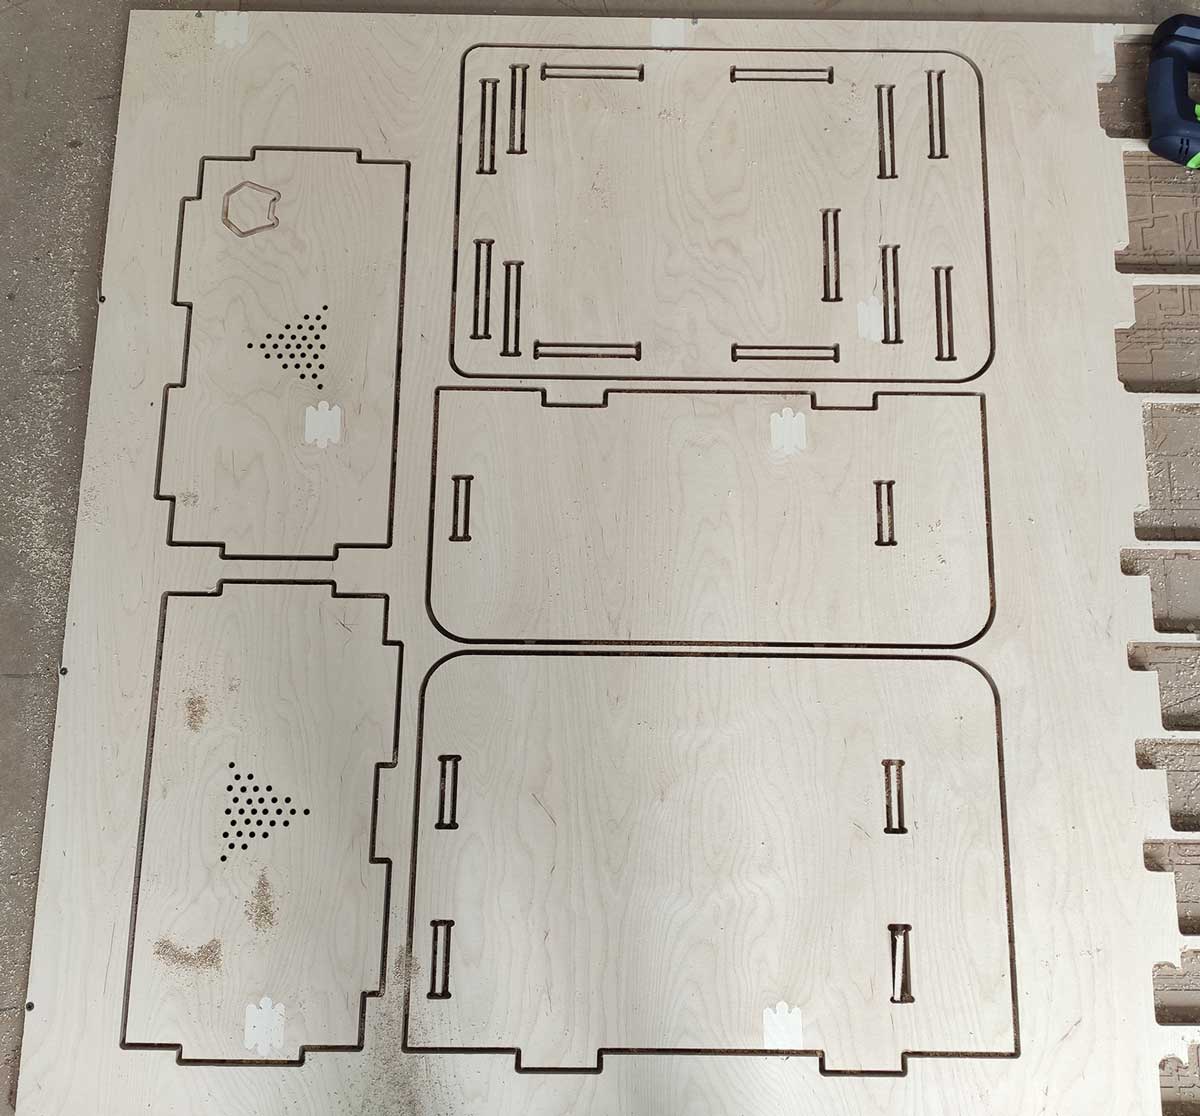
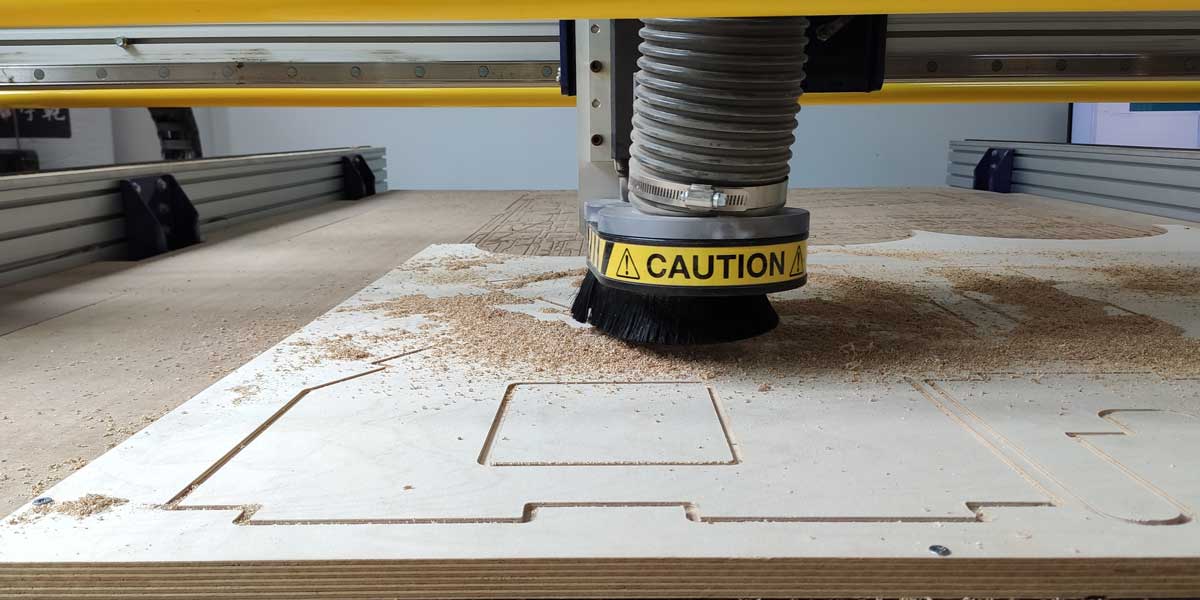
CNC MILLING
Oh my favourite machine of the entire course.
I used the Shopbot CNC machine we have available in the lab to cut the structure of the house, and I used
18mm plywood to make the prototype.
The type of tasks and settings I used to cut my structure were:
_1 POCKETS: used two settings, one for the deeper pockets of 14mm I used upcut endmill
spindle 18000RPM feed rate 4.2inch plunge rate 1.0sec. And for the 6mm depth pockets I used downcut
18000RPM feed rate 3.6inch/sec and feed rate 1inch/sec
_2 DRILL: I used a drill endmill 12000RPM and 10inch/sec plunge rate
_3 CUT: downcut task for the first layer (18000RPM, 3.6inch/sec feed rate, 1.0inch/sec plunge
rate
and conventional), and upcut task for the second layer (18000RPM, 4.2inch/sec feed rate, 1.0inch/sec
plunge rate).
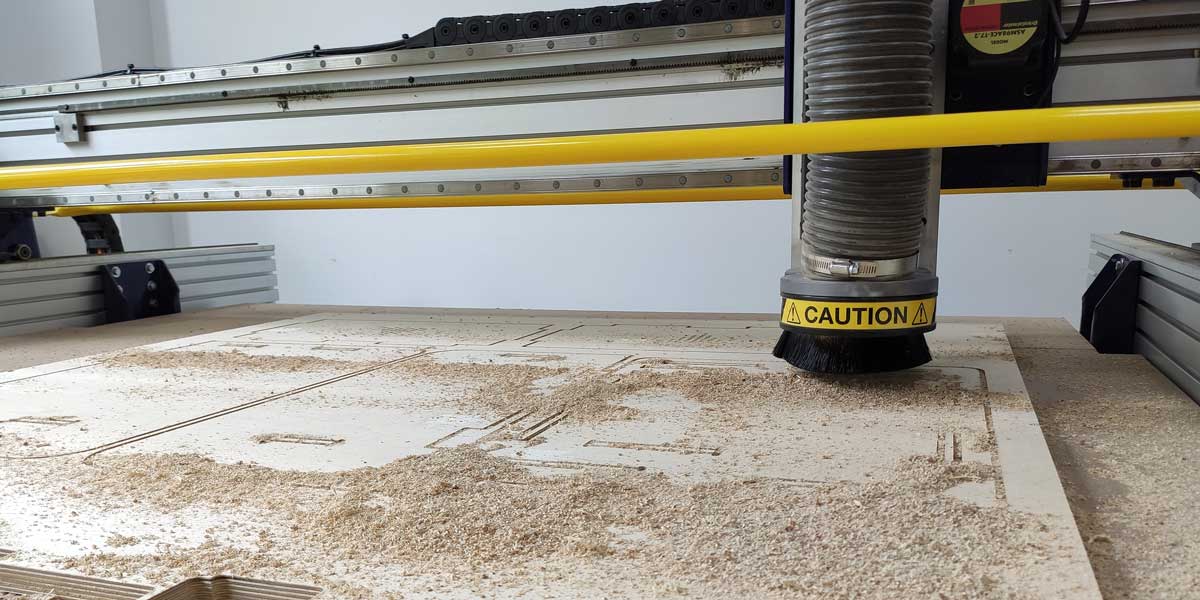
Here are some photos of the cutting progress and some more videos of the assembly.
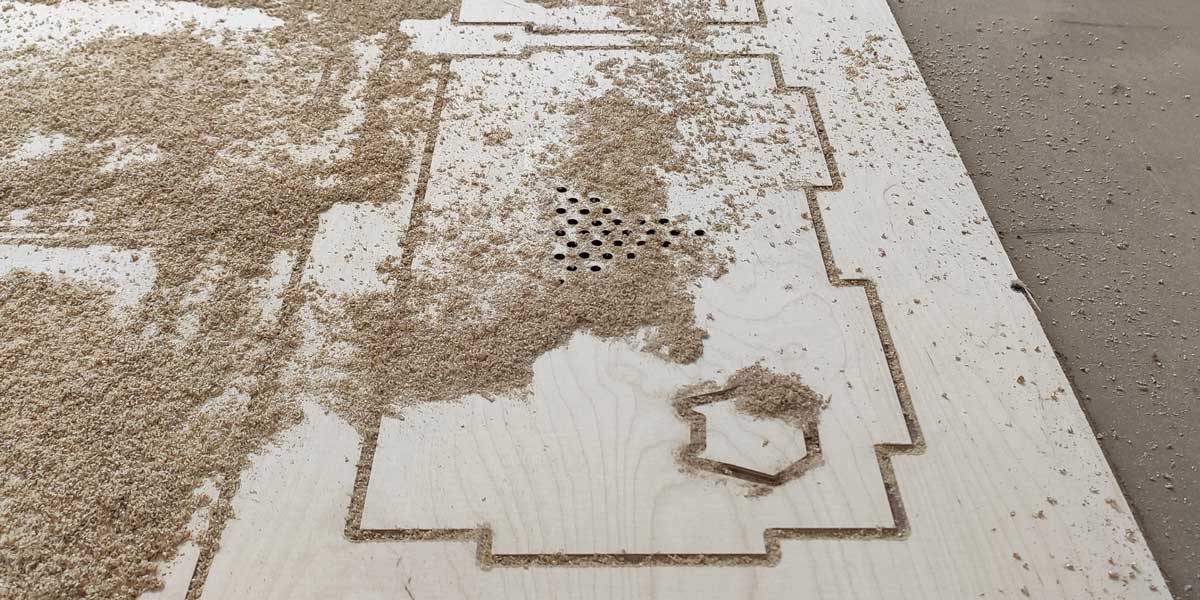
While doing the drills path I noticed the settings I used where not the correct ones, the plunge was too fast, you can see that the holes look very dark as if the wood burnt a little bit, and the holes didn't cut all the way through. The settings I used where not the best for drill, I need to figure out what is the best setting of this.

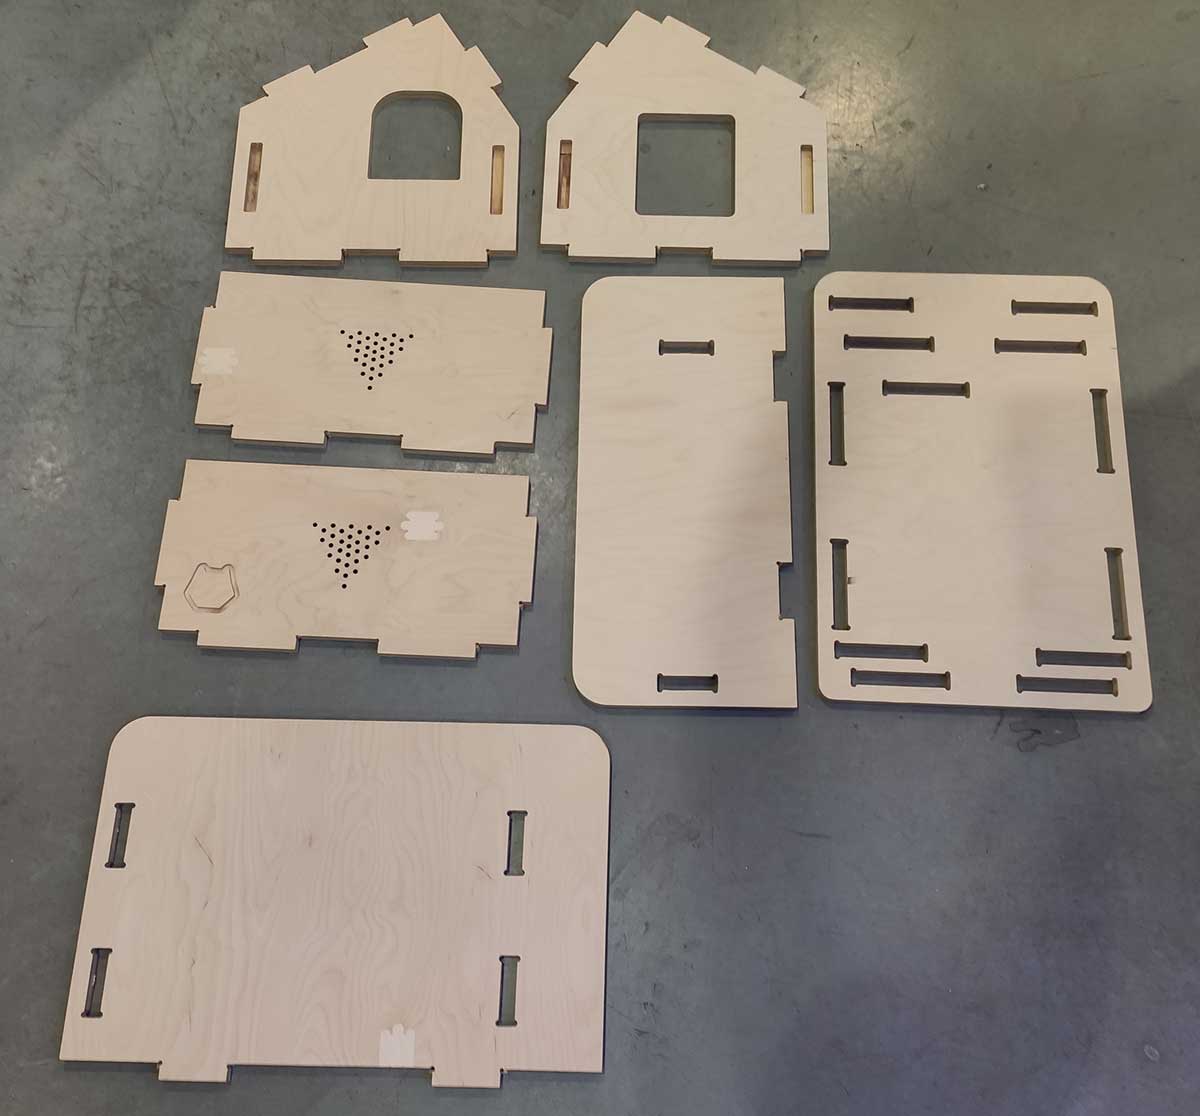
I did some minor mistakes...I forgot to add the dogbones on all the "male" aseembly parts of the
structure, I
did add the dogbones to all the "female" assembly parts. So after cutting the structure I used a
drill press
to add the dogbones where I forgot to...
Also, this is more that I need more practice using the CNC machine, but the pockets I did of 14mm I
used upcut endmill and the chips came a lot out ofc, as you can see on the photo below. But after
sanding those pieces the pockets were well.

This pocket, mirru in-out logo came out pretty well:

CNC MILLING VIDEO
The following is a video of the process while doing the CNC cutting:
ASSEMBLY VIDEO
This is a video that shows the assembly process of the structure:
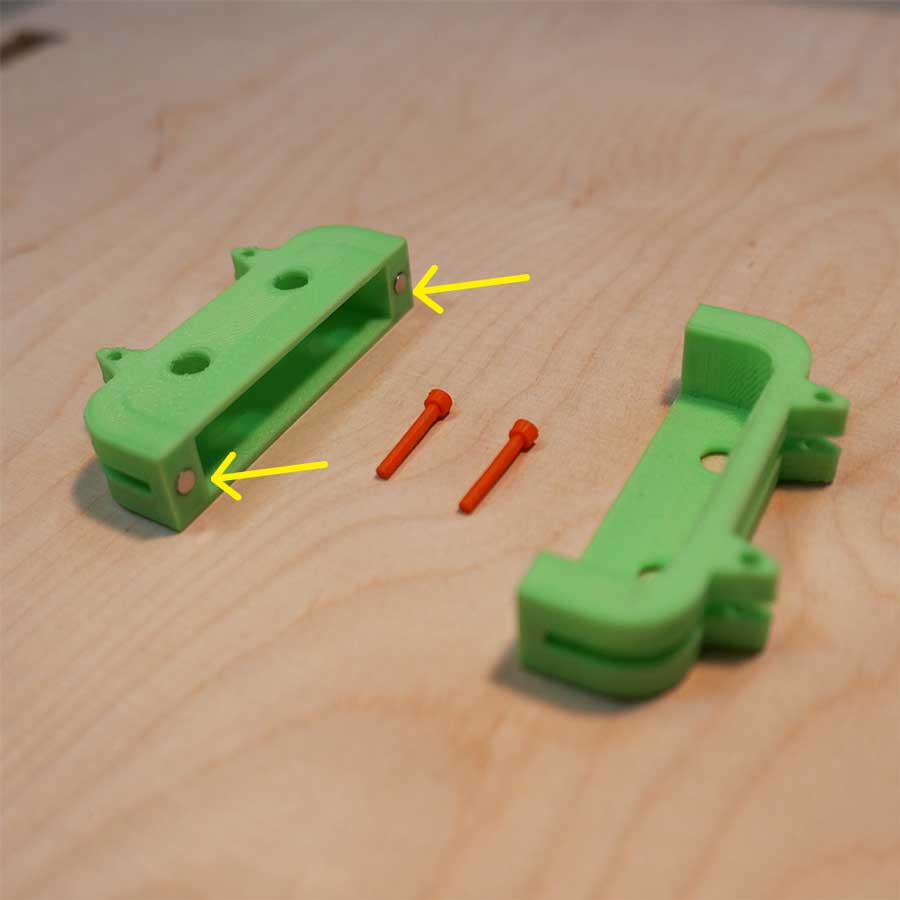
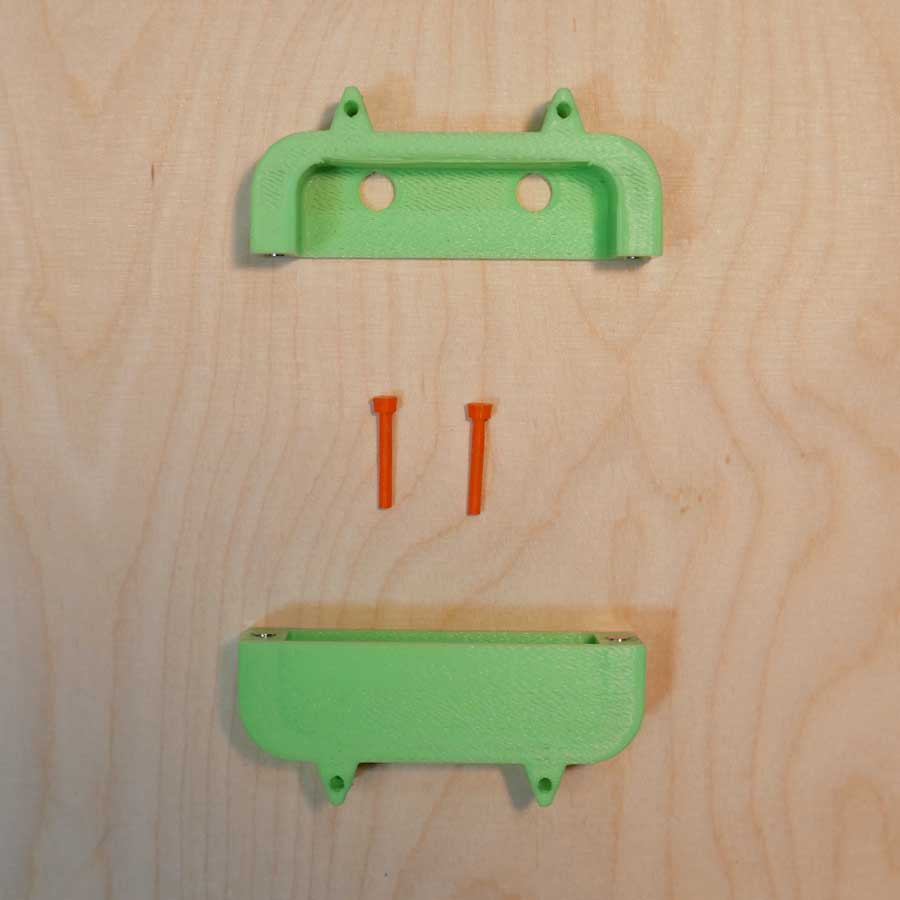
FLAP CLOSING SYSTEM
For the closing system of the door I designed two different systems to enclose the servo so that the
user can change them and adapt the logic of the system to its own needs.
Numer 1 doesn't allow the door to be open from the inside, unless using the closing/opening
app.
Numer 2 allows the door to be open from the inside any time, and from the outside only
reading the right RFID TAG.
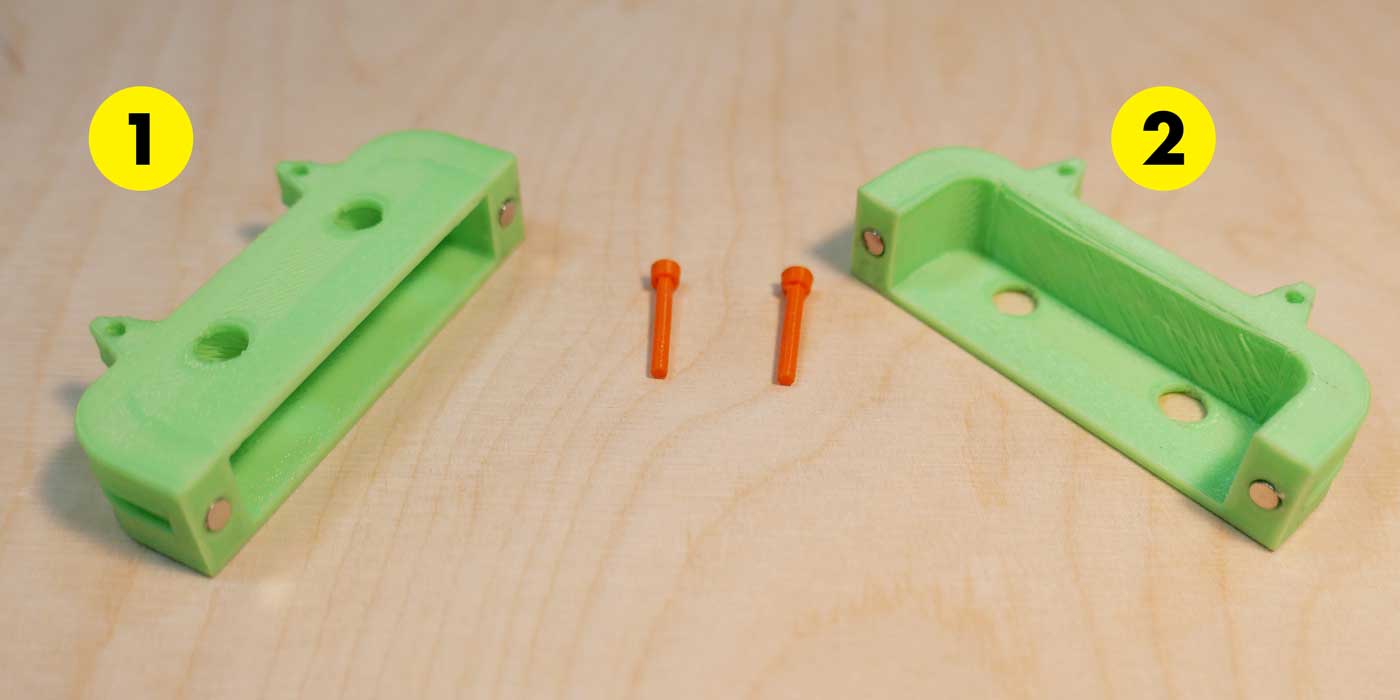
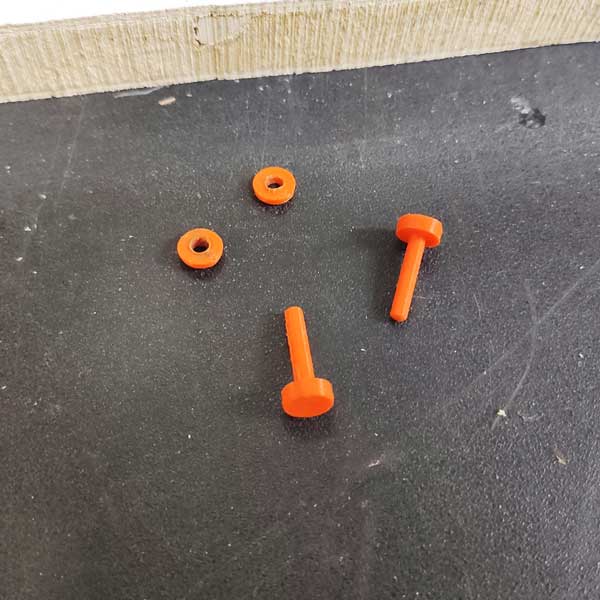
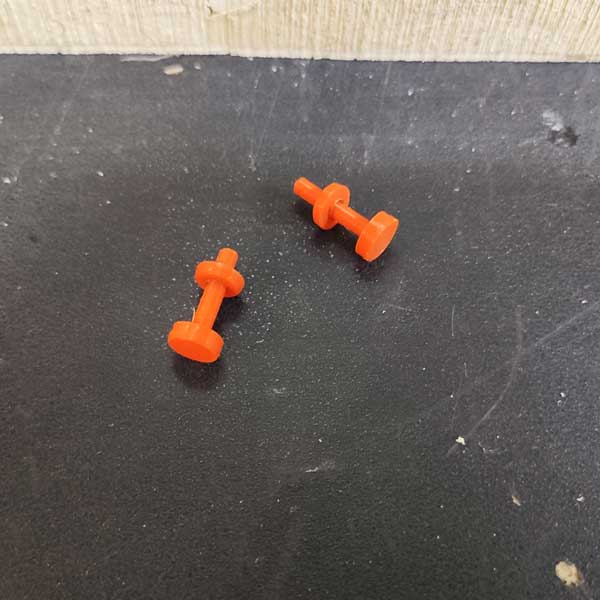
This small screws serve to change it easily and attach it to the door.
I added as well two small magnets so that the door aligns when opening/closing it (the tunnel has two other magnets as well).
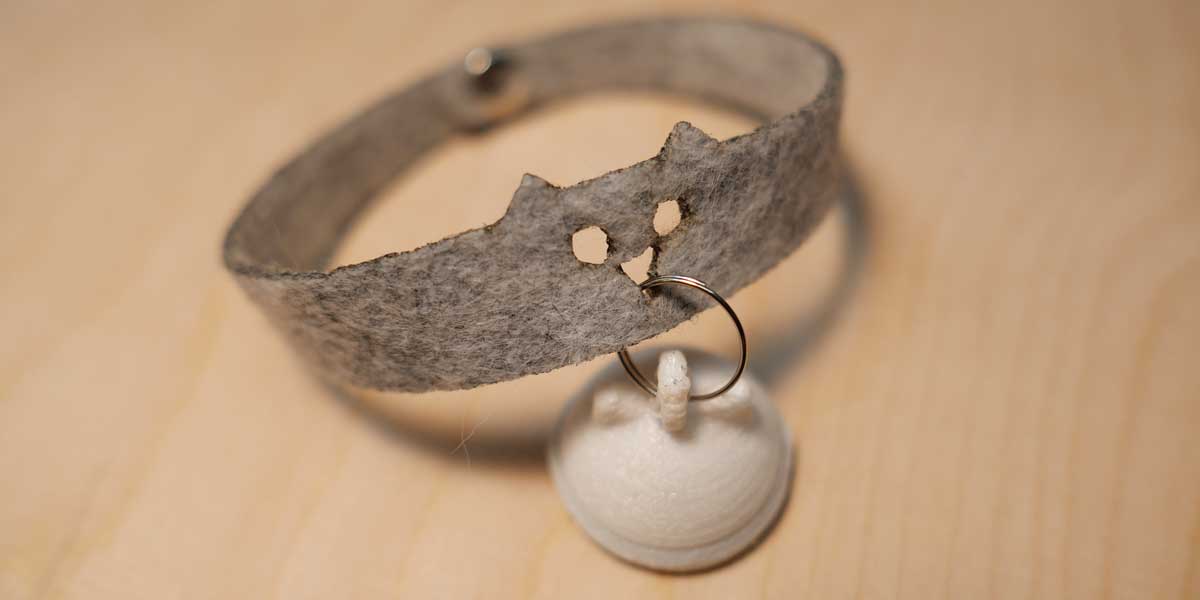
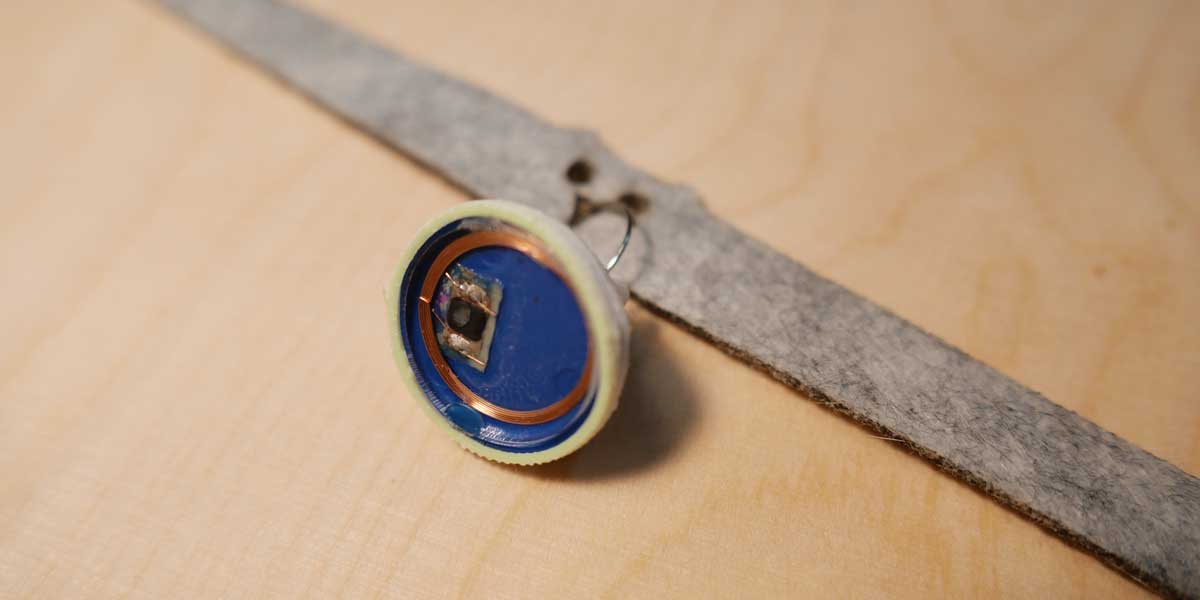
CAT NECKLACE
I designed a prototype for the necklace of my cat, I used felt for the necklace and I added a pressure button for the closure.
I went to see another maker to put the pressure botton as I didn't have the time and the tools for the size of the button I was using, so helped by Mr. Wang we added the pressure buttons to the necklace.

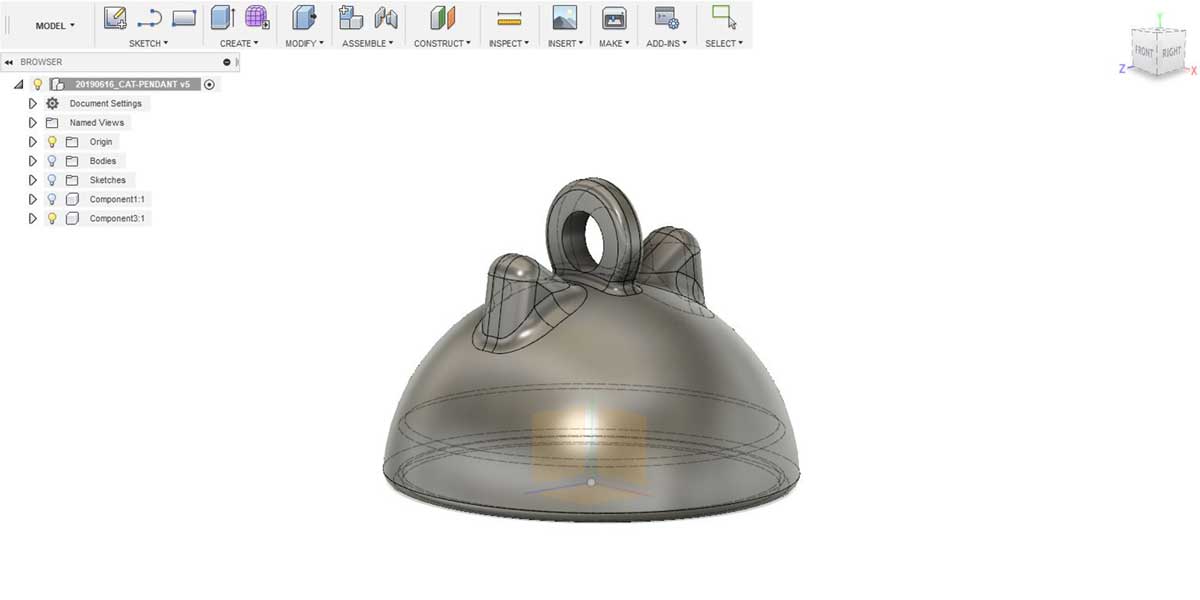
And for the tag, I designed a pendant that has the tag integrated in a way
so that the reading is easier when my cat is passing by the tunnel.
I used TPU (flexible filament) for the pendant, so that I could fit inside easier the RFID tag.
BACK DOOR TUNNEL
The idea of the house is that the back door is connected to the window of our house, and for the time being I did the prototype of a tunnel that attaches to hole that is in our window.
I used transparent acrylic for the material and a heating gun to bend the corners of the tunnel.
\
EXTRA ITEMS
I tried to follow Neil's advice as mch as possible trying to fabricate as many parts of my project as
I could and limit the parts I had to buy as much as possible.
I 3D printed small parts like screws and nuts for my prototype as well.
IMPROVEMENTS
_1 Improve servo motor attachment
_2 Improve back door tunnel
_3 Remove from the tunnel extrure the holes for nuts (not necessary)
_4 Remove from the structure house the internal reinforcement I built for the tunnel. It is
unnecessary as the tunnel is quite strong and the weight of the cat won't break it, it can stand
alone.
TASKS COMPLETED
_2D & 3D DESIGN ✔
_SUBTRACTIVE MANUFACTURING ✔
_ADDITIVE MANUFACTURING ✔
_DOWNLOAD FILES
_HOUSE
STRUCTURE
_HOUSE
STRUCTURE DISSASEMBLED (modified with correct joints)
_VCARVE
FILE
_SERVO
MOTOR
CAT-HEAD
_SERVO
LOCK
SYSTEM V1
_SERVO
LOCK
SYSTEM V2
_SCREWS
_NECKLACE
PENDANT
_NECKLACE
_ACRYLIC
FLAP
_ACRYLIC
TUNNEL