
On the wildcard week I opted to develop and prototype a specific part for my Small Nursery - The seedlings tray. For that I explored the use of burlap and epoxy composite.


I extracted a counter-mould in Fusion, by using an offset inner surface and turned it into a solid by stitching all the surfaces and adding caps. Finally I splet it in two parts that would fit the styrofoam thickness I had available.
Afterwards, I programmed the machining process using Autodesk Fusion 360 CAM manufacture module. For both I used a similar machining strategy: firstly a roughing path aimed at the use of a 6mm diameter flat-end mill, followed by a smoothing finishing path with a 6mm ball nose.

Producing the counter-mould:


For the Machining process I used the large CNC at Fablab Lisboa after a couple of very frustrating attempts in an overnight stay at Fablab FCT. The X-Carve model is definitely not adapted to this kind of machining process.
(A big mess and a couple of tries, up until 5:00 AM)
1. ROUGHING…

.jpg)
2. SMOOTHING…
.jpg)
.jpg)
2. A BIT OF SANDING…
.jpg)
... AND…
.jpg)
VOILÁ!
.jpg)
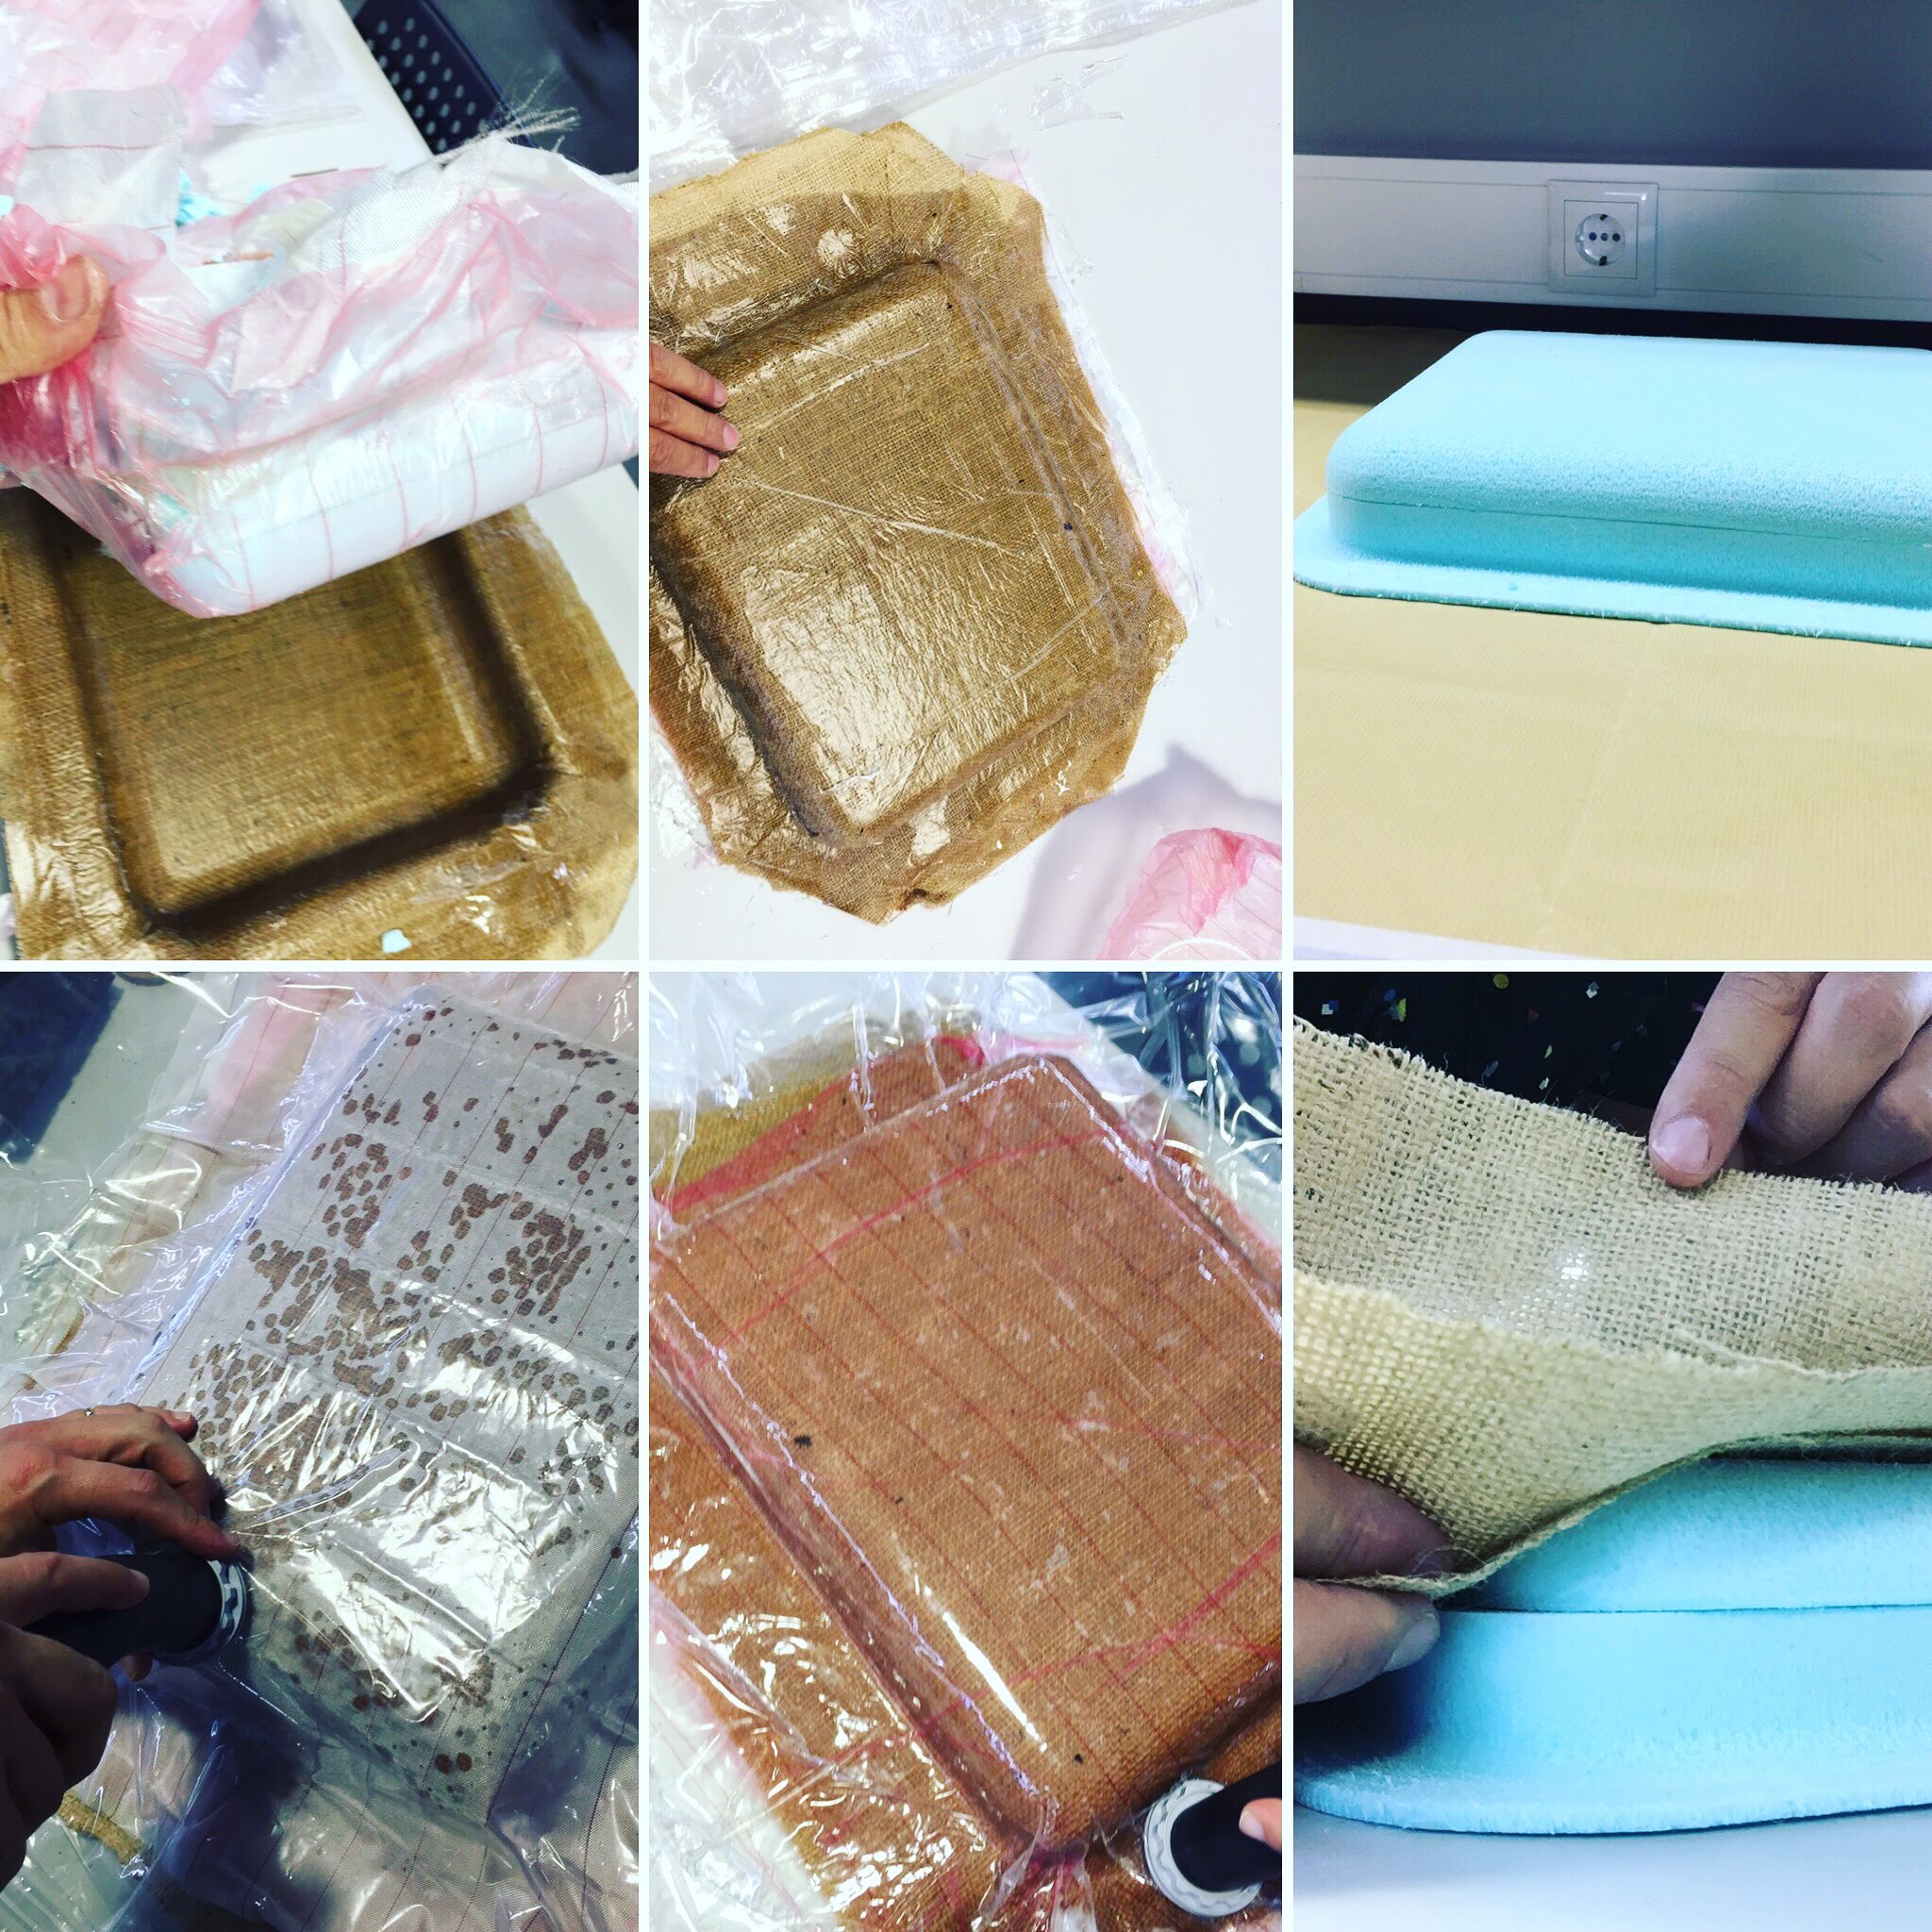
Afterwards I took the model back to FCT Fablab where I prepared everything. I started by cutting the 3 burlap sheets adjusting the corners with small cuts in other to achieve the desired shape and reinforce the corners.
After studying some vacuum bagging possibilities,

and the materials available in our local lab, as well as my colleagued previous experience, I came up with this:


I photographed this part, mostly to show the final result and how the layers got homogeneous through the vacuum process
Finally I cut the remaining borders in the electrical saw:


