
My input device needed a cover. I started by modelling it on Fusion360 and soon noticed that it would be feasible to try and make it on through the moulding and casting week assignment.
 render of the probe
After grabbing the two modelled parts, I soon noticed that one was not possible to carve both. To explain better, I started by designing the exact shapes that I wanted for the moisture probe casing. After that I took the mould out of the shapes in order to predict the final shape of it, once in silicone. Finally I generated the master shape, that would allow me to extract the mould out of carved hard wax. (see image bellow)
 modeled moulds - positive to negative to enclosed positive back again
At this point I noticed that one of the mould parts was an impossible to carve. In order to find a quick solution and to experiment further, I decided to try a different strategy: I divided the two parts into to different fabrication techniques with the aim of exploring its compatibility, advantages and disadvantages of each. he impossible to carve was then relegated to 3d printing. And the other for machining.
 the slicer and the part

After having the first printing a passed the other to fusion CAM. I only had a very used piece of hard wax, so I had to use it very well. I identified two main tools to use

After that I configured the tools on Fusion CAM in a specific section, since these are a couple of specific tools for this kind of works at the Fab Lab FCT.
After that I started by finding the flat areas in order to open it as 2d pockets
--->


And defined a roughing operation, both of these with the dental 2,3mm flat end mill.
<---
At the end I passed to the ball nose with the same diameter and used a very thin 0.1mm step over value.
--->

To check that everything was ok, I used the simulate tool to check if there were interferences or other type of problems and to have a notion of the final result.


Since I was going to use the carvey, I post produced it with by using their Post Processor and imported it to their web based tool: easel, available at inventables.easel.com.

1st with a flat end mill:


… and …

>>>>>FAIL!<<<<<< (I tought the remaining thickness was enough to add my elements to this side…. doh!)
After some milling… now with a new wax block, I managed to:
cut flat end pockets and rough curved surfaces:

and smooth it:

creating this result


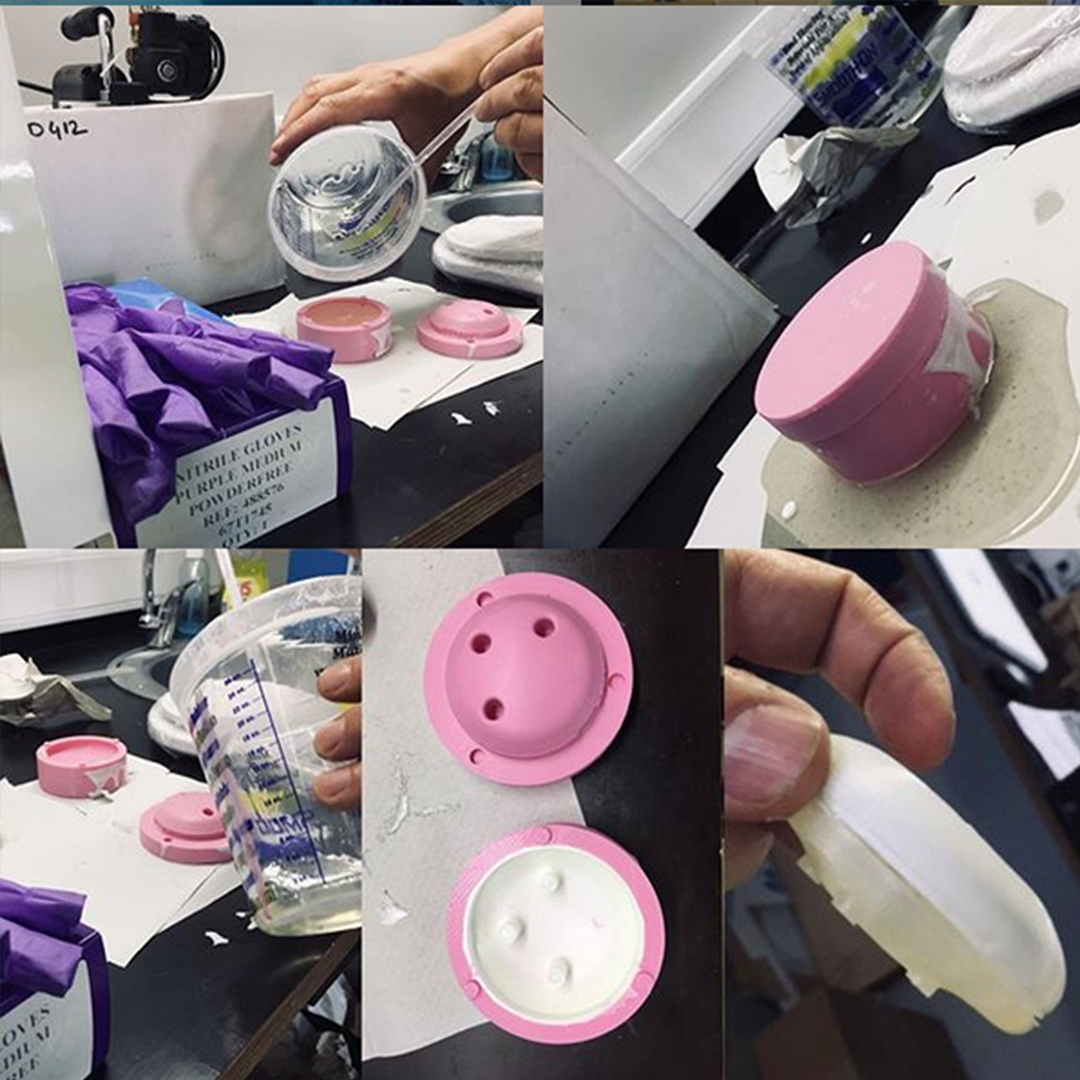
1:10 proportion, 2 components, mixing until it becomes homogenous and smooth


Taking the mix to the Vacuum chamber and performing successive vacuums until the mix has no bubles and doesn't raise as for chasing the air.


with both parts ready I mixed and degassed (on vacuum chamber) this 1:10 AB silicon and poured it over both


Finally, I mixed the Polyester (speedy drying) components 50/50 and poured it into the molds. Even though I got the parts out correctly, and it worked mostly as a learning experience, next time, I will want the design of the mold this better. I will surely think of how injection works better by adding a breathing canals system, allowing the resin to flow evenly. Also, this mix of 3d printing and machined master doesn't work at all. The contraction happening in the inner radius in 3d printing made both parts slightly incompatible. The design to be changed to accommodate both master's production through a machining process.


