Molding and Casting
Introduction
This week our assignments are the following:
• Review the safety data sheets for each of your molding and casting materials, then make and compare test
casts with each of them (group)
• Design a mold around the stock and tooling that you'll be using, mill it (rough cut + (at least) three-axis
finish cut),
and use it to cast parts. (Individual)
Materials/chemicals I used
Mold Max 60Mold Max 60 is a Shore 60A tin catalyzed silicone mold rubber formulated for applications requiring high heat resistance (up to 294°C). It features a low mixed viscosity and cured rubber exhibits very low linear shrinkage. Parts A & B are mixed 100A & 3B by weight. Pot life is 40 minutes and cure time is 24 hours. Applications include making foundry patterns, flat pattern reproductions and casting low-melt metal alloys such as tin and pewter.
PMC121/30
The PMC 121 Series urethane rubbers feature convenient one-to-one by volume mix ratios. The PMC 121 Series urethane rubbers feature convenient one-to-one by volume mix ratios. The rubbers will meet the stringent demands of production casting of wax, plasters, concrete, resins and epoxies. There are dry and wet versions. the dry version does not exude an oil and can be used for casting waxes, Smooth-On liquid plastics, gypsum plasters and other materials. The wet version contains a built-in release agent to aid in demolding hard plasters and concrete.
Smooth-Cast 305
The Smooth-Cast 300 Series of liquid plastics are ultra-low viscosity casting resins that yield castings that are bright white and virtually bubble free. Vacuum degassing is not necessary. They offer the convenience of a 1A:1B by volume or 100A:90B by weight mix ratio. The differences between them are pot life and demold time. Safety
Before starting the molding and casting process I read all instructions for each material ( PMC121/30, Mold Max 60, Drystone Hydrostone) For the safety we need gloves, glasses etc. It is very important to ensure proper ventilation, temperature.
Difference between 3D printing and molding
3D printing and mold making process duration is the same. But the molding has advantages:• we ca make a lot of models from one mold
• smooth surface.
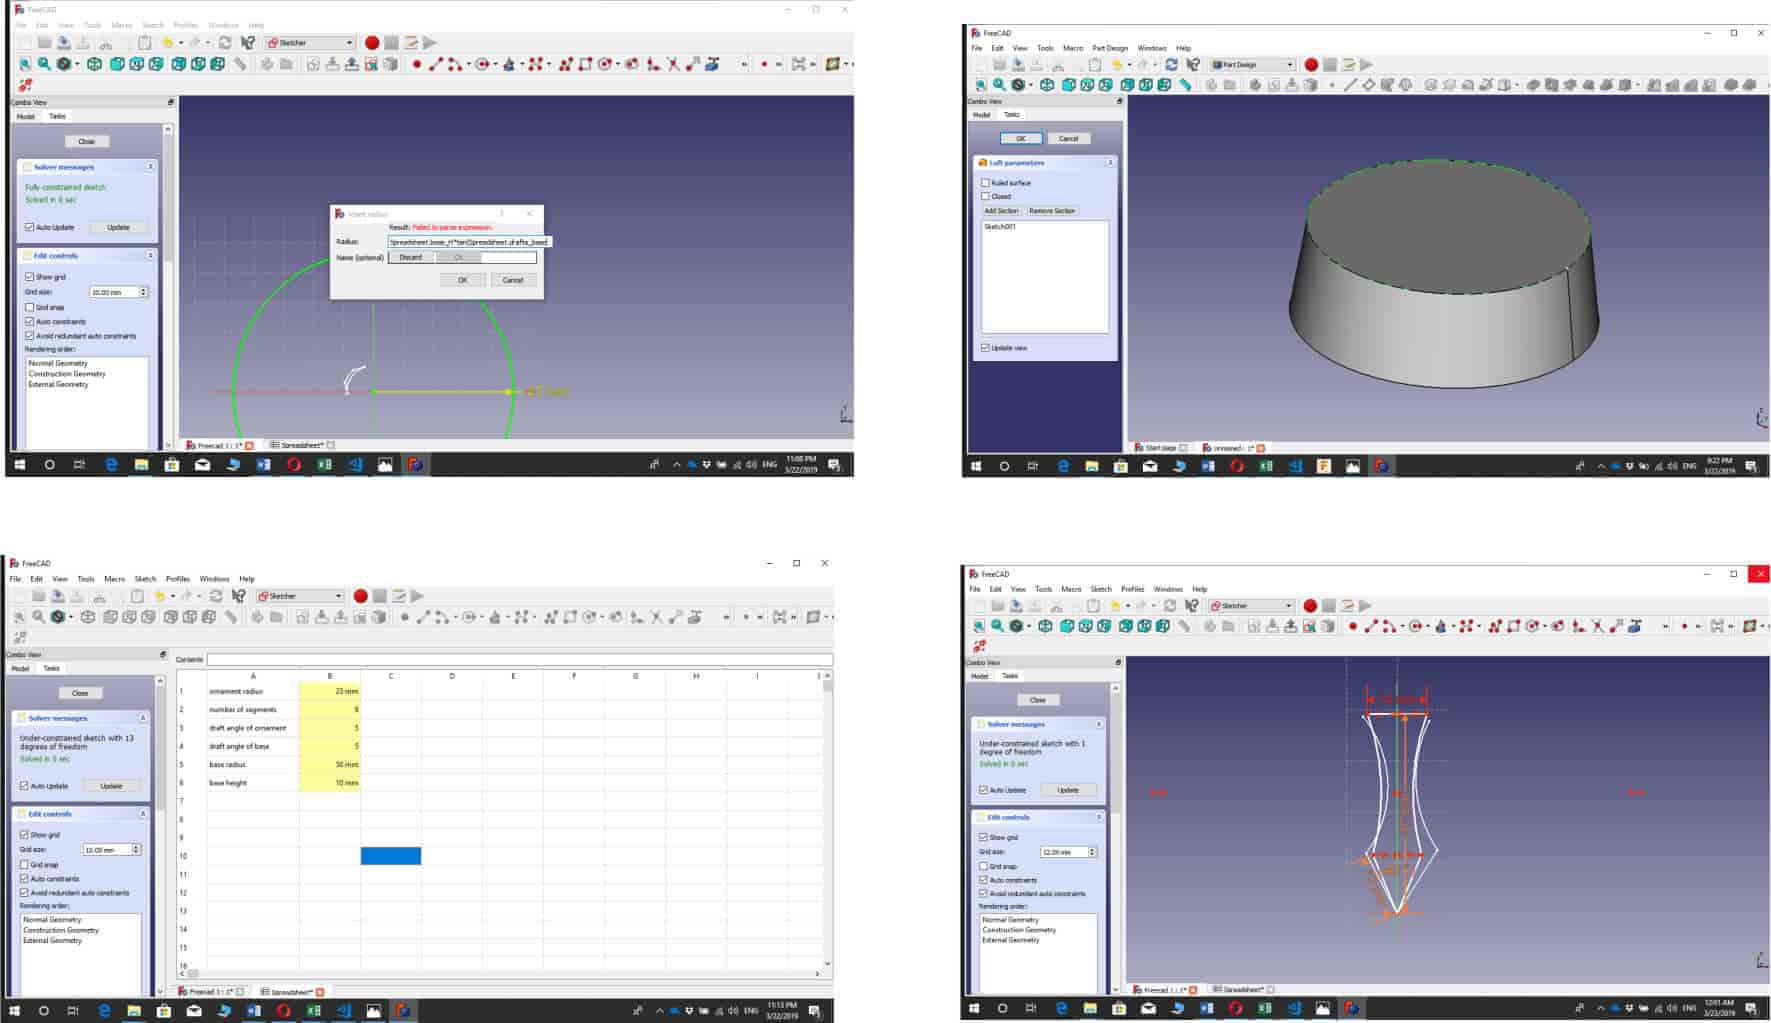
Designing Positive Mold Model
In order to design my mold I used Freecad 0.17 for windows 10 64bit. I have decided to make an Armenian ornament mold.
 armenian ornament
 freecad
During the design process I had some problems with design and drawing the patterns, that's why I decided to change my project and make an axe.
Here you can see the steps of design of the axe mold. The first step was to design the axe, after the mold. t is very important to have boundary box for your design. I added a parametric boundary box to my axe model.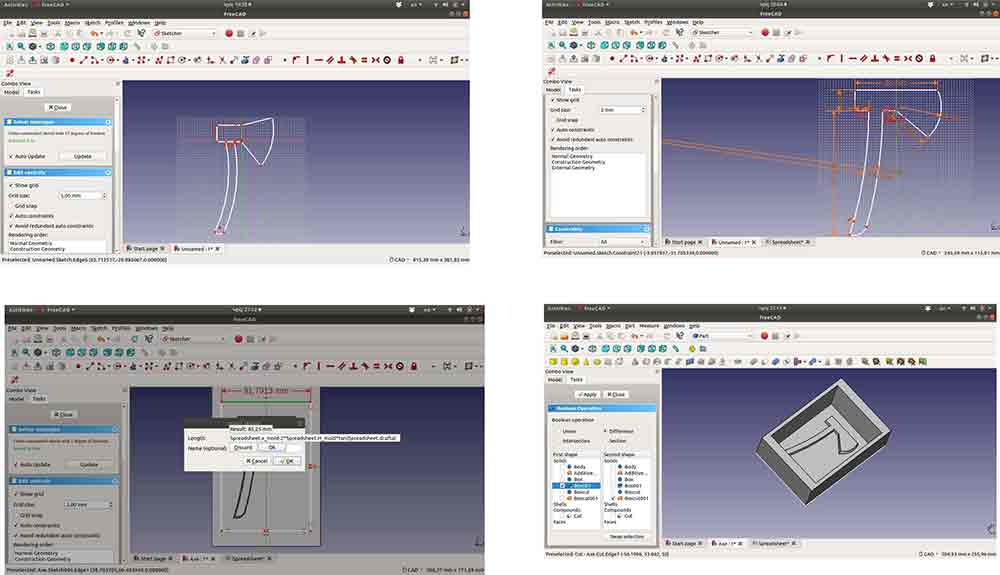 axe design
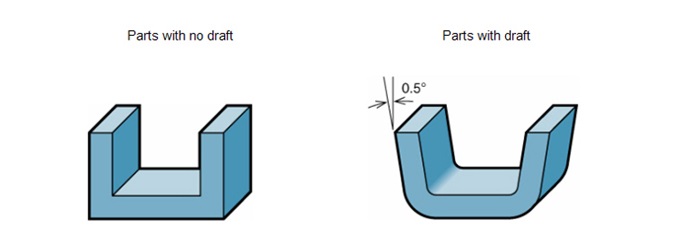
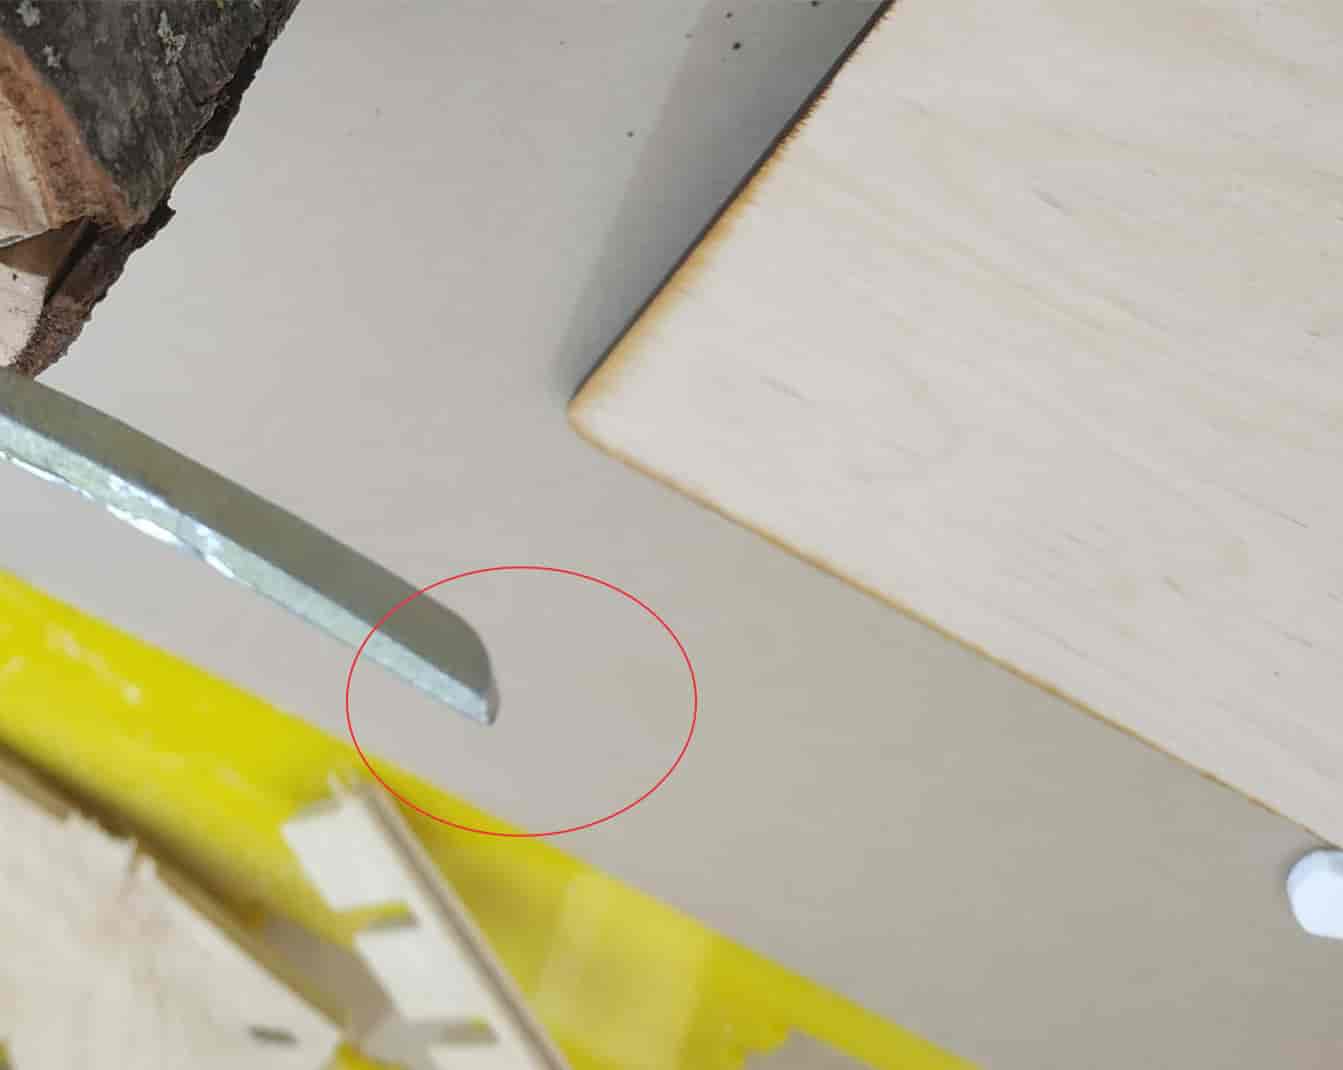
During the design process I forgot about the draft angles. We should add the angles to the walls, because it will help us to remove mold easier. After I added it. When I finish design process I exported the file to .stl. Draft Angles
The draft angles reduce friction between the finished, cooled part and the side of the mold.
Not only does this create a much easier release process, it offers several other benefits, depending on the
design of the part:
• Reduces the chance of damage to the part due to friction during release
• Reduces wear and tear and chances of damage to the mold
• Ensures a uniform, smooth, unscratched finish when required
• Ensures the integrity and uniformity of other surface finishes and textures
• Reduces overall cooling time by lessening or eliminating the need for unconventional ejection setups
• Most, if not all, of these benefits offer either direct or indirect overall production cost reductions
 Draft agnles
A few more things to remember about draft angles for injection molding:
• Draft angles are generally a requirement of injection molding design
(though there are a select few soft materials, like nylon, that can get away with draft angles of zero).
• Draft should be a part of design for manufacture, and all stakeholders
and contributors should be aware of its need at the outset of the design process.
• Any draft is always better than no draft.
The video I have possted helped me to better understand what are draft
angles and why we need them for molding and casting.
Creating a Mold from the Machinable Wax
After the design of the axe, I started to prepare my file for the milling. The milling process had 2 parts
rough cutting and finish cutting.
I used fabmoduls.org for generating the toolpath.
I have selected Gcode (NC code) as my output, chose Roland native .rml format,
then "foam rough 1/8", changed the cut speed from 50mm/s to 20mm/s, push calculate and waite, after saved it and started milling it.
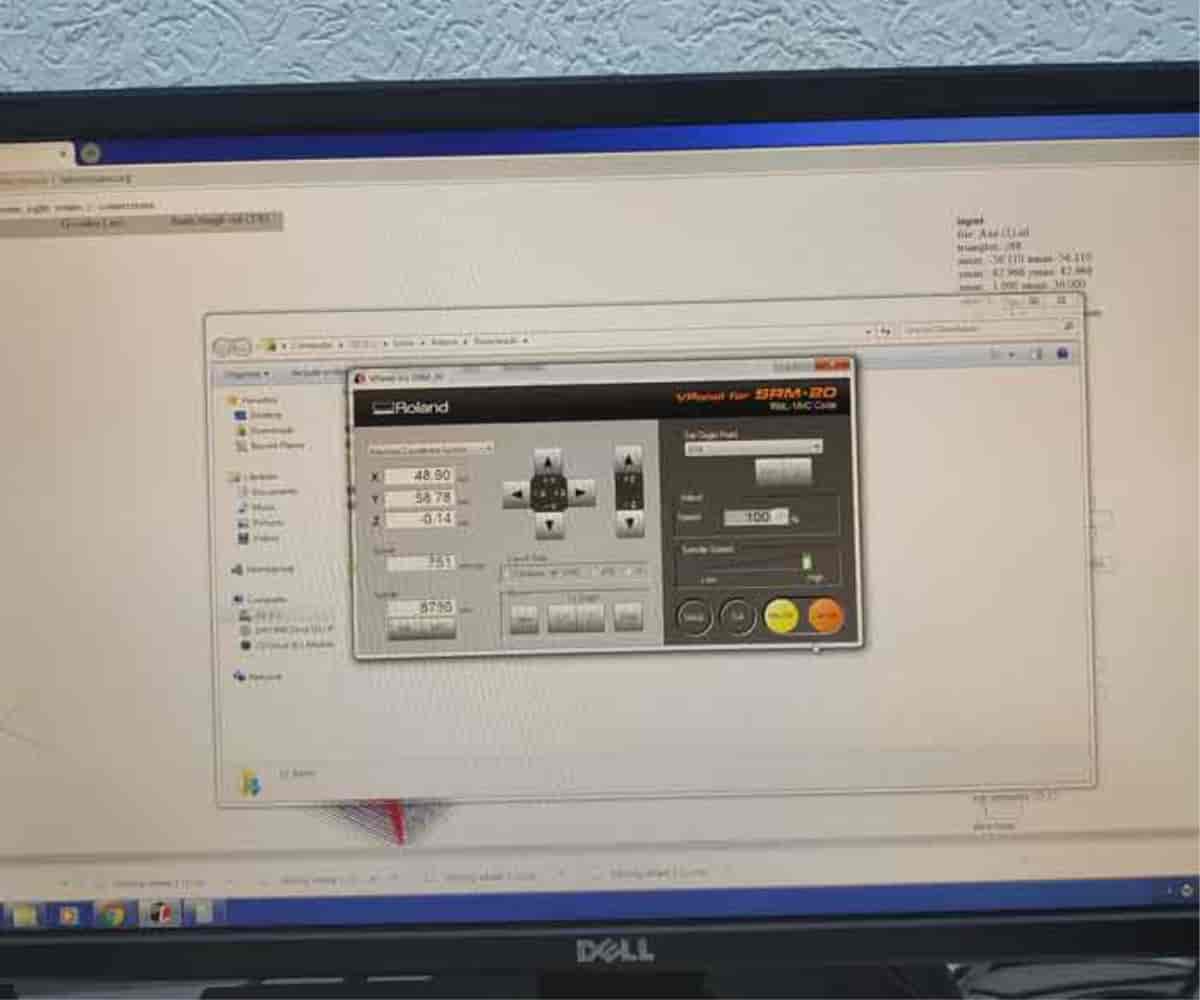
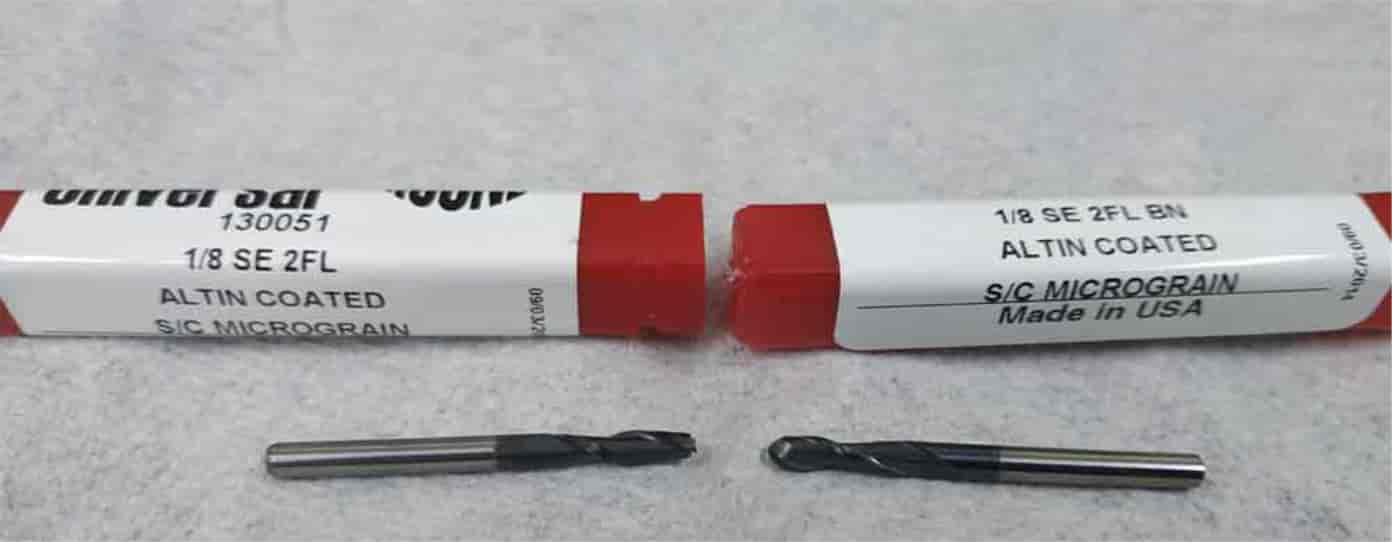
Before I have started milling process I settd up the machine SRM 20.
During the milling process I used 2 different 1/8" endmills (ball head and flat). Ball head is for finish cutting and
the flat for rough cutting.
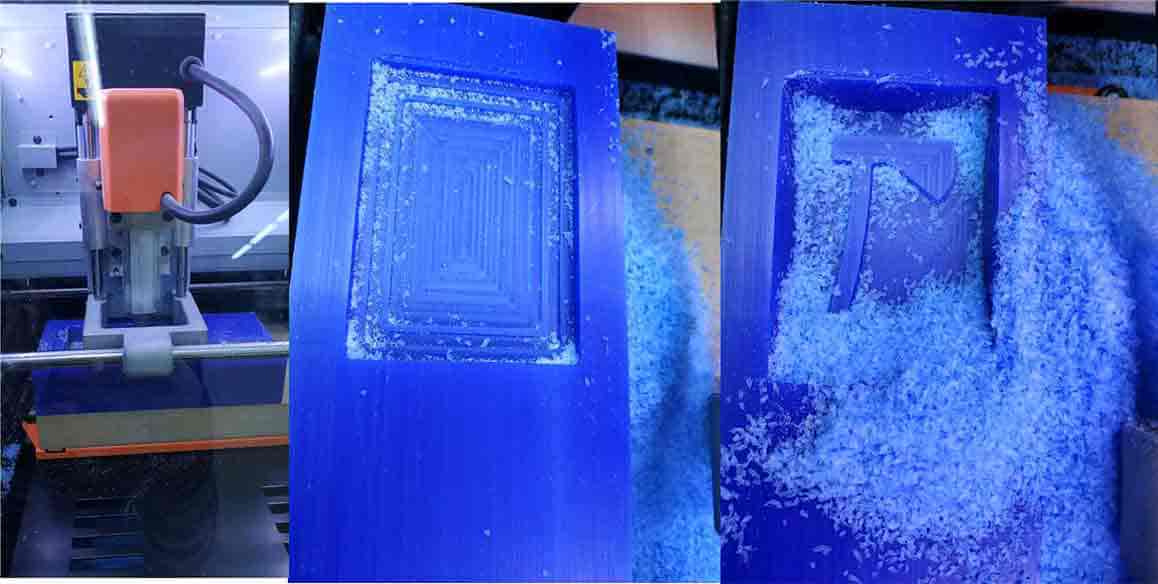
After finishing the "rough cut" I started "finish cut". Went back to fabmodules, changed the tool (1/8" ballhead endmills) repeated the above mentioned processes and started the milling process. "Finish cut" is necessary, because it makes the molds smooth.
Molding and Casting the Object
Before starting final casting process, I decided to test all components/materials, which I was going to use.
I tested PMC 121/30 urethane mold compound, smooth cast 305 liquid plastic and mold max 60.
Started with PMC 121/30 urethane mold compound. I measured the volume needed for
the mold by filling water into the machinable wax and then filling back into the cup.
It helped me to figure out how mush liquide I need for making my mold.
I mixed same value of PMC 121/30 Part A and Part B.
I used medical tongue depressor for mixing the liquide and there were a lot of bubles. After I started looking for some information
how to escape them and found this video,
where Neil explainde how to mix without making bubles.
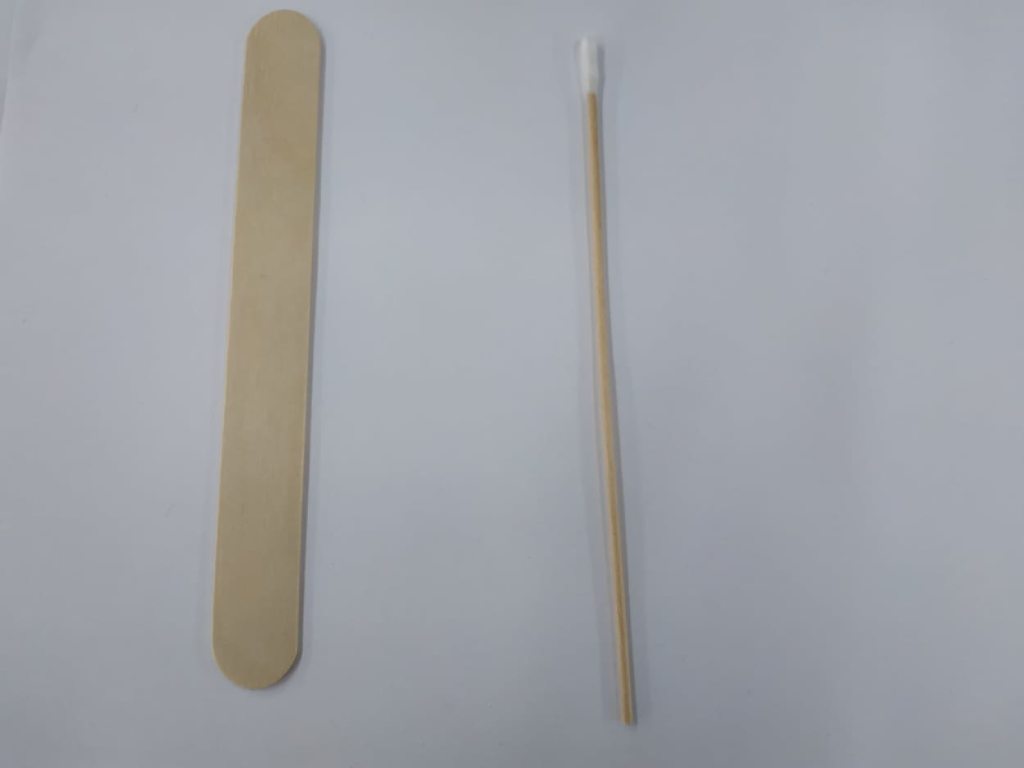
He suggested to stir the compounds with 150mm cotton tipped applicators,
because they are so thin and round they don't make bubbles while stirring.
I took cotton tripped applicator and started mixing the components. It helped me to escape bubles.
After I took WD40 ,
I used it as a release agent, after filled the liquid and waited for drying.
I decided to test mold max 60 heat resistant (up to 560°F/294°C) silicone.
I wanted to make a metal axe too. I found some
tutorials
Pot life is 40 minutes and cure time is 24 hours. I need to have 100A:3B ratio of part A and part B.
I poured part A into a cup measured it's weight then calculated the weight for the
part B and added the weights of each compound. Then I filled part B into the cup until it reached the added number.
After 24 hours all my molds were ready and I started casting rocess.
I took Smooth cast 305 liquid plastic. Smooth-Cast 305 is a ultra-low viscosity casting resin. It cures in 30 - 40 min,
low mass or thin-walled castings will take longer to cure. I measured the volume of the part by pouring water into the
mold then filling that water into a cup.
Cleaned and dried up the mold after that cutting. I sprayed WD-40 to the
mold surface as a release agent and spread it with a brush. Then I thoroughly shaken up the two components of
Smooth-Cast 305 and since the bottles are exactly the same size I used the caps of the bottles as a volume unit.
I pured two caps of each component into a cup that was about the same
level as the water in the cup I used to measure the volume needed. Then mixed the compound and filled into the mold.
I took smooth cast 305 I wanted to make more beautiful plastic and mixed with it machinable wax's flakes.
After getting the plastic axe, I decided to make a mold from heat resistant silicone for making a metal
cast.
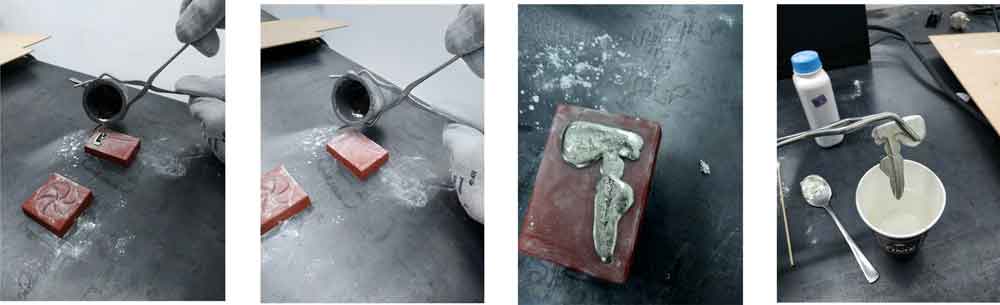
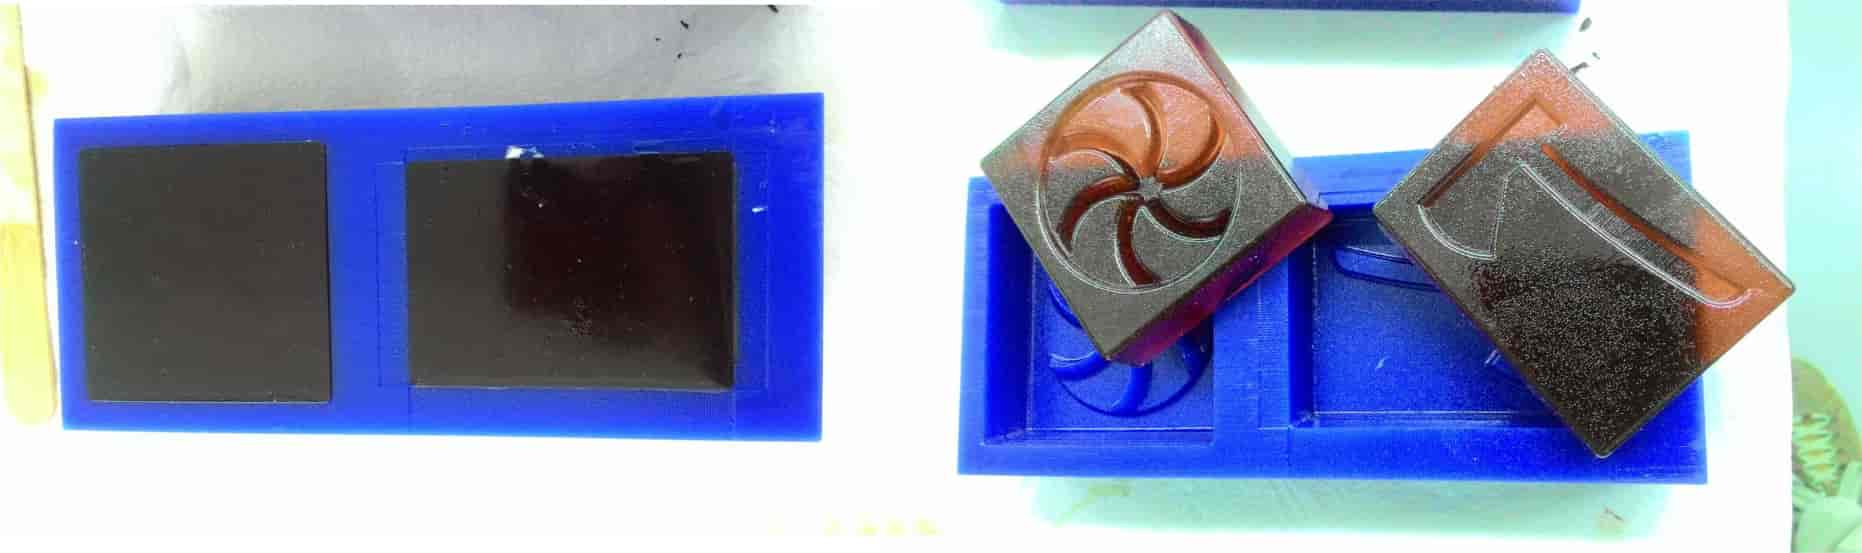
Here is the photos of plastic and metal casted axes.
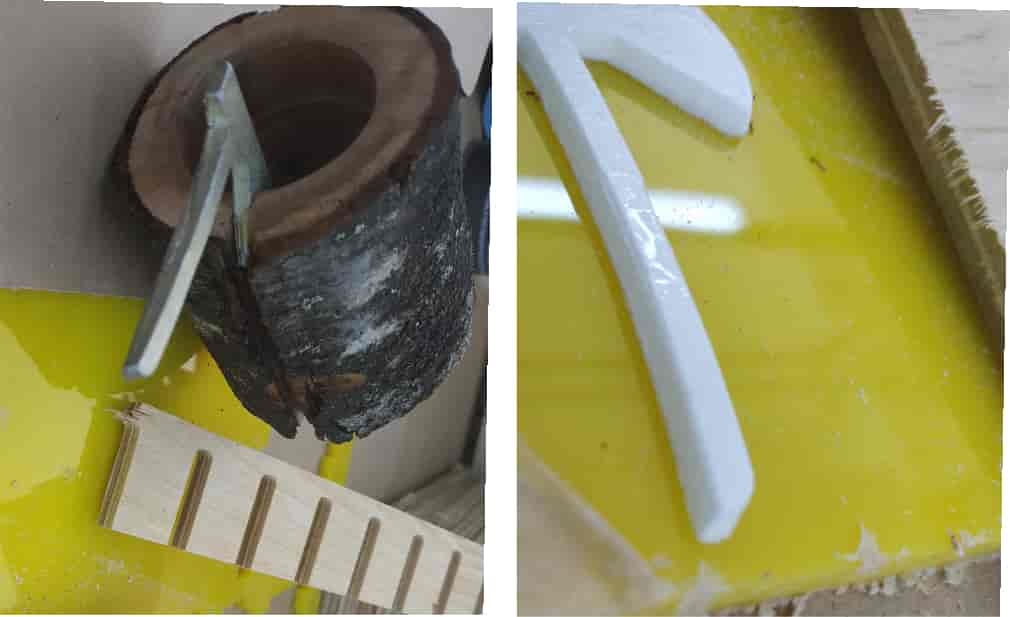
Here is my axes ready to use, note that they have angles, which let me only mold and cast them.
As during our regional review my axe wasn't acceptes as it is a 2D model I decided to scan my colleague, make a mold and cast it.
Molding and casting part 2
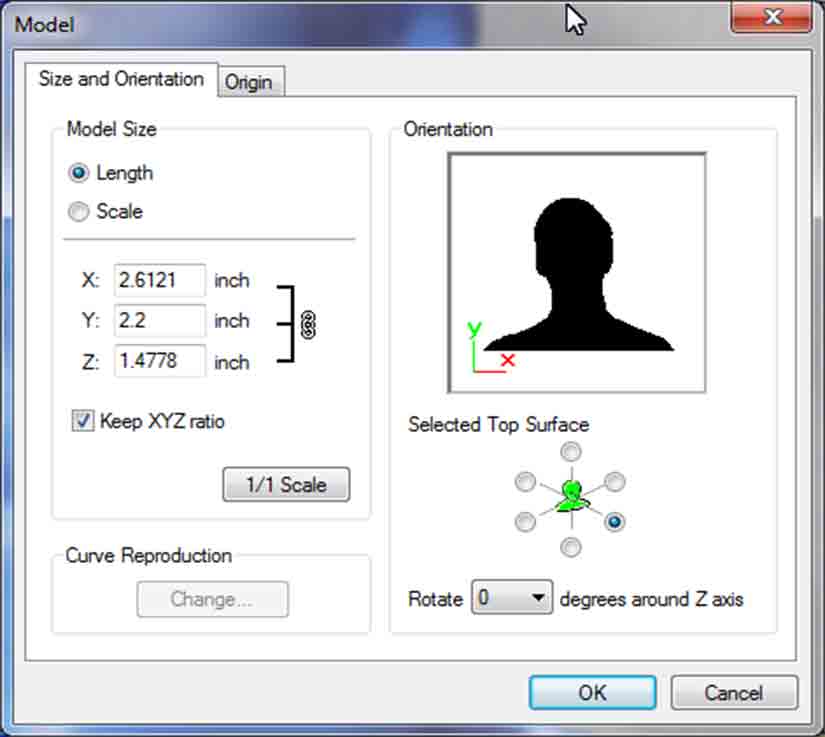
In this part of my assignement I wanted to test cutting using by Modela. I used it just for the interest. Modela Player is a 3D CAM software developed for the professional use. I can set the process of each surfacing, roughing and finishing before getting the job started. After I scaned Gevorg's face, I started make the mold from machinable wax.Setting up the machine
• Download “MODELA Player 4” and “Virtual Modela”.• Opened 3D model (.stl), chose the material (machinable wax)
• Opened "model" checked if the size and orientation of the model correct. After created toolpath of the model.
 • Started milling
• Chose the origin in “Model > Origin”
• Went to “Model Form” and chose the margins. For 1/8 inch end mill, I chose “Automatic” mode, for 1/32 inch ball head mill I chose the half of the “Automatic” set. Margins are necessary in order to place marks so that the X- and Y-direction cutting origin points on the front and back surfaces do not become misaligned. It would be better to set margines manually as the mill could jump on the walls of the model.
• Chose the right “Depth ”. I checked the “depth” is good or not by looking at toolpath. First, go to “center” and if it is not good change it.
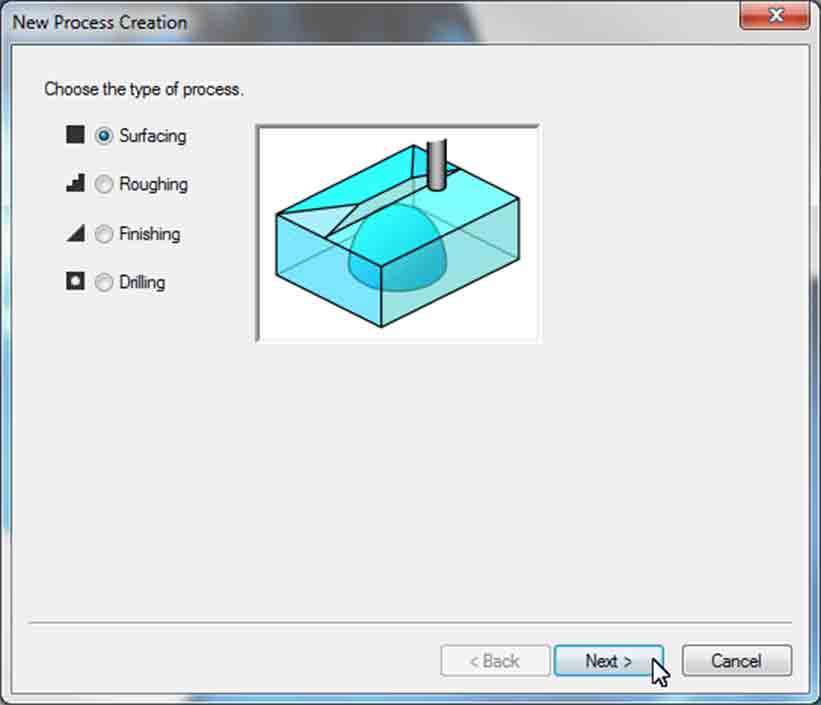
• Went to “New Process”.Created 3 processes “Surfacing”, “Roughing”, “Finishing”. In “Select the cutting surface.” for 3 processes left as a default.
• Went to “Slope” and chose the angel, as I wrote before angles are very important, bacause they would help us to remove the cast or silicone mold without any problems.
• In "In cutting are" we chek if it fits our material
• "New process" - for “Surfacing”, “Roughing” chose 1/32 inch ball head mill. In “Select the cutting surface.” for 3 processes left as a default. For “Surfacing”, “Roughing” chose “3 mm square”(it’s the same as 1/8 inch mill), for “Finishing” choose “0.5mm ball” (it’s the same as 1/32 inch ball head mill). In “set the area and depth for surface leveling” for “Surfacing” set 1mm “Depth” ( don't forget to zero z-axis after surfacing), and for “Roughing”, “Finishing” don't set “Depth ”. In “Choose the type of tool path to create”, “Set the cutting parameters” and “Enter a name for this process and choose whether to create the tool path ” left as a default.
• Went to “Cutting-position Setup ” and change “Model Position ” and “Tool Movement”.
• Generated toolpath and look with “Virtual Modela”
• Cut the path After cutting the mold, I washed it and started preparations for making silicone mold.
Making
.jpg)
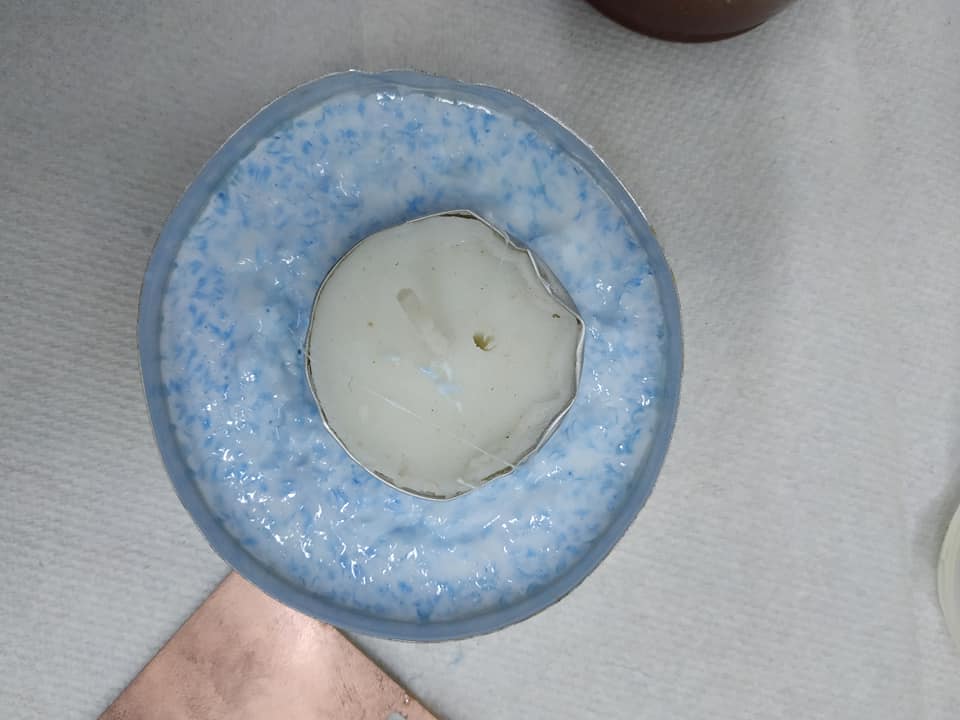
For making silicone mold I used PMC 121-30 part A and B, I mixed 2 compounds in equal quantaties. I repeated the action described before (in axe molding and casting part). I used WD40 as realease agent and sprayed it inside the machinable wax mold, it would help in removing the silicone mold. Mixed PMC 121-30 part A and B using cotton tripped applicator. I mixed compounds very carefully for escaping bubbles. Then filled the liquid silicone in the machinable wax mold and waited it to dry. After 10 hours the mold was ready and removes silicone mold from machinable wax and started casting process.
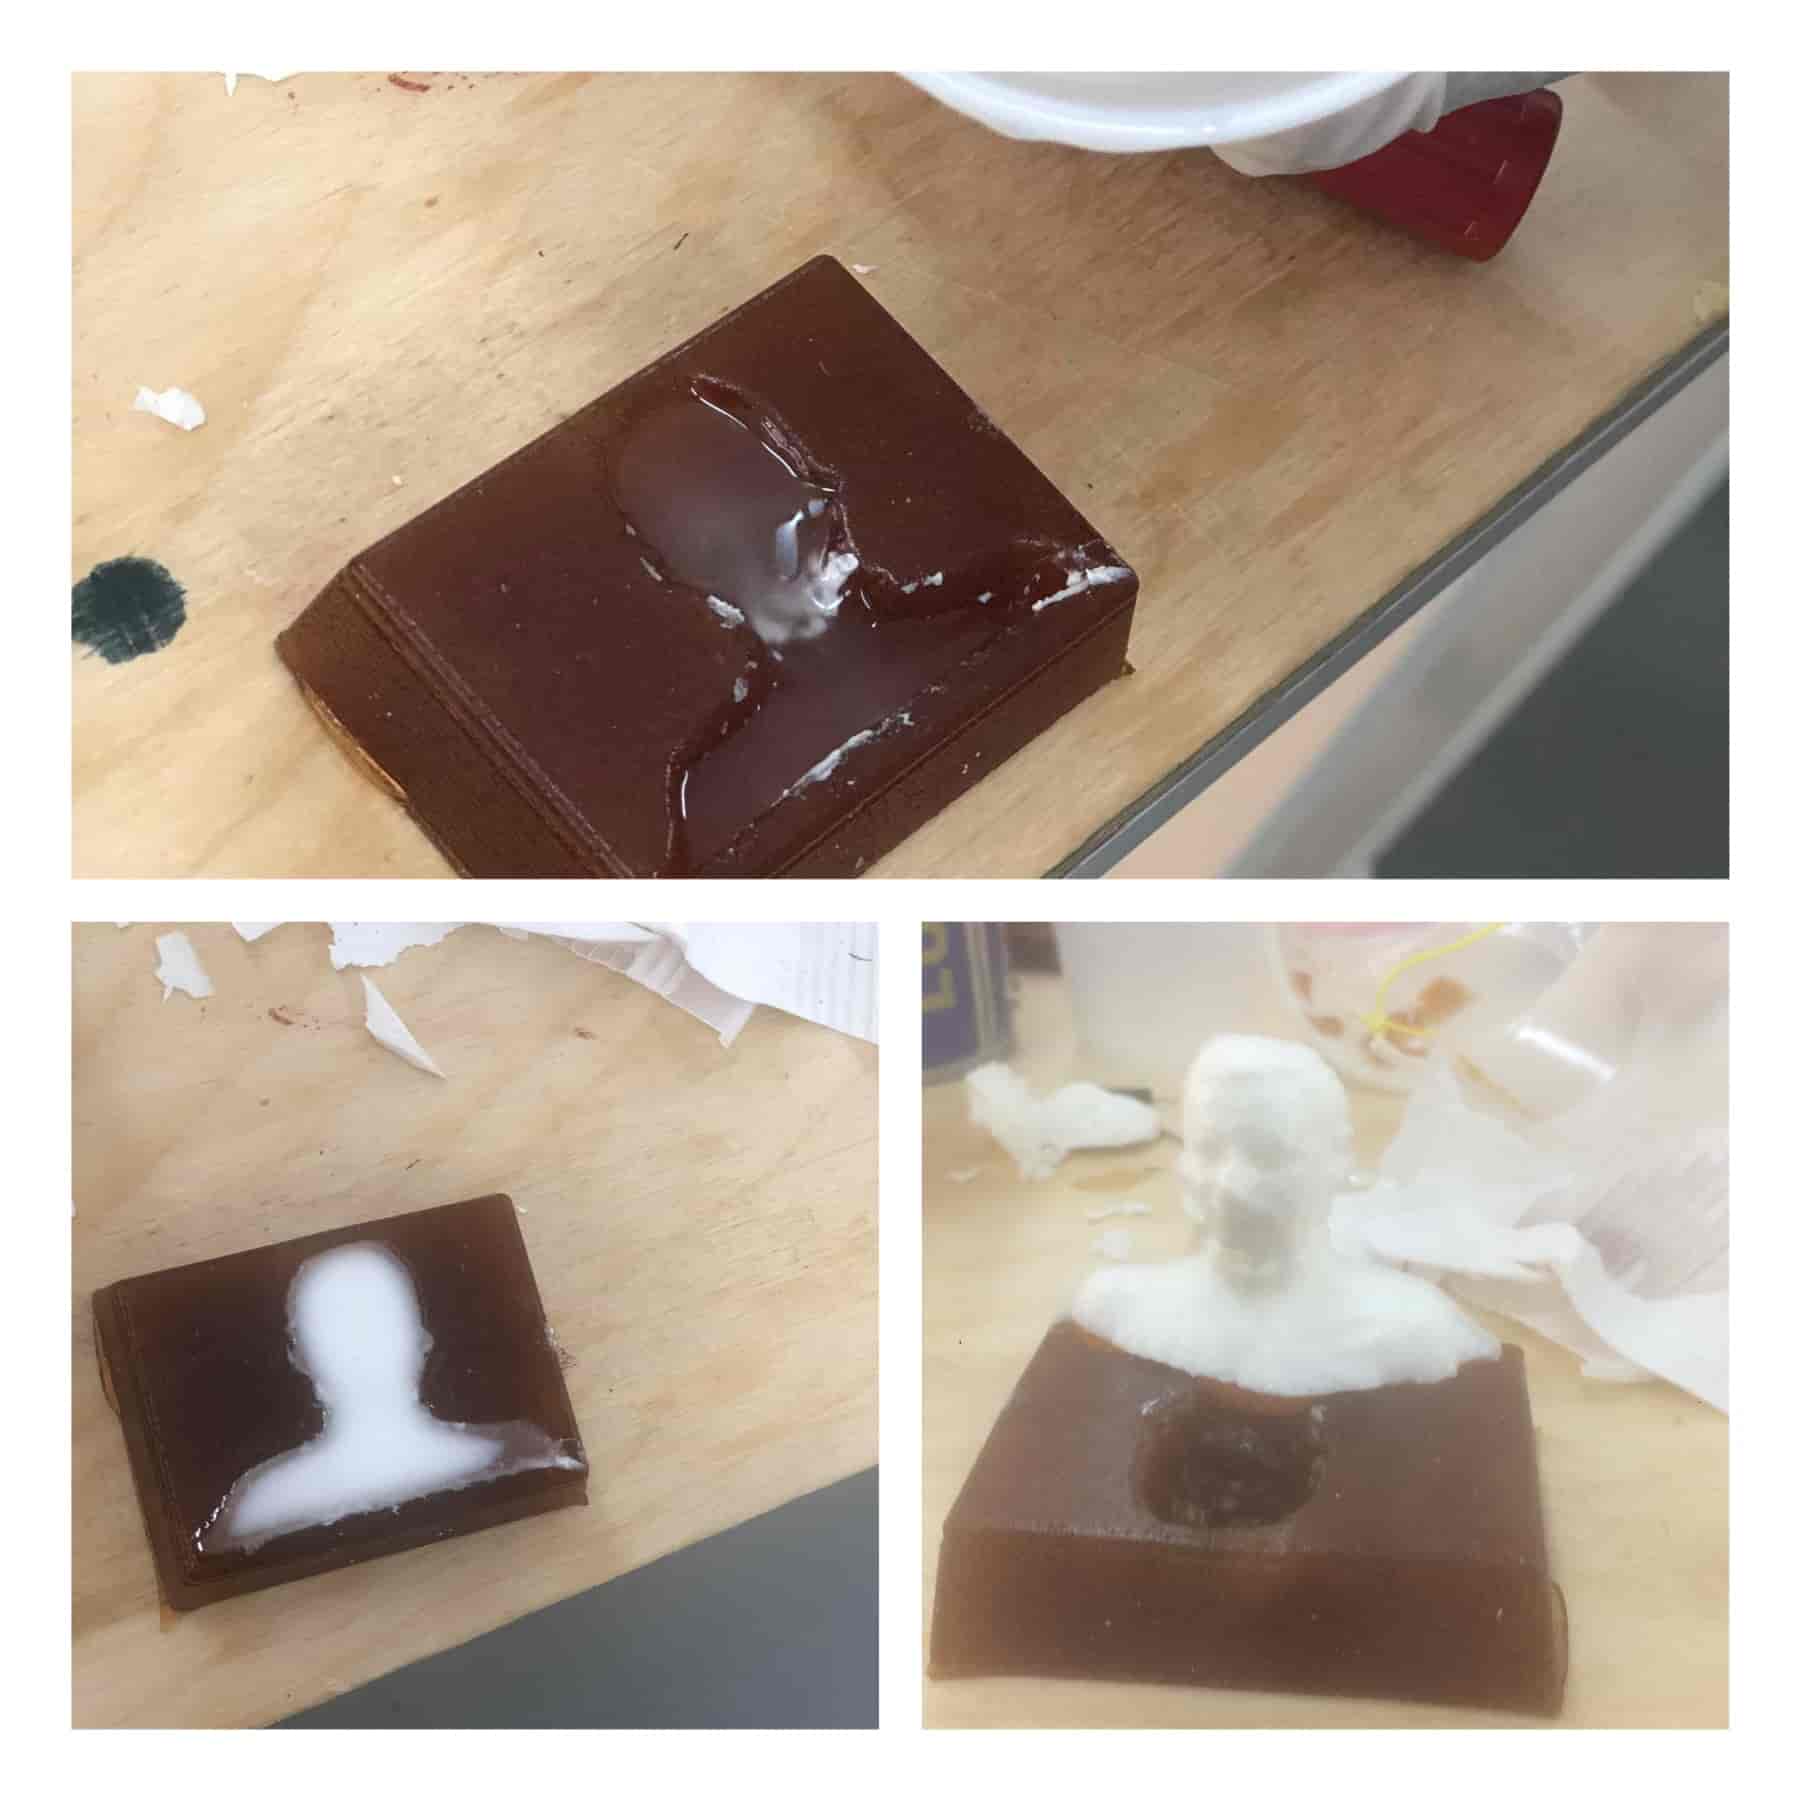
I used Smooth Cast 305 as a liquid palstic, and mixtured 2 compounds in equal quantaty. Sprayed WD40 inside the silicone mold and filled liquide plastic in it. Filled the mixture in the mold and waited for 10 hours before it to dry.
Conclusion
Diring this week I get a lot of information about molding and casting processes and going to develop my skills in it. We alsways shoud remember about:• Draft angles
• bubbles
• Safety conditions
• Release agents
• Check all configurations before starting milling process.