
3D Printing and Scanning
Introduction
For this week we had to:
1. test the design rules of our 3D printer(s)
2. design and 3D print an object (small, few cm) that could not be made subtractively
3. 3D scan an object (and optionally print it)
We used two printers Makerbot
Replicator+ and Ultimaker 2
Extended+
We started with Makerbot it's specifications are:
294.64 x 193.04 x 165.1mm Build Volume
100-400 Micron Layer Resolution
Single Extruder Nozzle
Uses 1.75mm MakerBot PLA Filament
It was bought this summer and was used 4 times to test print so it was
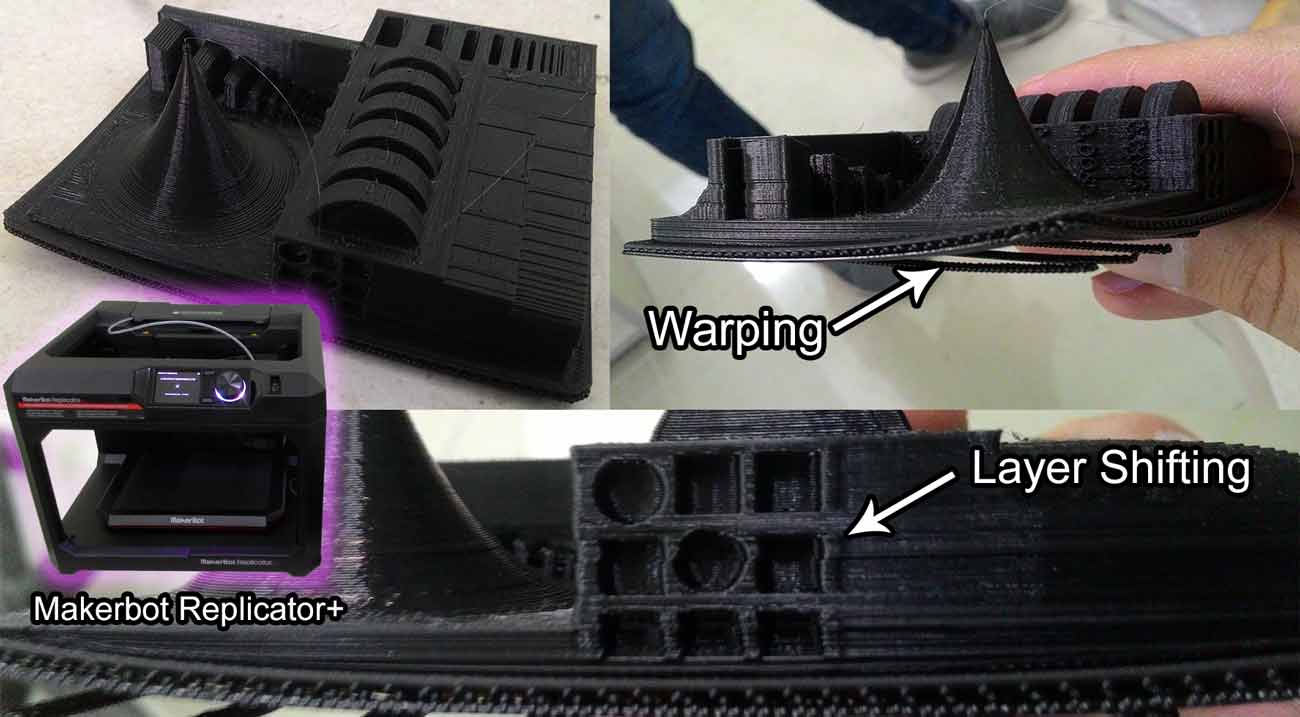
almost new, but the quality of the prints were not as good as it was advertised. We printed 3D Printer Tolerance Test by amandaghassaei to test our printer
capabilities. In the description of that file it was written "Tolerance tests for a high res
3d printer, designed with features beyond machine resolution". The first disturbing
fact was that the machine was making odd noises while printing so our first guess was that
lubrication was an issue.
 We used this print-quality-troubleshooting
guide that was very informative and helpful.
We used this print-quality-troubleshooting
guide that was very informative and helpful.
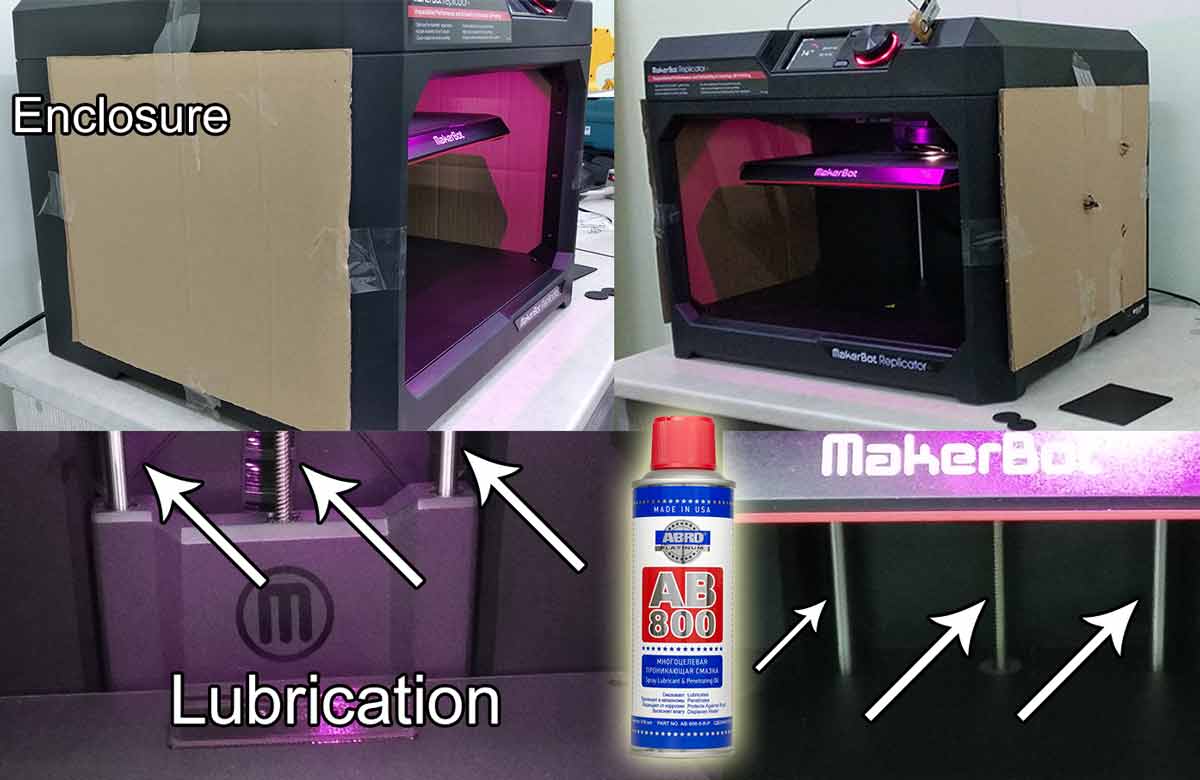
There is obviously some Warping and Layer Shifting For Warping our regional instructor Ohad Meyuhas gave us advice to level the Z axis and update the firmware of the machine. This machine has automatic bed leveling option so we did that first. Then we connected it to the computer installed Makerbot Print software and updated the firmware of the machine. Next after some research we decided to lubricat the machine. In the official Makrbot website we found HOW TO LUBRICATE guide that recommends to use "PTFE" Grease the best known brand name of PTFE-based formulas is Teflon™. There was no lubrication grease included in the Makerbot box, so we tried to get that from the shop and the only thing we found was AB-800 it consists of Teflon. We applied it to the threaded rod on our Z-axis and to the rails of the machine. Also we enclosed the machine from sides with cardboard to help regulate the temperature of the entire build volume. After these steps Layer Shifting was gone but Warping and strange noises were still there. We noticed that Warping was happening in the center of the build plate so we tried to place our parts at the backside of the build plate and the warping was gone.
Anyway, I called Makerbot support and described our issues the operator named Andy was very kind and responsive. He sent an instruction and a print file to level the build plate manually. Also, he asked to send a video to better understand the noises machine makes while printing.
Ultimaker 2 Extended+ has:
228.6 x 226.06 x 304.8mm Build Volume
Easily switch between 0.25, 0.40, 0.60 and 0.80 mm nozzles
It prints ABS, PLA, HIPS, PET, ColorFabb XT, ColorFabb XT-Carbon Fibre, Woodfill,
Bronzefill, Copperfill, Brassfill and flexible materials such as PolyFlex and Ninjaflex
Requires 2.85mm filament.
Unfortunately, we had only 1.75mm MakerBot PLA Filament in the lab that was not
compatible with Ultimaker. It took some time after we found a local shop that had that filament
and we had only one day to clean the machine from dust lubricate, level the bed and load the
filament. We decided to buy ABS to compare it with PLA.
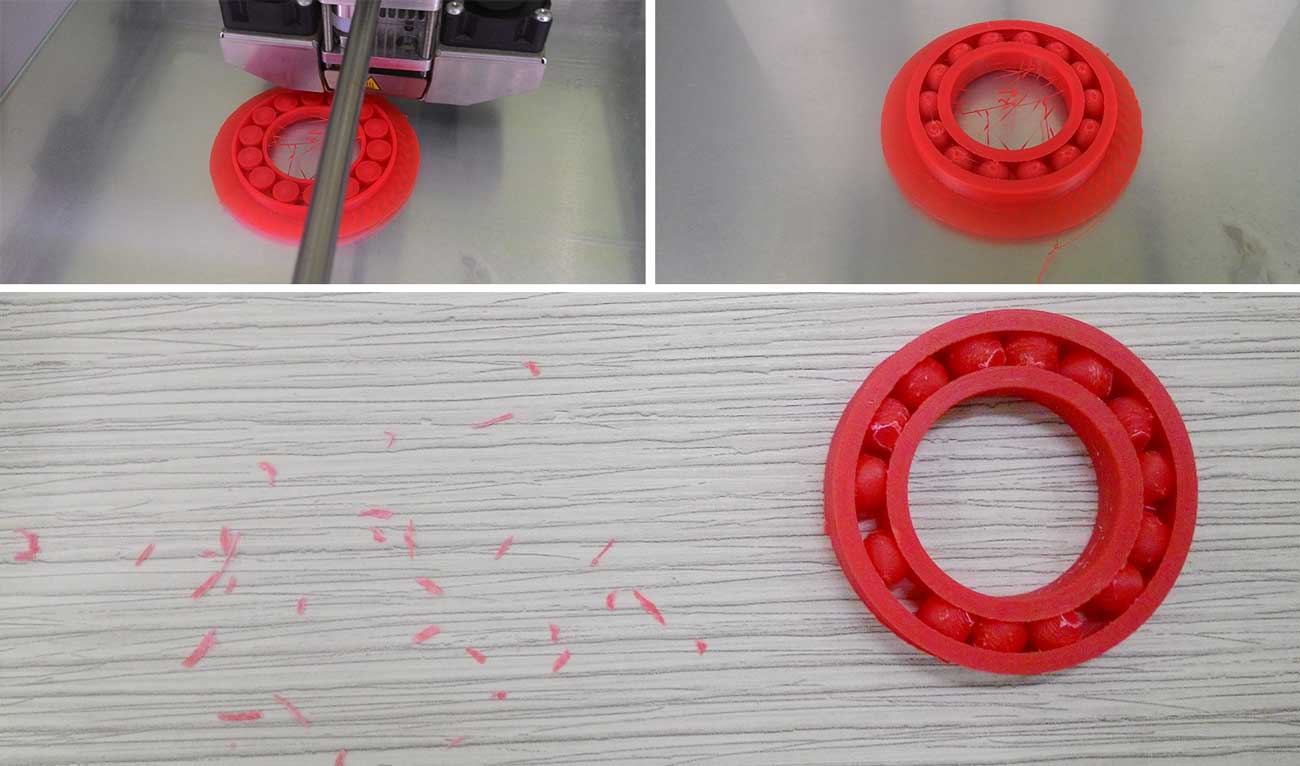
Designing complete Bearing
I thought that designing and printing a bearing is a simple, fun and interesting way to check the distances that machine needs in order to create moving parts. I used Antimony to design my bearing here's the design. The first version had a distance between balls and walls of 1mm but the balls were above the plate when layed flat so they needed supports.

This is the first print of bearing. Everything was tightly connected nothing was moving.
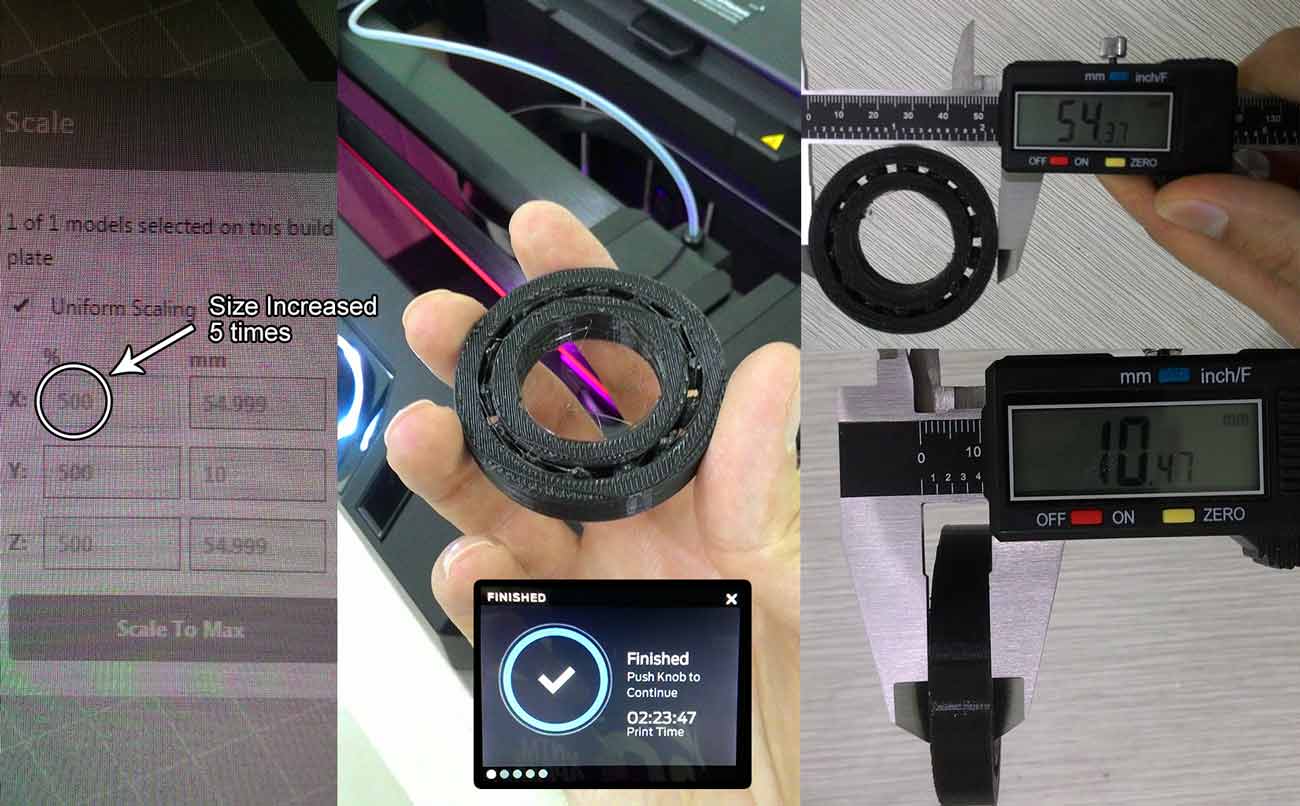
The width of the printed bearing was 10.5mm and in the design the width was set to 2 units, so 1 unit of Antimony in this case was 10.5/2=5.25mm so the distance between walls and the ball was 0.05*5.25=0.2625mm. The in the second version I've increased the gap between walls and balls from 0.5unit=0.2625mm to 1unit=0.525mm
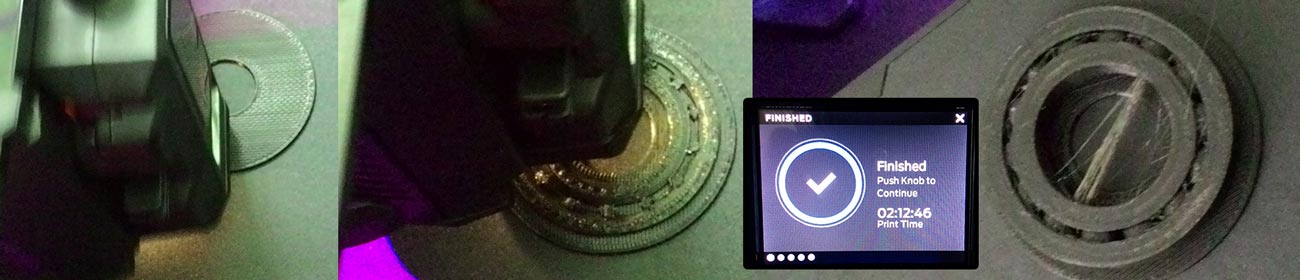
In the second version some of the balls were moving but there were balls that were firmly welded
with the supports and the walls.
For the third version I decided to use Ultimaker and instead of increasing the space between
balls and walls I decided to change the design so the balls wouldn't need any support. I reduced
the width of the bearing.
The first two prints failed because the part wasn't sticking to the bed properly.
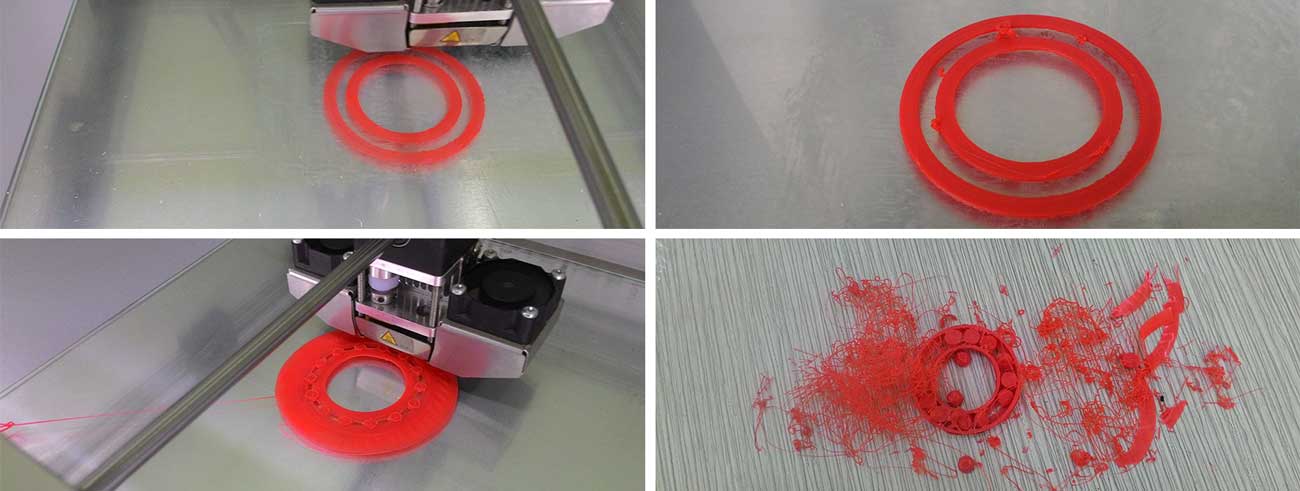
I increased the bed temperature from 80 degrees to 90degrees added some gluestick and also a raft to increase part adhesion. And finally it worked.
Here is the Antimony file for my bearing V4:
Bearing V4.sb
And here is the STL file:
Bearing V4.zip
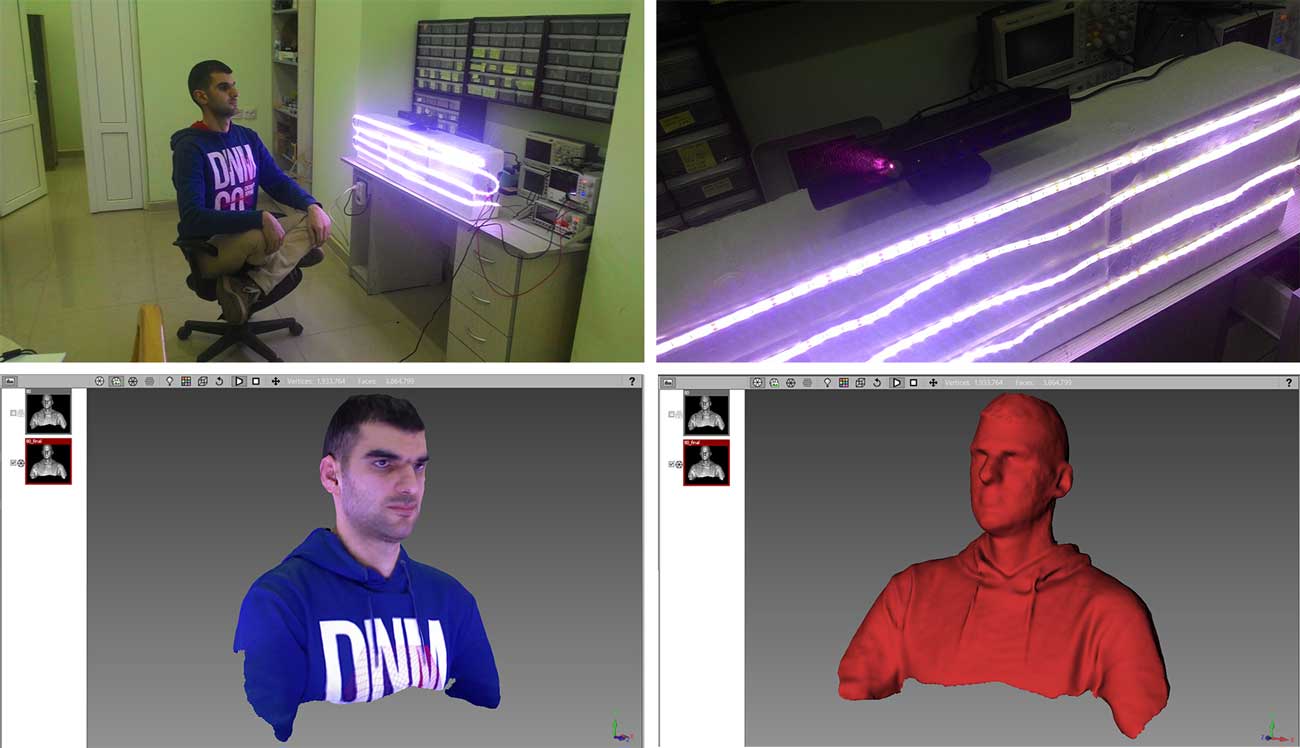
3D Scanning
While I was checking last year's 2018 students pages I came up across Abhinav Garg's 3D scanning experiance and I really liked it. He was using Kinect 360. I used Kinect with Scratch some years ago, and even bought the adapter to connect it to computer. It's not USB so you need an adapter shown in the image below.

Abhinav was using a special program called Skanect that has free limited version and the first problem with this software is that it consumes high CPU power, the scanning results are not good, and you can't export high quality destails without getting the paid version. I searched a bit and found this wonderful video that explains in detail how to scan using KScan3D which is free and doesn't use much CPU power, has lot's of options for exporting high quality details, even it supports Multi-Sensor Setup
The first scans were not so good because I was turning myself on a office chair without special lighting. My conclusion for getting good scans is to have a strong and even lighting on the object you're scanning and to turn the object without shaking it.
Since the top part of the head is not scanned there's an empty part on tbe top of the head so we need to edit this manualy. I exported it as .obj and edited with Autodesk Meshmixer
Here is the stl file
Babken Statue.stl