Interface and Application Programming
Assignment
group assignment:
Write an application that interfaces a user with an input and/or output device that you made.
individual assignment:
Compare as many tool options as possible.
Firefly
I think the group and individual assignments switched between years, so the individual work below is the interface application I initially wrote. See further down for a comparison of tool options.
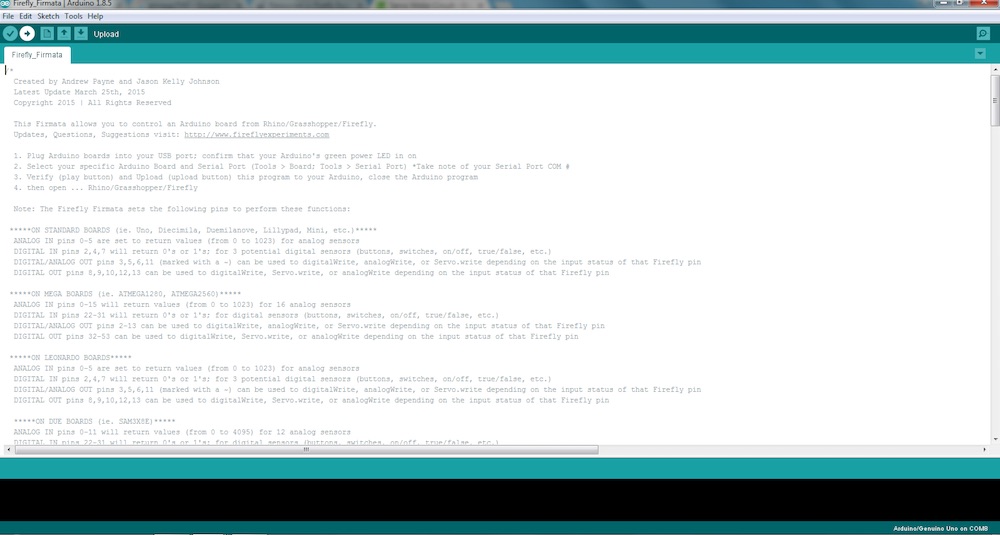
I am going to try yo use a program called firefly that connectes the arduino environment to Grasshopper, allowing for live control of a microcontroller through Grasshopper and vice versa. Thought this sounded very interesting, so I downloaded and installed it, following the instructions layed out here
So the basic documentation for Firefly can be found here.
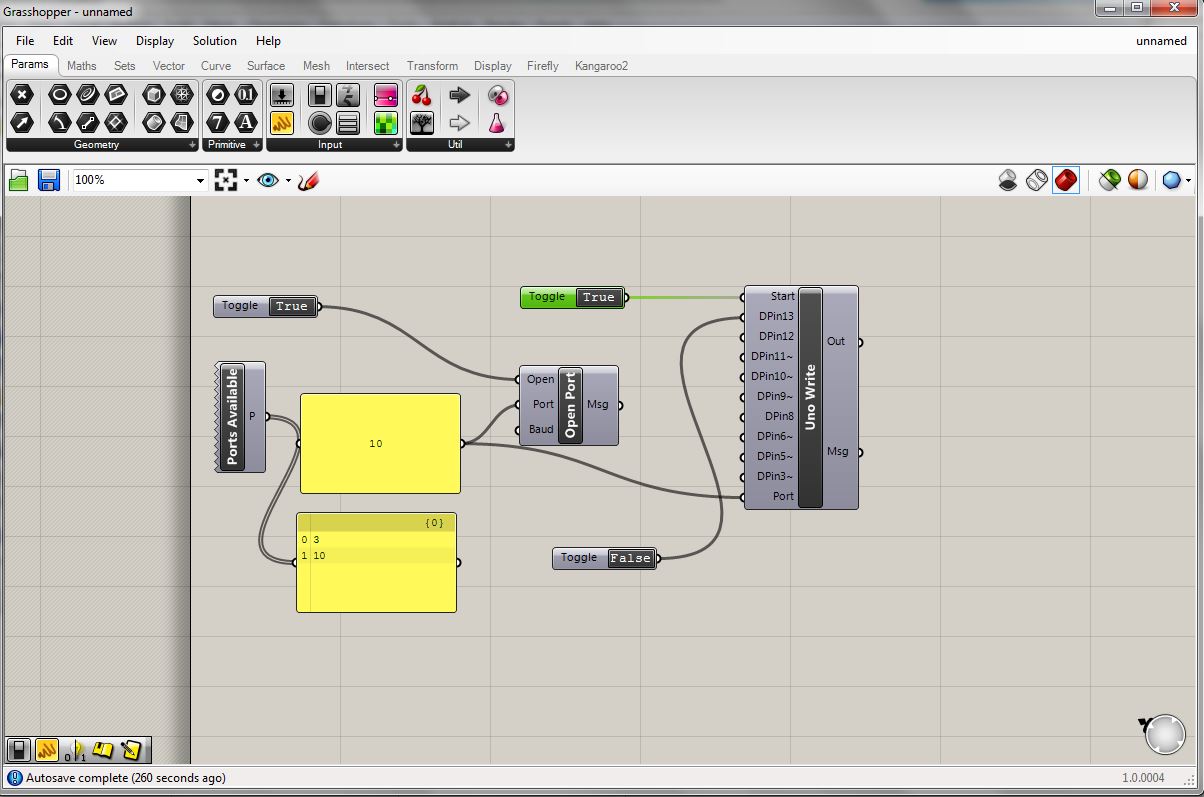
The first essential node to get the firefly interface up and running is the "Ports Available." The output is simply connected to a panel so we can see the results. From that we can see that ports 3 and 10 are available. I"m not sure if there is a definitive way of knowing which port is the one hooked up to the board without just trying to connect and see which one works. Anyway, I had just uploaded the Firmata firmware through Arduino IDE so I knew it was port 10. I created another panel containing "10" to input as the port variable on other nodes. Next we create the "Open Port" function. It has three inputs, the port (number 10), the baud (set to 9600 by default), and "open". The open variable takes a boolean state, true or false. If true, and the other inputs are properly selected, the port should open, creating a communication link between the board and the grasshopper interface. This set of modules really stand on their own and are simply to open communication. The next essential node is the "Uno Write" function. This function gives us access to digital pins 3-13 not including 4 or 7. Pins 11, 10, 9, 6, 5, and 3 have built in PWM capability as well as the standard High or Low, 0 or 1, true or false, boolean binary. Of course we are not using an arduino uno, but because we've programmed the satshakit board with the arduino bootloader, and it uses the same Atmega chip, everything works smoothly. I'm sure there is a way to dive a bit deeper and set up the firefly environment for other boards, but thats a bit beyone my reach right now. I just want to get a basic, proof of concept blink going to I know everything is working. To do this I create a boolean toggle and connect is to pin 13, which is attached to an LED. Indeed, when I toggled the button to true, the light turned on. I was surprised by how satisfying pressing this digital button and seeing a light on my board come on was.
Everything is very nicely laid out.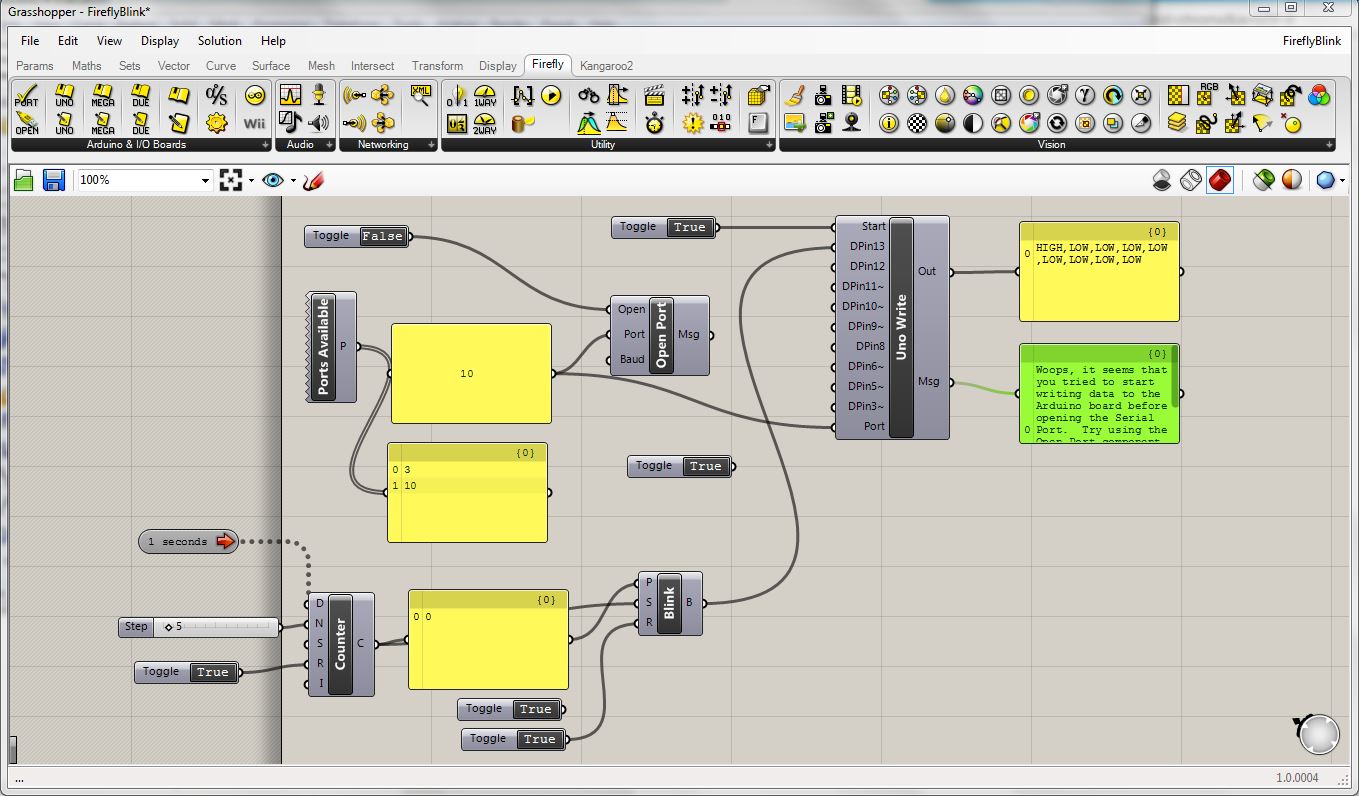
Comparison of Tools
Firefly
See above for in depth information. To summarize, Firefly is a powerful, yet limited tool. Without any alterations, it is only available for use with the atmega328p (really its for the arduino uno, but since this is the same chip everything works fine). What this tool does provide is a wonderful way to generate complex relations between virtual objects that ultimately have the ability to be controlled by or actuate objects in the real world as well as the graphical environment of Rhino. Grasshopper, the Rhino plugin that runs this tool does have a steep learning curve and can be difficult to understand initailly. Having some experience with Rhino and Grasshopper is definitely a huge help in trying to use this software
Processing
Processing is a flexible software sketchbook and a language for learning how to code within the context of the visual arts. It's environment is very similar to the Arduino IDE (the two share a bit of history with each other), but the language used is either Java (traditionally) or Python (more recently), and rather than writing code that runs on a microcontroller, we write code that runs on our local computer, interfacing with its periferials, such as the screen, microphone, mouse/touchpad, usb ports, and other i/o. Using the FTDI usb to serial chip, we can send or recieve serial data to or from a microcontroller and interface it with our computer periferials!
Below is a simple sketch that sends certain ASCII characters over a specified serial port when certain input conditions are met (keys on the keyboard being pressed or not pressed). This code is part of my final project, you can see Processing in action in the project video I'm using the classic W A S D keys to controll the forward, backward, and pivoting action of a small drawing robot. Another signal was later added to actuate the drawing device.
/**
 * Keyboard Turtle Control Simplified
 *
**/

import processing.serial.*;

Serial myPort;  // Create object from Serial class
int val;        // Data received from the serial port

void setup()
{
  size(500, 500);
  // I know that the first port in the serial list on my mac
  // is always my  FTDI adaptor, so I open Serial.list()[0].
  // On Windows machines, this generally opens COM1.
  // Open whatever port is the one you're using.
  String portName = "COM26";
  myPort = new Serial(this, portName, 115200);
}

void draw() {
  if(keyPressed)
  {
    if (key == 'w') {
    myPort.write('w');
    }
    else if (key == 'a') {
    myPort.write('a');
    }
    else if (key == 'd') {
    myPort.write('d');
    }
    else if (key == 's') {
    myPort.write('s');
    }
    else{
    myPort.write('x');
    }
  }
}
PowerShell
Powershell is a task automation and configuration management framework from Microsoft, consisting of a command-line shell and associated scripting language. Though it doesn't provide us with a nice GUI like processing, it does allow us to access directly access communication lines to send and recieve serial data with an FTDI usb-to-serial chip or even a wireless bluetooth serial chip. Again, it takes some time to learn the command-line shell and associated scripting language, but resources are abundant and it is an interesting tool to gain a better understanding of. This tool was also used to control the drawing robot in my final project. Keeping the same firmware that listens for certain ASCII characters for control, I used a simple python script to generate a series of W's A's S's and D's to dictate a path/pattern for the drawing robot, then saved that as a txt file and finally used Powershell to parse that text file character by character and send that information over the com port. Below is the powershell script that contain all of the relevant commands
$turt = New-Object System.IO.Ports.SerialPort COM35, 115200, None, 8, one
$turt.close()
$turt.open()
Start-Sleep -Seconds 10
Get-Content C:\Users\will.rudolph\Documents\txt_files\txt_test.txt -Encoding Byte | foreach { $turt.write([char]$_); Start-Sleep -Milliseconds 20 }
$turt.close()
To download my files click here: