3D Printing and Scanning
Assignment
Group
-Test 3D Printer Design Rules
Individual
- design and 3D print an object (small, few cm) that could not be made subtractively
- 3D scan an object (and optionally print it)
Group
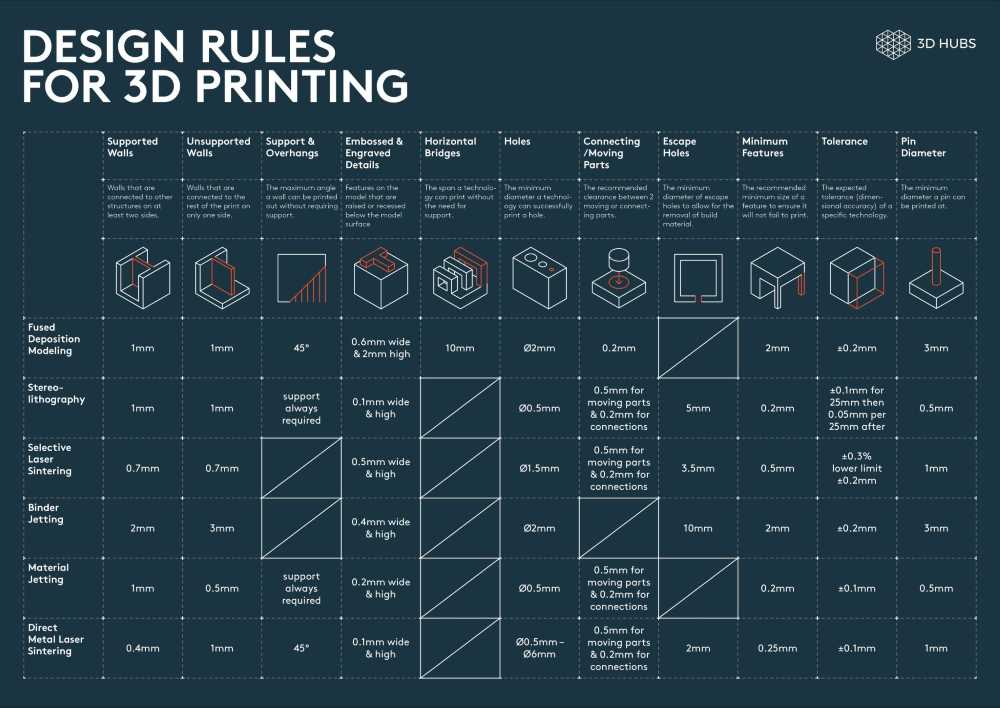
So I'm between years and kind of groupless again, so I'm going to test the design rules for my 3D Printer at home. It's a Prusa mkII kit knockoff that I built a in 2017. I used this STL to test the design rules of my printer and see where features such as overhangs begin to fail, when small detail will be lost, how accurate features will be. I found this chart which gives a nice rough overview of general 3D printing design considerations.
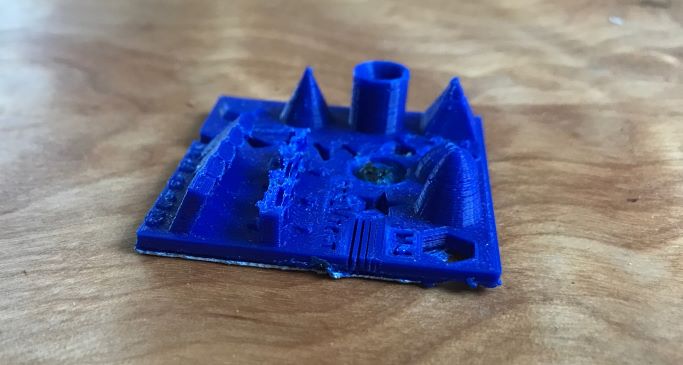
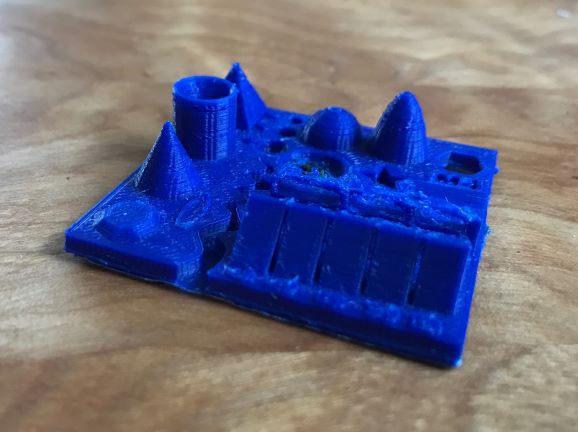
Here is the print that was produced using the standard profile that I've generated for the machine (.4mm nozzle, 1.2mm wall thickness 40% grid infill, 60mm/m max travel, .15mm layer height)

Scanning
This was my first time using a 3D scanner and to be honest, I had a bit of trouble thinking of something that I really want to scan. Most anything geometric with straight edges and regular curves seems easier to just model than to 3D scan (and modeling would produce a more substantial version of the object than a massive collection of points generated by a 3D scan). Organic things seemed like a nice candidate for 3D scanning as their irregular organic shapes would be very difficult to model traditionally. After too much bit of time spent trying to come up with an optimal object to scan, I decided to just start using the machine to get a better sense of how everything works.
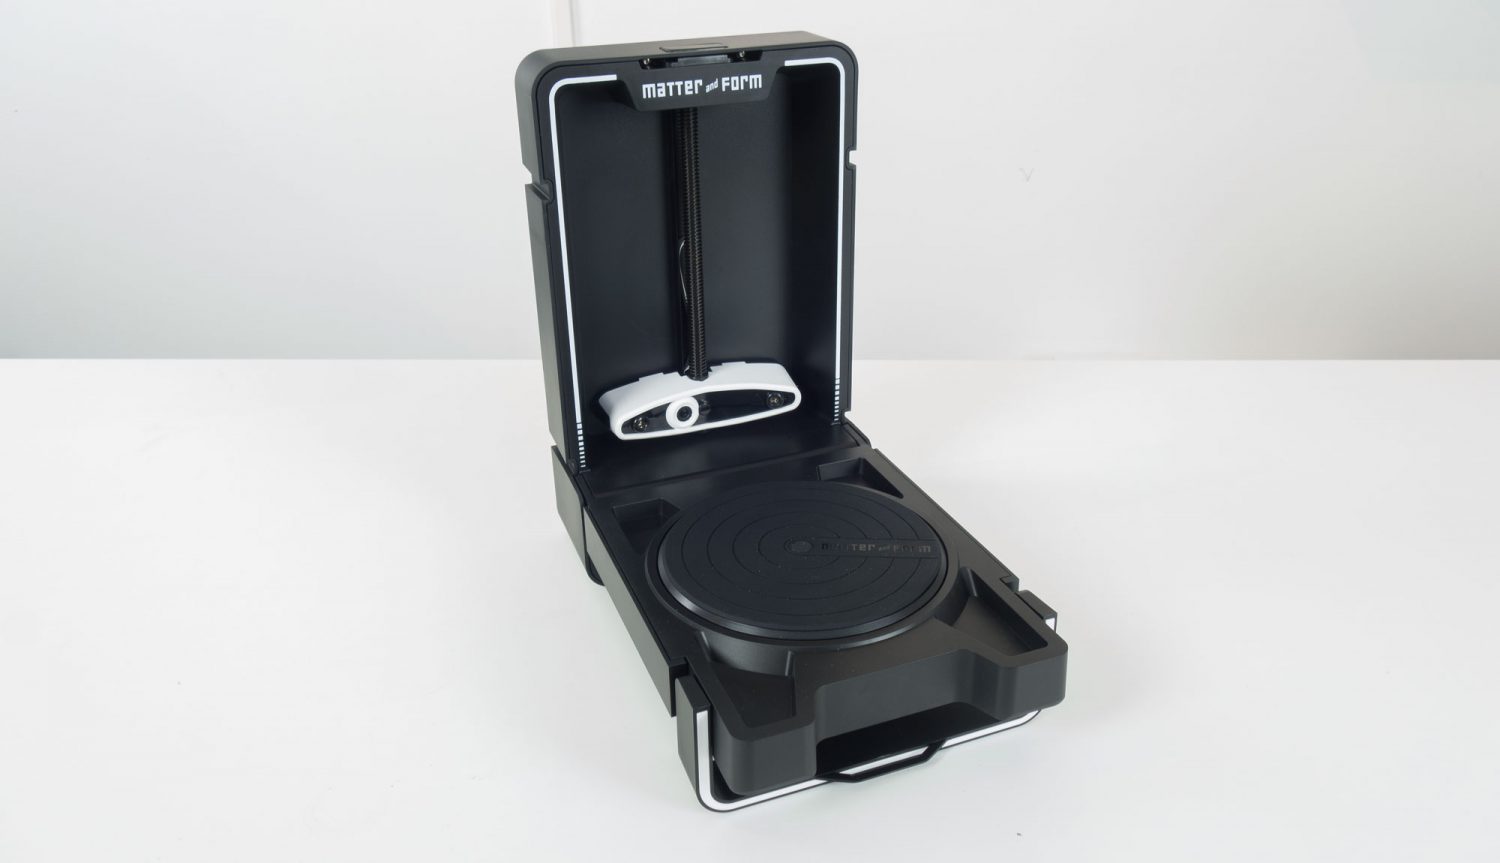
We have a Matter and Form 3D Scanner in the lab. The scanner has an accuracy of within ±1mm, a maximum object height of 250mm, diameter of 180mm, and weight of 3.0kg. Optically, it uses an HD CMOS sensor and two Class1 eye-safe lasers. It connects through to a computer through a usb cable, and software for setting up and making a scan is provided by the manufacturer. This manual provides in depth information about how to operate the machine and software. Scans are not perfect and still need to be cleaned up by hand - removing stray points, smoothing, closing, altering the mesh. Once it is acceptably edited, you can export the mesh as an STL or OBJ and perform and further manipulation in other software of your choosing such as Mesh Mixer, Sculptris, Fusion360, Rhino, FreeCAD, or many others.
My first scan, shown below was just the knife I had in my pocket. The final model produced is the result of mixing the mesh generated from two seperate scans. The scan quality in this case does not appear to be great. There was a lot of strange surface texture produced, though the overall model did an adequate job of capturing the form. For the quality of the model, the time spent scanning did not seem worthwhile in this instance. With some time spent editing, and a slower, finer scanning rate, I'm sure better results could be achieved. But I just wanted to see the machine in action. Perhaps organic forms would be better candidates for scanning than regular objects.
For my next scan, I went over to the Biology department to seek out some organic objects to model. I was given a shark jaw. Again, in this instance, the overall form was well captured, but small detail was lost and a rough surface texture was introduced. I had hopes for printing a facsimile so the department could let students handle the 3D model. Unfortunately, the level of detail felt insufficient for anything useful without lots of mesh refining and editing.
After my first couple less than fruitful scans, I decided I'd just scan some odd tchotchkes I've got laying around the house. They're both old cast tin toys/ornaments that have a lot of character (something worth capturing).
Again, the scans turned out somewhere between poor and adequate. I'm sure I could have gotten more detail by scanning the objects multiple times and combining the meshes, but honestly, I just couldn't think of anything I wanted scanned whose befefits would outweight the cost of the time necessary for a decent model.
Printing
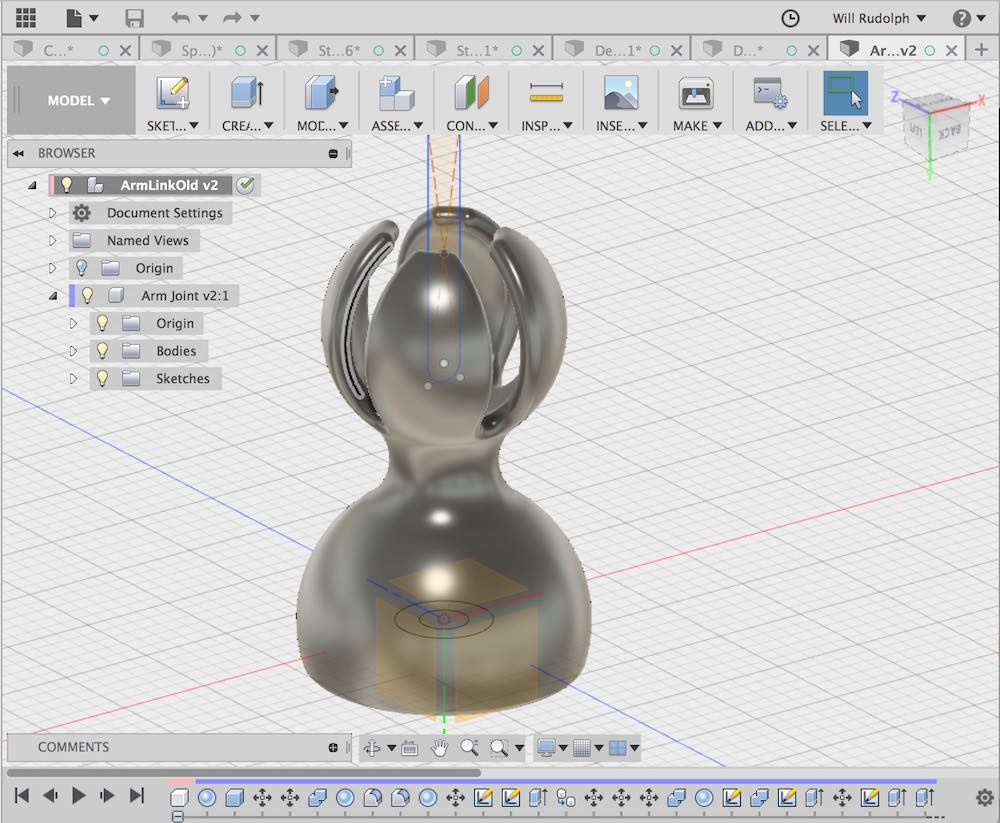
After all that scanning, I was antsy to actually get to printing something. I had an idea for flexible arm that could be turned into a small lamp for soldering. It would be made of modular linkages that would snap together and stay relatively rigid when assembled. This is something I can imagine relatively easily, but would struggle to fabricate through subtractive processes.
I started off creating the modular linkage piece that would snap together to form the bulk of the flexible arm. The base and head were simple alterations of this piece.
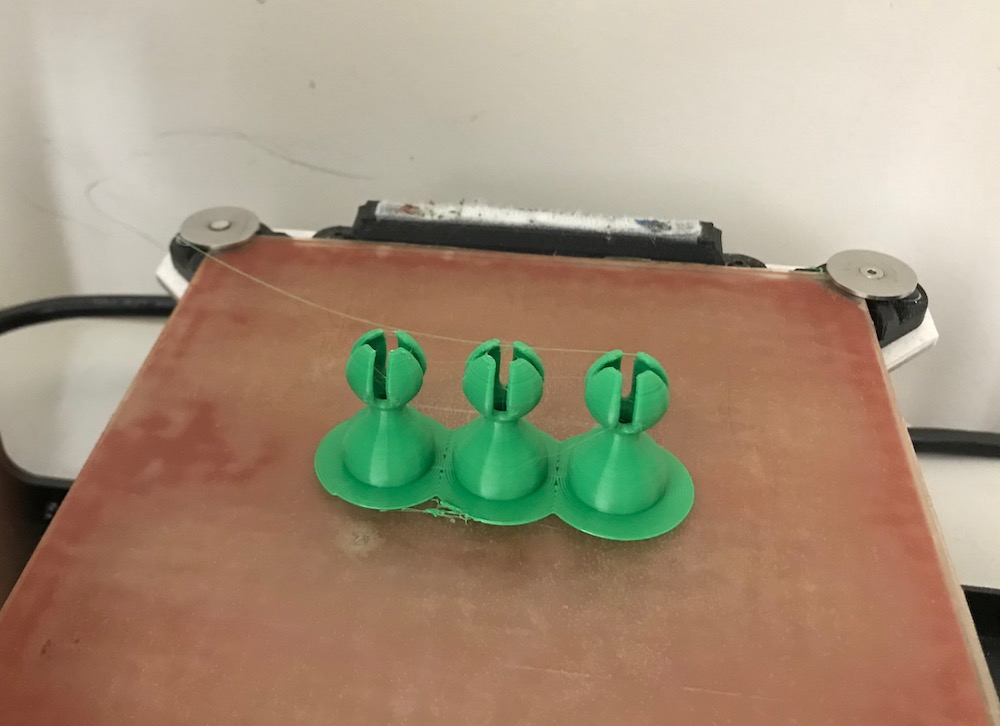
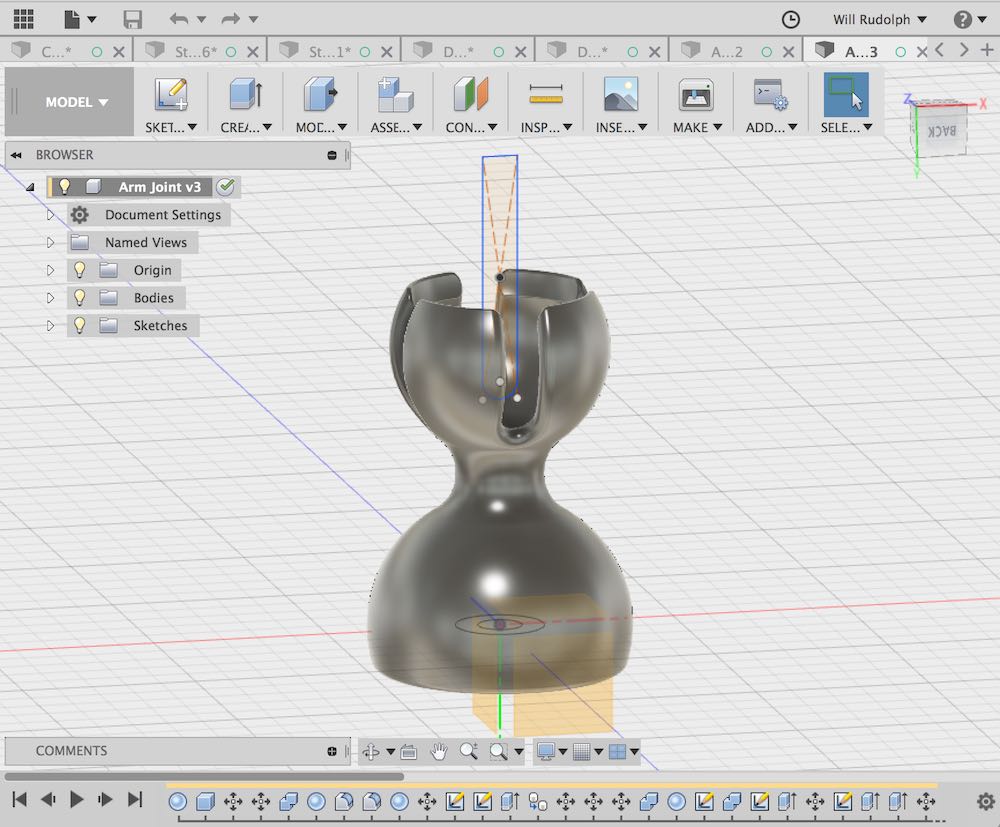
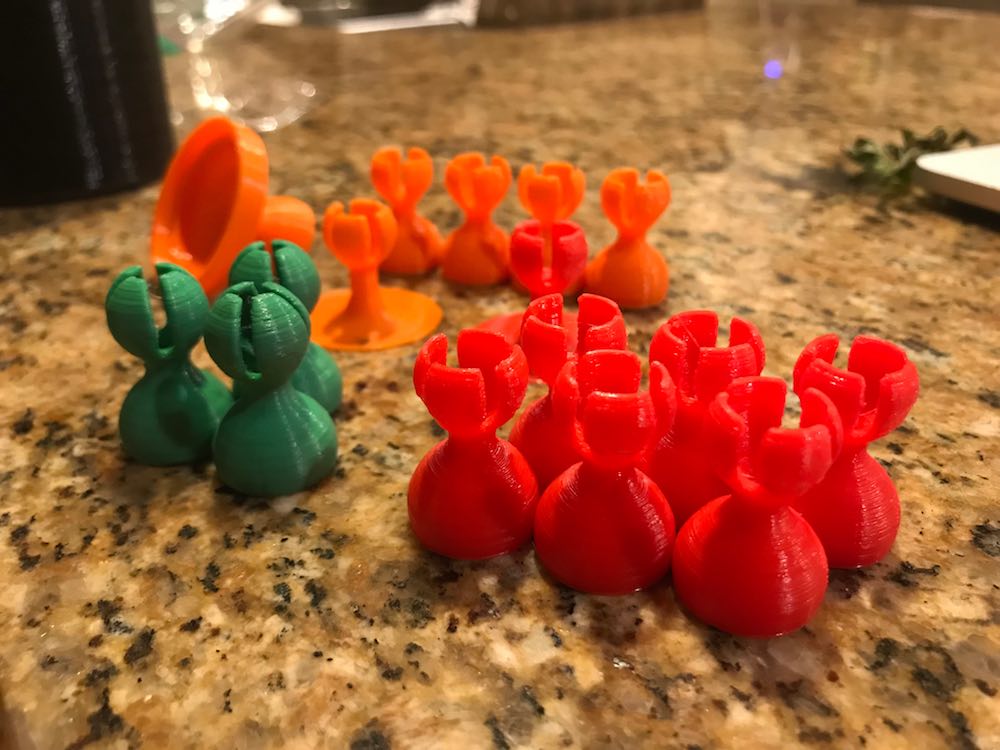
This design worked, and was very satisfying to snap together, flex, and play with, but I realized after assembling them that the top of the flexure would cover up the hole that passes through the piece when moved to its extereme. This would make running wiring through the neck impossible. I went back to the drawing board and updated to my model in fusion to give room for everything to move to its maximum extent and still allow wiring to pass through.
To download my files click here: