Safety
Fire Risk
The laser cutter is fairly good at starting fires. NEVER leave the cutter unattended. You need to watch your cuts at all times. Make tea first, then laser cut.
If a fire occurs, follow these steps in order:
- Open the lid to turn off the laser.
- Spray water from the small spray bottle.
- Use the CO2 fire extinguisher in front of the filter system. Consider the impact this will have on the machine, but obviously use the extinguisher if you think you need to!
Setup
Hardware setup
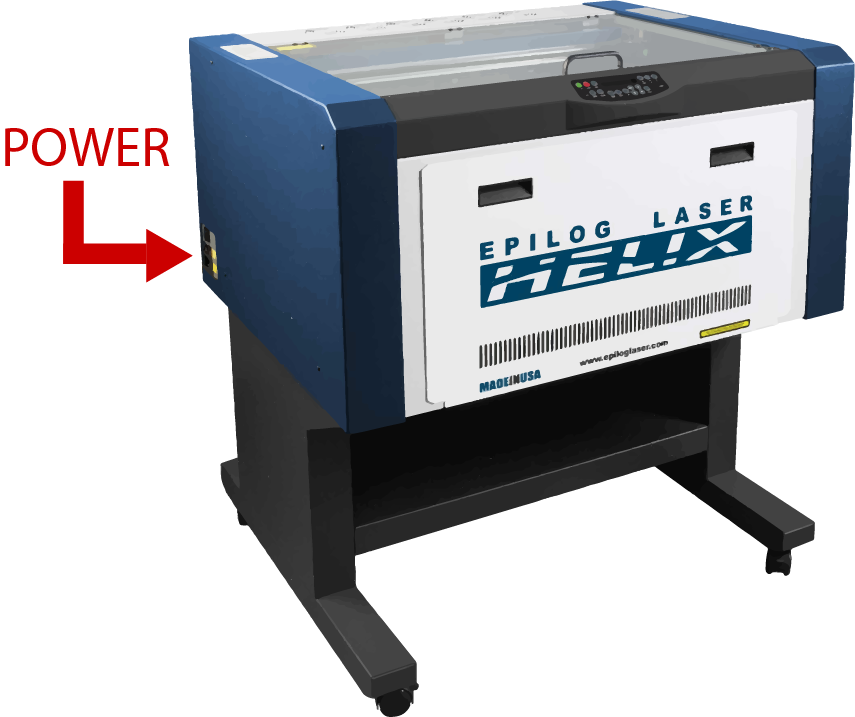
- Turn on the laser cutter. The power switch is at the rear left hand corner as you face the machine.
- Place your material on the machine bed, aligning it in the top left against the rulers. Consider raising the material away from the aluminium base using supports.
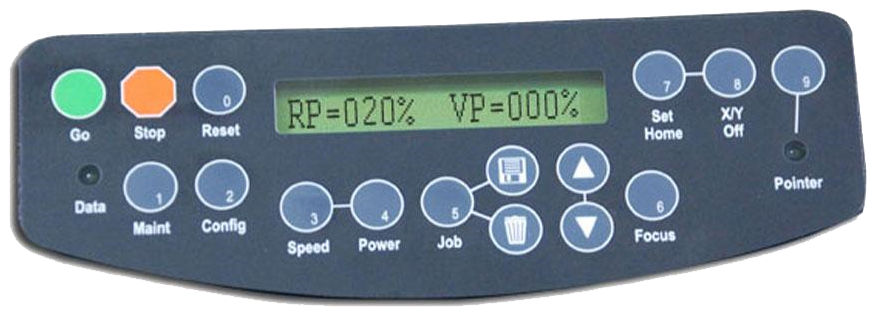
- Set up the machine using the front panel. Note: we work down from button 9 to button 6 (all on the right hand side of the panel), then skip to button 0 to reset the cutter. Buttons 1-5 are not required for cutting.
- Button 9: Press [POINTER] to toggle the red laser point on or off to aid with positioning.
- Button 8: Press [X/Y OFF] and press [GO] to confirm (this will turn off the motors which move the laser in X-Y). Physically move the gantry (gently) to your desired starting position (0,0).
DO NOT TOUCH THE MIRRORS - Button 7: Once the gantry head is positioned, press [SET HOME] to set the current X-Y position as the home position.
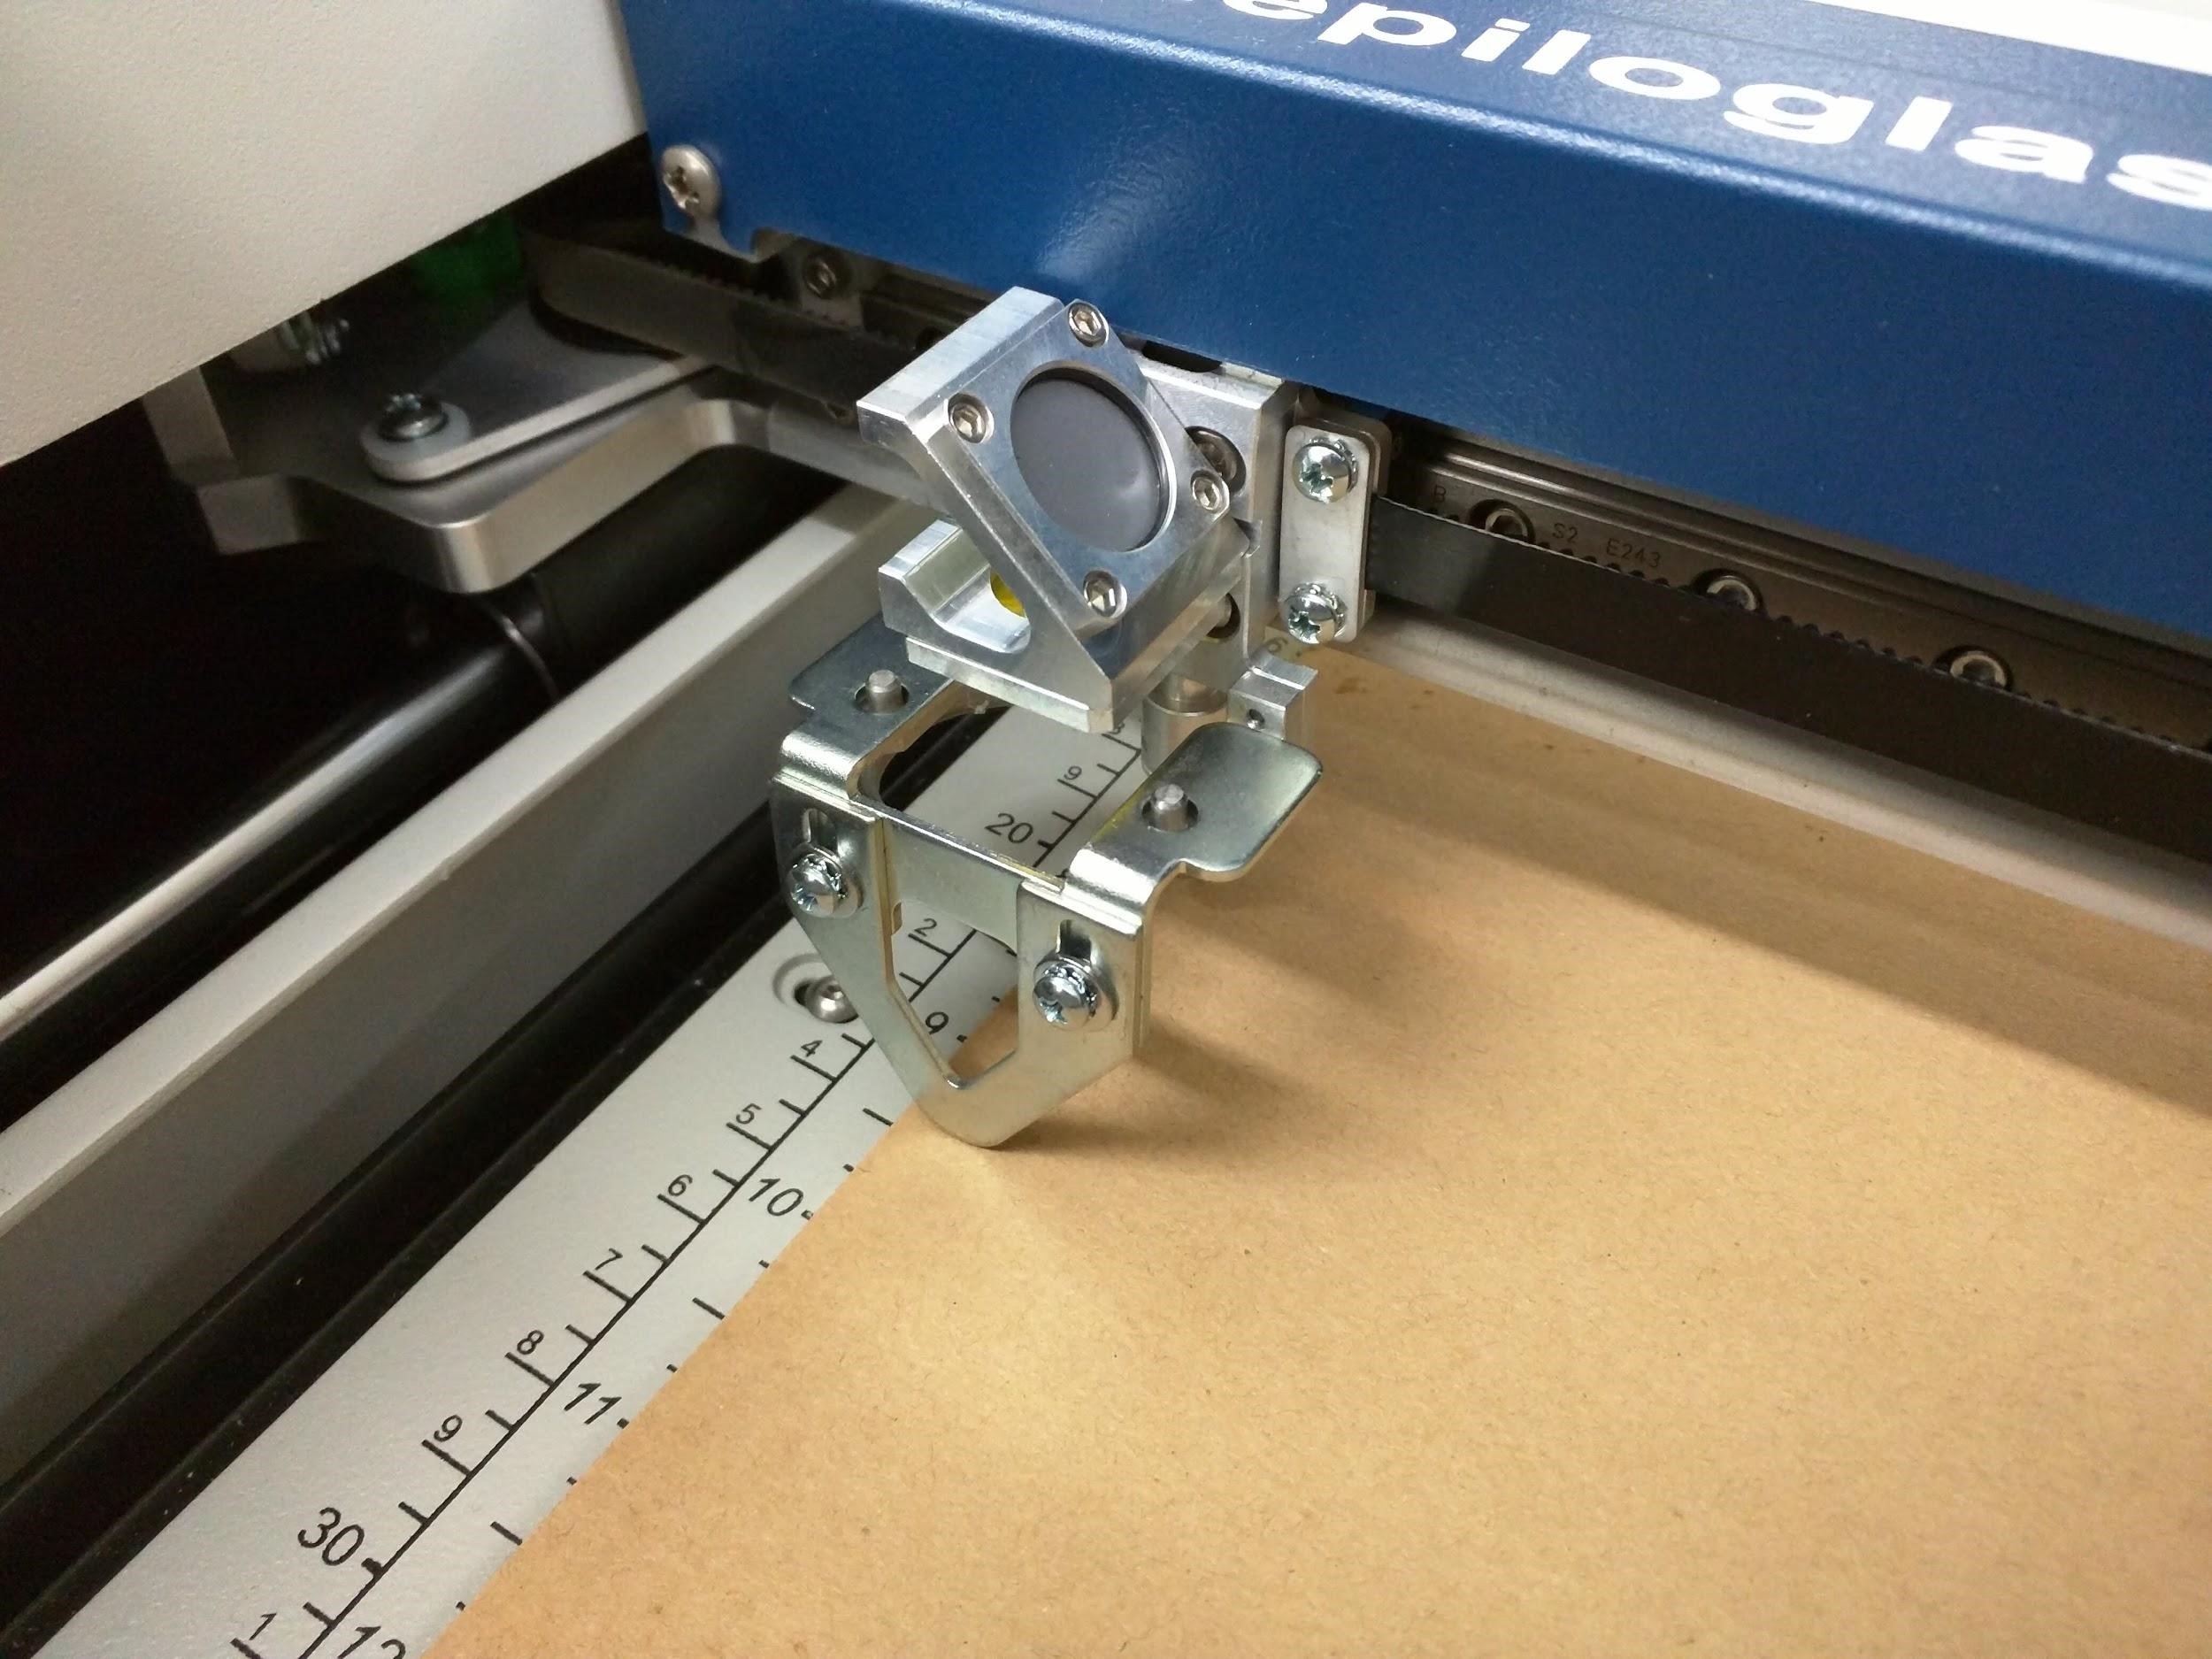
- Button 6: Press [FOCUS] and the gantry should move in from the origin slightly. Attach the magnetic focus tool (see image below) and adjust the bed height using the up and down arrows [▲] and [▼] until the height tool on the head is just touching your material. Remove the focus tool.
- Button 0: Make sure the focus tool has been removed and press [RESET] to move the head back to the home position.
The laser hardware is now set up for cutting and is waiting to be sent a job. The next step is to configure the software.
Software setup
- Do something.
Extraction setup
The extraction system is very easy to turn on, but is easily forgotten. NEVER cut anything without the extration system running. There is no interlock system for the extraction - the laser will cut without the filter or compressor turned on, but will rapidly fill the Fab Lab with horrible fumes.
- Turn on the tall standing fume extraction machine.
- Turn on the compressor on the floor.
- Check that the job is visible on the front panel of the laser. The jobs are numbered to differentiate multiple versions of the same file.
Make one last visual and auditory check - is the material in the right place? Is the laser focused? Are the compressor and fume extractor running?
Press [GO] to start the laser cutter.
Reference
Do Not Cut List
- Do something.
Material Speeds & Feeds
The table below provides a starting point for experimentatation with a material. Materials do not always perform the same way every time, for example different acrylic brands might melt or frost differently. Always run a test piece.
| Material | Purpose | Thickness | Speed | Power | Frequency |
|---|---|---|---|---|---|
| Acrylic | Text Engraving | - | 90s | 55p | 300 DPI |
| Cutting | 3mm | 20s | 90p | 5000f | |
| Cutting | 4mm | - | - | - | |
| Cutting | 5mm | - | - | - | |
| Cutting | 6mm | 6s | 100p | 5000f | |
| MDF | Text Engraving | - | 25s | 100p | 500f |
| Cutting | 3mm | 25s | 100p | 500f | |
| Cutting | 6mm | 10s | 100p | 500f | |
| Cutting | 3mm | - | - | - | |
| Card | Cutting | - | - | - | - |
| Corrugated Cardboard | Cutting | 6mm | - | - |
Kerf
- Do something.