PROJECT MANAGEMENT
2.WEEK
This assignment was all about introducing myself with web development with help of HTML (Hypertext Markup Language) and CSS (Cascading Style Sheets) and also with work trough Git.
#GIT
First thing to do was to install Git, if we don’t have one, so I installed GitBash for Windows from Git site. And this is how it looks on first look before any command…
After installation I configure my username and email with:
git config --global user.name "Your Name"
git config --global user.email your@mail.com
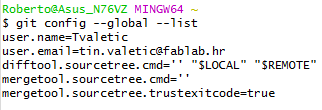
To check if I typed everything right I used the command to display my Name and Email.
“git config --global --list”
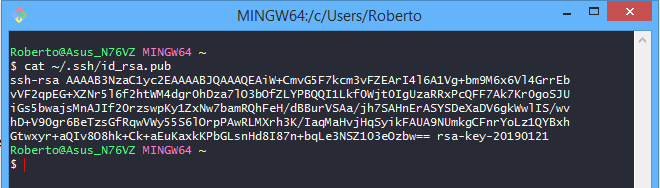
Now I can continue to the next step which is configurating SSH key. I had to be shure that I don’t have one so I typed:
“cat ~/.ssh/id_rsa.pub”
. So I installed PuTTY which is going to help me to get my public and private SSH key. Public key is the one that I have to put on my GitLab site. When is PuTTY installed I need to open "PuTTY Key Generator like picture below and pres "GENERATE" to get my Private and Publick SSH key. Publick key I need to copy and paste on gitlab site.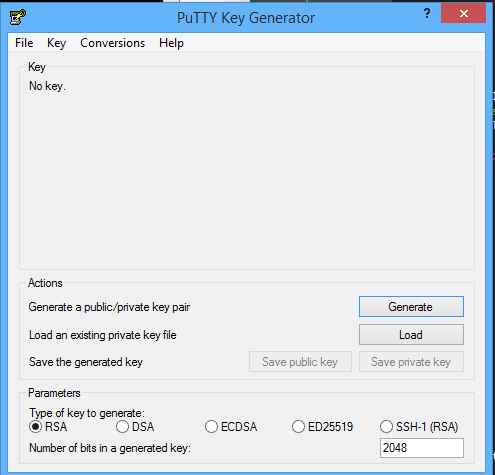
Now just to check if I done everything correct. Need to go on GIT BASH once more and put same comand like earlier.
“git config --global --list”
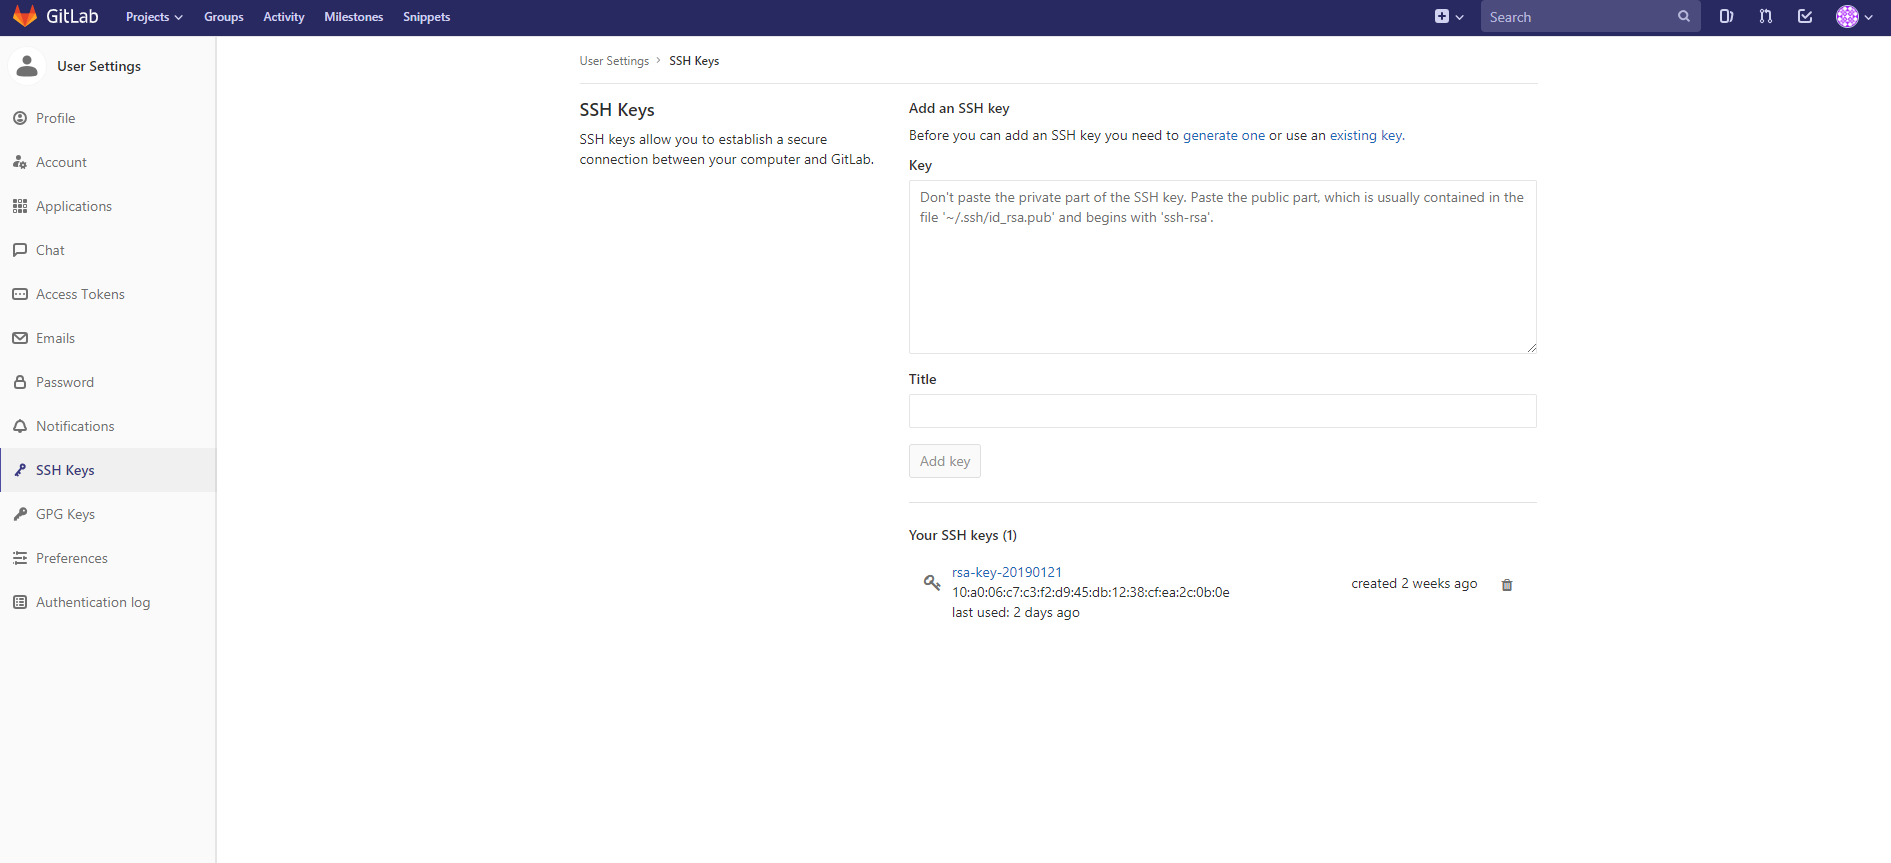
In picture bellowe is shown how the SSH site looks like. And also the icon of the key on bottom with SSH key that I put.
There is also simmplier way to do it. Just go to GIT Bash and type
ssh-keygen -t rsa -C "$your_email"
Now after I connected Git with GitLab I can clone my repository from server to my local computer with:
“git clone git@gitlab.fabcloud.org:academany/fabacademy/2019/...”
And I also need to know one of the major commands for working with my repository which can be detailed seen at git-the simple guide
git pull
git add git commit -m “your Commit Massage” git push#BUILDING WEBSITE WITH HTML AND CSS
For web development I used Bracketsfor HTML and CSS, it’s an open source program that is recomand me by my mentors and it also allows me a live view of my site.
HTML is the standard markup language for creating Web pages. HTML stands for Hyper Text Markup Language, describes the structure of a Web page, consists of a series of elements, elements tell the browser how to display the content, elements are represented by tags, tags label pieces of content such as "heading", "paragraph", "table", and so on. Browsers do not display the HTML tags, but use them to render the content of the page
This was the first time that I got to work with HTML and CSS so at the first it was hard for me, but with mentors help and w3schooltutorial site that describes every step by step and describes every command and you are also able to try it live on the site, I manage to develop my FabAcademy site. But I used the tamplate from w3school that seems nice and made some changes to the style and start to adding my documentation.
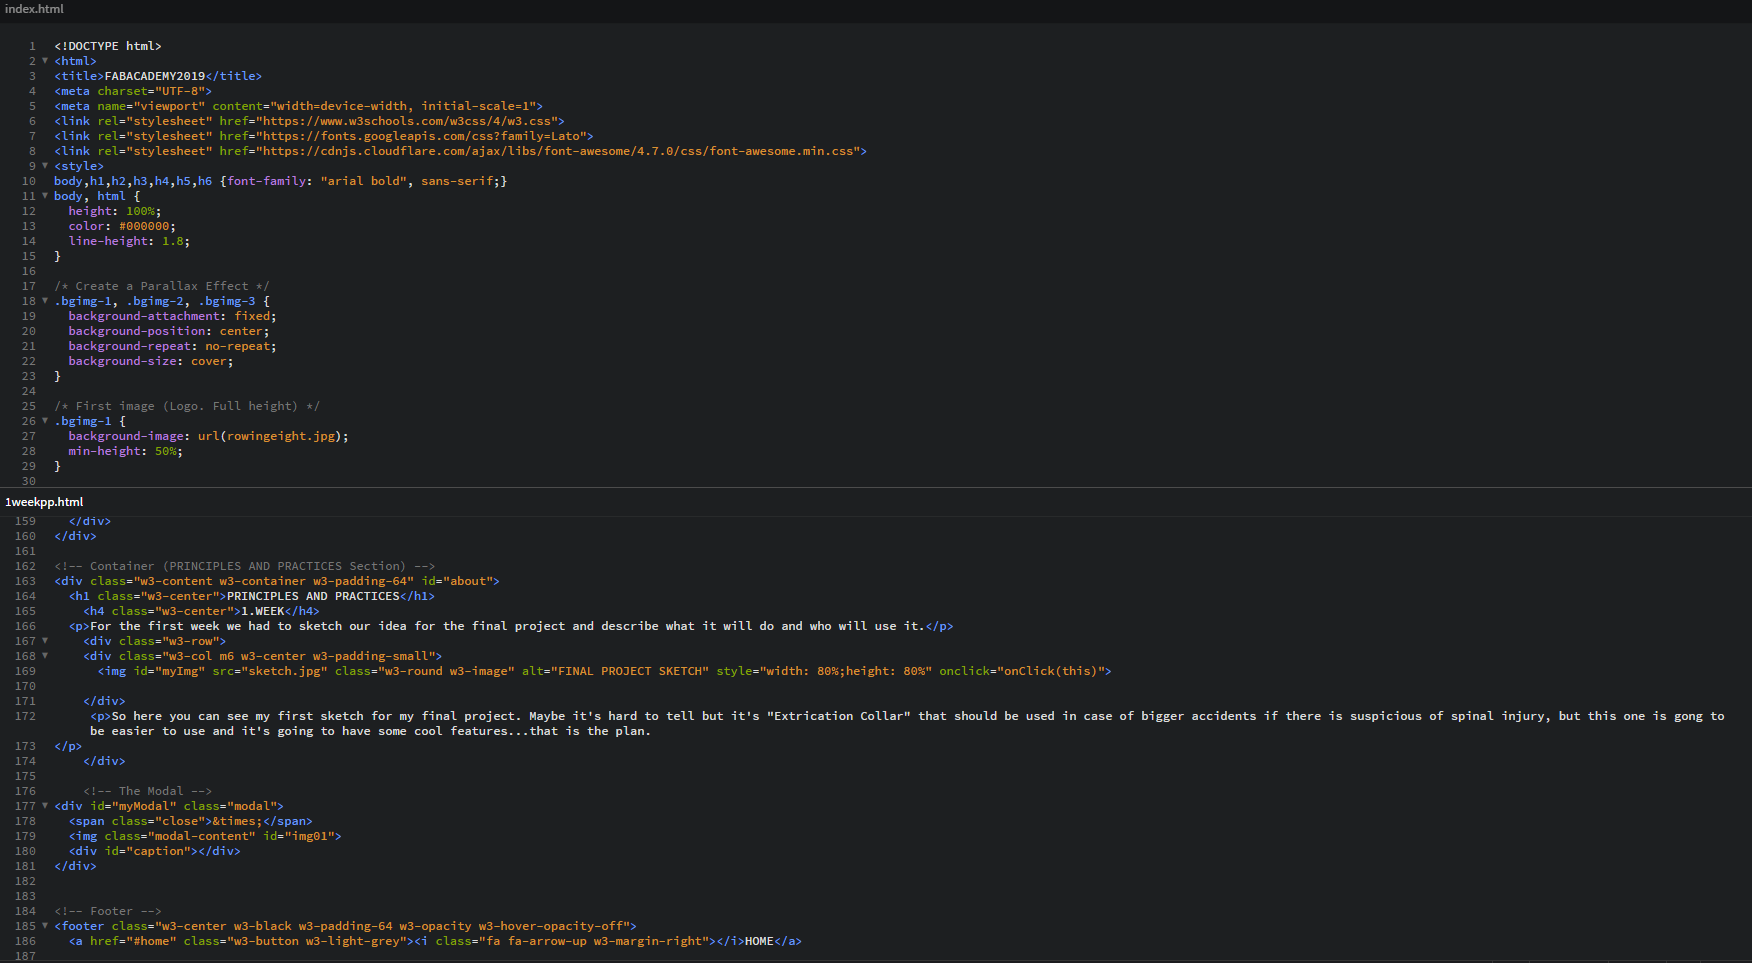
Picture below actually shows how my “Home” and “1week” site looks like in Brackets in HTML and CSS.
CSS is a language that describes the style of an HTML document, describes how HTML, elements should be displayed.
For CSS I used "w3schools" tamplate and change some of important things like look of toolbar, background, font style, etc.
EXAMPLE EXPLAINED FOR HTML
The declaration defines this document to be HTML5
The "html" element is the root element of an HTML page
The "head" element contains meta information about the document
The "title" element specifies a title for the document
The "body" element contains the visible page content
The "h1" element defines a large heading
The "p" element defines a paragraph
#ATOM EDITOR
After succesful work with Brackets and starting with web design, I wanted to try another web editor. So I searched trough the internet and got to this ammazing one called ATOM. Atom is a free and open-source text and source code editor for macOS, Linux, and Microsoft Windows with support for plug-ins written in Node.js, and embedded Git Control, developed by GitHub.
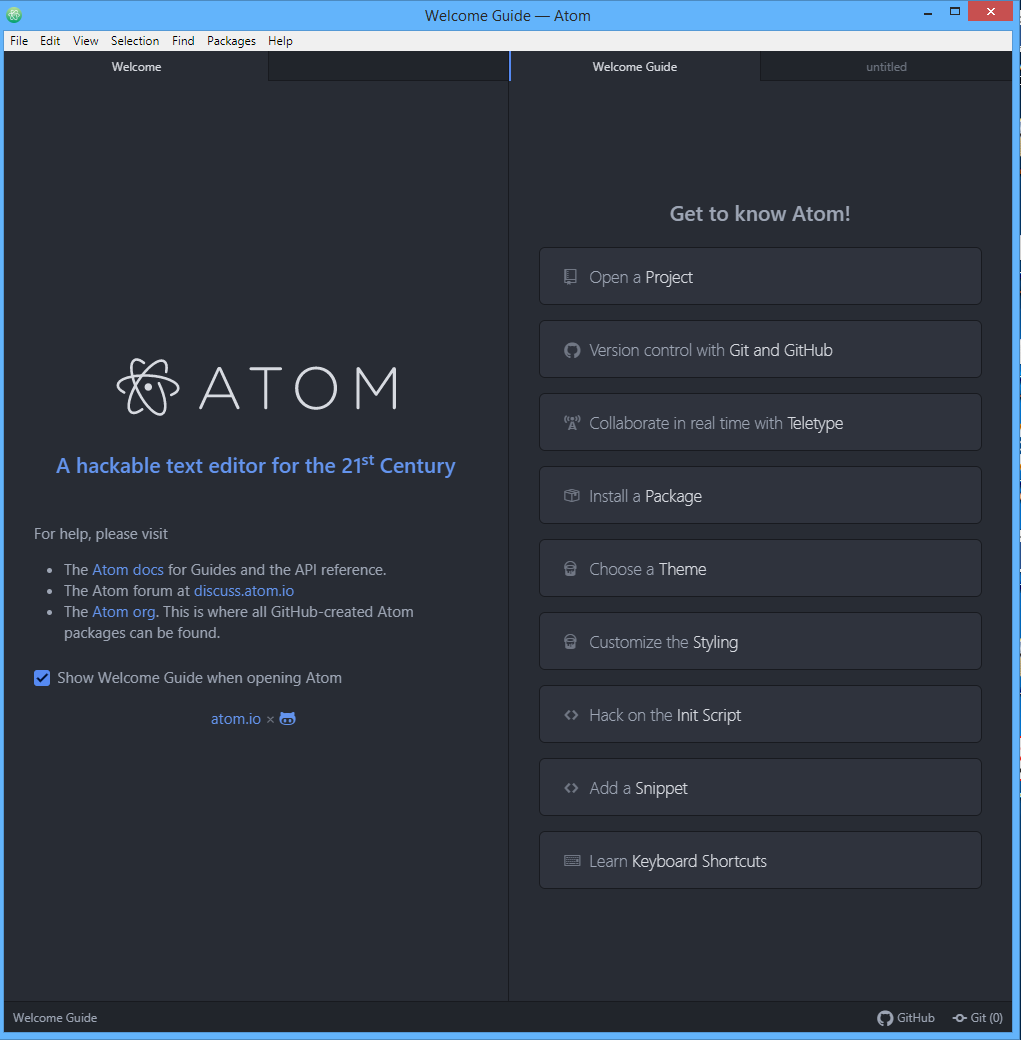
Because this is just for testing I'm not going into deep explanation. As you can see on first picture that is home page of ATOM where you can chose your first step, from opening already exesting projec, downloading themes and stying or learning shortcuts for making your experiance with Atom even better.

Now after checking some of basics, for just preview I opened in Atom my .html from this week (picture abowe). In comparation with Brackets, I can not see big difference in main window, but Atom seams like he has better organised window. Or is that only my point of view.
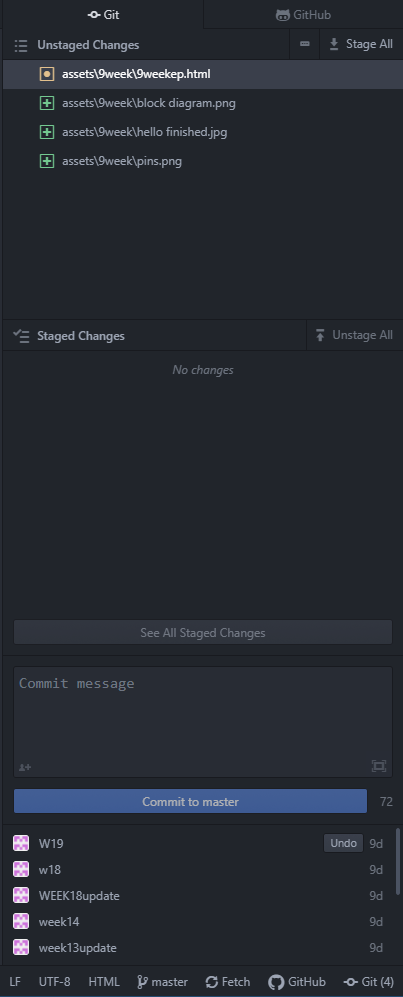
I noticed that Atom has already built in git, github and is connected to my master branch, without me connecting it separately. It also has big window for commit massage and like in Brackets you can "PUSH" and "PULL" directly from Atom.
After discovering little bit of Atom I felt really freandly with him and would like to use him for som eof my future work, but for FabAcademy I'll sty with Brackets.