
1 - Project Management
Program your own website
This was my first week as I enrolled late in the program and when started I didn't have access to my GitLab repository, so I started working on my website. I had some previous experiences programming, HTML and CSS, but I decided to investigate a little bit about easier ways to create a static website to learn new ways and methods to develop websites.
First trys and fails
The first thing I did was learning how to write in a Markup language. Following the Fab Academy suggestions I decided to lear Markdown following this tutorial. Markdown is easy to learn and use, and lets you create your web content really fast. Although, what I could experience was that using pure HTML you have more control, so I recommend using Markdown for people who doesn't like to write code and didn't have time to lear how to develop in HTML.
After learning Markdown, I tried Jekyll. Jekyll is a static web generator build to help people to create a blog-aware webs in an easy way. It is build upon Ruby, so, if you are using Windows, as I am, you first have to install Ruby and then install the Jekyll bundle gem to start using it. You can follow the instructions on theirwebsite to get it started.
With everything up and ready I did a few tours, but I decided to leave it apart and use HTML. For me it was easier as I did have some previous knowledge and, as I said at the beginning, it gives to you much more control on your website and you can do some cool stuff. I recommend to use a site generator for beginners or people who didn't like to code. Otherwise, spend some time learning and you would get amazing results.
HTML template, Sublime text editor and final design
As I start late and I only had 2 days to design my webpage and after spending some time playing around with other tools, I decided to use an HTML template and customize it. I downloaded a template from HTML5UP!, a website full of free templates that you can use for your websites.
After having the template I had to customize it. To do so, I decided to use Sublime Text as my files editor. It is a free to use editor with nice features, so I totally recommend it to anyone. Once it was installed I started modifying the files.
Everything could be done in HTML, but you can create a .css file to manage the style of the full website. So, I had the different pages .html files, where all the content is uploaded, and the .css stylesheet, where the styles are defined. There were also other assets as javascript files, but I didn't change them as I only wanted to change the view and the content of the web page. There is also a predefined images folder where all I will store all the images I need for the web page.
The most difficult part to customize is the .css files, as there is a lot of information there, but using Ctrl+F you will solve the majority of your problems to find what you are looking for. The first thing I did was to change the colors. To get some nice colors I used Coolors, a website that generates random color pallets. With the new colors decided I made some changes to the style, I changed the font (using one from Google Fonts), I resized the header and some other minor changes. Finally, I decide to start changing the content and I did a Generic page and the Index with all the week's assignments.
After having all the web working fine, I decidied to change the tiles, so I spend some time changing the default background lines for the tiles to get some nice design. After different tests I decided to use a web created .svg lines to create the final design with diagonal stripes:
GitLab repository setup and configuration
After 2 days working on my website, I get my access to my GitLab repository, so I needed to configure it and link my web page. It seems easy to do, but there is always a tricky part in it, so I will explain how I finally manage to get it working. 💪
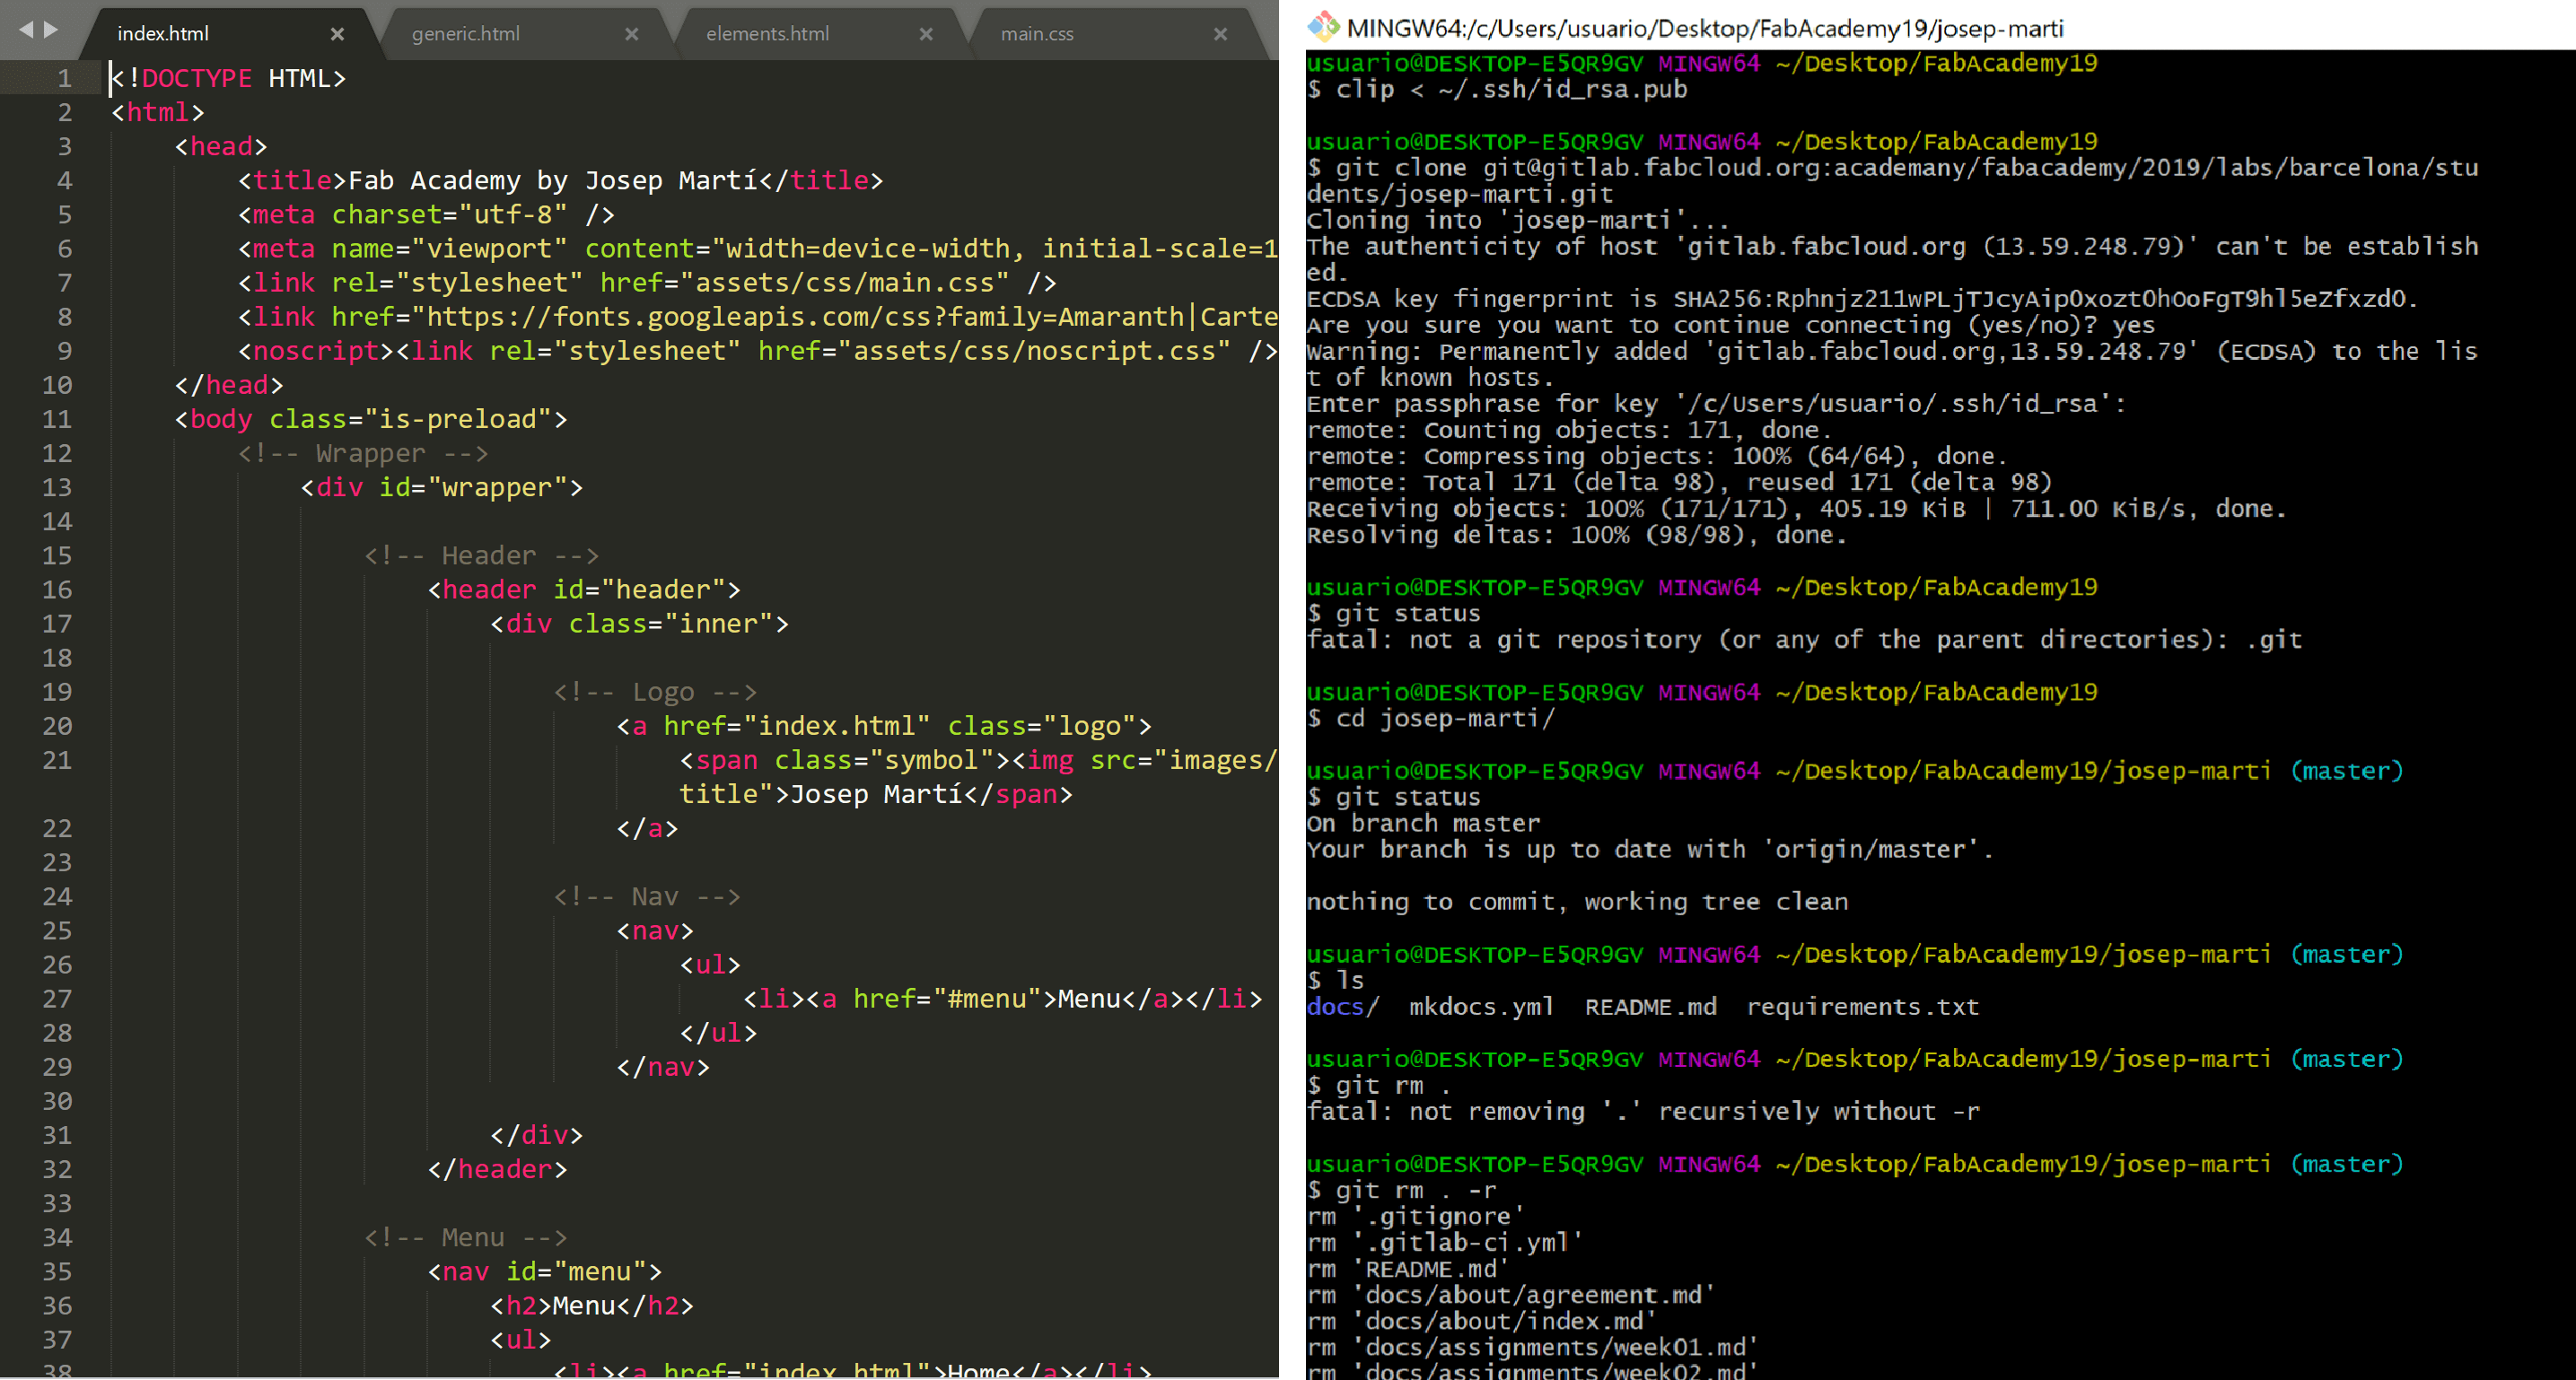
 As I was using Windows I needed to download the Git Bash (You can downloaded it from this site. Installing it was easy, only follow the steps of the installation and you will have it. The only problem I faced was trying to change the default editor, I tried using Sublime Text but it throws an error, so I decided to use Vim, the default editor, like you can see in the picture. It works fine for me, is a command terminal where you can deploy the git commands that you will need to get and upload files from your repository.
Once I had the Git bash installed and running, the first thing that I did was to configure my repository, updating my name and email with the next commands:
git config –-global user.name “YOUR_USERNAME”

git config –-global user.email “YOUR_EMAIL”
Afterwards, you have to create an SSH public key to share my content through the browser connecting my online repository with my computer. To do so, run the next command in the Git Bash terminal.
ssh-keygen -t rsa -C "$YOUR_EMAIL" 		//create the key

clip < ~/.ssh/id_rsa.pub 		        //copy the key to your clipboard
Then you have to copy this key to your GitLab web repository going through Settings/SSH Keys. With that, you will have your repository connected and ready to be used, you only need to create a local copy of the files and start working!
To do so, navigate trhoughout the terminal to the local folder where you want to store your work, or open Git Bash from the folder (right click inside the folder and open GitBash Here). Once there is time to clone the repository with the command:
git clone YOUR_GIT_URL //get your URL form the web
After it is cloned you will see you have the full repository in your local folder. Now you can start working with it.
Using GitLab
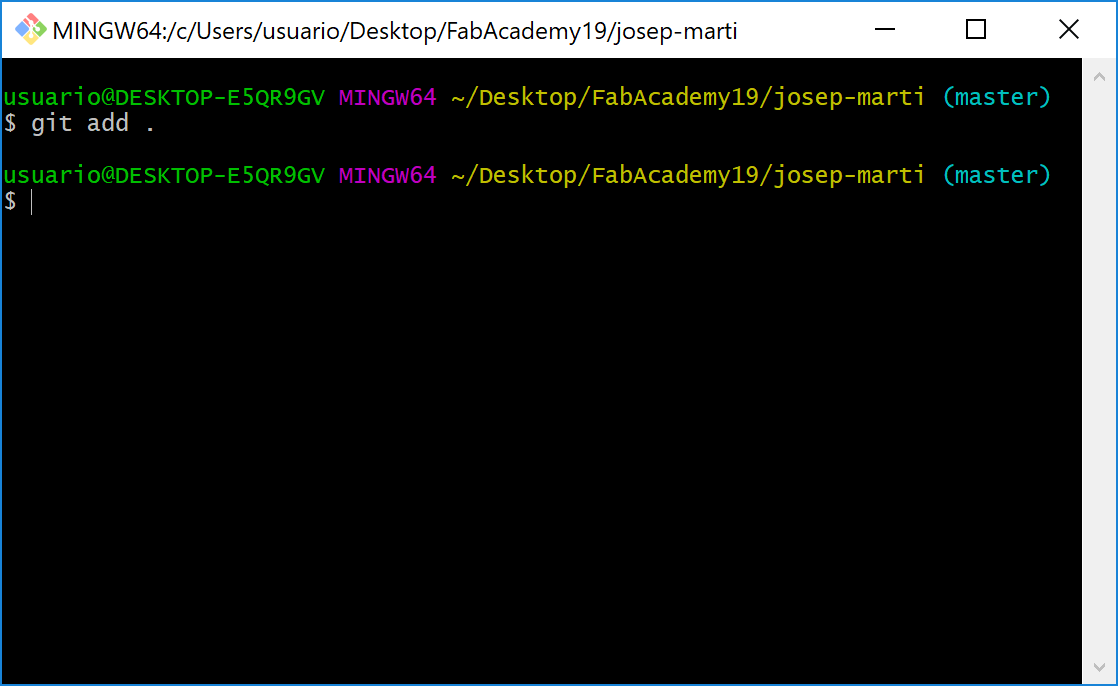
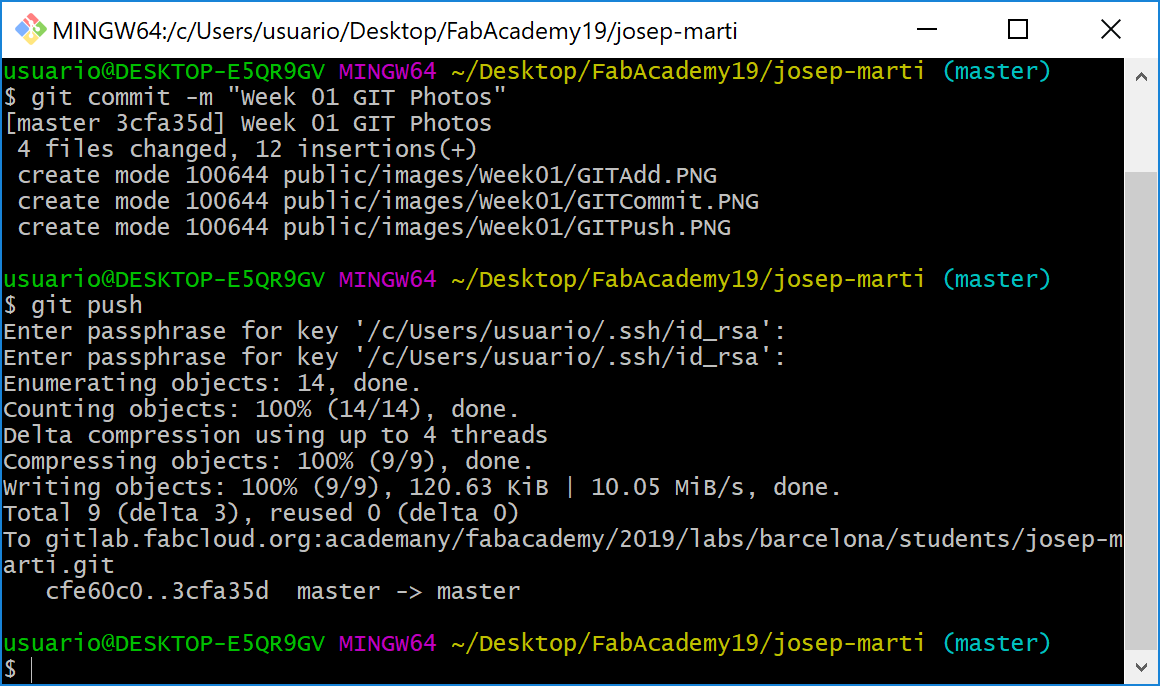
After configuring the repository I had to delete all files to upload my own HTML website, add the new files, commit the changes done and push it to the repository. To do so I followed these commands:
git pull		//download files form the master branch
git rm . -r 	//remove all files from the repo (-r for recursive)
git add . 		//add all new files to your branch
git status		//to check the status of your branch
git commit -m "comment"		//commit the changes
git push		//push all changes to the master repository
I realized that there were 3 commands that were the ones that I will use every week, the git add, the git commit and the git push. Those are the commands needed to upload all your work, so the one that I will use every day to upload all my progress. Here are some screenshots of the result it has to show:

After all work was done, I decided to try if my website was online, but it didn't... It misses one file, the .gitlab-ci.yml file! It is needed to deploy your website so, be careful. It is a file that contains the instructions for the repository to build your website, so it will be different depending which website extension you are using, if you are using HTML, Jekyll, Mkdocs... It can be generated directly from GitLab clicking in New file selecting the .gitlab-ci.yml file type and looking for your extension. Note that the standard way is to store all your web files in a folder named public inside your repository.
Also, I wanted to note that the online repository is case sensitive, so make sure that you define the correct file extension, because I had some files as .PNG and some as .png, locally I can see both, but onlie if it is in capital letters and you didn't define it that way it will not show.
Conclusions
It was a really interesting week, my first days in the Fab Lab, with a lot of information to process but tones of cool things learned. The tools learned here are very important nowadays in a globalized world. Repositories like GitLab are a very useful tool to manage your projects, and I am sure I will use it in the future. Also, learning to develop web pages is really fulfilling, challenging and fun to learn as you go, so I recommend everyone to face those problems and get a nice page done.