8. Computer controlled machining : Myna Bird
So in this week we have worked on CNC milling where each student in Fablab Bahrain had to pick a bird that lives in Bahrain design a press-fit for it and thin cut it by the shopbot cnc milling machine. I will be sharing my step in creating myna bird by cnc
Step 1: joinery
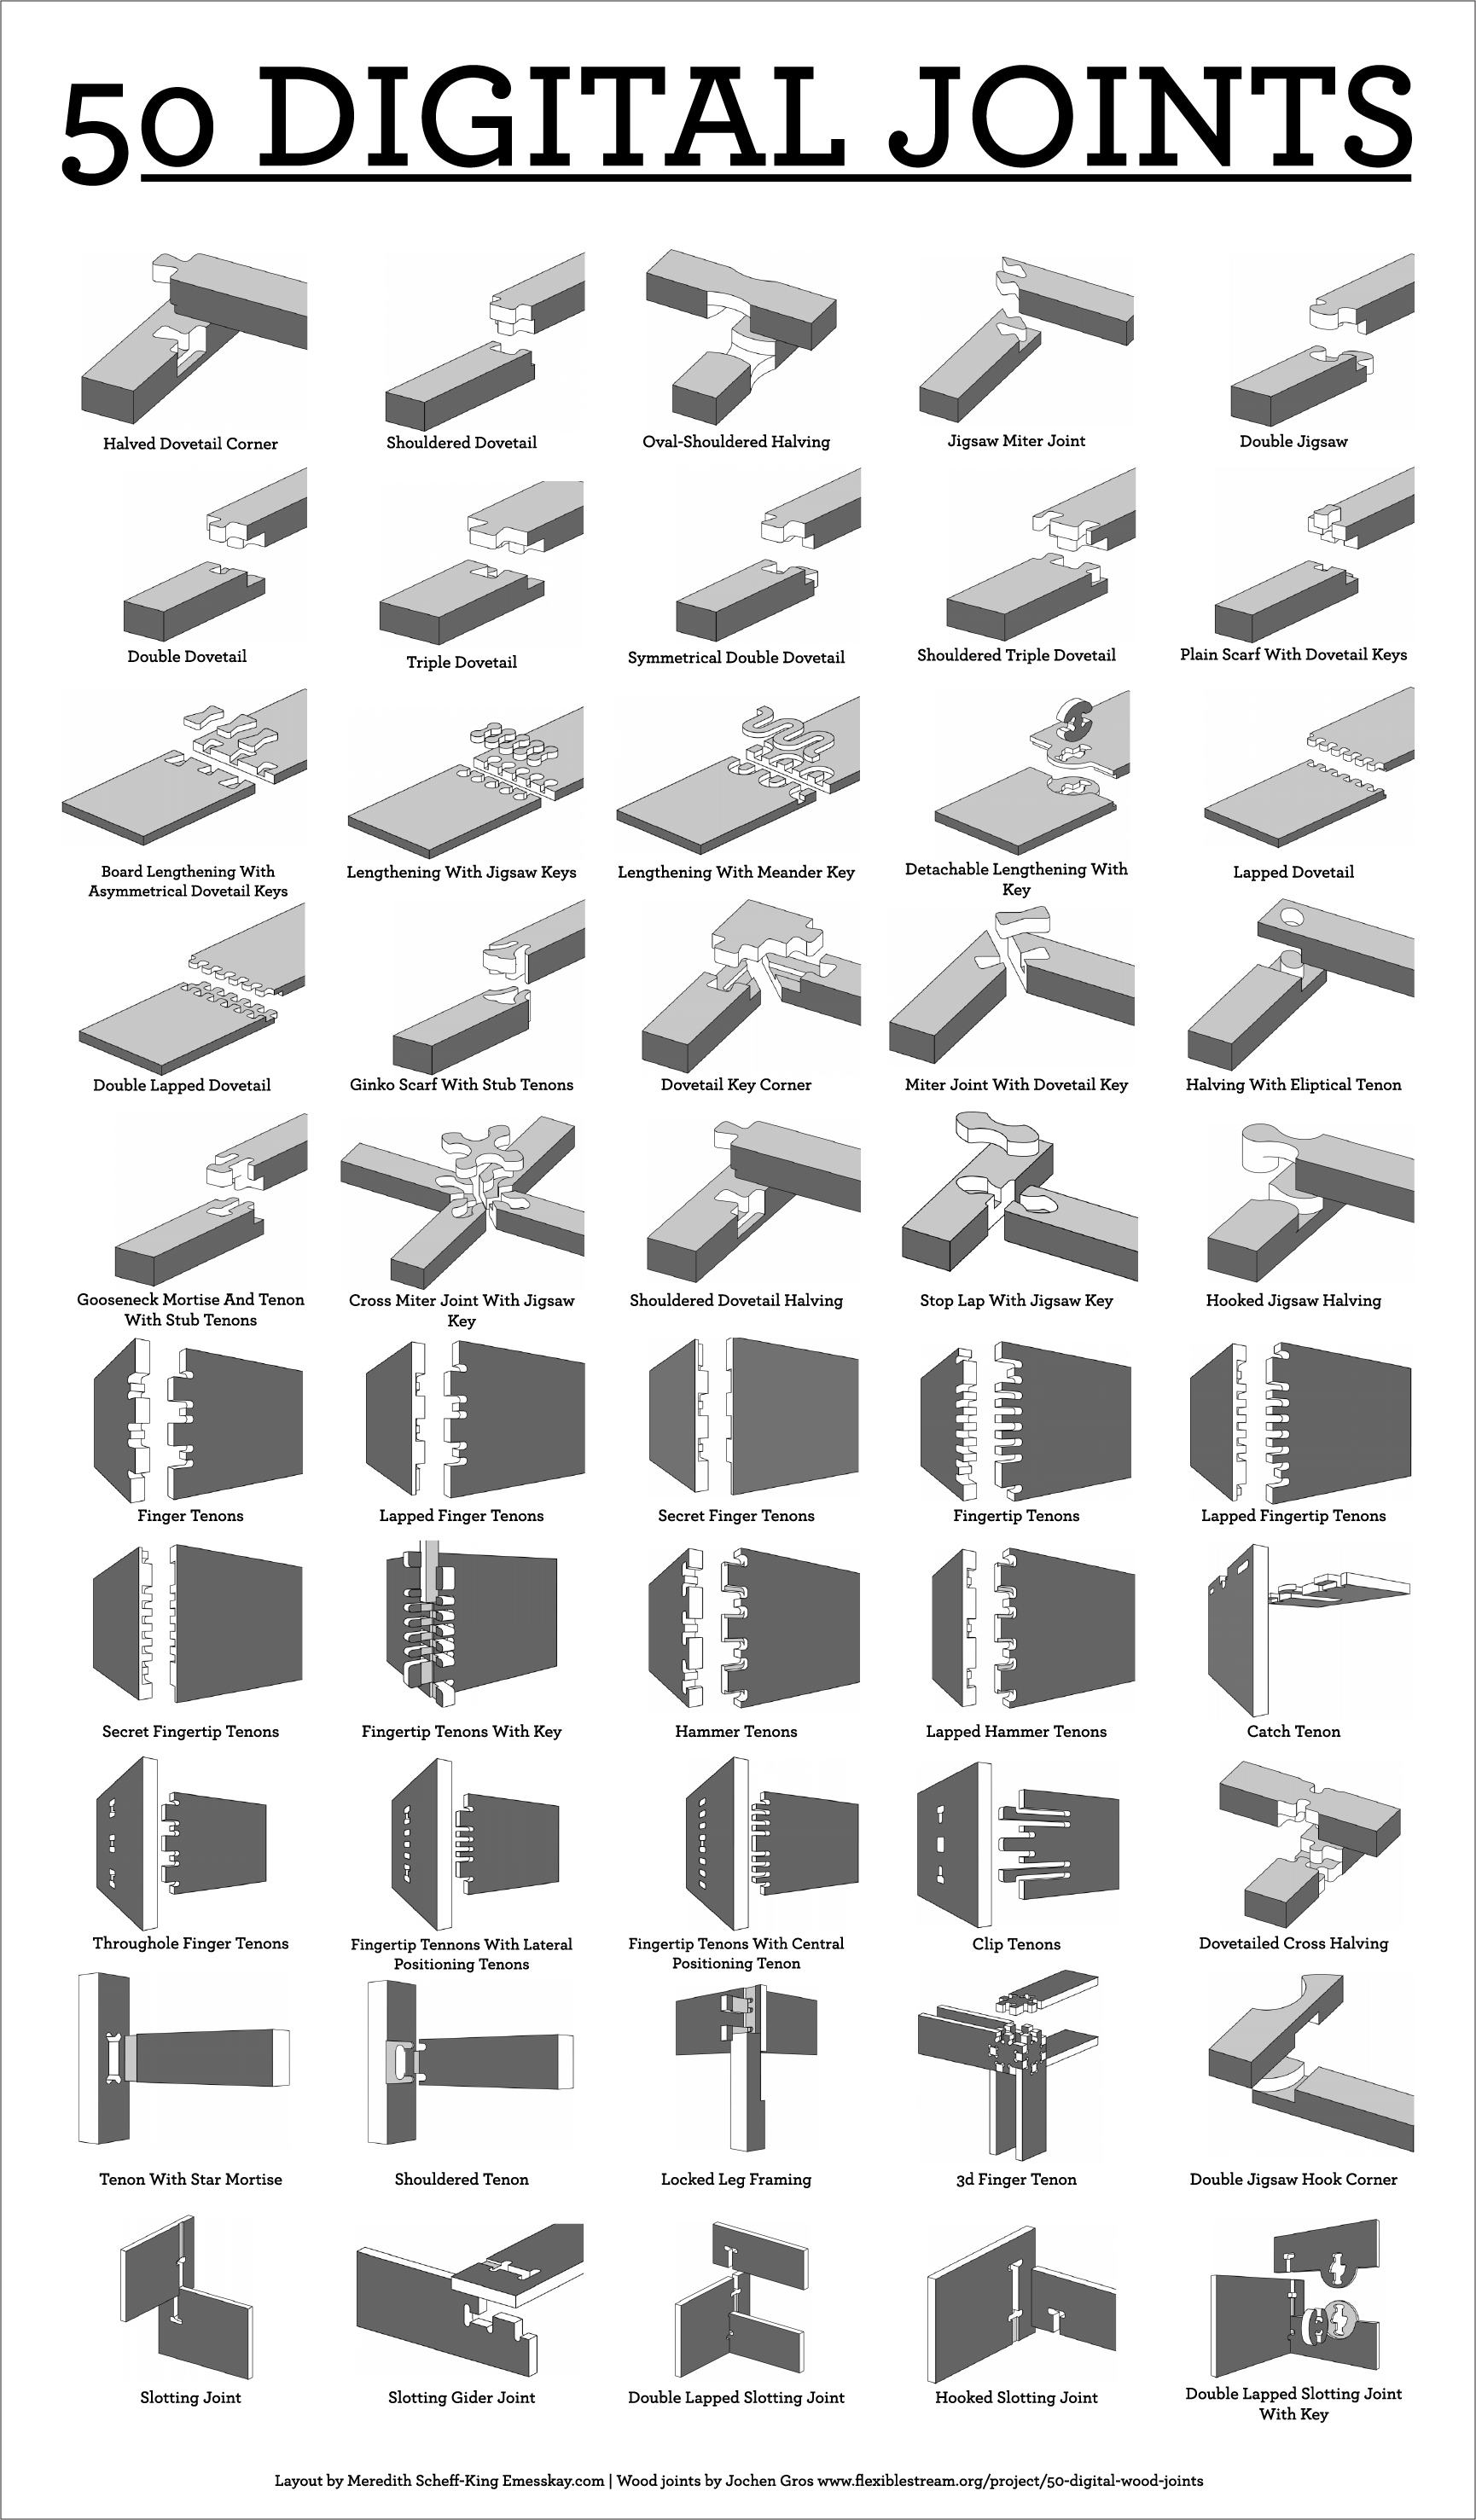
I have conducted some research to understand how joints are created:
This PDF File is very useful to have an idea about how can you make some joints through digital fabrication.
Step2: Pick your Bird Model
as the theme was about birds that live in Bahrain
I have found a very useful website which documents all the birds that live in the island Birds of Bahrain
I Picked Myna which I had one when I was kid. I picked this picture to be my bird model

Step 3: Draw it
by using Autodesk sketch book App on Ipad, I have imported my bird model picture and started sketching on it

I have changed the color of each layer to make it easier for me to visualise it

then I have draw a box which will have a piece to connect all the parts together

Then I have Saperated the layers

However, the App had no option where you can save it as a vector form. So I had to save the file as PNG and then imported on Inkscape. I tried to do automatic tracing but it didnt work as I was because each vector had two lines

So I just traced it manually again:


Step 4: Test the accuracy of the drawings by 3D Assembly on Solidworks
Before I cut it I thought of Testing the design through Solidworks, So I saved the files as DXF files and Opened it on Solidworks:


Then I delete all the parts that I dont need and I keep the part that I want to model:

after that I used the extruded boss command with the sheet thickness:

I have done the same procedure for all parts and once I was done I have opneed a new assembly and added all parts on it:

and started to create mates between components: there are three mates I have used for each components:
Consident front faces:

Consident Horizontal faces

Consident Vertical Edges:

I have done the same procedure for the all parts and this was the final outcome:
As I zoom in to see where the conncetor will be I see that the square shape is inconsistent in all parts and it make since as I just traced it on inkscape,

So I had to go back on each part and give the same measurement for the square shape with adding some relation for the lines like horizontal, vertical and equal:

I Did the same step for all parts until the rectangle shape is consistent with all parts:

After that I adjusted the leg as they most be touching the ground

so some lines most be consident with each others and horiziontal so I added some relations:

and the same thing for the other leg:

Once I was done I have sketched the connector based on the total thickness of the layes and assembled it:

as I Wanted the bird to be in my office, thus I have scaled it down to 0.1
then I thought it would be better if I created a base for it so I sketched rectangles on the pieces that had the feet as the following:

then I have extruded cut the extra parts so the piece become flat and doesnt hit the base

and boss extruded in the other side to add some balance to the piece

then by creating a new part I have sketched the following after I measured the distance on the assembly:

I have made the thickness as 18 mm to make it stable and it will be 3 pieces of 6mm sheets

As I will be using 6 mm sheets I had to adjust the connector size as well as the holes for the connected on every piece, I have made it as 12 so it will be 2 piece of 6mm sheets

then I have assembled everything on the assembly:

Step 5: Make it 2D again
In this step, I have saved the files as dxf and inserted them on inkscape as the following:

then I have imported the drawing on VCarve software:

I made the toolpath setting as the following:

and I have created 2 toolpath, the first for the joints only

and the second for the outline:

then I saved the toolpath as the following

and on shopbot software I inserted the file and clicked start

then I clicked on the green button to start the machine

process:
