|
Groupwork
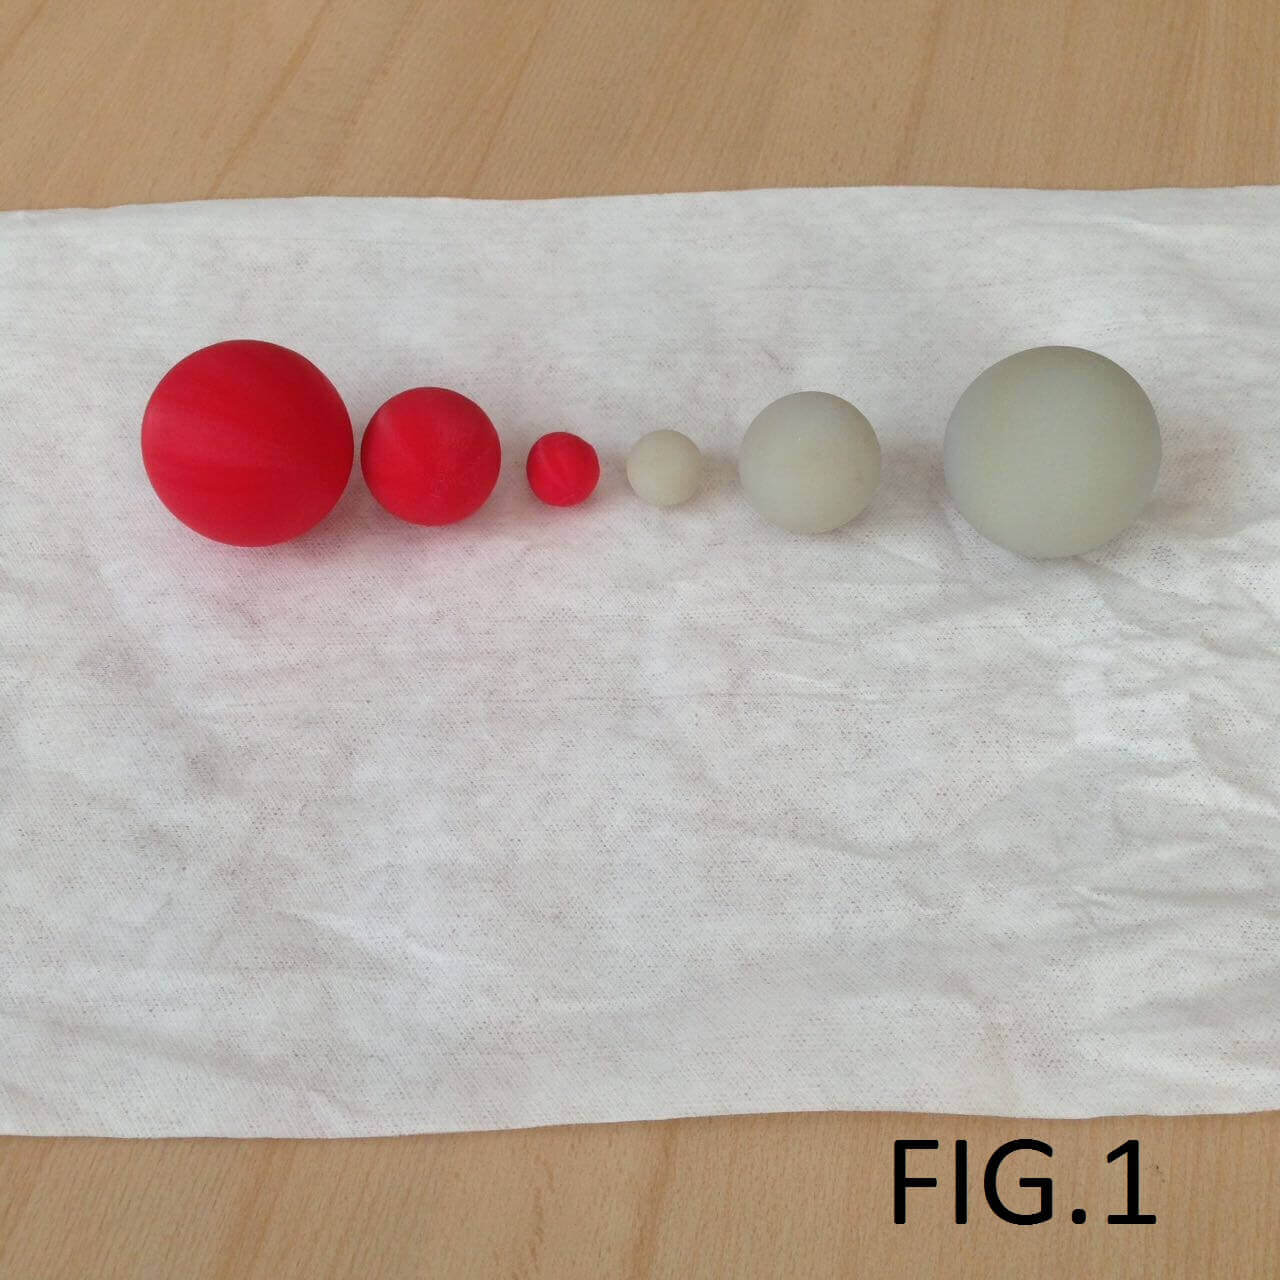
In this workgroup we printed different diameter spheres, both in resin and filament. We were looking for difference in finishing, weight, strenght, accuracy and support creation.
We used a Stratasys Objet 30 and Makerbot printer for resin (Vero Grey Material) and filament (Red ABS filament). Here are the results:
Finishing: Resin materials are really beatifull. The Objet30 prints thickness down to 26µ, allowing to have smooth organic surface. On the other hand, filament material
is not the best option for complex surface having rought surface and a stair-like form (Figure 5).
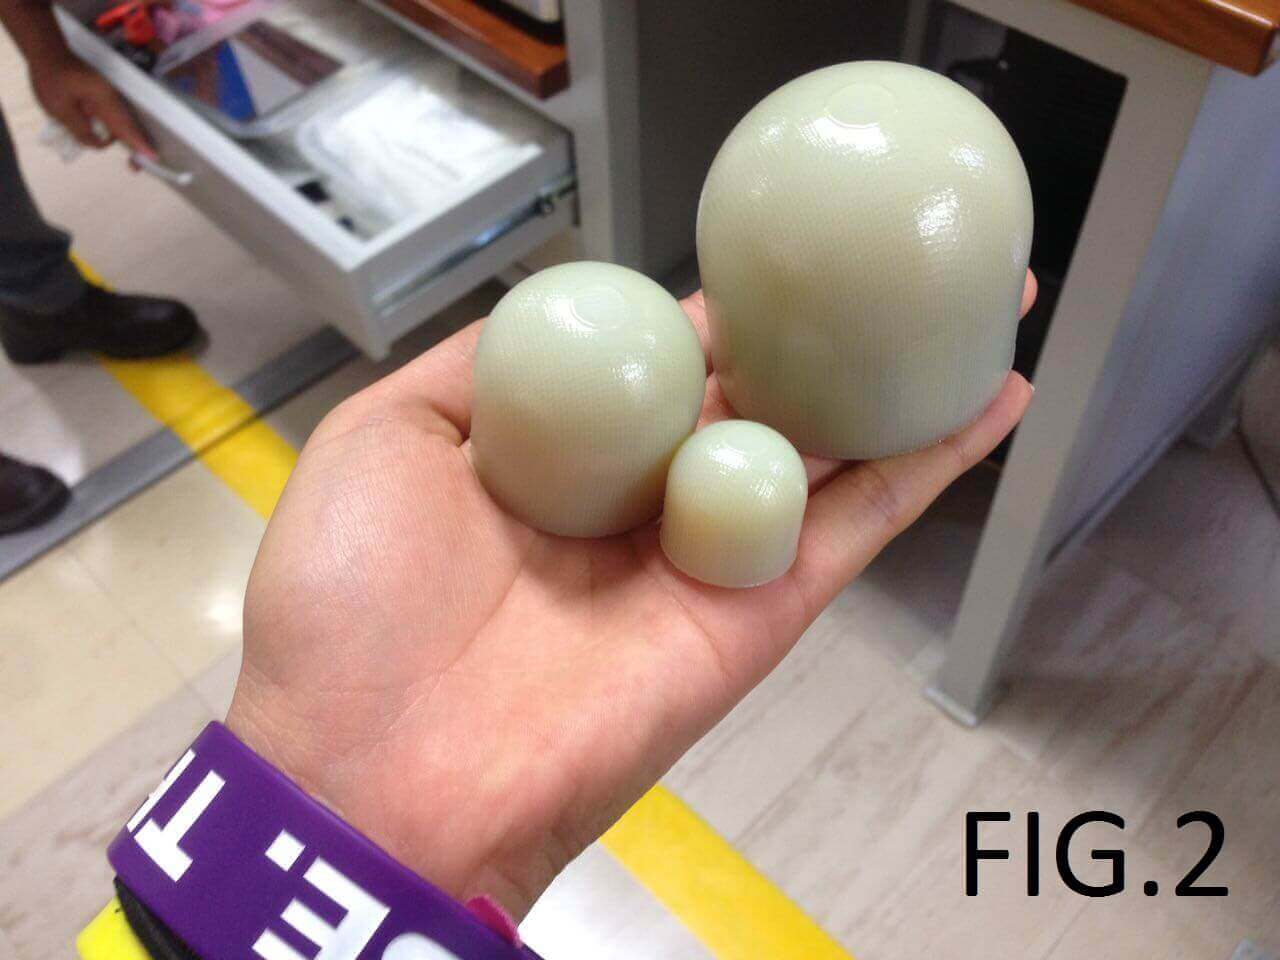
Weight: Here filament is the best. The Objet 30 printer doesn't allow to create inner structures (like filament does) to reduce material consumption but a solid piece,
this makes this kind of technology really expensive. Even if we design the piece to have an inner structure to save some material, this "hole" would be filled with support material,
in this case, a gel-like material.
Strenght: Resin materials like Vero, are very fragile. They are hard enought for low stress application, but will break if hit the floor for example. In this case, ABS material is
better suited due its mechanical properties.
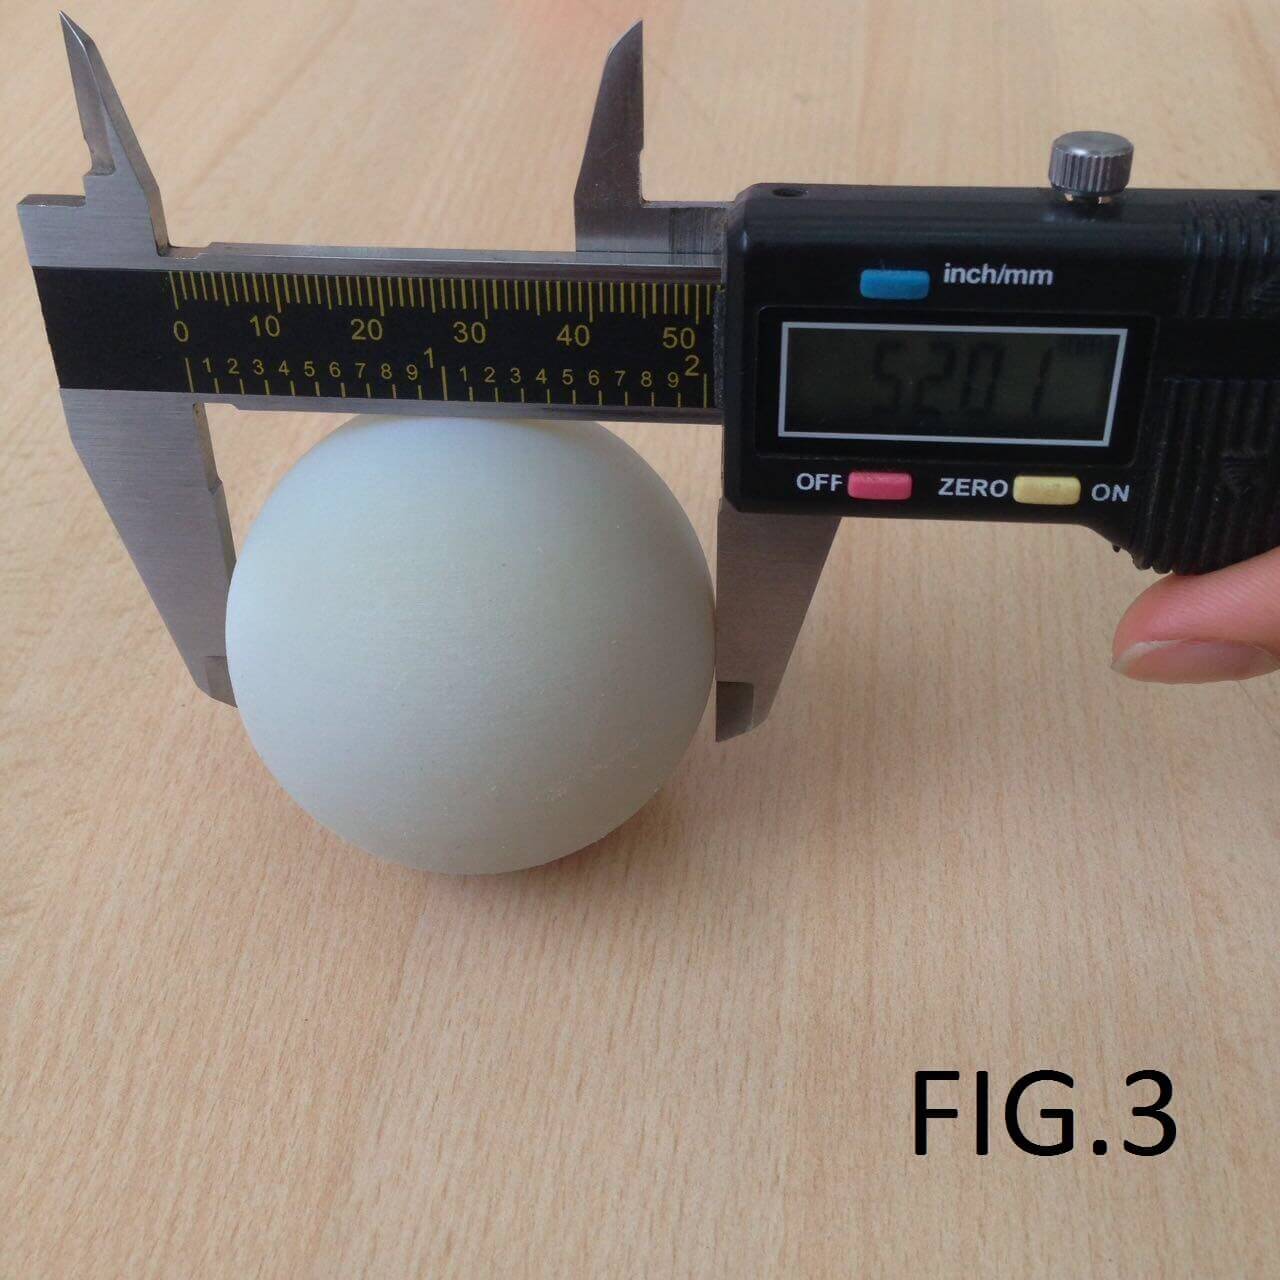
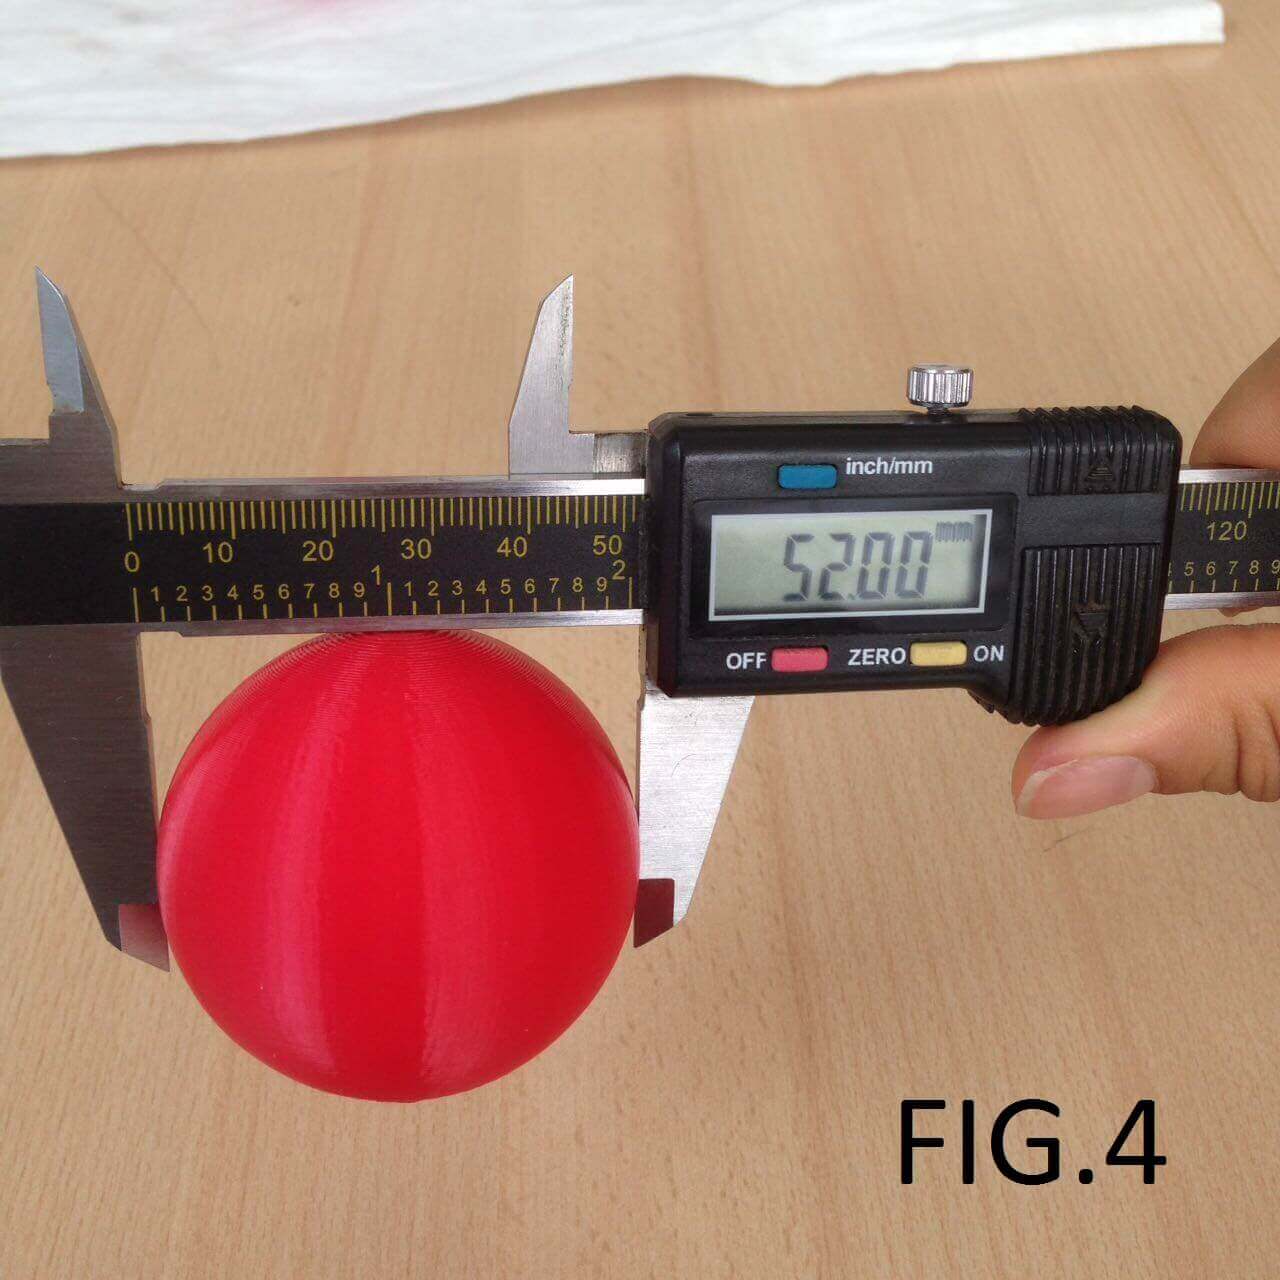
Accuracy: Usually, this topic is more related to the printer rather than the material. The Objet printer is much more accurate than the Makerbot, but for small pieces its not a big
issue.
Support: In Makerbots printers, the building filament serves as support material. The printer usually will decide to put supports where there is a "roof" or a wall have less than 45
degrees (measuring from the floor). In some cases (like this one), support material is no necessary because each layer of filament can support the next one. For resin things are different,
the printer will put support everywhere there is a hole between the material and the floor or other material; in other words there will be material in every angled wall and/or "roof".
|
3D Printing - Process
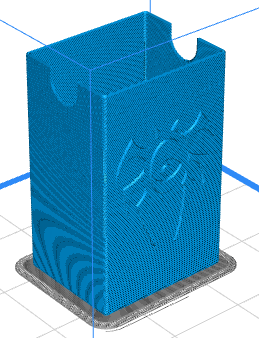
During Week 3 I designed a card holder for my trading card game deck. This week I will 3d print it.
I will be using a Zortrax M200 3D printer for this task. It is a 200x200x180mm build volume printer that allows to use ABS, PLA and even PET materials. Printer specs
can be found here
This printer uses Z-Suite software for printer preparations. After loading the STL file from Fusion 360, Z-Suite guides through to create the G-code file to print.
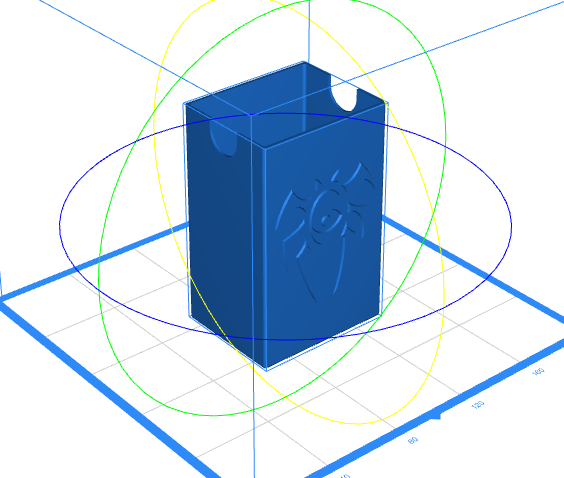
First step is to set the correct orientation for the part. The transformation step allows us to rotate, move, scale and even split the model to improve quality during print process.
This is important to avoid unnecessary support material which means less material waste and better quality print since support sometimes its difficult to remove
and leave some marks behind. Using the "rotate model" tool, I rotated the model 90 degrees about the x-axis, shifting the model to lay on its base.
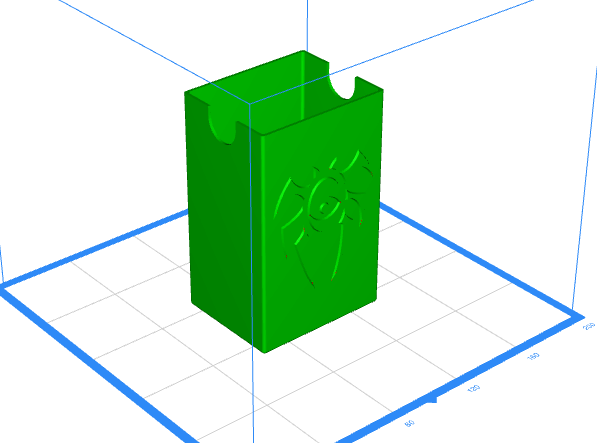
Next process is analisys. The software will scan the file to find any un-printable feature. This could be thin walls, geometry singularities, 2D planes with no width, etc.
The program will color the file with green (OK geomety) and red (problematic features). It is up to the designer to check those suggestions.
Third process is support. Since the model was designed to avoid using support, this step will be skipped. Its important to notice however, the software allow us to automatically
scan the print file to auto set supports based on geometric rules: if finds any inclination or hanging material under a set angular value (under 30 degrees for example), the software
will create support for that part.
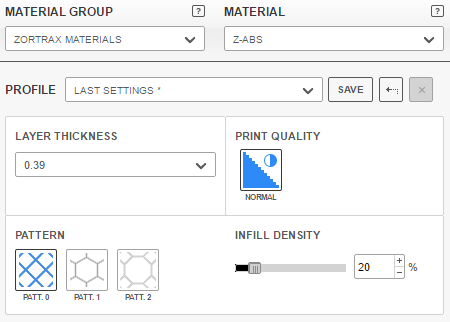
Forth step is to define print setting. This step allows to set layer thickness, infill density and pattern and print quality (this properties are for Z-Suite only). Other parameters
like raft placement and quantity of layers at bottom and top constructions are set by default when chosing Zortrax materials profiles. Each material have default parameters which
are usually ok. This print will be a 390 microns layer with 20% infill and simple cross pattern. With this layer thickness setup only normal quality is available. Material will be ABS.
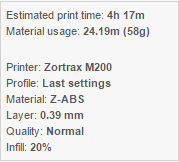
Finally, the preview step displays how the 3D printer will do the job: how raft is placed, supports and seams. Also it displays material usage and time required for the job.
|
|
|
3D Printing
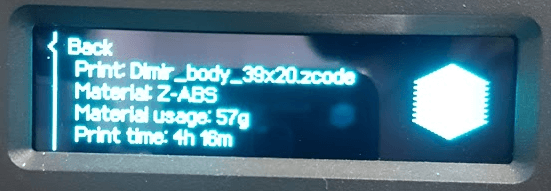
Once have my "*.zcode" file (Zortrax Gcode from Z-Suite), it can be loaded to the printer.
The steps for start printing are very simple: When the file is loaded to the SD card, we press "Models" on the Zortrax menu and select the file we
are about to print. It will display time and material consumption and material type. Once we select "print", the machine will start to het up.
This printer will heat the printbed and the extruder, and when temperature is high enought will autolevel the printbed.
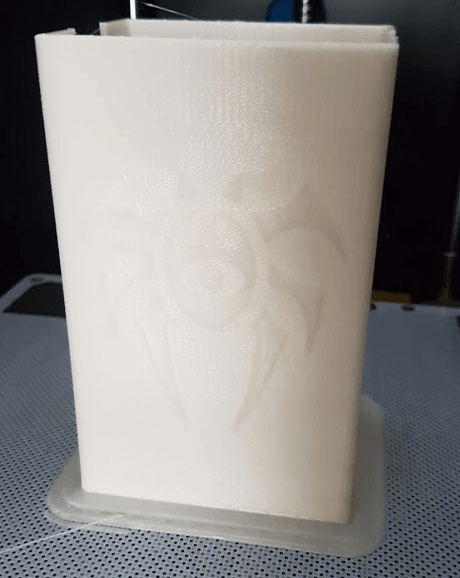
4 hours later, the print look good except in some areas. Since it was printed without support, high relief was not that good with 390 microns.
Maybe next time setting the printer to 190 microns layer high will be better to autosupport.
In the end it was good print, and will help to hold my TCG deck!
|
|
|
3D Scanning
Once have my "*.zcode" file (Zortrax Gcode from Z-Suite), it can be loaded to the printer.
The steps for start printing are very simple: When the file is loaded to the SD card, we press "Models" on the Zortrax menu and select the file we
are about to print. It will display time and material consumption and material type. Once we select "print", the machine will start to het up.
This printer will heat the printbed and the extruder, and when temperature is high enought will autolevel the printbed.
4 hours later, the print look good except in some areas. Since it was printed without support, high relief was not that good with 390 microns.
Maybe next time setting the printer to 190 microns layer high will be better to autosupport.
In the end it was good print, and will help to hold my TCG deck!
|
|
|
Files
All files can be found at here.
|
