3D scanning & Printing
Assignment
Design and 3D print object an that could not be made subtractively and 3D scan an object
Files
Here is a zip folder with different files of my Cloud
Here is a zip folder with different files for the turbine
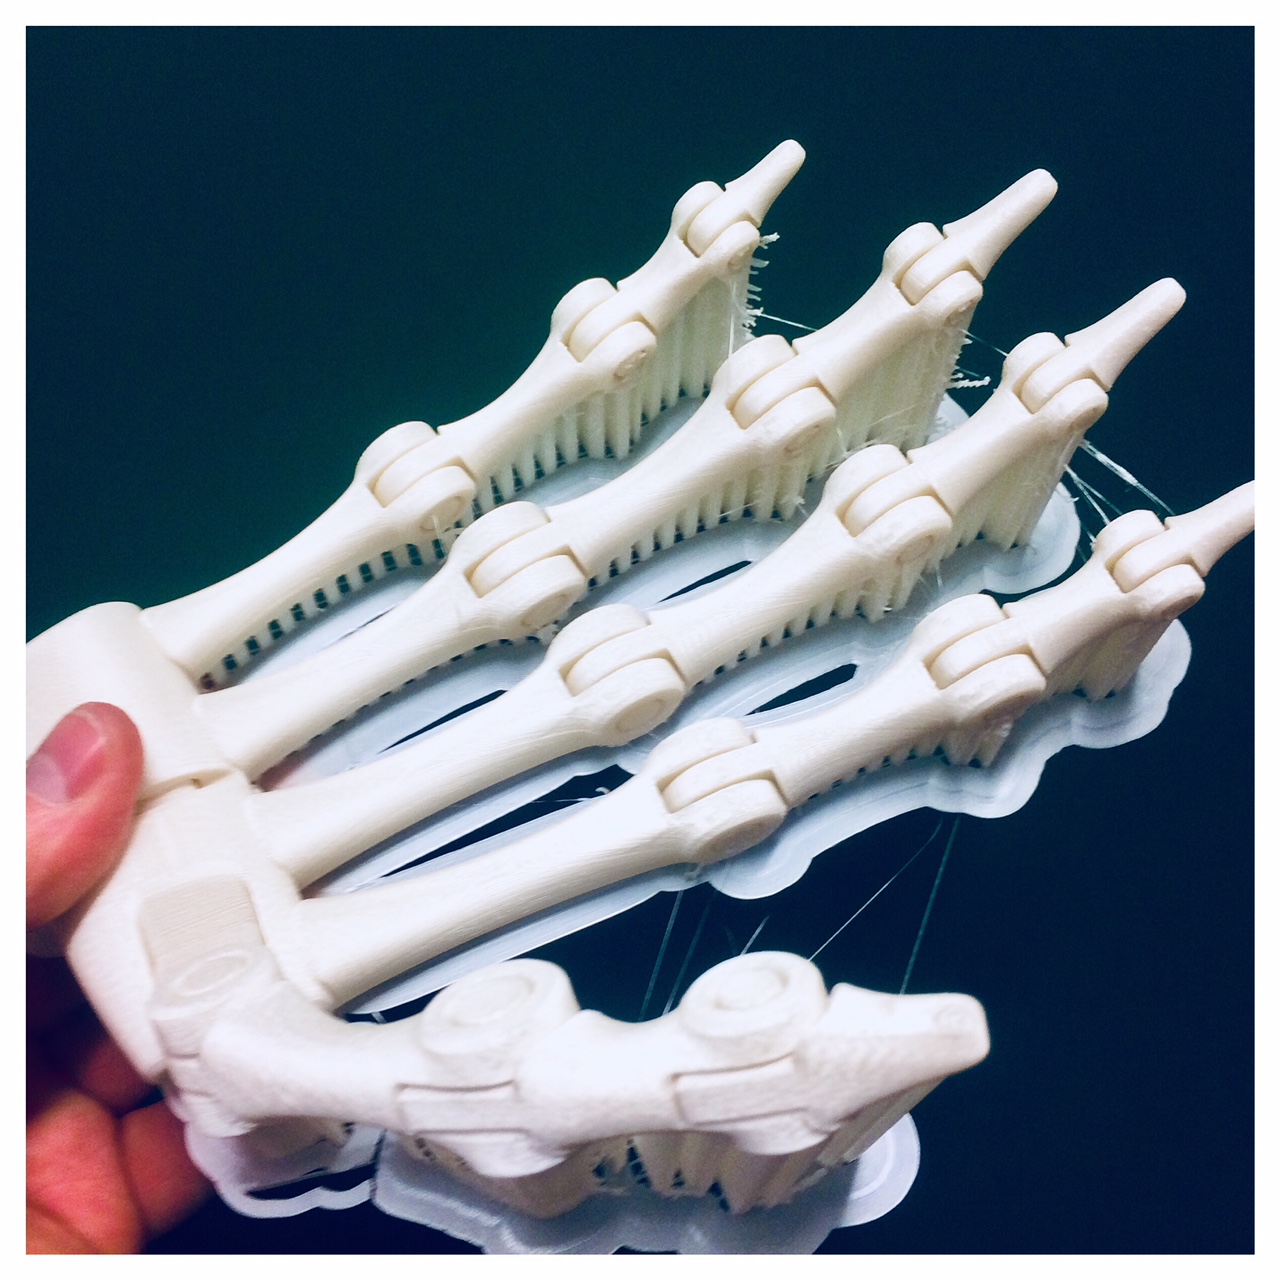
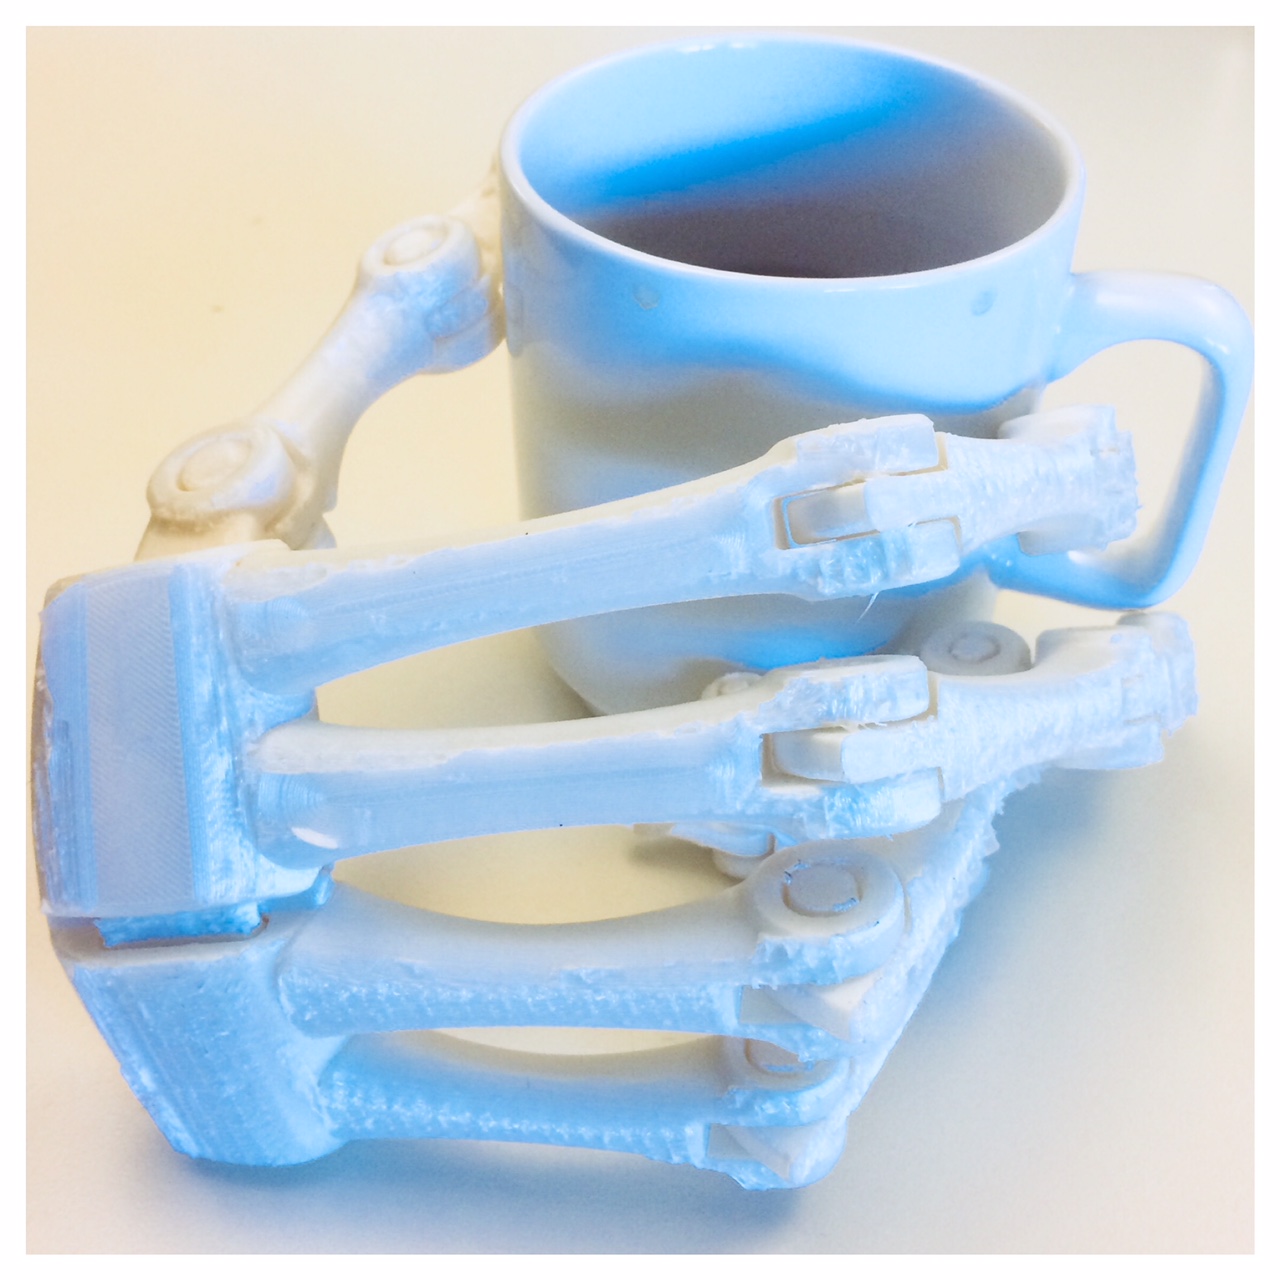
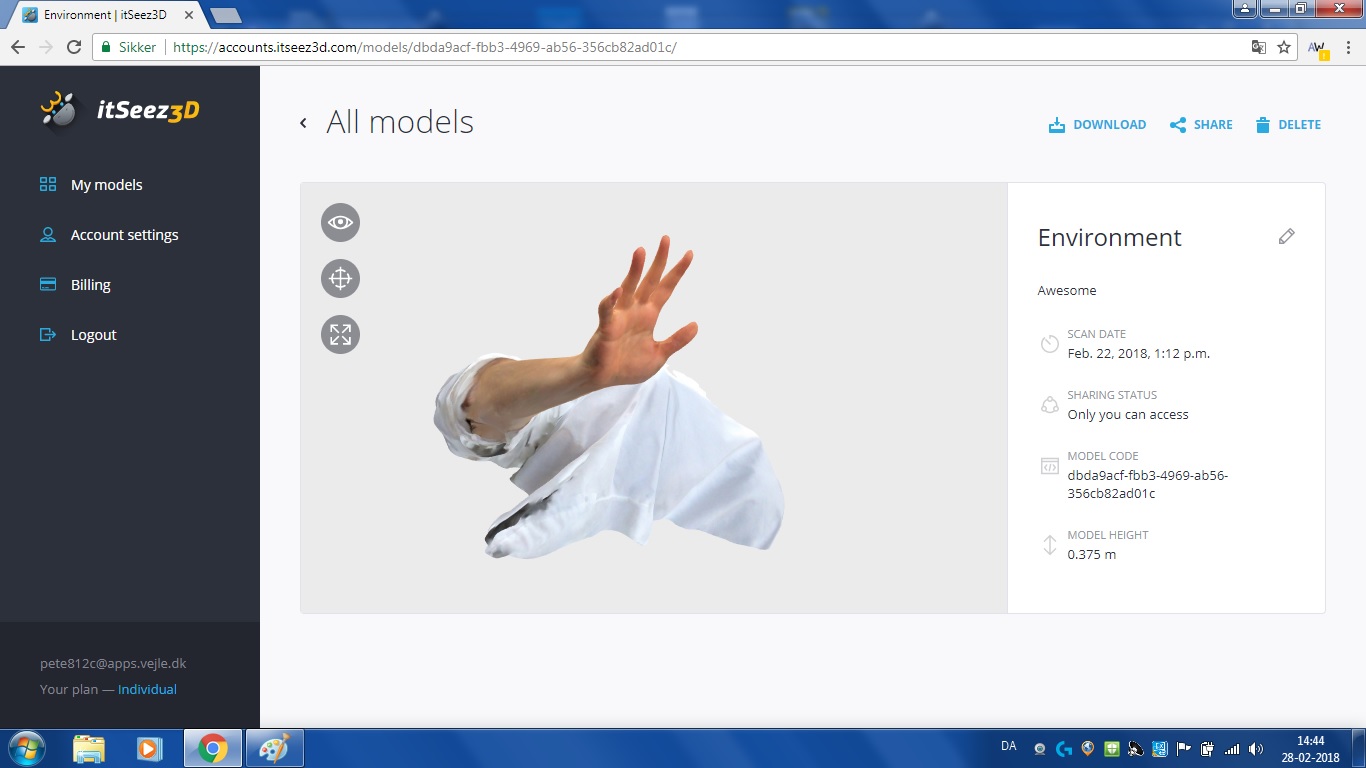
For scanning I wanted to try to scan my hand. I have printed this robothand from a stl-file I downloaded from Thingiverse. I wanted to print the hand to test the use of printing moving joints in one piese on the Ultimaker 2+. Now I have scanned my own hand with iSense, a hardware camera for 3D-scanning on the iPad we have in the lab. We used a software for the scanning proces called itSeez3D. I really want to try creating moving joints on a 3D-scan/print of my own hand.
I worked with the 3D-scan of my hand in itSeez3D togehter with a scanner to attach to an iPad. This scanner is called iSense. The scanner still works but the software it comes with is not available anymore. So I actually thin it scanned pretty nice, but when I came to the fact of downloading my files it came with the cost of 10 dollars per each file. So, of course, this is the disadvantage of some free apps.
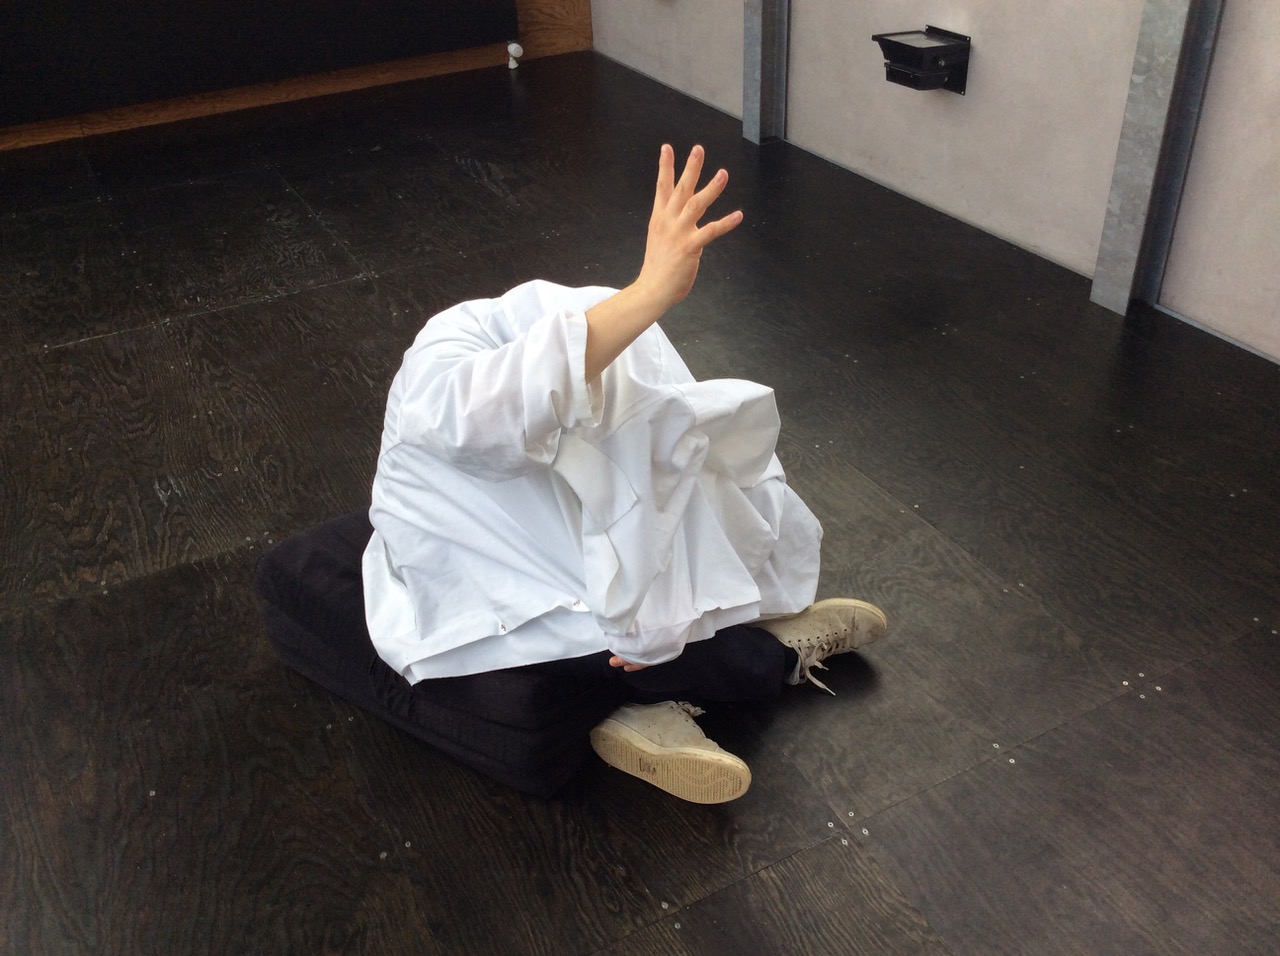
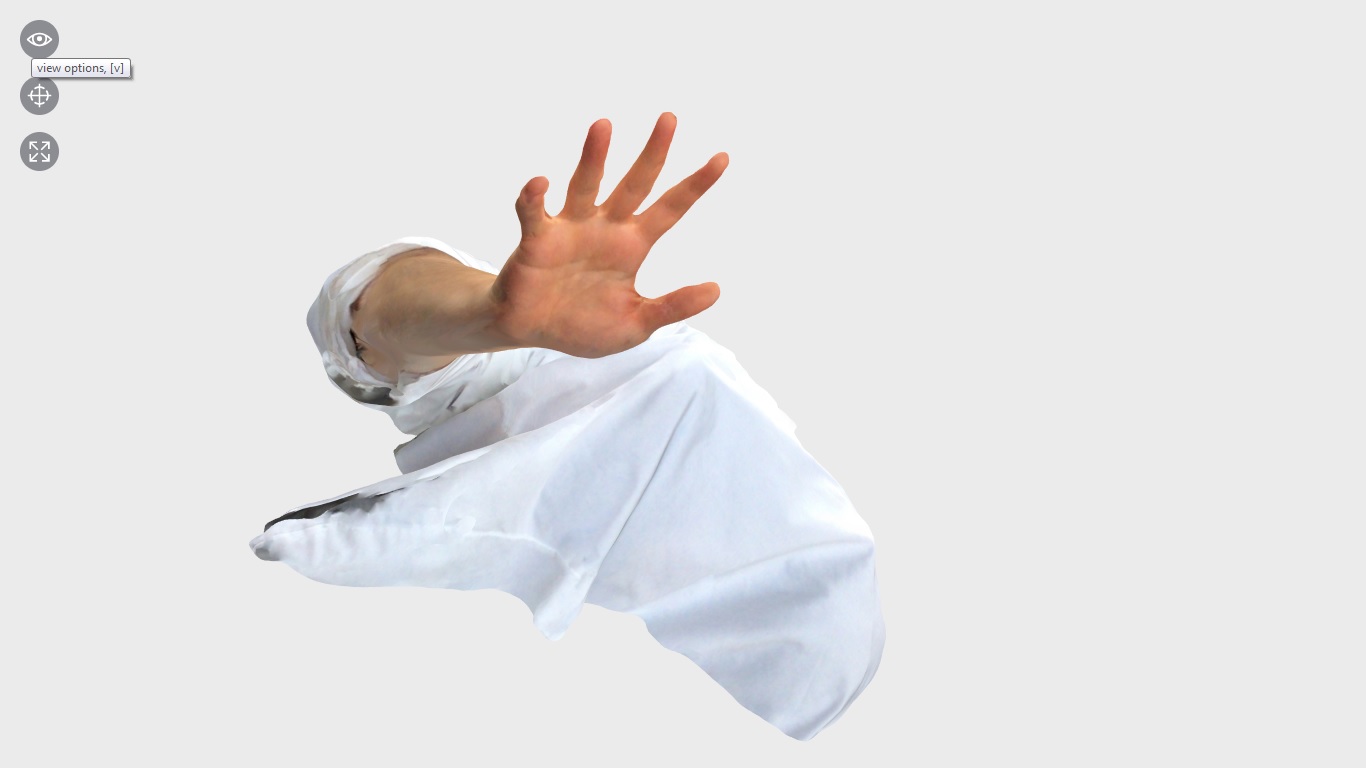
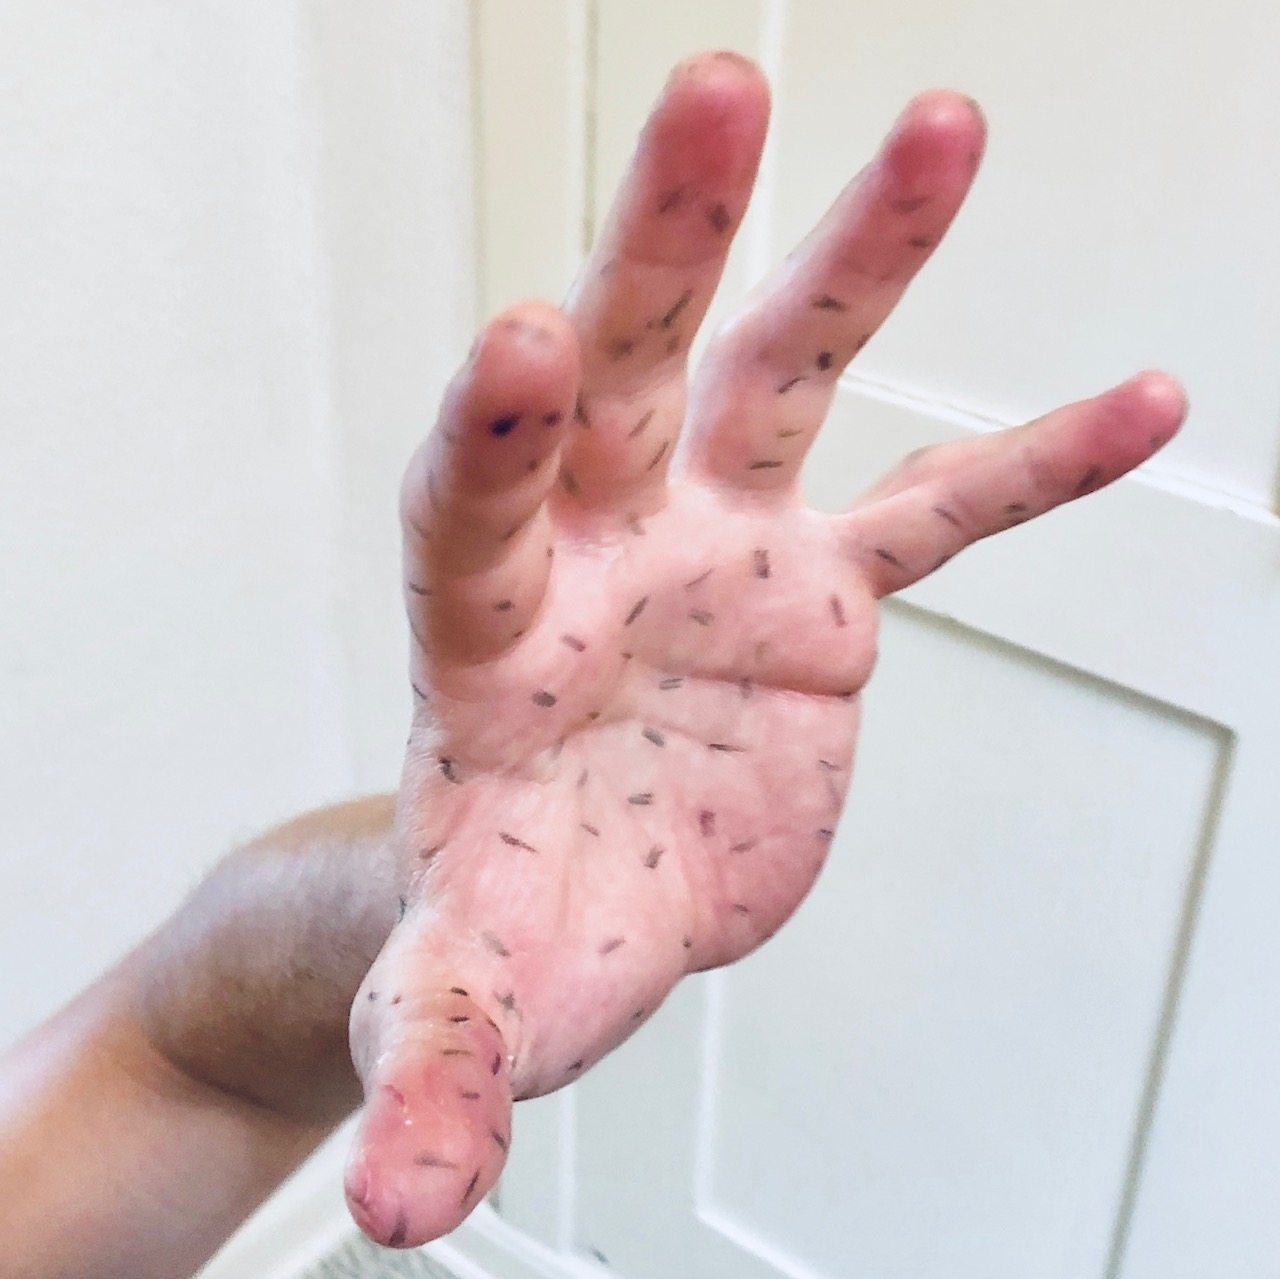
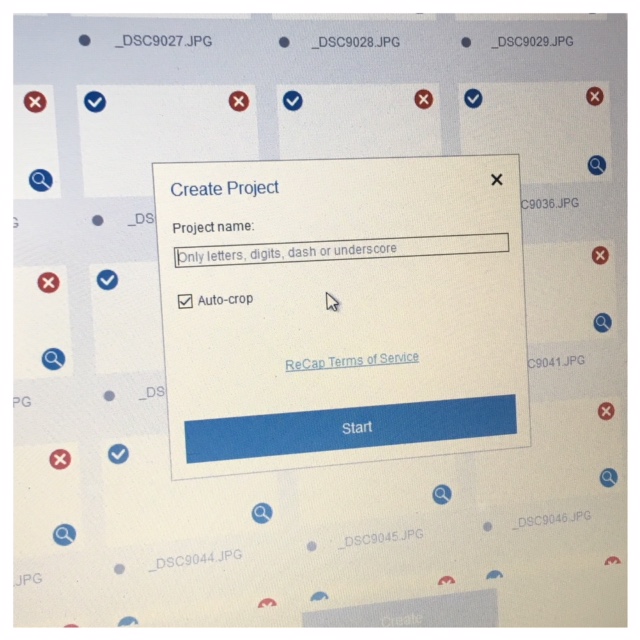
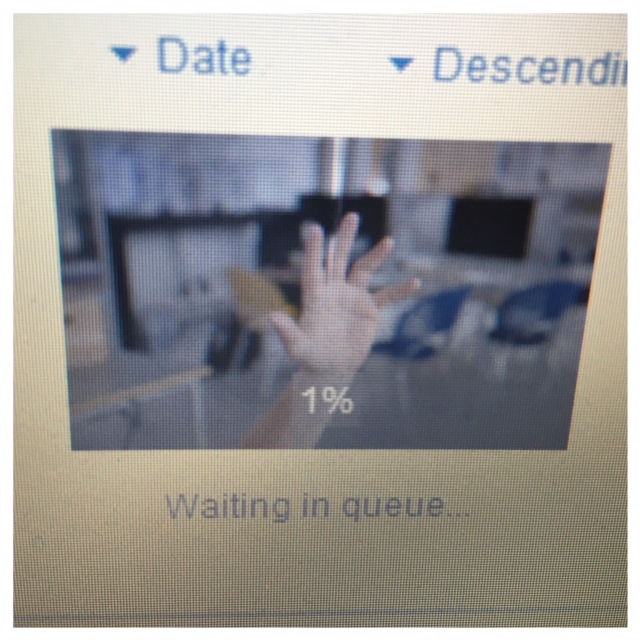
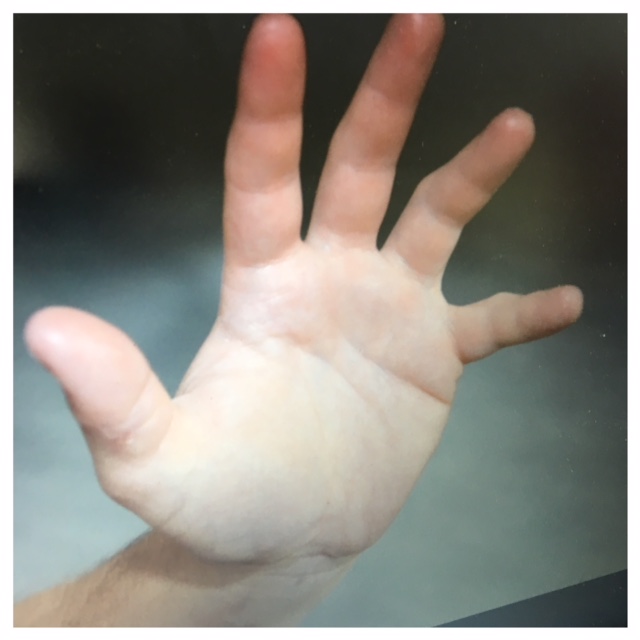
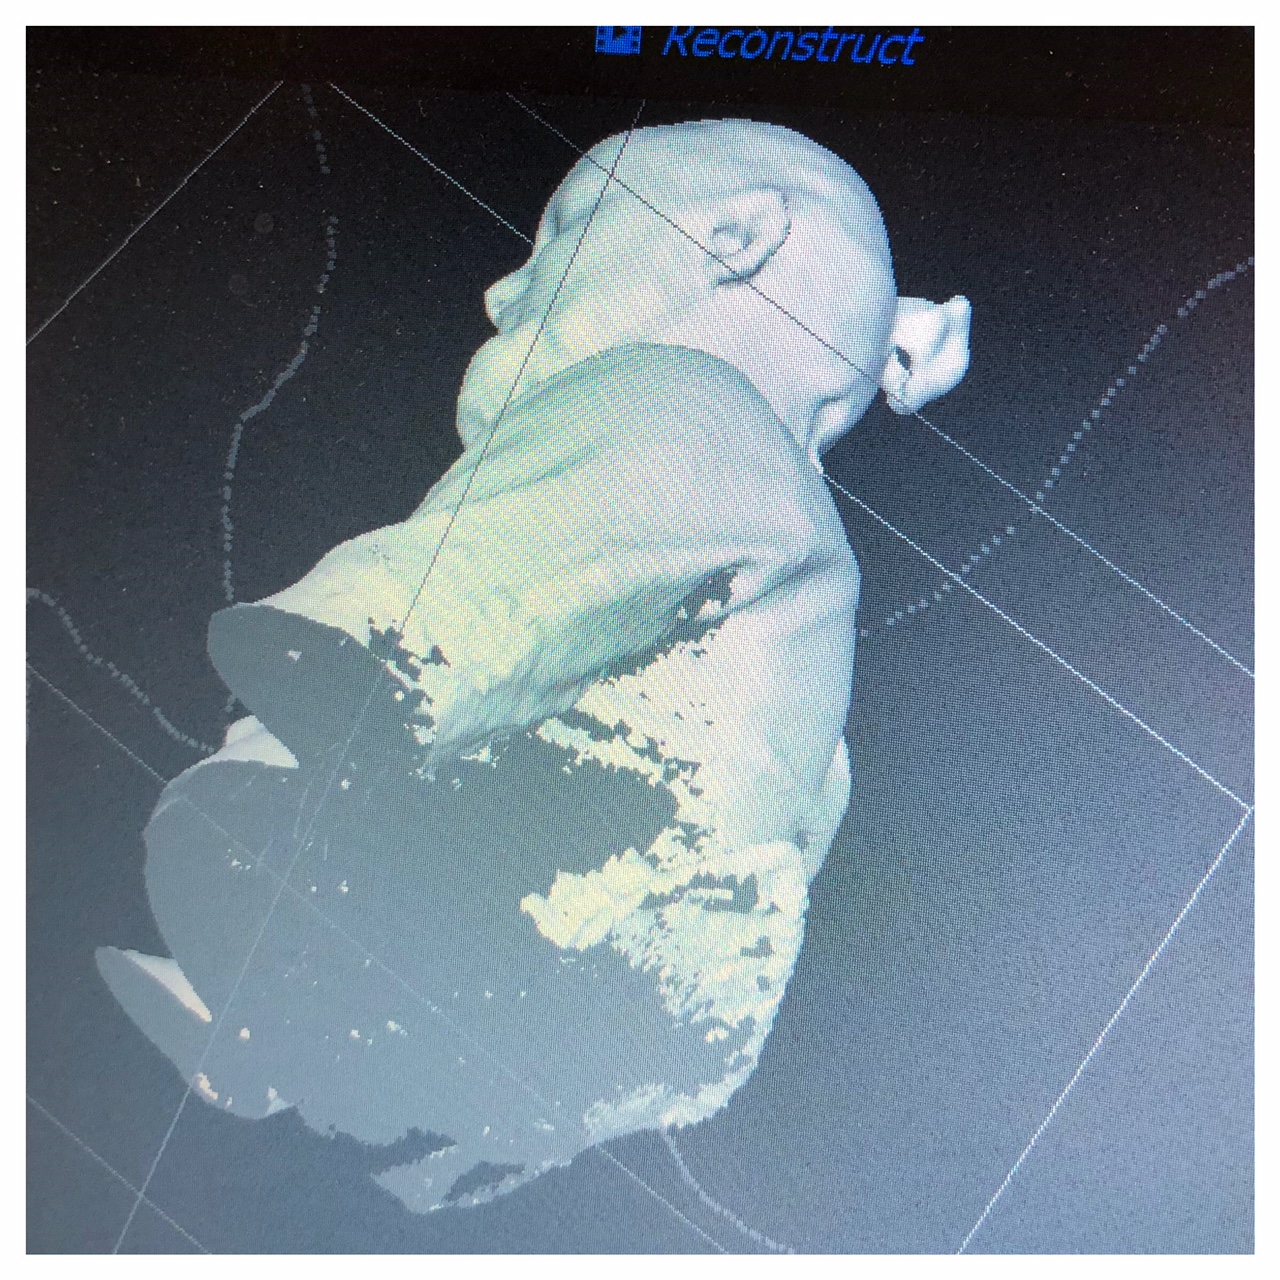
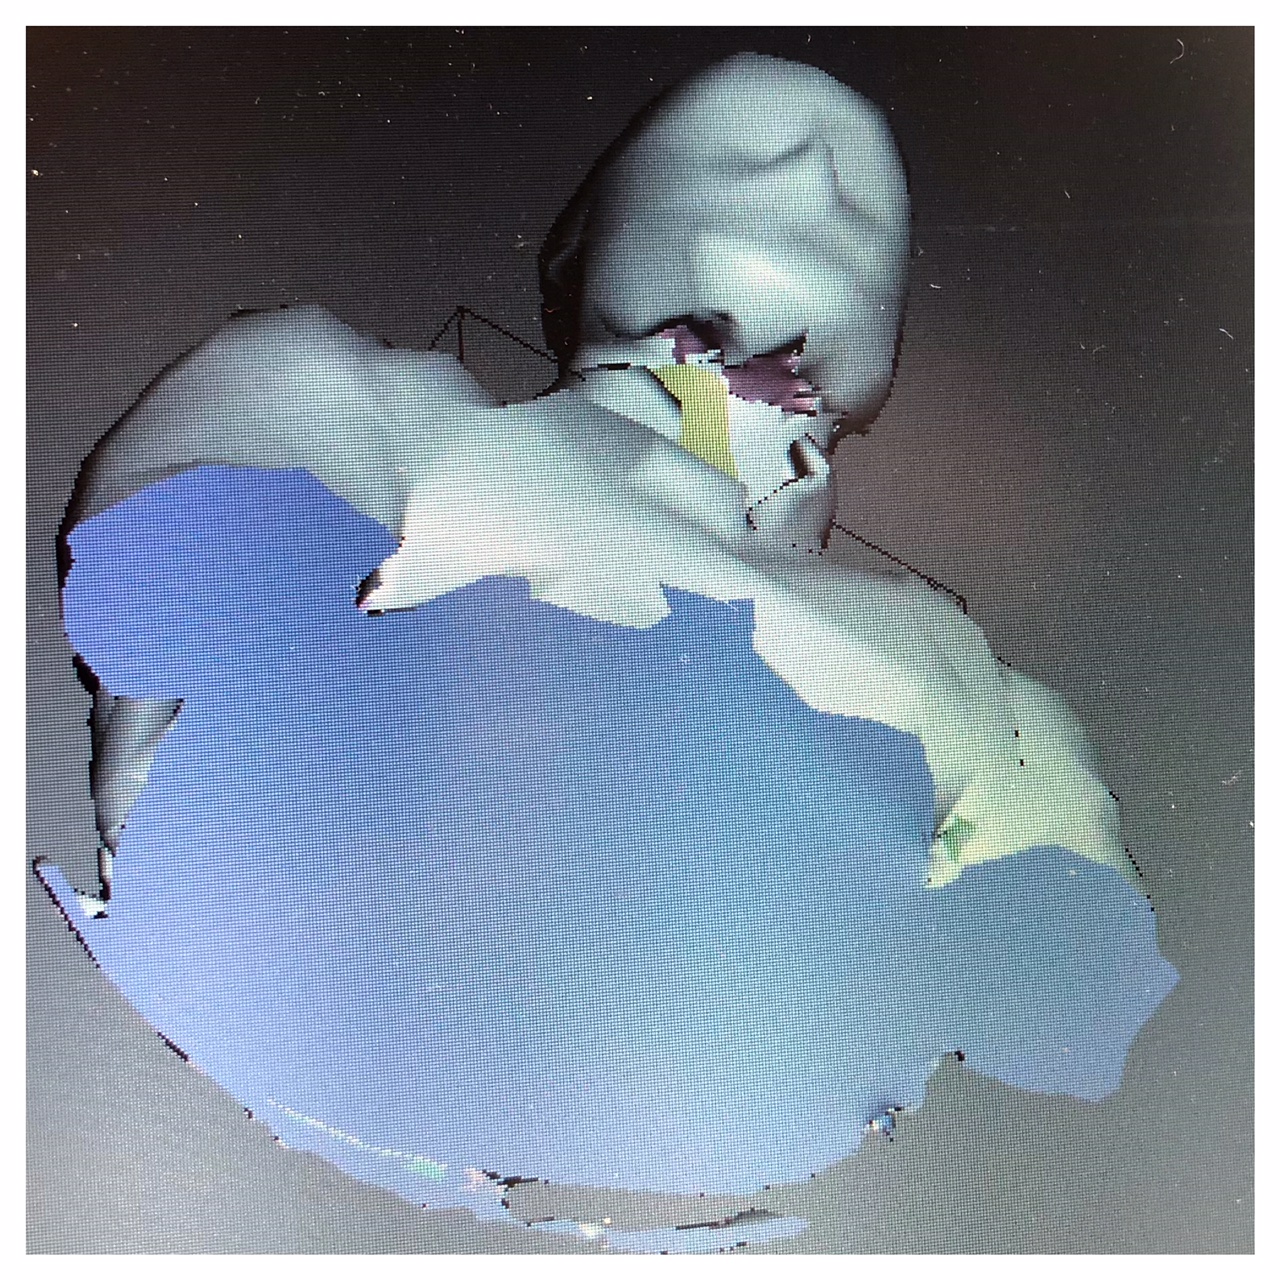
After trying the 3D scanner for the iPad I tried Photogrammetry (a science of making measurements from photographs, especially for recovering the exact positions of surface points). I had read that it was a good idea to draw black dots on the object you needed to scan, so I drawed black dots all over my hand. I took 200 pictures of my hand to get a more detailed result.
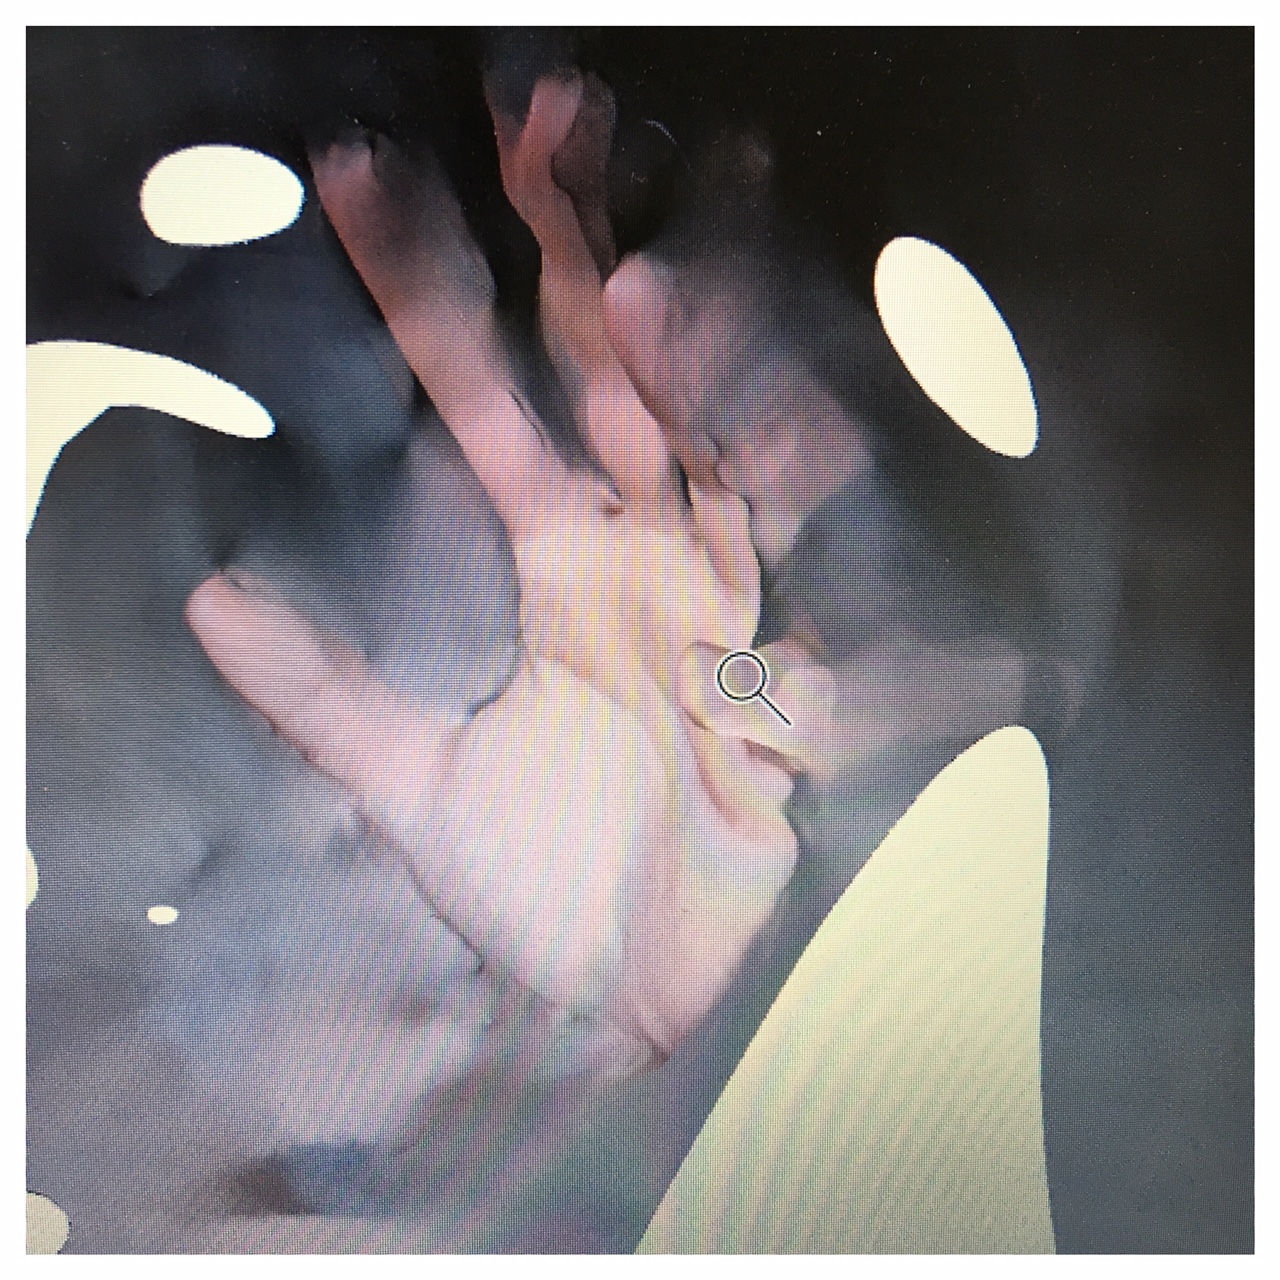
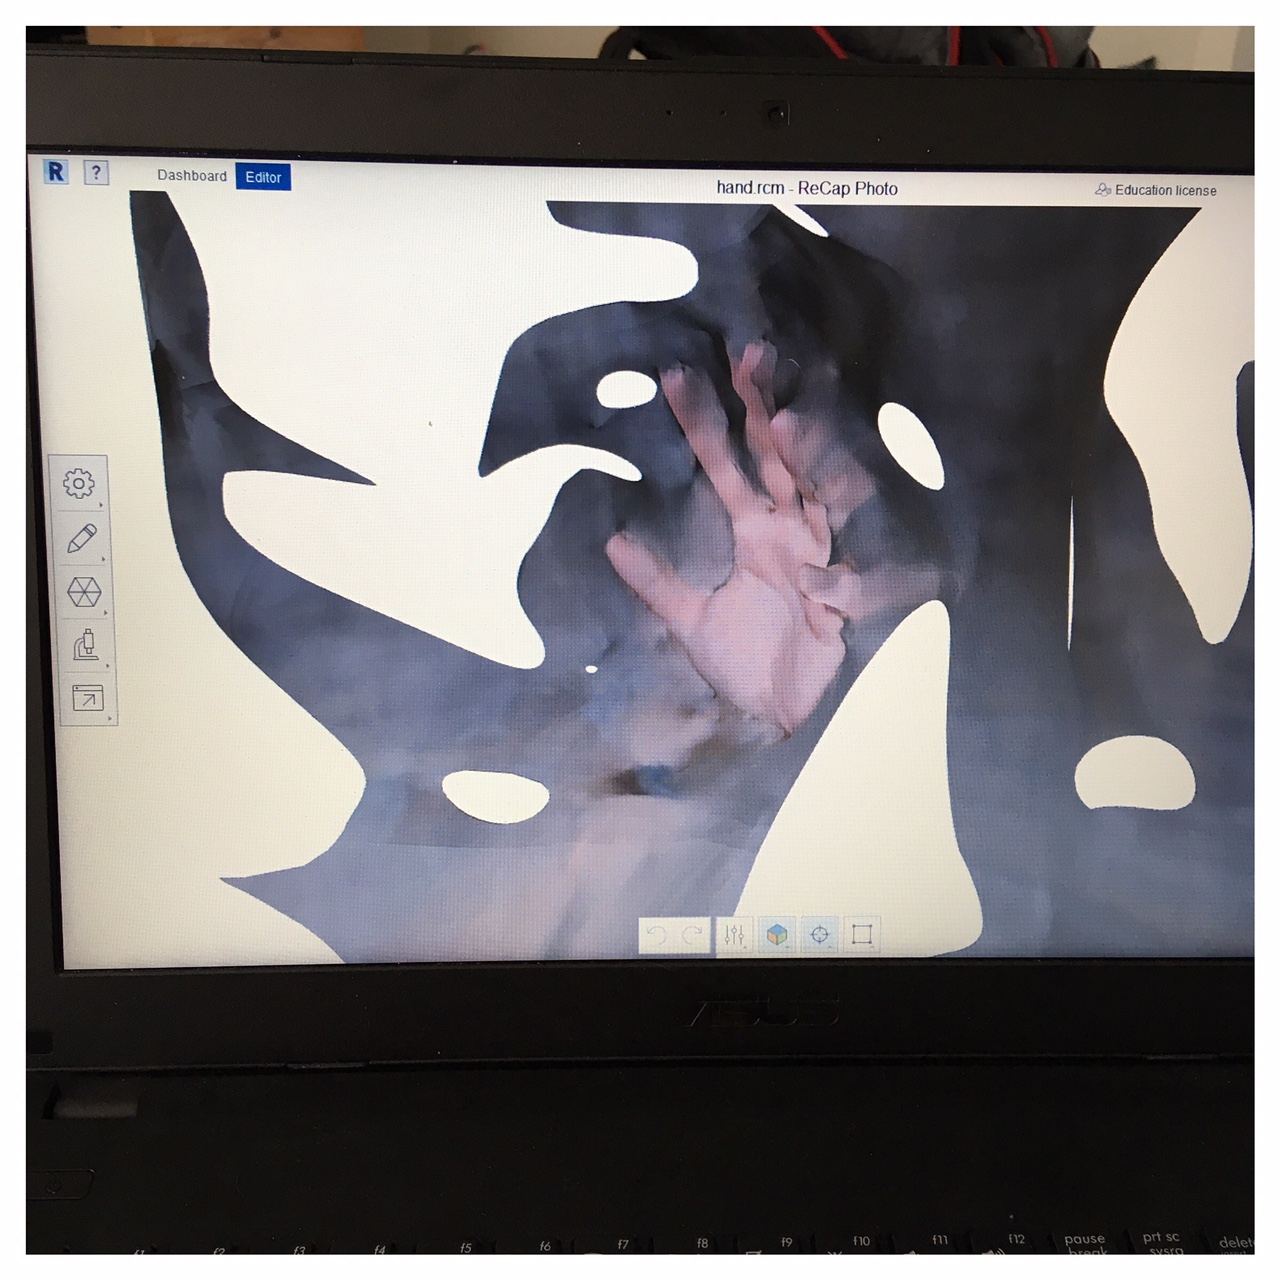
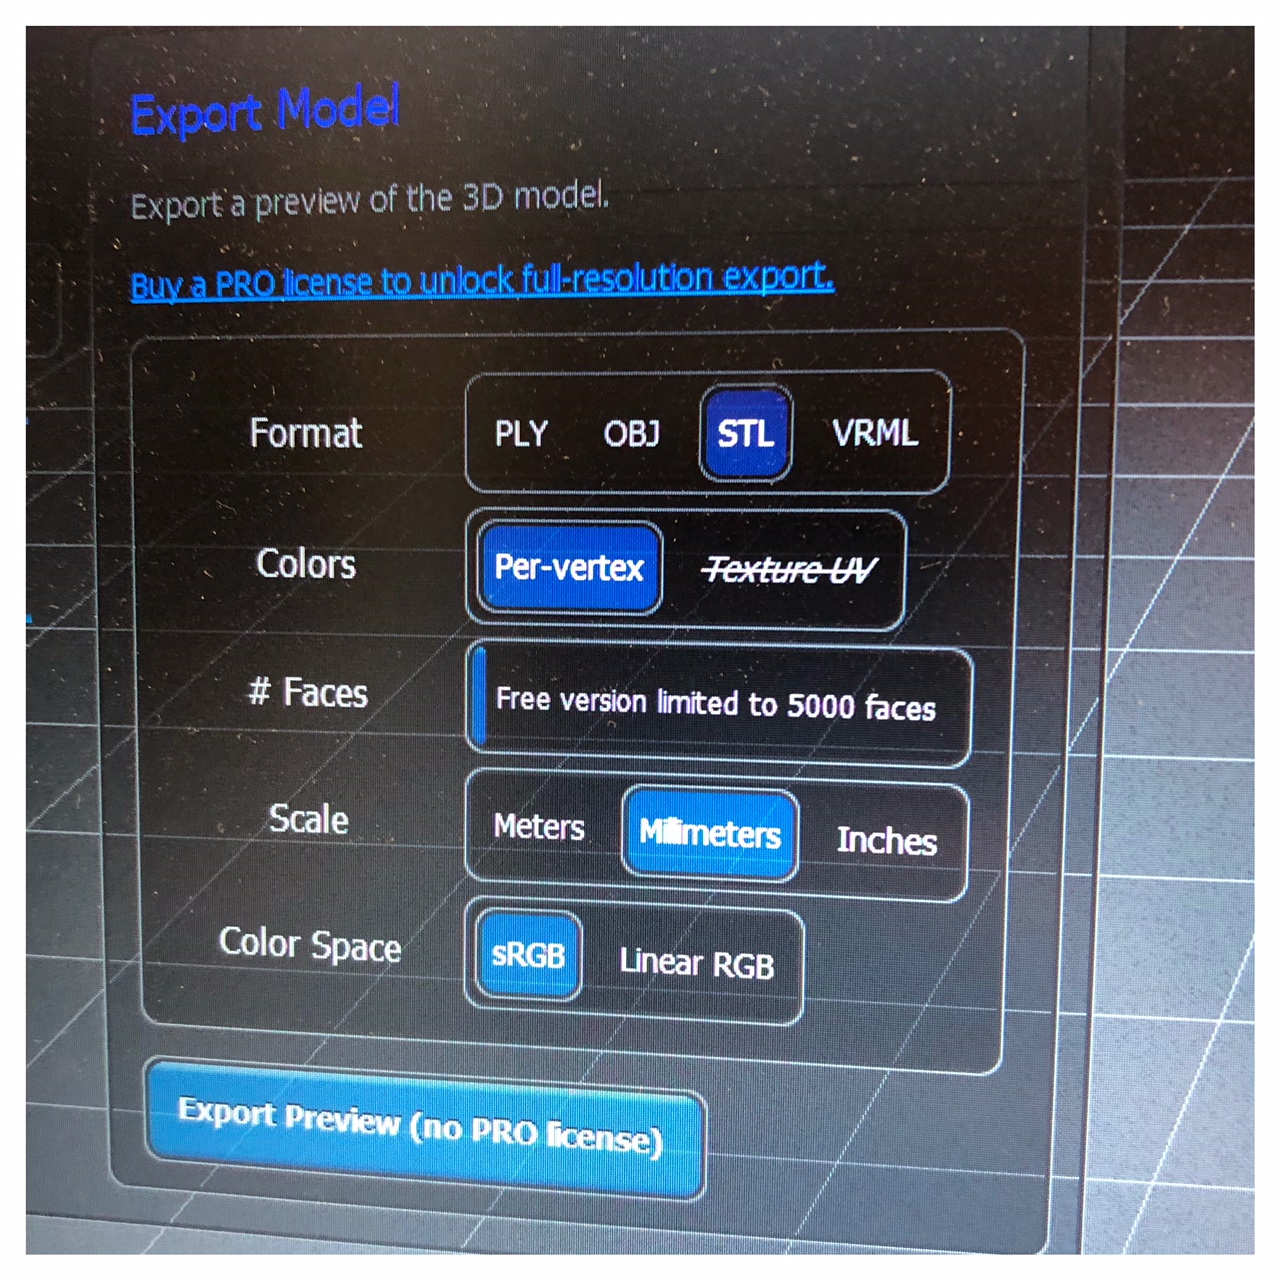
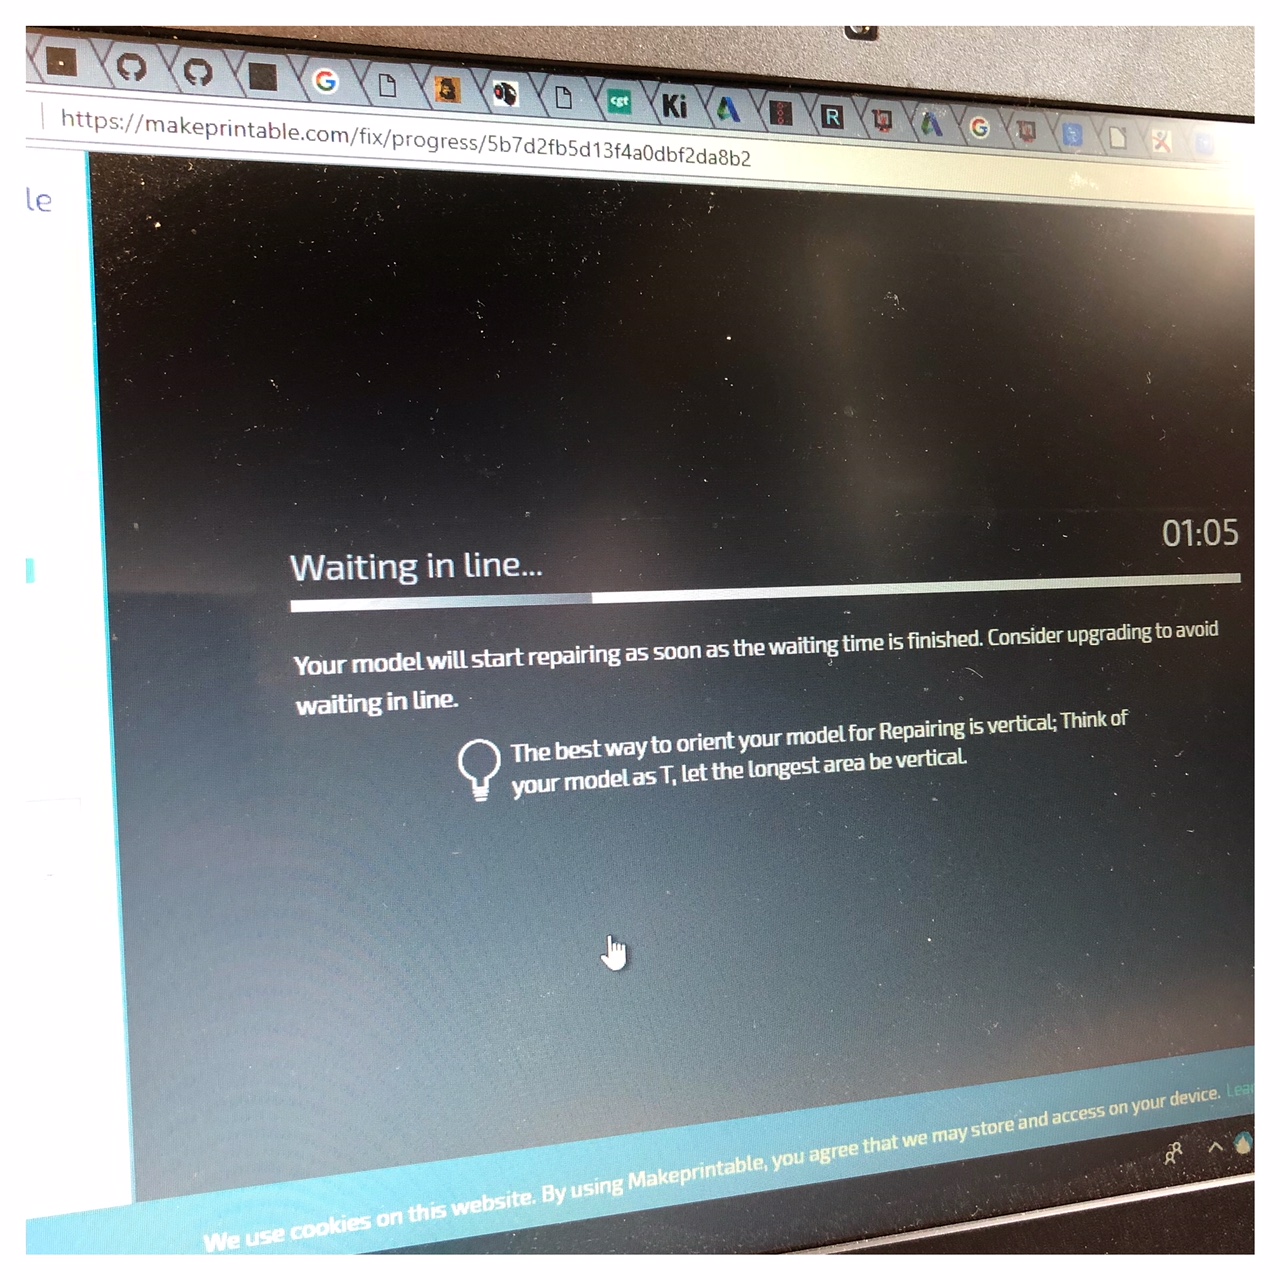
I got a free trial for the Autodesk software - Recap Recap, where I had the possibillity to upload 100 of my 200 pictures at their server. Then you "stand in que" (check the pictures below) for serverspace and the software are then processing the picture.
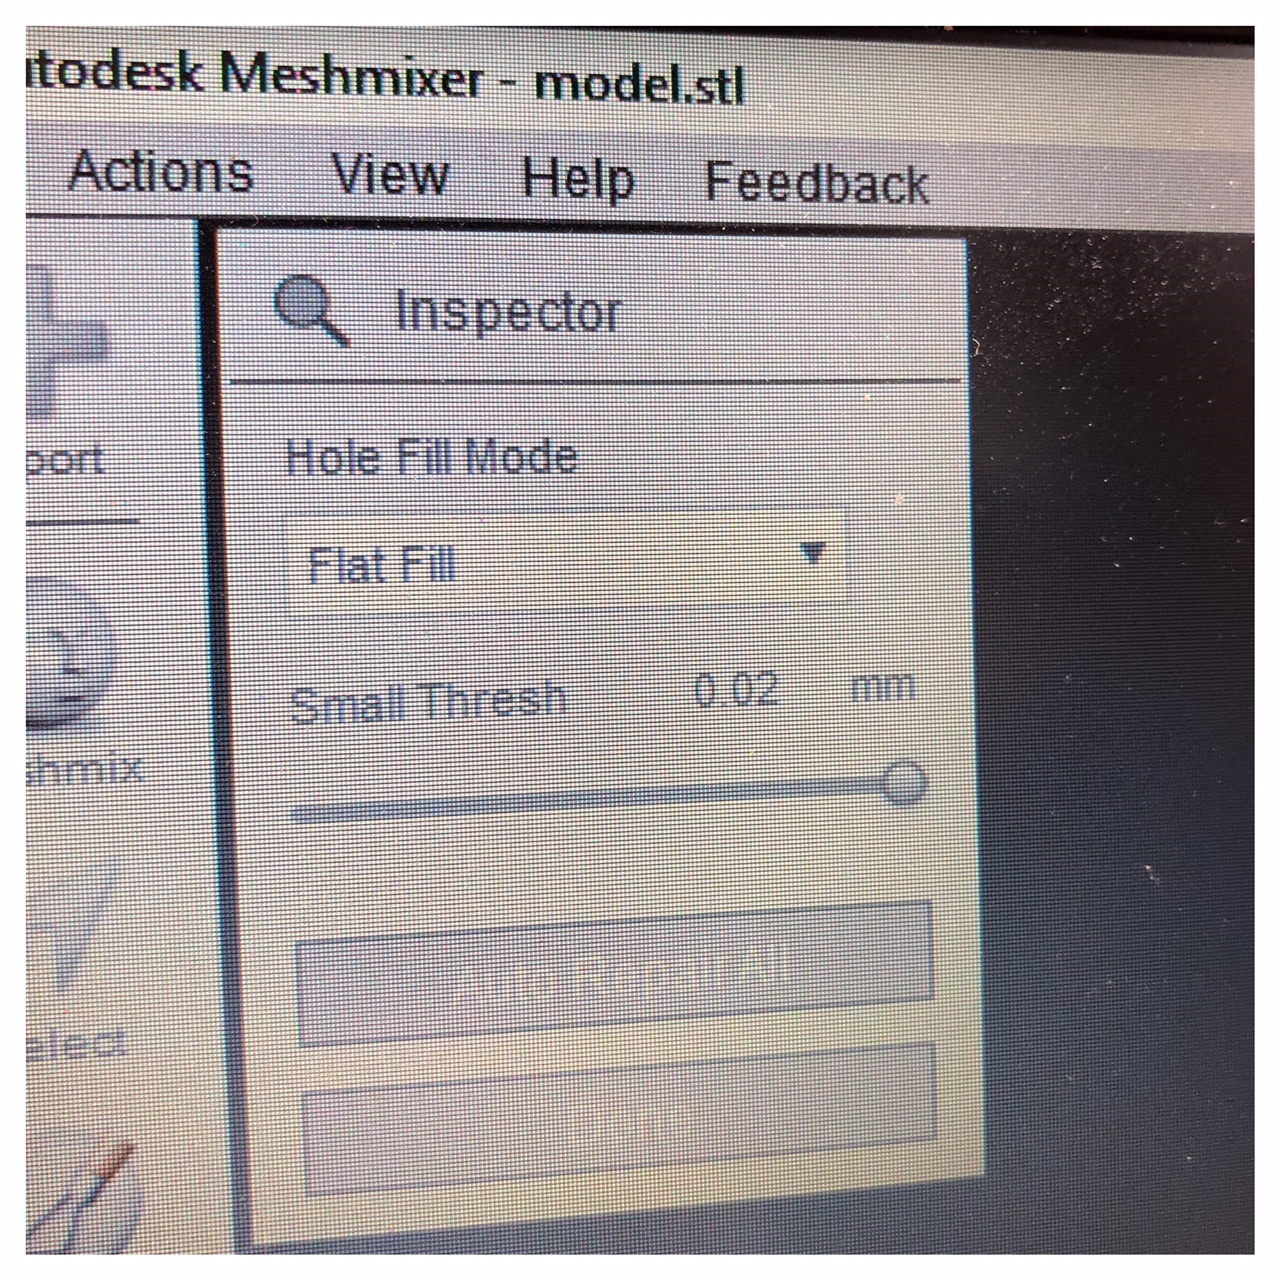
I don't know the effect of all the spots and for another time I thin I will use a better marker, so that the black spots would be more visible on the picture. The Recap programme also have a auto-crop funktion that works quite fast, but the result ended up better with the pictures I didn't auto-crop.

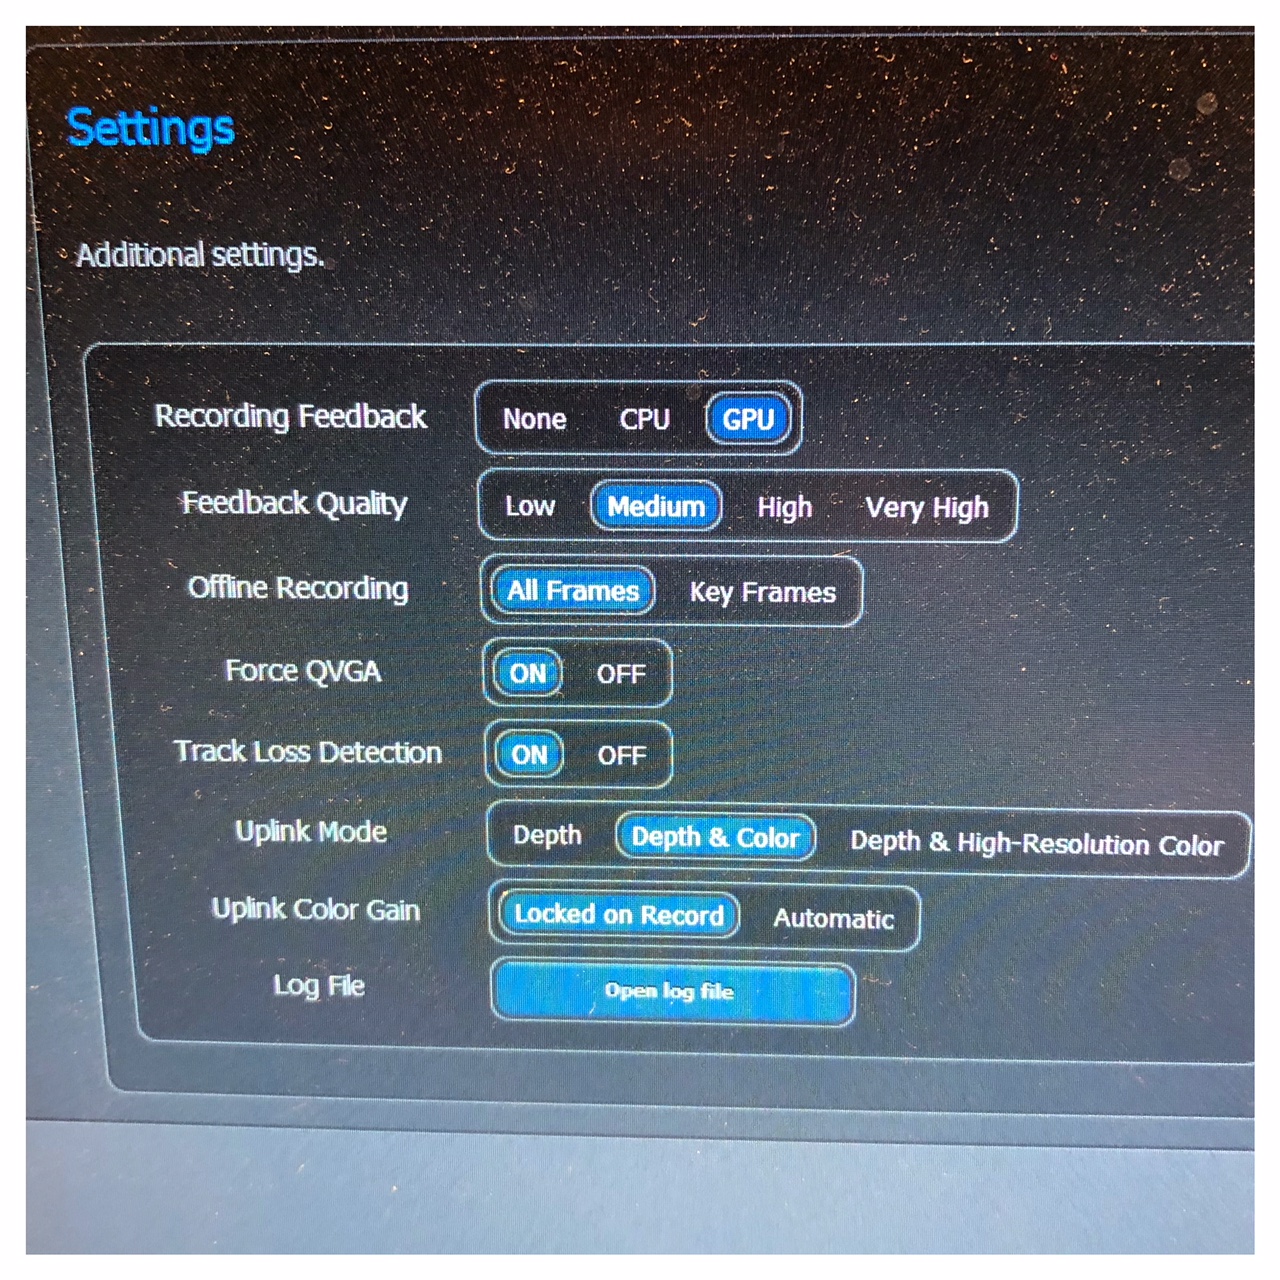
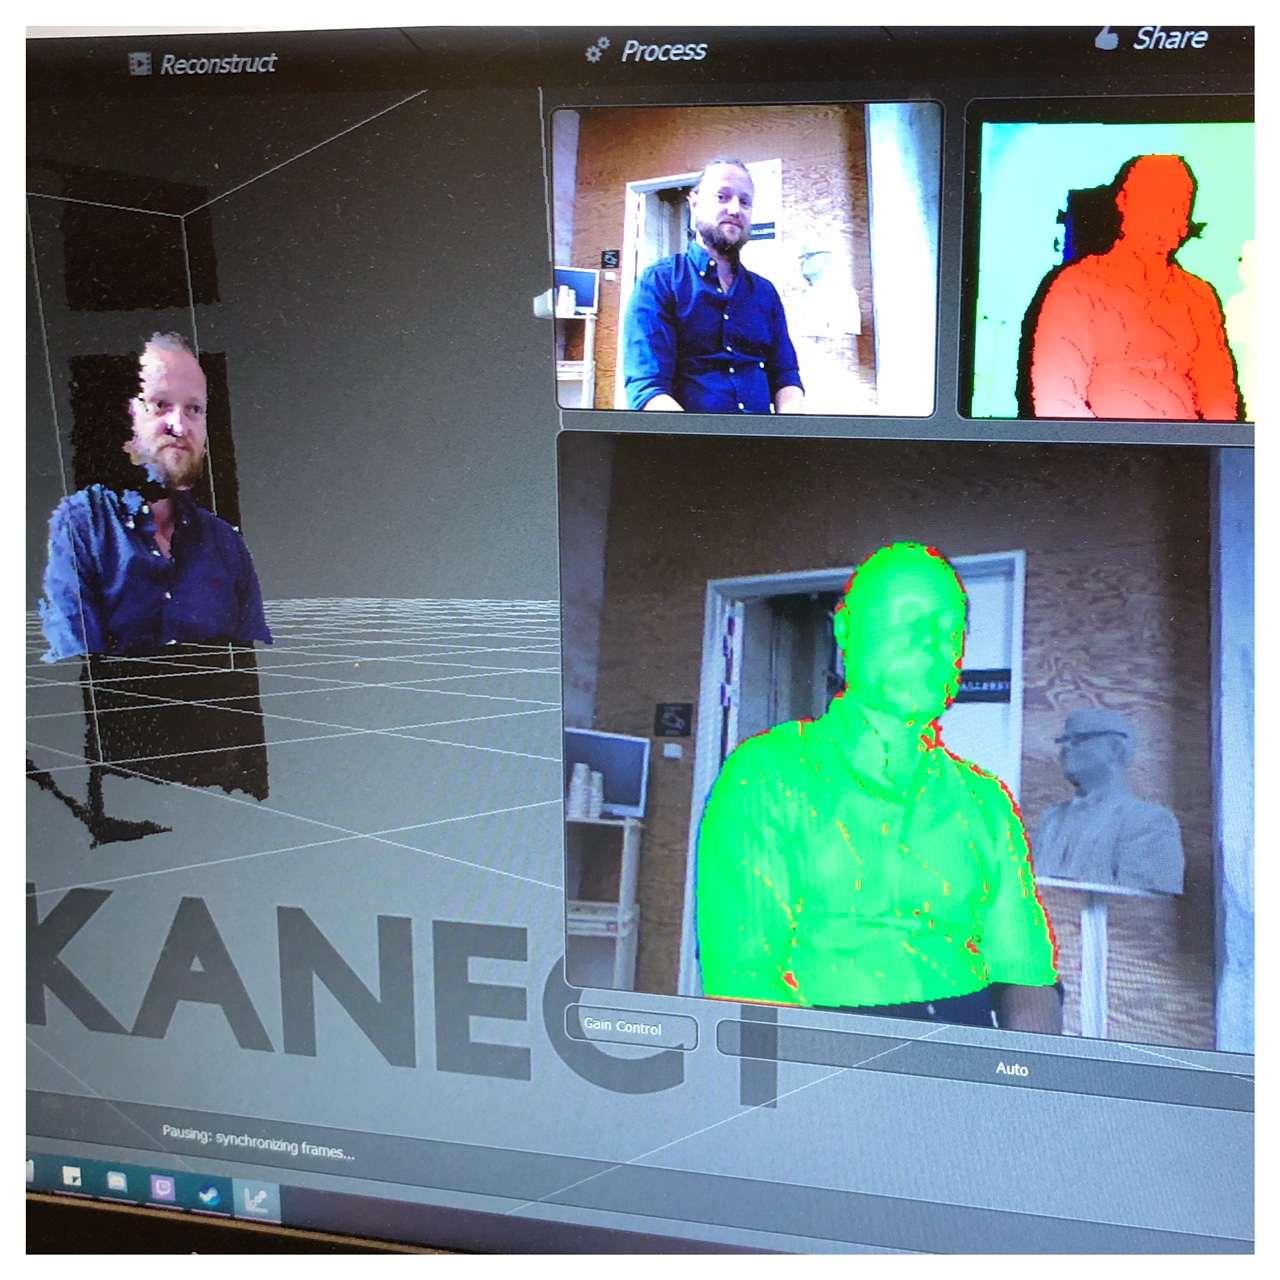
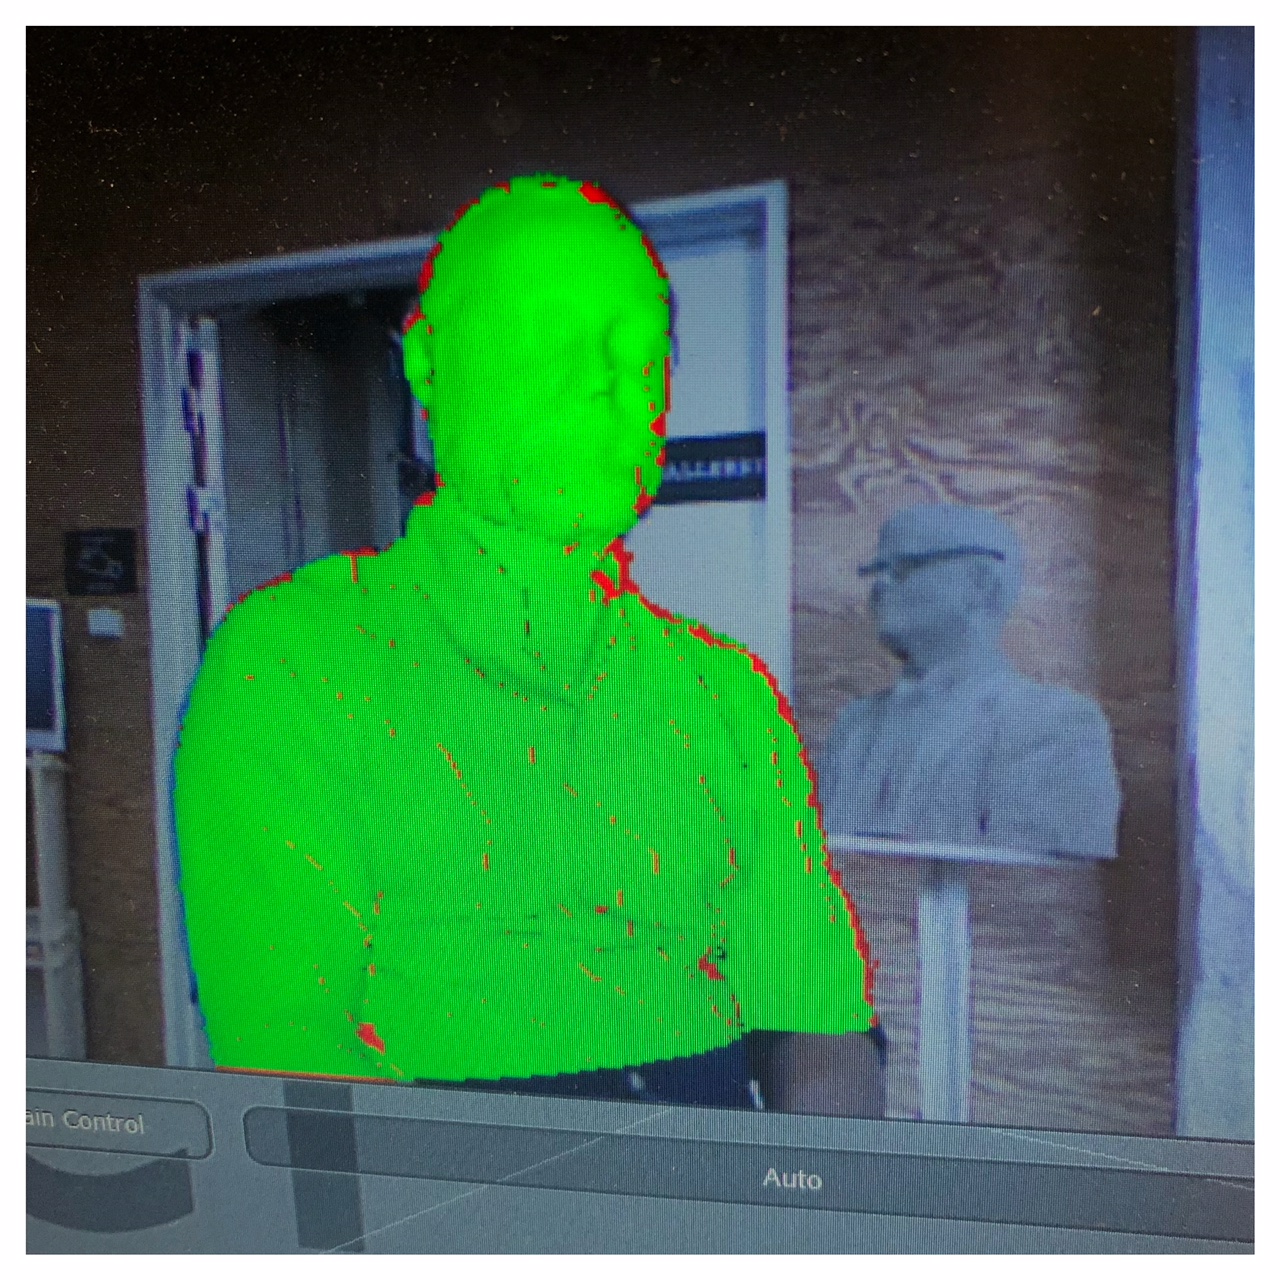
3D scanning with a Kinect
So I am getting a kind of a retro vibe here. I am scanning with a second hand 10 doller X-Box Kinect.

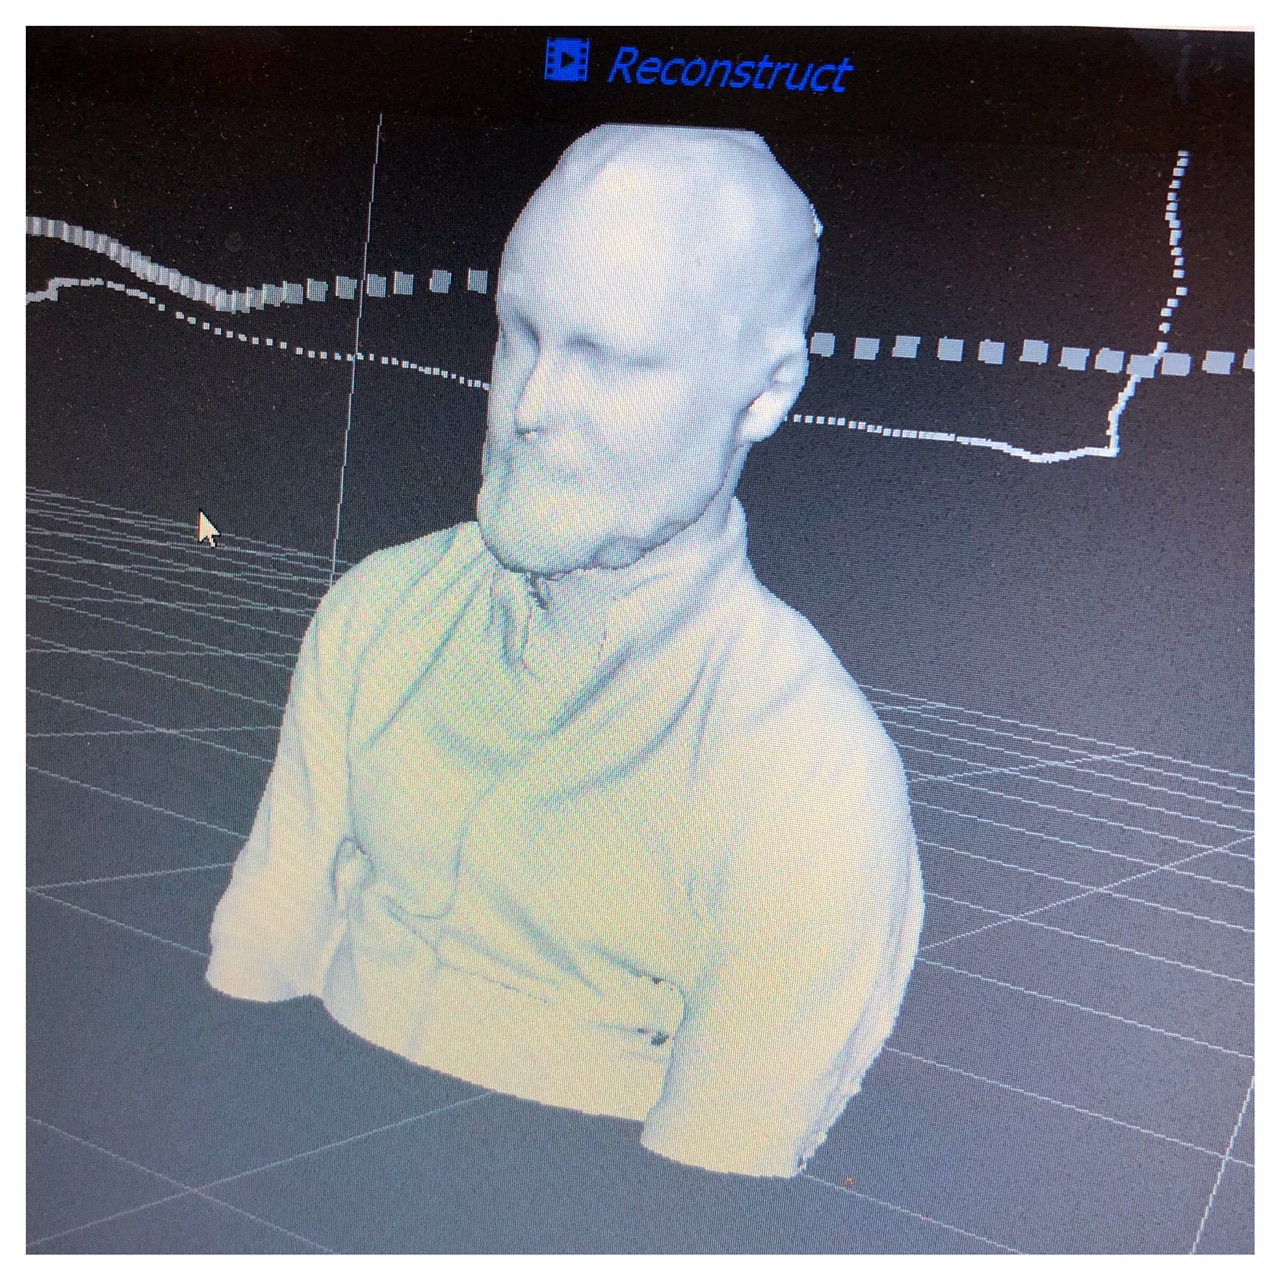
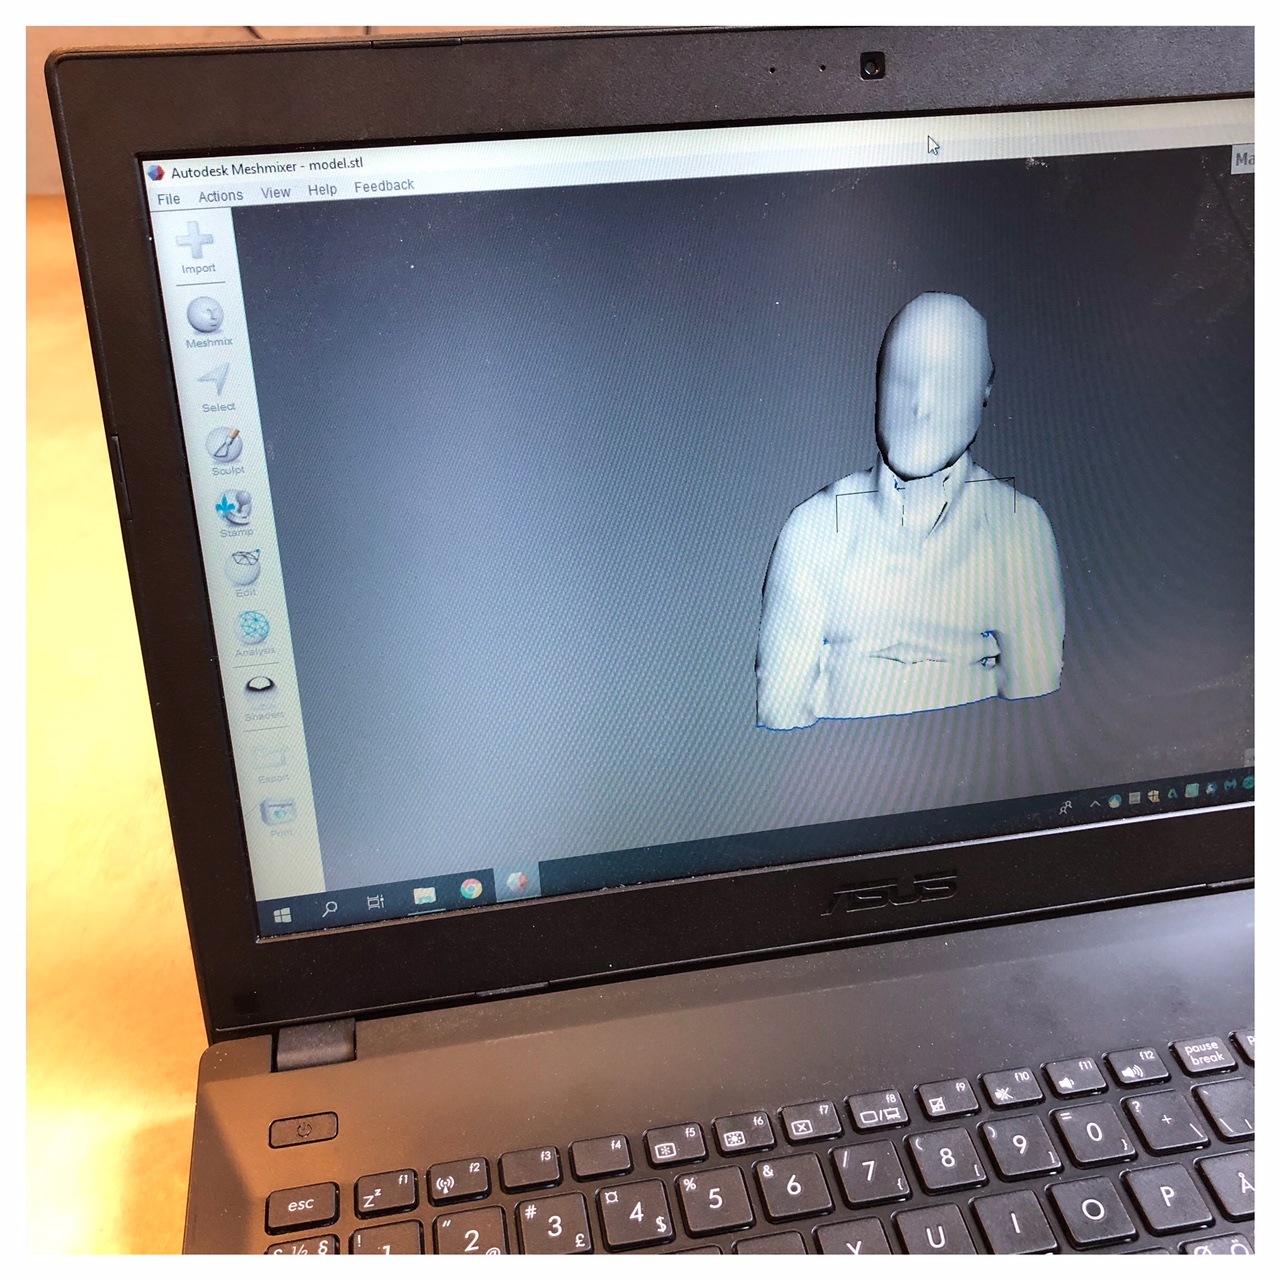
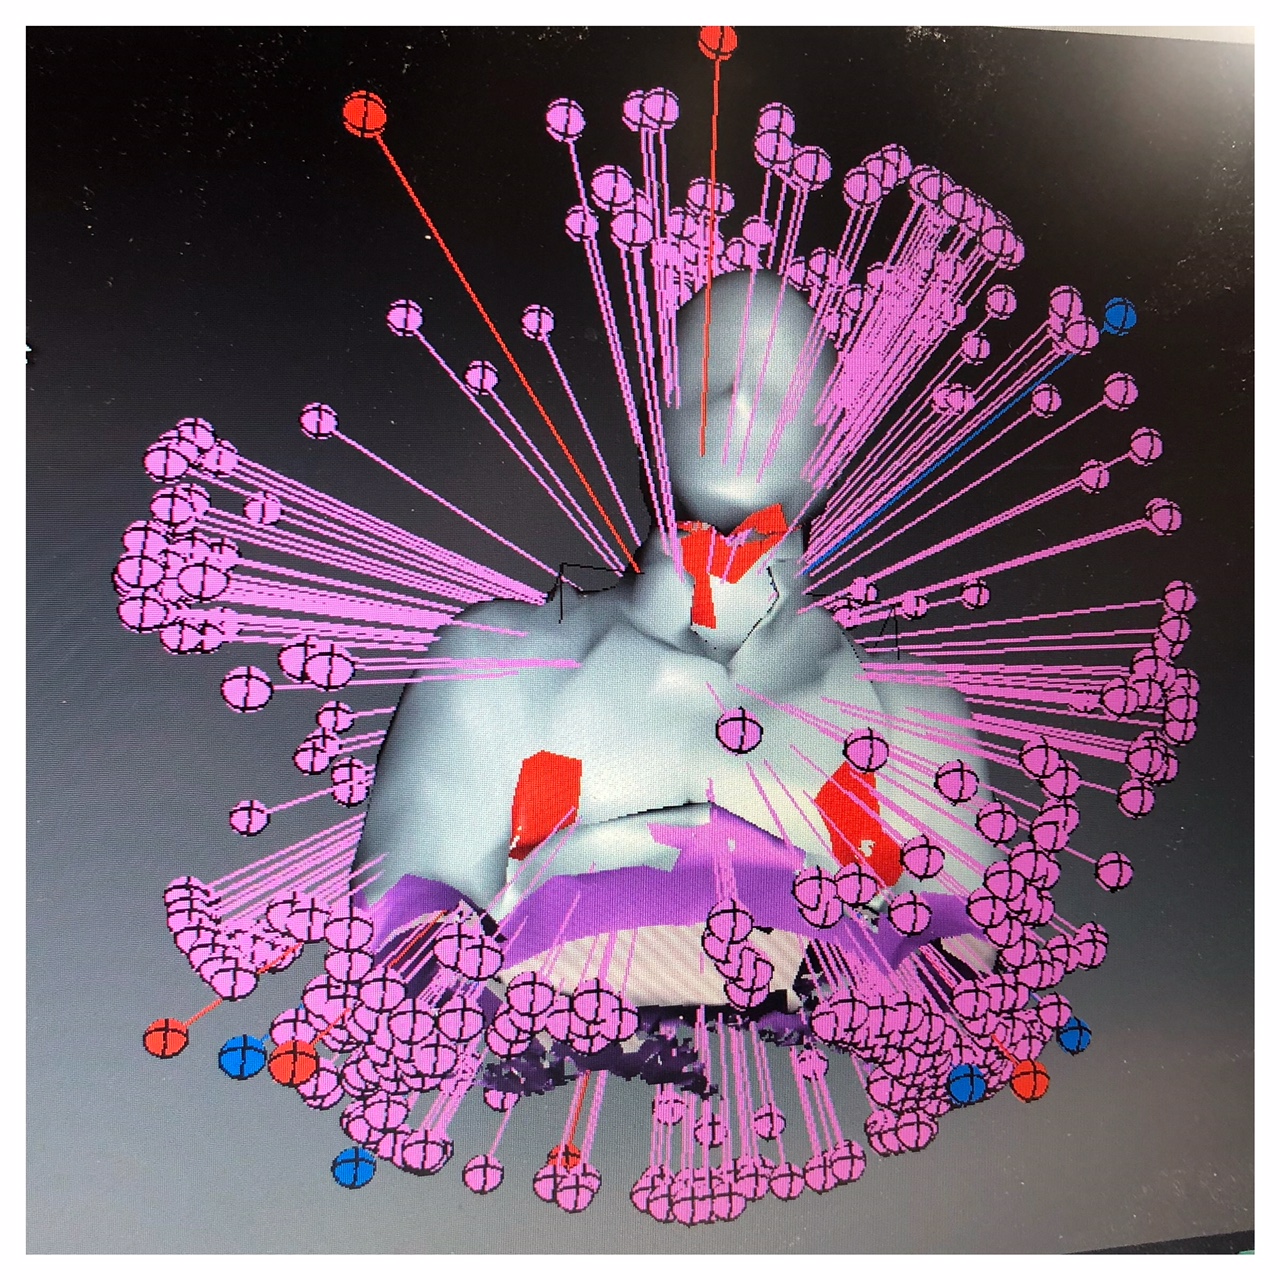
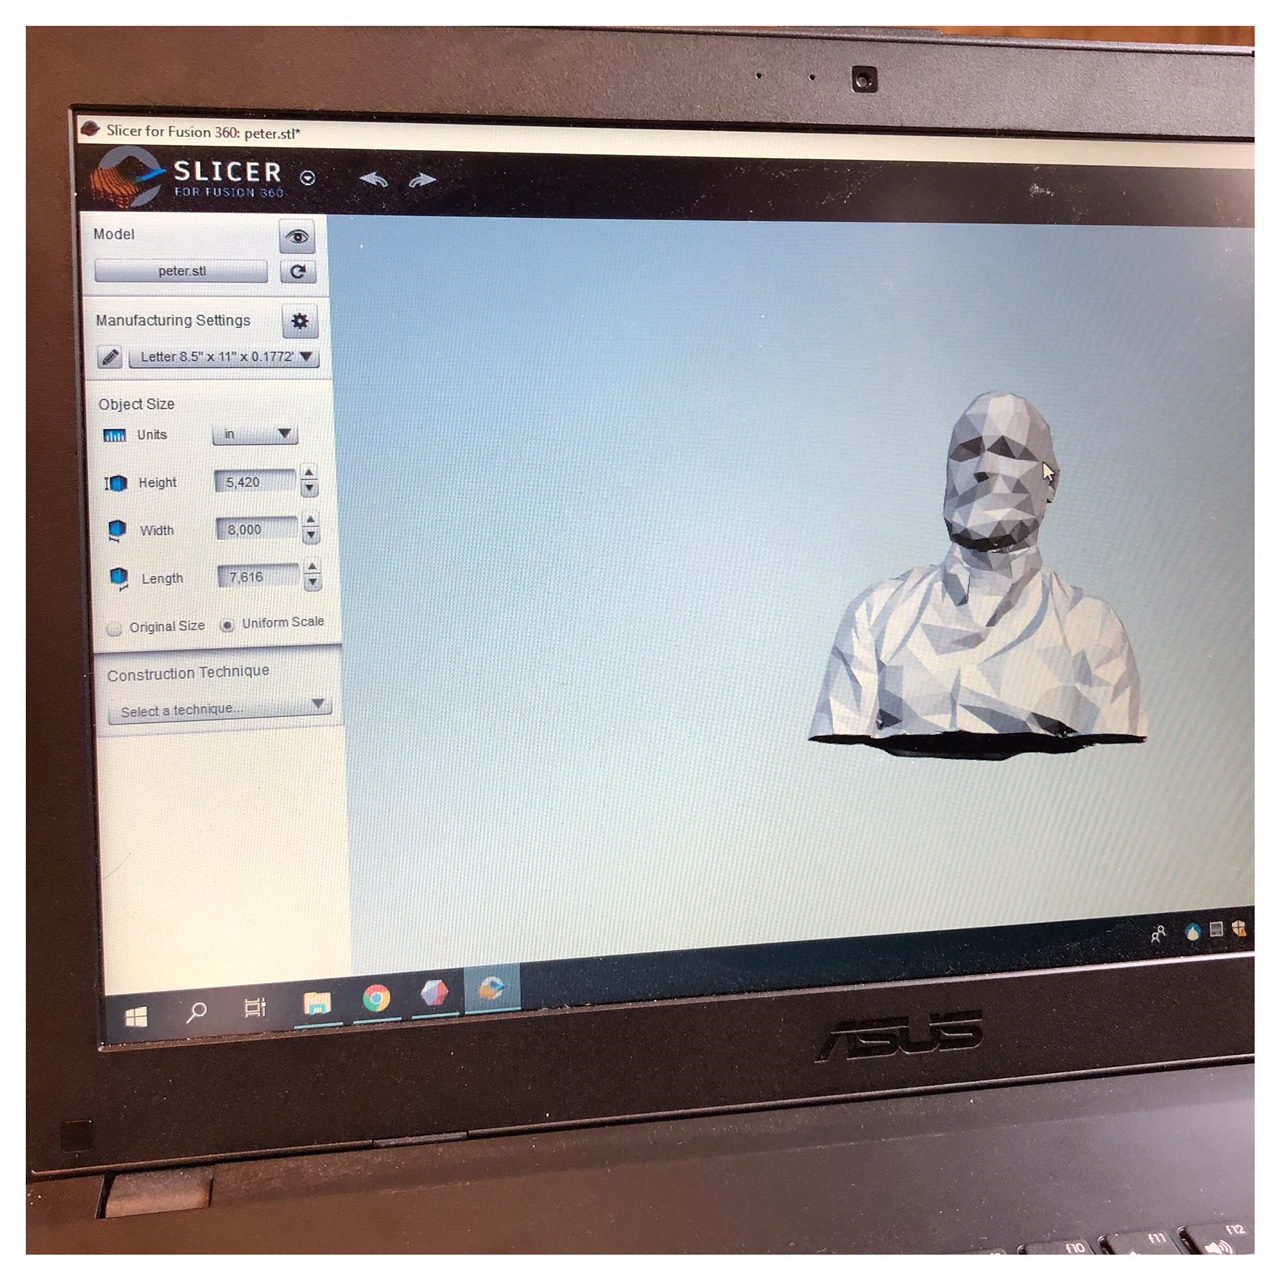
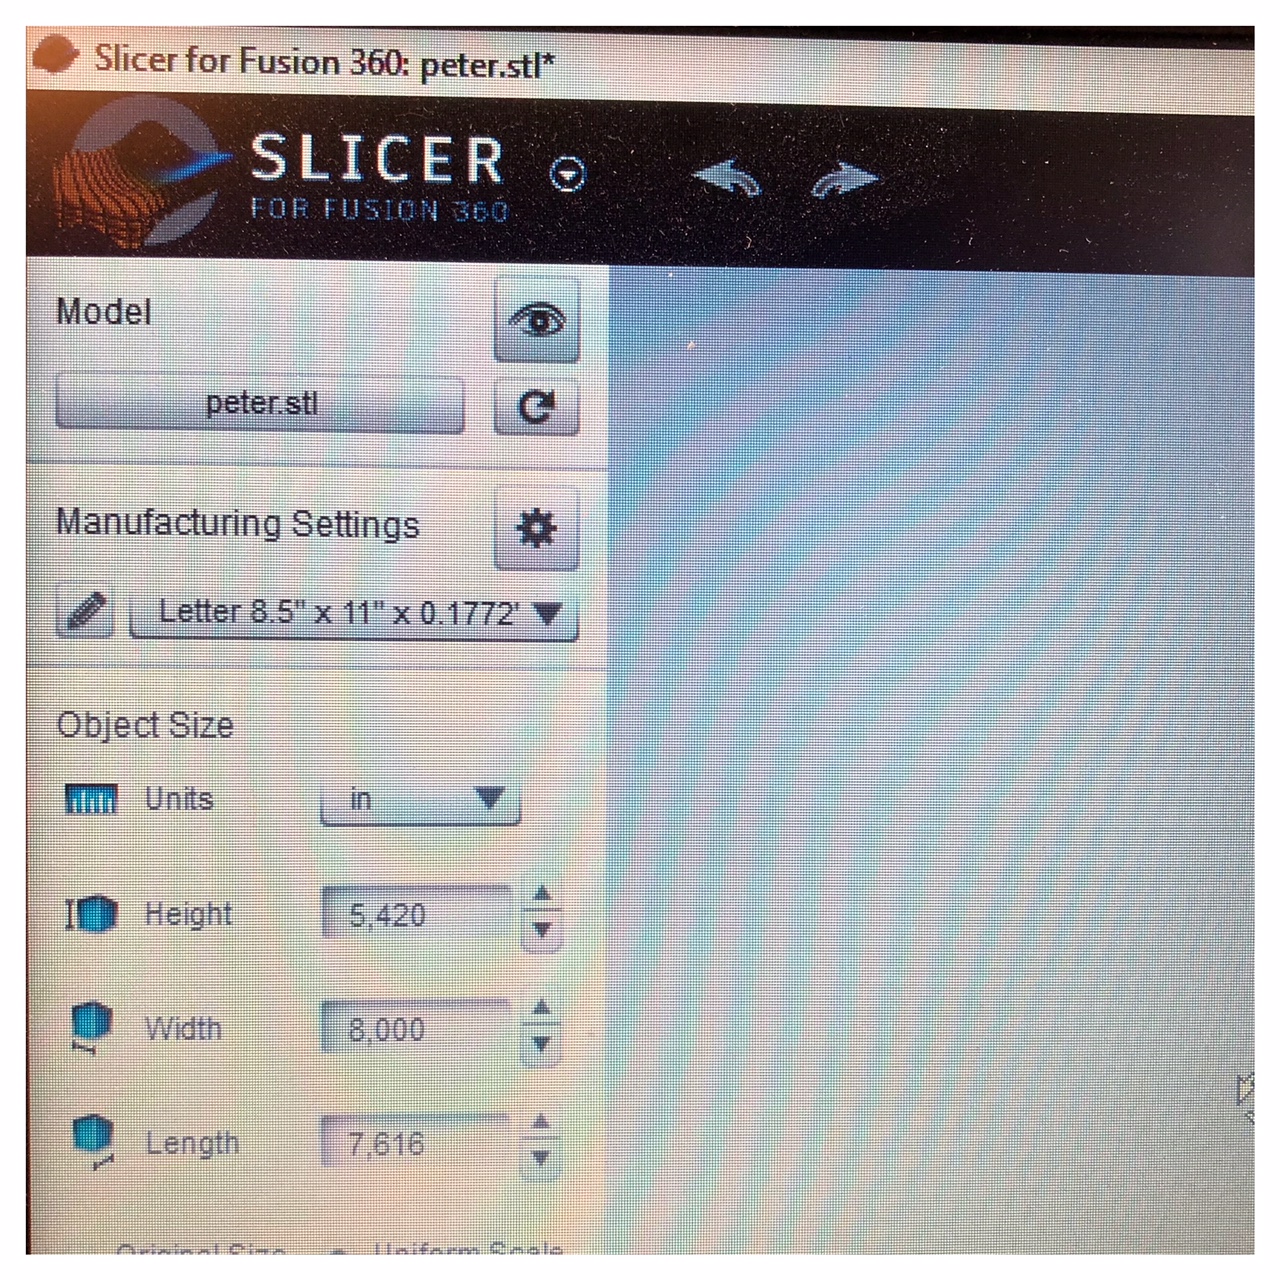
Slicer for Fusion 360
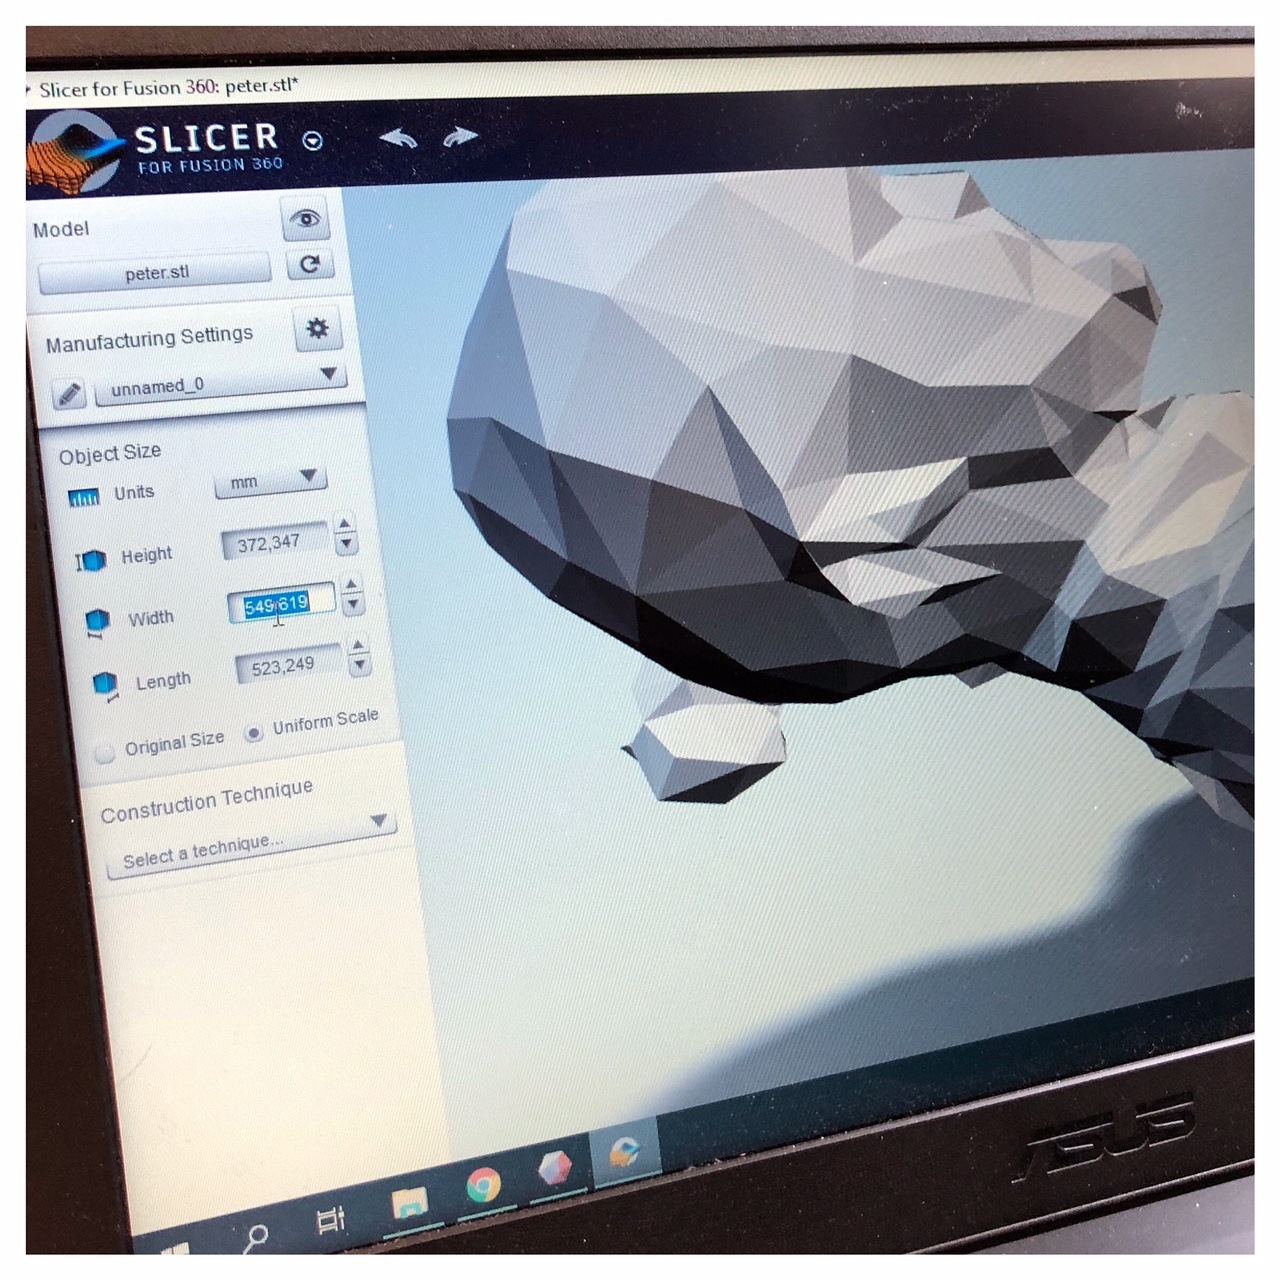
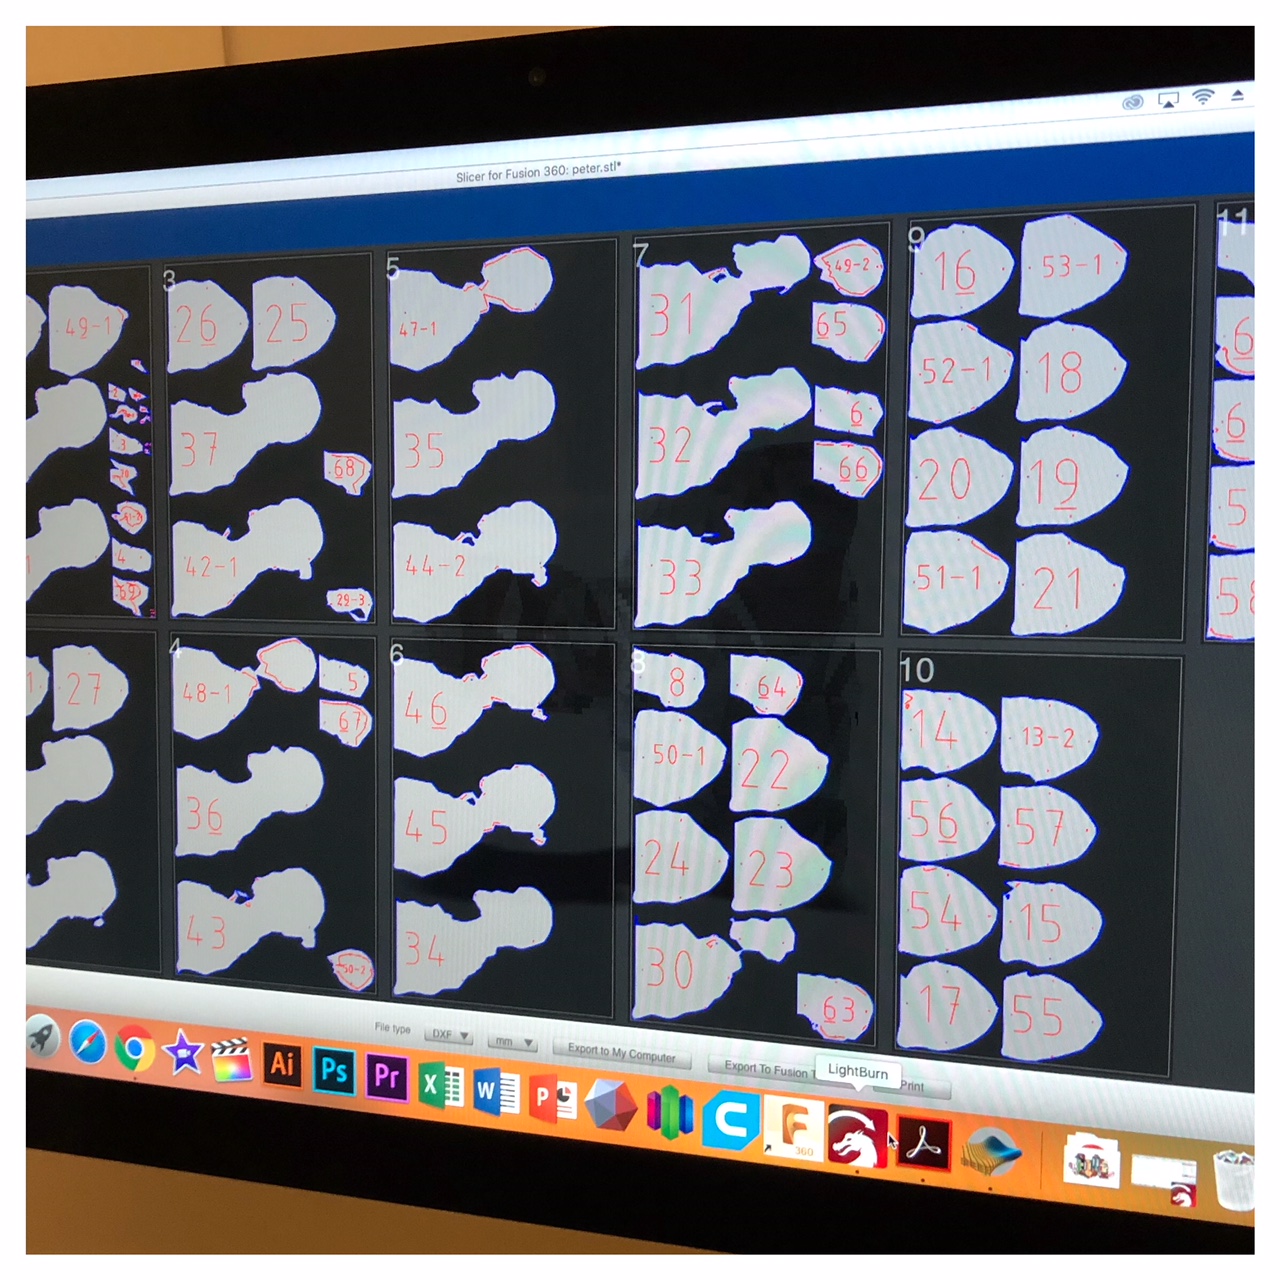
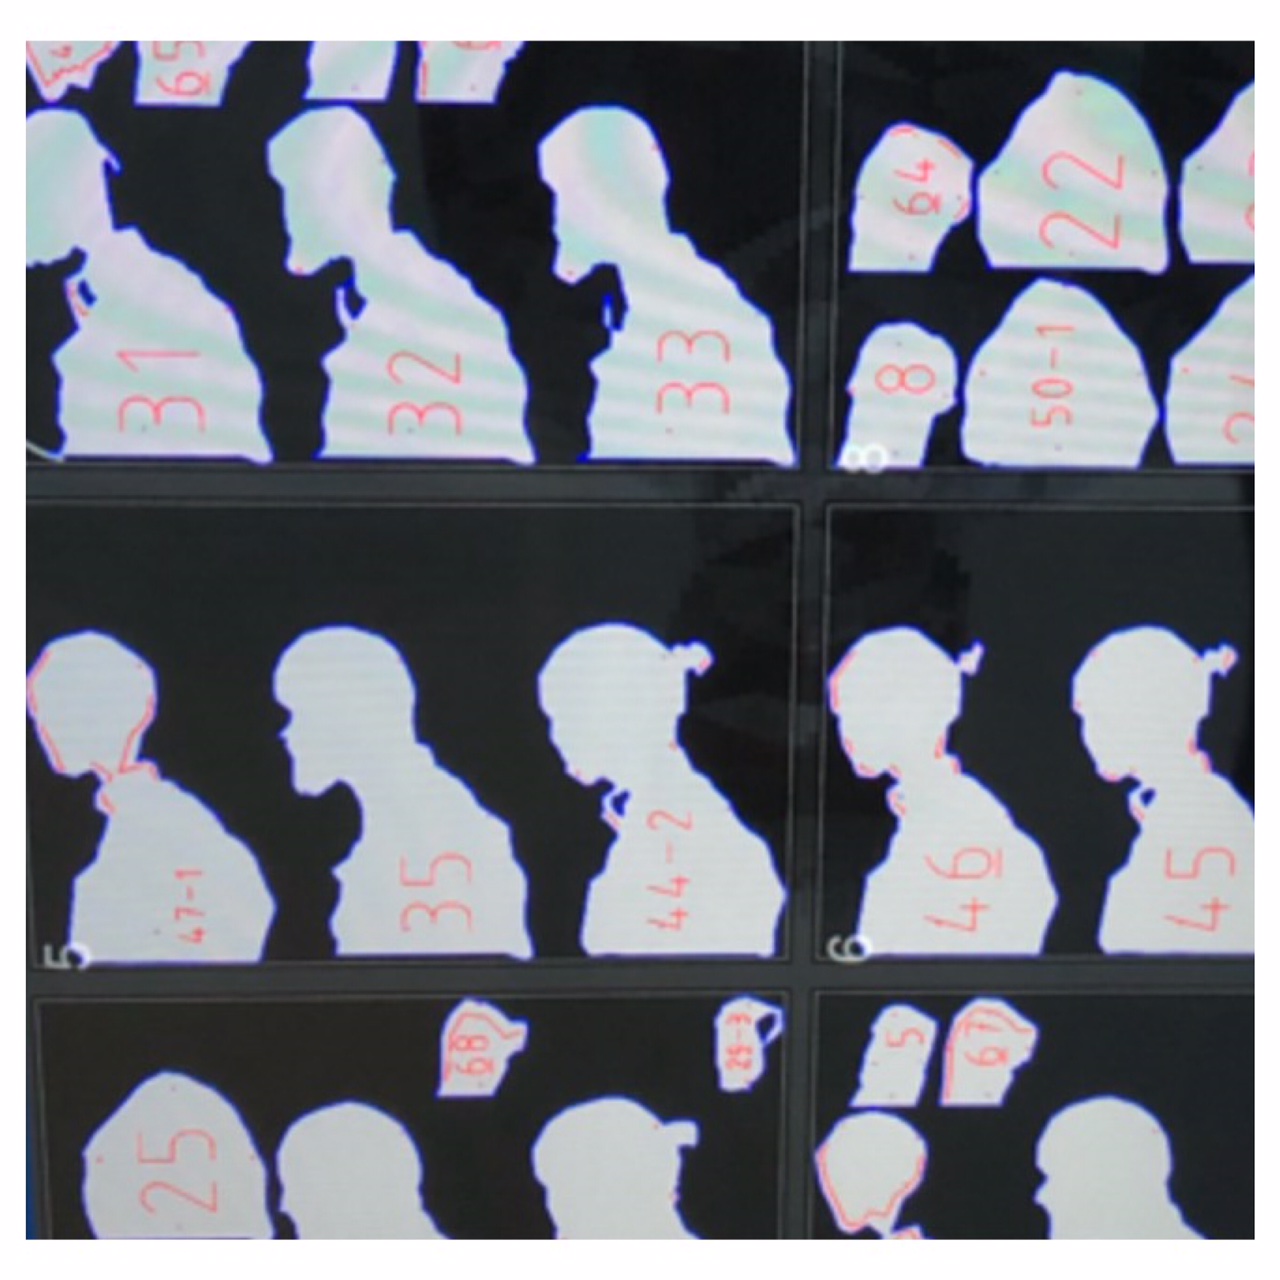
Using Slicer for Fusion 360 I get the opportunity to slice my mesh (.stl-file) into a specific dimension. Here I sliced it into pieces of 4,8 mm which fit the thickness of our cardboard in the lab. My intention is to make a bust of myself in slices of cardboard.
3D Printing
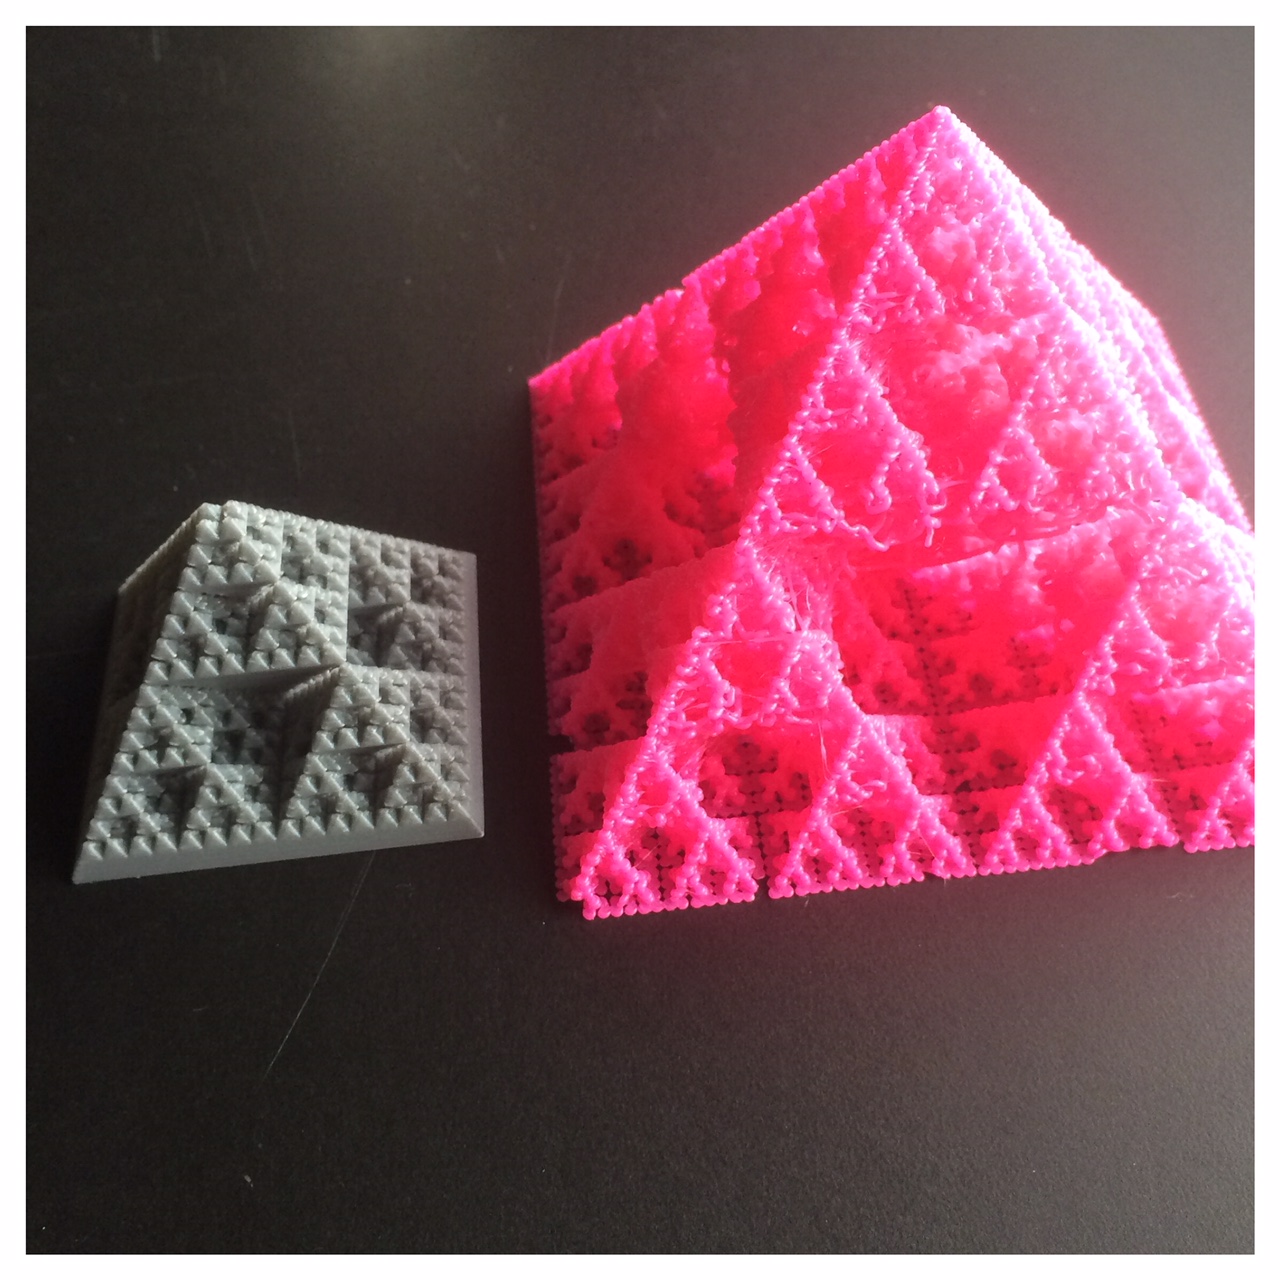
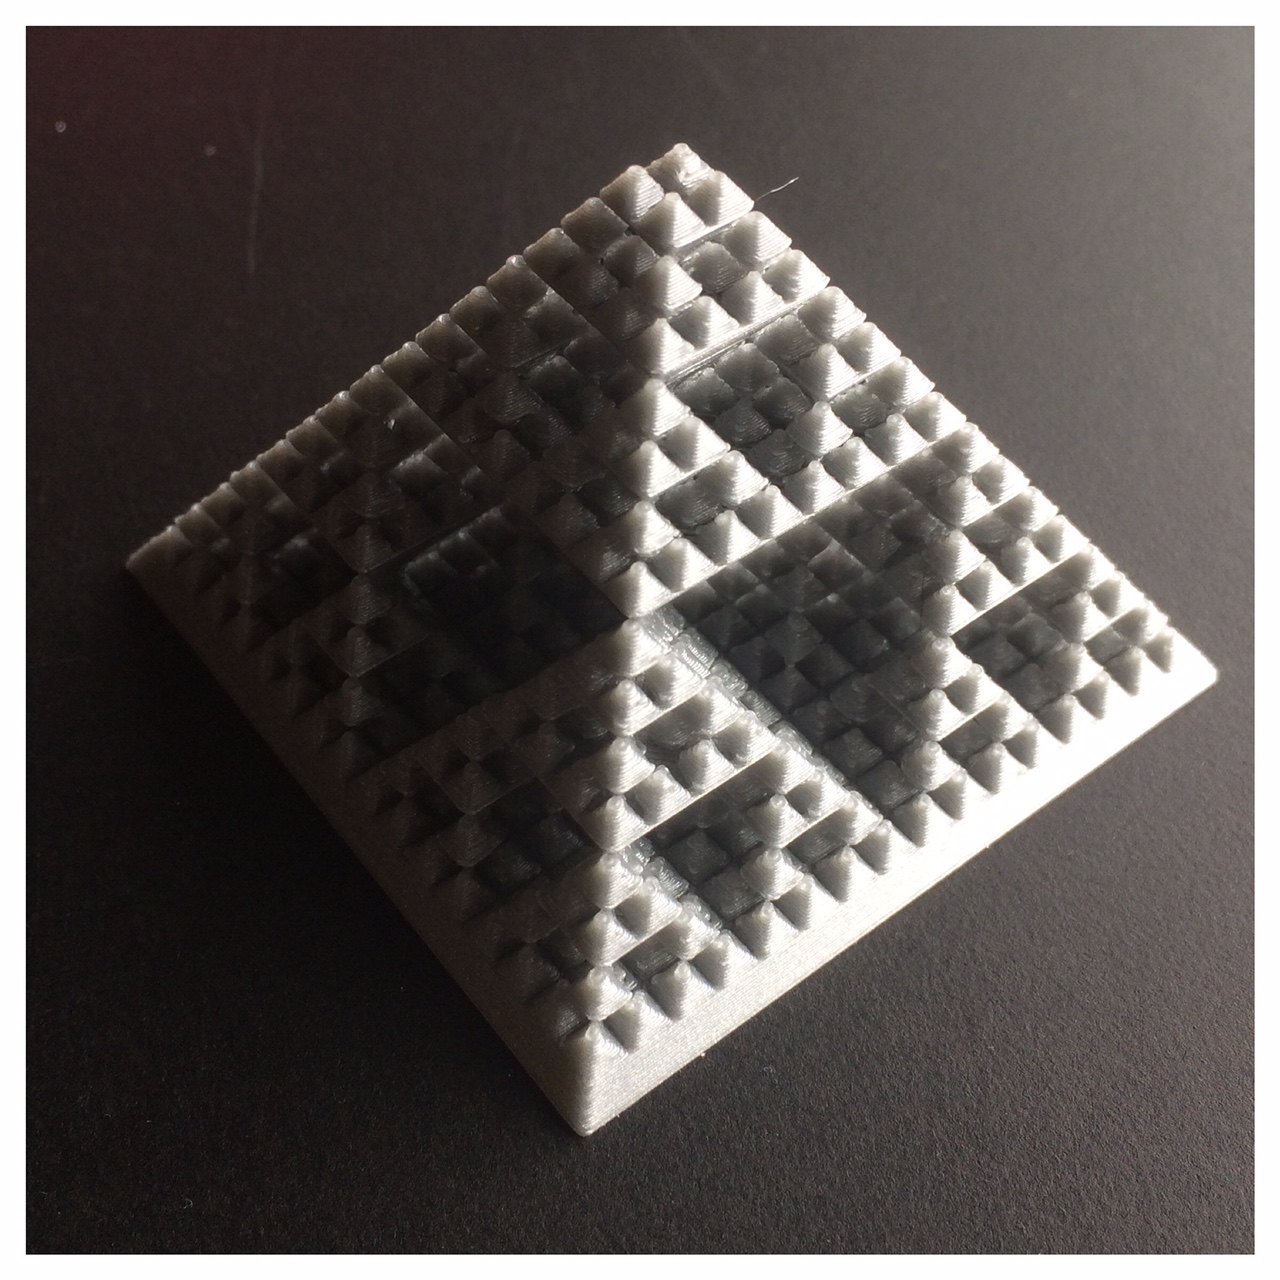
So at one of the small Maker Spaces at a public school here in Vejle we have two different printers. A Ultimaker 2+ and a Prusa i3. I wanted to try printing two different and slightly complicated prints in PLA to see the difference in the maschines and also test speed, nozzle and filament. I found this model of a pyramide fractal on Thingiverse.
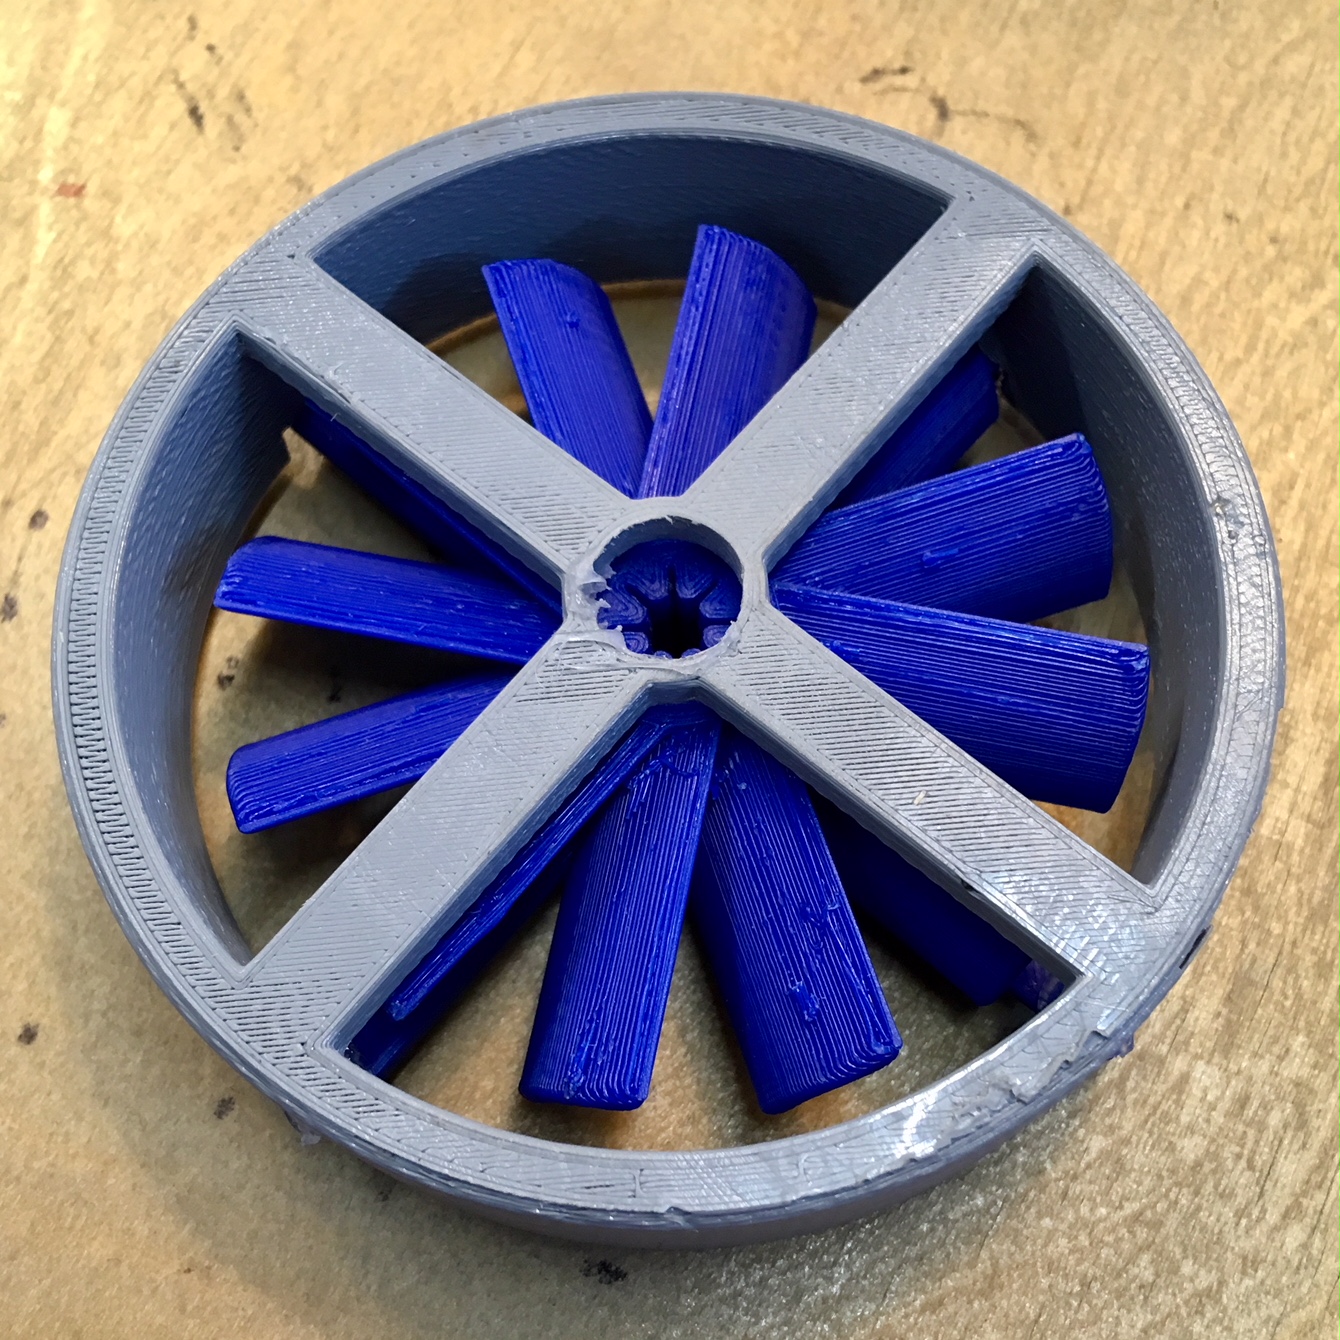
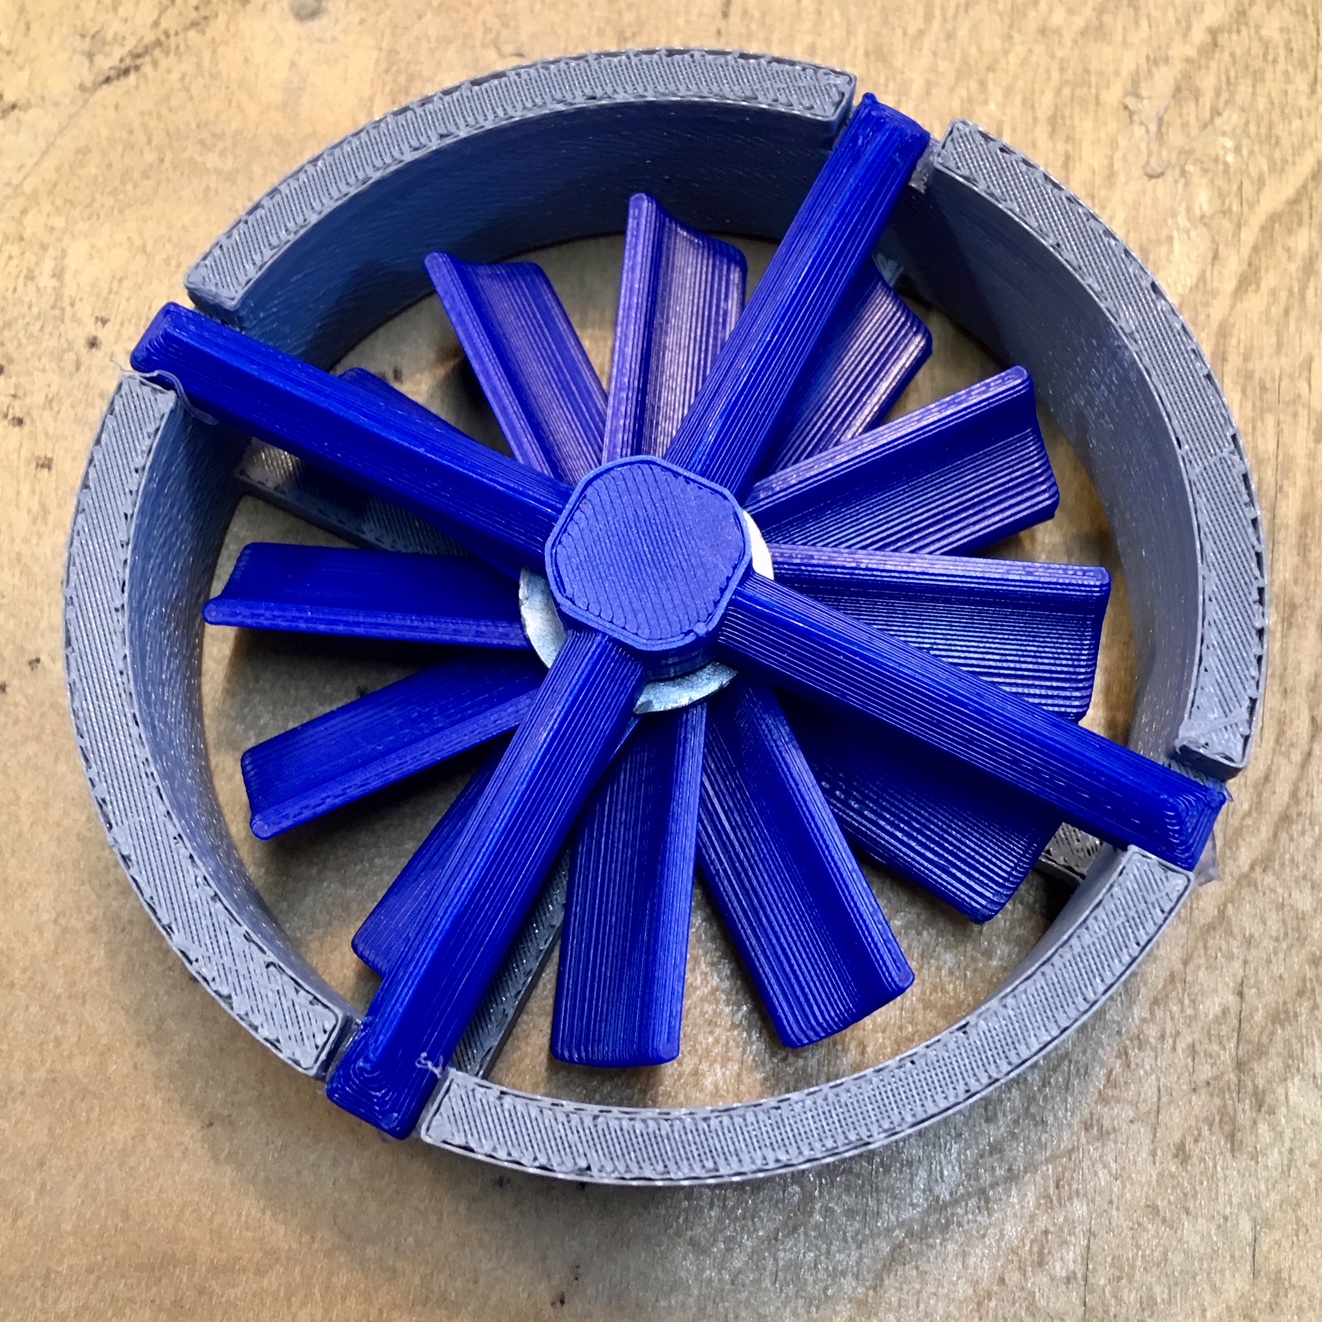
So this little turbine print in PLA I printed togehter with some students (at the age of 12 years old) at the public school's Ultimkaer 2+. It became a part of a project assignment for the 7th graders. They worked with green energy and would like to make a small turbine. The program used for this was Fusion 360 (I included the three files at the top of this site).
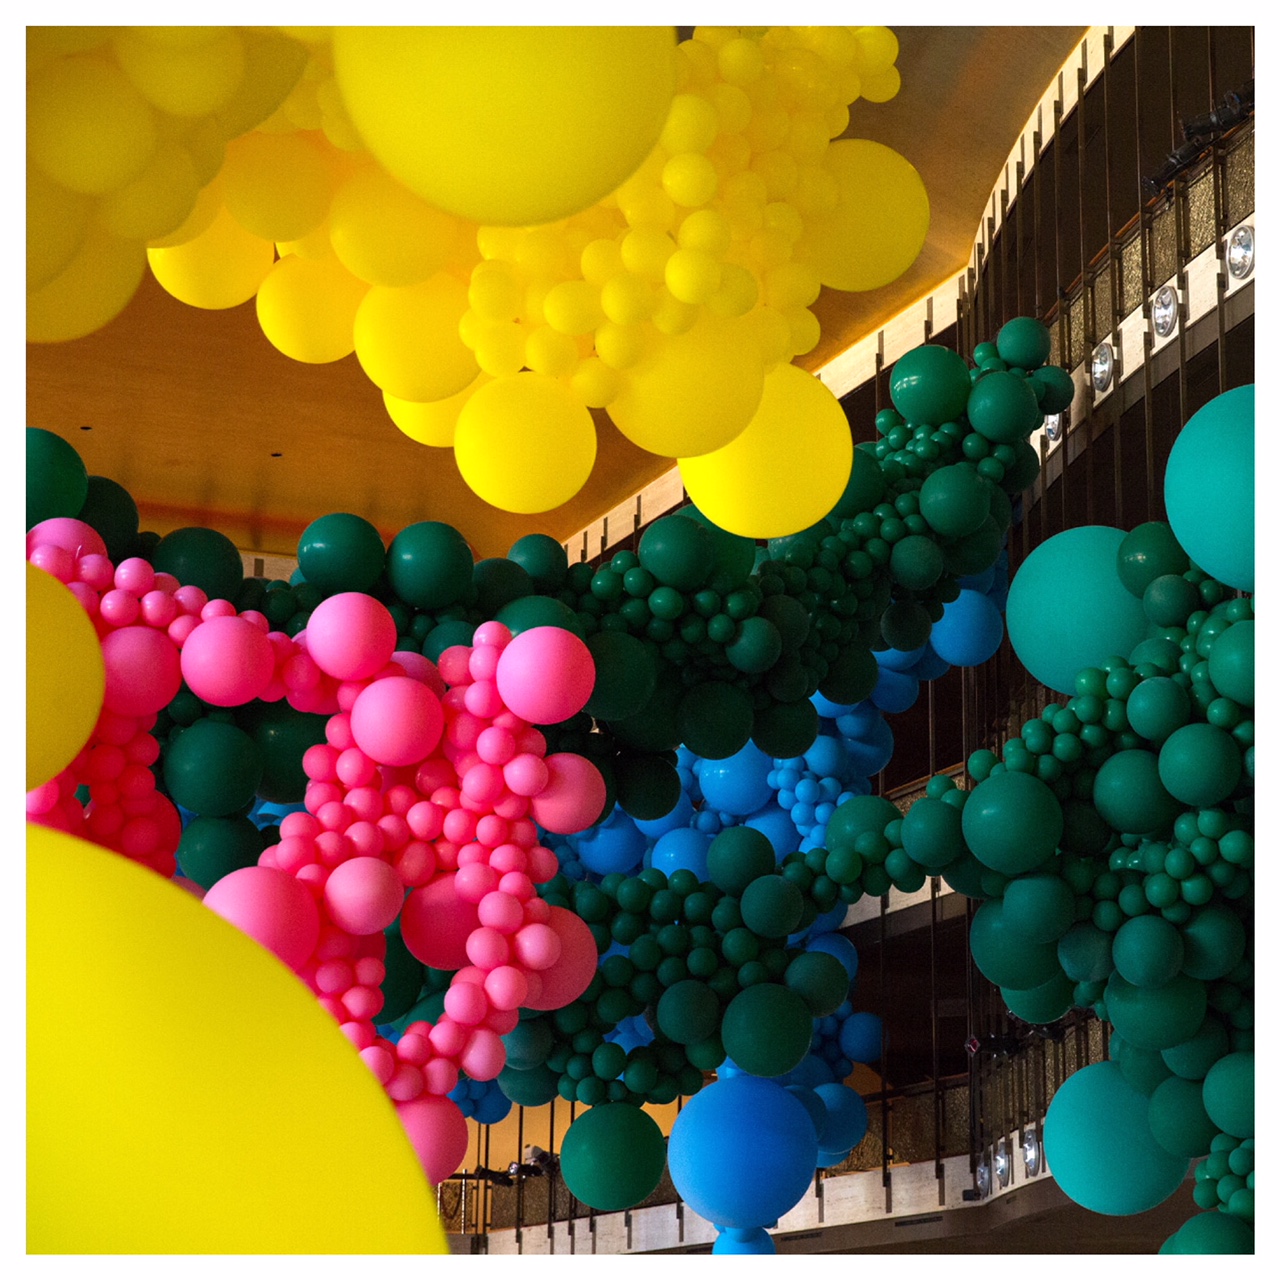
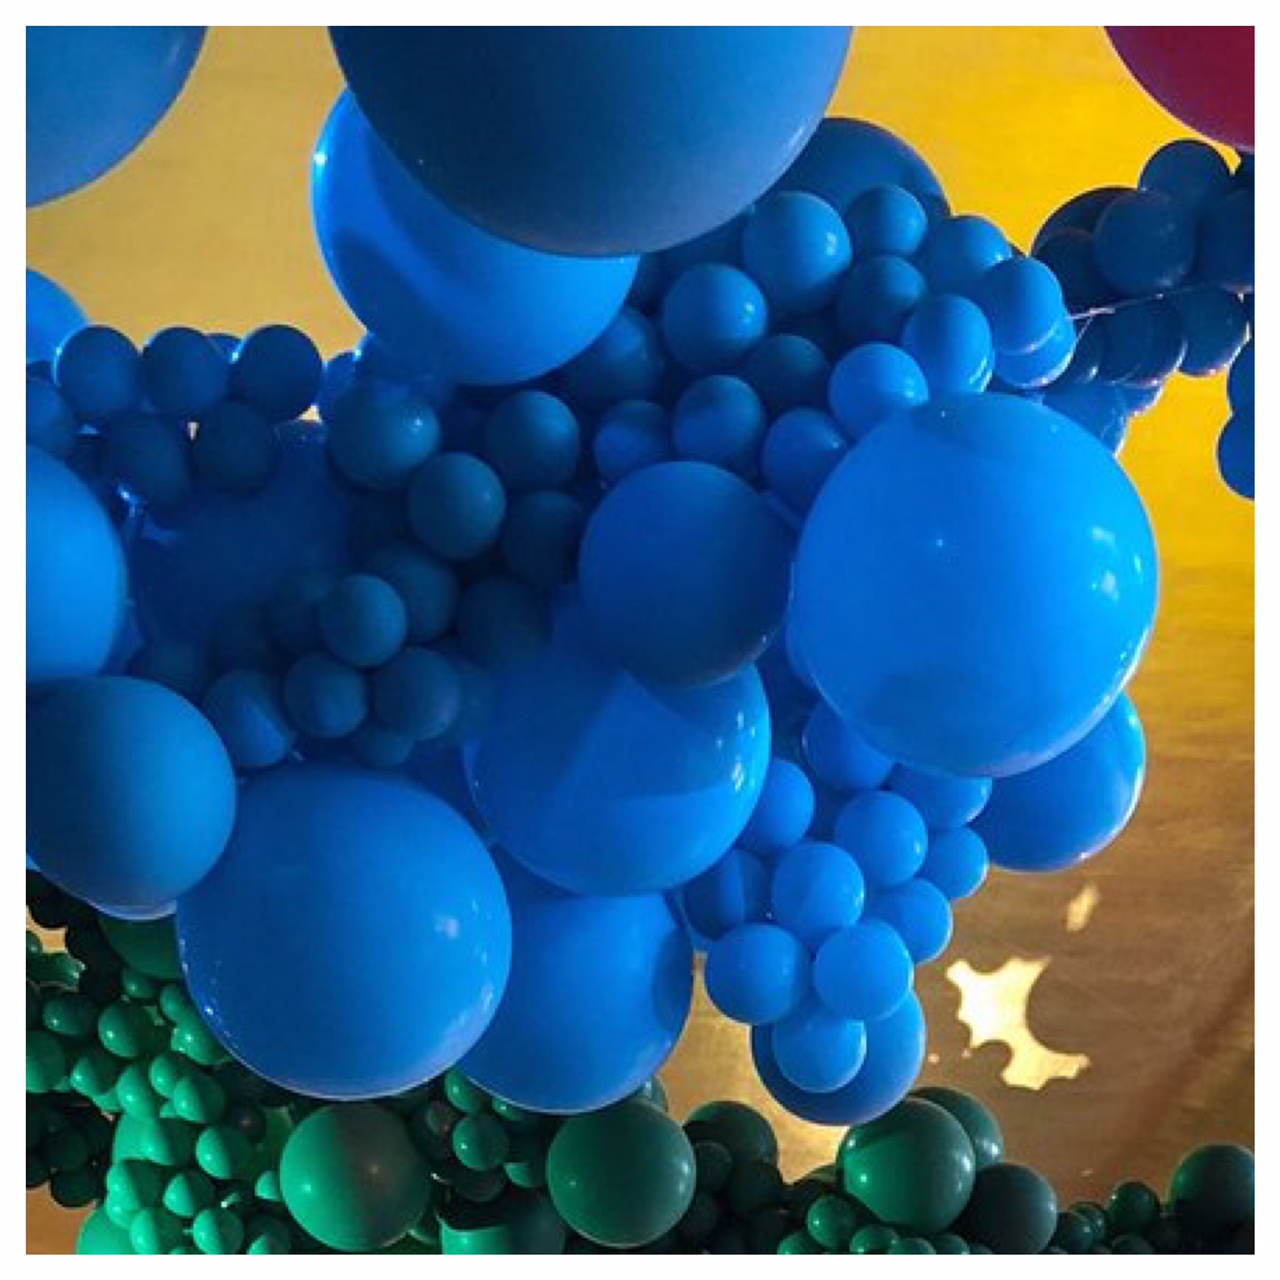
For my lamp in the final projct I need to try making a cloud formation that is hallow in order to make into a lamp. Lorenzo showed me this massive balloon installation for the New York City Ballet done by artist Jihan Zencirli tjeck this link for more information on that: Balloon installation
Some of the unique features I get from 3D printing
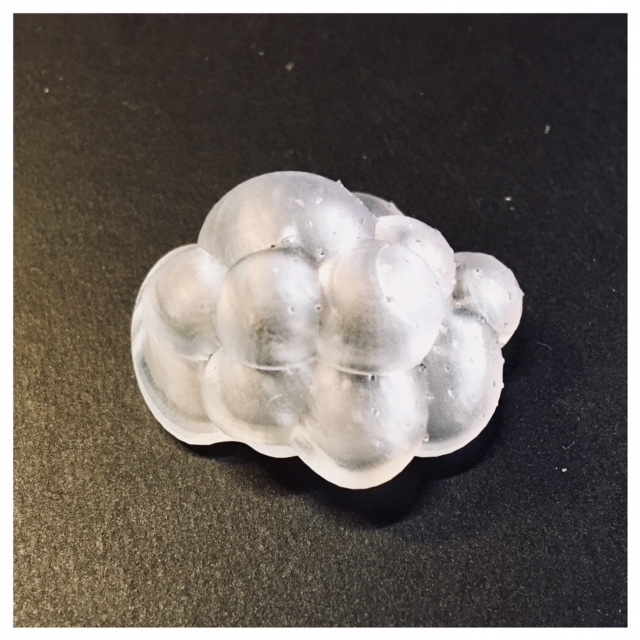
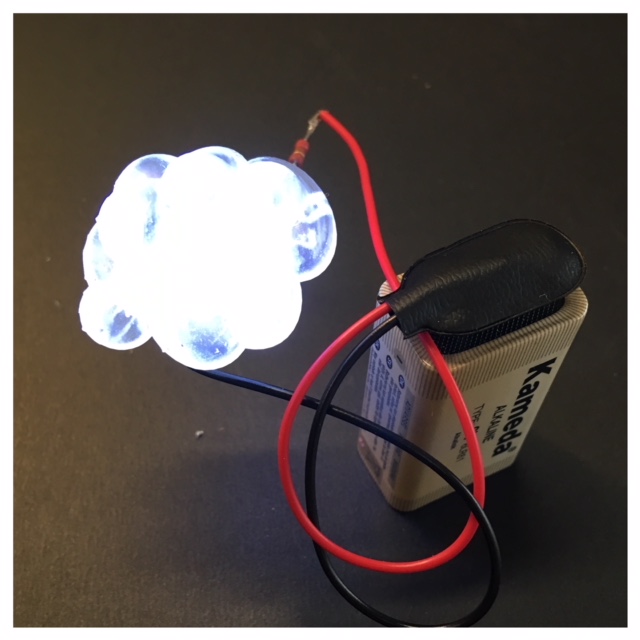
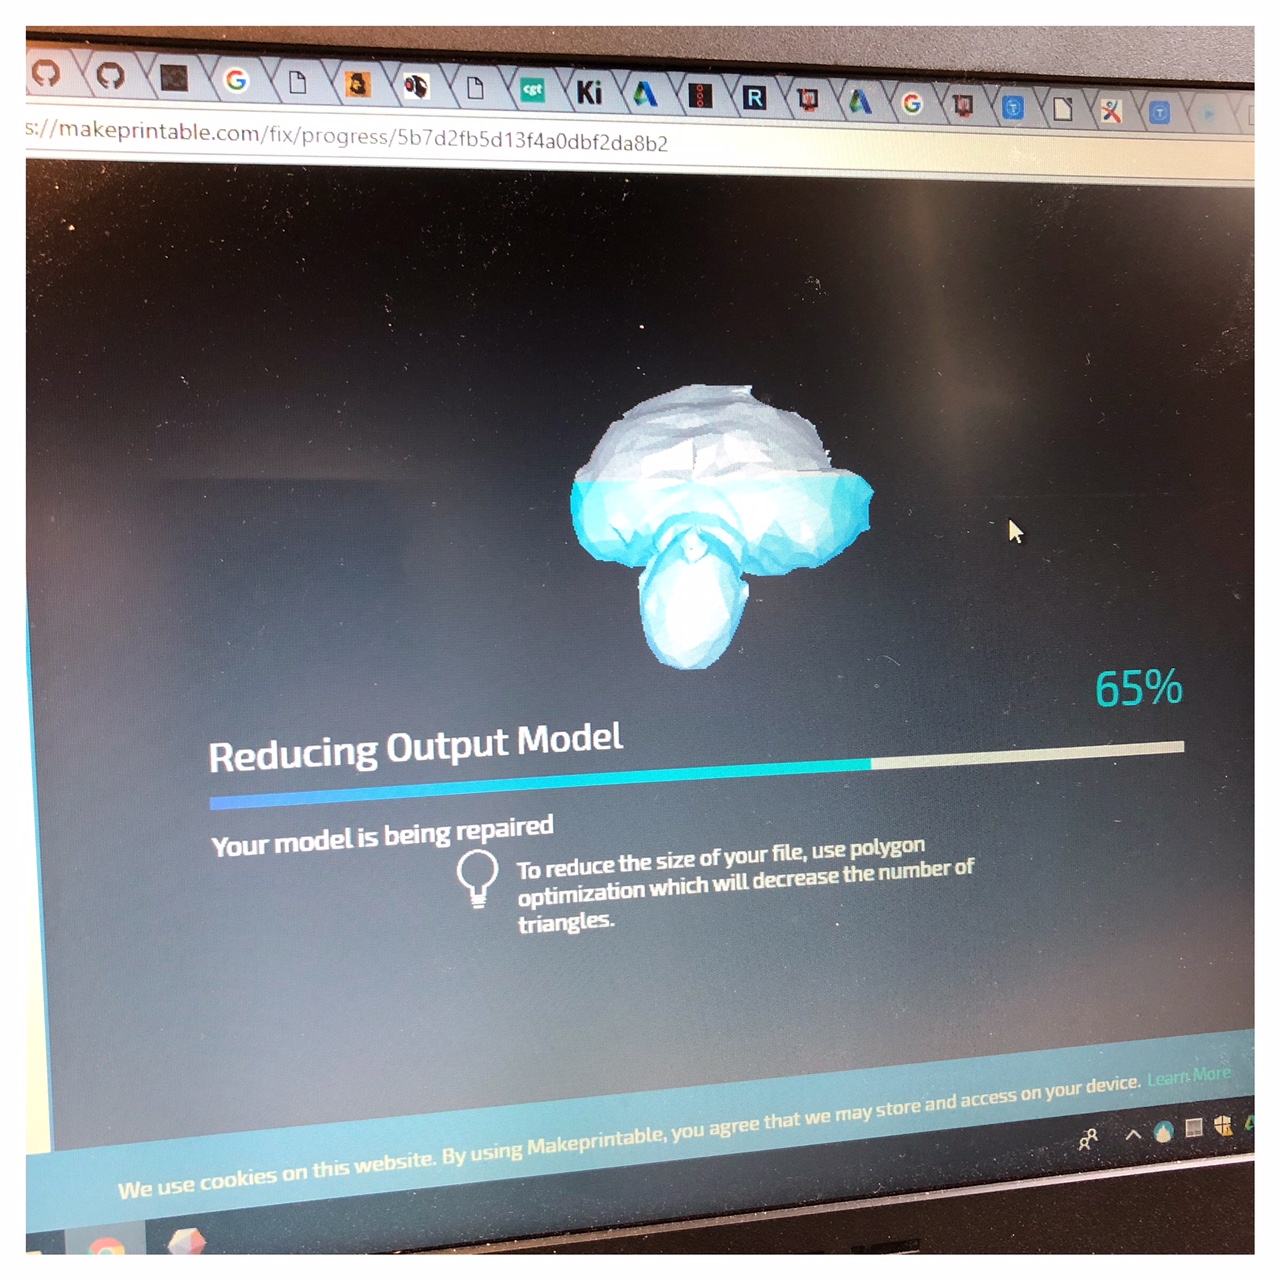
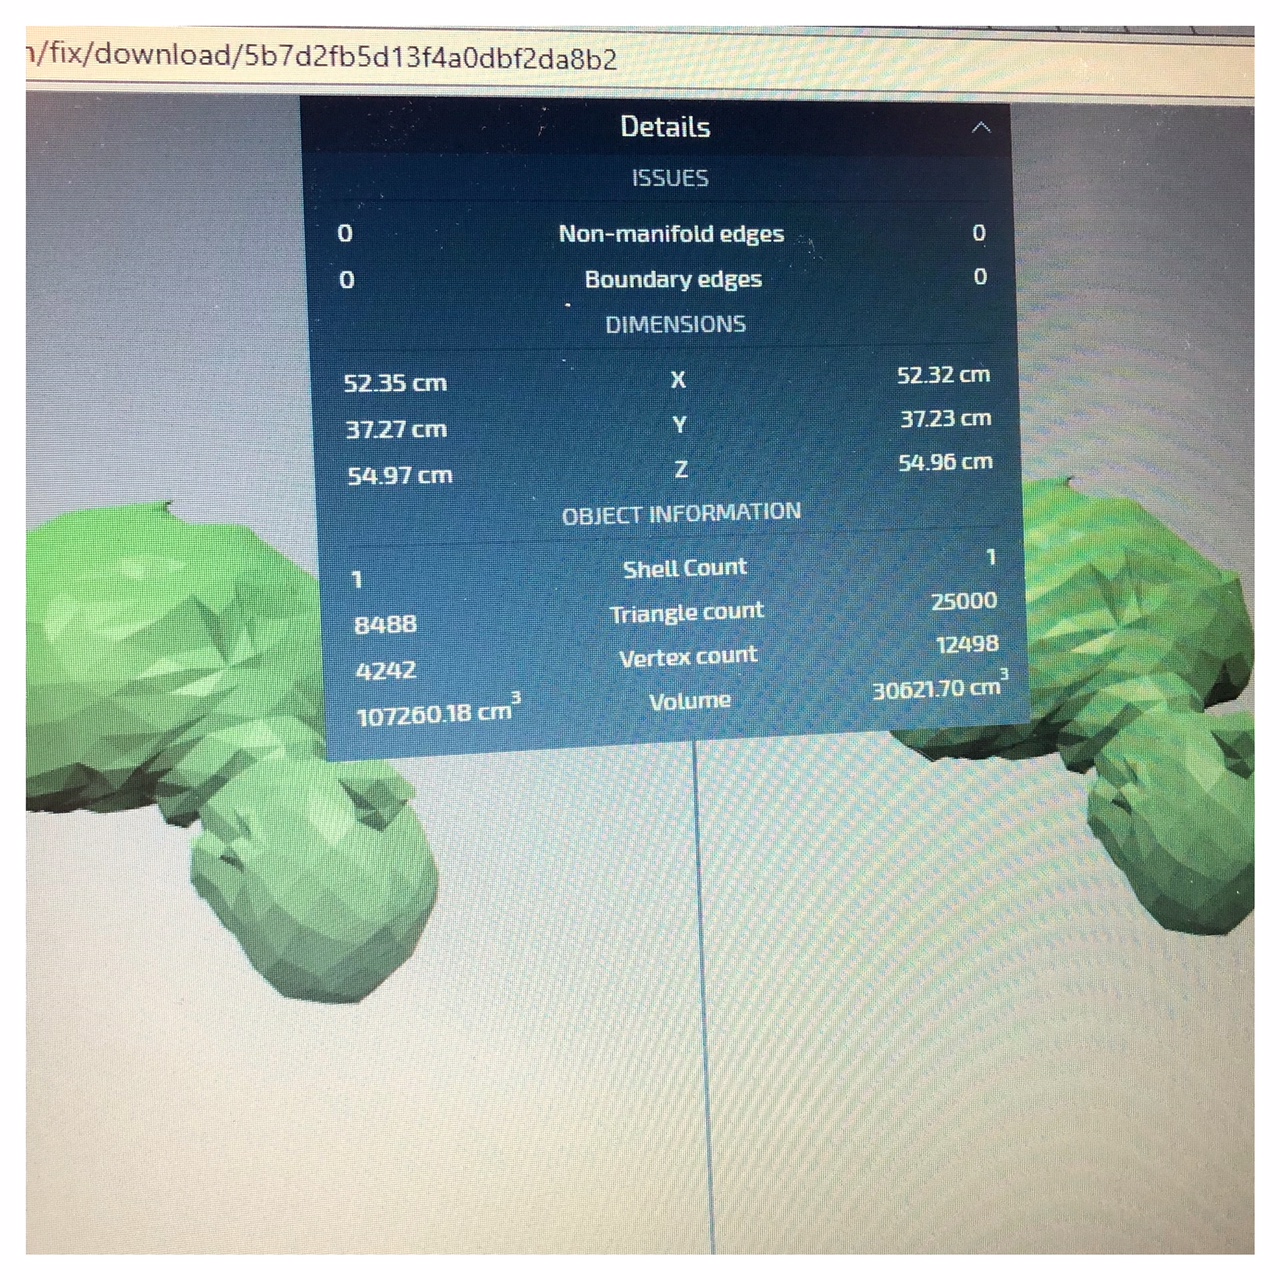
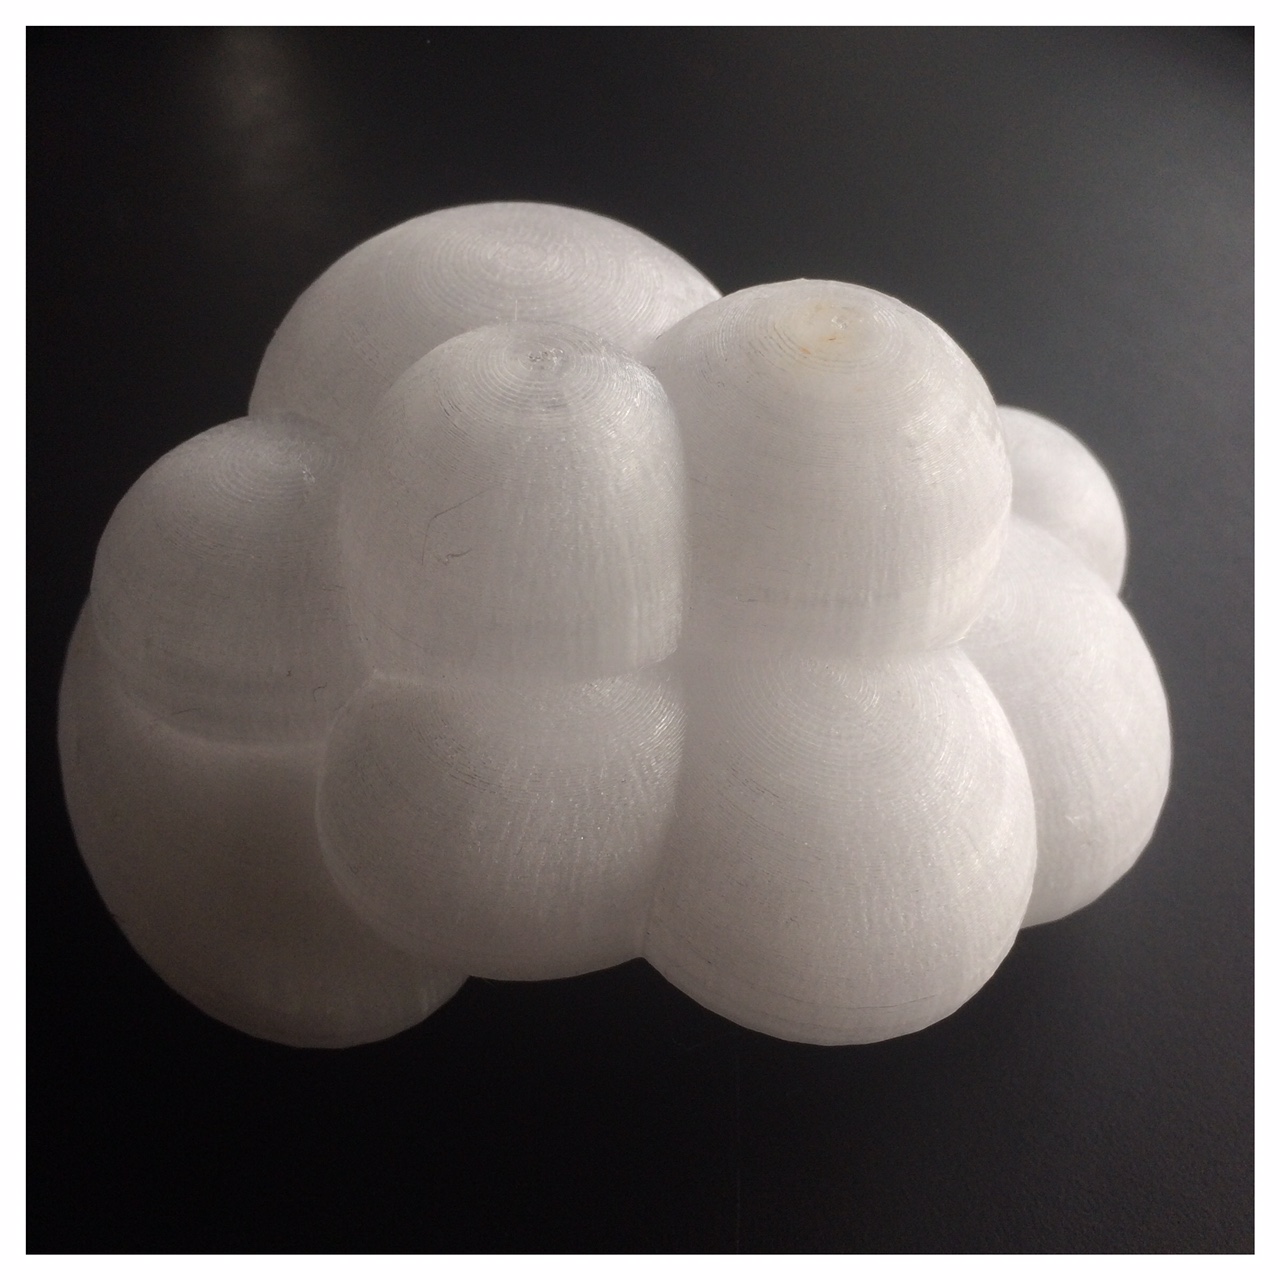
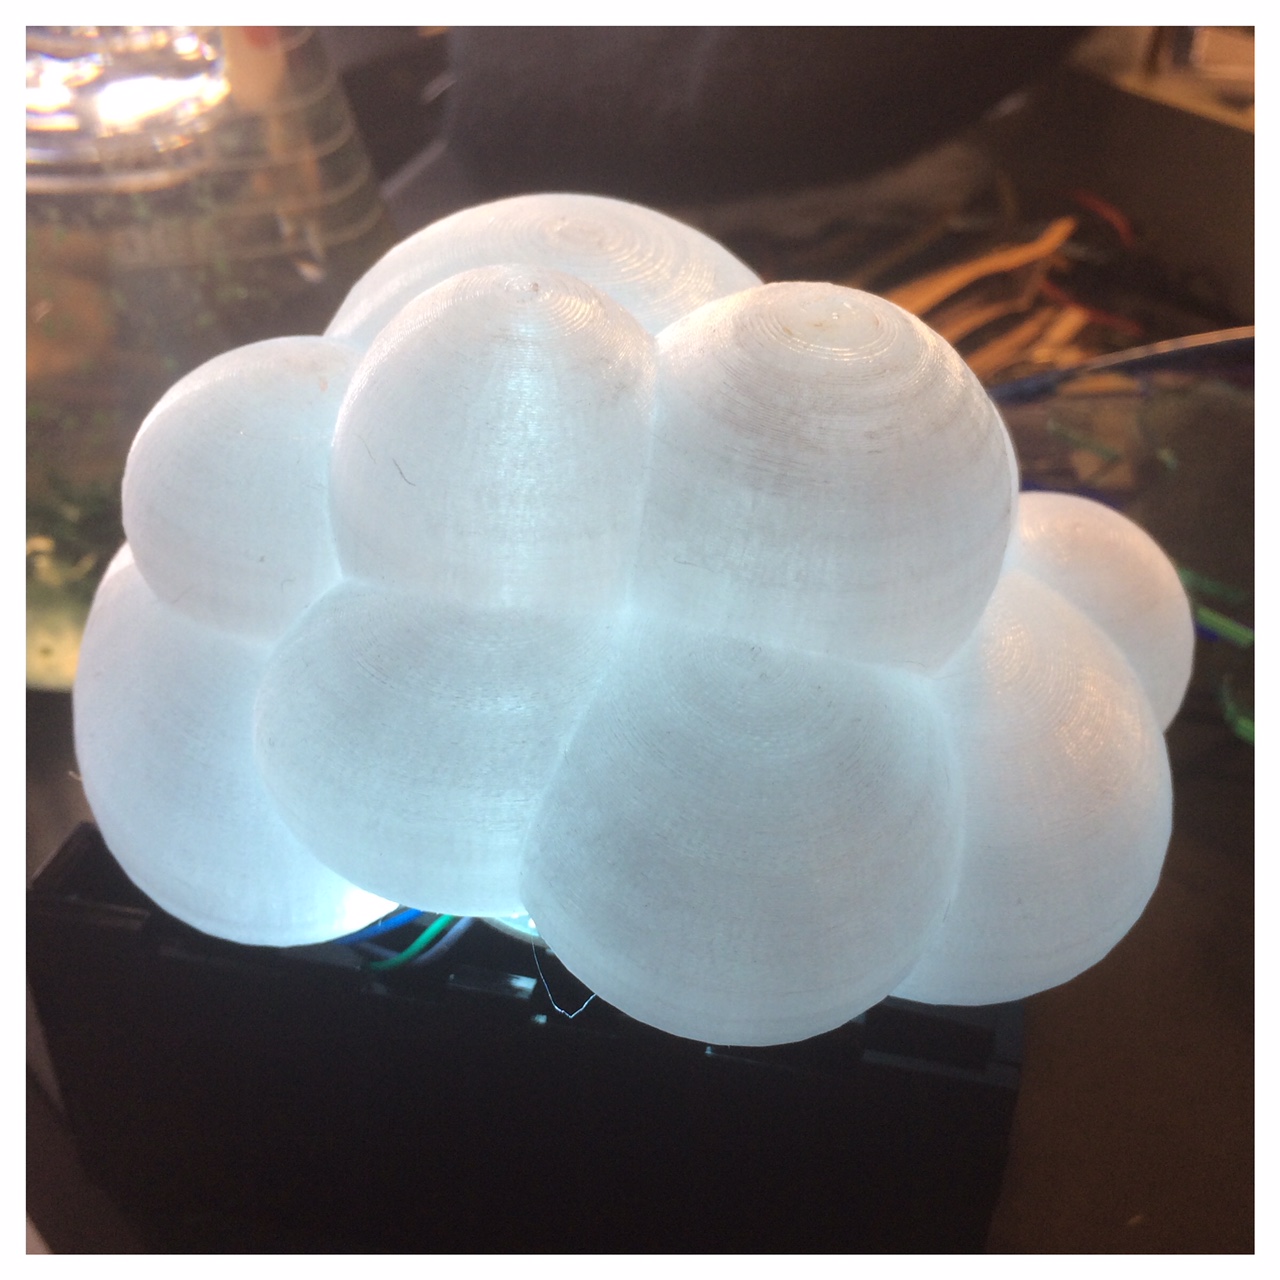
My cloud design was also a way of doing a 3D printet object that could not be made subtractively because it had to be hollow for inserting the LED's. This is one of the things that are unique with 3D printing. I can not achieve the hollow cavity in my cloud with all the detailing with other manufacturing processes. In my PETG semi tranparent cloud I have the opportunity to get my LED light out in all corners of the cloud, and also keep the same thickness of the walls everywhere, in my case 3 milimeters.
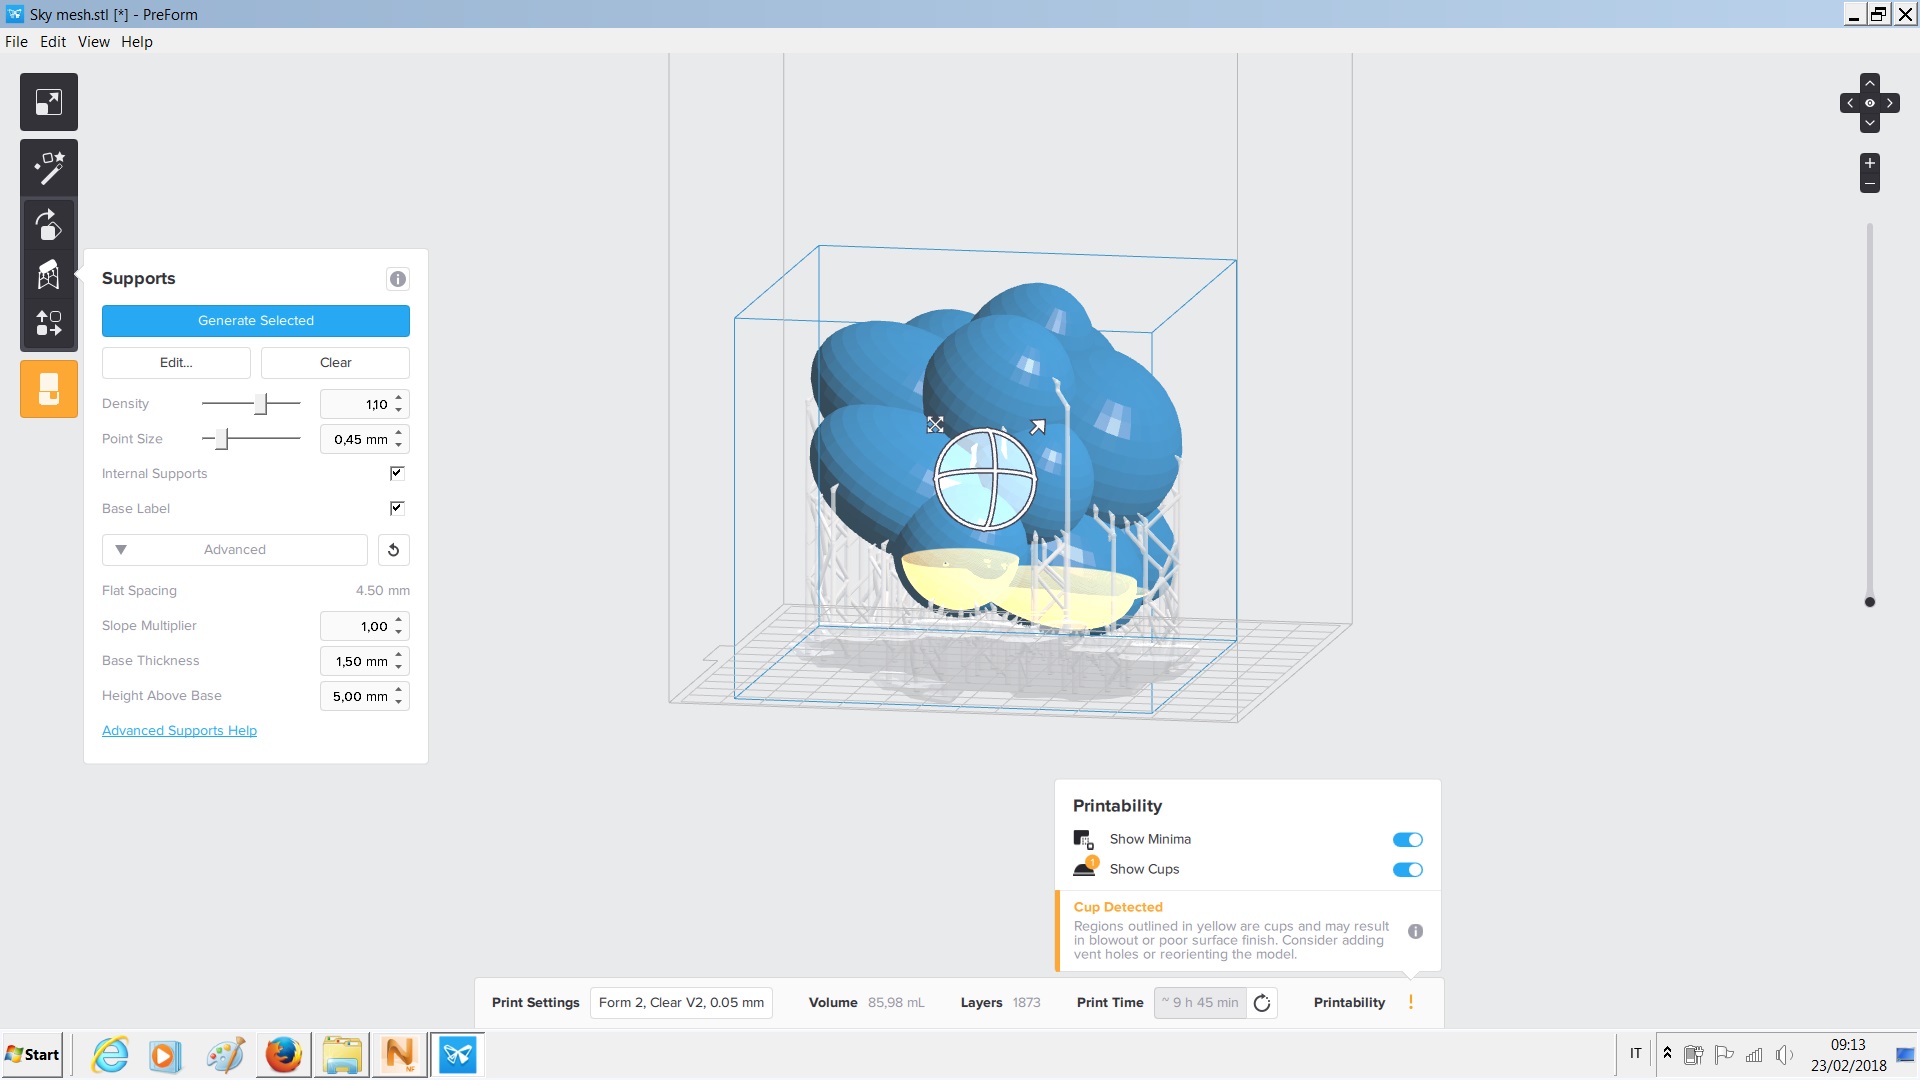
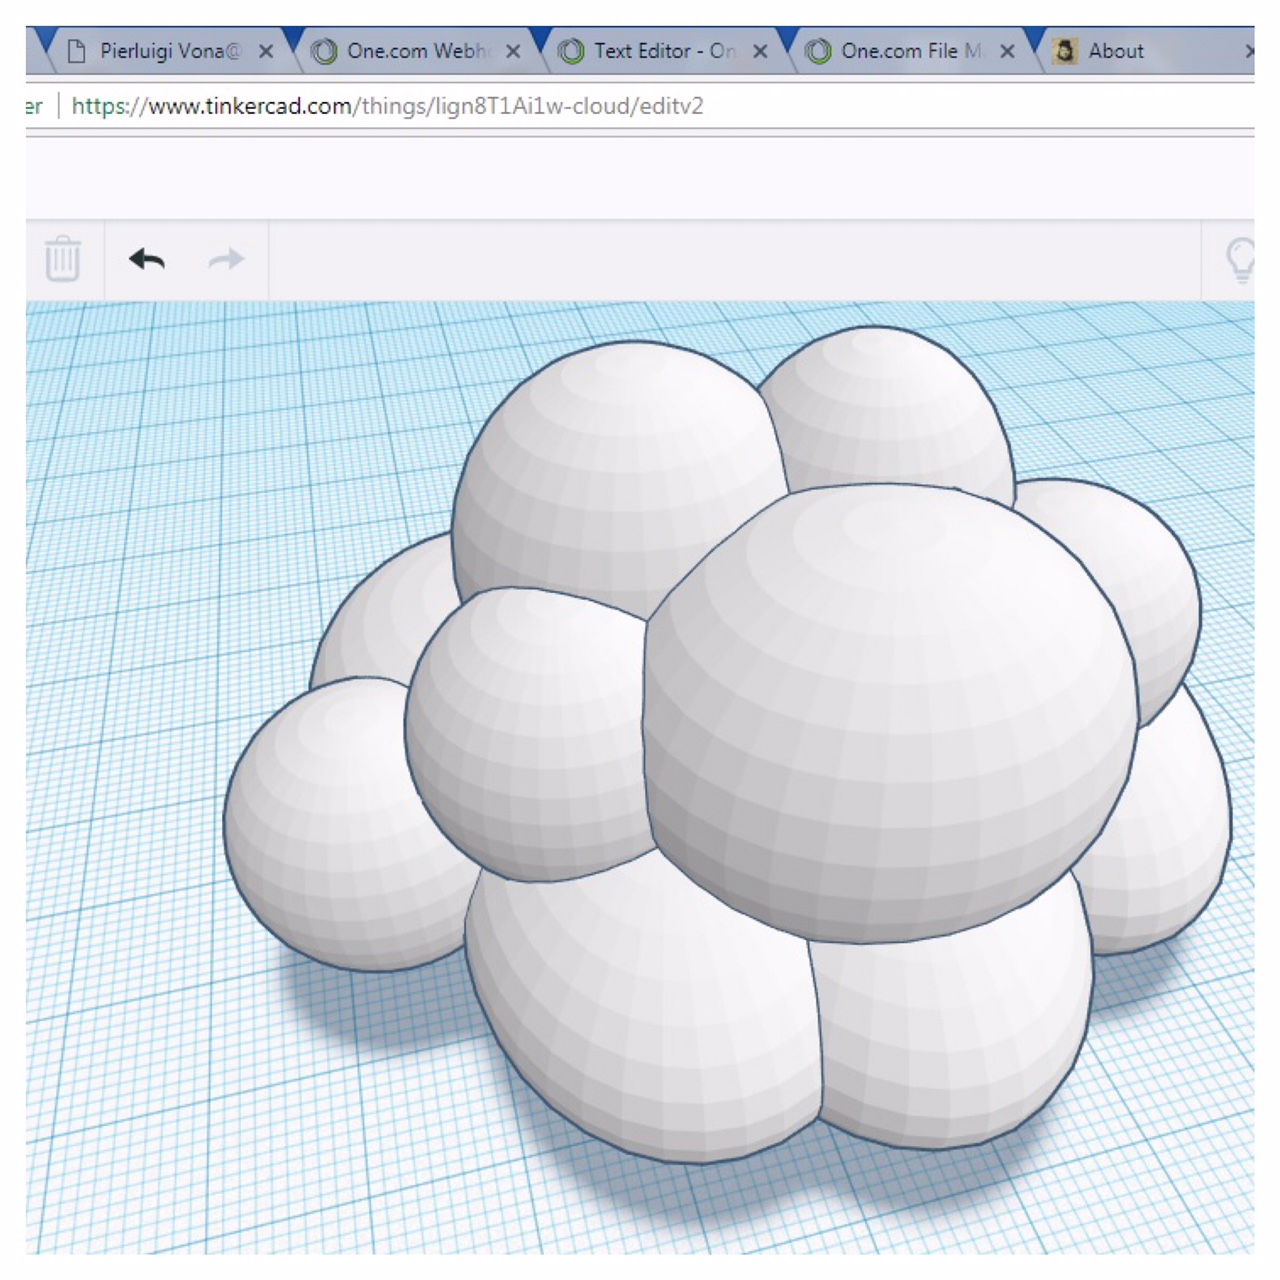
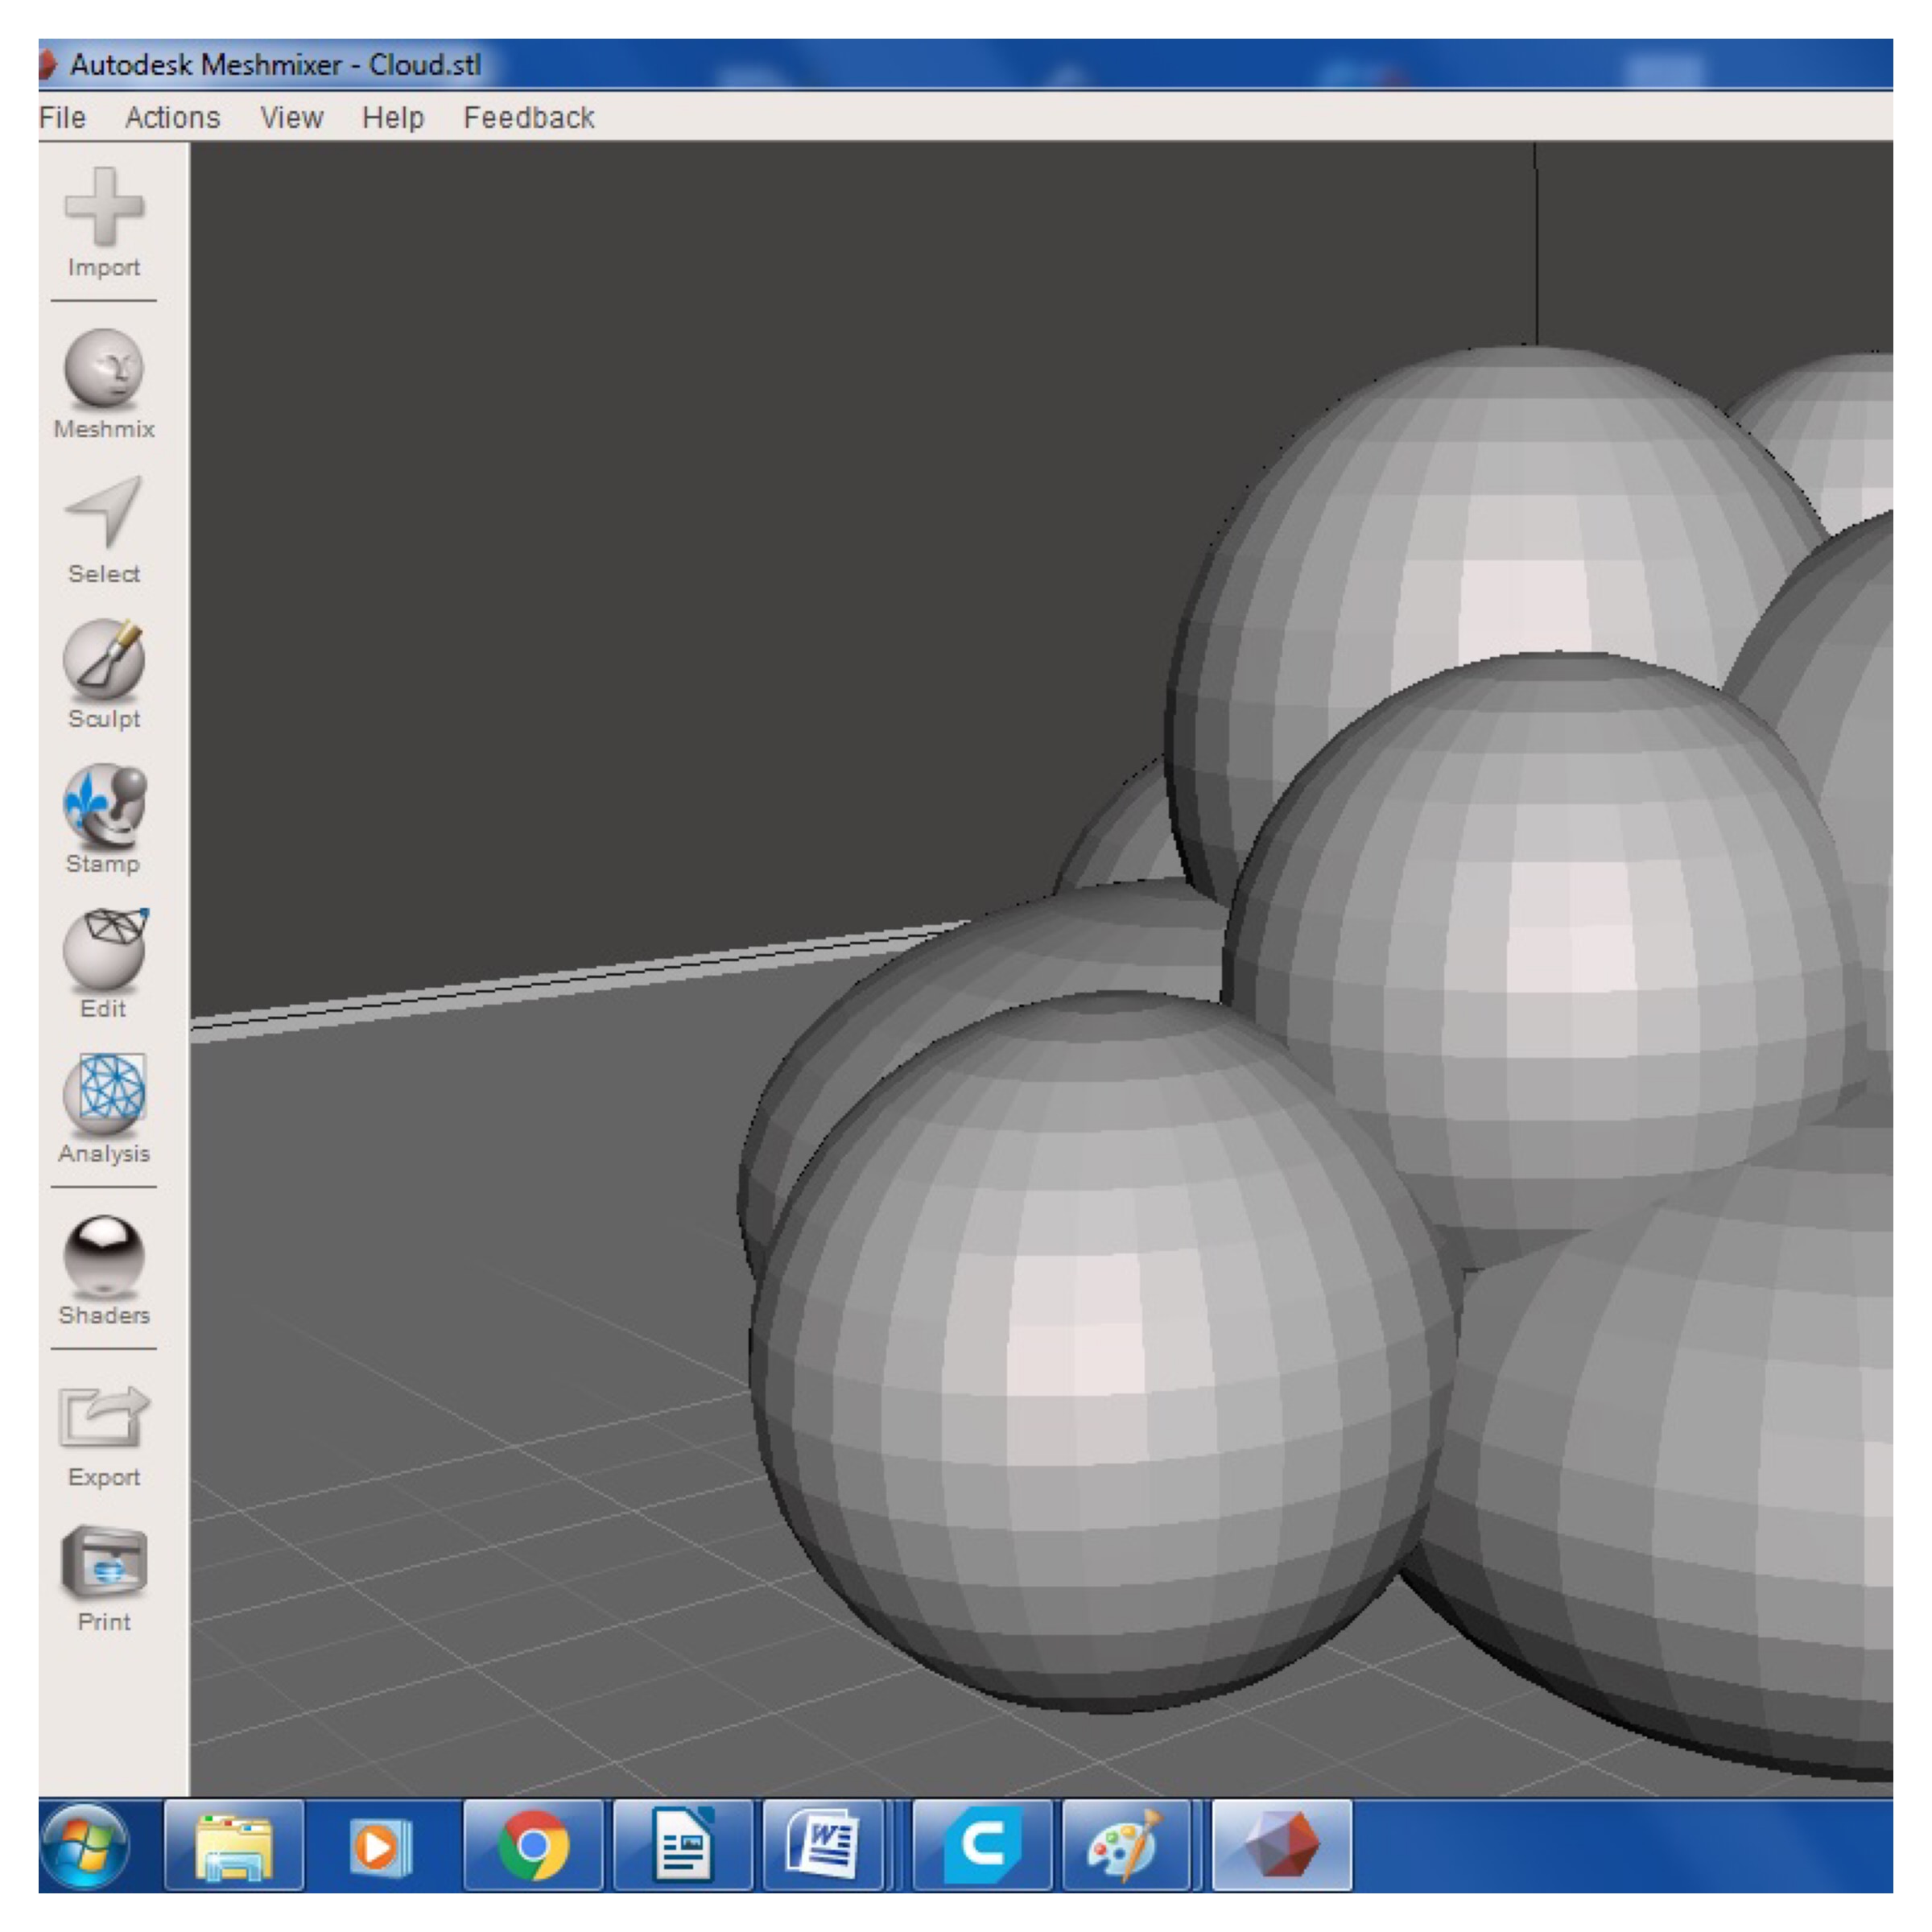
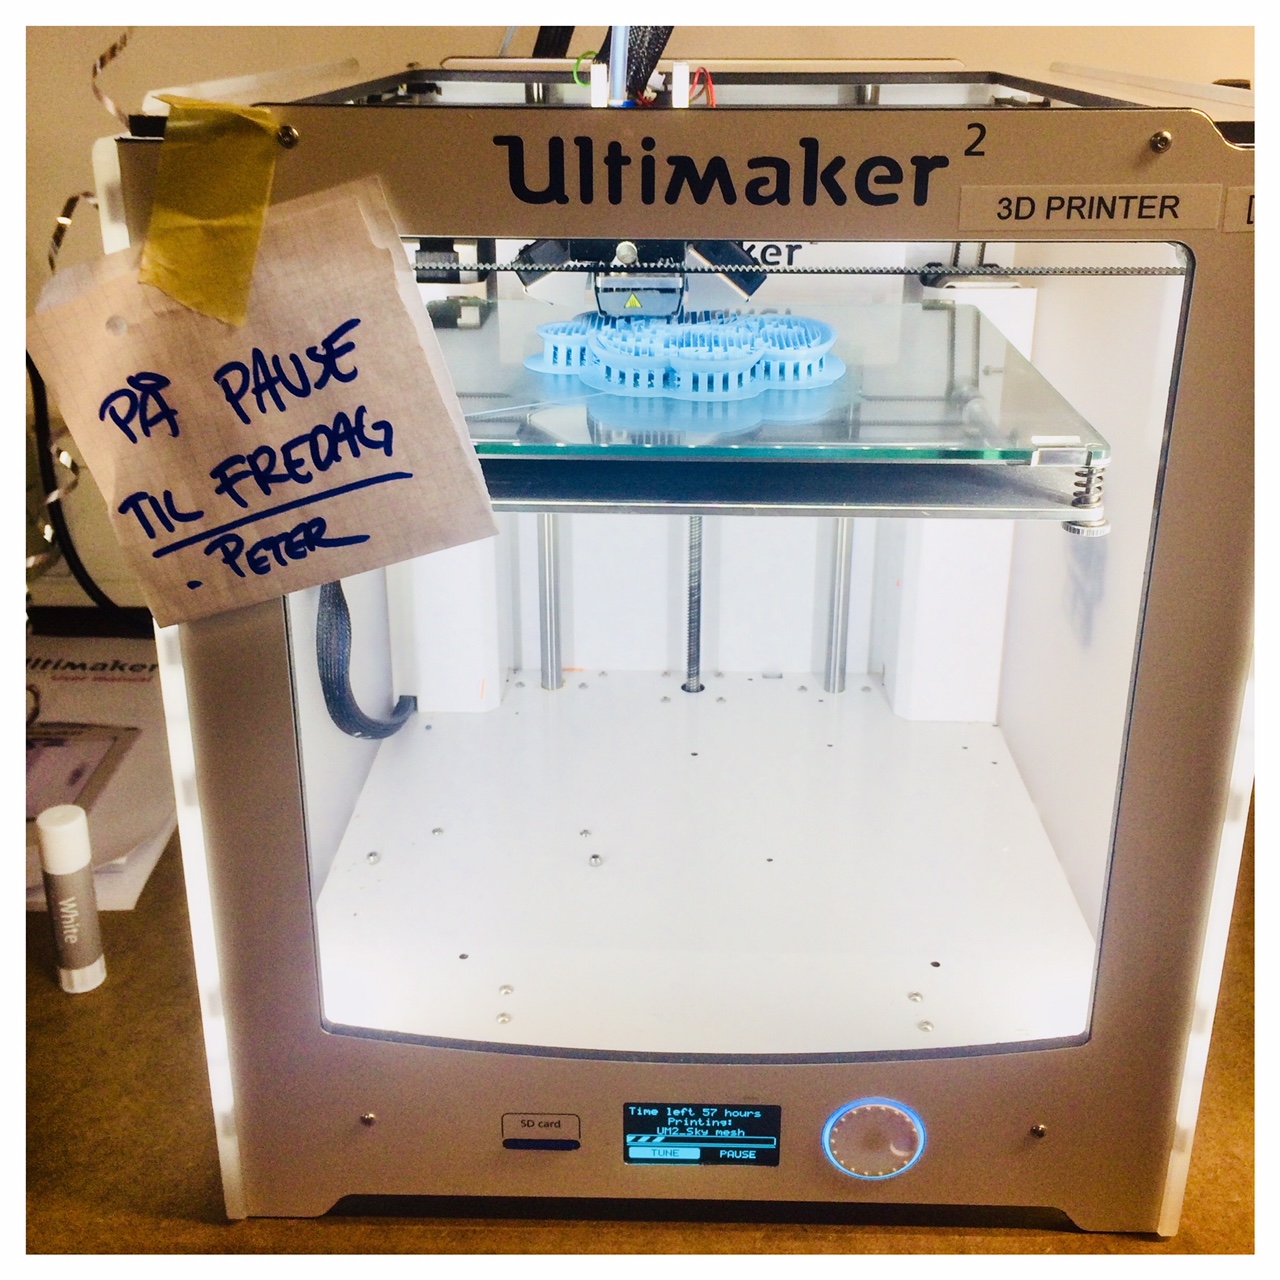
I wanted to print a cloud that was quite big, so I made my design around 6 x 4 inches and ended out with a print that would take 21 hours. But in our lab, the 3D printer may not run unattended so I made an appointment with our lab manager to start the print in the morning, print all day and then put the print on hold until I could continue the next morning.
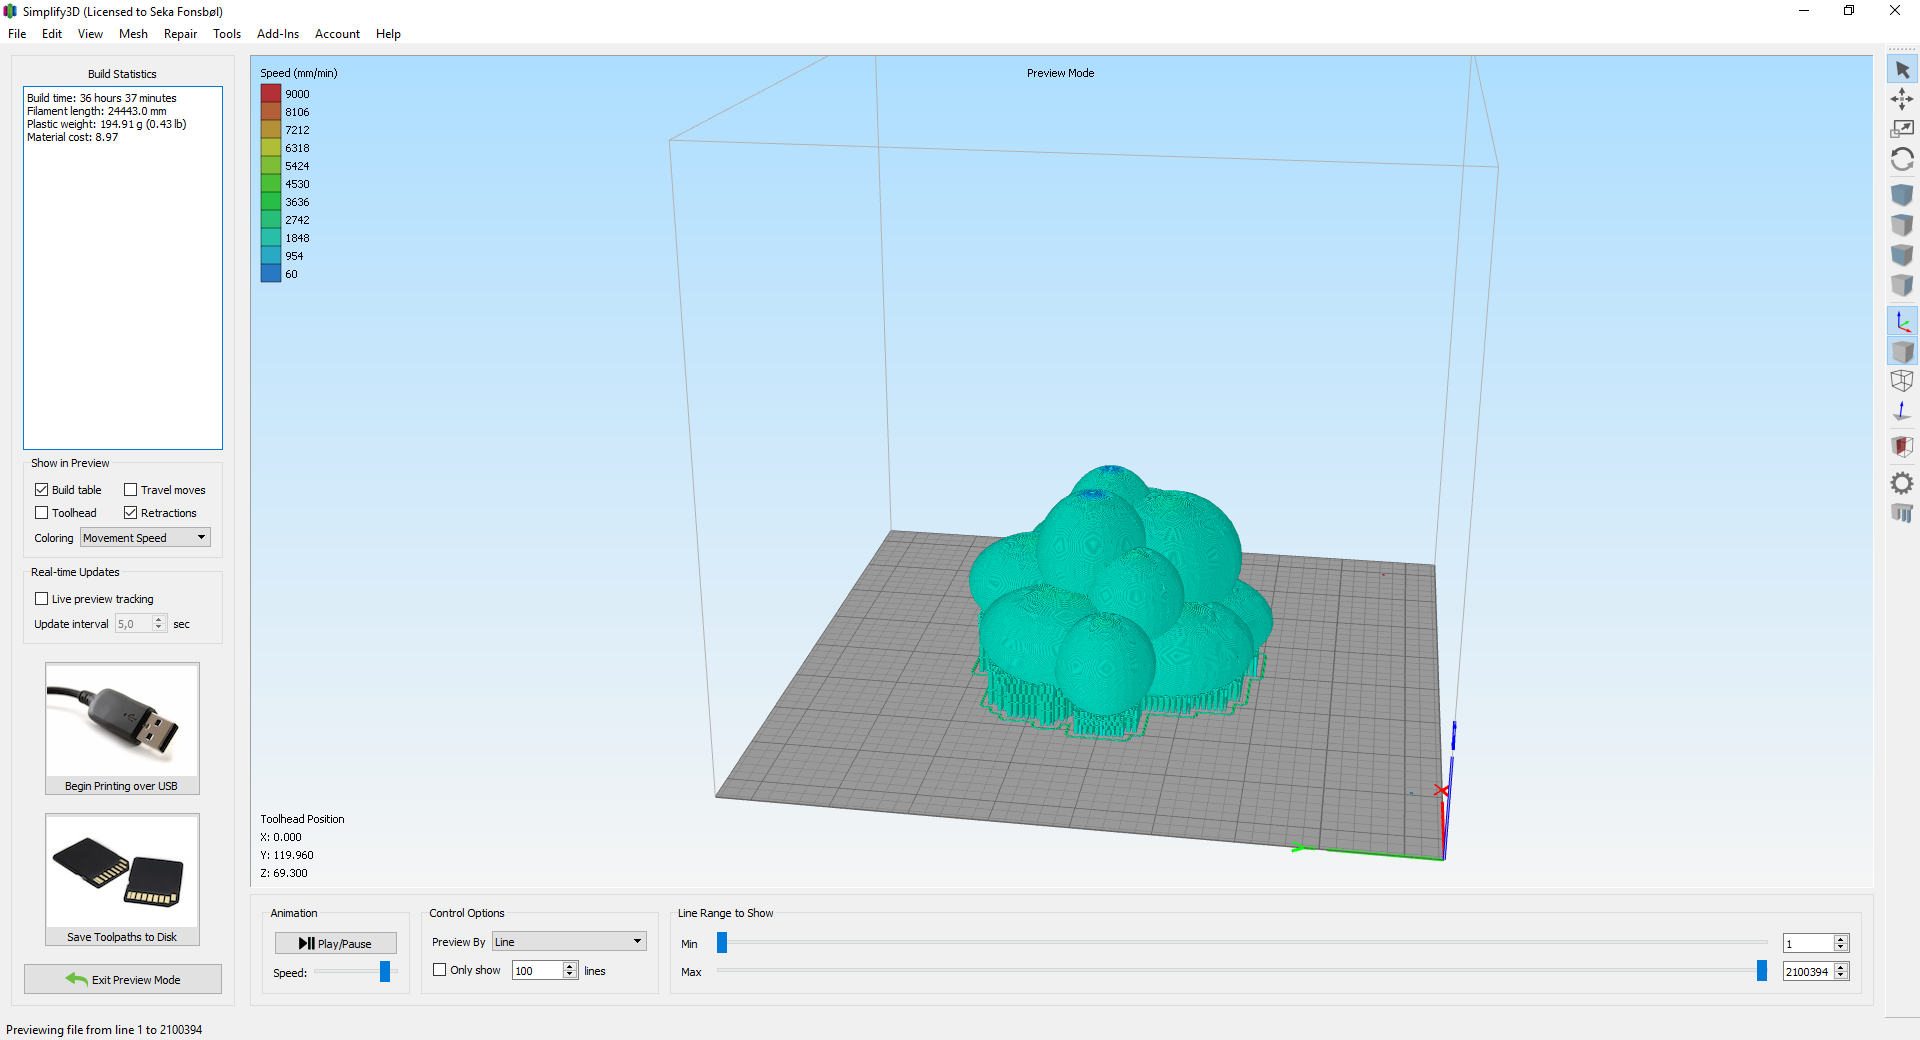
Slicing the cloud
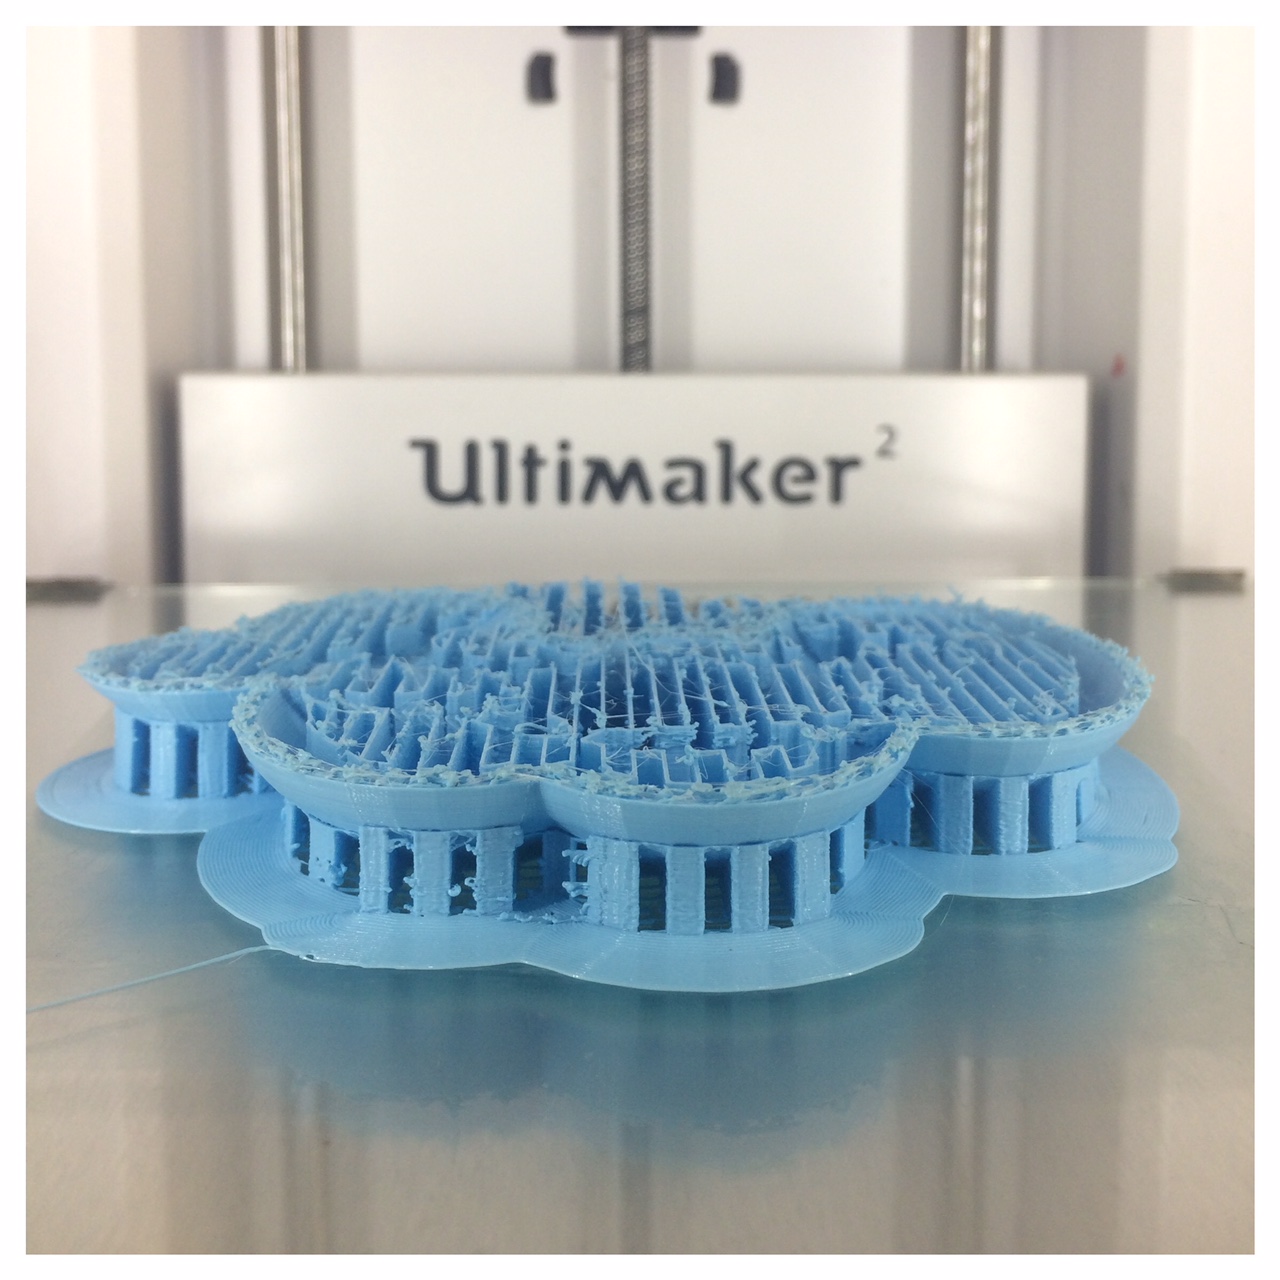
For slicing my cloud and preparring my file for the 3D-printer I used a software called Simplify3D simplify3d I worked with a layer hight on 0.2 and a 0.4 nozzle, the infill was 100 % (and quite hard getting out of the cloud, because of the small hole and all the curves). I set the support structures to support everything that slopes under 45 degrees, and it was only under the buttom of the cloud. It still needed support under the cloud because I made the button uneven, to make it look more realistic and create some nice light shapes underneath.

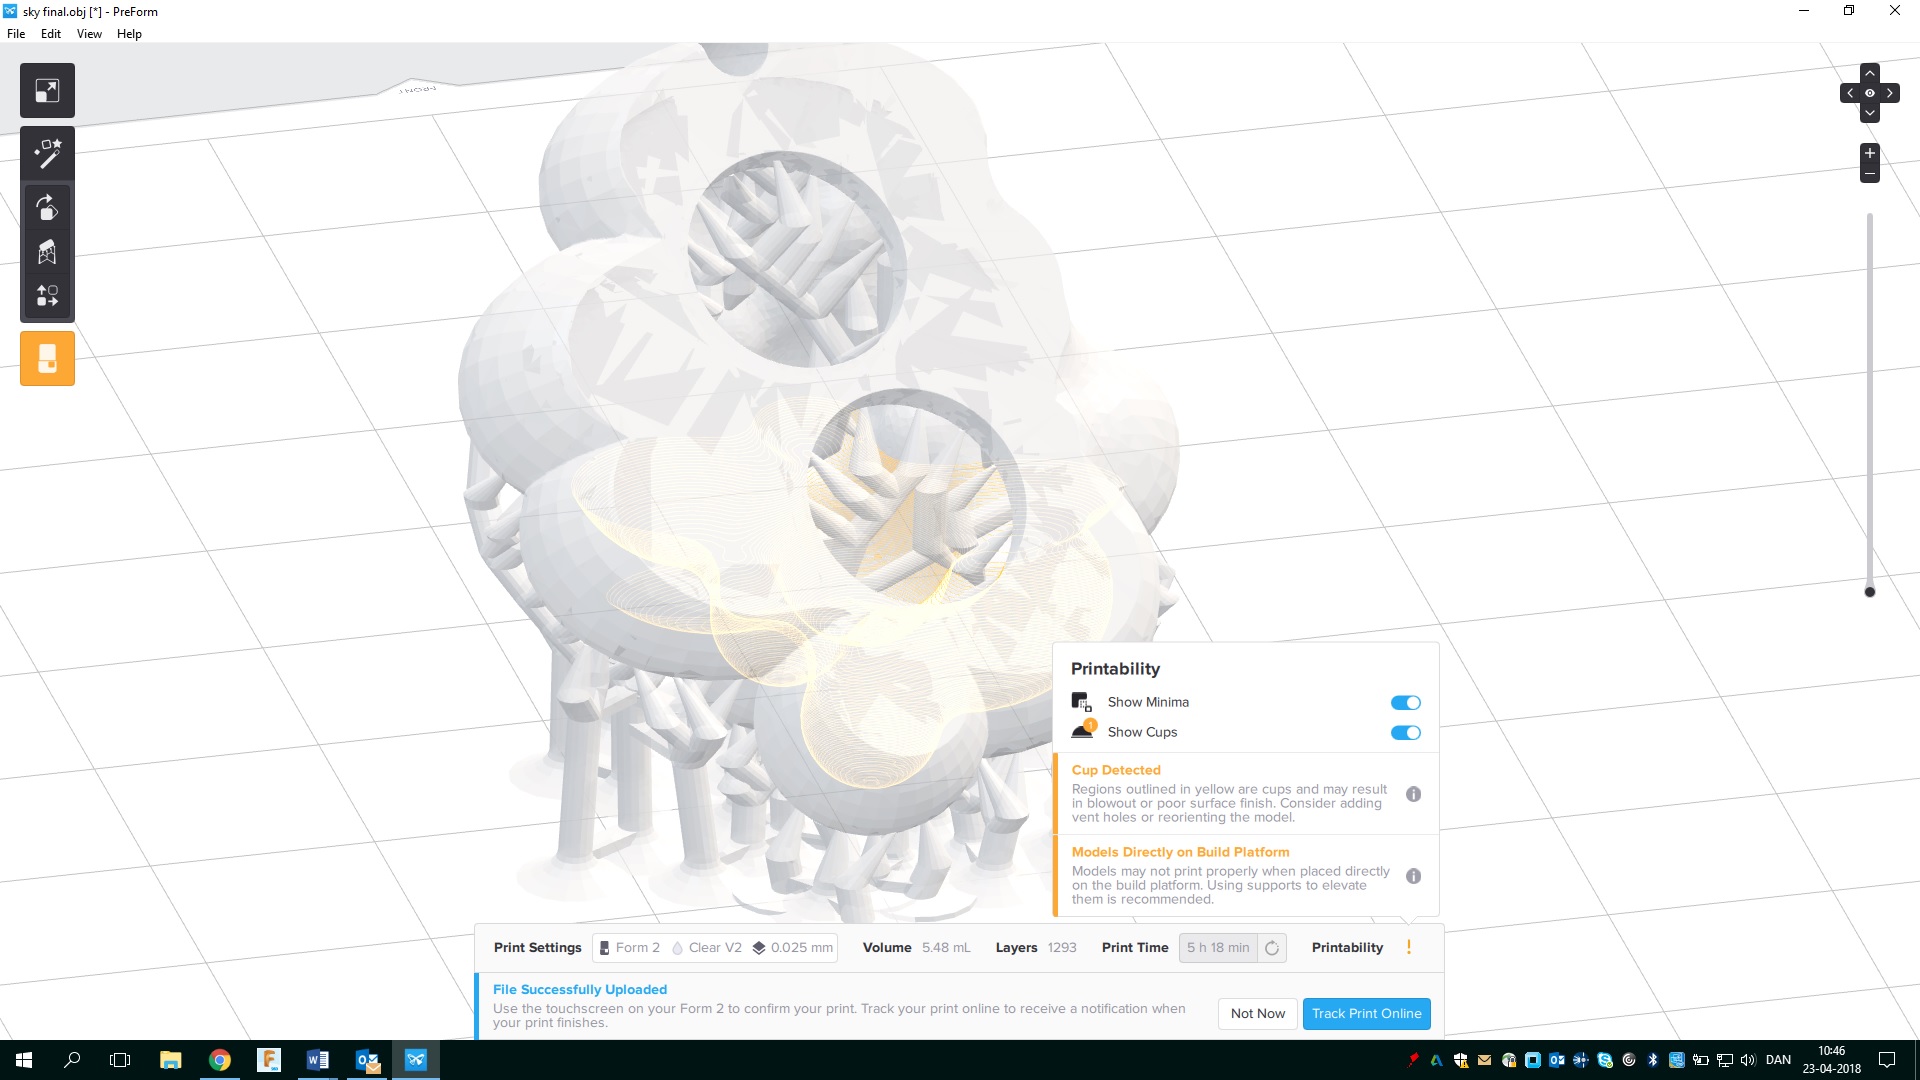
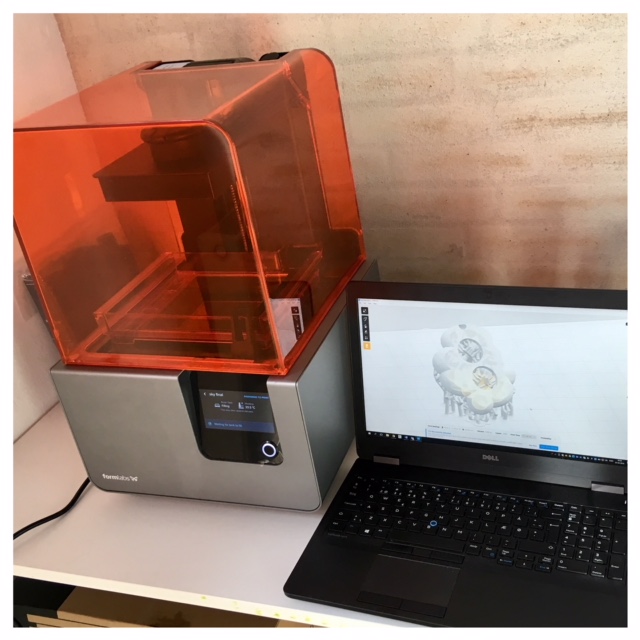
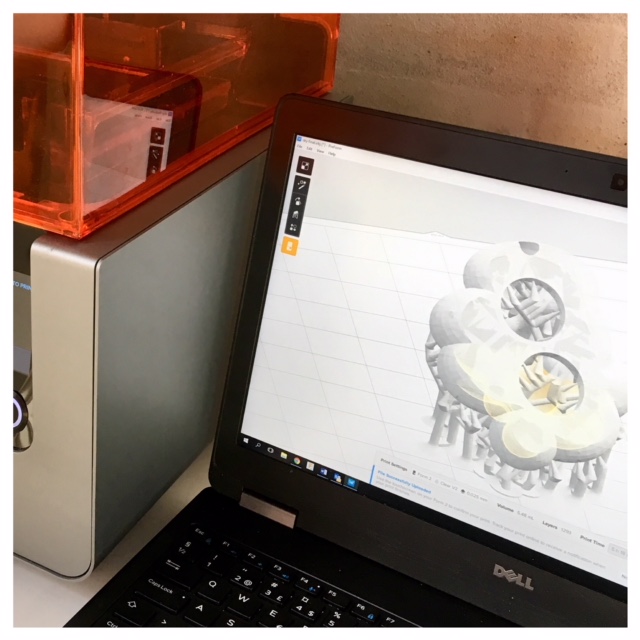
I have never before worked with, or tried a 3D printer that is printing in resin. But our local instructo Lorenzo had a FromLab2 with him, which I have been very keen to try. I've been struggeling a bit with this new printer a couple of times now, because it works a lot different from PLA printers. But finally I managed to print a mini version of a cloud in transparent resin. My troubles with the printer was mostly about my files as it has many areas that causes a "cup function", where the recin where kept in the cloud as in a cup. Therefore, I had to make some holes in my model so the recin could ran out.
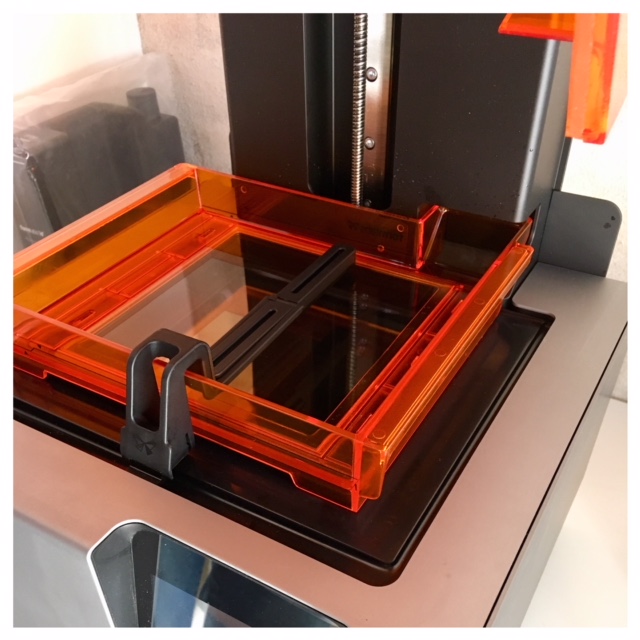
When the cloud was finished in the FormLab printer, I came to the cleaning part of working with Resin. The cloud should be cleaned in isopropyl alcohol that is 99% alcohol (very strong so this requires caution and the right protection).
Post-Cure my 3D Printed cloud
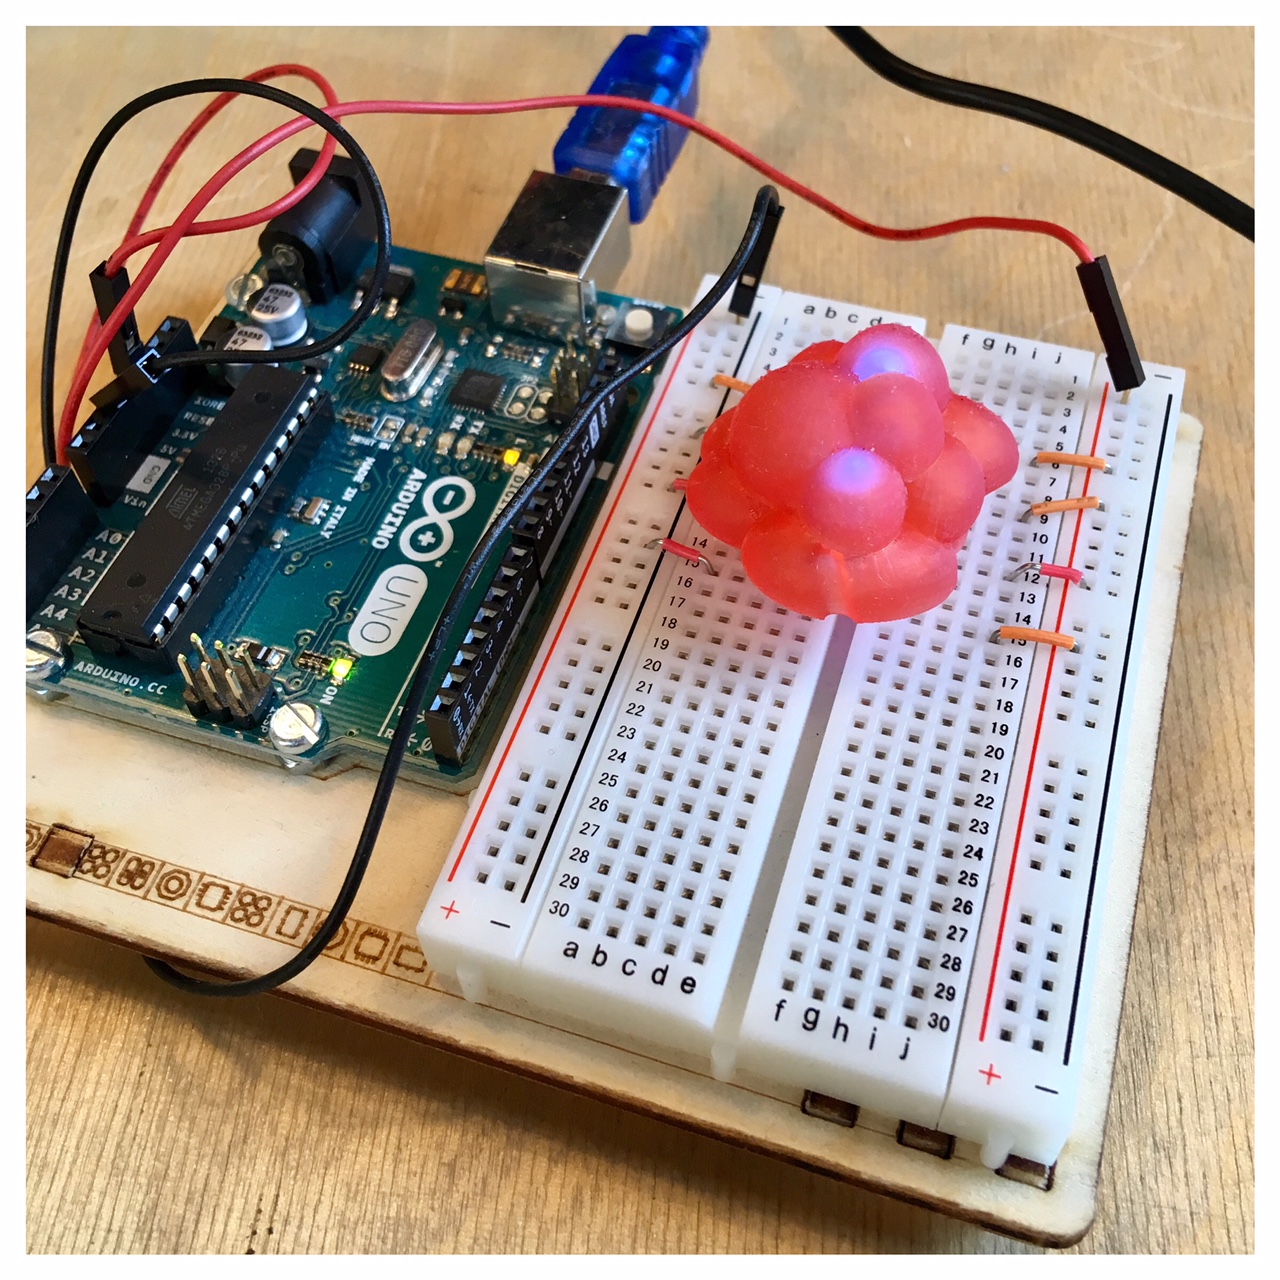
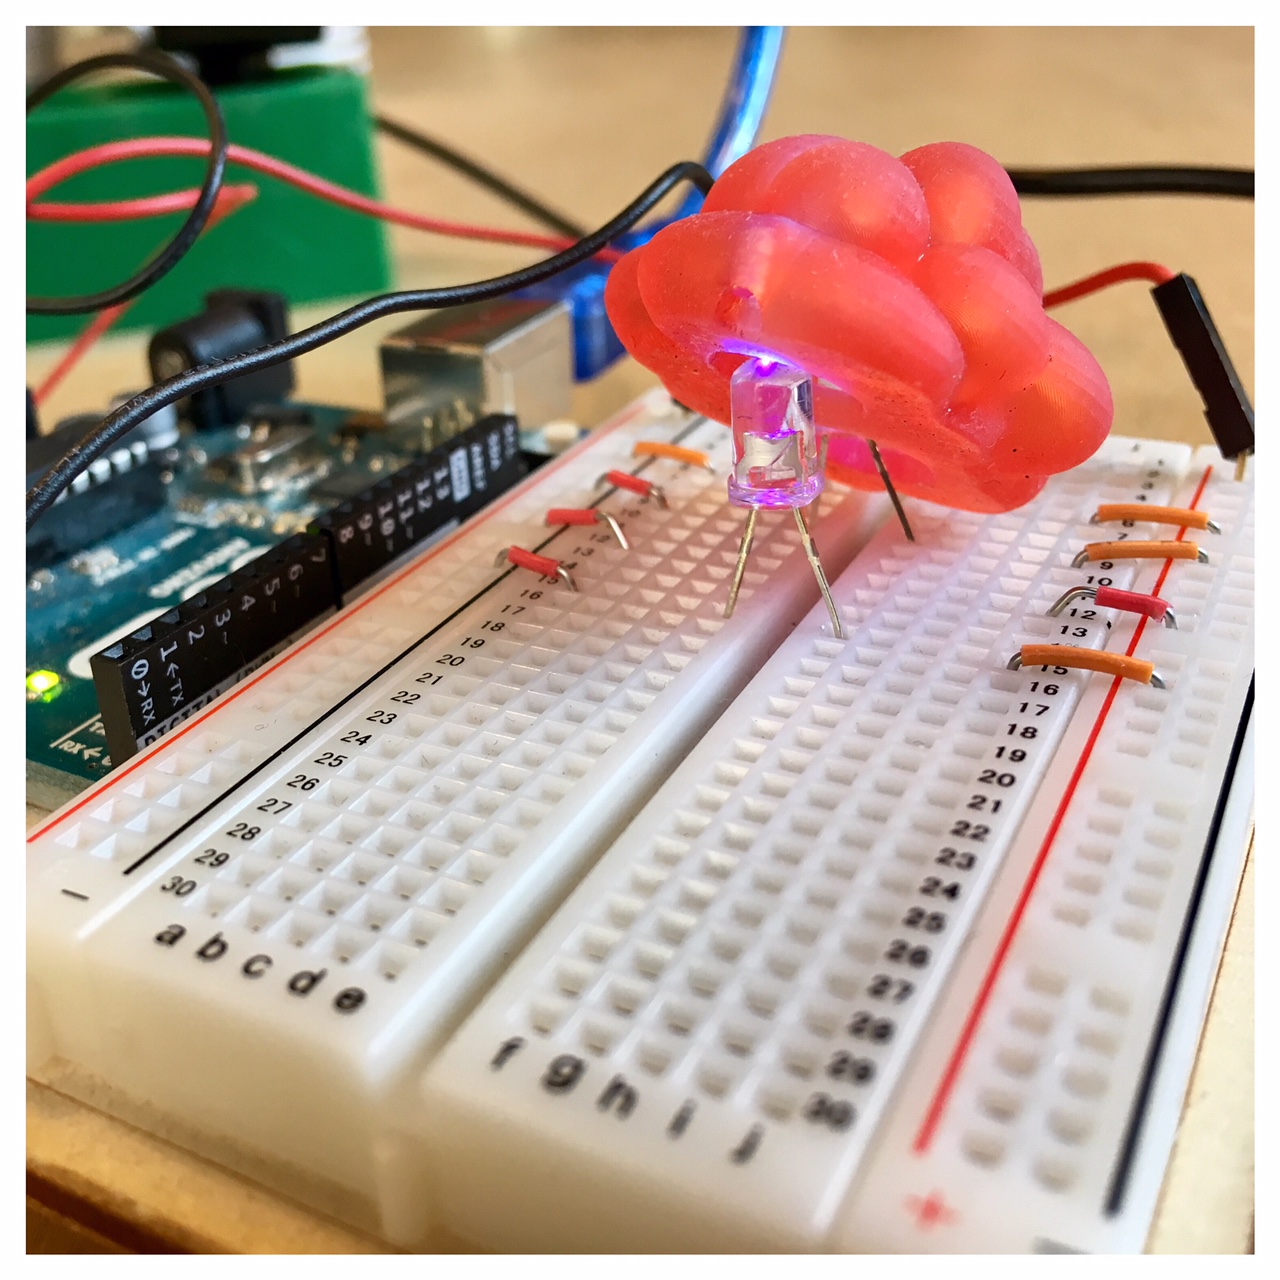
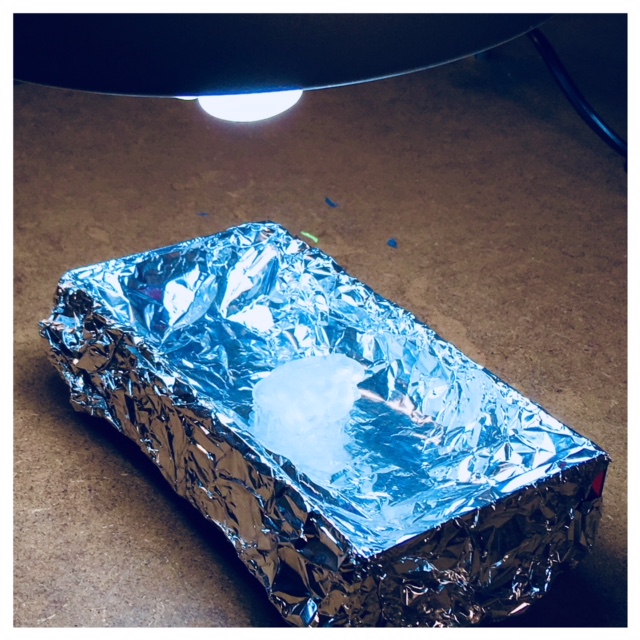
When using a Formlab2 printer, it’s essential to post-cure your 3D prints. Post-curing enables parts to reach the highest possible strength and become more stable. This step is especially important for Functional Resins. For example, post-curing is required for a successful burnout and resin almost doubles its strength with post-curing. I post-cured my cloud with a UV-light. I placed my cloud in a little foilcase I made from tin foil we had laying around in the lab. Later on (mostly for the fun of it) I made a little Arduino UNO set up, with two UV-diodes which fitted perfeltly into the cloud. It gave a nice light and dried the resin at the same time. For more information about post-cure of resin prints visit FormLabs webpage here: post-cure of resin prints