Assignment
Design and produce something with a digital fabrication process (incorporating computer-aided design and manufacturing) not covered in another assignment, documenting the requirements that your assignment meets, and including everything necessary to reproduce it. Possibilities include (but are not limited to) composites, textiles, biotechnology, robotics, and cooking.Files
Death star_gif
Death star_svg
Death star_gif
Power button_svg
Robot boy_png
Robot boy2_png
Robot boy_outline_png
Embroidery Machine
Machine: Brother 885-V51Sewing program: SewArt
For the wildcard week I am designing something for the embroidery machine. I have only used this machine a few times, and I think it is a really cool machine.
We have some thread that is conductive. So i would like to use this thread and add some components as for example LED and maybe it also needs a resistor.

How to operate the machine
Frame:First you find the fabric that you want to use.
You can also use this kind of felt that you put behind the fabrick. It is good to use it if your fabric is flexible because the machine can pull a bit when it’s embroidering. And the felt will make it more stable. We have different variants, but I have only worked with the kind of felt. When the design is done, you can just pull it apart from the design.
Then you take the frame out of the machine by pushing in the bottom on the left side of the frame.
In the front of the frame there is a screw to adjust the tightness between the two frames.
When you insert the fabric, put the bottom of the frame on the table. Unscrew it a bit so it is loose.
Then place the fabric on top and then the last piece of the frame on top of the fabric. Note here that there is a little arrow on both frames on the top. These should be next to each other.
Then tighten the screw to secure the fabric.
Insert the frame to the machine. Be careful here, because the frame needs to go underneath the needle and then it should be pushed on place in the side.


Thread the machine:
Before inserting the frame I would put in the bobbin/under thread that I want to use. Normally I don’t change this colour during an embroidery, but I think you can do that, because sometimes it will be visible on the front. The bobbin is what secures the design on the backside.
You change the bobbin by pushing a little button to the side, this will pop the lit open and you are now able to remove the thread and insert your desired colour. There is a little drawing showing you which way the thread should run.
Then we can go to the top. Here you insert the main colour of the design because this is the most visible colour and the colour that ends up on the front of your design.
You add the thread to the stick and then follow the arrows and numbers around the machine.
At last you should end by going through the eye of the needle.


Then turn on the machine:
It will move the carriage=the frame so don’t have your fingers in between here.
Now you can choose a design from the machine or upload it via the computer with an embroidery program.
There are several designs included on the machine and you choose them by touching the screen and going left or right on the arrows.
When I choose a design now the machine will complain and say that I didn’t put the pedal down. The button with the arrow will also indicate that it is not ready to begin.
When the frame is set and you have your design ready we can set the pedal down and the arrow should now be green.
Click the arrow. It will make one stitch in order to secure the thread.
Now you can start the design by clicking on the design.
If it is a design with multiple colours it will stop everytime you need to switch the color.
When it stops to switch colors, there is a scissor button that can be used.
I have experienced that it’s not always working - but most of the time.
This will cut the thread and you can just pull it out and insert the new colour.
You can use the same scissor button when the design is done.
Then you can take the frame out and release the design by turning the screw.


Testing and making
I started out with making this test with the conductive thread and an LED too see if it worked. It did.
Then I started finding out what design I wanted to make. I decided to make the death star from star wars. So I found a picture on the internet and downloaded it. I put the picture in Inkscape to make it less detailed and delete some of the very detailed things. Afterwards I changed the size of the paper in inkscape to 90x90mm I think, because the program for the brother embroidering machine can’t save the files on the machine if the picture is bigger than what it is able to fit in the embroider frame.


Now I wanted to make a test with the conductive thread before I began with a very detailed design. So I chose one of the simple designs that the machine has. But already when threading the machine I could feel that it was really tight. When I began the embroidery it didn’t look right, so I stopped it. I found out that everything was stuck underneath. This is not good. I managed to get all the thread out and concluded that the conductive thread was too thick for the machine.
I put in a normal thread and made a test to see if the machine was still working. It was. So I started the design of the death star.

The death star took a while to embroider but it got very detailed even though not all the details could be seen.


I tried with adding the conductive thread by hand. I was planning on using the small LED’s. So I made two lines where the thread went because they can’t touch. And then the tricky part was to add the small LED on top of the two lines. I made a cross on top of the LED with normal thread to secure it.

I then tried to test it with a battery, and tried turning the battery different ways to see if I was turning it the correct way. But there was no light. I then tested the thread with a multimeter. The multimeter also showed that there was connections where there should be none. I removed the LED too see if there were any connection between the two lines but couldn’t see any. So I had to try re-sew it if I wanted it to maybe work.


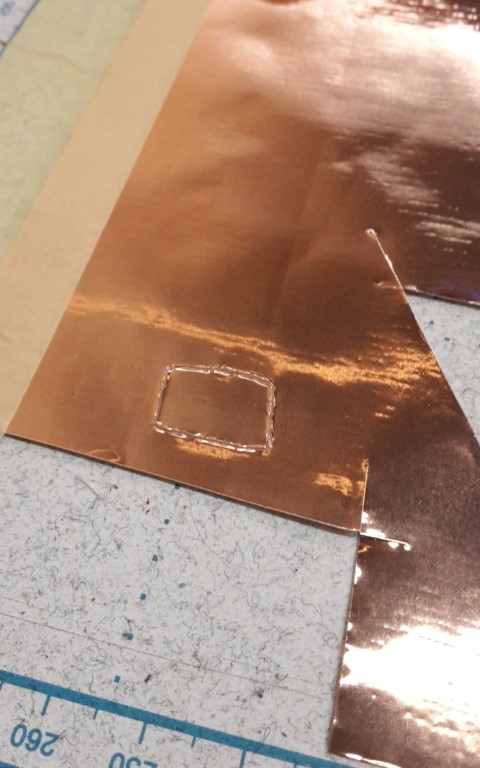
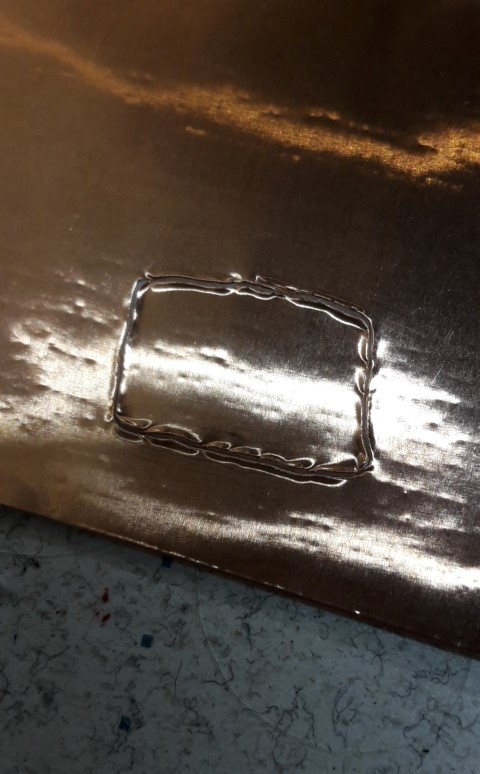
I then tried another version where I used a big LED and a resistor and then soldered onto copper with tape on the back side. The copper I used here is something we have in a thin line. I then added the copper to another piece of fabric. In this way I had made a button.


I also made a robot man. I first drew a sketch and afterwards drew him on my tablet where I have a mirror function, so he became completely symmetrical. Afterwards I put him in paint and just coloured him in different colours. I did this because the sewing program for the embroidery machine recognizes different colours, and the robot can then be sewn in different colours.


In the sewing program there is a function called auto sew. This will choose all the colours of the same nuance. I used this for the inner fill. When I wanted to make the outline of the robot I accidentally chose the function that will make a line on both sides.

This ruined the design so i made another and decided to skip the outline even though I had set it to center line so this should be correct.

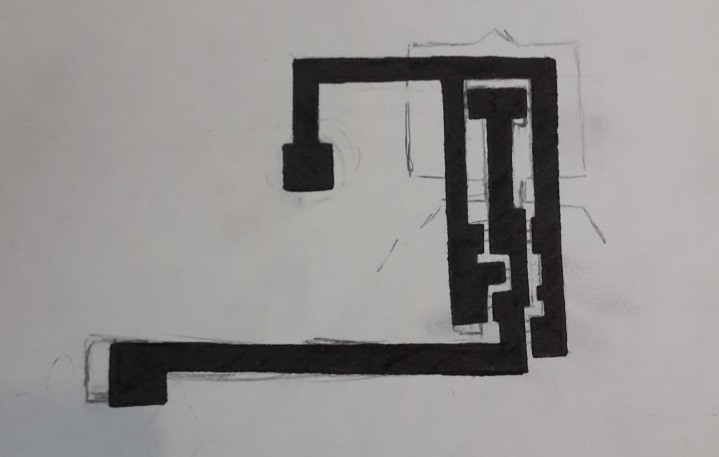
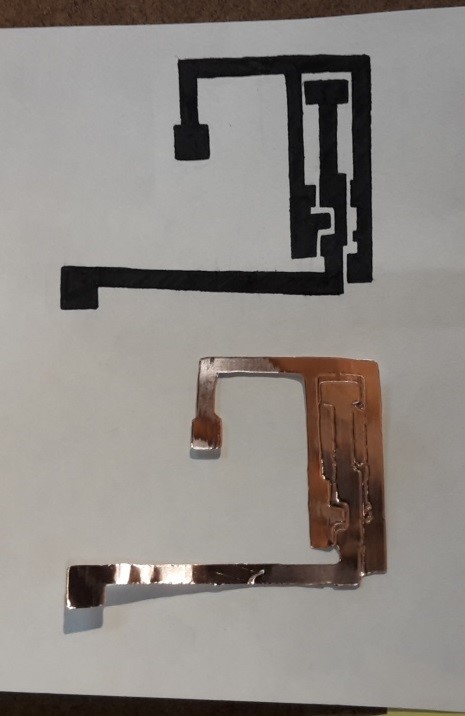
I still wanted to use the small LED’s because this could be fun for the robot. I wanted him to have light in the eyes and in the stomach, so i needed to place it pretty precise. I then thought that I could just sketch it out and try using the vinyl cutter and the sheet of copper that we have.
I started with taking a piece of paper an layed in on top of the embroidery and then with a pencil I traced on top of the paper. i cut the outline of the robot and where the eyes and the stomach was. Afterwards I traced around it. In this way I could place the LED’s where I wanted them to be.


When I finished sketching the paths I then traced it with a black pen and erased the pencil lines.
Then i used the Scan and cut to scan the path I just drew and trace it. I then made a test on paper to see how the trace was. It didn’t come out perfect but it was okay. I then made a square for testing the depth of the cutting needle because I have never used this material before. When I was happy with the dept I started the cut.
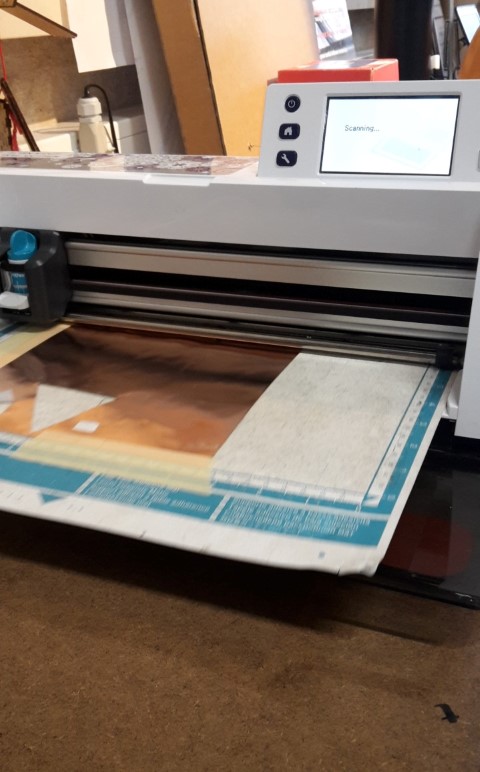
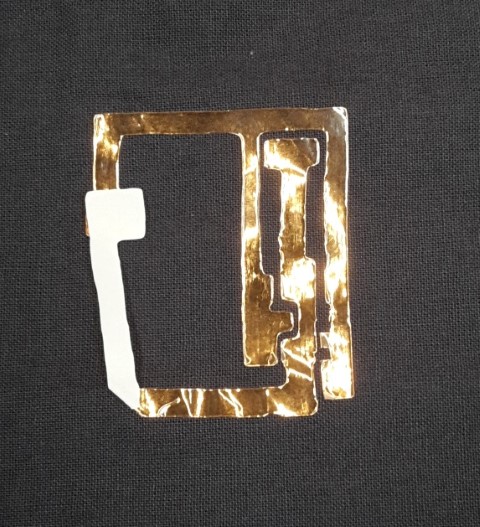
It turned out okay but I had to fix a few things with a scissor.

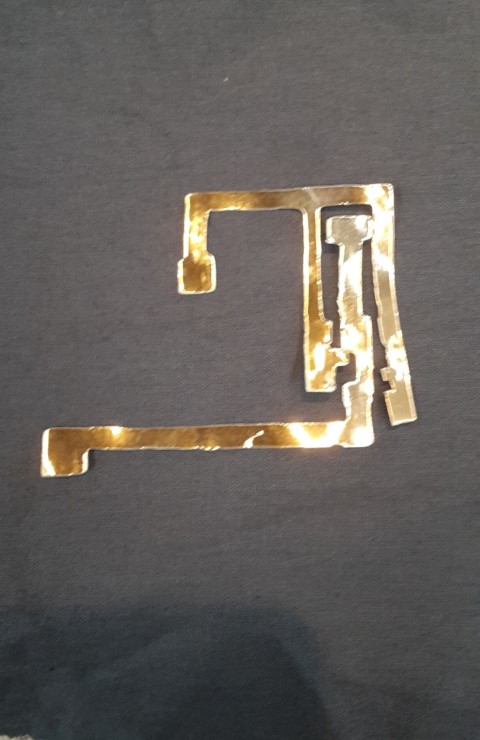
After I fixed this I could attach it to the fabric. I kept the paper on the arm i bended so I can use it as a button without it sticking to everything.
I made a test with the LED’s and found out that I couldn’t have all the different colours on the same time because the red is taking most of the power. So I either had to have the same colour or do something so the LED’s wouldn’t get power from the battery at the same time. I then used the copper tape to make extra paths and made buttons to each of the LED colours. In this way I could switch between the colours.


Because the extra buttons wasn’t part of the design I have added marks on the fabric with the robot so you can see where to push the buttons. I made some of the figures by hand and one of them in inkscape and then cut it on the scan and cut in some of the leftover materials that we have.

