Embedded Programming
this week assignement is:
- Read a microcontroller data sheet.
- Program your board to do something, with as many different programming languages and programming environments as possible.
Reading a datasheet.
I decide this week to work on the ATtiny85 Datasheet.
the first thing i found was that a datasheet for this type of component are really big. but you have Every info you should know about it inside this.
we can cut the datasheet in Three big part, The features pages, the summary, and the details.
1) Feature
 The first page of the AtTiny85 datasheet is the feature of the product, really useful we can find the necessary information we need to know before using this component, for exemple
The ATTINY85 is rated as:
Voltage - Supply (Vcc): 2.7 V ~ 5.5 V
OR
8K Bytes of In-System Programmable Program Memory Flash
The summary
 Or the table or contents, you will find every section of the product, by page and chapters. in a pdf, you can click on them and it will send you too the good page directly.
the summary have a lot of Section, so you should find the one you looking for really easly.
Or the table or contents, you will find every section of the product, by page and chapters. in a pdf, you can click on them and it will send you too the good page directly.
the summary have a lot of Section, so you should find the one you looking for really easly.if you don't CTRL+F make you able to rechearch a specfic word everywhere in the documentation.
The details.
 Explaining 234 page of details, doesn't sound really possible. but we could to for example,
we can see here what the sens of MOSI SCK, MISO, we can see that,
Explaining 234 page of details, doesn't sound really possible. but we could to for example,
we can see here what the sens of MOSI SCK, MISO, we can see that, the timing sent to the program is on sck,
Then the timing of sending data should be sinchronise to the end of the Most Significant Byte -MSB-
PINOUT
One of the most useful thing in a datasheet is the Pinout of the component.with that, you can know really easly wich pin of the component you should connect one function.
For exemple, when you are making a pcb, you know with it, the First left pin is dedicated to VCC, and the first on the right is Gnd

Program your board.
This week i programmed my board two ways. With a FabIsp, and an Arduino Uno.
WIth a FabISP
Few Weeks ago we made a FabISP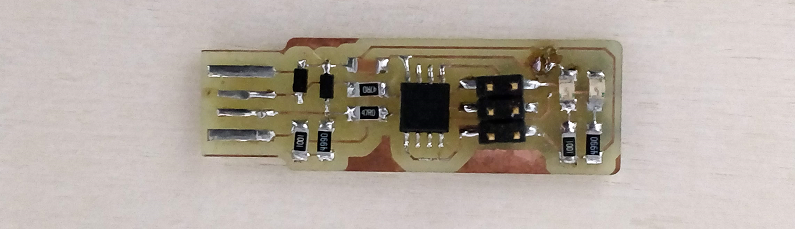 One of the possibilty for programming our Echo Hello board is simply use it.
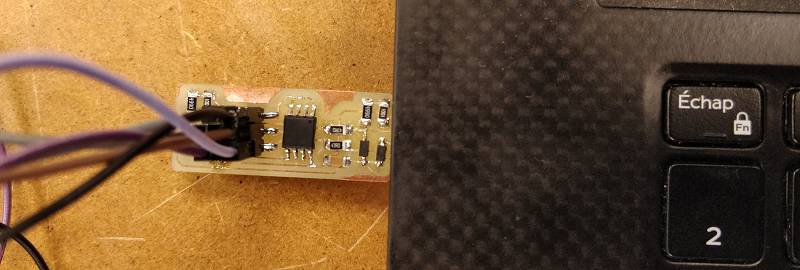
for that we have to connect the fabisp to the Echo Hellob board. we will use some jumper female -female wire.
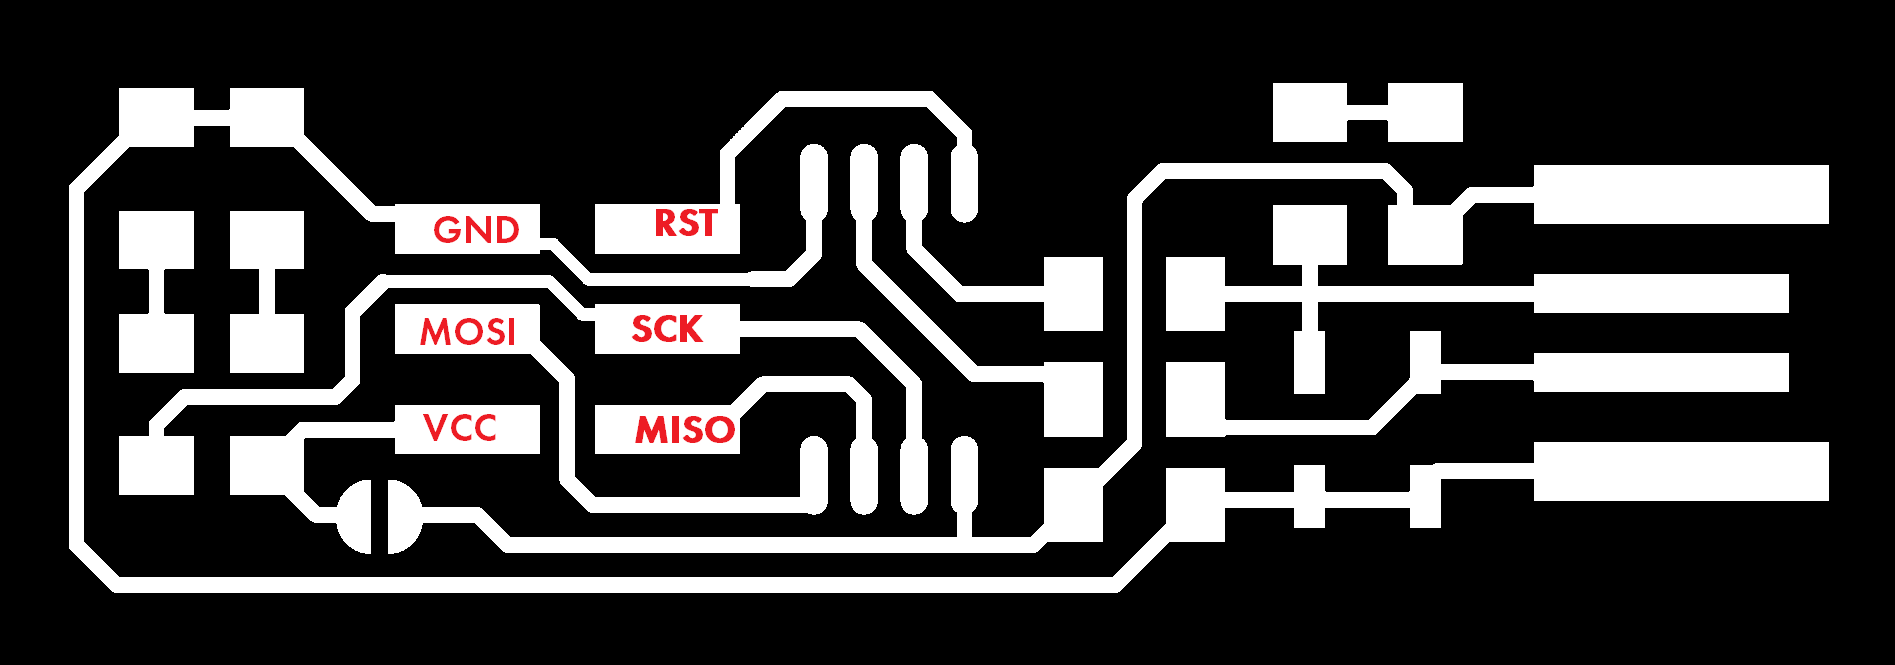
we have to connect.
One of the possibilty for programming our Echo Hello board is simply use it.
for that we have to connect the fabisp to the Echo Hellob board. we will use some jumper female -female wire.
we have to connect.
- Reset to RESET
- VCC to VCC
- Mosi to Mosi
- Miso to Miso
- GND To GND
- SCK to SCK
 plug the Fabisp to the computer.
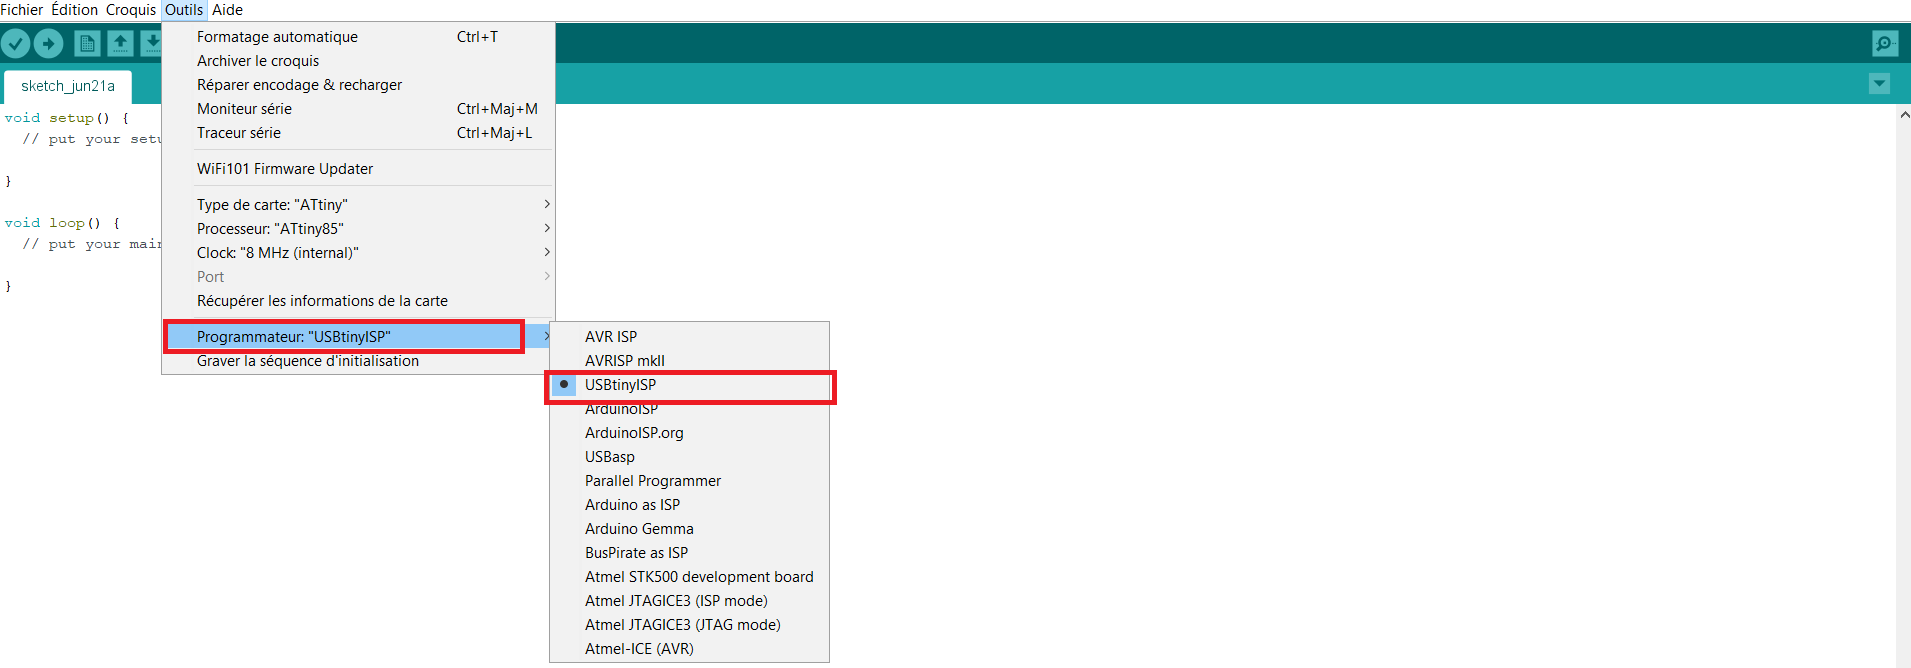
 Open your arduino IDE.
and on "tools" change the programmer by USBtinyISP
Open your arduino IDE.
and on "tools" change the programmer by USBtinyISP
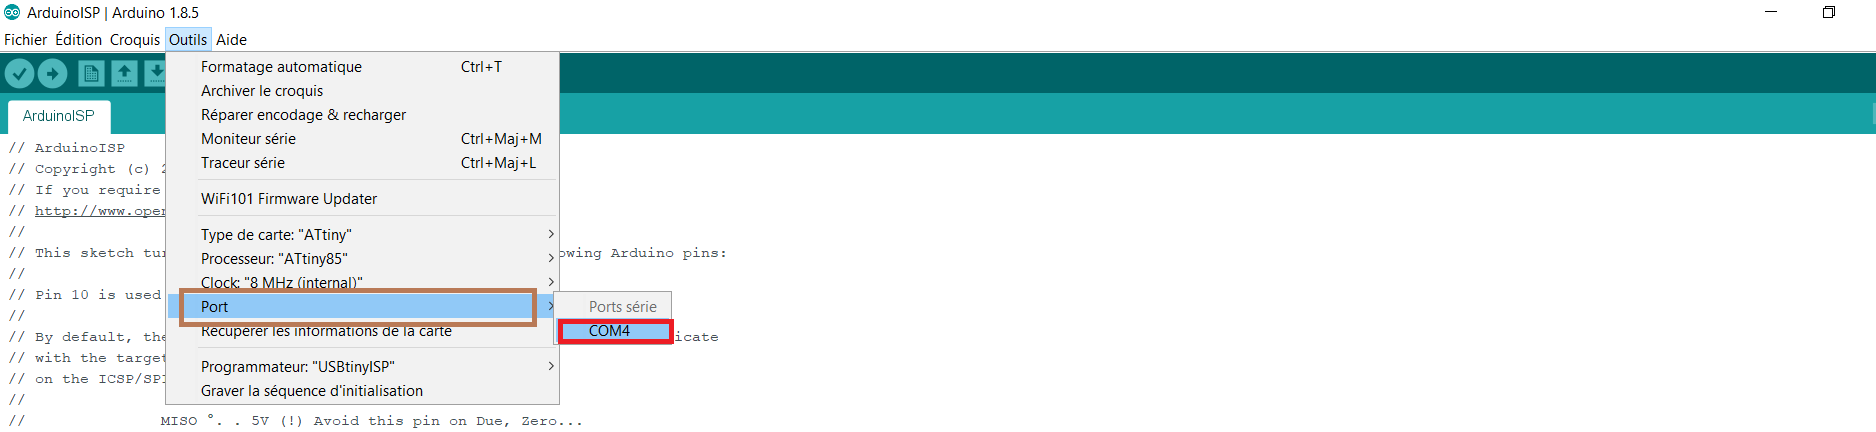
 When you did that. choose the good COM PORT
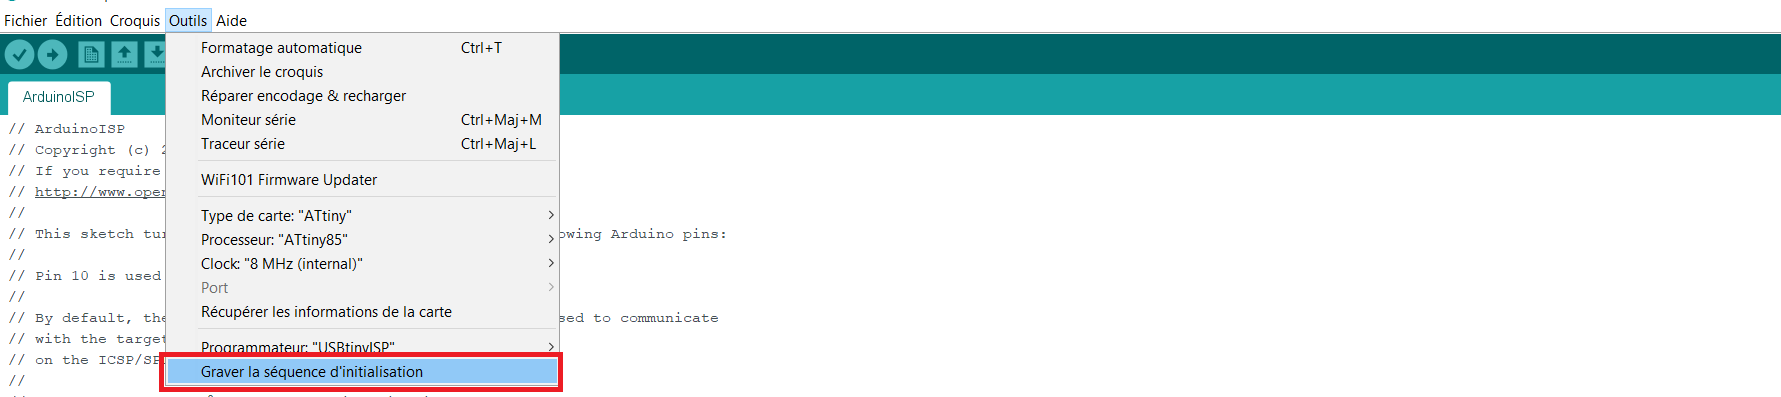
 and finnaly, engrave the bootloader on it.
With an arduino Uno
Programming a board with an arduino is pretty similar to the way to do it with the FabISPfor that i'm using an arduino as an ISP. it's working great.
- Pin13(arduino) to SCK
- pin12 (arduino) to MISO
- Pin11(arduino) to MOSI
- Pin 10(arduino) to RESET
- 5V to VCC
- Gnd TO Gnd
GO on file> example>arduinoISP
Upload the file into your arduino. then choose the Attiny 44 into the board manager, choose the internal clock to 8Mhz, change the programmer to Arduino as isp.
 burn the bootlader and you can upload a blink code for checking if your board is working !

Time to code
now that we now our board is working is time to code the ECHO HELLO Board FOR that, i know that i connected the pinout A3 on the BUTTON & the led on A7 so we will make a programm who will start the led when we push the button .
int boutonETAT = 0; //THIS WILL SAVE THE STATE OF THE BUTTON
const int bouton = A3;     // THIS IS THE PINOUT OF THE BUTTON
const int led =  A7;      // THIS IS THE PINOUT OF THE LED


void setup() {
  pinMode(led, OUTPUT);//THE LED WILL RECEIVE A VOLTAGE FROM THE PINOUT SO IT'S AN OUTPUT

  pinMode(bouton, INPUT);//the ATTINY WILL READ THE STATE OF THE BUTTON SO IT'S AN INPUT
}

void loop() {


  boutonETAT = digitalRead(bouton);// THIS WILL READ THE STATE OF THE BUTTON AN SAVE IT INTO THE VARIABLE BOUTON ETAT


  if (boutonETAT == HIGH) { // THIS WILL VERIFY IF THE BUTTON IS PRESSED?

    digitalWrite(led, HIGH); //THE LED WILL START TO GLOW
  }


  else {// IN ANY OTHER CASE.
    digitalWrite(led, LOW);// THE LED WILL STAY OFF
  }
}
file of the week.
here you'll find the file of the week
For downloading
right click and save as
- datasheet file (pdf)
- code (BLINK) file (RIGHT CLICK -SAVE AS-)
- code (bouton) file (RIGHT CLICK -SAVE AS-)
- ()