Assignment 2: Project management
Assignment:
Work through a git tutorial
Build a personal site in the class archive describing you and your final project
Installing git
I use Ubuntu 14.04 and therefore the process of installing git is simple. Just insert following command in terminal
>sudo apt-get install git-all
Generating key for ssh connection to gitlab
To create the key I inserted command:
>ssh-keygen -t rsa -C "ari.vuokila@oulu.fi" -b 4096
I added the public key to gitlab just by copy-pasting it from my computer. At first I opened the fabcloud page in gitlab https://gitlab.fabcloud.org/. After logging in, the front page looks like this: 

In the profile page I selected the SSH keys and copy pasted my key in the slot and pressed add key. 
I created folder myProject where I tested git commands to see how it works before using the Fab Academy project, by using command:
>git init
creates a new local repository
I created file test.txt and tested git commands:
>git status
lists all new or modified files to be committed
>git add test.txt
snapshots the file in preparation for versioning
>git status
>git commit -m 'test added'
records file snapshots premanently in version history
>git status
The first problem presented itself when I tried to clone (creates a copy of the gitlab folder in my computer) my repository from gitlab to my computer. The address for the cloning is the address for my folder in the gitlab.fabcloud.org
>git clone git@gitlab.fabcloud.org:academany/fabacademy/2018/labs/fablaboulu/students/ari-vuokila.git
The error was: Error: Permission denied (publickey). It said that I don't have permission to access this repository. I googled the problem and found out that my ssh key is not used and I have to use command:
>ssh-add ~/.ssh/gitlab
After that I was able to clone the repository and everything worked perfectly. It cloned the folder ari-vuokila. Following that, I created simple Hello world index.html, used commands
>git status
>git add index.html
>git commit -m 'hello world'
>git push origin master
uploads all local branch commits to Gitlab.
I added .gitlab-ci.yml to the gitlab and the website worked as intended. On the gitlab website, in your own gitlab master branch, .gitlab-ci.yml is created by selecting + -> New file -> Choose type -> .gitlab-ci.yml -> Apply a template -> HTML -> commit changes. The .gitlab-ci.yml creates a folder .public, copies all the files in it and changes the name to public, which makes the website visible to everybody. As I work with two different computers, I need to do git pull everytime I change the computer. Everything has worked nicely so far. It seems that git makes it easy to work with several computers.

Git tutorials
I followed through a couple of git tutorials. The first one was git - the simple guide by Roger Dudler. It presented the basic idea behind git and the most important commands for the beginner. It was easy to follow, but didn't offer much new information from the lectures (including our local lecture on git). But for the beginner it is important to repeat same things to internalize the information.


Creating the website
I have created a simple website before and worked with html, so the syntax was familiar to me, which made the task pretty simple. I looked for the suitable template for my website and found it on the website freehtml5.co. In that page, I found a template called Blend, which is designed for photography gallery purposes. At the beginning the website looked like this 

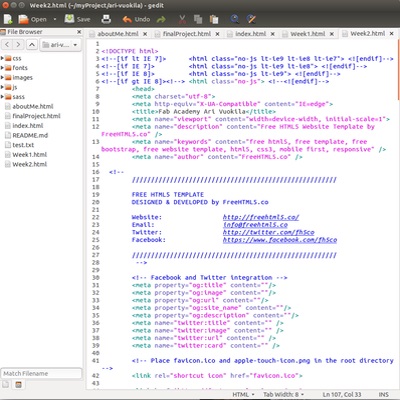
The website creation consisted of basically just changing the images and links and adding the text and images of my own. I removed all the sample text and images and replaced them. I removed also links to Twitter and Instagram, because I don't have accounts for those and I have never used them. I left the "Designed by FreeHtml5.co" on the website to honor their work. Because the template was clear and easy to use I had very little problems with the website creation. I tried Sublime Text as well, but it was evaluation version and after short use it was required to buy a license to continue and I switched to gedit. One thing created problem, which was getting images in the center of the page. In the original version the images were so large that the page settings adjusted them in the center of the page, but my images were 800 pixels wide, which created the problem, that the images were on the left side of the page. I googled the problem and found out that I have to change display: block to display: center-block in the bootsrap.css.
The website consists of:
-index.html, which is the starting page and contains all the assignments,
-finalProject.html, which contains the final project of Fab academy,
-aboutMe.html, which contains the basic information about me,
-Week1.html and Week2.html, which contains the assignments for the weeks 1 and 2.
The images for the website are stored in the folder images
I used GIMP image editor to edit images for the website and ImageMagick's convert (suggested by our instructor) tool to make the images small enough for the Fab academy needs. The commands for the image resizing are:
convert *.png -resize 800x600 -strip -depth 8 -define png:compression-level=9 name.png
convert *.jpg -resize 800x600 -strip -quality 40 name.jpg
After everything was made and I was happy with the page structure and content, I pushed the site to the fabcloud. The commands that I used were in this order:
git pull,
git status,
git add .,
git status,
git commit -m 'Website',
git push origin master
After that I tested the website and everything worked as it should.