05. 3D Scanning and Printing
Group Assignement
- Test the design rules for your 3D printer.
Individual Assignement
- Design and 3D print an object (small, few cm) that could not be made subtractively
- 3D scan an object
Test your 3D printer
We have downloaded from Thingverse a series of tests to print for characterize the printer, an: Ultimaker2+ Those are:


Design and 3D print an object
I'm very messy person. When I draw, I have pencils scattered all over the desk. So I decided to design a pencil holder for the pencils and tools I use most. I have drawn in Rhino. I drew the profile and then I extruded it. With the tool "Boolean Difference" I dug the body. Is impossible produce this piece in a single injection with industrial technologies cause of grooves on a face, in which you can put pencil or pens in horizontal position that creates undercuts, togheter with cavity on top side, and also cause of perfect perpendicular sides.

I elaborated the g-code in Cura, and then i printed it.


The pencil holder worked great!

3D Model Holder Pen
The model can be rotated and zoomed with the mouse/trackpad.
Download
You can download Pen holder 3D model here:
Scan an object
The object I will scan is a Canopo, loaned by Egyptian Museum in Palazzo Te, Mantua. This is a little sculpture with head of Selkis God. This kind of sculptures and jars, were put inside tombs of nobility egyptians, for the protection of dead person during the travel to the heaven, after death. I chose to scan it with photogrammetry, using 3DF ZephyrFree. The free version of software has a limit to 50 photos in upload, that are enaugh to scan objects. For scanning of architectures should be not enaugh. I placed the sculpture on a revolving plate, and all around the object I put some markers to help the software to calculate keypoints. I've taken exactly 50 photos all around the object, from varius point of view. The Depth of Field and ISO were fixed, so as the distance between me and the object.
.jpg)
I opened Zephyr, and clicked on "Workflow" and then on "New project"
jpg2.jpg)
After clicked "Next", the software require to upload the photos. After that, I choose the amera Orientation setting, the standard presets are pretty good. Now I've clicked on "Run" to start the orientation of photos and the first reconstruction of our 3D model. Well 49 photos on 50 were used for the calculation, this is a very good result.
jpg4.jpg)
jpg5.jpg)
jpg6.jpg)
jpg7.jpg)
At this point I obtained a first 3d Model reconstructed mesh, but there are other step to increase the quality and the accurancy of mesh. Again in "Workflow", I selected "Dense point cloud generation". This command create a mesh of object with more interpolated points, improving the quality of mesh. In a window you can check the task manager of your CPU, RAM memory and GPU during the processing of point cloud.
jpg9.jpg)
jpg10.jpg)
Now the mesh were more smooth, the surfaces were more cleaned and near the reality.
jpg11.jpg)
jpg12.jpg)
With following step I could generate a mesh perfectly usable and editable in 3d software. I selected "Mesh extraction" and the software re-calculated the polygons again to interpolate better and close some hole and crack in the surface of object.
jpg14.jpg)
jpg15.jpg)
At this moment i had a mesh I could export in varius format file, for instance .stl, .obj, .ply etc. But there is another step in which I can export the uv texture map generated starting from the varius photos on the object. This texture can be used in 3d software for rendering. To do this I selected "Textured mesh generation" under Workflow. The standard settings are good enaugh in order to generate a great texture for any rendering use.
jpg17.jpg)
jpg18.jpg)
jpg18.jpg)
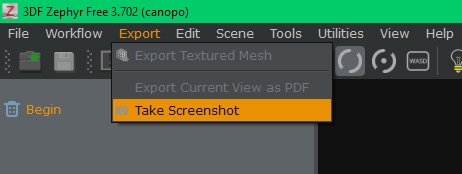
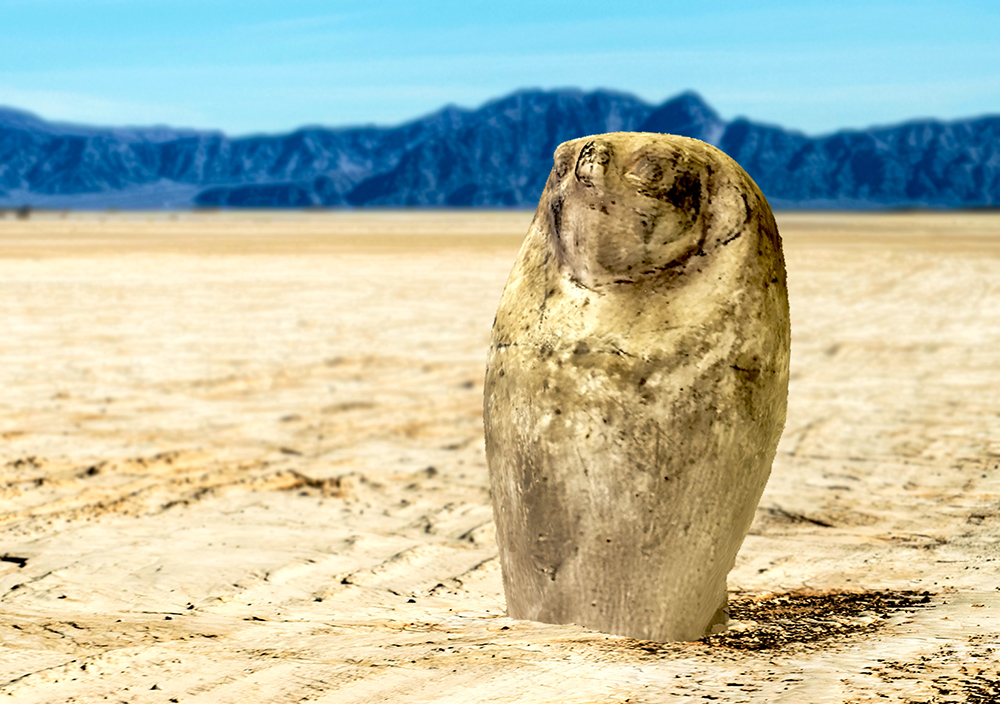
Now I was ready to export my textured mesh. In Zephyr you can also take a screenshot of preview. I saved this screenshot as png and edited in Photoshop (Gimp is the same) on another photo taken by Joshua T. PEXELS page. In this way you can have in few minutes a really good result, very very faster then a 3d software rendering process.
jpg20.jpg)


.png)
And here you can see my Hero Photo

My mesh is not printable yet, because Zephyr is unable to recognize and close the base of scanned object by the surface. In orderd to generate a printable mesh, I imported the stl file of my scan in Meshmixer and under "Edit" menu, I selected Plane Cut with Remeshed fill to cut part of object at the base with irregular geometry and create a flat base that make possible print the object. Then I re-exported in .stl format
.png)
.png)
.png)
3D Model Canopo
The model can be rotated and zoomed with the mouse/trackpad.